This post contains affiliate links. As an Amazon Associate, I earn from qualifying purchases at no extra cost to you.
Are you looking for a way to make your bathroom feel calmer, fresher, and more “alive” as we move from spring into summer? Do you want to try plants in bathroom styling without turning your sink area into a messy science experiment?
In this post, I’m walking you through my favourite biophilic bathroom design ideas using indoor plants that truly enjoy humidity. I’ll show you how I plan placement, pick plant types, and layer natural textures so your bathroom feels like a mini retreat instead of a purely functional room.
From my experience, this is perfect for anyone who wants a nature inspired bathroom vibe—whether you’re working with a tiny apartment bath, a family hallway bathroom, or a primary bath that needs a soft seasonal reset.
I’m also sharing my go-to visual recipe—hanging pothos, shelf ferns, and a live moss wall moment—plus easy swaps like wood accents, stone-look trays, and warm lighting that makes greenery glow. When I design this look, I focus on simple routines so your indoor plants bathroom setup stays beautiful (not stressful).
If you’re ready for green bathroom ideas that feel handcrafted, budget-friendly, and genuinely relaxing, you’re in the right place. Below are 25 Biophilic Bathroom Design with Indoor Plants that…
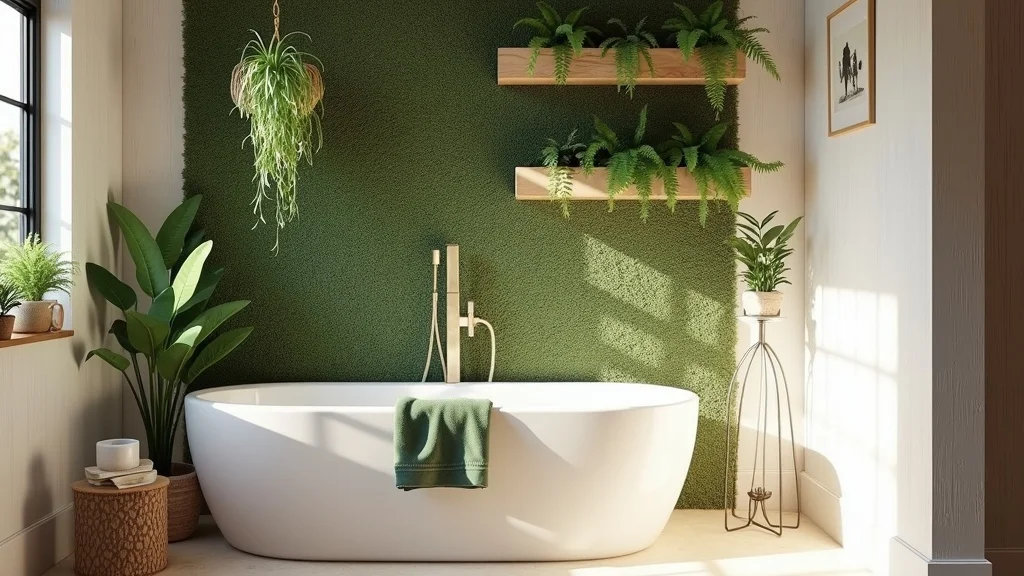
1. Hanging Pothos + Shelf Ferns + a Live Moss Wall Panel Moment
I always start by building a “hero trio” that thrives in steam: a trailing pothos overhead, a fern on a shelf, and a live moss wall panel as the wow factor. In my opinion, this combo nails biophilic bathroom design because it uses vertical space and turns humidity into an advantage.
To do it, I hang pothos near a window (or bright light) using a ceiling hook and a drip tray-friendly planter. Next, I place a shelf fern where it gets indirect light and won’t be blasted by the shower stream. Finally, I mount a framed moss panel on a wall that stays humid but doesn’t get constant direct water—think “near the shower,” not “inside it.”
I find that matte black hooks, warm wood shelves, and a creamy white wall paint make the greens look extra lush. If you want a budget-friendly option, I always recommend starting with one pothos and one fern, then adding moss later.
Pro tip: add a small timer light in warm white light (2700K–3000K — the cosy, yellowish tone you see in most homes) so your greenery looks intentional day and night, and the whole room feels like a tiny indoor sanctuary.
2. Choose a “Humidity Map” Before You Buy Any Plants
From my experience, the biggest reason plants in bathroom fail is placement, not plant choice. I always start by making a quick “humidity map” because bathrooms have micro-zones—some spots stay damp, others dry out fast.
First, I run the shower like normal and notice where steam collects: usually high corners, near the shower curtain line, and above towel bars. Then I identify drier zones like the vanity edge or a far wall. I place humidity-lovers (ferns, pothos, some orchids) in the steamy zones, and tougher plants (snake plant, ZZ plant) in the drier zones.
I find that a simple wood or bamboo shelf lets me fine-tune height, while a stone-look tray under pots keeps surfaces protected. For colour, I like pairing deep green leaves with soft whites, sandy beiges, and a touch of black hardware for contrast.
Pro tip: if your bathroom has no fan, crack the door after showers so leaves don’t stay wet for hours—healthy airflow is the quiet secret behind a thriving indoor plants bathroom setup.
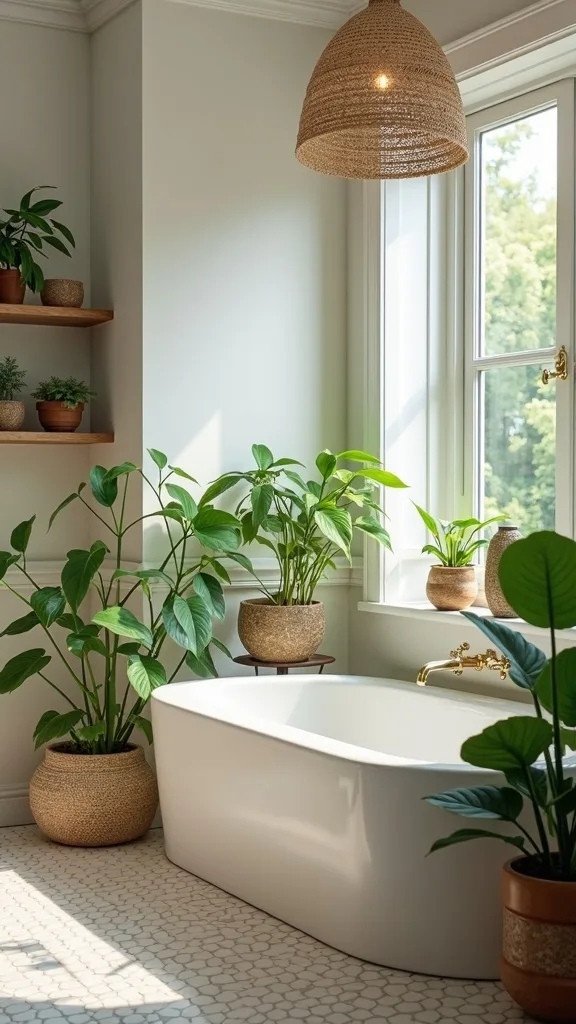
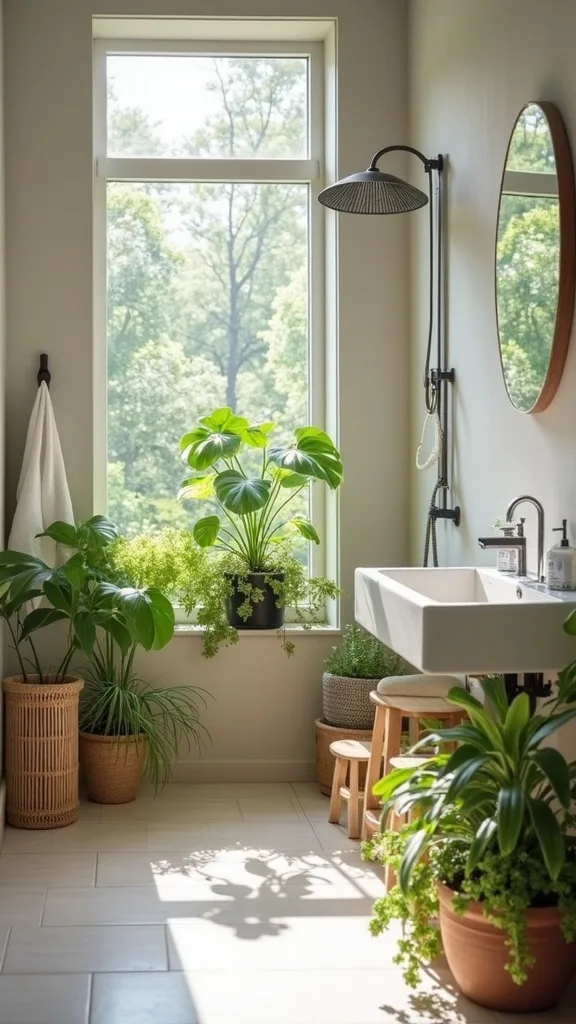
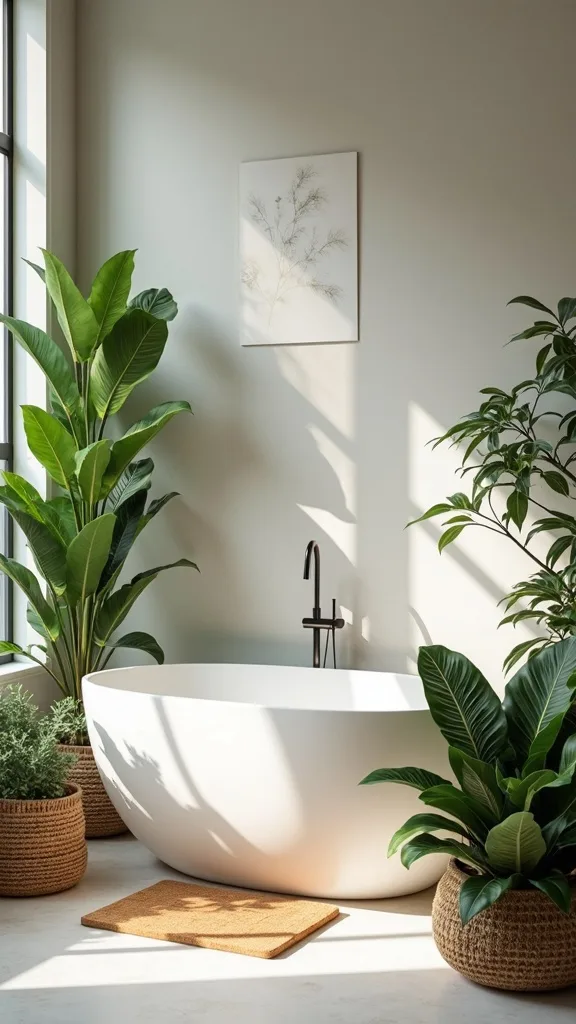
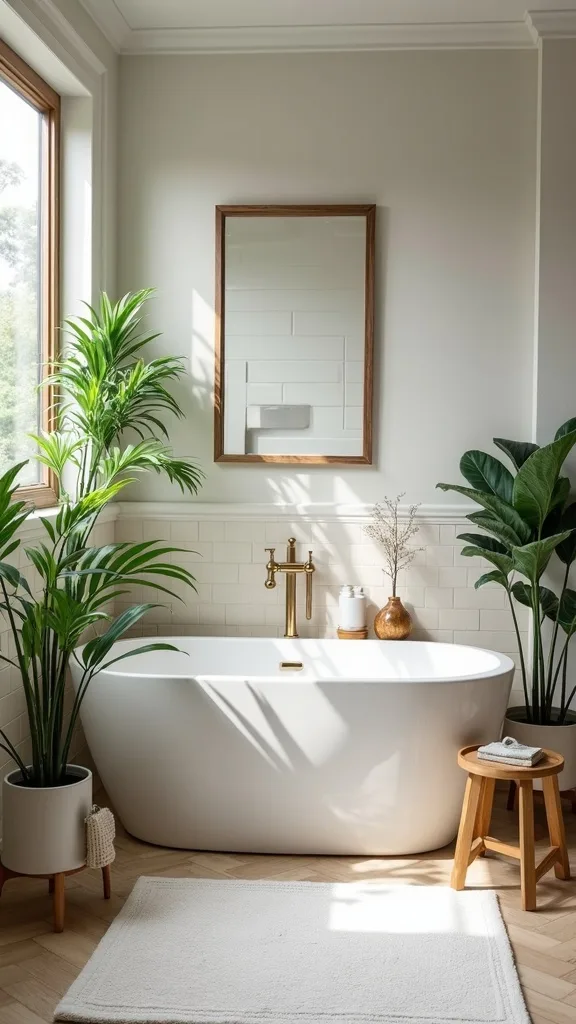
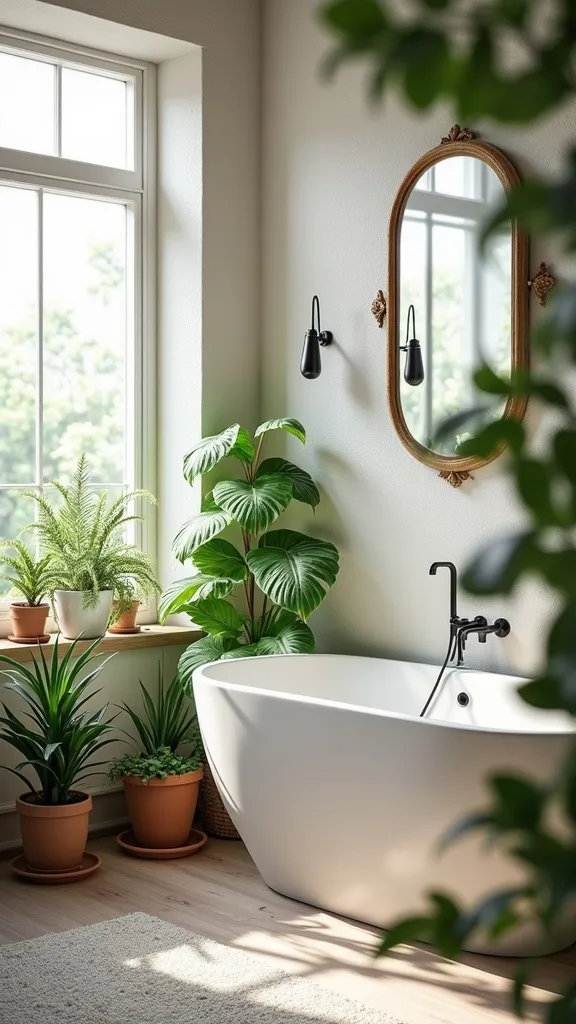
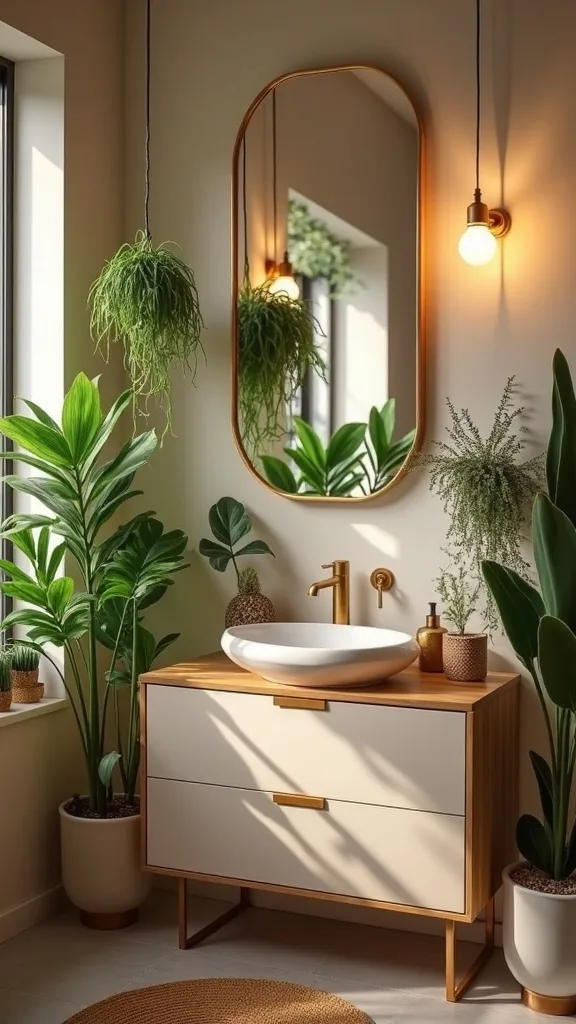
3. Layer Greenery at Three Heights for Instant Spa Energy
When I design this look, I aim for greenery at three heights—high (hanging), mid (shelf/ledge), and low (floor or vanity corner). In my opinion, that’s the fastest way to make a nature inspired bathroom feel styled instead of randomly “planty.”
I hang a trailing plant like pothos or heartleaf philodendron near the ceiling or above the toilet tank. Then I add a mid-level plant on a floating shelf—ferns, peperomia, or a compact calathea work well in bright, indirect light. Finally, I place a sturdy floor plant (snake plant is my go-to) in a slim basket or waterproof cachepot.
I always recommend repeating one planter finish—like white ceramic or warm terracotta—so the room feels cohesive. If your bathroom is small, I find that matching planters in two sizes keeps it calm and uncluttered.
Pro tip: group plants in odd numbers (three is my favourite) and leave a little “breathing room” around them—your green bathroom ideas will look intentional and serene.
4. Swap One Shelf for a Plant Ledge Above the Tile Line
I find that a narrow ledge is one of the most budget-friendly upgrades for biophilic bathroom design, especially in spring-to-summer when you want everything to feel airy. A ledge keeps plants visible without stealing counter space.
To implement it, I install a slim floating shelf (or a picture ledge) above the tile line so it’s protected from direct splashes. Then I line up small nursery pots inside matching cachepots, leaving an inch or two between them for airflow. If the ledge is near the shower, I choose plants that enjoy humidity—mini ferns, pothos cuttings, and small philodendrons.
For materials, I love sealed wood, bamboo, or a painted shelf in soft white. I always recommend adding a waterproof tray or clear liner so the shelf doesn’t get water rings over time.
Pro tip: keep a small microfiber cloth in the vanity and wipe the ledge weekly—this tiny habit keeps your indoor plants bathroom display looking fresh and cared for.
5. Create a “Shower-Safe” Plant Zone (Without Drowning Anything)
One of my favourite approaches is creating a shower-adjacent plant zone that catches steam but avoids constant soaking. In my opinion, it’s the sweet spot for plants in bathroom because it feels lush without inviting rot.
I place a plant stand or corner shelf just outside the shower curtain line, where it gets humidity and indirect light. I choose plants with a reputation for handling bathroom conditions—pothos, bird’s nest fern, and some dracaena varieties. Then I water at the sink on a schedule instead of letting shower spray do the job, which keeps moisture consistent and controlled.
I find that black metal stands look crisp against white tile, while natural wood adds a softer, spa-like vibe. If you want extra “spring” energy, I add a pale green hand towel to echo the leaves.
Pro tip: rotate plants a quarter turn every week so they grow evenly toward the light—this simple step makes your green bathroom ideas look polished and professionally styled.
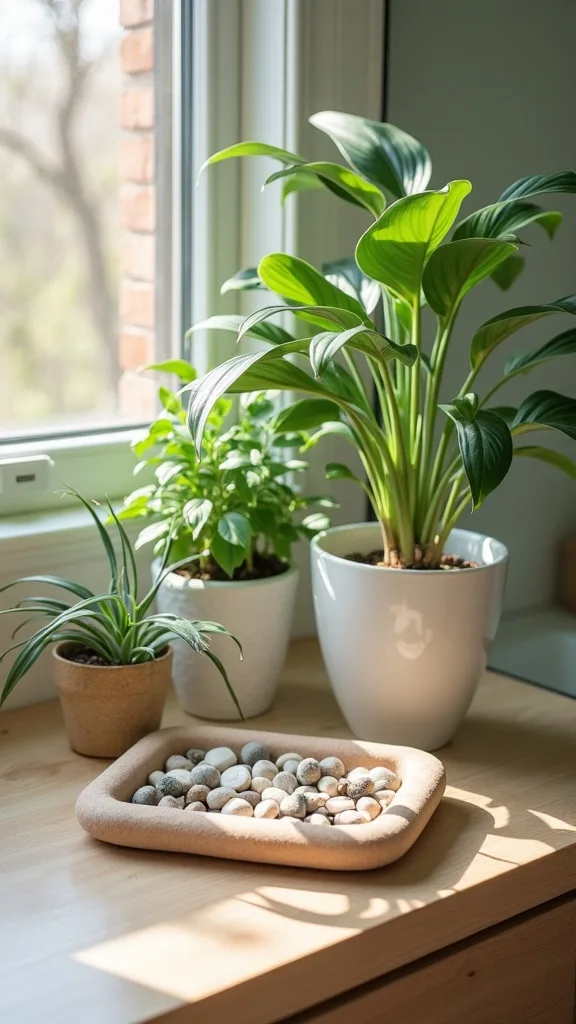
6. Use a Pebble Tray to Catch Drips and Add Nature Texture
I always start by solving the practical problem—water drips—then I make it pretty. A pebble tray is an easy, handcrafted-feeling detail that supports biophilic bathroom design and keeps counters protected.
To do it, I grab a shallow tray (stone-look, ceramic, or sealed wood) and fill it with smooth river rocks. I set my smaller pots on top so any drainage water falls between the stones instead of pooling against the pot. This also lets airflow reach the bottom, which I find helps prevent that musty smell some bathrooms get.
For colours, I like mixed grey pebbles with white planters, or warm tan stones with terracotta. If you want a more elevated look, I always recommend adding one piece of driftwood or a small shell to the tray for a subtle coastal-meets-garden vibe.
Pro tip: rinse the stones seasonally and let them dry fully—your nature inspired bathroom will stay crisp, clean, and spa-like all summer.
7. Add a Bathroom-Safe Grow Light Bulb for Windowless Spaces
From my experience, you can absolutely do indoor plants bathroom styling even with a tiny window—or none at all—if you use light intentionally. I find that a simple grow bulb is the most realistic fix, and it doesn’t have to look “techy.”
I screw a grow light bulb into a vanity sconce or a nearby lamp (only where it’s safe from splashes), then I put it on a timer for consistent daily light. I keep the setup subtle by using a shade that hides the bulb and choosing plants that tolerate lower light, like pothos, ZZ plant, and snake plant.
For the vibe, I always recommend pairing the grow light with warm white light (2700K–3000K — the cosy, yellowish tone you see in most homes) elsewhere in the bathroom so the room still feels relaxing. I like white or linen shades to soften everything.
Pro tip: start with one “test plant” for a month before you buy more—once you see it thriving, you’ll feel confident building out your green bathroom ideas.
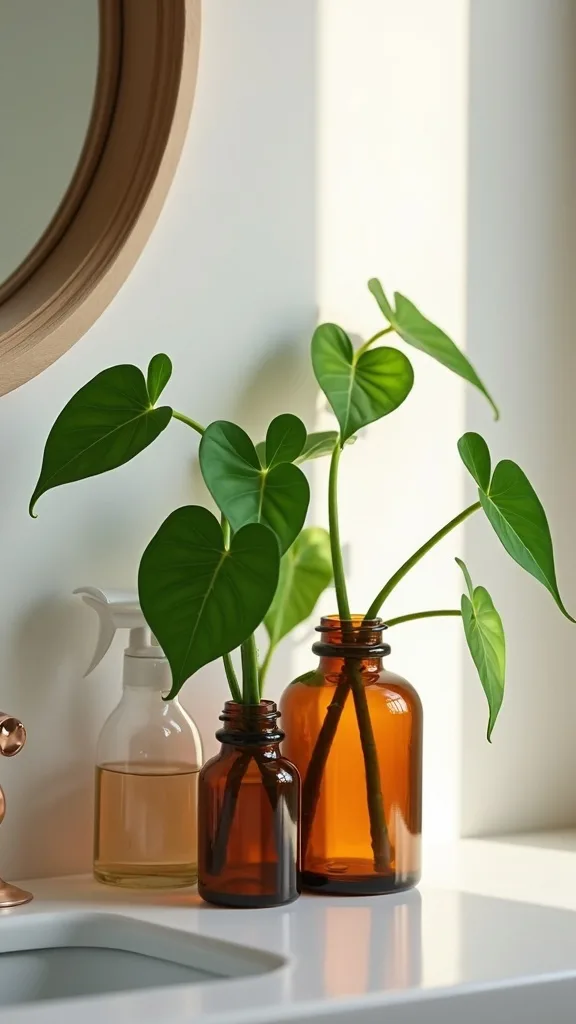
8. Propagate Pothos Cuttings in Amber Bottles for Budget-Friendly Decor
I love using propagation as decor because it’s creative, budget-friendly, and honestly addictive once you see roots forming. In my opinion, pothos cuttings are the easiest way to expand plants in bathroom styling without buying new plants.
I snip a healthy vine just below a node (that little bump where roots grow), then I place the cutting in a small bottle of water. I line up a few bottles on a windowsill or shelf, changing the water weekly so it stays clear. After a few weeks, I pot them up—or I keep them in water for a clean, modern look.
I find that amber apothecary bottles or clear bud vases look gorgeous against white tile and natural wood. For extra spring-to-summer freshness, I add one eucalyptus stem nearby (kept out of standing water) for scent and texture.
Pro tip: label your bottles with a tiny date tag—watching growth is motivating, and it turns your biophilic bathroom design into a living little project.
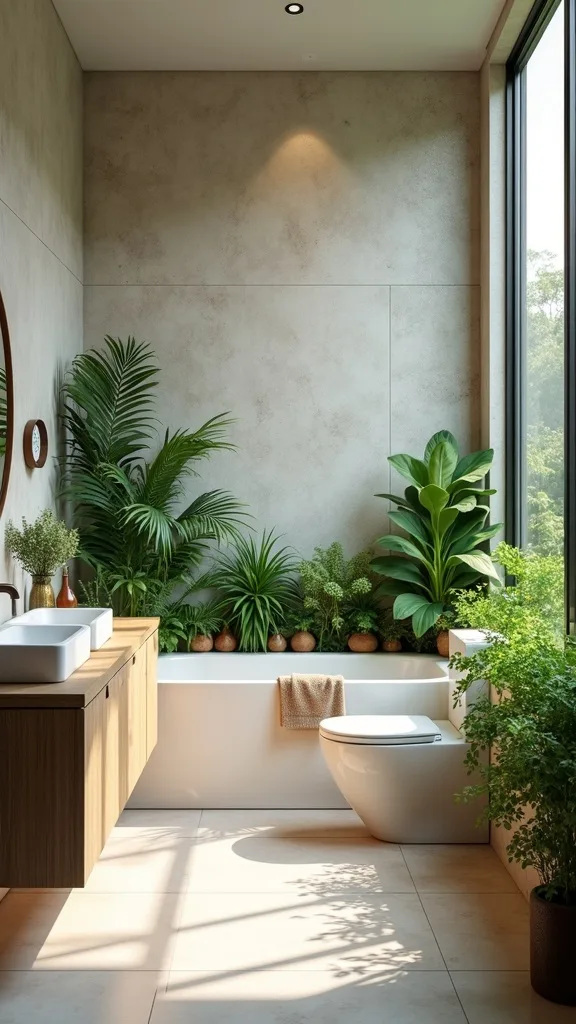
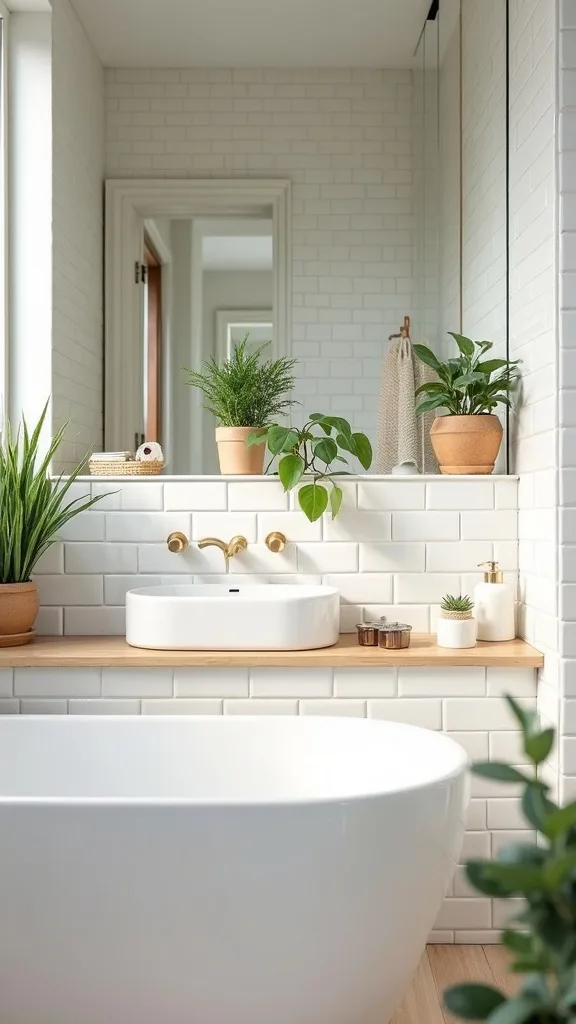
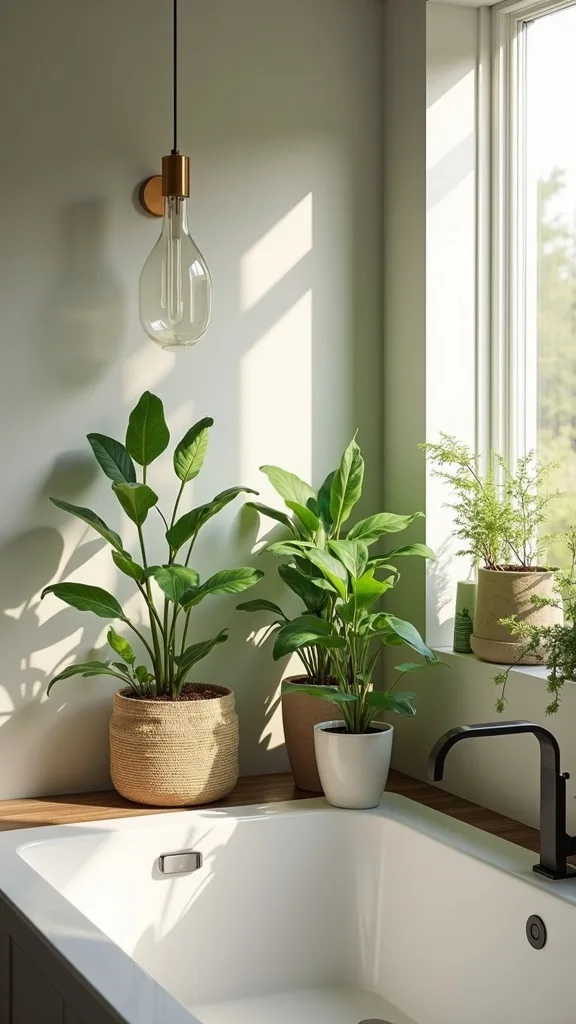
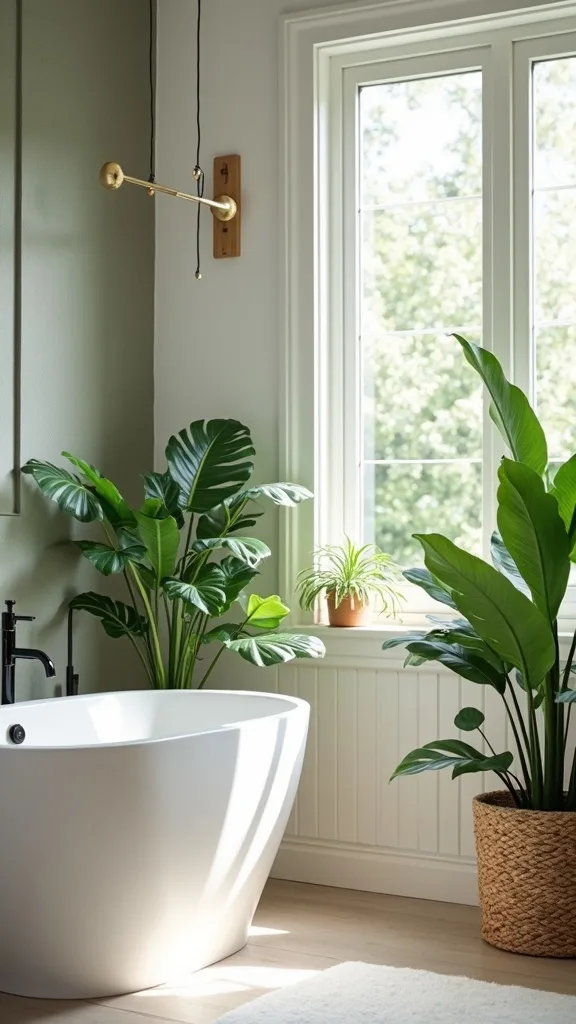
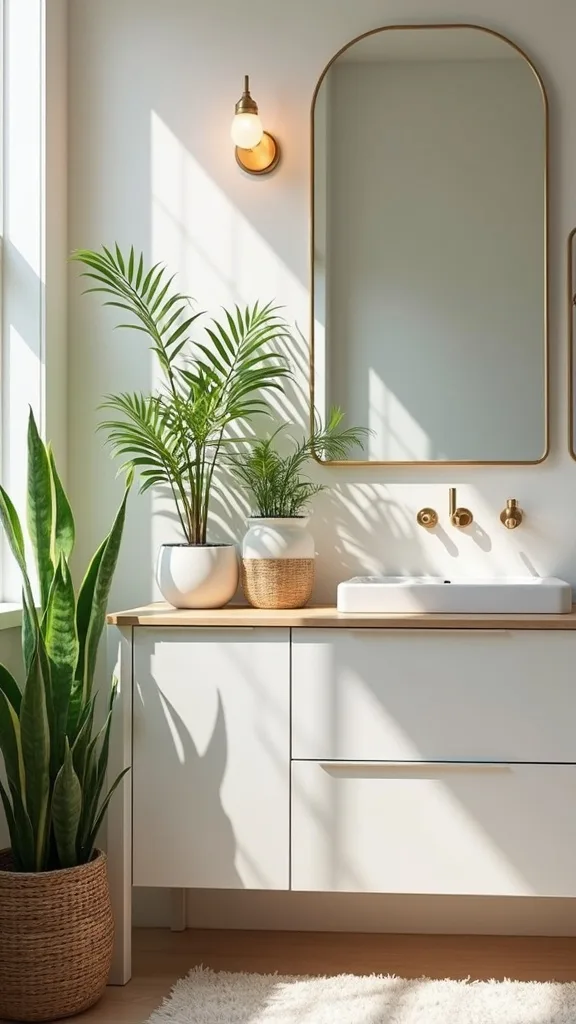
9. Style a “Vanity Jungle Corner” Without Losing Counter Space
I find that the vanity is where bathrooms get cluttered fast, so I design greenery there with strict boundaries. A small “jungle corner” can still feel lush while keeping your daily routine easy—key for a lasting nature inspired bathroom.
I always start by clearing one corner completely, then placing a single medium plant in a tall, slim pot so it uses vertical space. If I want more, I add one tiny plant on a riser (like a small wood block) so it’s layered, not spread out. I keep soaps and skincare on a tray so nothing competes visually with the leaves.
For materials, I love a travertine-look tray, a matte ceramic planter, and a small wood riser. Colour-wise, I stick to two neutrals plus green—this keeps the whole scene calm.
Pro tip: choose plants with sturdier leaves (pothos, peperomia) near the sink—your indoor plants bathroom corner will look fresh even with daily splashes.
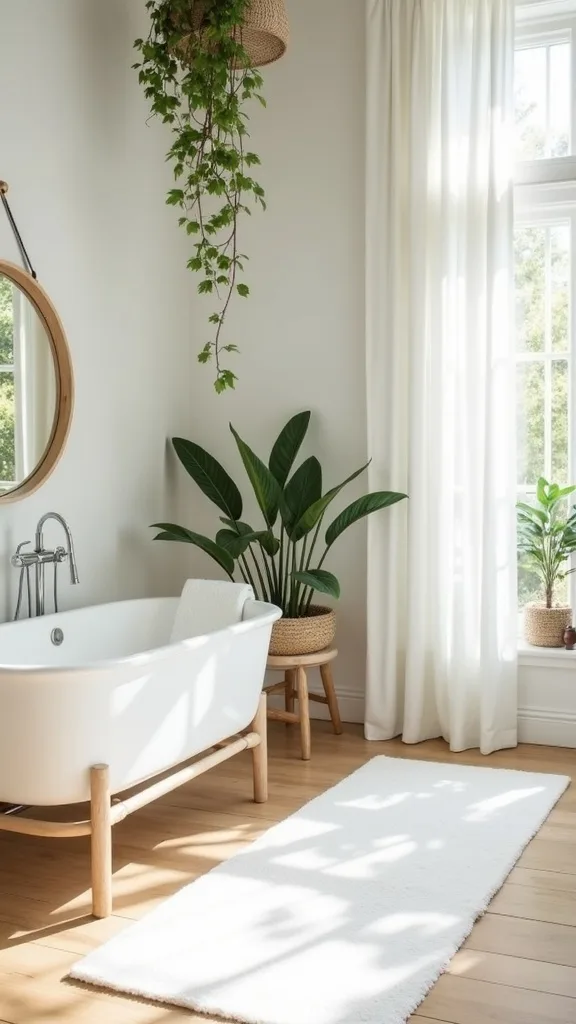
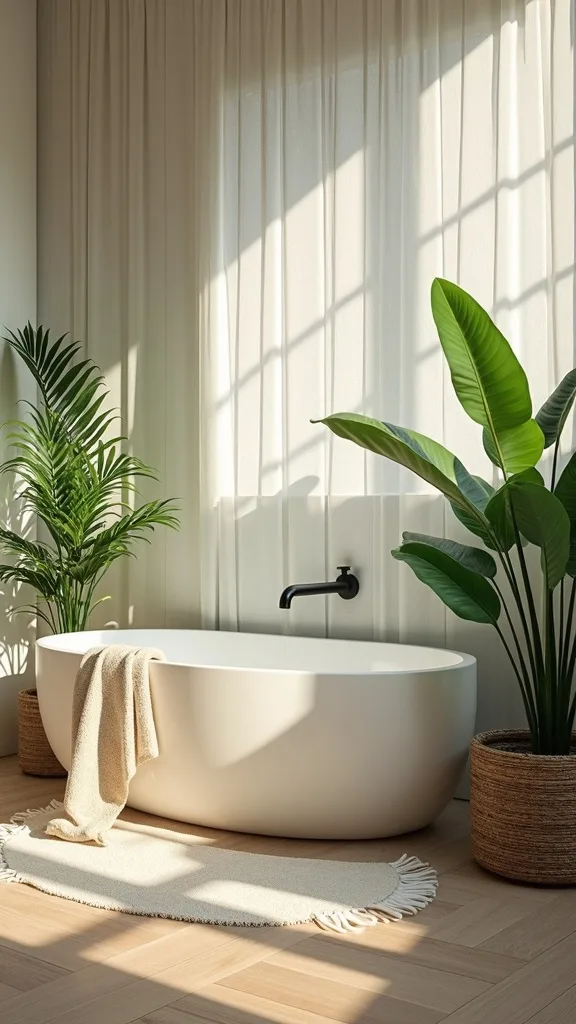
10. Bring in a Teak Bath Mat to Anchor the Greenery
When I design this look, I always ground all that “soft” greenery with one solid natural element underfoot. A teak bath mat instantly supports biophilic bathroom design because it adds warm wood tone and that spa-resort feeling.
To implement it, I swap a fabric mat for a slatted teak mat and place it where you step out of the shower. Then I echo that wood tone with one small shelf or stool so the room feels intentional. If you’re styling plants in bathroom areas, I like putting a plant stand near the mat so the wood and green feel connected.
I find that teak pairs beautifully with white tile, brushed nickel, and soft sage accents for spring-to-summer. If teak isn’t in the budget, I always recommend bamboo as a similar vibe with a lower cost.
Pro tip: treat the mat like decor—wipe it down weekly and let it dry fully, and your green bathroom ideas will feel clean, warm, and welcoming every single day.
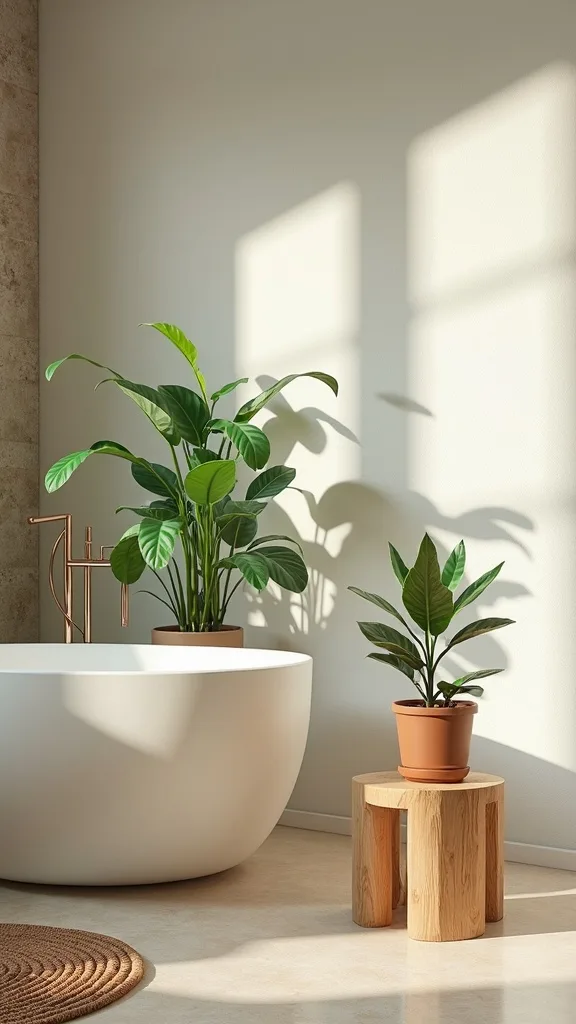
11. Use a Small Wooden Stool as a Plant Pedestal (And Landing Spot)
One of my favourite approaches is using a simple wooden stool as a multi-tasking piece: it holds a plant, catches your towel, and makes the bathroom feel styled. In my opinion, that’s the heart of biophilic bathroom design—useful beauty.
I place a compact stool beside the tub or near the shower, then top it with a humidity-loving plant in a waterproof pot. If the stool is close to splashes, I add a tray under the plant to protect the wood. I keep the styling minimal: one plant, one candle, or one small jar—nothing more.
For materials, I like teak, bamboo, or sealed oak tones. Colour-wise, I keep it natural and let the plant be the star—deep green leaves against warm wood always looks expensive.
Pro tip: if your bathroom is tiny, choose a stool that can slide under a floating vanity—your indoor plants bathroom look stays flexible and never feels cramped.
12. Try a Eucalyptus Shower Bundle (With a Plant-Friendly Placement Plan)
I love adding eucalyptus in spring-to-summer because it makes the whole room smell like a spa, and it visually supports a nature inspired bathroom instantly. I always start by treating it as an accent—not a replacement for living plants.
I tie a small eucalyptus bundle with cotton string and hang it from the shower head or a hook nearby, keeping it out of direct spray so it lasts longer. Then I place my living plants (like pothos or ferns) where they’ll get steam but not constant water. This way, the eucalyptus does the scent work while the plants do the lush, living texture.
I find that eucalyptus looks best with neutral towels—white, sand, or pale sage. If you want a handcrafted touch, I always recommend using a simple muslin ribbon instead of plastic ties.
Pro tip: replace the bundle every couple of weeks and compost the old one—your green bathroom ideas will feel fresh, seasonal, and intentionally cared for.
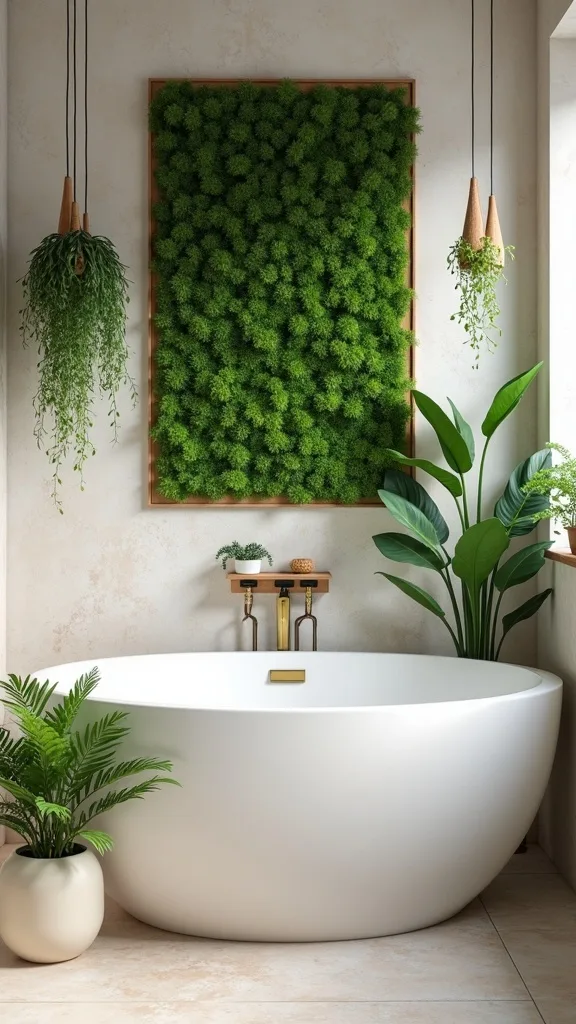
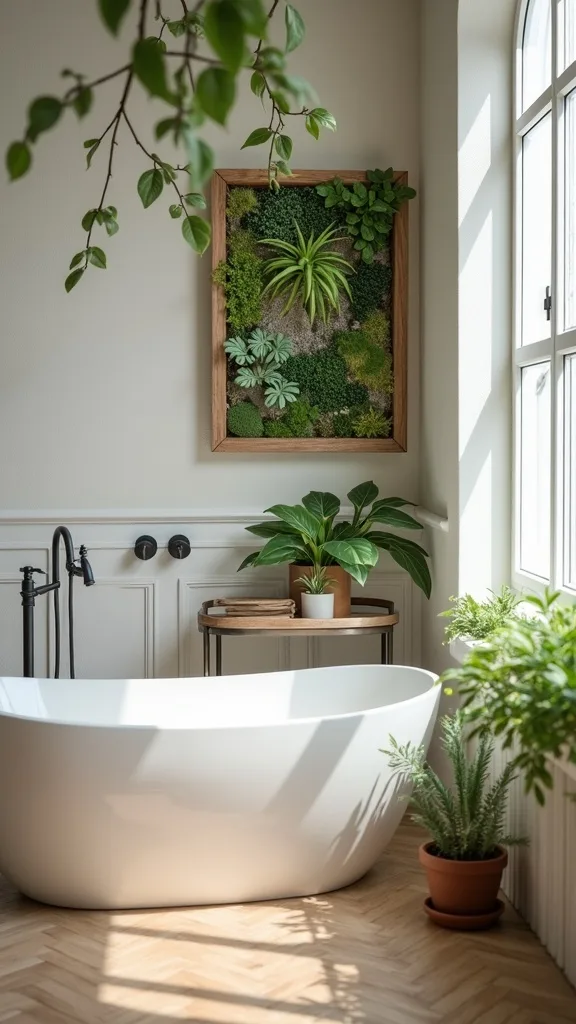
13. Build a Mini Moss Frame for a Living Art Moment
In my opinion, living wall art is one of the most satisfying ways to do biophilic bathroom design because it turns a blank wall into something you experience, not just look at. I find moss frames especially charming in humid bathrooms.
I always start by choosing a shadow-box style frame with depth, then I line it with a moisture-resistant backing. Next, I add sheet moss (or a moss kit) and press it in firmly so it sits snug. I hang it on a wall that gets humidity but not direct shower spray, and I mist lightly only if it looks dry.
For colours and finishes, I love a natural oak frame, black frame for modern contrast, or white for a softer spa vibe. If you’re pairing it with plants in bathroom styling, I repeat the same green tone by choosing pothos or fern nearby.
Pro tip: add a small picture light above it in warm white light (2700K–3000K — the cosy, yellowish tone you see in most homes) and your living art will glow like a boutique hotel detail.
14. Pick Planters That Handle Moisture (So You Don’t Ruin Surfaces)
From my experience, the quickest way to fall out of love with indoor plants bathroom styling is water damage—rings on wood, peeling paint, or soggy corners. I always start by choosing planters that make moisture management effortless.
I use pots with drainage for most plants, then place them inside waterproof cachepots or on a tray. If I’m putting a plant on a wood shelf, I add a clear liner or a small saucer underneath. For hanging planters, I choose styles that include a drip tray insert, or I water them in the sink and let them drain fully before rehanging.
I find that ceramic, sealed terracotta, and resin planters are the easiest in bathrooms. Colour-wise, I love white, stone, and soft grey because they make green leaves pop without visual clutter.
Pro tip: keep a dedicated “watering towel” under the sink—this tiny system makes your green bathroom ideas feel easy, not fussy, and you’ll actually stick with them.
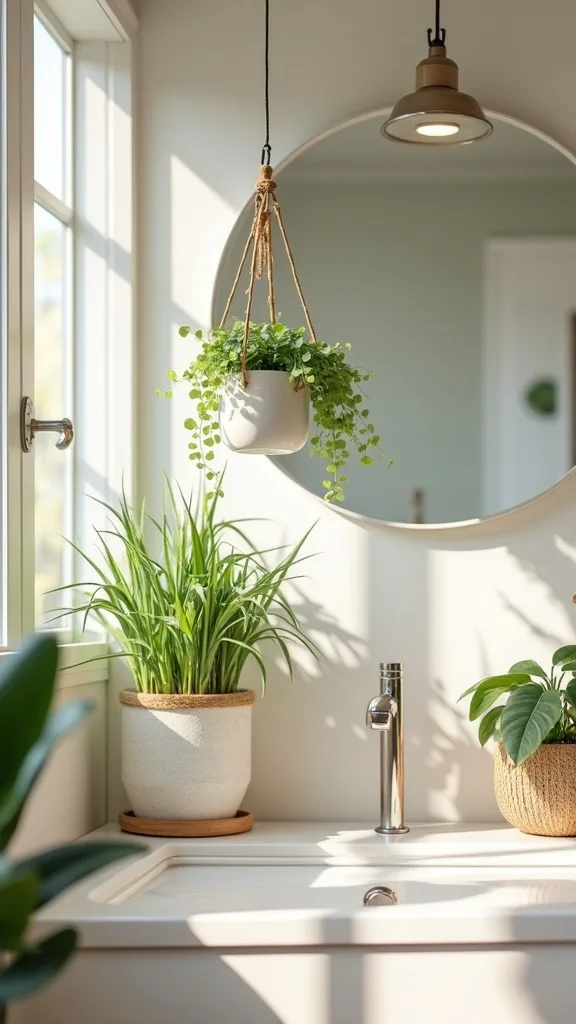
15. Use a Tension Rod for Hanging Plants in Rentals
I always recommend a tension rod trick if you rent or just don’t want to drill into tile. It’s one of my favourite approaches for plants in bathroom because it creates instant vertical greenery with almost no commitment.
I install a tension rod across a window recess or in a corner near the shower (but not where it’ll get yanked by towels). Then I hang lightweight planters with S-hooks, keeping them high enough to avoid splashes. I stick to trailing plants like pothos because they’re forgiving and look lush quickly.
For a cohesive look, I choose matching hooks in black or brushed steel and planters in white or natural woven covers (with a waterproof inner pot). I find that repeating one material makes it feel styled, not improvised.
Pro tip: hang one plant slightly lower than the others so the vines cascade at different lengths—this simple move makes your biophilic bathroom design feel creative and layered.
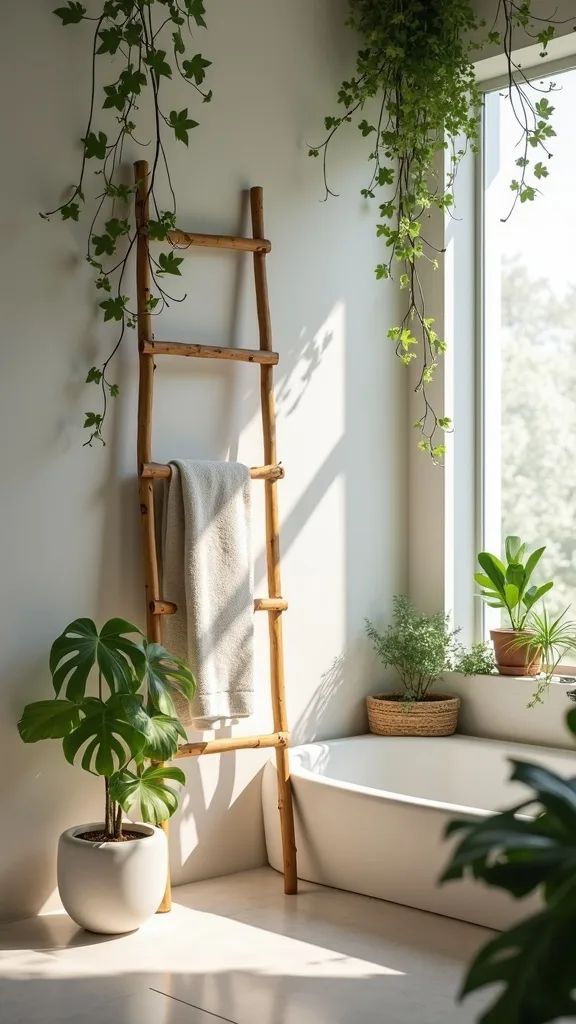
16. Add a Bamboo Ladder for Towels and Trailing Vines
When I design this look, I like decor that earns its keep, and a bamboo ladder does exactly that. In my opinion, it’s a perfect bridge between function and nature inspired bathroom style.
I lean a bamboo ladder against a dry wall (not where it will constantly get splashed), then I hang towels on the lower rungs and drape a trailing vine plant from the top. If the plant is in a pot, I secure it with a sturdy hook or place it in a hanging basket that won’t slip. I keep the ladder slightly away from the wall so air can circulate and towels dry properly.
I find bamboo looks best with white towels, a woven basket, and a few black accents for contrast. If your bathroom is small, I always recommend a slim ladder so it doesn’t eat floor space.
Pro tip: add one tiny clip-on light aimed at the vines—your green bathroom ideas will feel like a styled vignette every evening.
17. Choose Humidity-Loving Plants That Forgive Inconsistent Care
From my experience, the best indoor plants bathroom choices are the ones that don’t punish you for missing a watering day. I always start by picking plants that actually like humidity and can handle real life.
For steamy bathrooms, I reach for pothos, bird’s nest fern, Boston fern (if you’ll water consistently), and some orchids if you have decent light. For medium humidity, I like snake plant, ZZ plant, and philodendron. I place them based on light first, then humidity second, because even humidity-lovers still need some brightness to thrive.
I find that mixing leaf shapes makes the whole room feel more natural—one trailing plant, one feathery fern, one upright plant. Colour-wise, I keep planters neutral so the foliage variety becomes the design.
Pro tip: write a simple care note on your phone (water, rotate, wipe leaves) and set a weekly reminder—your biophilic bathroom design will stay gorgeous with minimal effort.
18. Wipe Leaves Weekly for That Fresh, Glossy “Just Styled” Look
I find that clean leaves are the difference between “cute plants” and a truly elevated biophilic bathroom design. Bathrooms collect dust, hairspray, and residue, so a quick wipe keeps everything looking vibrant.
I always start by dampening a soft cloth (just water is fine), then I support each leaf with one hand and gently wipe with the other. For ferns, I lightly mist and shake off excess water instead of wiping fronds. I do this once a week or whenever I notice dullness—especially in spring-to-summer when windows are open and dust moves around more.
I like keeping a small spray bottle and microfiber cloth under the sink so it’s easy. If you want a more handcrafted vibe, I use a simple glass spray bottle with a minimal label.
Pro tip: after wiping, step back and adjust plant angles—this tiny “reset” makes your plants in bathroom styling feel intentional, like you just refreshed the whole space.
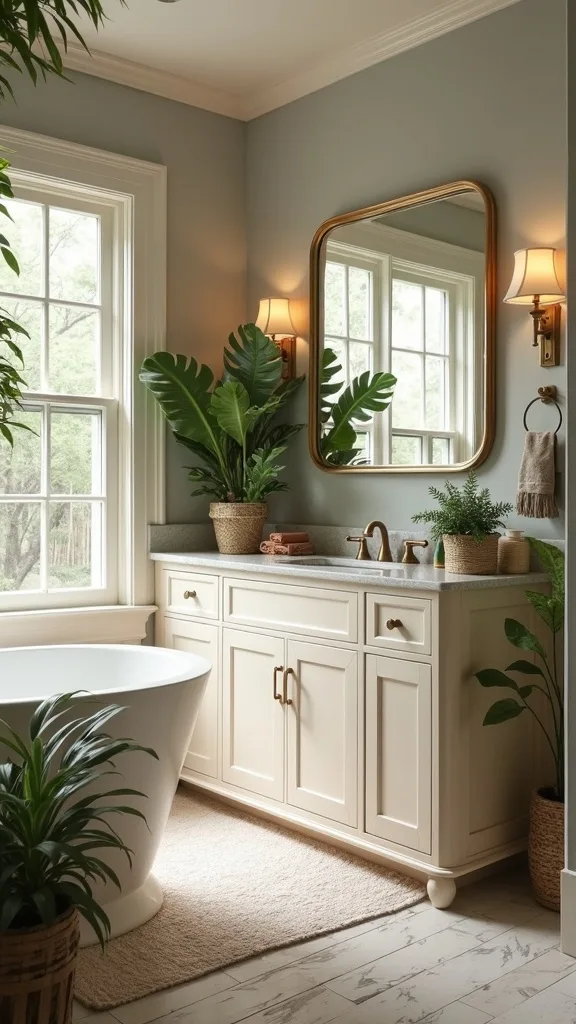
19. Create a Calm Palette: White + Wood + Green (With One Accent)
In my opinion, colour is what makes greenery feel soothing instead of chaotic. When I design a nature inspired bathroom, I always start with a calm base—white, warm wood, and green—then I add just one accent colour.
I choose white or off-white towels and a neutral shower curtain, then bring in wood through a stool, shelf, or bath mat. Next, I add plants in two or three spots so the green repeats naturally. For the accent, I pick one: matte black hardware, soft sage textiles, or a clay-toned soap dispenser.
I find that repeating the accent three times (for example: black hook, black tray, black planter) makes it feel cohesive. If you’re on a budget, I always recommend swapping small items first—hand towels and a soap pump can change the whole mood.
Pro tip: keep countertops as clear as possible—your green bathroom ideas will feel like a spa because the eye has space to rest.
20. Use Natural Scents to Support the Biophilic Mood
I always start by thinking about the senses, because biophilic bathroom design isn’t only visual—it’s a feeling. From my experience, adding a natural scent makes the plants feel even more immersive.
I place a simple essential oil diffuser on a high shelf away from splashes, or I use a reed diffuser near the vanity. For spring-to-summer, I like eucalyptus, lavender, and a hint of citrus because they feel clean and energizing without being sugary. I keep the scent subtle so it doesn’t compete with the “fresh plant” vibe.
I find that amber glass bottles and light wood diffuser tops look best with greenery. If you want a handcrafted look, I always recommend a ceramic diffuser in a matte white finish.
Pro tip: match your scent to your shower routine—calming at night, bright in the morning—and your indoor plants bathroom will feel like a daily ritual you actually look forward to.
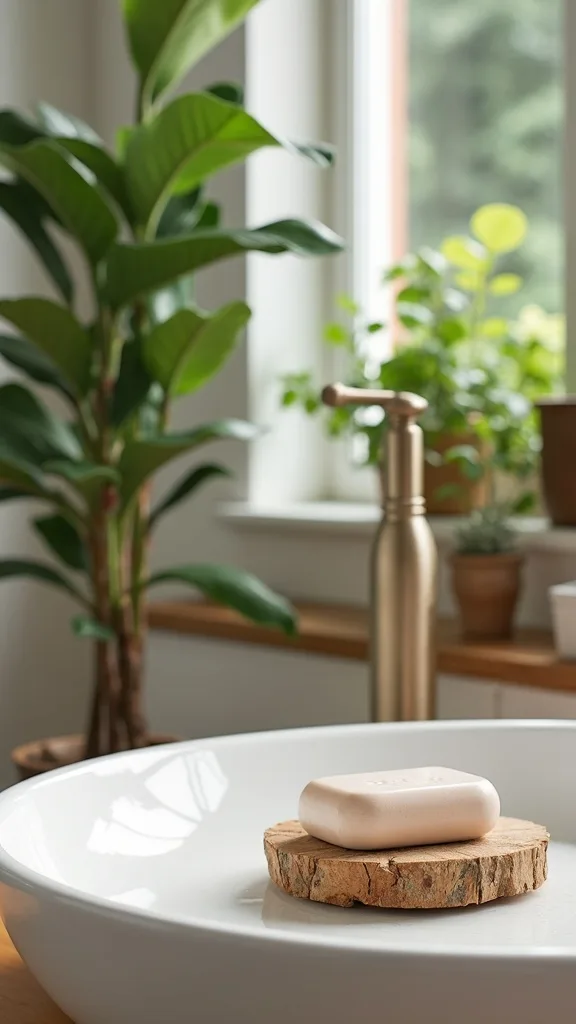
21. Add a Stone or Wood Soap Dish to Echo Outdoor Materials
One of my favourite approaches is using tiny material swaps to reinforce the nature vibe without a full remodel. A stone or wood soap dish is small, but it quietly supports nature inspired bathroom styling.
I replace plastic soap trays with a simple travertine-style dish or sealed wood dish, then I pair it with a matching toothbrush holder or small tray. I keep it near the sink but not directly under dripping water, and I rinse it weekly so it stays clean. This is especially helpful if you’re adding plants in bathroom areas—natural materials help the greenery feel integrated.
I find that creamy stone tones look gorgeous with white sinks, while darker soapstone feels modern and grounding. If you love budget-friendly DIY, I always recommend sealing a small wood dish so it handles moisture better.
Pro tip: choose one “hero” natural texture (stone or wood) and repeat it—your green bathroom ideas will feel curated, not cluttered.
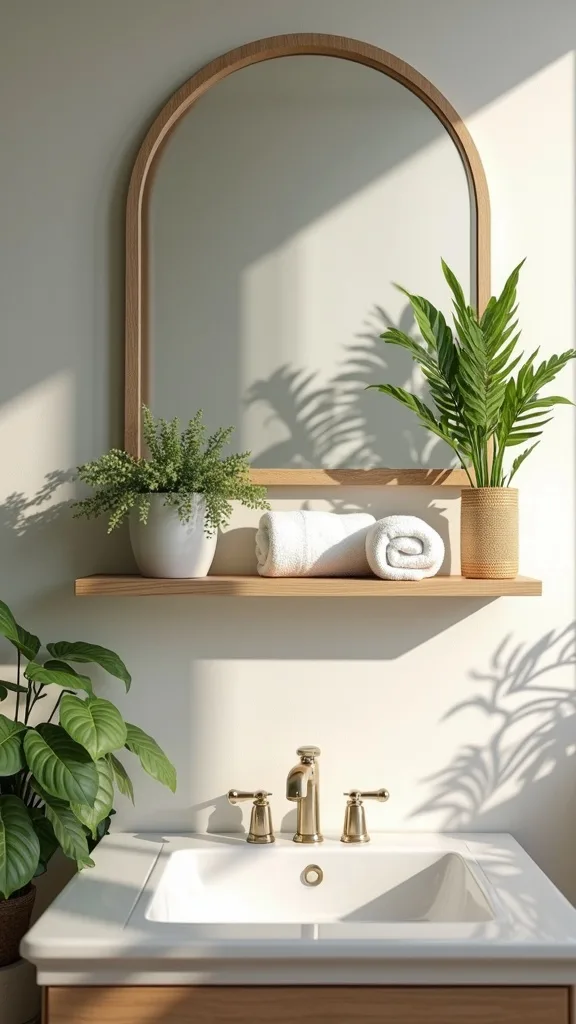
22. Install a Simple Floating Shelf for Rolled Towels and Ferns
I find that floating shelves are the easiest way to make a bathroom feel styled for spring-to-summer, especially when you combine towels and greenery. In my opinion, this is a cornerstone of biophilic bathroom design because it layers soft and living elements together.
I mount one shelf above the toilet or on an open wall, making sure it’s level and securely anchored. Then I roll two or three towels in a light neutral and place a fern or pothos beside them. I keep the arrangement balanced: towels on one side, plant on the other, and one small object (like a candle) in the middle if it needs it.
I always recommend sealed wood or moisture-resistant MDF shelves for bathrooms. Colour-wise, I like warm oak tones with white towels and deep green leaves for a clean, spa-like contrast.
Pro tip: add a small basket for extra toilet paper—your indoor plants bathroom shelf will look beautiful and stay practical, which is the real win.
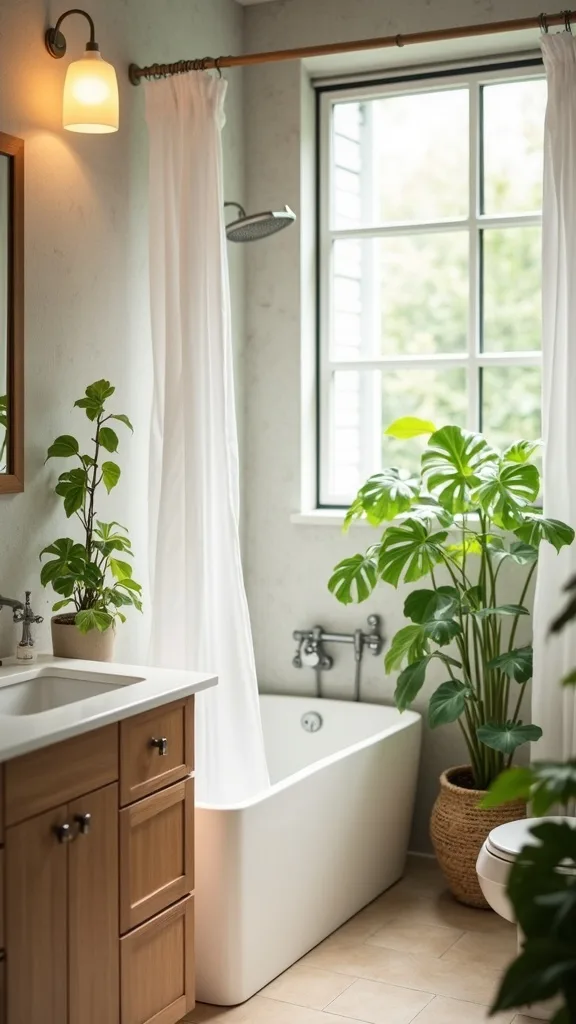
23. Use a Clear Shower Curtain to Let Plants Get More Light
From my experience, light is the limiting factor in many bathrooms, not humidity. I always start by maximizing what you already have, and a clear shower curtain is a surprisingly effective move for plants in bathroom setups.
If your shower is near the window, I swap an opaque curtain for a clear or lightly frosted liner-style curtain so daylight travels deeper into the room. Then I place my humidity-loving plants where that extra light lands—often on a shelf or stand near the shower. If privacy is a concern, I use a frosted look that still passes light through.
I find that clear curtains look best when the rest of the bathroom is tidy, so I pair them with simple white towels and a neutral bath mat. This also helps your greenery become the main decor moment.
Pro tip: if you hate the “plastic” look, layer a pretty fabric curtain on the outside—your green bathroom ideas stay bright, but the style stays soft and elevated.
24. Create a Plant Care Station Under the Sink (So You Stay Consistent)
I always recommend setting up a tiny care station because consistency is what makes biophilic bathroom design sustainable. In my opinion, the best decor is the kind you can maintain without thinking too hard.
I stash a small watering can, microfiber cloth, and plant-safe scissors in a bin under the sink. Then I add a shallow tray for fertilizer or spare saucers so everything stays contained. On watering day, I pull the bin out, water plants at the sink, let them drip for a minute, and return them to their spots—no mess, no searching for tools.
I find that clear bins or woven baskets look neat and feel intentional. If you love a handcrafted vibe, I use a labeled canvas pouch for the small tools.
Pro tip: tie plant care to something you already do weekly—like changing towels—and your indoor plants bathroom will stay lush with almost zero extra effort.
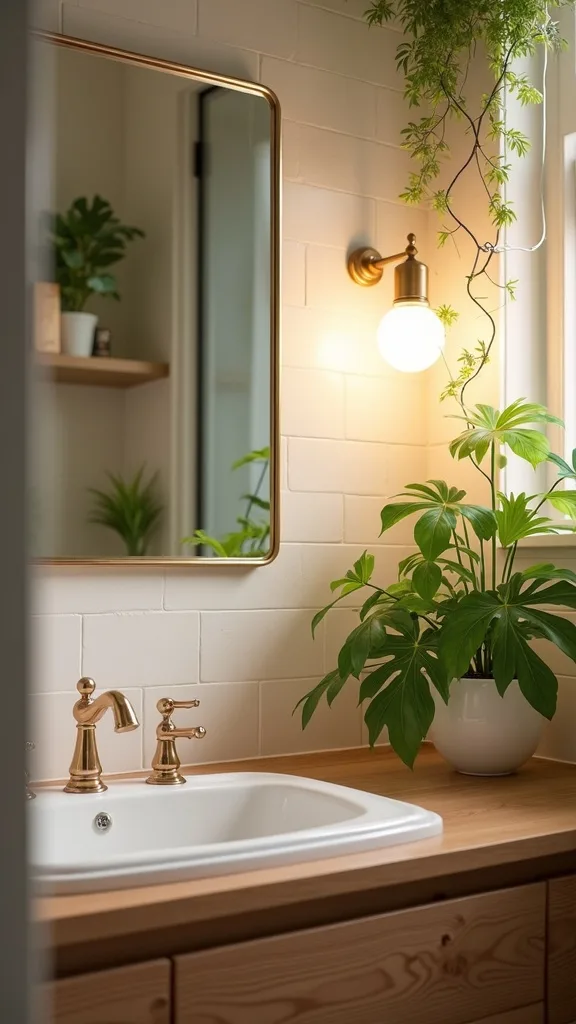
25. Finish with Warm Lighting So Your Greenery Feels Cozy at Night
When I design this look, I treat lighting as the final “polish” that makes everything feel like a retreat. I find that the right glow is essential for nature inspired bathroom styling because it makes leaves look rich and calming after dark.
I always start by swapping harsh bulbs for warm white light (2700K–3000K — the cosy, yellowish tone you see in most homes) in the vanity and any overhead fixtures. Then I add one small accent light—like a plug-in night light or a tiny lamp on a shelf—aimed toward plants so they cast soft shadows. If you’re using a grow light, I keep it on a timer and separate from the evening “relax” lighting.
I like frosted glass shades, brass or matte black accents, and natural wood details to keep the mood spa-like. If you want a budget-friendly upgrade, I always recommend a dimmer switch so you can control brightness (measured in lumens) based on the moment.
Pro tip: take one photo at night once you’re done—seeing your finished green bathroom ideas glowing is the best motivation to keep the space feeling fresh all season.
Final Thoughts
I find that the most successful biophilic bathrooms aren’t the ones packed with the most plants—they’re the ones with a simple plan you can keep up with. If you take only one step today, I always recommend choosing one “hero” plant (pothos is my ride-or-die) and giving it the best spot for light and humidity, then building outward slowly.
From my experience, spring-to-summer is the perfect time to refresh this room because the natural light tends to be stronger and your routine naturally shifts toward lighter, fresher textures. Once you add even a small shelf fern or a moss panel detail, the whole bathroom starts to feel like a tiny retreat you get to visit every day.
If you try any of these ideas, I’d start with the easiest win—vertical greenery plus a tray to control drips—then add layers like wood, stone, and warm lighting as you go. In my opinion, that’s how you create a nature-inspired space that looks beautiful, feels calming, and stays realistic to maintain.
Products I Recommend for This Project
Here are some of my favourite products to help you bring these ideas to life:
- Hanging Pothos Live Plant (Epipremnum aureum) — I love starting with pothos because it trails beautifully and forgives missed waterings.
- American Plant Exchange Boston Fern Live Plant — This is one of my go-to ferns for that soft, lush shelf look in a humid bathroom.
- FRONTGATE Preserved Moss Wall Art Panel — I use a moss panel to get that living-wall vibe fast, especially when I want a bold focal point.
- GE Grow Light LED Bulb for Seeds and Greens — I recommend a grow bulb for windowless bathrooms so your plants get consistent light without extra clutter.
- Umbra Triflora Hanging Planter Set — This makes it easy to hang trailing plants neatly and create a layered green moment in a small space.