Are you looking for a budget kitchen makeover that actually changes how your kitchen feels—without signing up for a renovation? Do you want to walk in this spring and see a fresh, pulled-together space even if you’re working with builder-grade cabinets and a tight budget?
I always start by focusing on the “big visual wins” first: cabinets, hardware, lighting, and the few surfaces your eyes land on the most. In this post, I’m sharing my favourite affordable kitchen update moves that stay under $500, plus the exact order I tackle them so the money goes to the spots that matter.
From my experience, this is perfect for renters (with a few removable swaps), first-time homeowners, and anyone who wants a spring reset without weeks of chaos.
When I design this look, I lean on one hero transformation—like painting cabinets a calm sage and adding brushed brass pulls—then I layer in small DIY details that make the whole room feel intentional. I’ll also share kitchen refresh DIY ideas that don’t require fancy tools, just a weekend and a plan.
Below are 25 Budget Kitchen Makeover Ideas Under $500 that help you refresh your kitchen fast, spend smarter, and get that satisfying before/after you’ll want to show off.
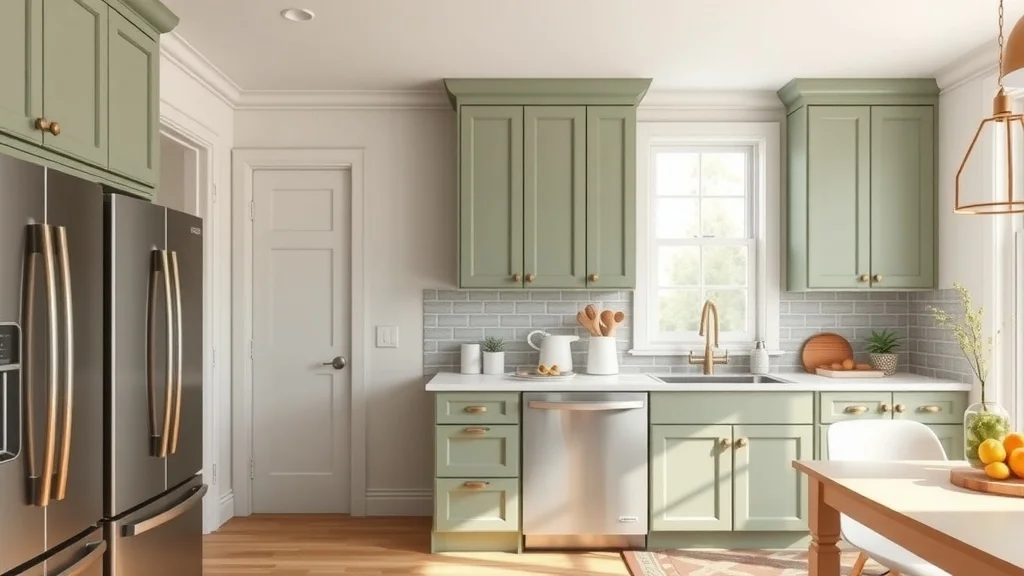
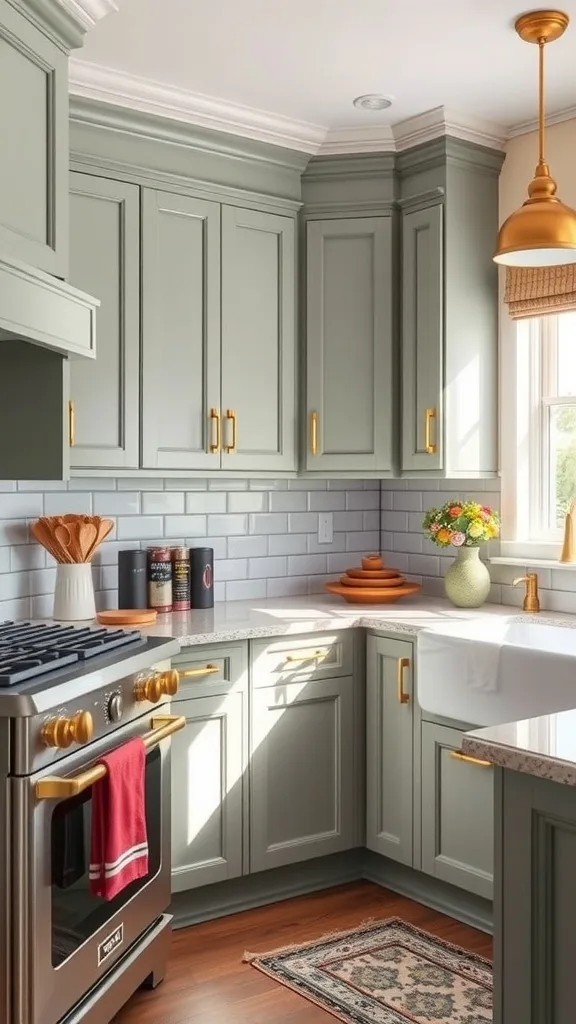
1. Paint Cabinets Sage + Add Brushed Brass Pulls (My Favourite Full Before/After)
I find that nothing beats the “wow” of a true cabinet makeover, and my go-to spring combo is sage cabinet paint with brushed brass pulls for that clean, warm before/after transformation. It works because it changes the biggest visual surface in the room while keeping your existing layout and counters.
I always start by removing doors, labeling hinges, and giving everything a serious degrease (this is where most DIY paint jobs fail). Then I sand lightly, prime if needed, and use a cabinet-specific enamel in thin coats with a foam roller for a smooth finish. Once cured, I install new pulls using a hardware jig or a simple cardboard template so every hole lines up perfectly.
For colour, I love muted sages with gray undertones for modern kitchens, and warmer sages for cozy spaces. For hardware, I recommend 3–5 inch center-to-center pulls in brushed brass for a timeless pop.
Pro tip: I always recommend upgrading just the “touch points” first—doors, drawers, and knobs—because cabinet hardware ideas like this make your kitchen feel brand new without a full remodel, and that’s an empowering win.
2. Swap Out Cabinet Knobs for a Coordinated Hardware Set
From my experience, replacing mismatched or dated knobs is one of the quickest ways to make a kitchen feel intentional, and it’s a classic affordable kitchen update that reads more expensive than it is. I love it because you get an instant “edited” look without touching cabinets or counters.
I always start by counting every door and drawer, then I decide on a consistent finish (brushed brass, matte black, or satin nickel). If the existing holes don’t match your new pulls, I either choose hardware with the same center-to-center measurement or use a backplate to cover old marks. Installation is straightforward: a screwdriver, a measuring tape, and a little patience to keep everything aligned.
For products, I find that mid-range hardware from big-box stores or Amazon multipacks gives the best value. If you want a softer spring vibe, I’d pair brushed brass with simple bar pulls and a few matching knobs for uppers.
Pro tip: One of my favourite approaches is to splurge on the most-handled drawers (trash, utensils) and save on the rest—smart cabinet hardware ideas can stretch your budget while still feeling luxurious.
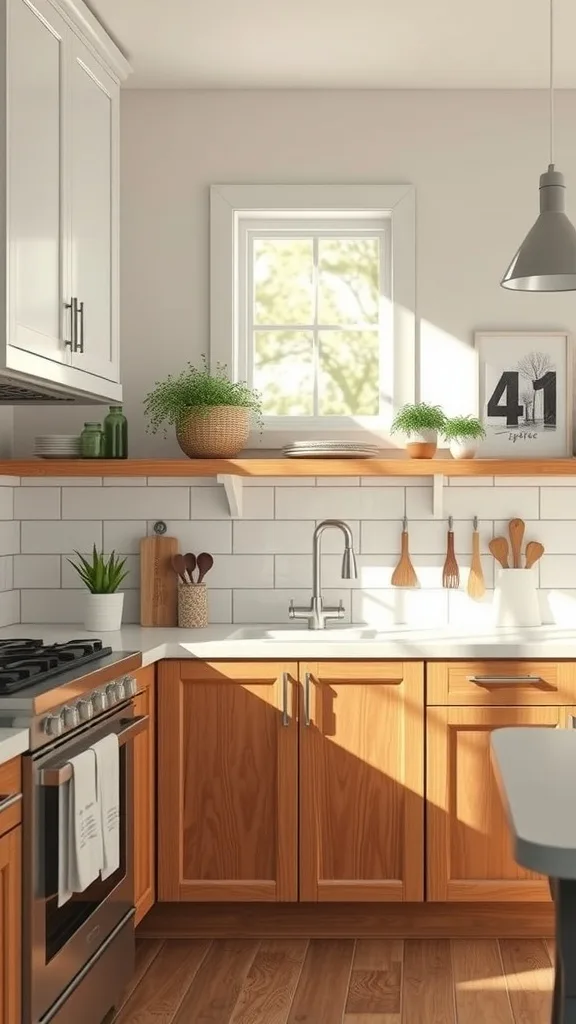
3. Add a Peel-and-Stick Backsplash for a Weekend Upgrade
I find that a backsplash is the “jewelry” of a kitchen, and peel-and-stick options have become my secret weapon for a kitchen refresh DIY that looks surprisingly polished. It works because it creates pattern and contrast right at eye level, making the whole room feel finished.
I always start by cleaning the wall with a degreaser and letting it fully dry, then I map out my layout so cuts land in less noticeable corners. I use a level to keep the first row straight, and I cut tiles with a sharp utility knife and metal ruler. Around outlets, I remove the cover plates and trim carefully for a snug fit.
For style, I love matte subway looks, soft zellige-inspired textures, or warm white “stone” patterns that complement sage cabinets. If you’re doing brushed brass hardware, I’d choose a backsplash with creamy undertones to keep it cohesive.
Pro tip: I always recommend sealing the edges near the sink with clear silicone—this small step protects your affordable kitchen update and helps it stay beautiful through real-life splashes and busy mornings.
4. Paint the Walls a Warm White to Brighten Everything
In my opinion, wall paint is the most underrated tool in a budget kitchen makeover because it changes the light in the room more than almost anything else. I love a warm white in spring because it makes cabinets, counters, and decor feel cleaner and more intentional.
I always start by testing two to three samples on different walls and checking them morning, afternoon, and night. Then I patch holes, lightly sand rough spots, and tape trim for crisp edges. For kitchens, I use a washable eggshell or satin finish so fingerprints and cooking splatter wipe off easily.
Colour-wise, I find that creamy whites (not stark) pair beautifully with sage cabinets and brushed brass. If your kitchen runs dark, I’d avoid gray-heavy whites that can feel flat under warm bulbs.
Pro tip: When I design this look, I match the paint to the undertone of the countertop—this creates a seamless flow that makes your affordable kitchen update feel calm, cohesive, and surprisingly high-end.
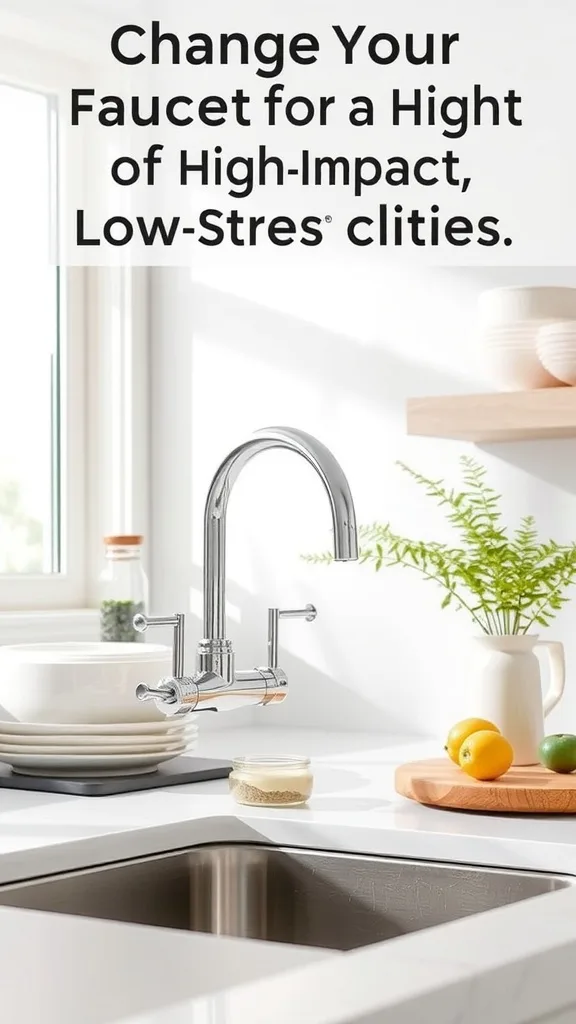
5. Change Your Faucet for a High-Impact, Low-Stress Upgrade
I find that a new faucet is one of those upgrades you notice every single day, which is why it’s a practical anchor for a budget kitchen makeover. It works because it modernizes the sink zone instantly—especially if you’re pairing it with fresh cabinet hardware.
I always start by checking the hole configuration (single-hole vs. three-hole) and measuring reach so the water lands in the center of the sink. Installation is usually a simple DIY: shut off water, disconnect lines, remove the old faucet, then tighten the new one and test for leaks. If you’re nervous, I recommend setting aside $80–$120 for a plumber and still staying under budget by saving elsewhere.
For products, I like pull-down sprayers in brushed brass, champagne bronze, or matte black depending on your hardware. If your water is hard, choose finishes known for resisting spots.
Pro tip: One of my favourite approaches is to coordinate the faucet with your cabinet hardware ideas—that small repetition makes the whole kitchen feel designed, and it’s such a satisfying spring refresh.
6. Update Light Bulbs to a Flattering, Consistent Color Temperature
From my experience, lighting is the difference between “meh” and “magazine,” and swapping bulbs is the easiest affordable kitchen update you can do in under an hour. It works because mismatched bulbs make even beautiful finishes look off.
I always start by choosing one color temperature for the whole kitchen—usually 2700K for warm/cozy or 3000K for a clean, bright spring feel. Then I replace every bulb (ceiling, pendants, under-cabinet) so the light matches. If you have dimmers, I make sure the bulbs are dimmable to avoid flicker.
I find that high-CRI LEDs (90+ CRI) make cabinet paint colors like sage look richer and more true. For fixtures with exposed bulbs, I like frosted LEDs to reduce glare.
Pro tip: I always recommend treating bulbs like paint—test one first, then commit. The right lighting makes your kitchen refresh DIY efforts look intentional and elevates every other change you make.

7. Add Under-Cabinet Lighting (Plug-In or Battery) for Instant Glow
I find that under-cabinet lighting is a game-changer because it adds both function and that cozy, layered look people associate with renovated kitchens. It’s a budget kitchen makeover move that makes counters look cleaner and tasks like chopping feel easier.
I always start by deciding between plug-in light bars, rechargeable puck lights, or LED strips. For renters or quick installs, I use adhesive LED strips or magnetic rechargeable bars. I place lights toward the front underside of the cabinet so the counter is evenly lit and shadows are minimized.
For colour, I prefer warm white (2700K–3000K) so it complements brushed brass and keeps sage cabinets from looking too cool. Look for options with a diffuser so you don’t see individual LED dots.
Pro tip: When I design this look, I put under-cabinet lights on a remote or motion sensor—this tiny upgrade makes your affordable kitchen update feel luxurious, and it’s the kind of everyday convenience you’ll love all spring long.
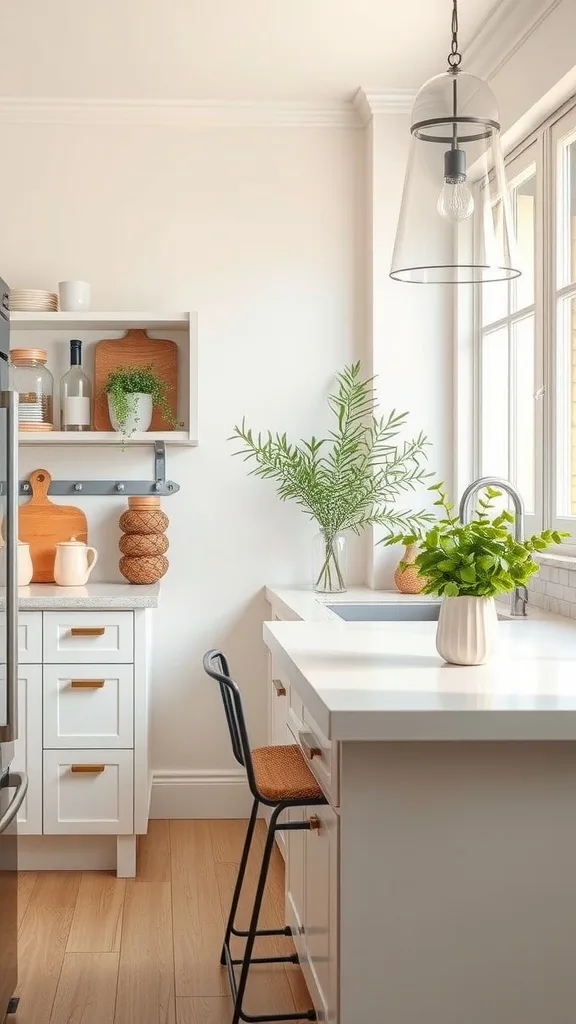
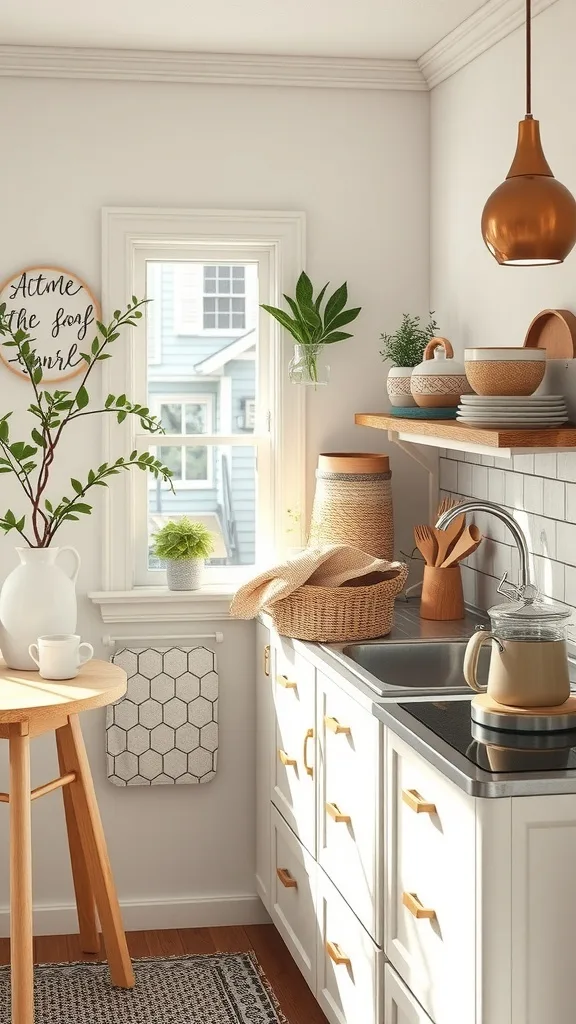
8. Style Your Countertops Like a Designer (Without Buying New Counters)
In my opinion, clutter is the fastest way to make a kitchen feel dated, so I treat countertop styling as a core part of any kitchen refresh DIY. It works because you’re editing what’s visible and turning necessities into decor.
I always start by clearing everything off, then I add back only what I truly use daily. I group items into small “stations”: a coffee tray, a cooking zone by the stove, and a handwashing set by the sink. Keeping items on trays or in crocks makes the counter feel organized even when life gets busy.
For materials, I like warm wood, clear glass, and a little stone or ceramic—these textures pair beautifully with sage cabinets and brushed brass. I often use a small cutting board, a neutral soap dispenser, and a simple utensil crock to create a cohesive palette.
Pro tip: One of my favourite approaches is to leave one full counter run empty if possible. That negative space makes your affordable kitchen update feel higher-end, and it gives you room to actually live in your kitchen.
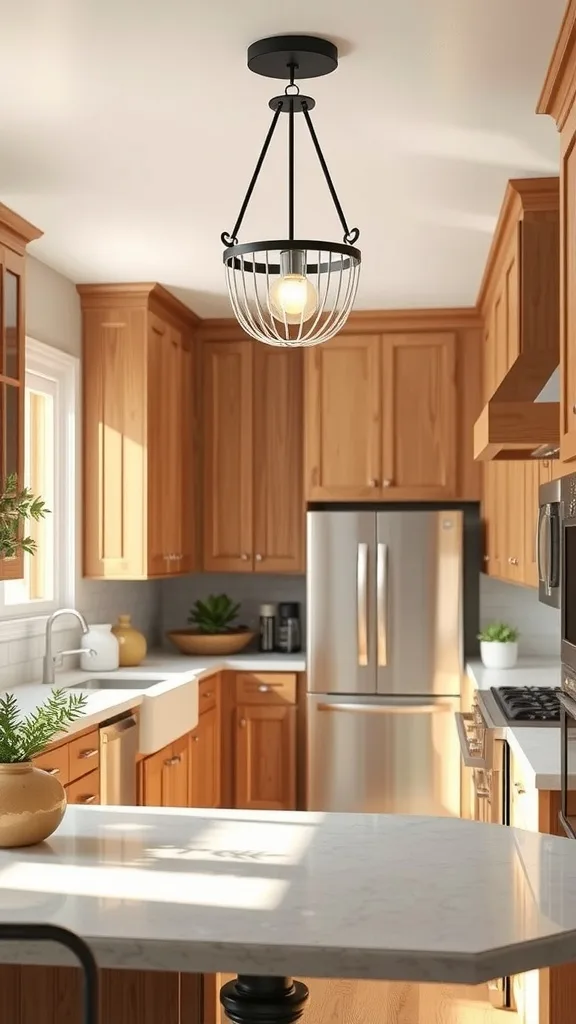
9. Replace a Builder-Grade Pendant or Flush Mount for a Statement Moment
I find that swapping one light fixture can change the entire personality of a kitchen, which makes it a strong budget kitchen makeover choice. It works because lighting sits at eye level and reads like a “renovation” even when nothing else moves.
I always start by measuring the space and choosing a fixture size that won’t overwhelm the room. For safety, I turn off power at the breaker, confirm with a voltage tester, and then swap the fixture using the included mounting bracket. If wiring makes you nervous, I recommend hiring an electrician and saving money by doing other DIY updates yourself.
For style, I love simple globe pendants, linen shades, or a clean semi-flush mount in warm brass to echo your hardware. If your cabinets are sage, I’d keep the fixture shape classic so the colour remains the star.
Pro tip: I always recommend using the same metal finish family as your cabinet hardware ideas. That repetition makes the kitchen feel designed, and it’s a spring refresh that pays off every time you flip the switch.
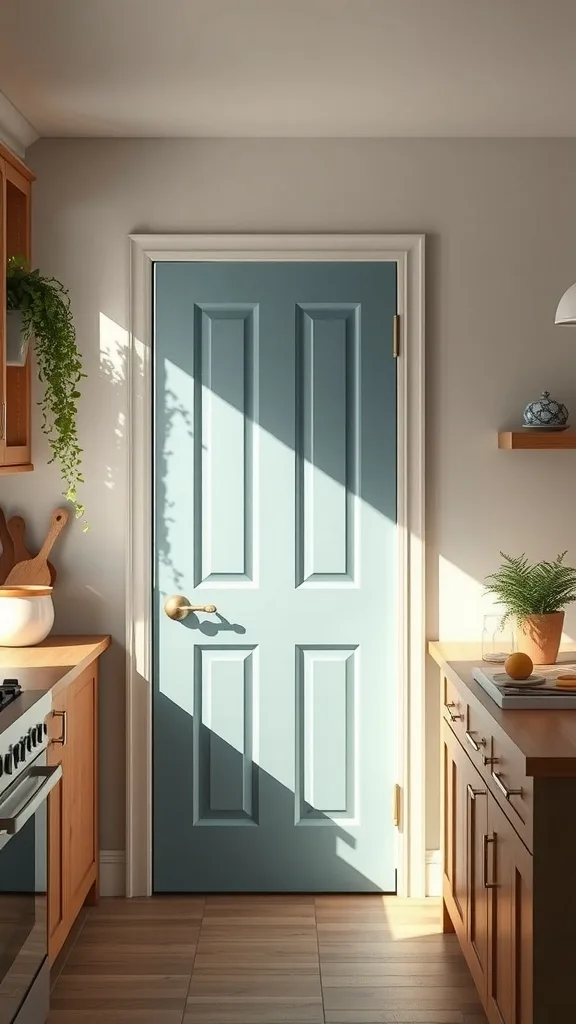
10. Paint the Pantry Door (or Back Door) for a Subtle Pop of Color
From my experience, a single painted door is a low-risk way to add personality, especially if you’re not ready to paint kitchen cabinets yet. It works because it creates a focal point without committing to a whole-room color change.
I always start by choosing a colour that ties into the kitchen palette—sage, soft greige, or even a muted clay. Then I clean the door, lightly sand, and use a durable trim enamel in satin for easy wipe-down. If the door has panels, I use a brush for edges and a small roller for the flat areas to keep it smooth.
I find that sage on the door looks gorgeous with warm whites and brushed brass, especially in spring when you want that fresh, garden-inspired feel. If you want extra cohesion, swap the door knob to match your kitchen hardware.
Pro tip: When I design this look, I paint the inside edge of the door too—this tiny detail makes the affordable kitchen update feel intentional, and it’s such a satisfying finishing touch.
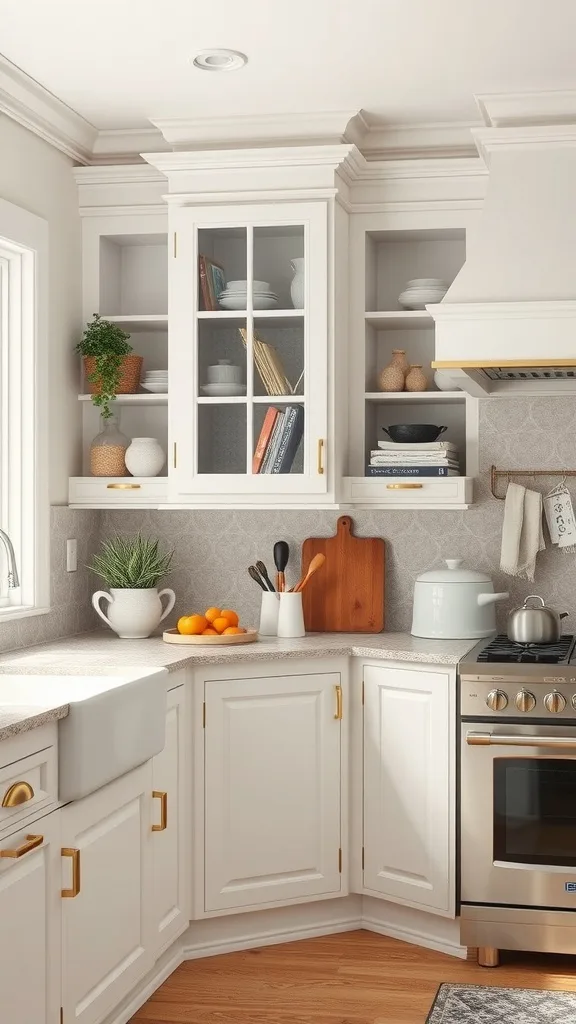
11. Add Open Shelving (Just One Section) for Airy Spring Vibes
I find that a small section of open shelving can make a kitchen feel lighter and more current, especially during a spring refresh. It works because you’re breaking up upper cabinets visually without doing a full remodel, which keeps it firmly in budget kitchen makeover territory.
I always start by choosing a spot that won’t become a clutter magnet—usually one cabinet near the sink or a short run by the coffee area. After removing the cabinet doors (you can store them for later), I patch holes, paint the interior, and install two sturdy shelves anchored into studs or with heavy-duty drywall anchors. Then I style with everyday items you actually use.
For materials, I love simple pine boards sealed with a clear matte finish, or pre-made shelves in a light oak tone to warm up sage cabinets. White dishes, clear glassware, and a small plant keep it fresh.
Pro tip: I always recommend limiting shelf decor to one colour family plus one metal accent. That restraint makes your kitchen refresh DIY feel calm, curated, and easy to maintain.
12. Use Contact Paper to Refresh a Tired Countertop (Temporary but Transformative)
In my opinion, countertop contact paper is one of the most dramatic “for the price” tricks when you need an affordable kitchen update fast. It works because it covers the surface you see and use constantly, giving you a clean slate while you save for future upgrades.
I always start by choosing a high-quality, thick vinyl with a realistic pattern (marble, soapstone, or light concrete). Then I deep-clean and dry the counters, cut manageable sections, and apply slowly using a squeegee to push out bubbles. Around the sink, I trim carefully and seal edges with clear caulk to prevent water seepage.
I find that warm white marble-look paper pairs beautifully with sage cabinets and brushed brass, creating that airy spring feel. If your kitchen is busy, a subtle pattern hides crumbs and daily wear better than solid colors.
Pro tip: One of my favourite approaches is to do just the island or one main run first. It’s a low-commitment kitchen refresh DIY that builds confidence—and seeing that before/after can be the motivation you need to keep going.
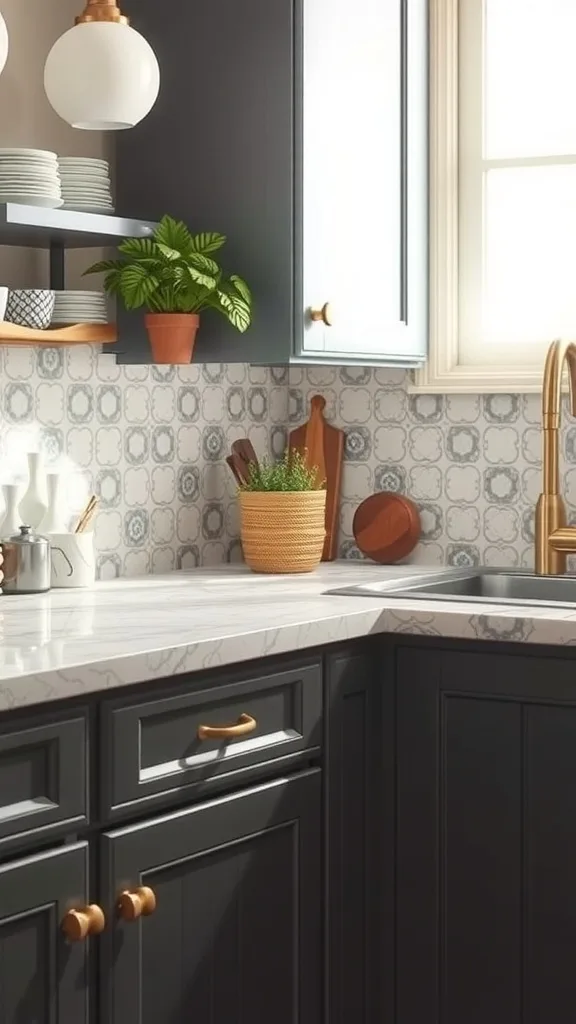
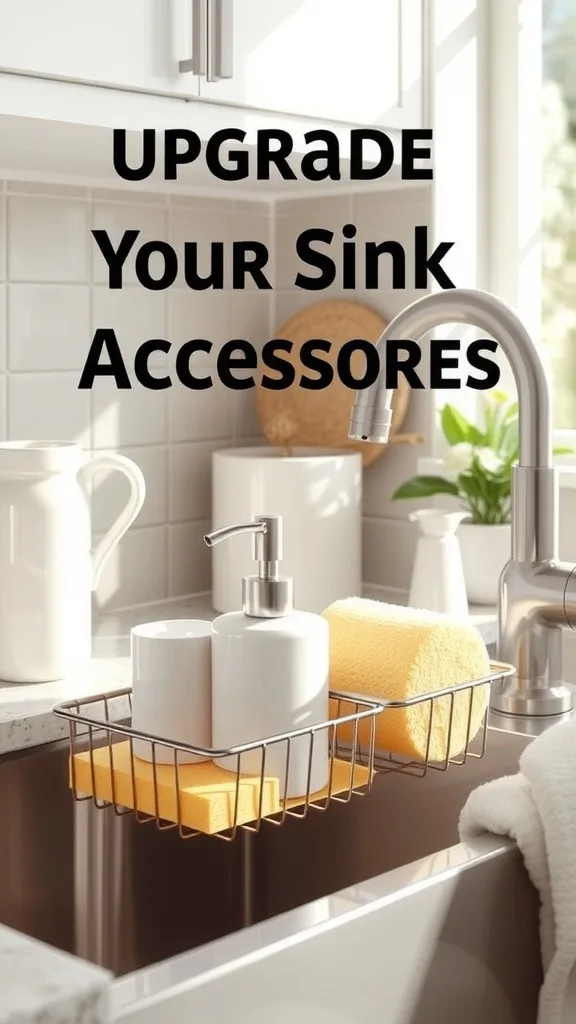
13. Upgrade Your Sink Accessories (Soap Dispenser, Sponge Caddy, Drying Rack)
I find that the sink area can make or break how clean a kitchen feels, and small accessory swaps are a sneaky-effective budget kitchen makeover move. It works because you’re turning daily clutter into coordinated pieces.
I always start by removing everything around the sink and deciding what truly needs to live there. Then I choose matching finishes—brushed brass, matte black, or stainless—and pick a single tray to corral items. A compact sponge holder inside the sink and a slim roll-up drying rack keep counters clear.
For products, I like amber or clear soap bottles with simple labels, a neutral dish brush, and a small ceramic or stainless caddy. If you’ve gone with brushed brass pulls, I’d echo that warmth with a brass-toned soap pump or tray handles.
Pro tip: I always recommend buying fewer, better-looking essentials rather than lots of gadgets. This kind of affordable kitchen update makes your kitchen feel calmer every day, and that’s the real luxury.
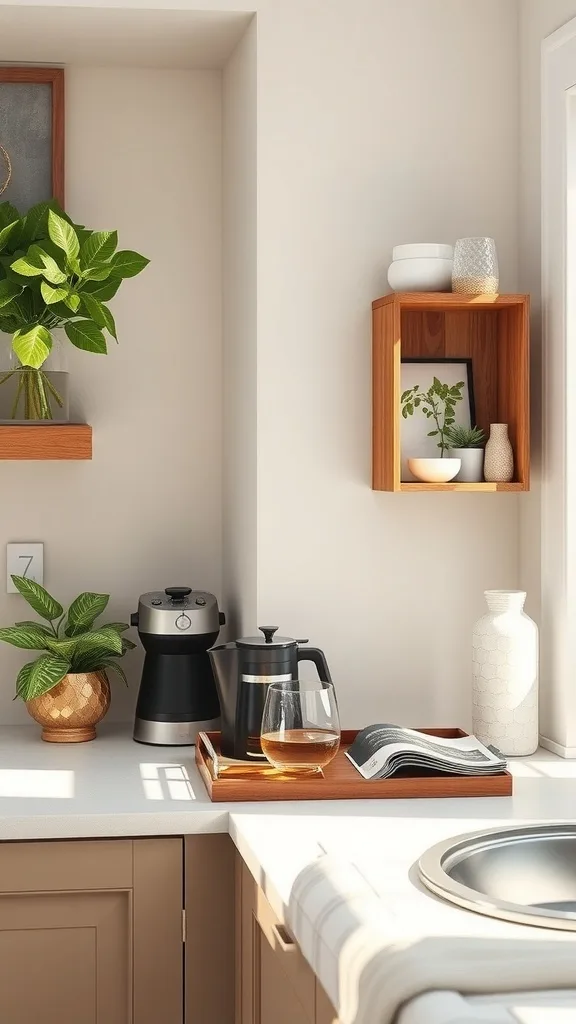
14. Create a Coffee Station Corner with a Tray and Vertical Storage
From my experience, a coffee station is a high-impact way to make a kitchen feel styled and functional at the same time. It works because it consolidates mugs, pods, and sweeteners into one attractive zone—an easy kitchen refresh DIY that reduces visual noise.
I always start by choosing a single counter corner near an outlet, then I add a tray to define the footprint. Next, I go vertical with a small mug tree, a narrow shelf, or adhesive hooks under a cabinet for hanging cups. I keep only the daily essentials out and store the rest in a nearby bin.
For materials, I love a warm wood tray, white mugs, and one brass accent to tie into brushed brass cabinet pulls. A small jar for stir sticks and a lidded canister for coffee keeps it tidy.
Pro tip: When I design this look, I add one “pretty but useful” item—like a small framed recipe or a plant. That tiny styling choice makes your affordable kitchen update feel personal, and it turns an everyday routine into a cozy spring moment.
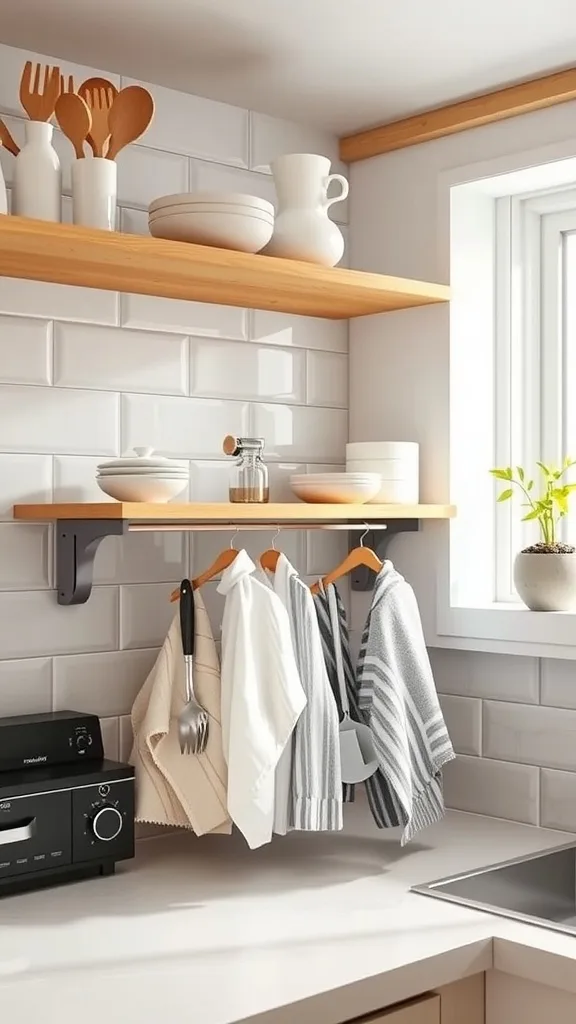
15. Install a Simple Rail System for Utensils and Towels
I find that rail systems are perfect for small kitchens because they add storage without taking up counter space, which is a practical win in any budget kitchen makeover. It works because it keeps the items you reach for most within arm’s reach—while still looking neat.
I always start by choosing a spot with enough clearance, usually on a backsplash wall or the side of a cabinet. Then I mark studs (or use strong anchors), install the rail level, and add S-hooks for utensils, a towel ring, or small baskets for spices. The key is spacing: I leave breathing room so it doesn’t look crowded.
For finishes, I like brushed brass if you’re already using brass pulls, or matte black for contrast against sage cabinets. Wooden-handled tools and neutral towels keep it spring-fresh.
Pro tip: I always recommend limiting what hangs on the rail to your “top five” tools. That restraint keeps your kitchen refresh DIY feeling styled, and it makes cooking feel easier and more enjoyable.
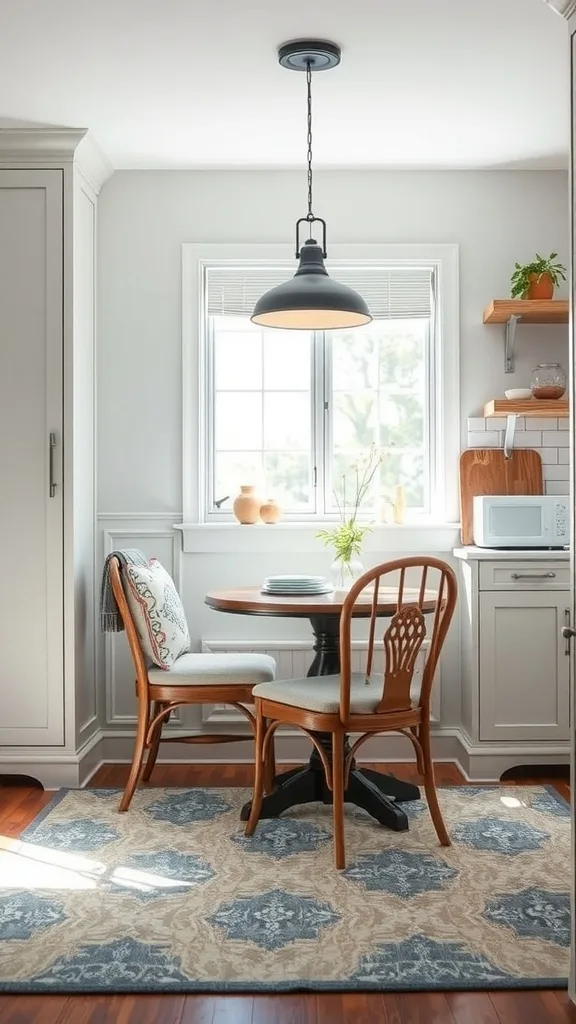
16. Refresh Your Dining Nook with Chair Cushions and a Washable Rug
In my opinion, a kitchen makeover isn’t complete if the seating area still feels tired, and textiles are the fastest way to soften the room for spring. It works because a new rug and cushions add color, comfort, and sound absorption—an affordable kitchen update with real daily impact.
I always start by measuring the nook and choosing a rug size that lets chairs slide without catching. For spills, I pick a washable rug or an indoor/outdoor option that wipes clean. Then I add simple chair cushions or seat pads in a fabric that ties into the cabinet colour—think warm neutrals, small stripes, or soft botanical prints.
I find that sage cabinets pair beautifully with oatmeal, cream, and tan textiles, plus a hint of brass in a small centerpiece or candle holder. If your kitchen is all hard surfaces, a rug instantly makes it feel more welcoming.
Pro tip: One of my favourite approaches is to repeat one colour three times (rug, cushion, small decor). This creates that “designed” feeling in your budget kitchen makeover without buying a single piece of furniture.
17. Replace Switch Plates and Outlet Covers for a Clean, New Look
I find that old, yellowed switch plates quietly drag down an entire kitchen, and replacing them is one of the easiest kitchen refresh DIY wins you can do. It works because crisp, clean details make the whole room feel maintained and modern.
I always start by walking the kitchen and counting every plate—switches, outlets, and GFCIs—so I can buy a matching set. Then I turn off power to the outlets if I’m swapping those covers near water, remove the old plates, and install new ones with a hand screwdriver (not a drill) to avoid cracking. I also align the screws vertically for that extra “finished” touch.
For style, I like simple white plates for a seamless look, or matte black if you want contrast. If you’re leaning into brushed brass, there are beautiful metal plates, but I keep them minimal so the hardware stays the star.
Pro tip: I always recommend doing this right after painting walls. It’s a small affordable kitchen update, but it makes your fresh paint look sharper—and that’s the kind of detail that elevates the whole space.
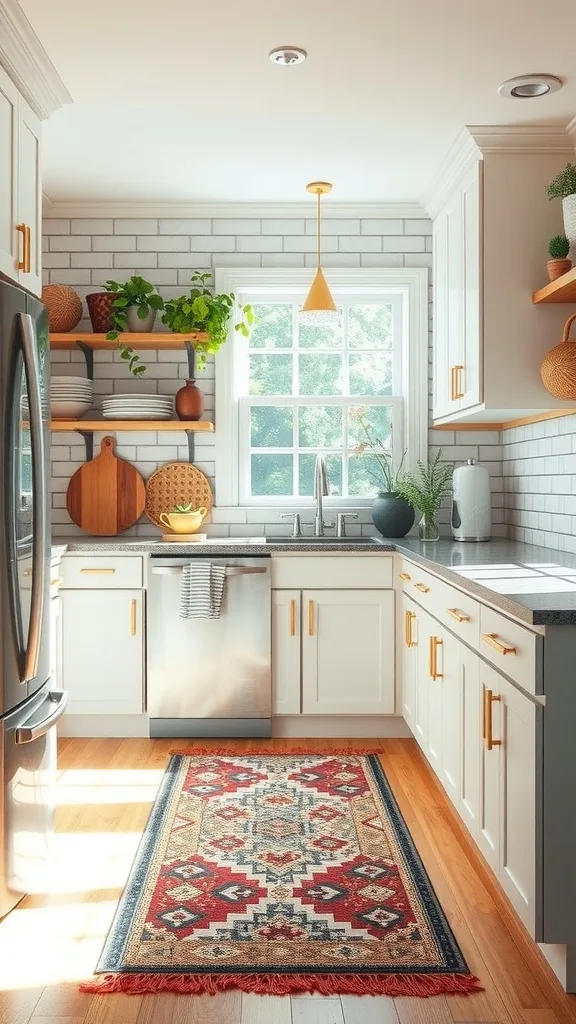
18. Add a Runner Rug to Warm Up the Work Zone
From my experience, a runner rug is one of the most practical upgrades for busy kitchens because it adds comfort where you stand the most. It works as part of a budget kitchen makeover because it brings in pattern and softness without changing any permanent finishes.
I always start by measuring the main walkway and choosing a runner that leaves a few inches of floor visible on each side. For kitchens, I pick low-pile, washable, or indoor/outdoor rugs that can handle crumbs and spills. I add a non-slip pad underneath so it stays put and feels cushy.
I find that spring is the perfect time for lighter patterns—soft geometrics, subtle botanicals, or vintage-inspired neutrals. With sage cabinets and brass pulls, I love rugs with warm creams, muted greens, and a touch of tan.
Pro tip: When I design this look, I treat the rug like a unifying piece that ties your cabinet colour to your wall colour. That one textile choice can make your affordable kitchen update feel complete, cozy, and ready for everyday life.
19. Organize One Drawer with Dividers (The “Feels Expensive” Trick)
I find that drawer organization is the kind of upgrade you feel more than you see, and it’s a surprisingly motivating kitchen refresh DIY. It works because a tidy drawer reduces daily friction—no more digging for measuring spoons or fighting a junk drawer avalanche.
I always start by picking one high-traffic drawer (utensils or cooking tools), emptying it completely, and sorting items into keep/donate/trash. Then I measure the interior and choose adjustable dividers or a modular organizer set. I place the most-used tools closest to where I stand and leave a little empty space so it stays easy to maintain.
For materials, I like bamboo organizers for warmth with sage cabinets, or clear acrylic for a clean modern look. If you want to go further, I add a non-slip liner in a neutral tone.
Pro tip: I always recommend organizing one drawer at a time instead of trying to do the whole kitchen in a day. Small wins build momentum in a budget kitchen makeover, and that momentum is what creates real change.

20. Refresh Your Cabinet Interiors with Paint or Liner
In my opinion, cabinet interiors are an overlooked place to get that “new kitchen” feeling, especially if you’re already planning to paint kitchen cabinets or swap hardware. It works because every time you open a door, you see a clean, fresh surface instead of scuffs and stains.
I always start by emptying one cabinet at a time, vacuuming crumbs, and wiping down shelves with a degreaser. For a quick change, I use peel-and-stick shelf liner cut to size. For a more durable upgrade, I paint the interior with a washable enamel and let it cure fully before restocking.
I find that a soft warm white interior makes dishes look brighter and pairs well with sage exteriors. If you want a fun surprise, a pale sage interior can feel cohesive and custom, especially with brushed brass pulls outside.
Pro tip: One of my favourite approaches is to do just the cabinets you open most (plates, pantry, mugs). This targeted affordable kitchen update saves time and money while still delivering that satisfying “everything feels cleaner” result.
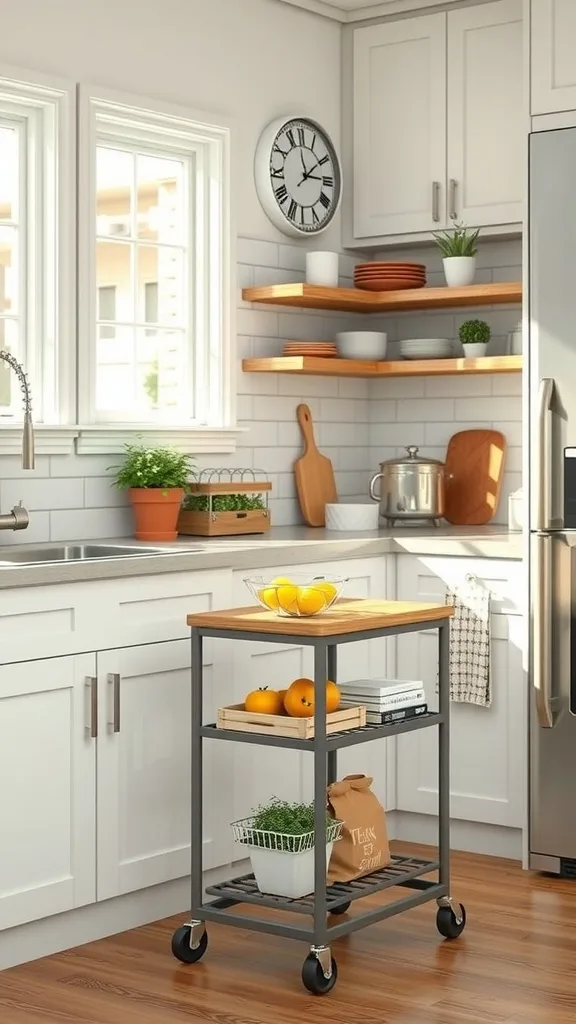
21. Add a Rolling Cart for Extra Storage and a Styled Moment
I find that a rolling cart is a lifesaver in kitchens short on storage, and it’s a flexible piece that fits a budget kitchen makeover perfectly. It works because it adds surface area and organization without any construction.
I always start by measuring the gap where the cart will live—next to the fridge, by the pantry, or near the dining nook. Then I choose a cart with at least two tiers and lockable wheels. I use the top for a pretty, practical setup (fruit bowl, cutting board, oils on a tray) and the lower shelves for baskets, small appliances, or backstock.
For style, I love white or light wood carts to keep the room airy in spring. If you’re using brushed brass pulls, I’ll often add a small brass-toned handle accessory or a matching tray to tie it in.
Pro tip: I always recommend styling the cart with “containers first” (baskets, bins) before filling it. That structure makes your kitchen refresh DIY feel calm, curated, and easy to keep tidy.
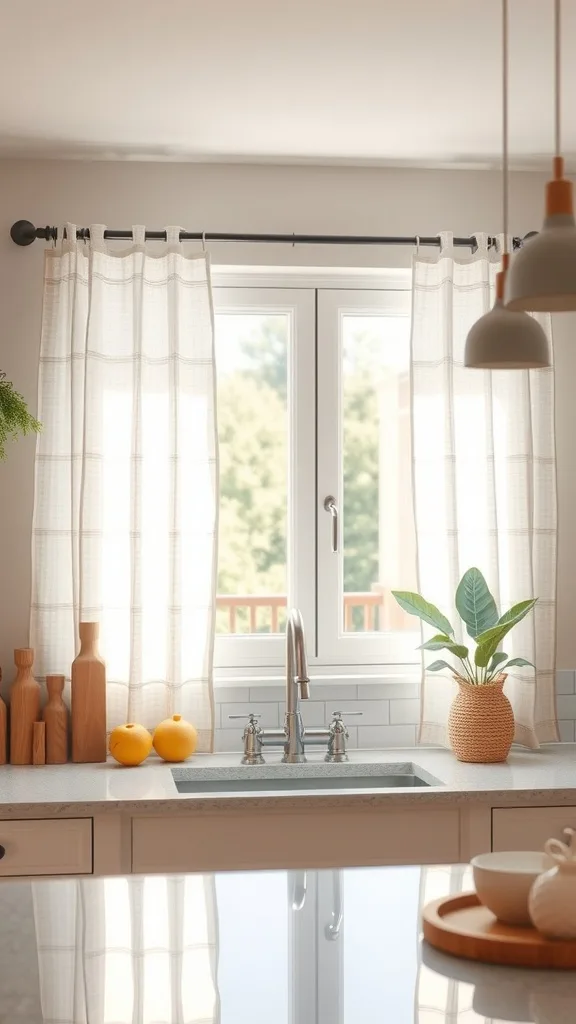
22. Frame the Window with Simple, Light-Filtering Curtains
From my experience, window treatments can completely change a kitchen’s mood, and light-filtering curtains are my go-to for a spring refresh. It works as an affordable kitchen update because it softens hard surfaces and makes natural light feel intentional.
I always start by deciding whether I want inside-mount (clean and minimal) or outside-mount (makes the window look larger). For a quick DIY, I use a tension rod for café curtains or a simple rod mounted above the frame. I hang panels high and wide when possible to create height and let in maximum light.
I find that linen-look fabrics in warm white or soft oatmeal look beautiful with sage cabinets and brushed brass. If privacy is needed, I choose a light-filtering weave rather than heavy blackout fabric.
Pro tip: When I design this look, I keep the curtain hardware simple and coordinate it with my cabinet hardware ideas. That small detail creates a cohesive finish, and it makes the kitchen feel airy, fresh, and ready for spring mornings.
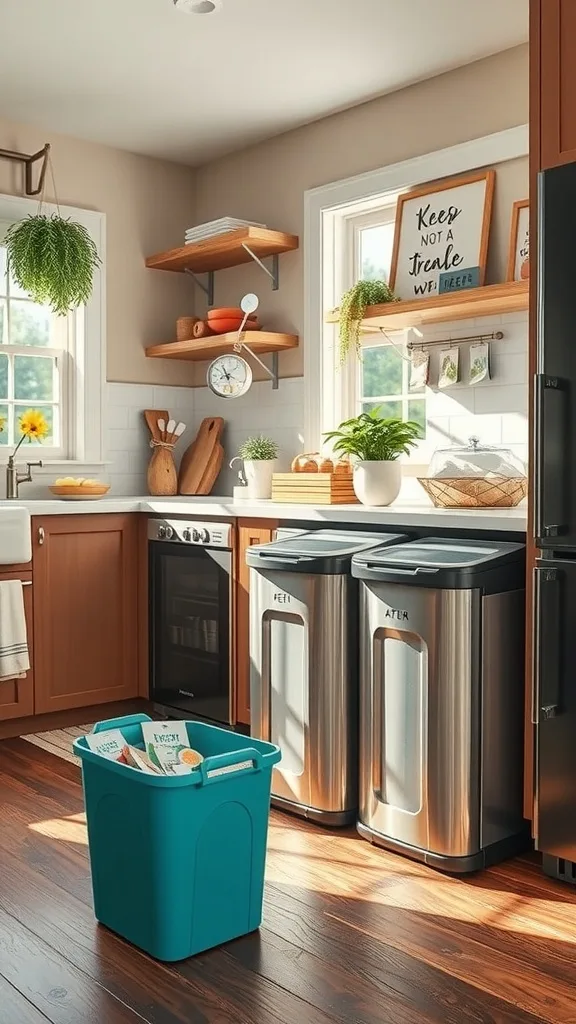
23. Refresh Your Trash Setup (Pull-Out Hack or Matching Bins)
I find that an ugly trash situation can undo the feeling of a clean kitchen, so I treat it like a real part of a budget kitchen makeover. It works because reducing visual clutter instantly makes the room feel more polished.
I always start by deciding whether the trash can should be hidden or styled. If you have a spare base cabinet, a simple pull-out trash kit can be an excellent DIY upgrade with a screwdriver and a drill. If not, I choose a slim, lidded can in a finish that matches the kitchen—white, stainless, or black—and I place it where it’s convenient but not the first thing you see.
For products, I like bins with a tight seal and easy-clean surfaces. If you’re leaning into brass accents, I’ll add a small coordinating label or a nearby basket for trash bags so the zone stays tidy.
Pro tip: I always recommend setting up a tiny recycling bin right next to trash—even if it’s hidden. This practical kitchen refresh DIY makes daily routines smoother, and smoother routines make your kitchen feel better every day.
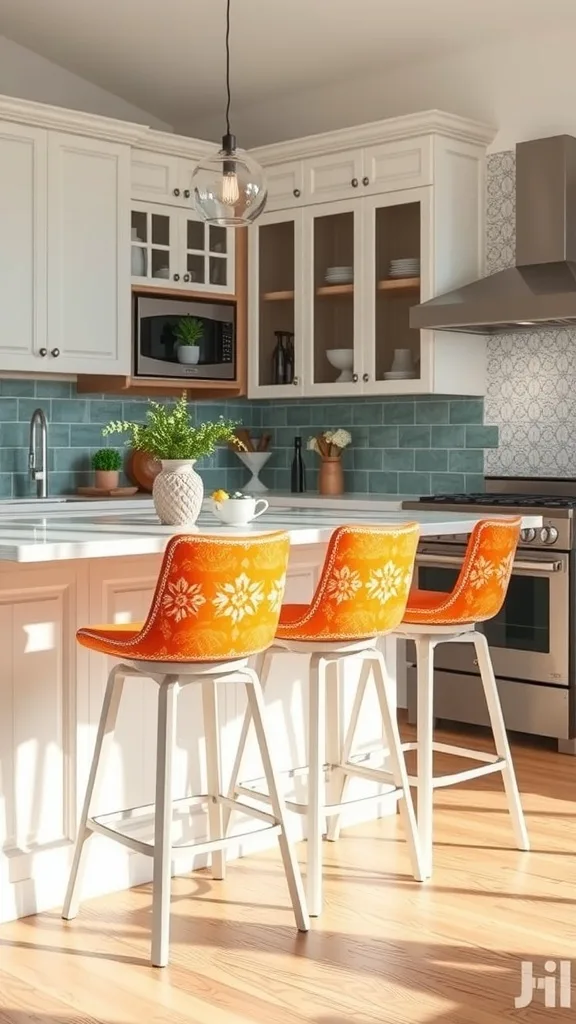
24. Replace or Paint Bar Stools for a Coordinated Look
In my opinion, bar stools are one of the most visible “furniture” pieces in a kitchen, so updating them can make the entire space feel new. It works as an affordable kitchen update because you can often paint or re-cover what you already have instead of buying new.
I always start by checking stool height (counter vs. bar) and stability. If the frames are solid, I lightly sand and paint with a durable enamel, then seal if needed. For upholstered seats, I use a staple gun to re-cover with a wipeable fabric or faux leather—easy to clean and family-friendly.
I find that light wood tones, black frames, or warm white stools pair beautifully with sage cabinets. If you’re using brushed brass pulls, I love stools with subtle brass foot caps or warm-toned legs to echo that finish.
Pro tip: One of my favourite approaches is to repeat your cabinet colour in a tiny way—like a sage seat cushion or a patterned fabric with green threads. That repetition makes your budget kitchen makeover feel cohesive, intentional, and truly “done.”
25. Do a Spring “Edit” and Deep Clean for the Best $0 Makeover
I find that the most powerful makeover sometimes costs nothing, and a spring edit is the foundation that makes every other kitchen refresh DIY look better. It works because you’re removing what doesn’t serve you and making space for what does.
I always start by setting a timer and working zone by zone: one counter, one cabinet, one drawer. I toss expired food, donate duplicate gadgets, and group like items together so storage makes sense. Then I deep clean: degrease cabinet fronts, wipe baseboards, scrub grout lines, and polish appliances so everything looks brighter.
For supplies, I keep it simple—microfiber cloths, a degreaser, baking soda, and a gentle scrub brush. If you’ve painted cabinets or swapped hardware, this step makes the new finishes shine and keeps them looking fresh.
Pro tip: I always recommend taking a “before” photo even if you’re only cleaning. Seeing the difference reminds you that a budget kitchen makeover is about real-world impact, and you deserve a kitchen that feels good to walk into every day.
Final Thoughts
Final Thoughts
I always recommend choosing just two to three upgrades from this list and doing them really well—because a focused plan beats a scattered spend every time. From my experience, the biggest spring wins come from pairing one bold visual change (like sage cabinets and brushed brass pulls) with one functional improvement (lighting, faucet, or organization) so your kitchen looks better and works better.
When I design this look on a budget, I keep reminding myself that “under $500” doesn’t mean small results—it just means smarter choices. If you want the fastest path, I’d start by editing your counters, upgrading your hardware, and tackling one weekend paint project. That combination delivers the kind of before/after that makes you excited to cook, host, and enjoy your kitchen again.