This post contains affiliate links. As an Amazon Associate, I earn from qualifying purchases at no extra cost to you.
Are you looking for hammock ideas that feel like a mini vacation without redoing your whole yard? Do you want to turn a plain patch of grass into an outdoor relaxation corner you’ll actually use all summer?
In this post, I’m sharing my favourite ways to style a backyard hammock area for early-summer lounging—think shade, soft textures, and lighting that makes evenings feel inviting. I’ll walk you through practical layouts, affordable add-ons, and small upgrades that make a real difference in comfort.
I wrote this for anyone who wants a calming summer outdoor spot—renters, small-yard owners, busy families, and anyone working with a realistic budget.
From my experience, the “secret sauce” is combining one solid hammock setup with just a few supporting pieces: a stable hang, a reachable drink spot, and layered light so you can stay out past sunset. I’ll also share easy ways to create a lush hammock garden feel, even if you’re starting with only a couple of pots.
Below are 25 Hammock Backyard Ideas & Relaxation Corner that help you build a comfortable, affordable escape—one simple step at a time.
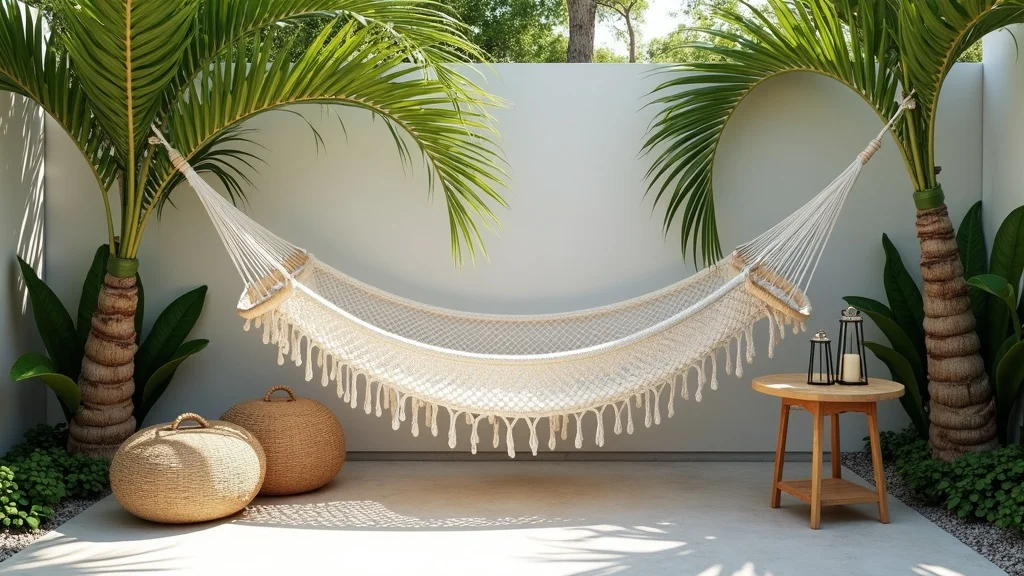
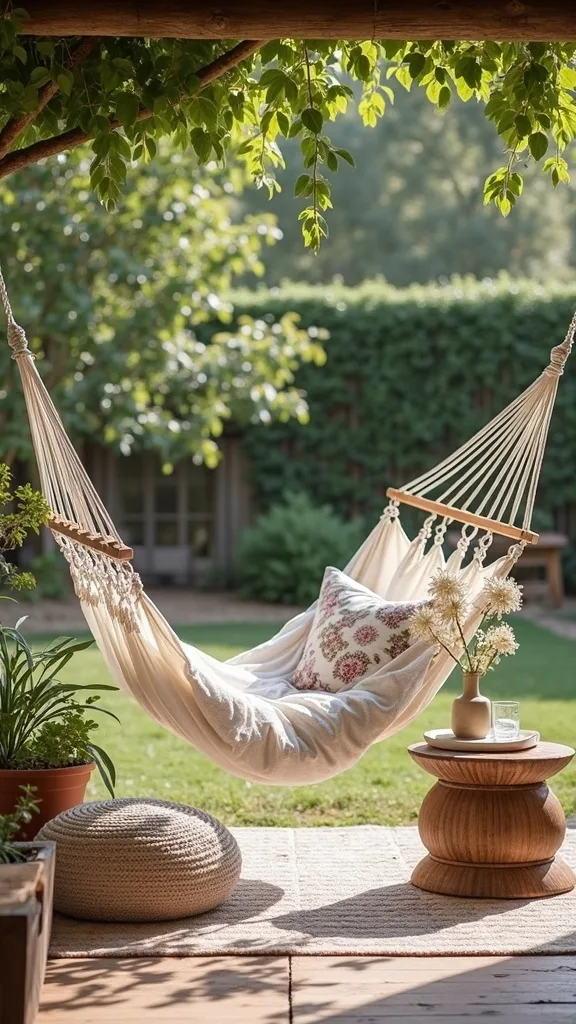
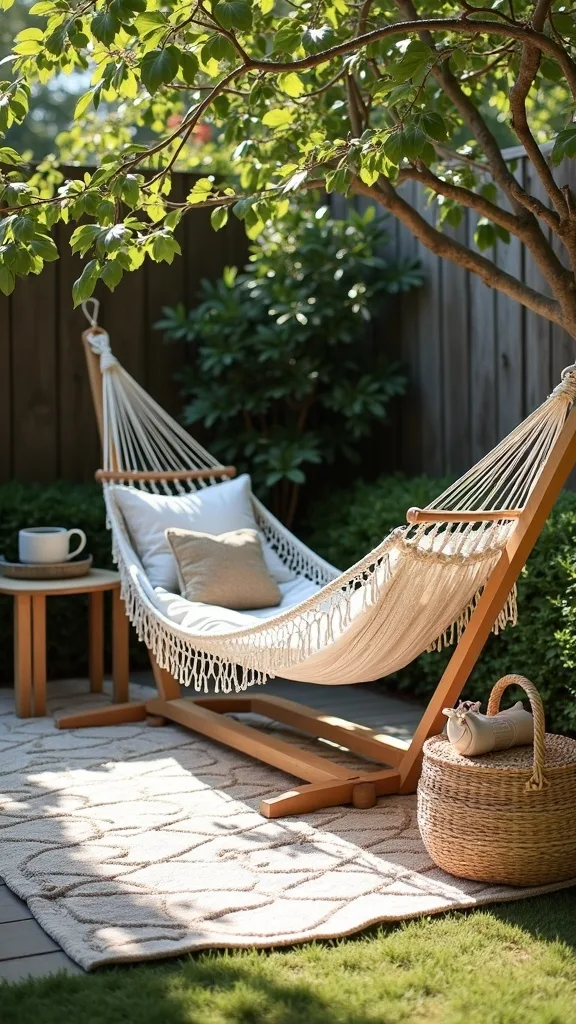
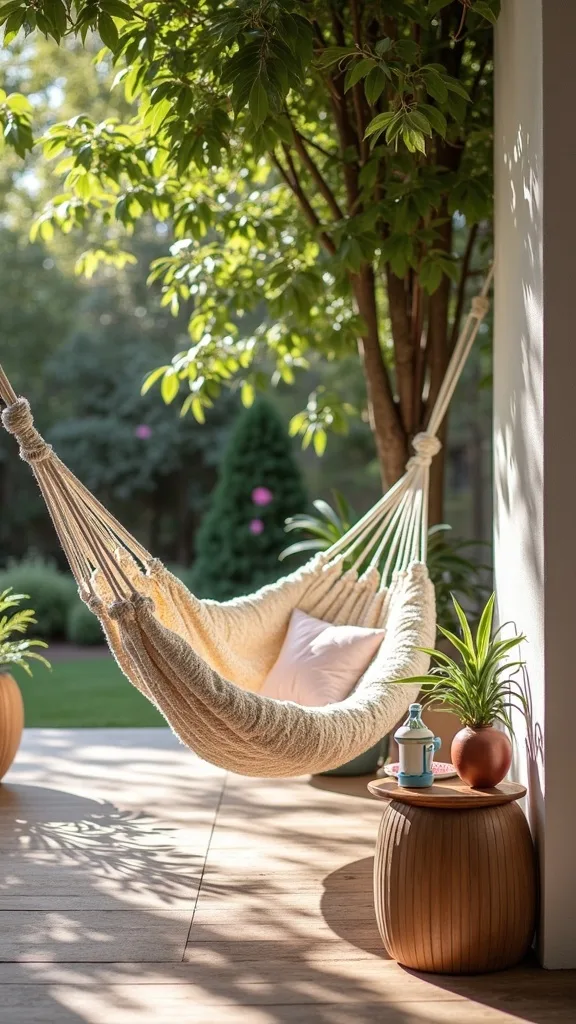
1. Cotton Rope Hammock Between Two Palms With Lanterns and a Tropical Border
I always start by recreating the classic getaway look: a cotton rope hammock hung between two palms, with a small side table, lanterns, and a leafy border. It works because the palms provide natural shade and the tropical plants visually “frame” the nap zone, so the whole corner feels intentional instead of random.
To do it, I check the distance between trunks and use tree-friendly straps so I’m not damaging bark. I place a compact side table right where my hand naturally falls when I’m lying down, then I line the back edge with pots (or in-ground plants) to create a soft green wall.
I find that neutral rope looks best with sandy beiges, crisp white cushions, and deep greens; a teak-toned table or faux-wicker works on a budget too. For lighting, I stick to warm white light (2700K–3000K — the cosy, yellowish tone you see in most homes).
My pro tip: add two lanterns at different heights (one on the table, one on the ground) so the glow feels layered—and you’ll want to linger there every evening.
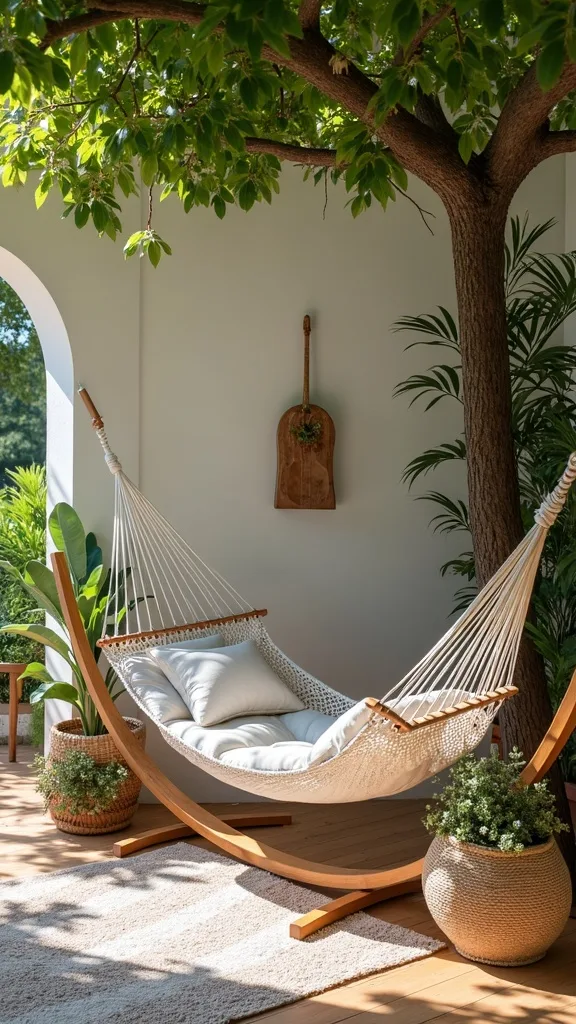
2. No-Trees? Use a Budget-Friendly Hammock Stand That Looks Intentional
From my experience, a stand is the fastest way to get a backyard hammock setup when you don’t have the right trees (or you rent and can’t install hardware). It works because you control placement—sun in the morning, shade in the afternoon—without committing to permanent anchors.
I always start by choosing the flattest spot in the yard, then I rotate the stand so the hammock faces my best view (plants, fence line, or even the sky). If the ground is soft, I slide pavers under the feet so it doesn’t sink after a few uses.
When I design this look, I keep the stand color simple—matte black, bronze, or natural wood tones—then I add one outdoor throw pillow and a light blanket for early-summer breezes. A small resin or metal side table is usually the most affordable option and holds up well.
Pro tip: I like to “ground” the stand with an outdoor rug so it reads like a real outdoor relaxation corner, not workout equipment—instant polish for very little money.
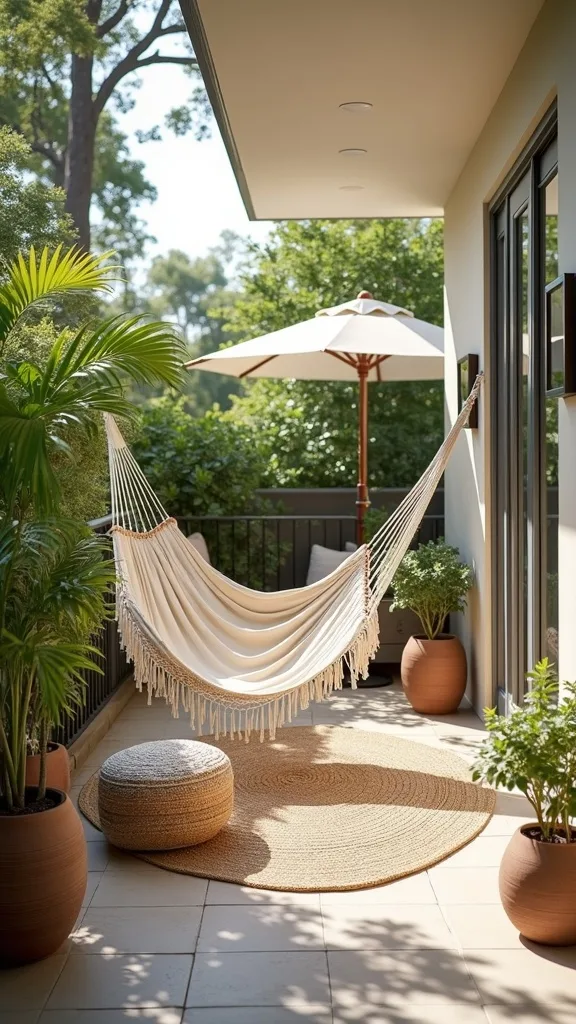
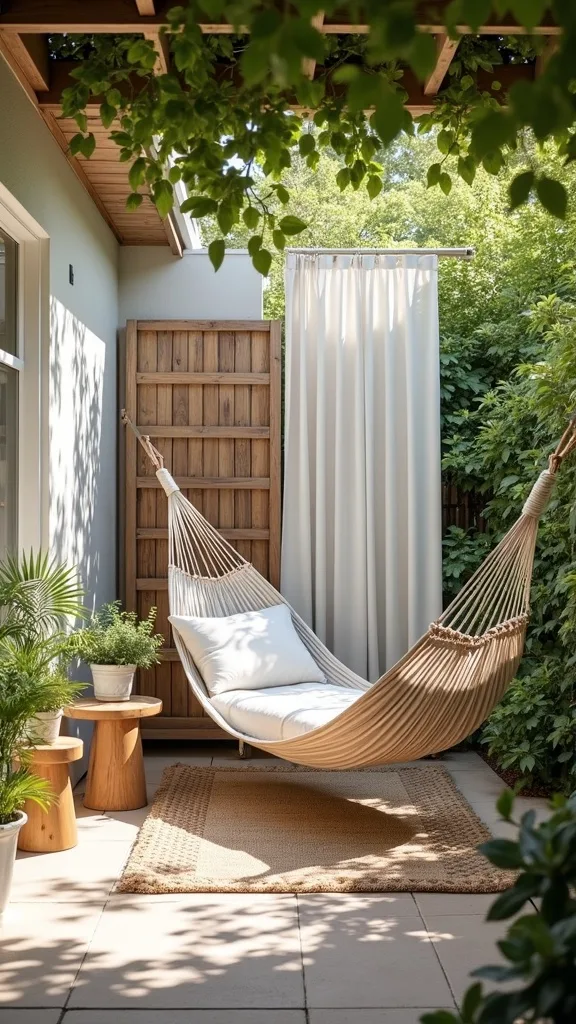
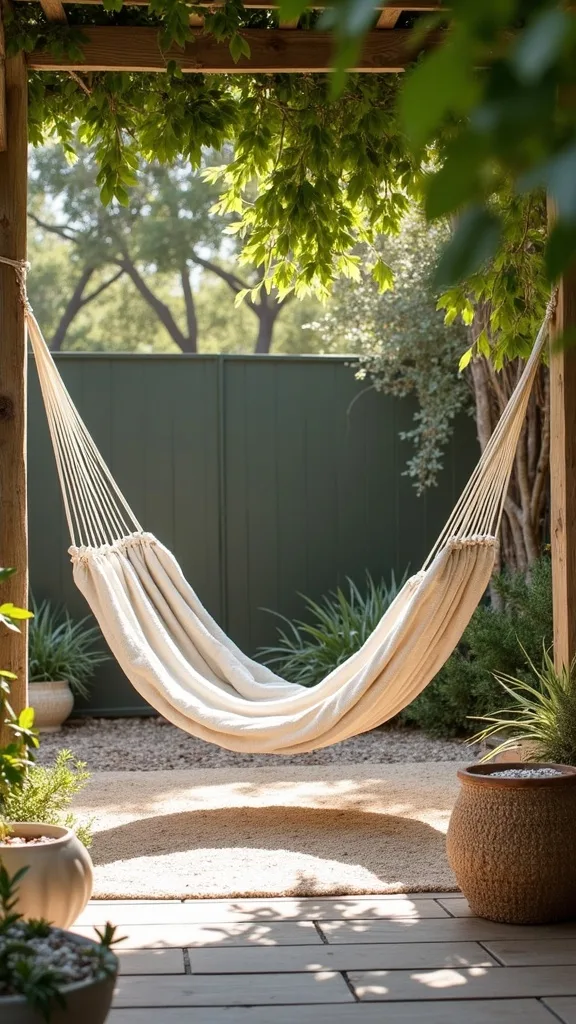
3. Create Shade With a Sail or Umbrella (So You Actually Use It at Noon)
I find that the biggest reason people stop using their hammock is simple: too much sun. Adding shade works because it protects your skin, keeps the fabric cooler, and turns your hammock into an all-day summer outdoor hangout instead of a 6 p.m. only spot.
I always start by watching where the sun hits for an hour or two, then I decide between a shade sail (more coverage) or a cantilever umbrella (more flexible). For a sail, I anchor it to a fence post, tree, or sturdy wall mount; for an umbrella, I place the base behind the hammock so the pole doesn’t interrupt the lounging zone.
In my opinion, sandy neutrals or soft white shade fabric looks clean and coastal, and it pairs beautifully with a cotton rope hammock. If you want extra privacy, I add outdoor curtains to one side using a simple tension rod under a pergola edge.
Pro tip: angle the shade slightly so rain runs off—then your corner stays inviting even after a quick summer shower.
4. Add a Side Table That’s the Right Height (My Comfort Non-Negotiable)
I always recommend a side table because it’s the difference between “cute hammock photo” and a corner you use daily. It works because you can set down a drink, book, sunscreen, or headphones without doing that awkward hammock wiggle to reach the ground.
I always start by sitting in the hammock and noting where my elbow naturally lands; that’s where the table goes. For small spaces, I use a slim C-shaped outdoor table that slides under the hammock edge, or I repurpose a sturdy garden stool as a compact perch.
From my experience, materials matter more than price: powder-coated metal, resin wicker, or sealed acacia are all affordable and weather-friendly. I like a tray on top so smaller items don’t tip, and I keep the palette simple—natural wood + white + green reads instantly “resort.”
Pro tip: if you want an easy upgrade, add a small solar lantern to the table—soft light makes the whole outdoor relaxation corner feel like an evening ritual.
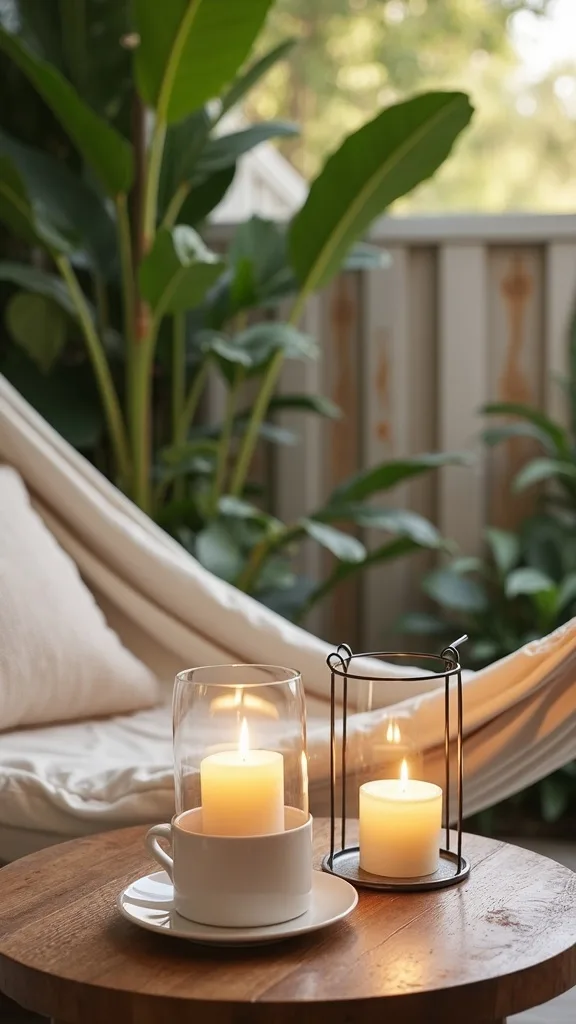
5. Lantern Layering: One on the Ground, One Above, One on the Table
When I design this look, I treat lighting like the “glue” that holds the whole corner together after sunset. Lantern layering works because it creates depth—your hammock doesn’t float in darkness, it sits inside a warm, welcoming glow.
I always start by placing a larger lantern on the ground near the hammock entry point (so I can see where I’m stepping). Then I add one tabletop lantern for task light (finding a page, pouring a drink), and I finish with an overhead string of lights or a hanging lantern from a branch or pergola beam.
I find that warm white light (2700K–3000K — the cosy, yellowish tone you see in most homes) looks best with rope hammocks and tropical greenery. If you’re shopping, look for solar lanterns or battery lanterns so you’re not dealing with extension cords.
Pro tip: I cluster lanterns in odd numbers (3 is my favourite) and mix heights—suddenly your backyard hammock corner feels like a boutique patio lounge.
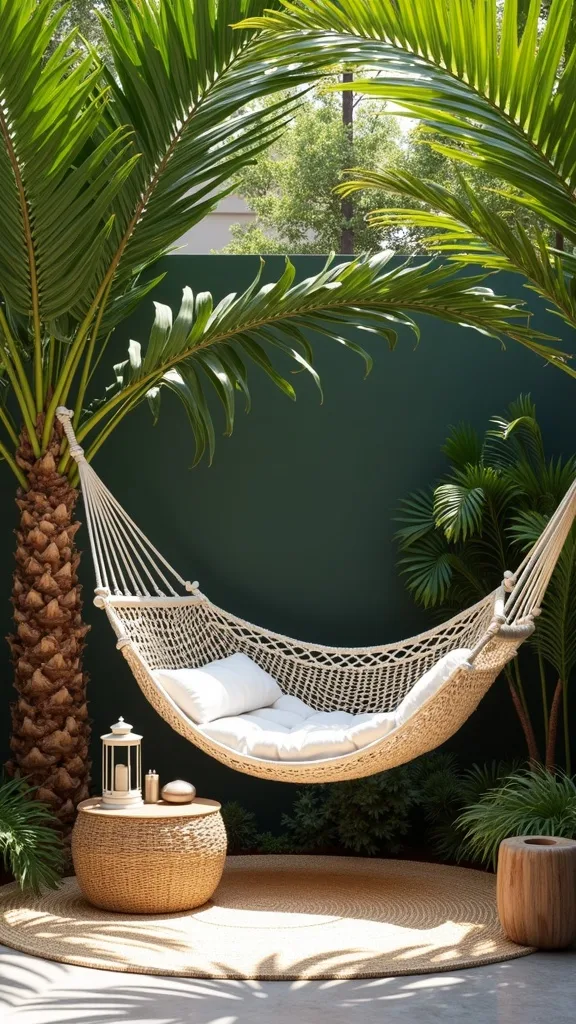
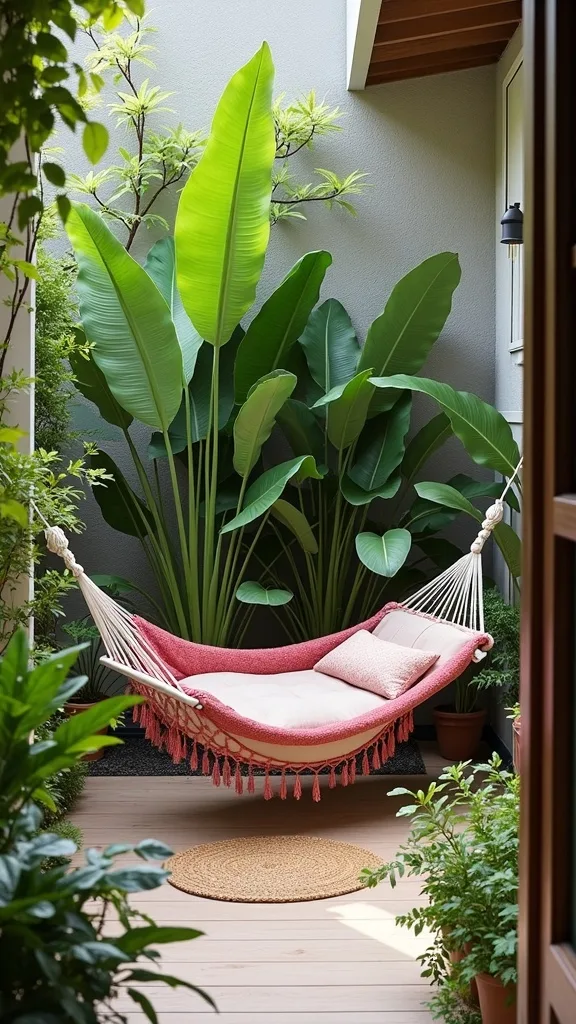
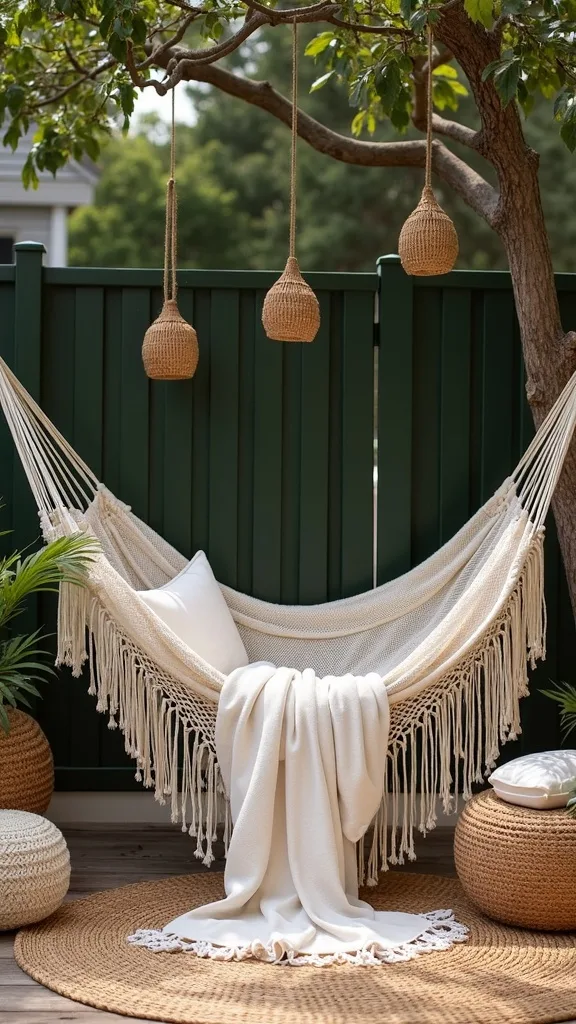
6. Tropical Plant Border With Pots (My Fastest “Hammock Garden” Trick)
One of my favourite approaches is building a plant border behind the hammock using pots, even if the yard itself is plain. It works because plants create privacy, soften fences, and give you that lush hammock garden feel without major landscaping.
I always start by choosing 3–5 larger pots (they read more intentional than lots of tiny ones), then I stagger them in a gentle curve behind the hammock. If you’re on a budget, I mix one “hero” plant (like a palm or bird of paradise) with cheaper fillers like ferns, coleus, or pothos in shaded spots.
In my opinion, matte black or terracotta pots look timeless, and they make green foliage pop. I also like adding one plant with a different leaf shape—spiky dracaena or broad banana leaves—so the border looks designed.
Pro tip: tuck a small solar spotlight at the base of the biggest plant; at night, the leaves cast shadows and your outdoor relaxation corner feels instantly elevated.
7. Outdoor Rug Under the Hammock to Define the Zone
I find that an outdoor rug is the cheapest way to make a hammock corner feel “finished.” It works because it visually defines the space, keeps feet cleaner, and adds texture—especially helpful if your yard is mostly dirt, mulch, or patchy grass.
I always start by sizing the rug so it extends beyond both sides of the hammock; that way, the rug frames the entire lounging area. If you’re placing it on grass, I rotate and lift it occasionally so the lawn can breathe, or I use a breathable outdoor mat designed for patios.
From my experience, flatweave polypropylene rugs are the easiest to hose off, and they come in patterns that hide pollen and footprints. I like coastal stripes for a breezy vibe or a subtle geometric for a modern look—either pairs well with hammock ideas that lean simple and practical.
Pro tip: layer a small doormat at the entry side of the rug so you can step in with cleaner feet—tiny habit, big comfort upgrade.
8. Add a Light Blanket and One Lumbar Pillow (Less Is More Outside)
I always recommend keeping hammock textiles minimal: one light blanket and one supportive pillow. It works because outdoor fabric gets dusty fast, and a simple setup is easier to shake out, wash, and put back—so you actually maintain it.
I always start by choosing a blanket that’s breathable for early summer—think cotton, a thin quilt, or a Turkish towel. Then I add a lumbar pillow for lower-back support when I’m reading; I keep it in a small deck box when not in use to protect it from dew.
I find that solids and small patterns age best outdoors, especially in sandy, tropical palettes: warm white, tan, olive, or a muted aqua. If you want a boho touch, I pick one pillow with subtle texture (like a woven stripe) rather than fringe that can snag.
Pro tip: spray fabrics with a fabric protector made for outdoor use, then you can relax without worrying about every iced-tea drip—comfort should feel easy.
9. Hang a Small Clip-On Fan for Sticky Summer Afternoons
From my experience, airflow is what turns a hammock into a daily habit in early summer. A small fan works because it keeps you comfortable during humid afternoons and helps deter mosquitoes without needing to bathe in bug spray.
I always start by testing where the breeze naturally moves in my yard, then I position a rechargeable clip-on fan on a nearby chair, stand, or post aimed across the hammock (not straight at my face). If I’m using a stand, I clip the fan to the stand frame and keep the cord tucked safely away.
I find that black or white fans visually disappear, and models with a built-in hook are easiest outdoors. Pair it with a light cotton throw and you’ve got a nap-ready setup that still feels simple and uncluttered.
Pro tip: I keep a second battery pack charged inside—when the fan is always ready, your backyard hammock becomes the place you escape to, even on the hottest days.
10. Mosquito Control That Doesn’t Ruin the Vibe
I find that bugs are the quickest way to abandon an outdoor relaxation corner, so I plan for them from day one. The goal is comfort without turning the space into a chemical zone, and a few layered strategies usually do the trick.
I always start by removing standing water nearby (saucers, buckets, clogged gutters), then I add a simple deterrent: a citronella candle in a lantern or a mosquito-repelling coil placed safely on a fireproof surface away from fabrics. If mosquitoes are intense, I use a small rechargeable fan to disrupt their flight near the hammock.
From my experience, eucalyptus or lemongrass-scented outdoor candles feel fresher than heavy fragrances, and they pair nicely with tropical plant styling. I also like adding rosemary or lavender in pots near the entry point—bonus: it looks pretty and smells clean.
Pro tip: keep a small basket with bug wipes and a lighter on the side table; when everything’s within reach, you’ll actually stay out and enjoy your hammock ideas in real life.
11. DIY Privacy Screen With Outdoor Curtains or a Simple Trellis Panel
I always recommend a bit of privacy because it helps you relax faster—your shoulders drop when you’re not on display. This works especially well if your hammock is visible from a neighbor’s window or a busy street.
I always start by deciding whether I need full coverage or just a visual “softener.” For full coverage, I hang outdoor curtains from a pergola, fence-mounted rod, or even a tension wire between posts. For a lighter touch, I lean a trellis panel against the fence and train a climbing plant in pots at the base.
I find that off-white curtains look breezy and coastal, while natural bamboo screens lean more tropical. If you’re building a hammock garden vibe, I love pairing a simple wood trellis with jasmine or climbing roses—fragrance makes the corner feel special.
Pro tip: add tiebacks so you can open the curtains for airflow; that flexible “choose your mood” setup makes the space feel like a true retreat.
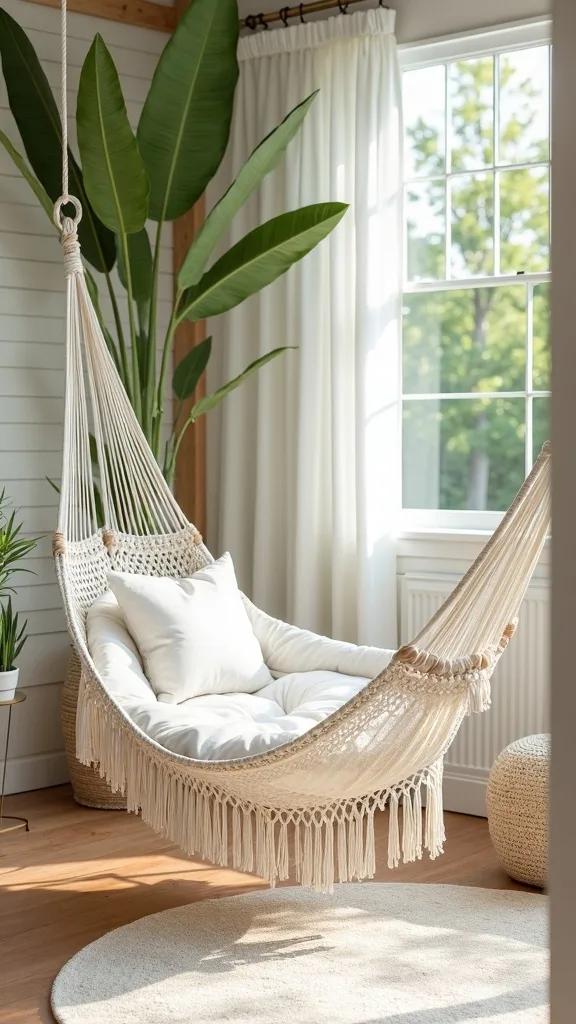
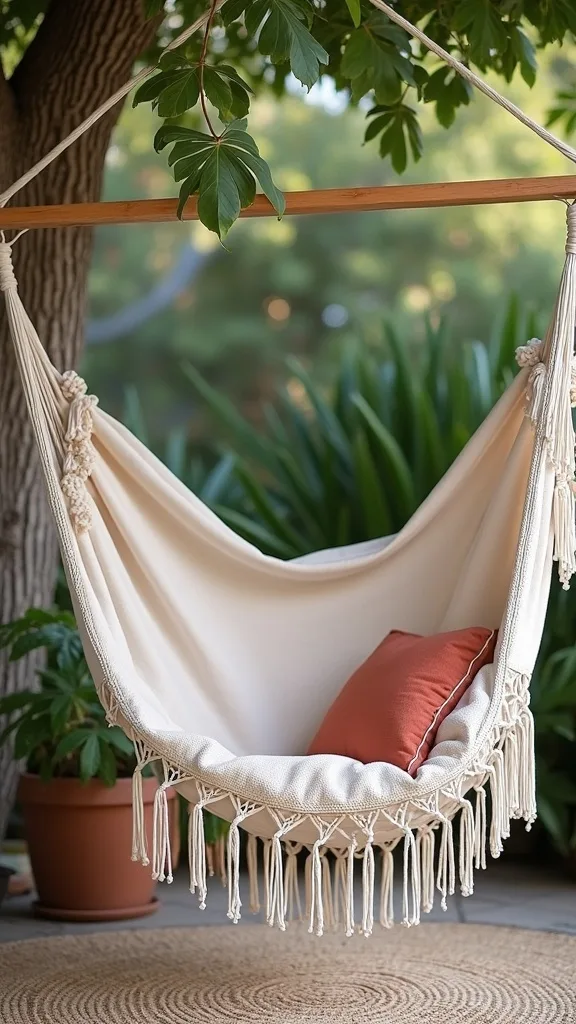
12. Small Space Hammock Corner Using a Chair Stand or Compact Frame
When I work with a tiny patio or balcony-like yard, I switch to compact hammock solutions. It works because you still get the gentle swing and lounging comfort without needing two perfect anchor points.
I always start by measuring the footprint and leaving a clear walkway—nothing kills relaxation like squeezing past furniture. Then I choose a compact hammock chair stand or a shorter hammock stand designed for smaller spaces, and I angle it into a corner so it feels tucked-in and cozy.
In my opinion, this is where texture does the heavy lifting: a rope hammock chair, one outdoor cushion, and a small bistro table can look styled without adding clutter. I keep colors light—white, tan, and green—so the area feels bigger.
Pro tip: hang one lantern overhead and place one plant at the base; even in a small footprint, you can create an outdoor relaxation corner that feels like a destination.
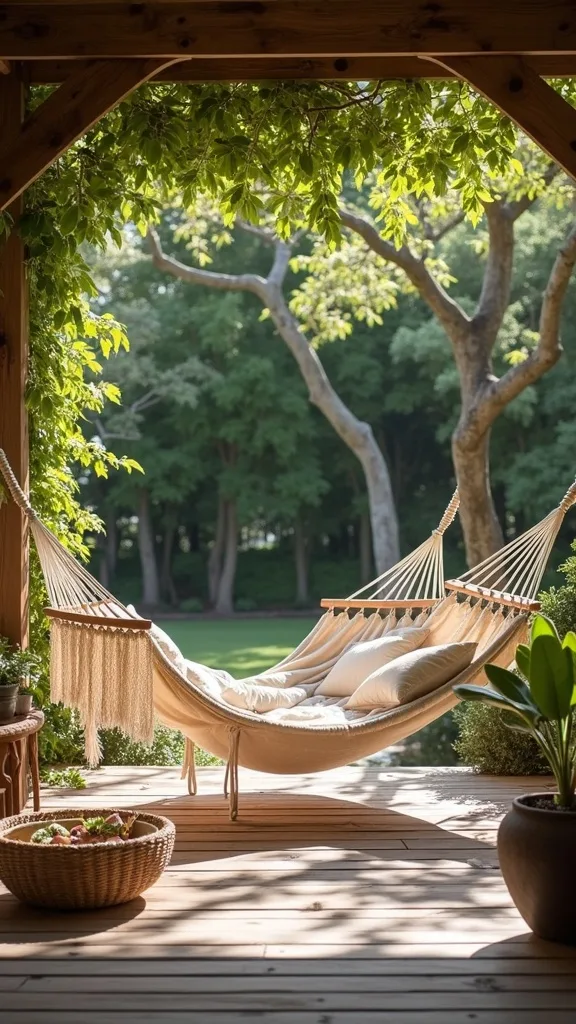
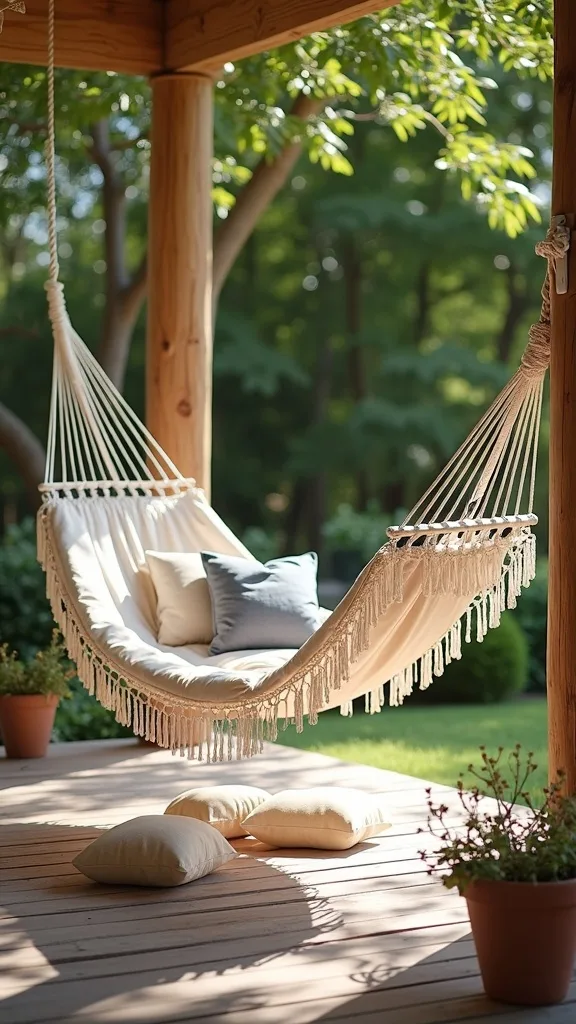
13. Double Hammock Setup for Couples (Without Crowding the Yard)
I find that a double hammock is one of the most satisfying upgrades if you share your outdoor space. It works because you can lounge together (or sprawl solo) and it instantly makes the area feel more like a resort than a spare-yard afterthought.
I always start by choosing a stand rated for a double hammock and placing it where there’s room to swing gently without hitting plants or furniture. Then I add two small pillows instead of one big pile—outdoors, less fuss means more use. If you want conversation nearby, I place two low chairs across from the hammock rather than beside it.
From my experience, quilted fabric hammocks feel softer for two people than rope styles, especially for longer lounging sessions. I like pairing it with a larger side table or a small outdoor bar cart so drinks and snacks stay stable.
Pro tip: add a shared blanket basket right next to the stand—when comfort is effortless, your backyard hammock becomes everyone’s favorite spot.
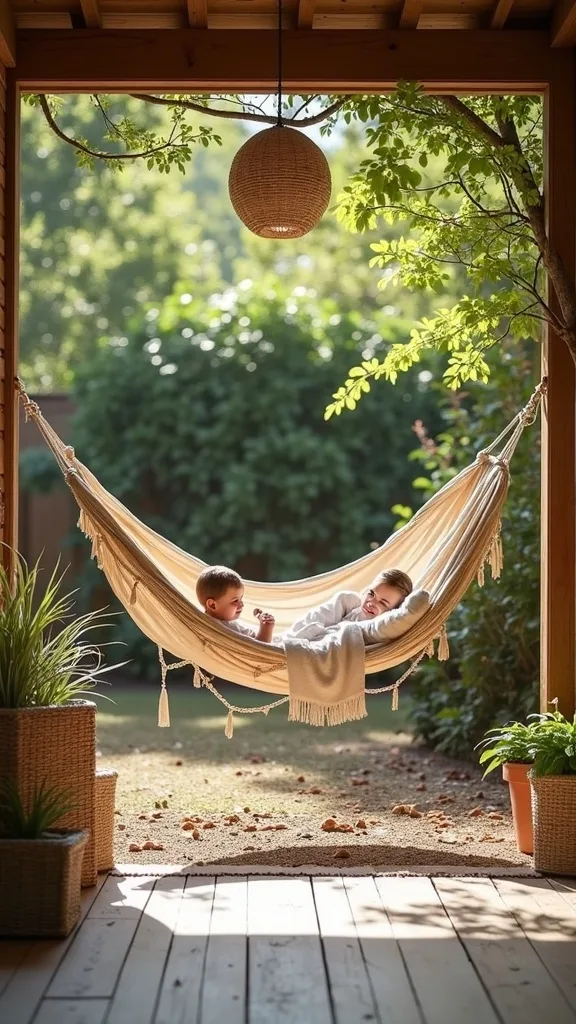
14. Kid-Friendly Hammock Zone With Clear Rules and Soft Grounding
I always think about safety and durability when kids are involved, and a hammock can still be a great family feature. It works because it gives kids a calming swing space—when it’s set up thoughtfully and supervised.
I always start by choosing a sturdy stand or secure anchors, then I set the hammock a bit lower so getting in and out is easier. Underneath, I add a soft landing zone: an outdoor rug over grass, or foam play tiles tucked under the rug if the surface is hard. I also create a simple “one at a time” rule and keep the swing gentle.
I find that darker, washable fabrics hide mess better, and quick-dry materials are a lifesaver after popsicles. For the surrounding area, I keep decor minimal—one side table and one lantern—so there’s less to knock over.
Pro tip: add a small bin with books or quiet toys nearby; it turns your outdoor relaxation corner into a calm reset space for the whole family.
15. Reading Nook Hammock: Add a Book Caddy and Task Lighting
I find that a hammock makes reading feel slower and more enjoyable—if I set it up like a true nook. This works because everything you need is within reach, so you’re not constantly climbing out to grab a book, glasses, or a drink.
I always start by adding a simple hanging organizer or a small basket on the side table for paperbacks, sunscreen, and a notebook. Then I bring in a lantern that’s bright enough for pages while still feeling cozy; I aim for warm white light (2700K–3000K — the cosy, yellowish tone you see in most homes) so the corner feels relaxing, not harsh.
From my experience, a supportive lumbar pillow is the real hero here. I also like a light clip-on reading light if I’m out late, and I keep it stored in a weatherproof container when I’m done.
Pro tip: choose one “signature scent” candle for the nook—every time you light it, your brain learns it’s time to unwind.
16. Nap-Ready Setup: Eye Mask, Neck Pillow, and a Quiet Sound Layer
In my opinion, the best hammock ideas are the ones that change your day-to-day life, and a nap-ready corner does exactly that. It works because you remove the little annoyances—glare, neck tension, and neighborhood noise—so rest feels easy.
I always start by storing a small “nap kit” in a lidded box near the hammock: an eye mask, a compact neck pillow, and a light blanket. If noise is an issue, I use a small Bluetooth speaker at low volume with nature sounds, placed on the side table so it’s close but not loud.
I find that neutral textiles (cream, tan, soft gray) look calm and don’t show pollen as quickly as bright white. For the speaker, I choose a water-resistant model so I’m not stressed about dew.
Pro tip: set a gentle timer on your phone before you lie down—when you wake up refreshed instead of groggy, your summer outdoor routine becomes something you look forward to.

17. Budget DIY Hammock Anchors Using a Sturdy Post Pair (When Trees Are Wrong)
From my experience, sometimes you have trees—but they’re too far apart, too thin, or in the wrong spot. A simple post setup works because it gives you the “between-two-points” hammock feel while letting you choose the best location for shade and privacy.
I always start by checking local rules and calling before digging if needed, then I set two sturdy posts in the ground with concrete so they don’t wobble. I position them so the hammock hangs with a gentle curve, and I use proper hardware designed for hammocks rather than improvised hooks.
I find that staining the posts a warm cedar tone helps them blend into a tropical border, especially if you’re building a hammock garden around them. To soften the look, I plant tall grasses or place large pots at the base.
Pro tip: add a small crossbeam or decorative cap to the posts—tiny detail, big visual upgrade that makes your DIY look intentional and long-lasting.
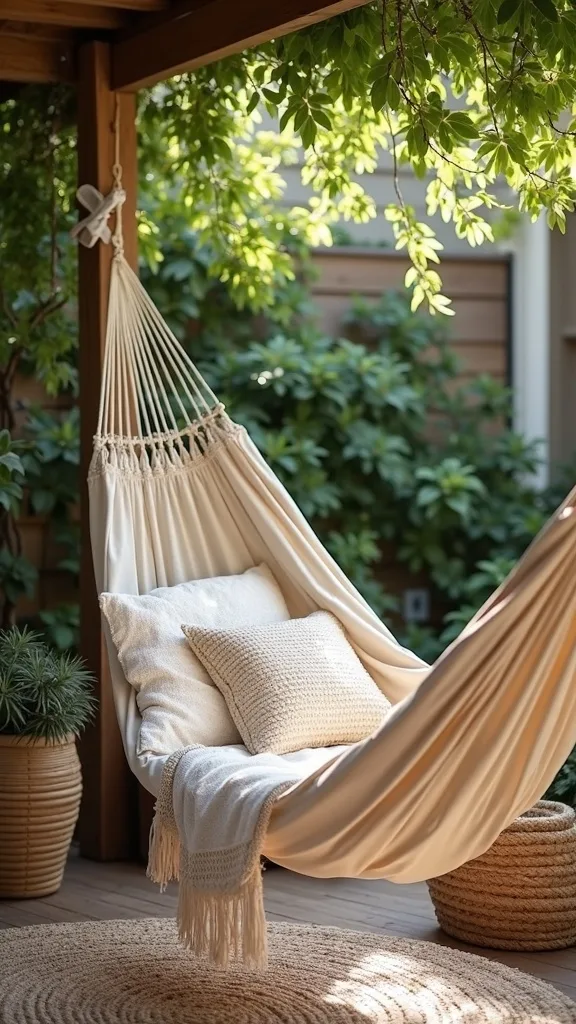
18. Coastal Color Palette: Sand, White, and Sea-Glass Accents
When I want my hammock corner to feel fresh for early summer, I lean coastal. It works because light neutrals reflect heat, look clean against greenery, and make even a small yard feel more open.
I always start by keeping the big pieces neutral: a rope or cream fabric hammock, a light-toned rug, and a simple side table. Then I add sea-glass accents sparingly—one pillow, a lantern with tinted glass, or a small vase on the table (weighted so it won’t tip).
I find that mixing textures keeps the palette from feeling flat: woven rope, smooth ceramic, and a slubby cotton throw. If you’re shopping on a budget, I look for outdoor pillow covers you can swap seasonally instead of buying new inserts every time.
Pro tip: repeat the accent color twice (not ten times)—that’s how I keep a backyard hammock corner feeling curated but still relaxed.
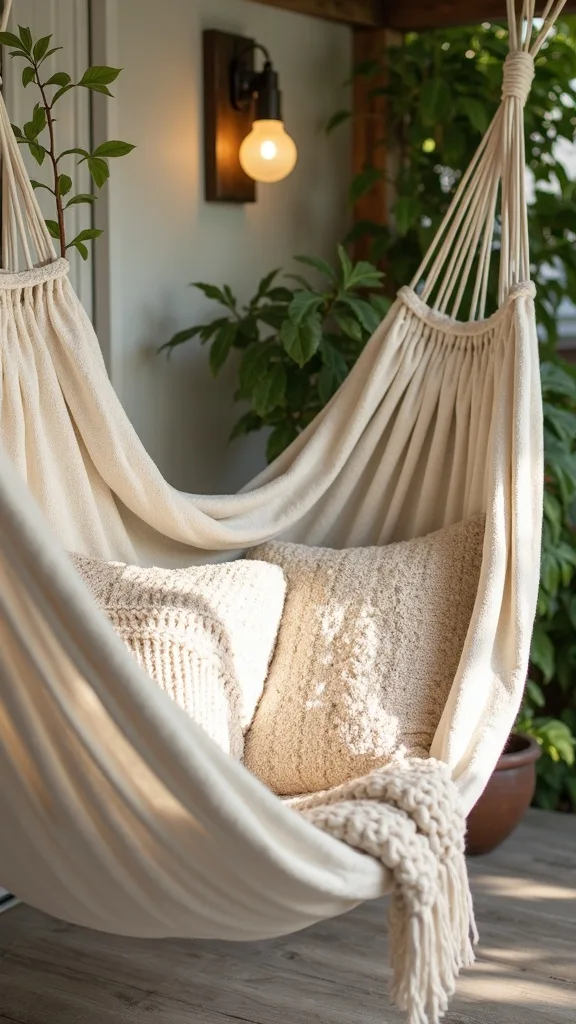
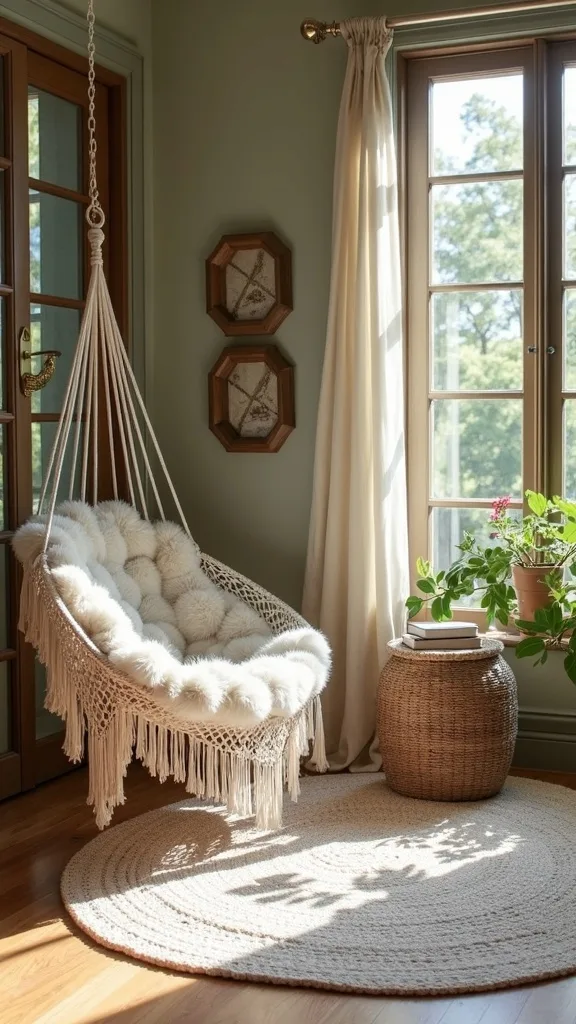
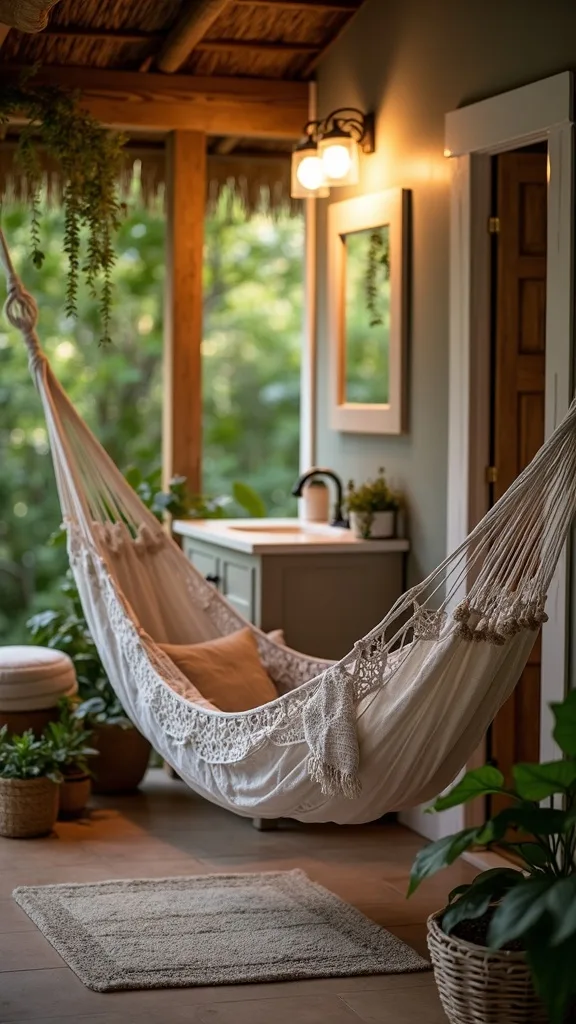
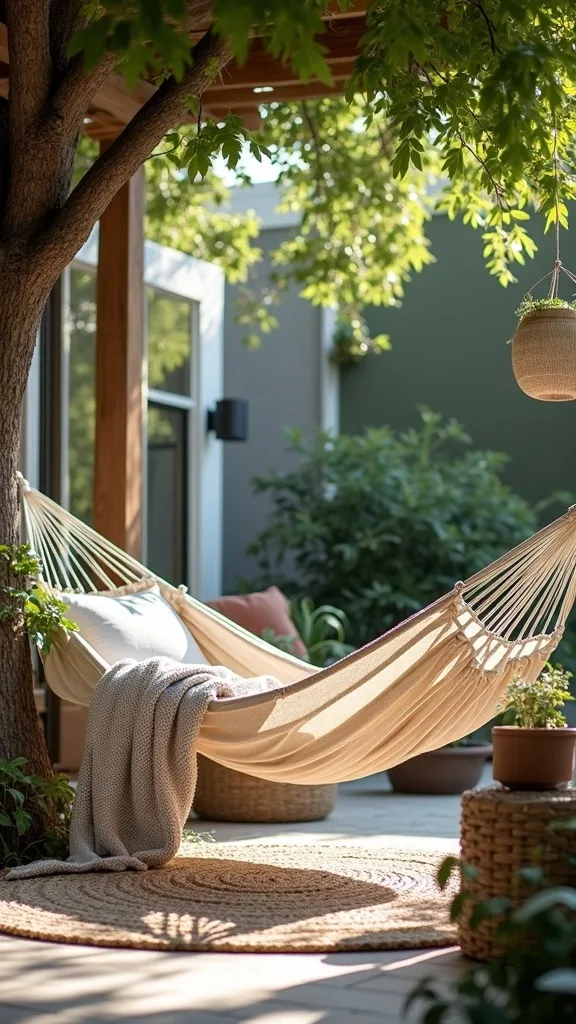
19. Boho Layering Without Clutter: Texture Over Trinkets
One of my favourite approaches is boho styling that stays practical outdoors. It works because you get warmth and personality through texture—without filling the space with delicate decor that blows away or gets weathered.
I always start by choosing one statement textile: a patterned outdoor rug or a striped throw. Then I layer one or two pillows in complementary tones and add a natural element like a rattan tray or woven lantern. If I want more boho vibe, I bring in a macramé plant hanger under a covered area.
From my experience, earthy colors (clay, olive, warm cream) look best with a cotton rope hammock and tropical plants. I also like using unbreakable melamine cups on the side table—boho vibe, real-life durability.
Pro tip: keep surfaces mostly clear; when the hammock is the star, your outdoor relaxation corner feels calm instead of chaotic.
20. Add a Mini Beverage Station (So You Don’t Keep Going Inside)
I find that the more trips I take back into the house, the less I relax—so I build a tiny beverage station near the hammock. It works because you can settle in and stay there, which is the whole point of a summer outdoor corner.
I always start with what I already have: a small bar cart, a narrow plant stand, or even a sturdy crate stack. Then I add a tray for cups, a small cooler or insulated jug, and a lidded container for napkins. If space is tight, I keep it to one shelf and one hook for a towel.
In my opinion, acrylic drinkware is a must outdoors—less stress, fewer accidents. I like adding a single bud vase or a tiny potted herb (mint is my go-to) so the station feels styled but not fussy.
Pro tip: keep a dedicated “outdoor only” bottle opener and lighter there—when everything has a home, your hammock ideas actually become a habit.
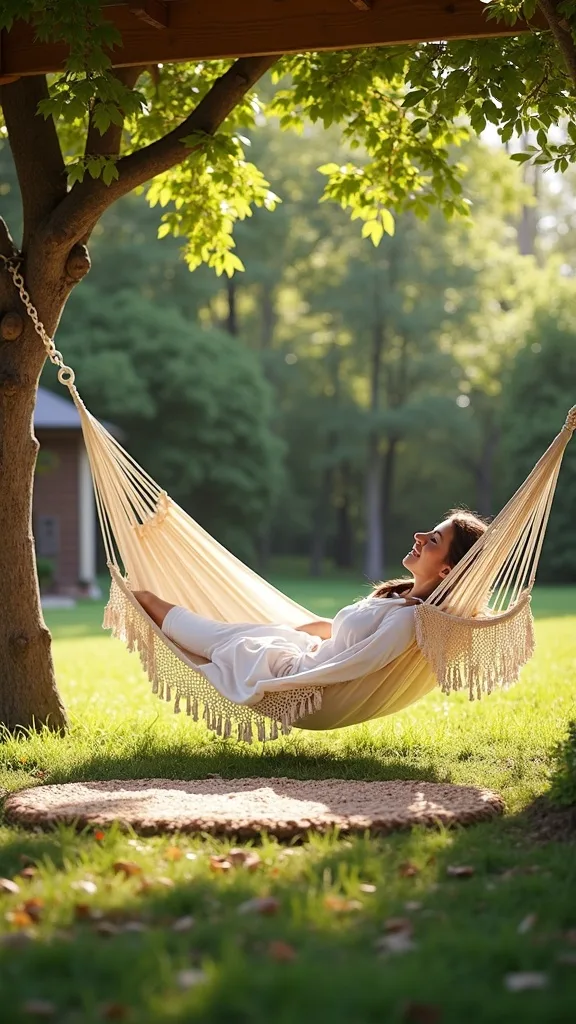
21. Morning Coffee Hammock Spot: Face the Sun, Keep the Shade for Later
I always start by thinking about how I’ll use the hammock at different times of day, and mornings are my favorite. This works because early sun feels energizing, and the yard is usually quieter—perfect for a slow coffee and a few pages of reading.
I position the hammock so it catches gentle morning light, then I set up shade options (umbrella or curtain) that I can pull into place later. I keep a small coaster on the side table and a light blanket nearby because mornings can still feel cool in early summer.
I find that a simple, clean setup makes mornings feel peaceful: one lantern, one plant, and a neutral pillow. If I’m using a stand, I rotate it seasonally—small adjustment, big payoff in comfort.
Pro tip: add a tiny hook or basket for sunglasses and keys; when your essentials live in the outdoor relaxation corner, you’ll step outside more often and start the day calmer.
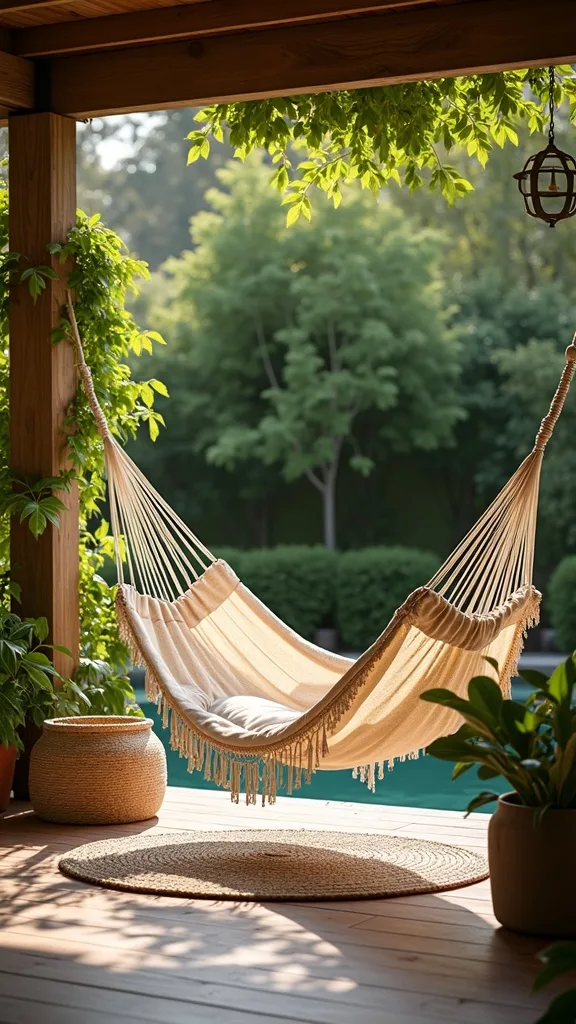
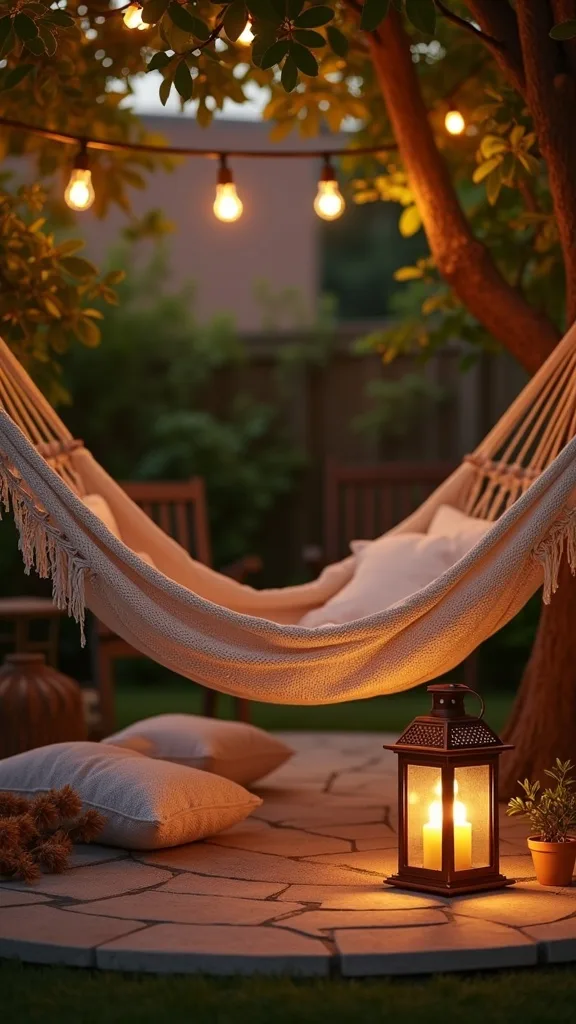
22. Evening Glow Setup With String Lights and a Single Statement Lantern
From my experience, evenings are when a hammock corner really earns its keep. This works because soft lighting makes the yard feel safe and welcoming, and it encourages you to stay outside long after dinner.
I always start by hanging string lights along a fence line, pergola edge, or between two poles—high enough to feel ambient, not in-your-face. Then I add one statement lantern near the hammock entry point, so the glow feels anchored and intentional.
I find that warm white light (2700K–3000K — the cosy, yellowish tone you see in most homes) is the sweet spot for relaxing. If you’re comparing options, look at brightness (measured in lumens) and choose something gentle—too bright can feel like a parking lot.
Pro tip: put lights on a timer so they turn on automatically; that effortless routine makes your backyard hammock corner feel like a nightly retreat.
23. Rain-Ready Plan: Quick Covers and Smart Storage
I find that the easiest way to keep an outdoor space looking good is planning for bad weather before it happens. This works because you’ll protect your hammock fabric, pillows, and lanterns—so the corner stays inviting all season instead of turning into a soggy mess.
I always start by adding a small deck box or waterproof storage bench within a few steps of the hammock. When clouds roll in, I can toss in pillows, blankets, and even small lanterns in under a minute. If the hammock is on a stand, I keep a simple cover or tarp folded nearby for fast protection.
From my experience, quick-dry textiles and outdoor-rated pillow inserts are worth it—they bounce back faster after humidity and dew. I also like choosing side tables that can handle rain (resin, metal, or sealed wood).
Pro tip: make “resetting the corner” part of your evening routine; waking up to a tidy outdoor relaxation corner feels like a gift you gave yourself.
24. Add a Foot-Wash Station for Sandy, Garden-Heavy Backyards
When I’m in and out of the garden, I always appreciate a simple foot-wash setup near the hammock. It works because it keeps your hammock cleaner, reduces tracked-in dirt, and makes the whole space feel more like a resort.
I always start with a shallow tray or basin (even a large plant saucer works), then I add smooth river stones or a slatted teak mat so feet don’t sit in muddy water. I keep a small watering can or hose nearby, plus a towel hook on the fence for quick drying.
I find that this is especially helpful if you’re building a hammock garden with lots of pots—soil ends up everywhere. Visually, I keep it simple: neutral stones, a natural mat, and one small plant beside it so it feels intentional.
Pro tip: add a little lidded bin for flip-flops; that tiny convenience makes your summer outdoor lounging feel effortless and clean.
25. My 10-Minute Reset Routine to Keep the Hammock Corner Always Ready
I always recommend a quick reset routine because the most affordable “upgrade” is consistency. This works because a tidy, ready-to-use hammock corner gets used more—no decision fatigue, no cleanup barrier.
I always start by shaking out the rug and hammock, then I wipe the side table and gather any cups or wrappers. Next, I fluff the pillow, fold the blanket, and put anything weather-sensitive into a storage box. Finally, I do a fast plant check—water if needed and remove any fallen leaves.
From my experience, keeping a small outdoor caddy helps: microfiber cloth, gentle spray cleaner, bug wipes, and a lighter for lanterns. I keep colors calm and consistent so even when the space is simple, it still reads as a designed outdoor relaxation corner.
Pro tip: set a recurring reminder twice a week—when your backyard hammock is always ready, you’ll step outside more often and feel the real-world impact of these hammock ideas every single day.
Final Thoughts
I’ve learned that a hammock corner doesn’t need a huge budget or a massive yard—it just needs a few choices that support real comfort: reliable hanging, reachable surfaces, and shade and lighting you can actually live with. Once those basics are in place, the styling becomes the fun part, not the stressful part.
If you’re not sure where to begin, I’d start with one solid hammock setup and a side table, then add lanterns and plants as you go. Early summer is the perfect season to build momentum—every small upgrade makes you more likely to step outside, breathe deeper, and use your yard like it was meant to be used.
And if you try even one of these hammock ideas, I hope you give yourself permission to enjoy it daily—ten minutes in a gentle sway can genuinely change how the whole day feels.
Products I Recommend for This Project
Here are some of my favourite products to help you bring these ideas to life:
- Vivere Double Cotton Hammock with Space-Saving Steel Stand — I like this for an easy, no-trees setup that feels sturdy and comfortable right away.
- Wise Owl Outfitters Hammock Straps (Tree-Friendly) — I always recommend these when hanging from trees because they help protect bark and make adjustments simple.
- TomCare Solar Lantern Lights (Flickering Flame Style) — These give that cozy lantern glow without cords, which is perfect for an outdoor relaxation corner.
- Govee Outdoor String Lights — I use these to create warm evening ambiance and define the hammock zone with reliable lighting.
- Suncast 22 Gallon Small Resin Deck Box — This is my go-to for quick, weather-ready storage for pillows, throws, and small accessories.