This post contains affiliate links. As an Amazon Associate, I earn from qualifying purchases at no extra cost to you.
Are you looking for a spring reset that makes laundry feel less chaotic and more automatic? Do you want to stop hunting for detergent, missing socks, and that one stain spray that always disappears right when you need it?
I always start by treating the laundry zone like a mini “workstation,” and in this post I’m sharing my most reliable laundry room organization strategies for a garage/organization setup. I’ll walk you through storage, layout, and small design tweaks that create an organized laundry flow without spending a fortune.
From my experience, this is perfect for anyone working with a garage laundry area, a tight wall behind the machines, or a space that doubles as storage for cleaning supplies and seasonal gear.
When I design this look, I focus on wall space first (hello, shelves), then I add easy-to-grab sorting systems, and finally I layer in a few “pretty but practical” details like baskets and labels. I’ll share my go-to laundry room ideas for folding, hanging, stain treating, and keeping supplies in reach—without turning your laundry corner into a clutter magnet.
I find that the biggest wins come from small upgrades you can do in a weekend, and they add up fast during a Spring Laundry Refresh. Below are 25 Laundry Room Organization & Design Ideas that…
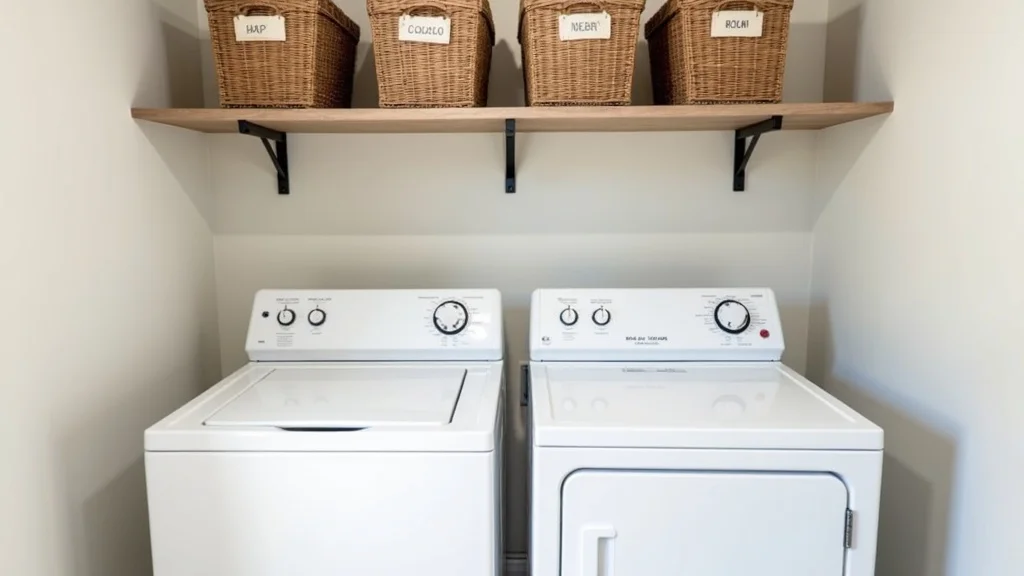
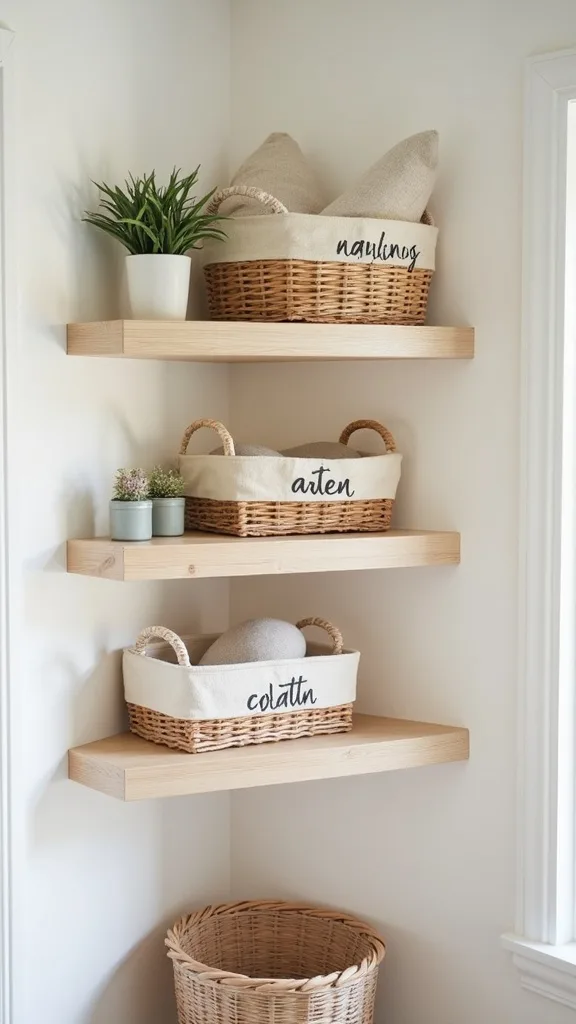
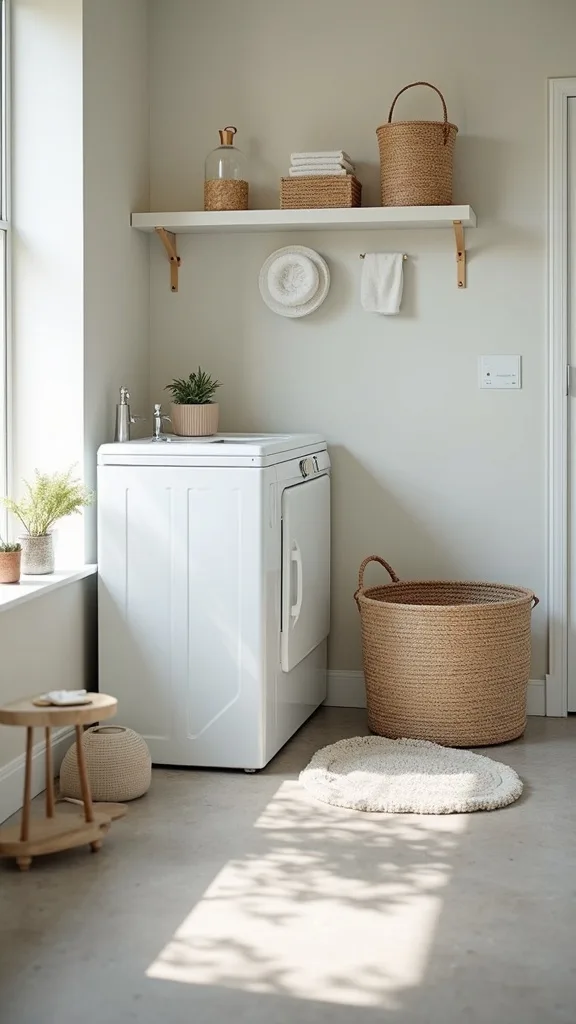
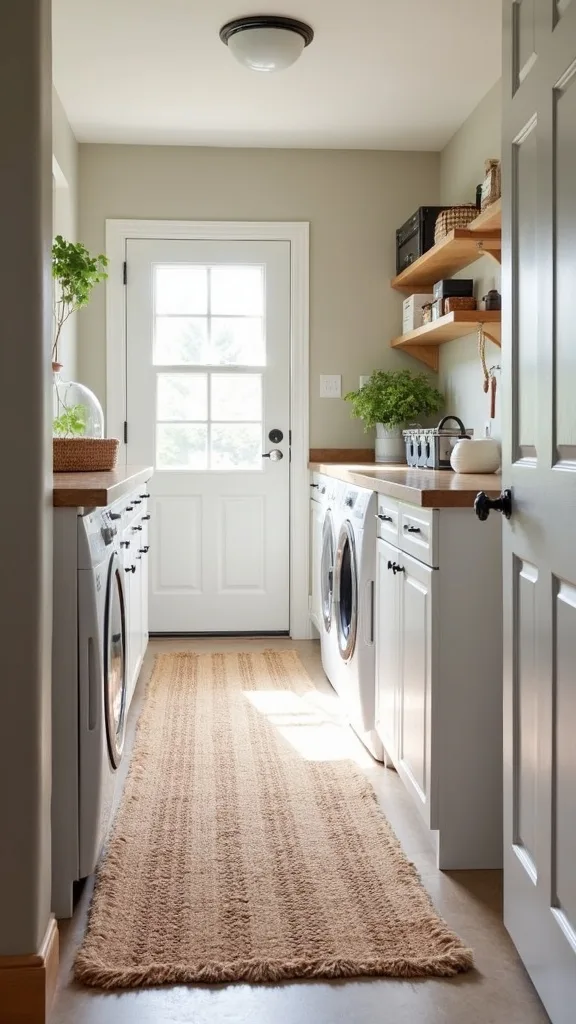
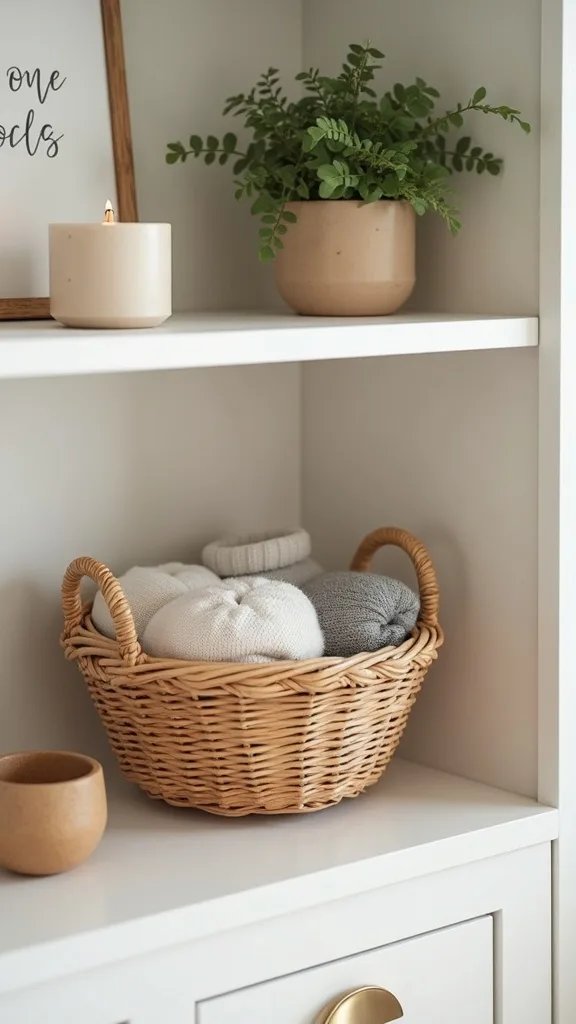
1. Wall-Mounted Laminate Shelves + Wicker Baskets With Cotton Labels
I always start by claiming the wall above the washer and dryer, and this is my favourite “instant calm” move for laundry room organization. From my experience, wall-mounted laminate shelves keep essentials off the machines (no more mystery drips and toppled bottles) while wicker baskets soften the garage feel and make everything look intentional.
To implement it, I mount two long laminate shelves into studs (or sturdy wall anchors if needed) and keep the bottom shelf at a height I can reach without stretching. Then I group supplies by task: one basket for detergents, one for stain care, one for dryer sheets and lint tools. I label each basket with simple cotton tags so anyone in the house can put things back correctly.
I find that white or light oak laminate brightens a garage laundry corner, and natural wicker adds warmth without costing much. For labels, I like black ink on cotton for a clean, readable look.
Pro tip: add one “backstock” basket up high for refills so your daily shelf stays tidy—small systems like this make laundry feel surprisingly peaceful.
2. Create a Three-Zone Laundry Workflow (Sort, Wash, Finish)
In my opinion, the fastest way to get an organized laundry routine is to design your space around how you actually move. I always start by dividing the area into three zones—sort, wash, and finish—because it reduces decision fatigue and keeps piles from migrating all over the garage.
For sorting, I place hampers or bins closest to where laundry enters the room. The wash zone is the machines plus a small tray for “today’s products” like detergent and stain remover. The finish zone is where I fold, hang, and stage clean loads—usually a counter, cart, or wall-mounted folding surface.
I find that matching bins (even inexpensive ones) instantly looks cleaner, and neutral colors like white, gray, or tan make the whole setup feel less like storage overflow. If you’re adding labels, keep them short: “Lights,” “Darks,” “Towels.”
Pro tip: walk the path with an empty basket and adjust until it feels natural—when the flow feels easy, you’ll keep it up all spring and beyond.
3. Install a Slim Rolling Cart Between Machines
One of my favourite approaches is using the awkward gap between machines, because it’s basically free storage waiting to happen. I find that a slim rolling cart is a budget-friendly way to boost laundry room organization without drilling a single hole.
I always recommend measuring the gap first, then choosing a cart that slides in and out smoothly. I load the top tier with daily-use items (detergent pods, stain stick, measuring scoop), the middle with dryer supplies, and the bottom with rags or cleaning cloths. If the cart has hooks, I hang a lint brush or small spray bottle right where I’ll grab it.
From my experience, white plastic carts are easiest to wipe down, while metal carts feel a bit more “garage tough.” If you want a cohesive look, add small matching bins inside the cart to stop items from tipping.
Pro tip: keep one tier intentionally half-empty for “inbox” items—having a landing spot prevents clutter from creeping back in.
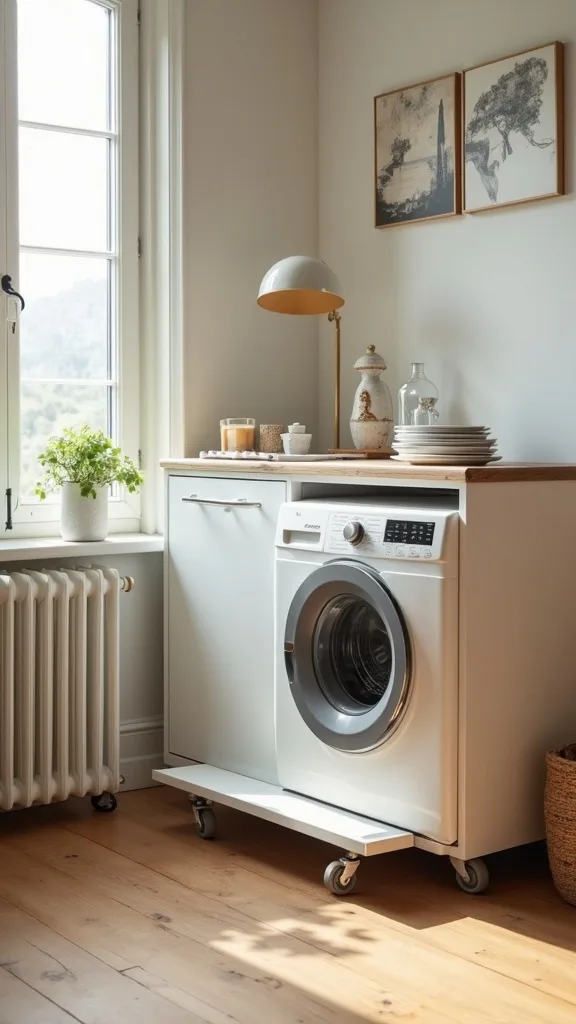
4. Add a Folding Counter With an Affordable Butcher-Block Look
I find that folding is where laundry either gets finished… or becomes a week-long pile. A simple counter over front-load machines (or a wall-mounted fold-down surface) is one of the most practical laundry room ideas I use for real-life momentum.
To implement it, I choose a ready-made countertop, a cut-to-size board, or a laminate top that mimics butcher block. If you have side-by-side machines, I set the counter on anti-slip pads so it stays put and doesn’t rattle. If space is tight, I mount a fold-down table to the wall near the dryer and keep it clear except for a small catchall tray.
In my opinion, warm wood tones balance the “utility” feel of a garage, and a matte finish hides scuffs. I also like adding a small fabric basket for unmatched socks right on the counter.
Pro tip: keep a tiny handheld vacuum nearby—when the surface stays crumb-free and lint-free, it feels like a fresh little boutique station.
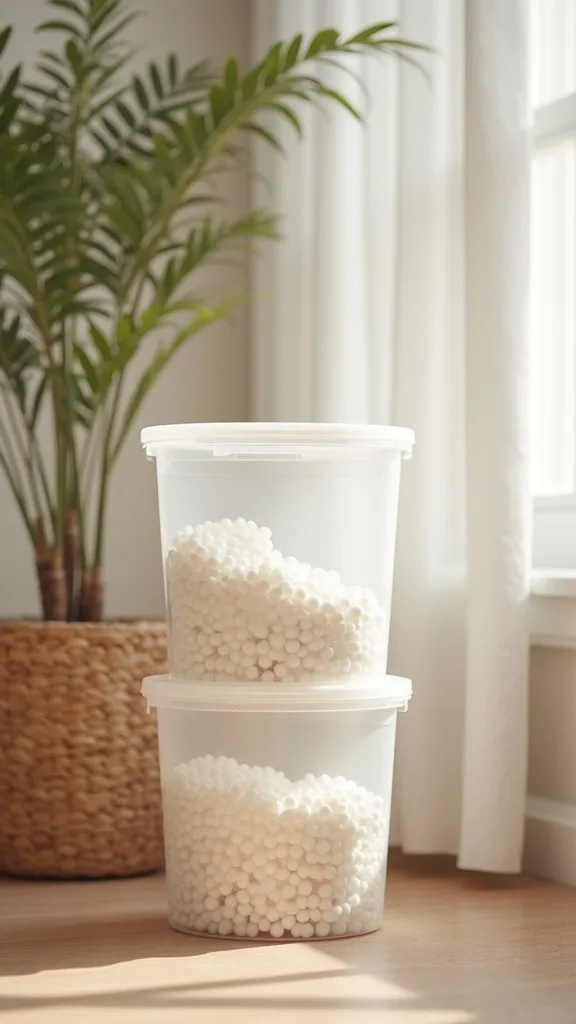
5. Use Clear, Stackable Bins for Backstock and Refills
I always start by separating “daily use” from “backstock,” because that’s the secret to shelves that stay neat. Clear, stackable bins make laundry room organization feel effortless since I can see what I have without digging.
I group refills by category: detergent refills, paper products, stain treatments, and cleaning sprays. Then I place the bins on the highest shelf or a side shelf so they’re accessible but not in the way. If you’re working in a garage, I keep lids on everything to protect from dust and seasonal pollen.
From my experience, square or rectangular bins waste less space than round ones, and simple black-and-white labels look clean even if the products inside are colorful. I like to add one “Open First” bin for items already started.
Pro tip: do a quick monthly “shop your shelf” check—when you use what you already own, you save money and your storage stays beautifully under control.
6. Hang a Wall-Mounted Drying Rack for Delicates
When I design this look, I always include a drying solution that doesn’t eat up floor space. A wall-mounted drying rack is a game-changer for organized laundry, especially in a garage where you want to keep pathways clear.
I mount a fold-out rack on an open wall near the dryer so I can move items straight from the drum to the rack. I dedicate a few hangers nearby for sweaters and “hang dry” tops, and I keep a small basket underneath for clothespins. If you rent or don’t want holes, I use an over-the-door drying rack on a nearby utility door.
I find that white racks blend in and feel tidy, while wood-tone racks add warmth if your garage laundry area feels stark. Either way, choose one that folds flat so it disappears when not in use.
Pro tip: add a small fan nearby when needed—faster drying means fewer piles and a routine that actually finishes.
7. Label Everything With Simple Cotton Tags (Not Fussy Stickers)
From my experience, labels only work if they’re easy to read and easy to maintain. I find that cotton labels tied to baskets and bins look charming, feel “homey,” and make laundry room organization stick because everyone understands the system at a glance.
I always recommend choosing a consistent label style—same color, same font, same placement—so the space looks calm. I write categories that match habits: “Detergent,” “Stain Care,” “Dryer,” “Cleaning Cloths,” and “Lost + Found.” Then I attach the labels to wicker baskets, wire bins, or even hooks for tools.
In my opinion, black lettering on natural cotton is the most readable, and it fits the Spring Laundry Refresh vibe without looking too seasonal. If your garage is dusty, I keep an extra set of blank tags in a jar so I can replace any that get grimy.
Pro tip: label by task, not by product brand—when the system is flexible, it stays organized even when you switch products.

8. Add a “Stain Station” Tray Right Where You Pretreat
I always start by making stain care convenient, because if pretreating is annoying, it won’t happen. A small stain station tray is one of the most affordable laundry room ideas that instantly makes your routine feel more organized.
I set a wipeable tray on the washer (or on the counter) with just the essentials: stain remover, a soft brush, a stain stick, and a small towel. I keep it minimal on purpose so it’s easy to pick up and wipe underneath. If you have kids or pets, I add a tiny timer so I remember to check stains before drying.
From my experience, a white or clear acrylic tray looks clean and helps contain drips. If you prefer cozy texture, a sealed bamboo tray works too—just make sure it can handle spills.
Pro tip: keep a small “stain cheat sheet” card in the tray—when you don’t have to think, you act fast, and your clothes last longer.
9. Use a Lidded Lint Bin to Keep the Area Fresh
I find that lint is the sneakiest kind of clutter—it spreads everywhere and makes a clean space feel messy. A lidded lint bin gives laundry room organization a surprisingly big boost because it keeps fuzz contained and makes cleanup feel automatic.
I place a small lidded trash can or metal bin right next to the dryer so I can toss lint the second I pull it from the screen. If you have room, I add a second small bin for dryer sheets or empty product wrappers. In a garage, lids also help keep odors and dust from mixing in.
In my opinion, matte white or black bins look the most intentional, and step-lid styles are easiest when your hands are full. If you want a softer look, a small woven bin with a washable liner works well.
Pro tip: pair it with a lint brush on a hook—when tools live where you use them, your laundry corner stays crisp and inviting.

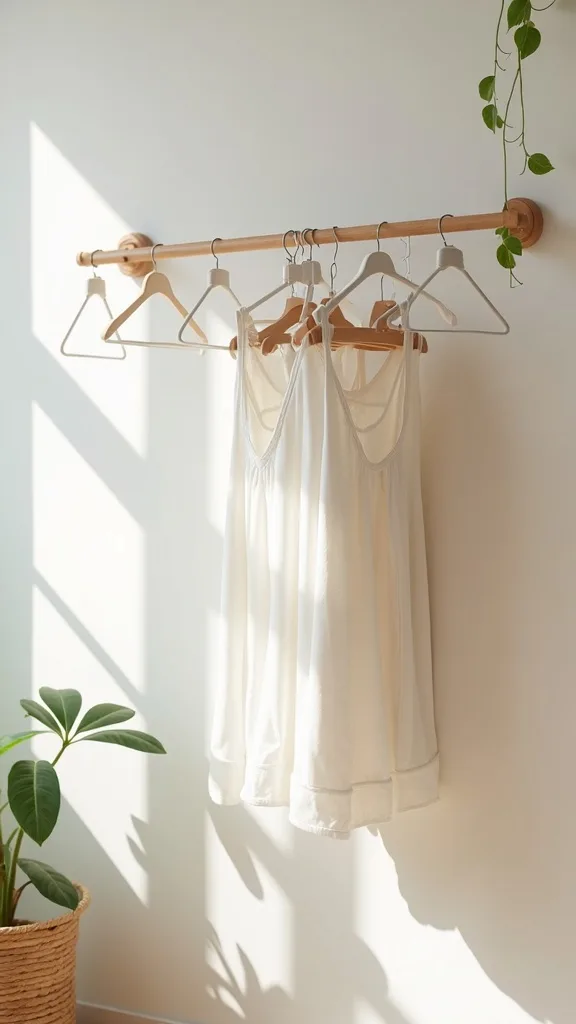
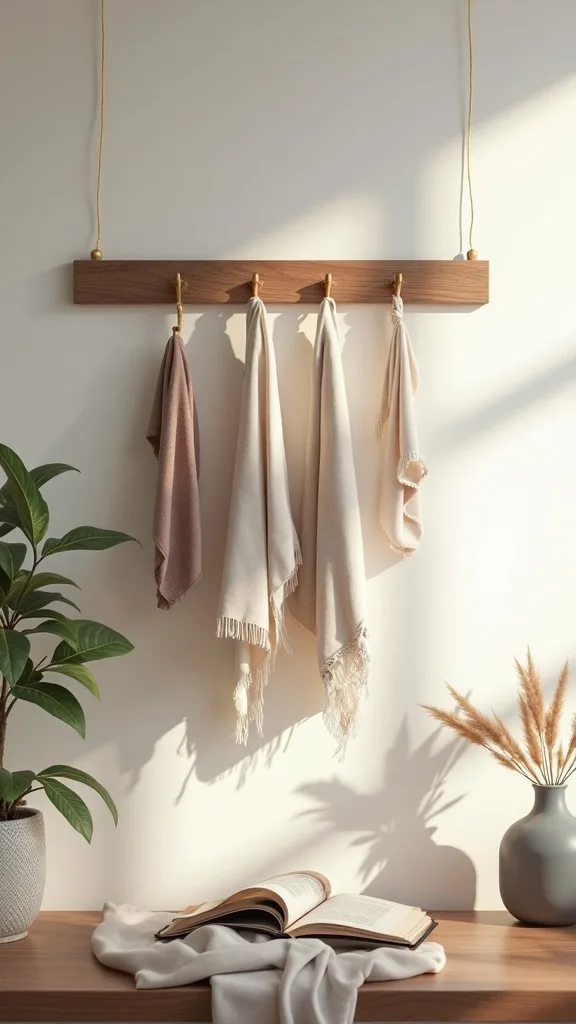
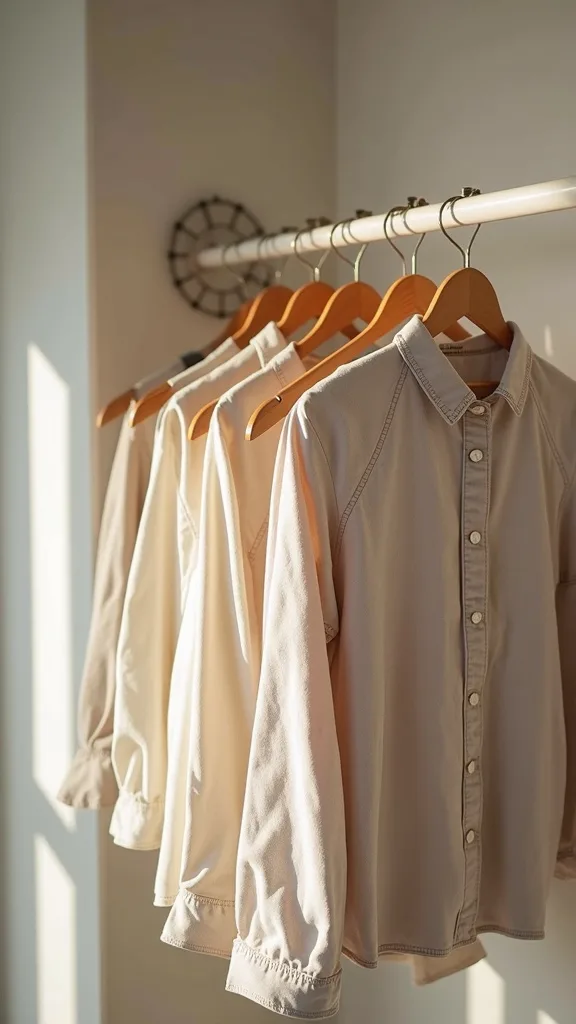
10. Mount a Simple Hanging Rod for “Air It Out” Pieces
One of my favourite approaches is adding a short hanging rod, because it solves so many everyday laundry annoyances. I find that a rod creates instant organized laundry space for items that need to drip-dry, cool down, or wait for ironing.
I mount a closet rod or a sturdy towel bar on the wall near the machines, leaving enough clearance so hangers don’t bump the washer lid or dryer door. Then I keep a small set of matching hangers in a basket below so I’m never searching. If you’re tight on space, I use a swing-arm wall hook rack that folds back when not in use.
From my experience, brushed nickel or matte black hardware looks clean in a garage setting and hides fingerprints. If you’re doing a light-and-bright refresh, a white rod blends into the wall and feels airy.
Pro tip: reserve two hangers labeled “Fix/Repair” for buttons and small mends—tiny habits like this keep clothes in rotation and your space under control.
11. Try a Two-Hamper System (Lights/Darks) to Prevent Pileups
I always recommend simplifying sorting, because complicated systems get abandoned fast. A two-hamper setup—lights and darks—gives you laundry room organization that’s easy for the whole household to follow.
I place two tall hampers or two wide bins right where laundry arrives (often the garage entry door). If you want to be extra practical, I add a small third bin just for towels, since they’re bulky and often washed separately. I label each hamper clearly and keep a small mesh bag nearby for socks or delicates.
I find that lidded hampers look tidier, but open-top bins are faster for kids to use. Neutral colors like charcoal, cream, or natural wicker keep the area looking cohesive, especially if your shelves are already doing the visual heavy lifting.
Pro tip: when a hamper hits “two-thirds full,” run the load—this one rule keeps laundry from becoming a weekend-long marathon.
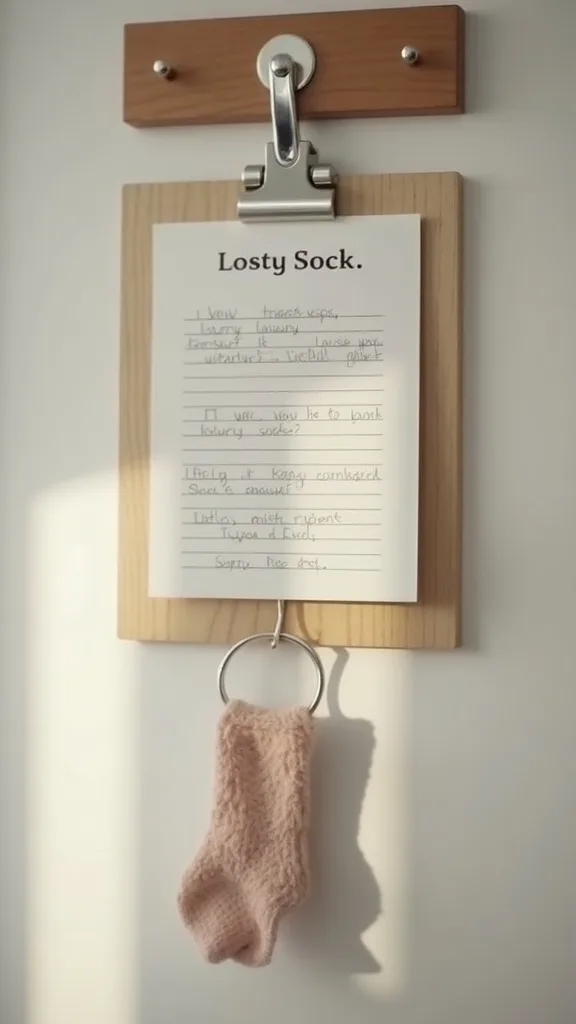
12. Use a Magnet or Clip Rail for Lost Socks and Laundry Notes
From my experience, the “tiny stuff” is what makes laundry feel messy—single socks, care tags, and notes like “don’t dry this.” A simple magnet strip or clip rail gives you a designated spot and upgrades your laundry room organization instantly.
I attach a magnetic strip to the side of a metal machine or mount a small clip rail on the wall above the folding area. Then I clip lonely socks, pocket finds, and reminder notes so they don’t end up on the counter. If you share laundry duties, I add a small card that lists the basics: water temperature preferences and which items are hang-dry.
I find that black clips look modern and hide visual clutter, while white clips blend in for a softer look. If your garage laundry corner is dim, I keep the rail near the brightest spot so it’s easy to use.
Pro tip: once a week, I “clear the rail” in two minutes—quick resets like this keep the whole space feeling light and manageable.
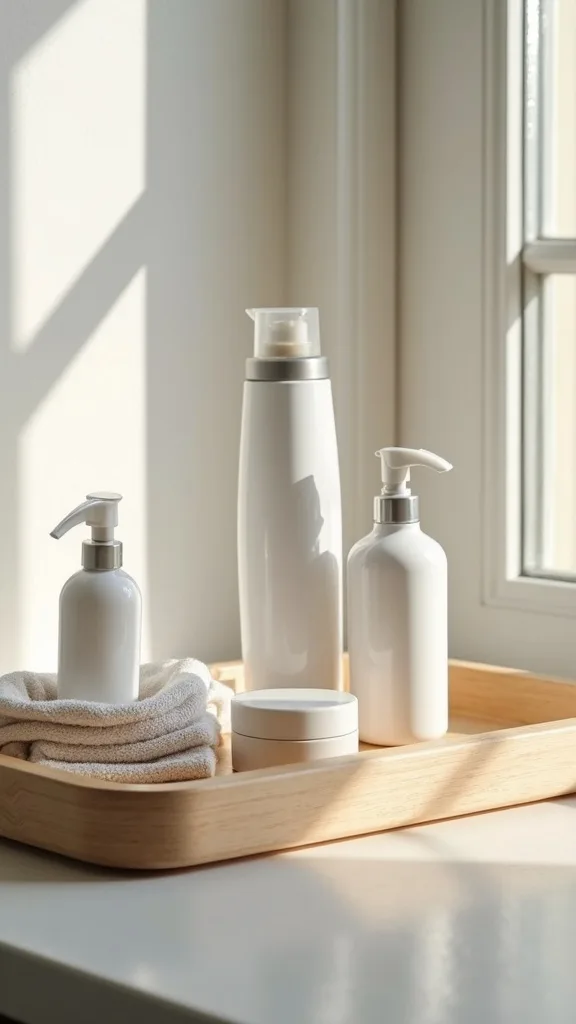
13. Swap Bulky Detergent Bottles for Decanted Jars (Only If You’ll Refill)
In my opinion, decanting is only worth it if it truly makes your routine easier. When I design this look, I use a couple of simple jars to reduce visual clutter and make organized laundry feel more elevated—without turning it into a high-maintenance project.
I decant powder or pods into clear, wide-mouth jars and label them clearly. I keep liquid detergent in its original bottle if it’s messy, but I store it inside a basket so the shelf still looks clean. The key is leaving enough space to scoop without spilling and keeping refills close by.
I find that clear jars with airtight lids keep things fresh and easy to wipe down. For a garage setup, I avoid anything too precious—basic glass or sturdy plastic is perfect.
Pro tip: keep the original packaging tucked in a backstock bin so you always have directions and safety info—then enjoy that calm, streamlined shelf every time you walk in.

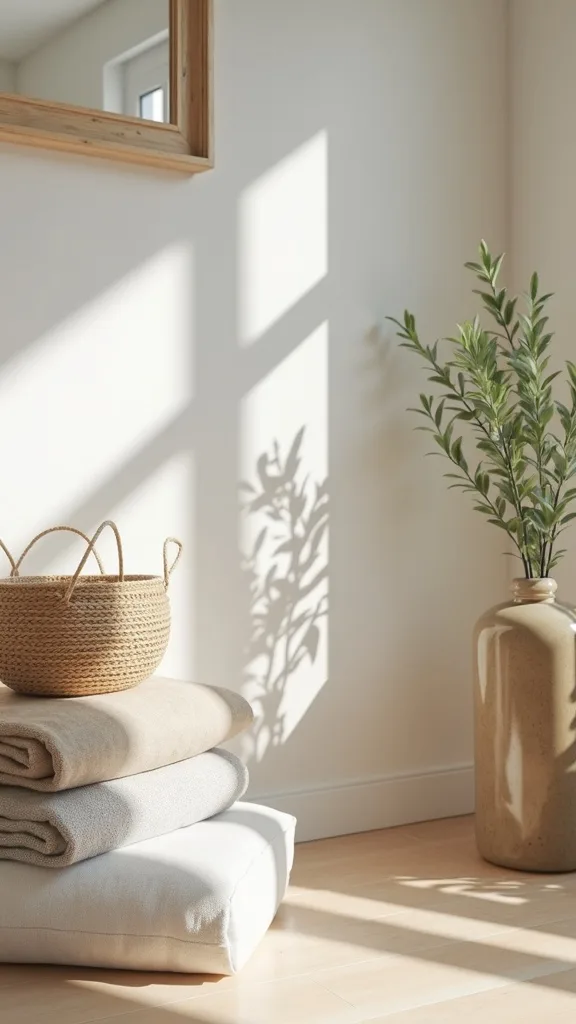
14. Add a Small Rug Runner to Warm Up the Garage Laundry Zone
I find that a garage laundry area can feel cold and purely functional, and a simple runner changes that instantly. A washable rug is one of the most affordable laundry room ideas for comfort, sound-dampening, and style—especially during a Spring Laundry Refresh.
I always start by measuring the walkway so doors and machine vents aren’t blocked. Then I choose a low-pile runner that won’t catch underfoot and can handle dirt. If you’re worried about slipping, I add a non-slip pad underneath so it stays put while you’re carrying baskets.
From my experience, patterns hide lint and dust better than solid colors, and warm neutrals (tan, cream, soft gray) pair beautifully with wicker baskets and laminate shelving. If your garage gets wet, I go for indoor/outdoor styles that wipe clean.
Pro tip: pick a runner you genuinely like looking at—when the space feels welcoming, you’ll be more motivated to keep it tidy and finished.
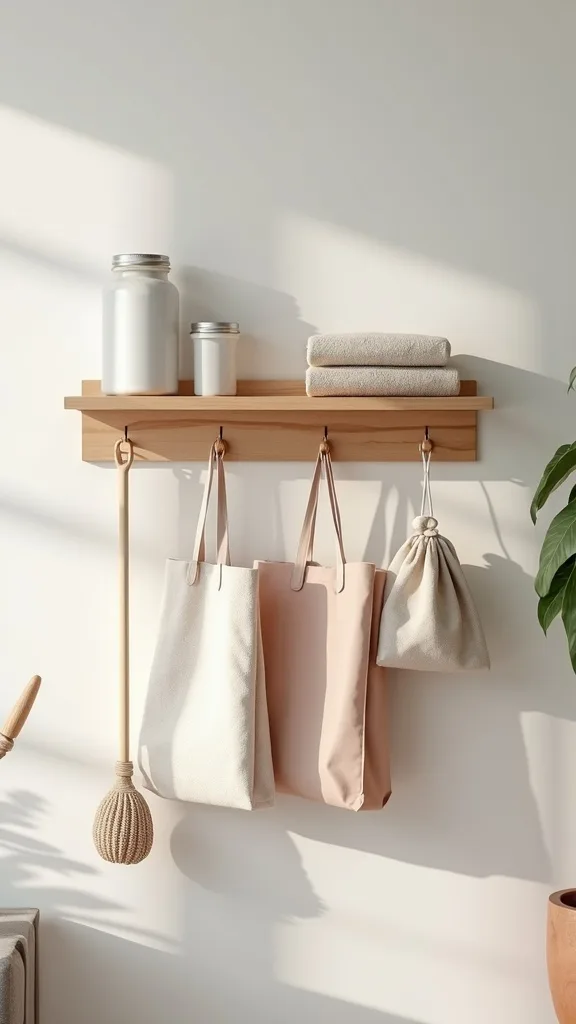
15. Use a Wall Hook Row for Bags, Reusables, and Cleaning Tools
I always recommend hooks because they’re cheap, fast to install, and they pull clutter off the floor immediately. A simple hook row supports laundry room organization by giving every “floaty item” a home—reusable bags, lint rollers, dusters, and even a small handheld broom.
I mount a row of hooks near the entry point to the laundry zone so I can hang items as I walk in. I assign each hook a purpose and keep it consistent—this is where labels help, even if it’s just a tiny cotton tag tied to the hook base. If you have kids, I hang a low hook for their sports bags so they learn the system too.
I find that matte black hooks look modern and hide scuffs, while brushed nickel feels classic. For a softer vibe, white hooks blend into the wall and keep the focus on your shelves and baskets.
Pro tip: leave one hook empty on purpose—an “open” hook prevents random piles and gives your system breathing room.
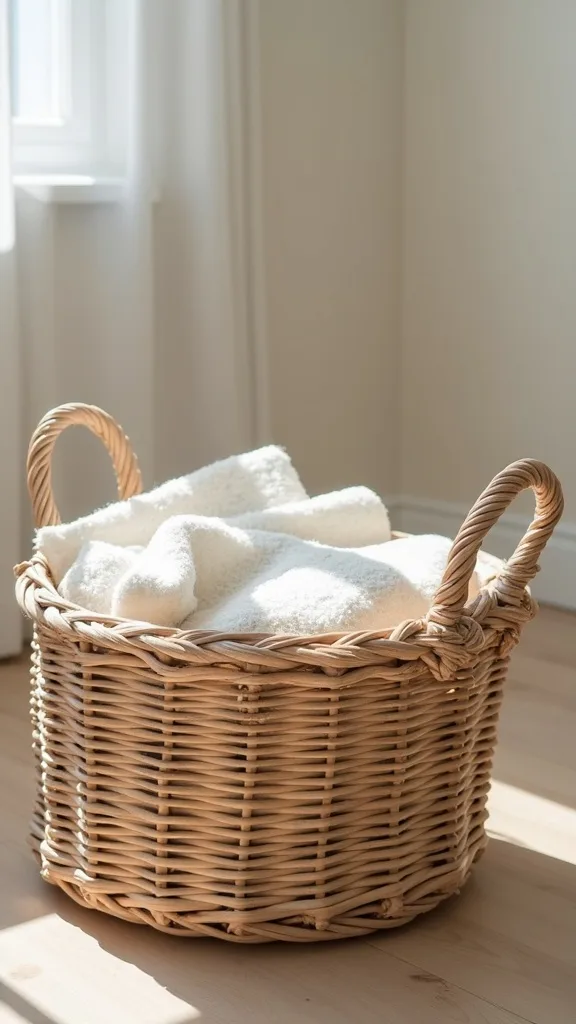
16. Make a “Clean Cloths” Basket and a “Dirty Rags” Basket
From my experience, rags and cleaning cloths are the number-one thing that quietly takes over a laundry space. I find that splitting them into two baskets—clean and dirty—creates instant organized laundry and makes it obvious what’s usable.
I place the “Clean Cloths” basket on an easy-to-reach shelf and the “Dirty Rags” basket lower down, closer to the floor or near the door. I always start by doing one big reset: wash everything, toss worn-out pieces, then only keep what fits in the clean basket. If you use microfiber cloths, I keep them separate from cotton rags so they wash properly.
In my opinion, wicker baskets with cotton labels look best with the wall-shelf theme, but wire baskets work great if you want a more industrial garage feel. Either way, choose something breathable so damp rags don’t get funky.
Pro tip: when the dirty basket is full, run a rag load—this tiny routine keeps your whole garage/organization area feeling under control.
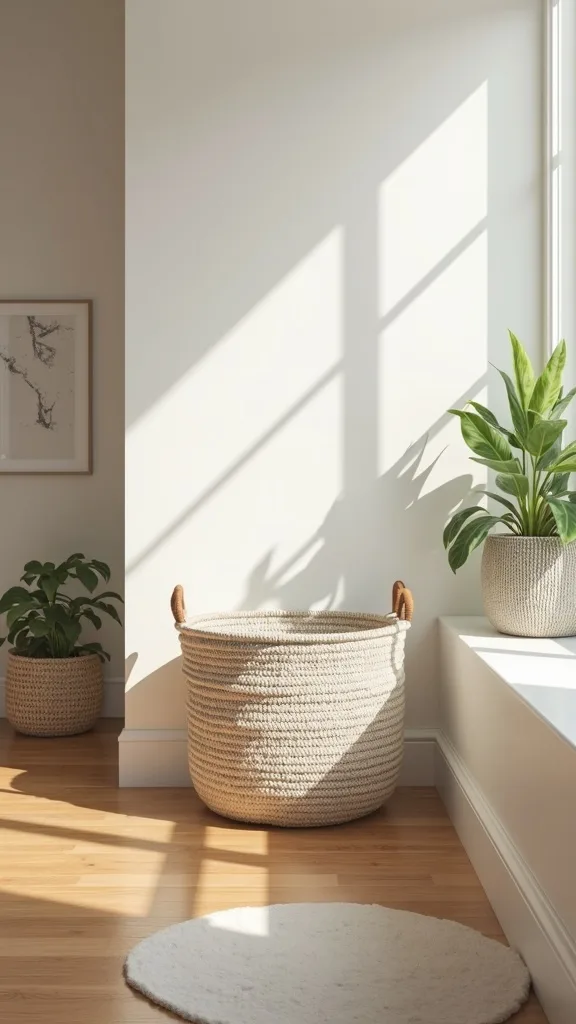
17. Use a “Laundry Landing” Basket for Items That Don’t Belong Here
I find that laundry rooms become clutter magnets because random items land there—tools, mail, toys, and mystery cords. A single “Laundry Landing” basket is one of the simplest laundry room organization tricks I use to stop the spread without needing perfection.
I always start by choosing one medium basket and labeling it clearly: “Return to Rooms.” Every time something doesn’t belong in the laundry zone, it goes in that basket instead of on the counter or shelf. Then I set a quick habit: on the way back into the house, I take the basket with me and drop items where they belong.
From my experience, a wicker basket keeps the look cohesive with shelf styling, while a plastic bin is easier if your garage is dusty. I like a neutral label so it doesn’t scream visually but still communicates the purpose.
Pro tip: make it a one-basket rule—when it’s full, it must be emptied, and that simple boundary keeps the whole space feeling light.
18. Add a Small Shelf or Basket Specifically for Single Socks
In my opinion, single socks deserve their own tiny system because they cause outsized chaos. I find that creating a dedicated “Singles” basket supports organized laundry and keeps your folding area from becoming a sock museum.
I place a small basket on the folding counter or on the lowest wall shelf so it’s easy to toss socks in as I fold. Once a week (or whenever it’s full), I do a two-minute match-up session. If a sock has been single for too long, I decide: repurpose it as a dusting mitt or let it go.
From my experience, a small wicker basket with a cotton label looks intentional and fits the spring refresh vibe. If you want something wipeable, a small plastic bin works well too—especially in a garage where dust is real.
Pro tip: keep the basket small on purpose—limits create discipline, and you’ll feel a little burst of satisfaction every time you clear it out.
19. Use Matching Hangers and Store Them Where You Fold
I always recommend matching hangers for one reason: they remove visual noise and speed up decision-making. When I design this look, I keep hangers right where I fold so the “finish” step happens immediately—key for laundry room organization.
I keep a small basket of hangers on the folding surface or on a shelf near the hanging rod. Then as I fold, I hang anything that wrinkles easily and move it straight to the rod. If your garage laundry area is also storage-heavy, I add a slim hook on the wall just for empty hangers so they don’t pile up.
I find that velvet hangers save space and keep clothes from slipping, while sturdy plastic hangers are more budget-friendly and easy to replace. Pick one style and stick with it for a cleaner look.
Pro tip: keep a few clip hangers for skirts and kids’ pants—having the right tool nearby makes the “finish line” feel effortless and satisfying.
20. Add a Simple Timer or Reminder System for Laundry Swaps
From my experience, the biggest laundry bottleneck is forgetting to swap loads. A tiny timer or reminder system is a surprisingly powerful laundry room idea because it keeps your flow moving and prevents that “rewash because it sat too long” problem.
I always start by choosing the easiest option for your life: a small kitchen timer on the shelf, a smart speaker reminder, or a sticky note on the machine that says “Set Timer.” Then I build one habit—every time I press start, I set the timer. If multiple people do laundry, I keep the timer visible and consistent so it becomes part of the shared routine.
I find that a simple white timer blends into the shelf styling, and it looks tidy next to labeled baskets. If you prefer digital, choose one with big buttons so it’s easy with damp hands.
Pro tip: pair the timer with a “swap basket” for clean items—when your system nudges you forward, laundry stops feeling like a never-ending loop.
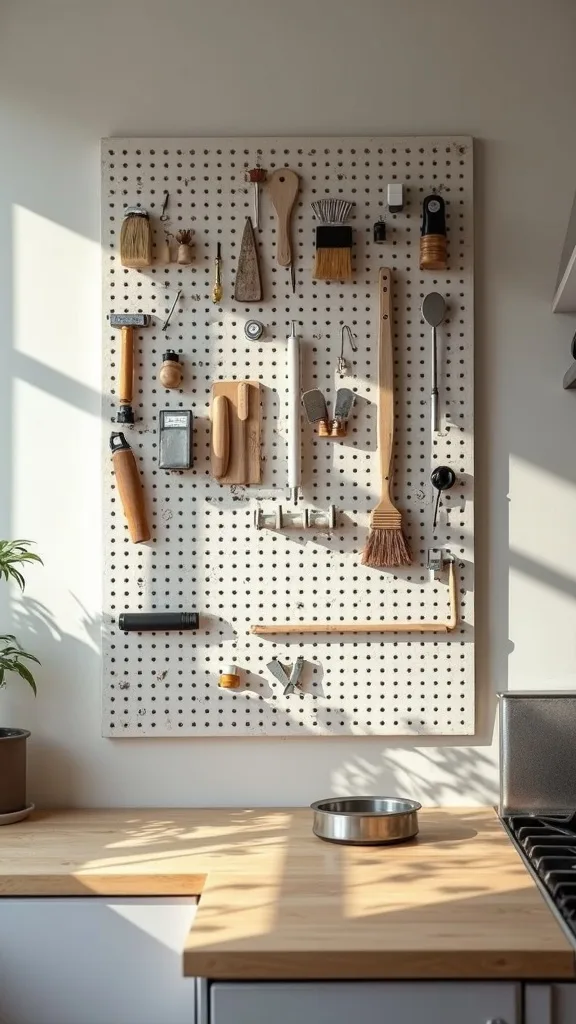
21. Use a Pegboard Panel for Tools, Brushes, and Small Supplies
I find that pegboards are perfect for garage laundry zones because they turn a blank wall into flexible storage. When I want next-level laundry room organization without expensive cabinetry, I always start by mapping out what needs to hang: brushes, lint tools, small sprays, and even scissors for tags.
I mount a pegboard panel near the machines, then add hooks and small cups for items that usually get lost. I keep frequently used tools at eye level and less-used items higher up. To prevent visual clutter, I group similar items together and leave some breathing space between clusters.
From my experience, a white pegboard looks clean and bright, while a black pegboard feels sleek and hides marks. If you want it to coordinate with wicker baskets, I add a couple of small wooden pegboard shelves for warmth.
Pro tip: treat it like a “tool display” and edit it often—when it looks intentional, you’ll actually put things back and enjoy the order you created.
22. Keep a Small Donation Bag Hooked Near the Finish Zone
I always start by using laundry time as a natural decluttering moment. A donation bag on a hook near the folding area supports organized laundry because it gives you a place to put items you’re ready to release—stretched tees, socks with holes, or kids’ clothes they’ve outgrown.
I hang a reusable tote or sturdy bag on a wall hook and label it “Donate.” As I fold, anything that doesn’t fit, doesn’t feel good, or is too worn goes straight into the bag. When it’s full, I put it in the car trunk so it actually leaves the house.
In my opinion, a neutral canvas tote looks tidy and fits the spring refresh mindset. If your garage is dusty, I use a bag with a zipper so items stay clean until drop-off day.
Pro tip: make it a seasonal habit—spring is the perfect time to lighten your load, and every donated piece makes your laundry routine easier going forward.
23. Do a Mini Laundry Room Makeover With Paint + Hardware Swaps
When I want a big impact without a big budget, I lean into a mini laundry room makeover—paint plus a couple of hardware upgrades. I find that fresh color and consistent hooks or shelf brackets make a garage laundry corner feel like a real room.
I always start by patching obvious holes and giving the wall a quick clean, then I paint in a light, bright neutral to bounce light around. After that, I swap mismatched hooks, add coordinated shelf brackets, and choose one finish (matte black or brushed nickel are my go-tos). Even if you only paint the wall behind the machines, it creates a defined “laundry zone” that looks intentional.
From my experience, soft white or warm greige works beautifully with wicker baskets and laminate shelves. If you want a little personality, a pale sage feels fresh for spring without being loud.
Pro tip: keep the makeover simple and repeat the same finish across the space—consistency is what makes budget upgrades look polished and proud.
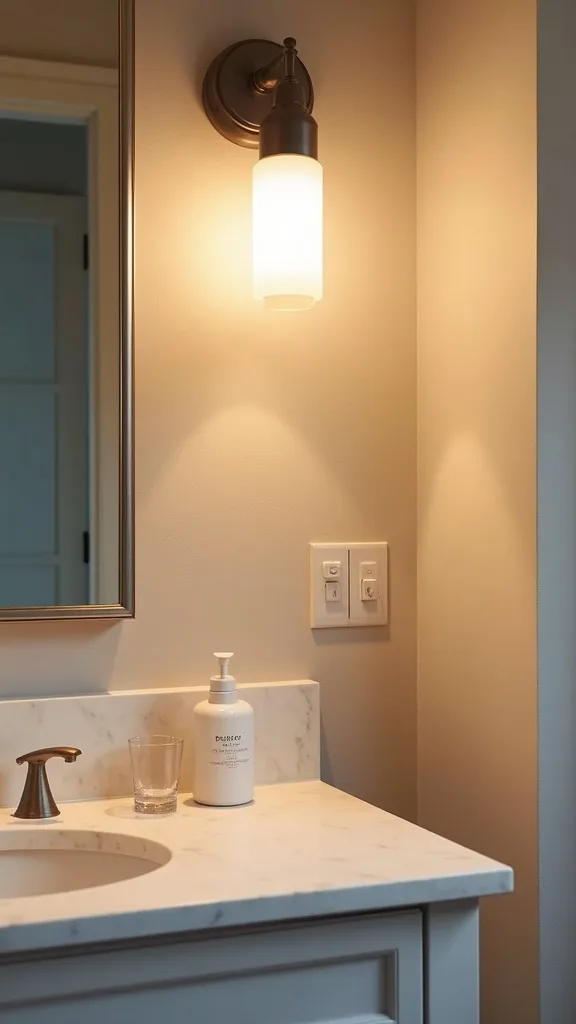
24. Add Under-Shelf Lighting for Better Visibility (No Hardwiring Needed)
I find that garages often have shadowy corners, and better lighting makes every organizing system easier to use. Under-shelf lighting is one of my favourite laundry room ideas because it improves visibility right where you measure, sort, and pretreat—without needing an electrician.
I always recommend peel-and-stick LED light bars that recharge or plug in, and I place them under the lowest shelf above the machines. Then I aim the light toward the counter or washer top so I can see labels and stains clearly. If your lights have color options, I choose warm white light (2700K–3000K — the cosy, yellowish tone you see in most homes) because it makes the space feel more inviting.
From my experience, slim white light bars disappear visually and keep the shelf styling clean. If you want extra function, choose lights with motion sensors so they turn on when you walk in with a basket.
Pro tip: good lighting makes you feel capable and in control—once you can see what you’re doing, staying organized becomes so much easier.
25. Set a 10-Minute Weekly Reset to Keep It Organized All Season
In my opinion, the best laundry room organization system is the one you can maintain with minimal effort. I always start by building in a tiny weekly reset, because spring schedules get busy and clutter sneaks back in fast.
I pick one day—often Sunday—and set a 10-minute timer. I return stray items to the “Laundry Landing” basket, wipe the counter, empty lint, and do a quick shelf straighten. Then I check backstock: if detergent is low, I add it to my shopping list immediately so I don’t run out midweek.
From my experience, keeping a small microfiber cloth and all-purpose spray in a labeled basket makes this reset effortless. I also like having one empty wicker basket on the shelf as a “catch” for anything that needs a home.
Pro tip: treat the reset like a gift to your future self—when you walk into a calm, ready-to-go space, laundry feels lighter, faster, and surprisingly satisfying.

Final Thoughts
Final Thoughts
I find that a Spring Laundry Refresh is less about perfection and more about setting up small, repeatable wins—especially in a garage laundry zone where clutter can pile up quickly. If you take just a few ideas from this list (my top picks are floating shelves laundry storage, labeled wicker baskets, and a clear sort-wash-finish flow), you’ll feel the difference immediately in your daily rhythm.
When I design an organized laundry space, I always aim for affordability, easy maintenance, and a layout that supports real life. Start with one wall, one shelf, and one label set, then build from there—because once your system works, it’s so much easier to keep it looking good all year long.
Products I Recommend for This Project
Here are some of my favourite products to help you bring these ideas to life:
- Rubbermaid FastTrack Garage Rail System (All-in-One Kit) — I use this to add strong, flexible wall storage with hooks and baskets that evolve with your routine.
- SONGMICS 3-Tier Slim Rolling Storage Cart — I love it for turning the gap beside or between machines into grab-and-go storage for daily essentials.
- Command Large Utility Hooks — I always recommend these for renters or quick upgrades when you want hanging storage without drilling.
- mDesign Wall Mount Foldable Drying Rack — This gives me a reliable hang-dry zone that folds flat, keeping the garage walkway clear.
- DEWEL Clear Plastic Storage Bins with Lids — I find these perfect for backstock and refills because I can see what I have and stack neatly on shelves.