This post contains affiliate links. As an Amazon Associate, I earn from qualifying purchases at no extra cost to you.
Are you looking for a simple way to turn your yard into a cosy hangout that everyone actually wants to stay in? Do you want to host an outdoor movie night that feels special without renting expensive equipment or stressing over the details?
I always start by picking a “movie-night mood” (cozy and twinkly, or fun and festival-like) and then building my setup around comfort, lighting, and snacks. In this guide, I’m walking you step-by-step through my favourite backyard cinema ideas, including a practical backyard movie setup you can tweak for any space.
From my experience, this is perfect for early-summer get-togethers, family nights, teen parties, date nights at home, or anyone collecting fresh summer entertaining ideas that don’t require a huge budget.
When I design this look, I focus on one “wow” moment (usually the screen), one comfort zone (blankets and pillows), and one treat station (a popcorn bar that makes people grin). I’ll also share the little fixes that save the night—like how I stop glare, keep bugs away, and make sure everyone can hear without blasting the neighbors.
Below are 25 Outdoor Movie Night & Backyard Cinema DIY that help you build a welcoming vibe, keep it budget-friendly, and host with confidence all season long.
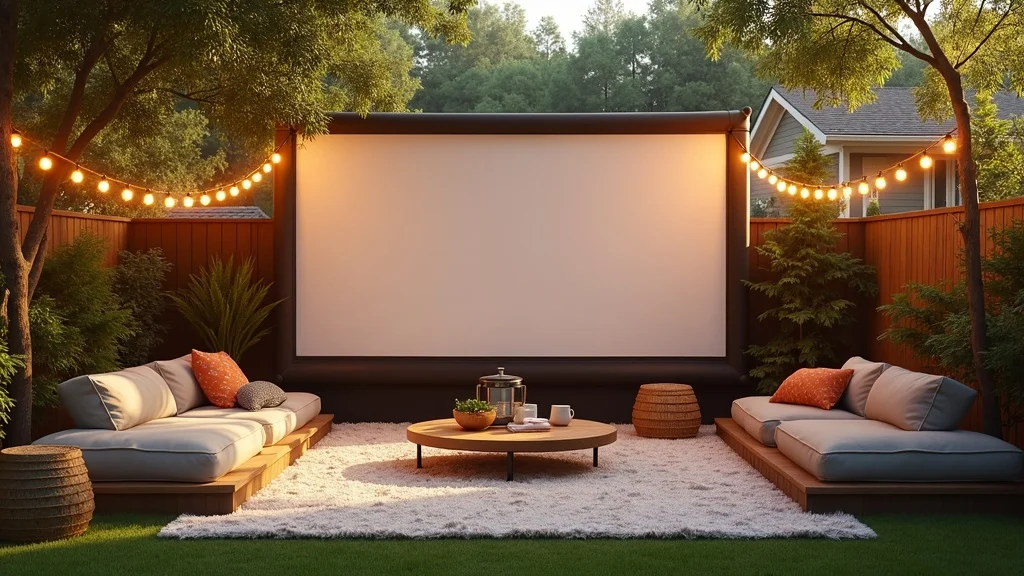
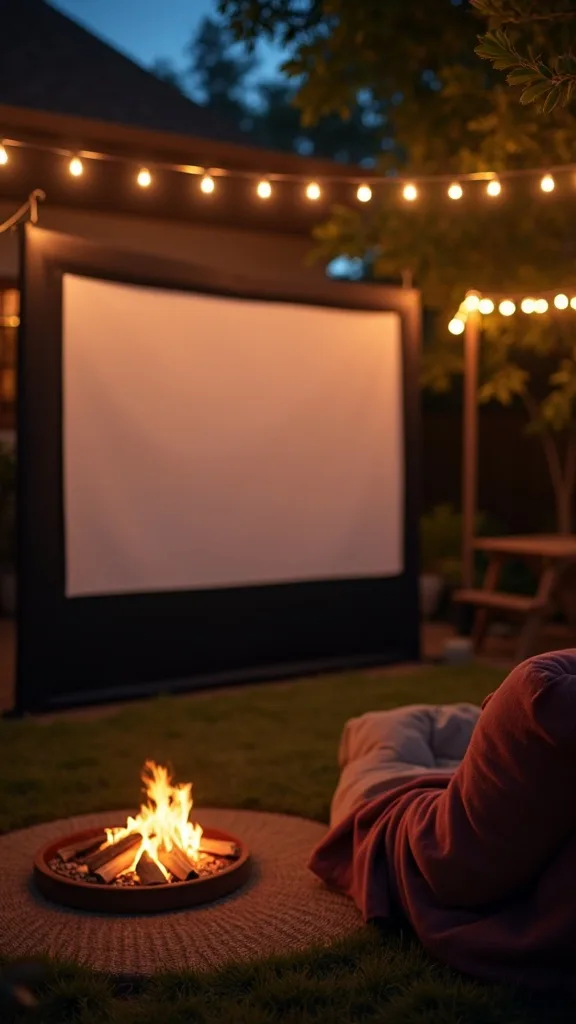
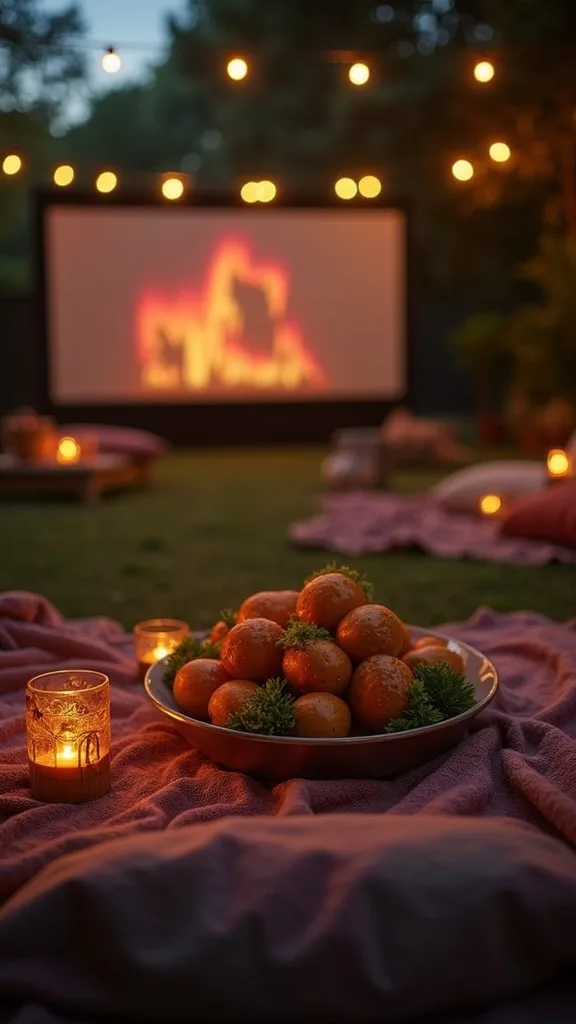
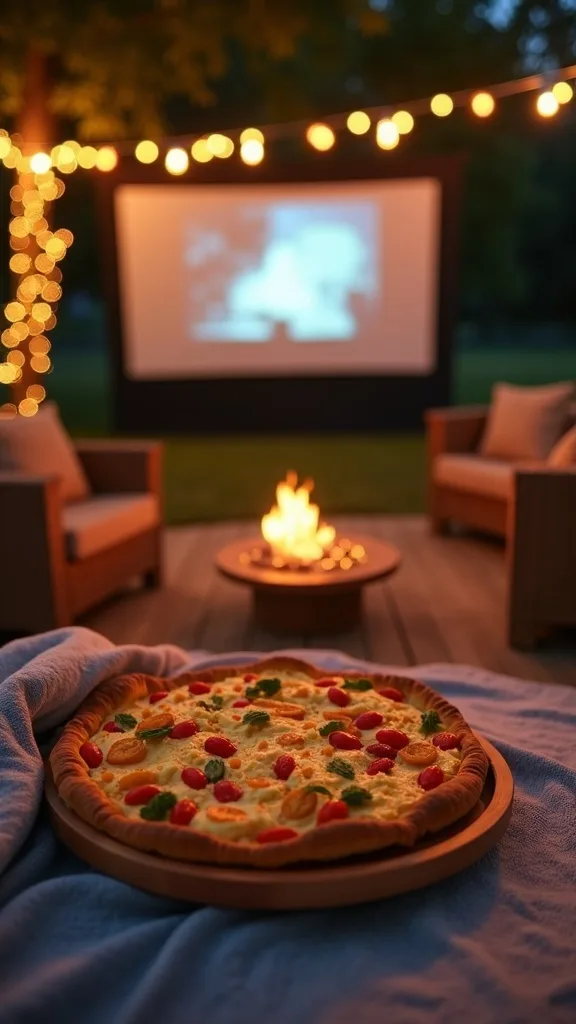
1. Build the Classic PVC Screen + Blanket Lounge + String Lights + Popcorn Bar
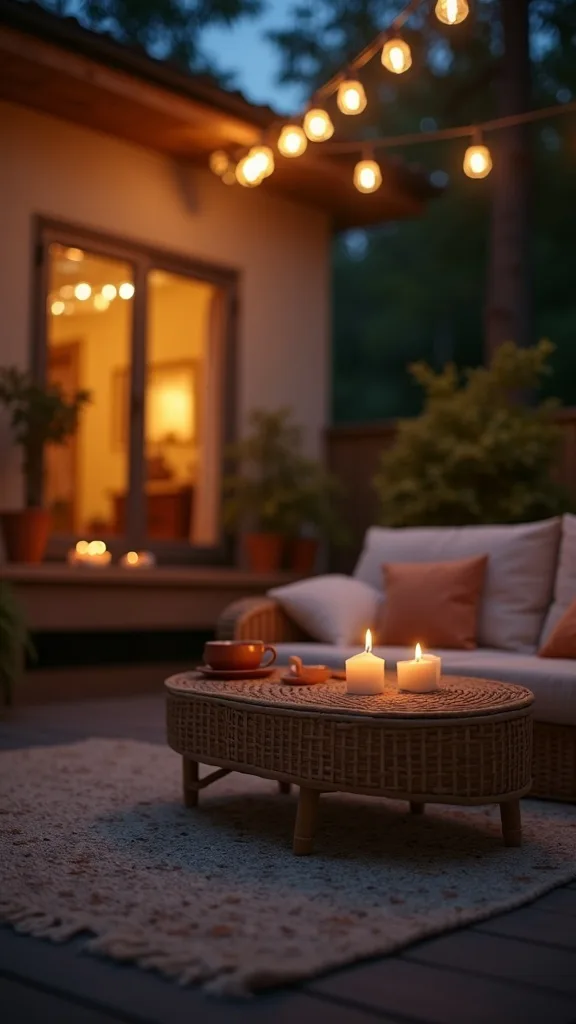
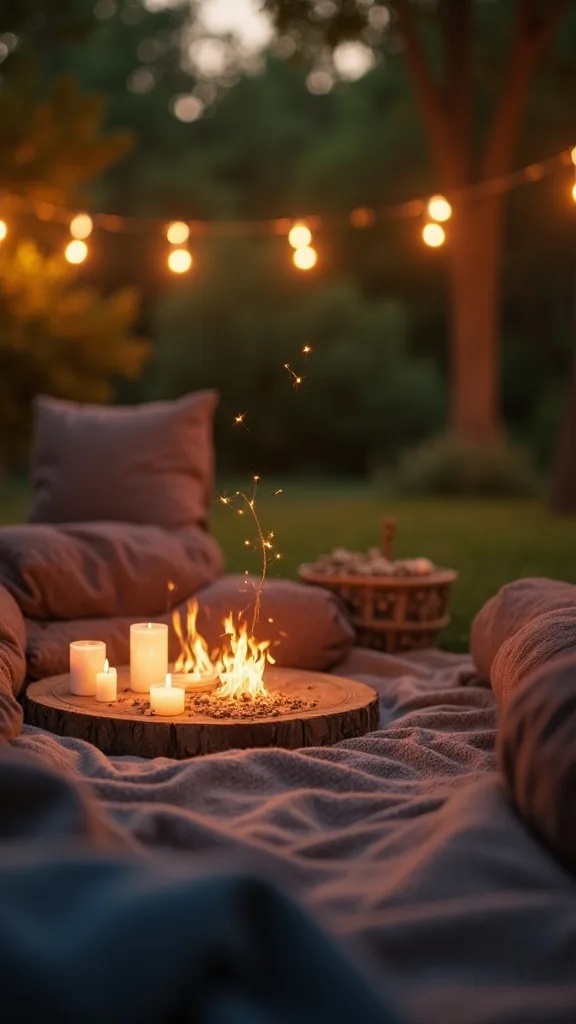
I find that starting with one cohesive “scene” makes the whole outdoor movie night feel intentional, and this combo is my go-to because it’s easy, affordable, and wildly charming. When I design this look, I treat it like a mini backyard cinema with four anchors: a PVC frame screen, a blanket seating zone, warm string lights, and a popcorn bar.
I always start by assembling a simple PVC rectangle frame, then I attach a white blackout curtain or projector screen fabric with clips so it stays smooth. Next, I lay out outdoor rugs, then layer blankets and big floor pillows in rows so everyone has a clear view. I finish by hanging string lights behind or to the side of the screen so they glow without causing glare.
For materials, I like white PVC, a crisp white fabric, neutral blankets, and a few accent pillows in summer shades like sage, denim blue, or terracotta. Add a small table for popcorn bowls, shakers, and napkins.
Pro tip: I always recommend doing a quick test projection at dusk and adjusting the screen angle—once the picture snaps into place, it feels like you created a little outdoor magic.
2. Choose the Best Screen Spot (So Everyone Can See Clearly)
In my opinion, the screen location is the difference between a cozy backyard cinema and a frustrating squint-fest. I always start by standing where I want the screen and looking around for porch lights, streetlights, or reflective windows that could wash out the image.
I place my screen so the projector points straight on (not from a sharp angle), and I leave enough space for seating rows—usually a front “blanket zone” and a back “chair zone.” If I’m working with a small patio, I keep the screen closer and use fewer seats, but I still protect a clear walkway so people aren’t stepping over blankets all night.
For colors, I like a bright white screen surface and darker tones behind it (like shrubs or a fence) to help the picture pop. If the background is light, I’ll hang a dark sheet behind the screen.
Pro tip: I find that turning off or covering just one harsh light source can instantly upgrade the image—small tweaks create a big “wow” without buying anything new.
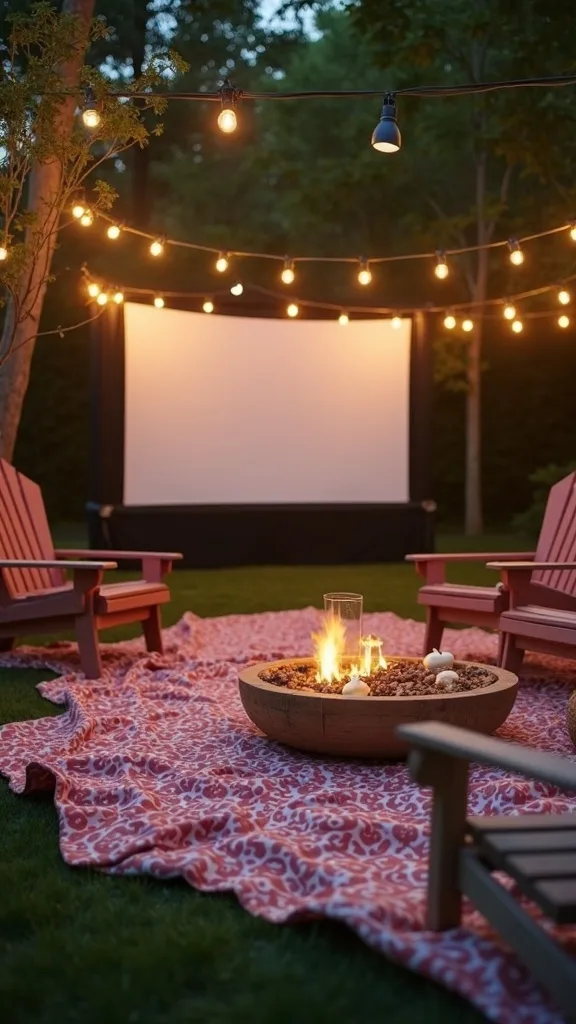
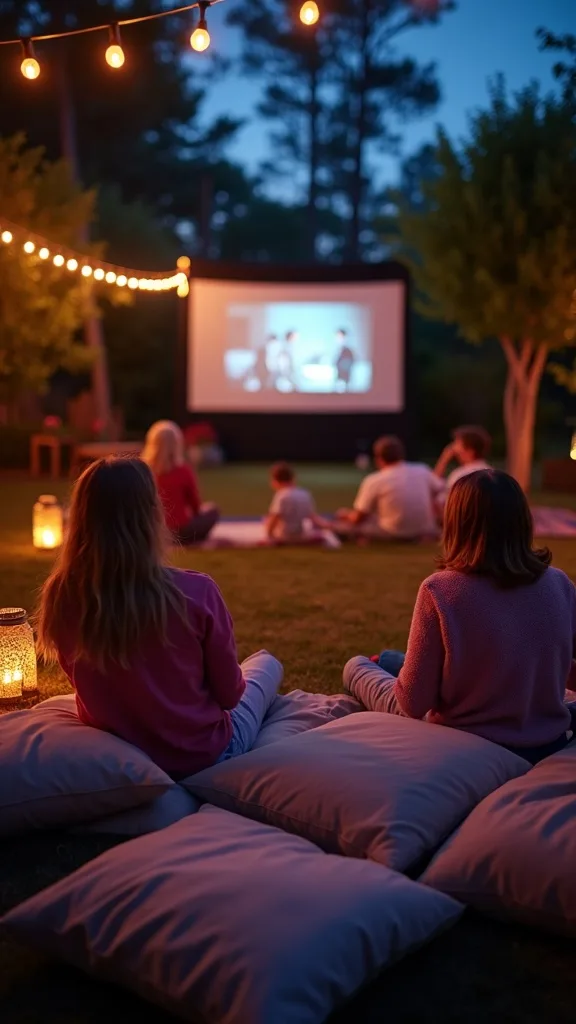
3. DIY Outdoor Theater Layout: Front Blankets, Back Chairs, Side Snack Lane
One of my favourite approaches is laying out the space like a tiny theater, because it keeps the night flowing smoothly and makes guests feel cared for. I find that a simple layout also helps you avoid the awkward “where do I sit?” moment.
I always start by marking the screen centerline, then I build two seating zones: blankets and floor cushions in front, and camp chairs or patio chairs behind. Next, I create a side “snack lane” with a narrow table so people can refill popcorn without blocking the view. If kids are coming, I keep the front row extra plush so they naturally gravitate there.
Materials I love: an outdoor rug base, mix-and-match throw blankets, and low trays for drinks. For colors, I stick to two neutrals (cream and charcoal) plus one accent color so it looks styled, not messy.
Pro tip: I always recommend leaving a small “parking spot” for shoes near the blanket zone—when everyone’s comfortable, the movie feels longer (in the best way).
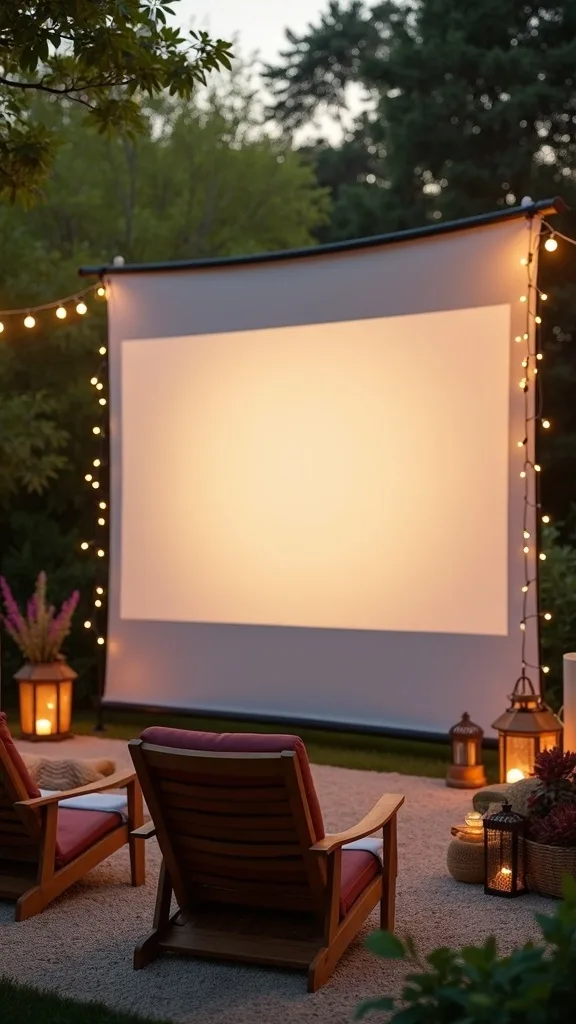
4. Make the Screen Fabric Look Smooth (No Wrinkles on Movie Night)
From my experience, wrinkles are the sneaky thing that makes a backyard movie setup feel DIY in the wrong way. I like a crisp screen because it instantly elevates the whole DIY outdoor theater vibe.
I always start by choosing a fabric that naturally hangs flat, like a blackout curtain panel. Then I pull it tight across the PVC frame and clip it every 6–10 inches, adjusting tension as I go. If I’m using a sheet, I lightly mist it with water and let it air-dry while stretched—this helps relax creases before the show.
For materials, I keep a pack of sturdy clamps, a steamer (optional), and a simple white screen surface. I avoid thin, shiny fabrics because they can reflect light unevenly.
Pro tip: I find that adding a thin black border (black tape or fabric) around the screen makes the picture feel more “cinema” and helps your eyes focus—like framing art on a wall.
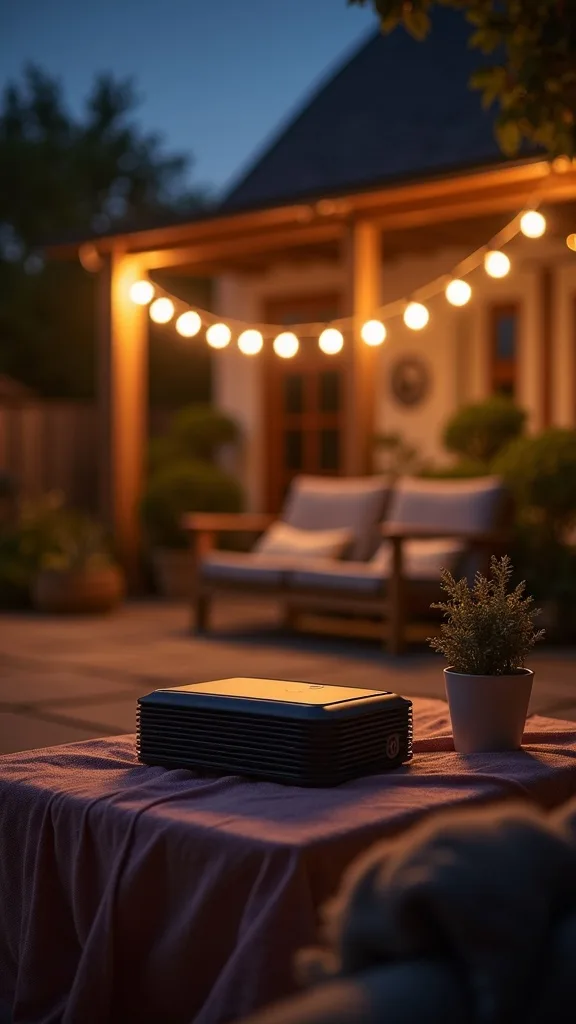
5. Projector Placement That Looks Good and Keeps People From Tripping
I always recommend treating projector placement like part safety plan, part design choice. When I design this look, I want the projector to disappear into the setup while still throwing a clean, centered image.
I always start by placing the projector on a sturdy small table or crate about waist height, then I align it with the center of the screen. Next, I tape down any cords along the edge of the patio or behind seating so no one trips during snack refills. If the projector is close to the seating area, I create a tiny “no-walk zone” with a basket or lantern so it’s obvious.
Materials to consider: a stable side table, outdoor-rated extension cord, and gaffer tape for cords (it removes cleanly). I also like a small tray under the projector to catch dew.
Pro tip: I find that a simple plant stand or low console can look more intentional than a random folding table—small styling choices make your backyard cinema feel truly hosted.
6. Simple Sound Setup: Hear Dialogue Without Annoying the Neighbors
In my opinion, sound is what makes an outdoor movie night feel immersive—especially when the wind picks up or you’re watching something dialogue-heavy. I always start by aiming for clear audio at a comfortable volume, not “stadium loud.”
I connect my streaming device to a portable speaker (or two) and place speakers near the screen, angled slightly toward the seating area. If I’m using two speakers, I put them left and right of the screen for a fuller feel. Then I do a two-minute sound check with someone sitting in the back row to confirm voices are easy to understand.
For products, I like a portable Bluetooth speaker with enough battery for the whole film, plus a simple aux cable option as backup. Visually, I tuck speakers behind planters or small stools to keep the setup tidy.
Pro tip: I always recommend subtitles outdoors—everyone relaxes when they can catch every line, and it makes the experience feel more inclusive and cozy.
7. String Lights Done Right (Warm Glow Without Screen Glare)
I find that string lights are the fastest way to make a backyard cinema feel magical, but placement matters. When I design this look, I want that twinkle in the background—not shining into the screen like headlights.
I always start by hanging lights behind the seating area or along a fence line, then I step back and check what the projector “sees.” If lights are in the projector path, I move them higher or to the sides. I also like wrapping lights around poles or trees to create vertical glow that doesn’t compete with the screen.
For lighting color, I always choose warm white light (2700K–3000K — the cosy, yellowish tone you see in most homes) because it flatters faces and feels inviting. Black-wire string lights tend to disappear visually at night, which I love.
Pro tip: I recommend putting lights on a timer so you’re not fiddling with switches mid-movie—once it’s set, you can sink into the blankets and enjoy the vibe you created.

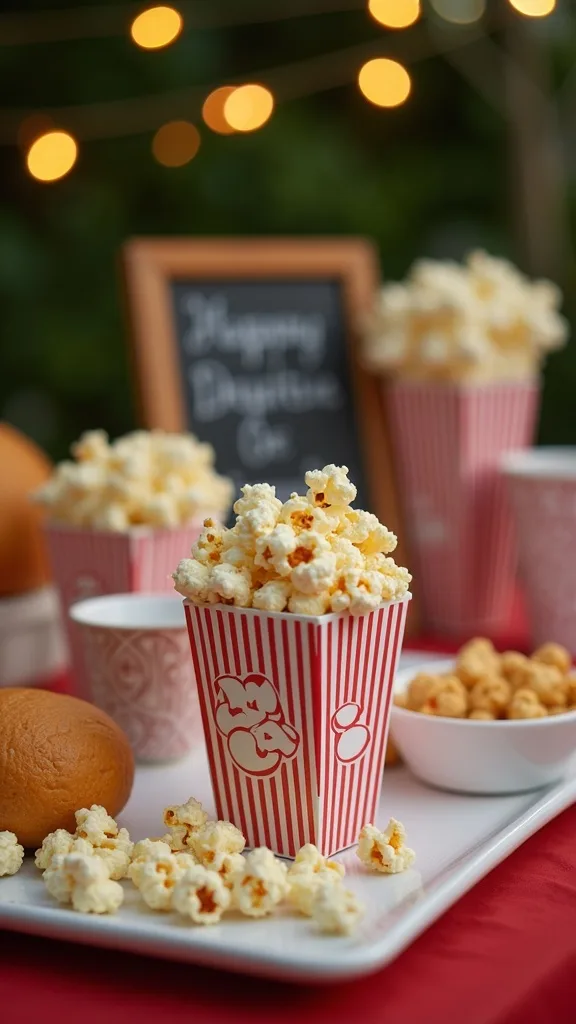
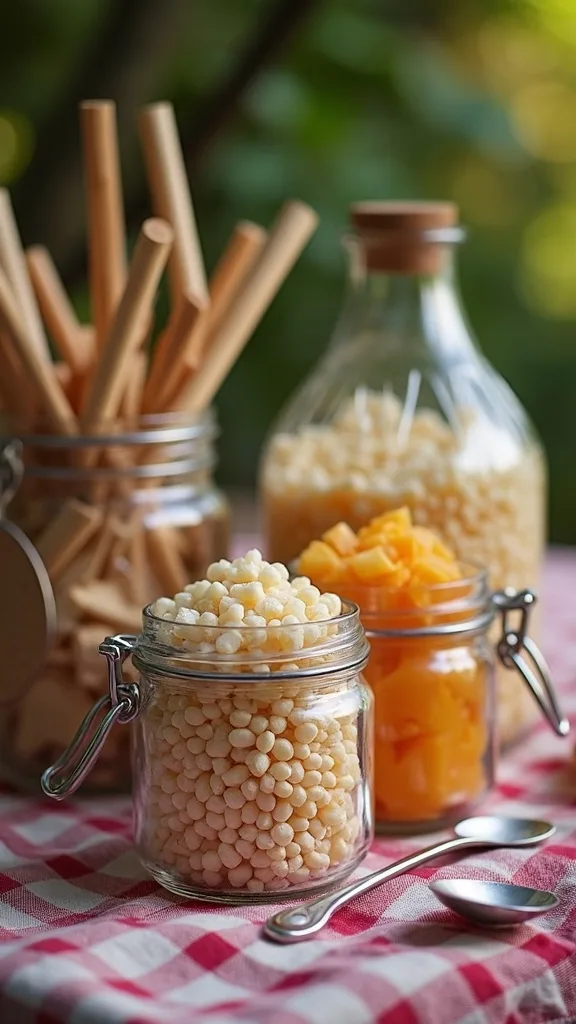
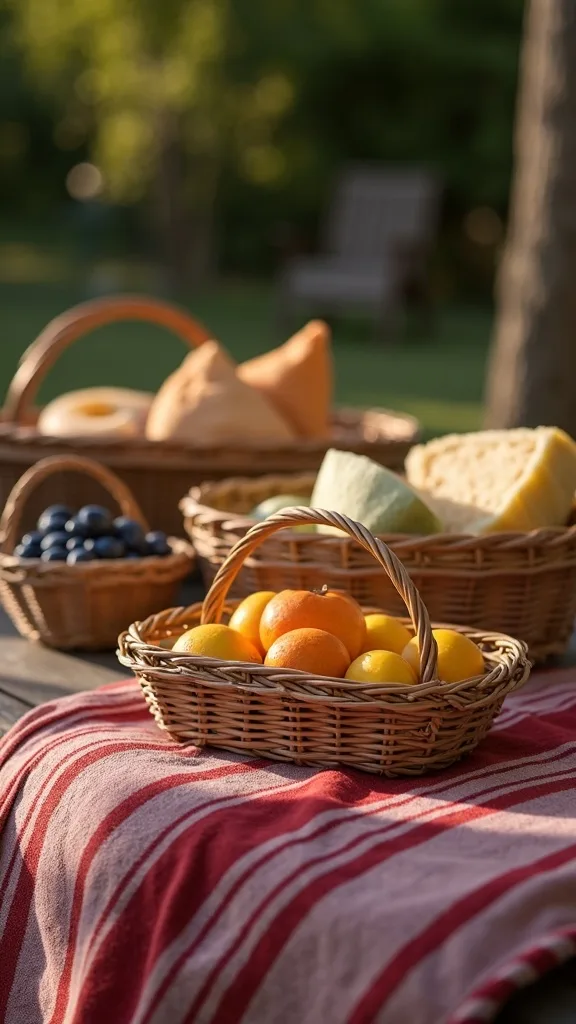
8. Create a Popcorn Bar That Feels Like a Treat Station (Not a Mess)
One of my favourite approaches is building a popcorn bar because it’s playful, affordable, and instantly signals “party.” I find that snacks are where guests gather, so I like making that area cute and functional.
I always start by choosing one table and giving it a washable base layer—an outdoor tablecloth or kraft paper runner. Then I set out popcorn in a big bowl, plus small paper boats or cups for easy portioning. I add three to five toppings (like cinnamon sugar, ranch seasoning, chili-lime, and mini chocolate chips) in labeled jars, and I keep napkins and a trash bin right underneath.
Materials and colors: clear jars, a striped runner, and a couple of bright accent bowls. I like red-and-white details for a classic cinema nod, or soft neutrals for a more elevated look.
Pro tip: I always recommend a “butter zone” with wipes nearby—when cleanup is easy, everyone relaxes and the night feels effortless.
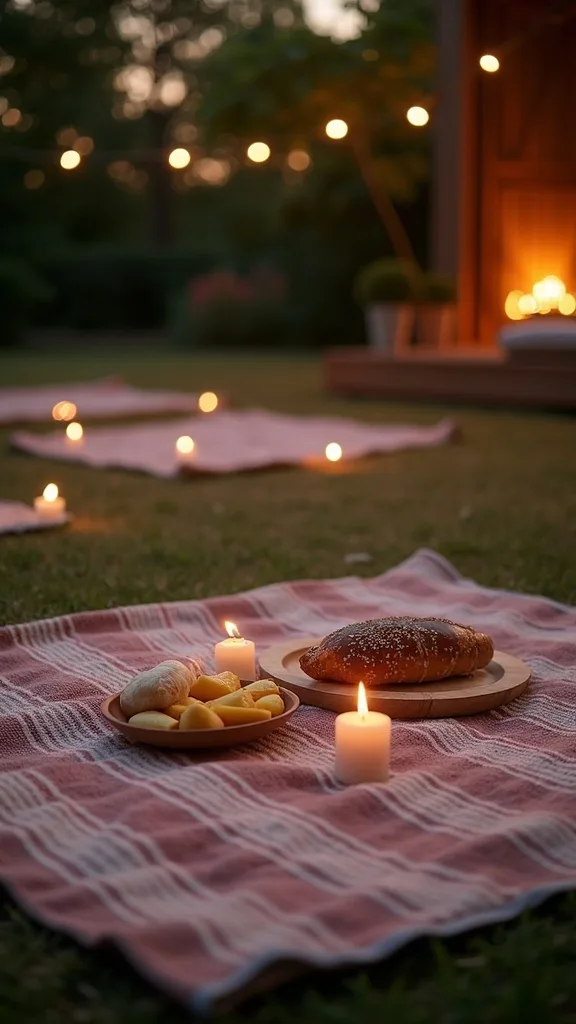
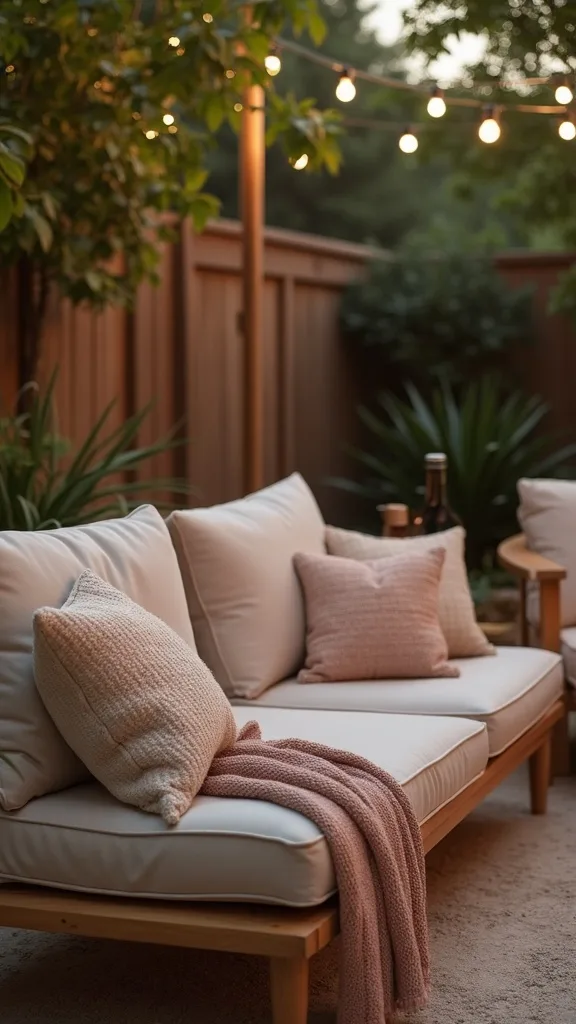
9. Blanket Seating That Stays Put (Even When People Shift Around)
I find that blanket seating is the coziest part of an outdoor movie night, but it can slide and bunch if you don’t anchor it. From my experience, a stable base makes the whole setup feel more comfortable and less chaotic.
I always start by laying down an outdoor rug or two as the foundation, then I layer blankets on top like a quilt. Next, I place heavier pillows at the corners to “weight” the blankets so they don’t migrate as people move. For back support, I add a row of oversized floor cushions or outdoor poufs so guests can lounge without neck strain.
For materials, I like water-resistant picnic blankets, chunky knit throws for texture, and pillow covers in washable fabrics. Color-wise, I keep the base neutral and sprinkle in one or two summer tones to make it feel styled.
Pro tip: I always recommend setting out one extra blanket per two people—when the temperature dips, that small kindness becomes the thing everyone remembers.
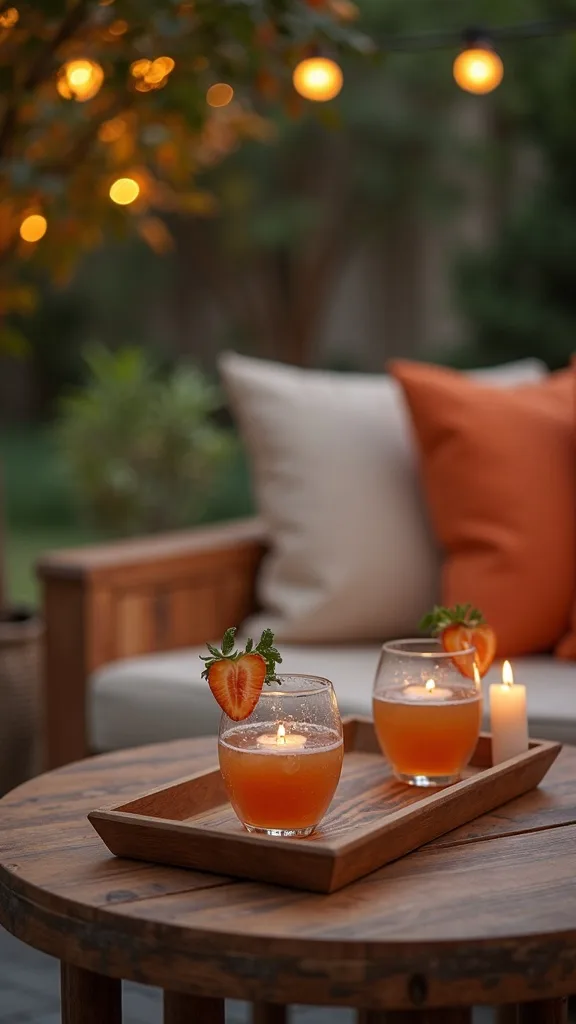
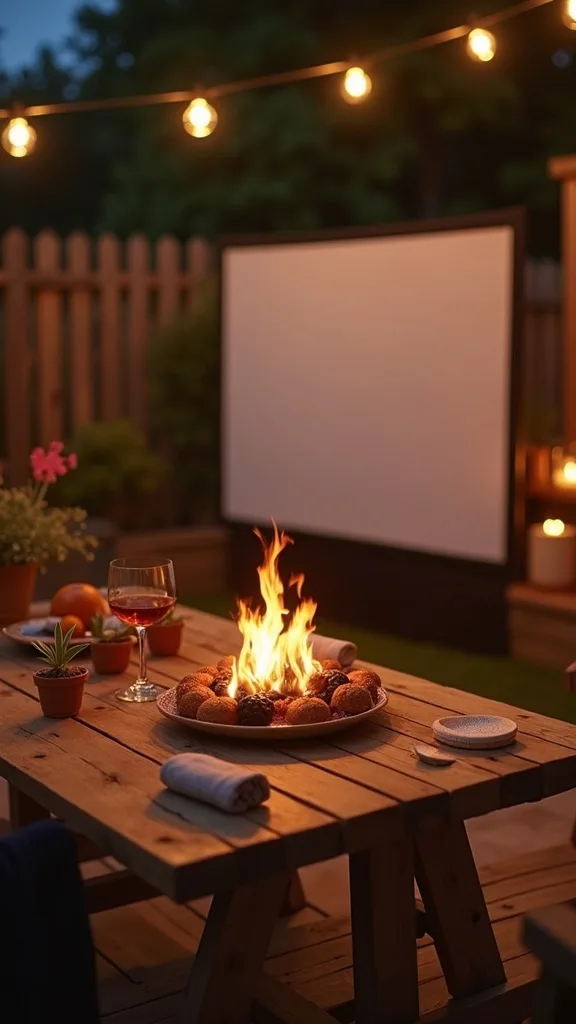
10. Add Low Tables and Trays So Drinks Don’t Tip Over
In my opinion, nothing breaks the movie spell like a spilled drink in the blanket zone. I find that adding a few low surfaces is a simple upgrade that makes your backyard movie setup feel thought-through.
I always start by placing two or three low tables along the sides of the blanket area, then I add trays in the center for shared snacks. If I don’t have low tables, I flip sturdy storage crates upside down and top them with a tray. I also like giving each “row” one designated drink spot so cups aren’t floating around on the ground.
Materials to consider: melamine cups (they’re lightweight and less breakable), small bamboo trays, and coasters that won’t blow away. For colors, I match trays to my pillows so it looks cohesive.
Pro tip: I always recommend using lidded tumblers for kids and the front row—less worry means you can actually watch the movie instead of managing accidents.
11. Bug Control That Doesn’t Ruin the Vibe (No Harsh Smells)
I find that bugs are the one thing that can make guests pack up early, so I plan for them gently and proactively. When I design this look, I aim for subtle protection that doesn’t smell like a campsite.
I always start by clearing standing water earlier in the day and trimming any tall grass near seating. Then I place a couple of citronella-style options around the perimeter (not right next to food), and I add a small fan near the snack table—moving air helps discourage mosquitoes. If it’s a high-bug area, I keep a basket of bug wipes or bracelets at the entry point.
Materials and products: unscented bug repellent wipes, a few outdoor candles in simple glass holders, and a neutral basket for supplies. I keep the colors calm so it blends in.
Pro tip: I always recommend offering light throw blankets even on warm nights—people love the cozy layer, and it doubles as a little extra bug barrier so everyone stays comfortable.
12. Keep Guests Warm: The “Early Summer Temperature Drop” Plan
From my experience, early summer evenings can flip from warm to surprisingly cool once the sun goes down. I always start by planning for that shift so the outdoor movie night stays cozy through the credits.
I set a “warmth station” near the seating area with folded blankets, a basket of socks for kids, and a few oversized shawl-style throws. If I have a patio heater or fire pit, I position it off to the side so it warms the crowd without competing with the screen. I also like serving a warm drink option—hot cocoa packets or herbal tea bags—alongside the popcorn bar.
Materials and colors: chunky knits, fleece throws, and neutral baskets that look like decor. I find that creams, tans, and soft grays feel especially inviting at night.
Pro tip: I always recommend telling guests “bring a hoodie” on the invite—when everyone arrives prepared, the night feels relaxed, and you get to be the host who thought of everything.
13. Use Outdoor Furniture You Already Own (And Make It Look Intentional)
I love a budget-friendly setup, and I find that most people already own enough outdoor furniture to host a backyard cinema—they just need a plan. When I design this look, I group pieces by function instead of matching sets.
I always start by pulling patio chairs into a neat back row and adding one small side table between every two seats. Then I bring out ottomans, poufs, or benches for the middle zone. If I’m short on seating, I set out a couple of indoor dining chairs and add outdoor cushions for comfort, but I keep them on a rug so they feel stable.
Materials and colors: I like adding matching cushion covers or a consistent throw blanket color to unify mismatched chairs. A simple outdoor rug ties everything together quickly.
Pro tip: I recommend leaving a little breathing room between seats—when people can shift, snack, and stretch without bumping elbows, your outdoor movie night feels like a true treat.
14. Create a “Ticket Booth” Welcome Moment With a Tiny Table
One of my favourite approaches is adding a playful welcome moment because it sets the tone before the movie even starts. I find that a mini “ticket booth” makes guests smile and helps guide them to snacks, seating, and blankets.
I always start by placing a small table near the entry path with a sign that says “Now Showing” and the movie title. Then I set out a bowl of “tickets” (just paper strips) that list where to find blankets, popcorn toppings, and bug spray. If kids are coming, I add a stamp marker so they can stamp their own ticket—it’s simple and adorable.
Materials and colors: a chalkboard sign, kraft paper tickets, and a lantern for soft glow. I like classic cinema colors (black, white, and a touch of red) for this detail.
Pro tip: I always recommend using this table as your “grab-and-go” supply spot too—when essentials are easy to find, you get to host with confidence and actually enjoy the night.
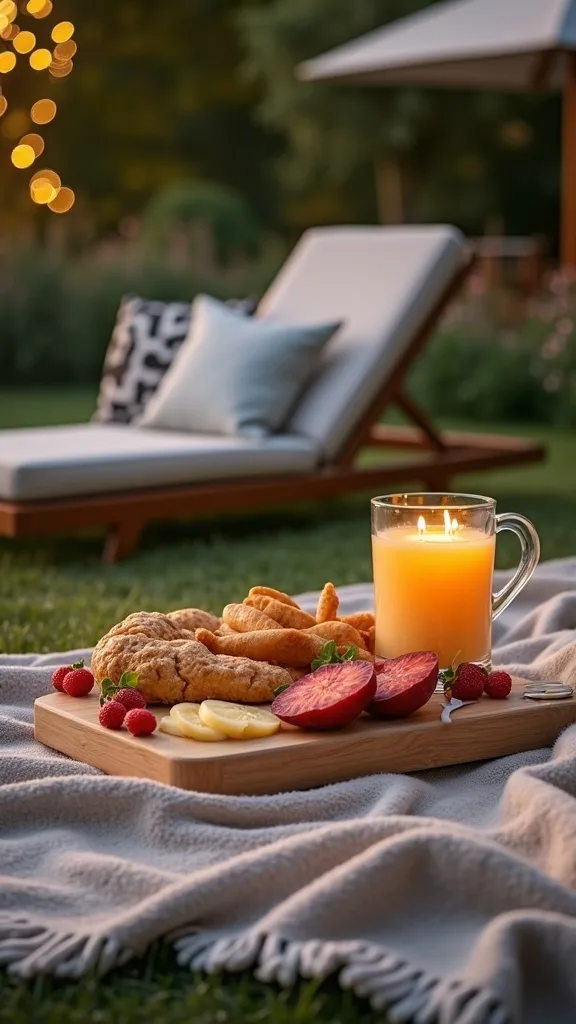
15. DIY Concession-Stand Styling With Jars, Labels, and Scoops
I find that the popcorn bar feels even more special when it looks like a mini concession stand. In my opinion, styling snacks is one of the easiest summer entertaining ideas because it’s mostly containers and labels—not expensive decor.
I always start by decanting toppings into clear jars so guests can see what they’re choosing. Then I add simple labels (masking tape works!) and one scoop or spoon per jar to keep things tidy. I place napkins, cups, and trash access within arm’s reach, and I keep drinks slightly separate so the snack table doesn’t get crowded.
Materials to consider: clear apothecary jars, mini scoops, paper popcorn bags, and a washable runner. For colors, I like a neutral base with one bold accent—like navy or cherry red.
Pro tip: I always recommend offering one “surprise topping” like crushed cookies—when guests discover it, the whole setup feels thoughtful and a little bit magical.
16. Add a Pre-Movie Playlist and a 15-Minute “Mingle Window”
From my experience, the best outdoor movie night isn’t just the movie—it’s the atmosphere before it starts. I find that a short pre-movie playlist gives everyone time to settle in, grab snacks, and chat without feeling rushed.
I always start by setting a start time that’s 15–20 minutes after “arrive time.” Then I play a low-volume playlist while the projector displays a simple “Welcome” screen or the movie poster. During this window, I encourage guests to build their popcorn cup and pick their seat before it gets dark.
Materials and products: a portable speaker, a small printed schedule (“Popcorn now, movie at 8:30”), and a lantern or two near pathways. I keep lighting soft so it feels like an event.
Pro tip: I always recommend a quick “phone on silent” reminder right before you press play—when everyone settles together, the backyard cinema moment feels surprisingly special and connected.
17. Plan for Kids: Glow Sticks, Front-Row Cushions, and Simple Snacks
I love hosting families, and I find that kids make an outdoor movie night extra joyful—if I plan a few easy boundaries. When I design this look for kids, I build a front-row “kid zone” that keeps wiggles contained and sightlines clear.
I always start by placing the softest cushions and blankets in the front area, then I add a small basket of glow sticks so kids can find their way without turning on bright lights. For snacks, I keep it simple: popcorn, fruit snacks, and water bottles with labels. If the movie is longer, I set a quiet “stretch break” halfway through so they can reset without chaos.
Materials and colors: glow bracelets, washable pillow covers, and lidded cups. I like bright accents in the kid zone so it feels fun and clearly “theirs.”
Pro tip: I always recommend keeping a few extra blankets just for the kids—when they’re cozy, they stay put, and everyone enjoys the movie more.
18. Date-Night Version: Two Chaise Lounges, One Blanket, and a Snack Board
In my opinion, a backyard cinema makes the sweetest at-home date night because it feels intentional without being complicated. I find that the key is simplifying: fewer seats, fewer toppings, and more comfort.
I always start by placing two chaise lounges or recliners centered to the screen, then I add one oversized blanket across both seats. Next, I set a small side table between them with a snack board—popcorn, chocolate, and something salty—plus two drinks in lidded tumblers. For lighting, I keep string lights dim and add one lantern near the table for a soft glow.
Materials and colors: neutral throws, a wooden board for snacks, and warm-toned lantern light. I like creamy whites with a touch of black for that classic “movie night” feel.
Pro tip: I always recommend choosing a shorter movie or a feel-good favorite—when the vibe is easy, you can relax into the night and let your outdoor movie night feel like a mini vacation.
19. Rain Plan: Quick Canopy Cover and a “Reschedule Text” Template
From my experience, the best hosts aren’t the ones who control the weather—they’re the ones who plan for it. I always start by deciding what “too wet” means for me, so I’m not making a last-minute call in a panic.
If there’s a light sprinkle risk, I set up a pop-up canopy over the projector and snack table (not over the screen, which can flap in wind). I keep towels handy and move seating onto rugs closer to the house. If the forecast looks truly rainy, I send a cheerful reschedule text early and offer a backup date—people appreciate clarity.
Materials and products: a pop-up canopy, plastic bins for blankets, and a couple of large trash bags to cover gear quickly. I keep everything stored together so setup is fast.
Pro tip: I always recommend treating the rain plan as part of your hosting confidence—when you’re prepared, you can pivot without disappointment and still keep the fun alive.
20. Power and Cords: Make It Safe, Hidden, and Easy to Unplug
I find that cord clutter is the quickest way to make a DIY outdoor theater feel stressful. When I design this look, I want everything to be safe and visually calm, so guests can move around without worry.
I always start by mapping where power will come from, then I run an outdoor-rated extension cord along the edge of the space—never across the main walkway. Next, I tape cords down with gaffer tape and cover any unavoidable crossings with a cord cover or a flat mat. At the end of the night, I like having one “unplug point” so teardown is quick.
Materials to consider: outdoor extension cords, gaffer tape, and a small weather-resistant storage box to keep connections off damp ground. Neutral tape blends in better than bright colors.
Pro tip: I always recommend doing a quick walk-through in the dark before guests arrive—when you catch trip hazards early, you get to relax and enjoy the movie like everyone else.
21. Add Cozy Borders With Planters, Lanterns, and Outdoor Rugs
One of my favourite approaches is creating “room edges” outdoors, because it makes the setup feel like an actual space instead of furniture scattered on grass. I find that defined borders make guests naturally gather where you want them.
I always start by anchoring the seating area with one large outdoor rug or two layered rugs. Then I place planters or lanterns at the corners to outline the zone. If I’m working with a wide yard, I’ll add a second rug near the popcorn bar to make that area feel like its own little destination.
Materials and colors: solar lanterns, terracotta or black planters, and rugs in simple patterns that hide dirt. I like warm neutrals with a subtle stripe for that classic summer look.
Pro tip: I always recommend keeping borders low (knee height or lower) near the screen—when the view stays clear, the whole backyard cinema feels open, welcoming, and beautifully put together.
22. Serve Drinks Smart: A Cooler Station With Labels and Towels
I find that drink logistics can quietly make or break an outdoor movie night, especially when guests keep opening the fridge inside. When I design this look, I set up a self-serve cooler station so everyone stays outside and the vibe stays steady.
I always start by filling a large cooler with ice and a mix of drinks, then I label sections with simple tags (sparkling water, soda, juice). Next, I add a small towel stack and a bottle opener tied to the handle so nobody has to hunt for tools. If bugs are an issue, I keep drinks in cans or covered bottles instead of open cups.
Materials and colors: galvanized drink tub or cooler, waterproof labels, and a neutral tray for cups. I like adding a single bright color here—like lemon yellow—to make it feel summery.
Pro tip: I always recommend placing the cooler near (but not on) the snack table—when traffic is spread out, lines disappear and your backyard movie setup feels effortless.

23. Pick the Right Movie Start Time (So It’s Dark Enough)
From my experience, timing is the secret ingredient for a great backyard cinema. I always start by planning backward from sunset, because the screen looks best once it’s properly dark.
I check the local sunset time, then I set arrival time about 30–45 minutes before dark for mingling and snacks. I aim to press play when the sky is dim enough that the picture looks crisp—usually 20–40 minutes after sunset depending on cloud cover. If I’m hosting kids, I choose shorter movies or start earlier and accept a slightly lighter sky.
Materials and tools: a simple weather app, a printed mini schedule, and subtitles turned on for clarity. I also like a small lantern by the popcorn bar so people can see toppings without bright overhead lights.
Pro tip: I always recommend doing a one-minute projection test at your planned start time the day before—when you nail the timing, your outdoor movie night feels smooth, cinematic, and totally worth the effort.
24. Easy Cleanup System: Bins, Baskets, and a 10-Minute Reset
I find that cleanup feels painless when I plan it from the beginning, not after everyone leaves. When I design this look, I build in a few “drop zones” so trash and dishes don’t spread across the yard.
I always start by placing one trash bin and one recycling bin near the snack area, then I add a small “used cups” tray so things don’t tip over. For blankets and pillows, I keep two big baskets or lidded bins ready—at the end, I just toss everything in and sort later. If dew is heavy, I hang blankets over chairs for 10 minutes before storing.
Materials and colors: lidded storage bins, paper goods for easy disposal, and a handheld brush for popcorn crumbs. Neutral baskets look like decor even when they’re functional.
Pro tip: I always recommend setting a tiny “closing routine” (lights off, cords unplugged, pillows binned)—when cleanup is quick, you’ll actually want to host another backyard cinema night soon.
25. Make It a Series: Weekly Themes for Early Summer Entertaining
In my opinion, the most fun way to enjoy early summer is turning one successful outdoor movie night into a tradition. I find that a simple theme makes each gathering feel fresh without reinventing your whole setup.
I always start by keeping the screen and seating the same, then I rotate one theme element: snacks, colors, or the movie genre. For example, I’ll do “Family Classics” with bright candy, “Rom-Com Night” with a simple dessert board, or “Adventure Night” with trail-mix toppings at the popcorn bar. I also like inviting guests to bring one item that matches the theme—like a favorite blanket or a topping suggestion.
Materials and colors: a small stash of interchangeable decor (table runners, labels, a sign), plus reusable popcorn containers to cut waste. I keep the palette consistent so storage stays simple.
Pro tip: I always recommend saving your setup checklist on your phone—when hosting gets easier each time, your backyard cinema becomes the kind of summer ritual that truly brings people together.
Final Thoughts
I find that hosting an outdoor movie night is one of those projects that looks impressive, but feels surprisingly doable once you break it into simple zones: screen, seating, lighting, and snacks. When I design this look with a PVC screen, blanket lounge, string lights, and a popcorn bar, it instantly turns an ordinary evening into something people talk about for weeks.
From my experience, the biggest wins come from the little comforts—extra blankets, clear walkways, a tidy cord plan, and a snack setup that doesn’t create a bottleneck. If you try just a few ideas from this list and keep the rest simple, you’ll still end up with a backyard movie setup that feels warm, welcoming, and genuinely fun.
I always recommend starting small, testing your setup at dusk, and then letting yourself enjoy it. Once you host your first backyard cinema night, you’ll realize you didn’t just plan a movie—you created a summer memory.
Products I Recommend for This Project
Here are some of my favourite products to help you bring these ideas to life:
- Elite Screens Yard Master 2 Outdoor Projector Screen — I like it for a fast, polished screen option when you don’t want to fuss with fabric tension.
- POWER PRACTICAL Portable Projector (The Projector by POWER PRACTICAL) — It’s an easy entry-level projector for casual backyard cinema nights and simple streaming setups.
- JBL Charge 5 Portable Bluetooth Speaker — I recommend it for clear dialogue and enough battery life to get through a full movie without stress.
- Brightech Ambience Pro Waterproof Outdoor String Lights — These give that warm, cozy glow and hold up well outside for repeated summer entertaining ideas.
- Gorilla Grip Original Waterproof Outdoor Picnic Blanket — I love it as a durable base layer for blanket seating that stays comfortable on grass.