This post contains affiliate links. As an Amazon Associate, I earn from qualifying purchases at no extra cost to you.
Nothing makes a kitchen feel more “summer” than walking in barefoot, sunlight bouncing off tile, and grabbing a fistful of basil without thinking. A well-designed herb setup isn’t a craft project—it’s a lifestyle upgrade. It turns weeknight cooking into something closer to the way indoor-outdoor living feels: casual, fresh, and always within reach.
This guide pulls together indoor herb wall and kitchen herb garden ideas that actually work in a real kitchen—steam, splatter, and all. You’ll get layout options, material and finish suggestions, and small habits that make growing herbs indoors feel easy instead of fussy.
This is perfect for anyone who wants a fresh herb kitchen vibe but doesn’t want planters crowding the counters or pots dying in a dark corner.
Inside, you’ll see everything from a clean grid of magnetic pots on tile to a rail-mounted vertical herb garden, plus smart lighting, watering, and labeling upgrades that keep it feeling calm day to day.
Below are 25 Indoor Herb Wall & Kitchen Garden Ideas that make your kitchen feel lighter, more functional, and quietly luxurious—one snip at a time.
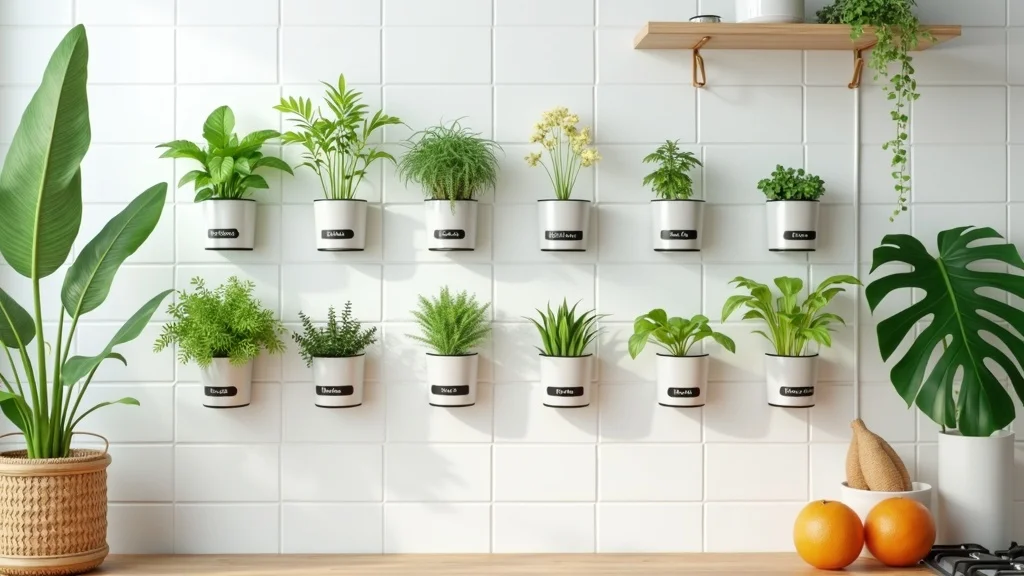
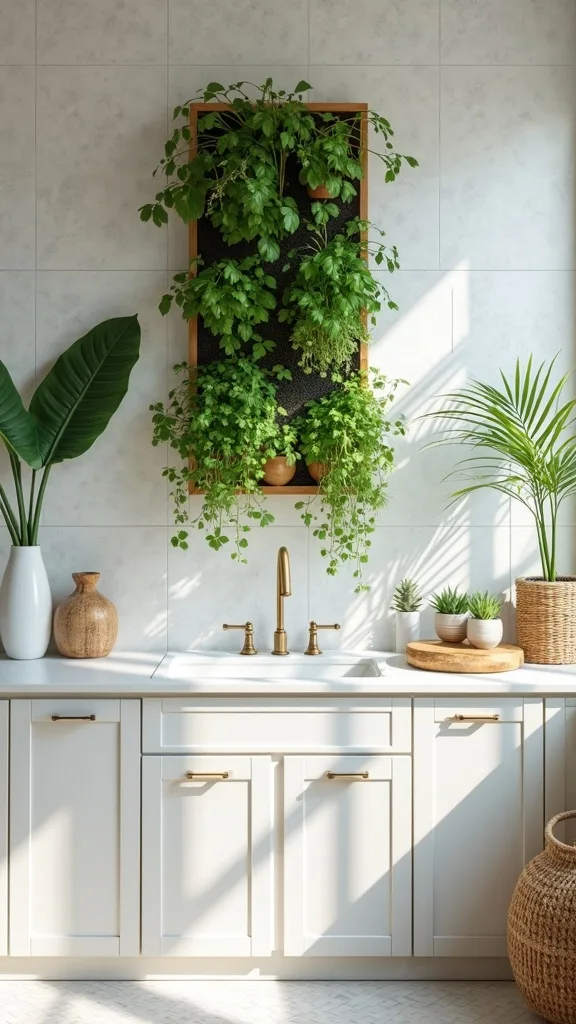
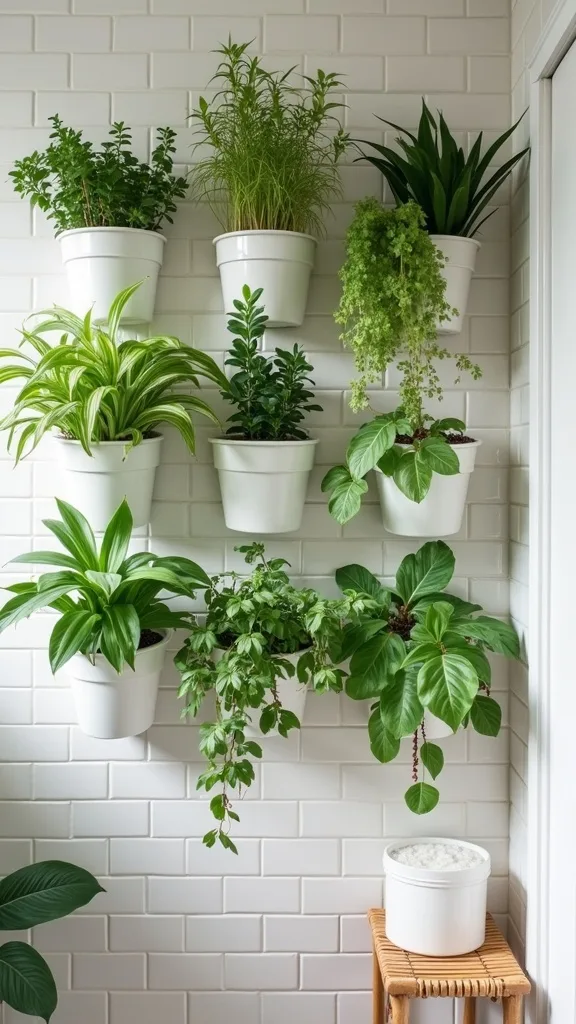
1. Grid of 12 magnetic herb pots on white tile with chalkboard labels
This is the look that feels instantly “pulled together”: a tidy grid that reads like part of the backsplash, not extra clutter. It works because the herbs live in your line of sight—so you actually use them—and the repetition calms the whole wall down.
Map out a 3×4 grid with painter’s tape first, keeping the bottom row about 6–8 inches above the counter so it doesn’t fight your outlets. Use magnetic pots made for tile or add a slim metal panel (painted to match grout) if your tile isn’t magnetic-friendly. Keep the “grab zone” herbs—basil, cilantro, parsley—at center height where your hand naturally lands.
Go for matte black pots with chalkboard labels on bright white tile for a crisp, modern contrast, or brushed stainless for a more appliance-forward kitchen. Pair with a waterproof paint marker if chalk smears in humidity.
Pro tip: dedicate one pot as a “starter” slot for new cuttings so the grid always looks full—like your kitchen runs itself.
2. Where should an indoor herb wall go in a real kitchen?
The best placement is the one you’ll touch every day, not the one that feels like a design statement. This works because herbs become part of your cooking flow—rinse, chop, snip—without crossing the room or dripping water across the floor.
Anchor your setup between the sink and your main prep zone, ideally within two steps of the cutting board. If you have a window, place the wall on the adjacent backsplash so the plants catch side light without blocking the view. In a galley kitchen, tuck it on the shorter end wall so it doesn’t compete with upper cabinets.
Finishes matter here: if your backsplash is glossy, choose matte containers so the wall doesn’t glare at you at night. If your counters are warm (butcher block, oak), soften the look with cream labels instead of stark white.
Pro tip: avoid placing herbs directly behind the cooktop—grease film is real, and it turns “fresh” into “sticky” fast.
3. How do you add a grow light without making the kitchen feel clinical?
Lighting is the difference between herbs that thrive and herbs that limp along. The trick is making it feel like part of the kitchen—like under-cabinet lighting—so your space still reads warm and livable.
Look for a slim LED bar you can mount under an upper cabinet or on a floating shelf above the herbs. Set it on a timer for 10–12 hours so you’re not thinking about it daily. Choose warm white light (2700K–3000K — the cosy, yellowish tone you see in most homes) so the wall glows softly at dinner instead of looking like a lab bench.
Black or brushed aluminum fixtures disappear against most hardware finishes. For a cleaner look, run the cord in a paintable cable channel the same color as your wall or tile trim.
Pro tip: place the light 8–12 inches above the leaves; close enough to help, far enough that basil doesn’t sulk.
4. What herbs are easiest for growing herbs indoors year-round?
The easiest herbs are the ones that forgive you when life gets busy. They work indoors because they tolerate container life, bounce back after pruning, and don’t demand perfect sun all day.
Start with basil, mint (in its own pot), chives, parsley, thyme, and oregano. Add rosemary only if you have strong light and patience—rosemary indoors is a mood. Keep one “fast win” herb like basil in the most convenient spot, and place slower growers like thyme higher where you’ll still see them but won’t overwater them.
Choose uniform pots for a calmer wall, but vary leaf texture for that subtle, natural richness. A neutral pot palette—matte black, warm white, or terracotta—keeps the greenery doing the talking.
Pro tip: skip cilantro if you hate heartbreak; it bolts quickly and makes people think they’re bad at plants when they’re not.
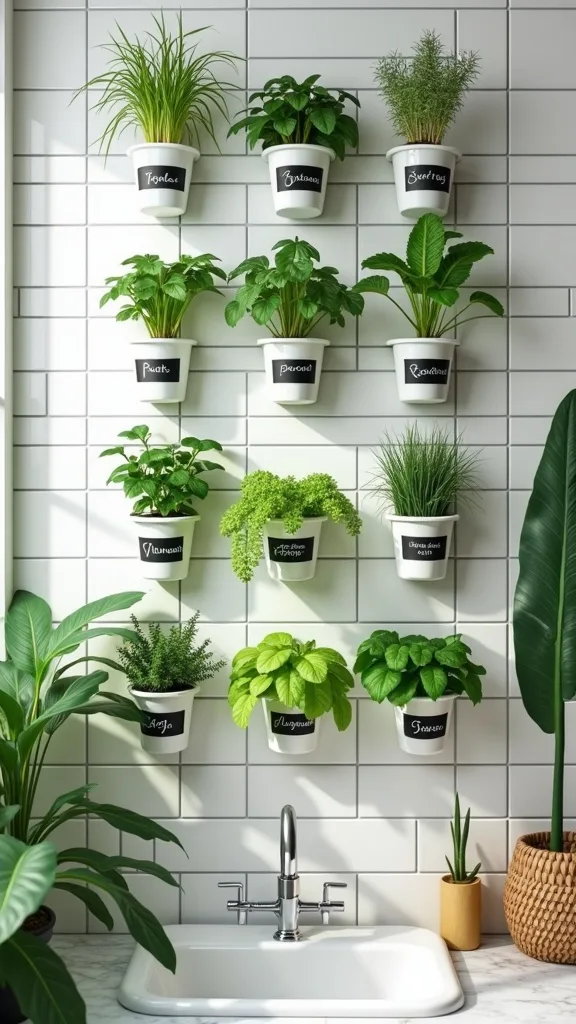
5. How do you keep a kitchen herb garden from looking cluttered?
Clutter usually isn’t about quantity—it’s about mismatched shapes and visual noise. This idea works because it treats herbs like a designed collection: consistent containers, intentional spacing, and one clear “system.”
Pick one format and commit: all magnetic pots, all rail planters, or all shelf pots. Keep labels consistent—same font, same placement, same color—so your eye rests. If you’re doing a counter-based kitchen herb garden, corral everything on a tray that’s at least 14″ long so it reads as one object, not a lineup of random pots.
Materials that feel elevated day to day: powder-coated steel, matte ceramic, sealed oak, and stone trays that can handle spills. Avoid glossy plastic in a bright kitchen; it always looks a little temporary.
Pro tip: leave 15–20% “air” in the arrangement—an empty slot or two makes the whole thing feel intentional.
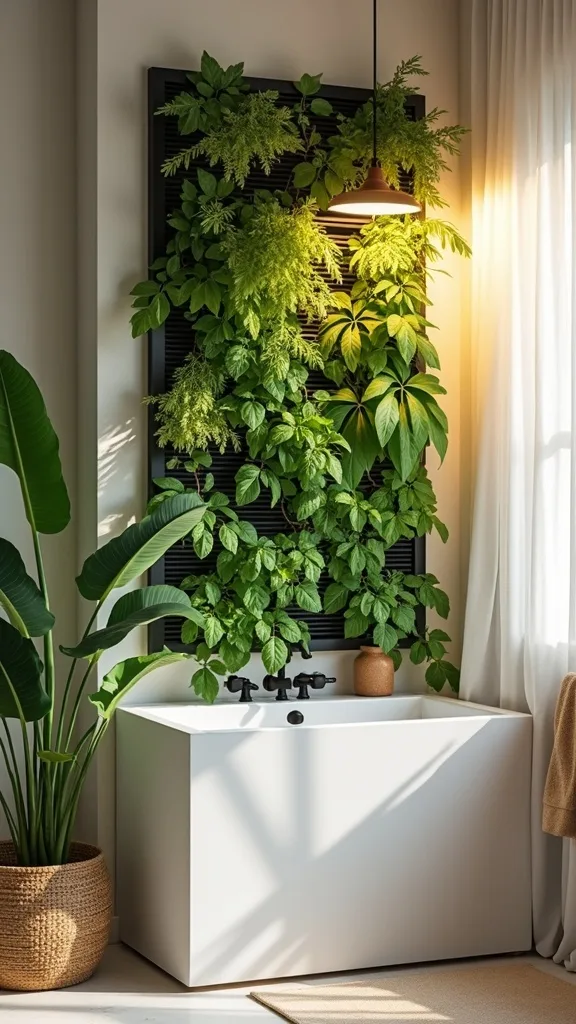
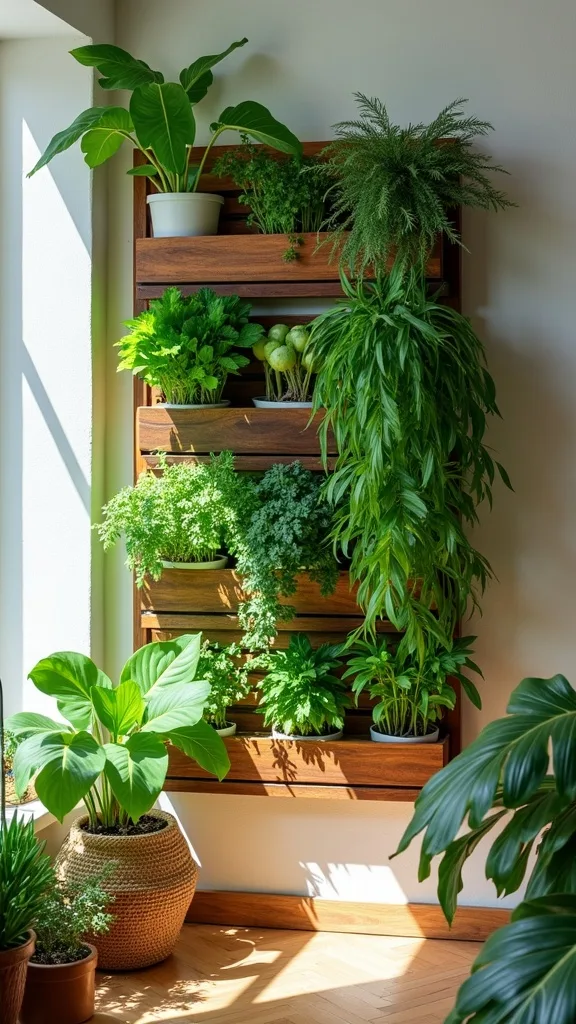
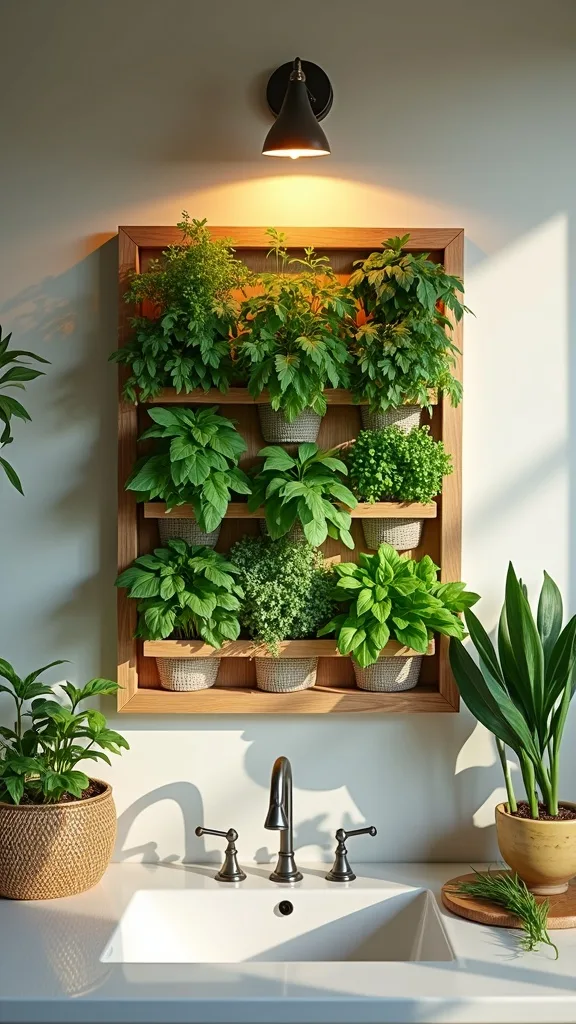
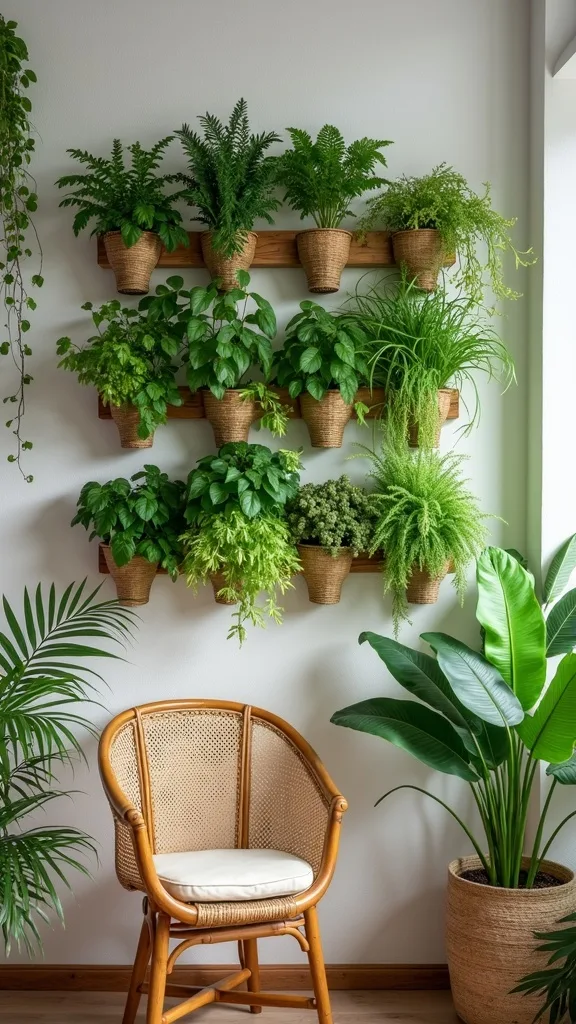
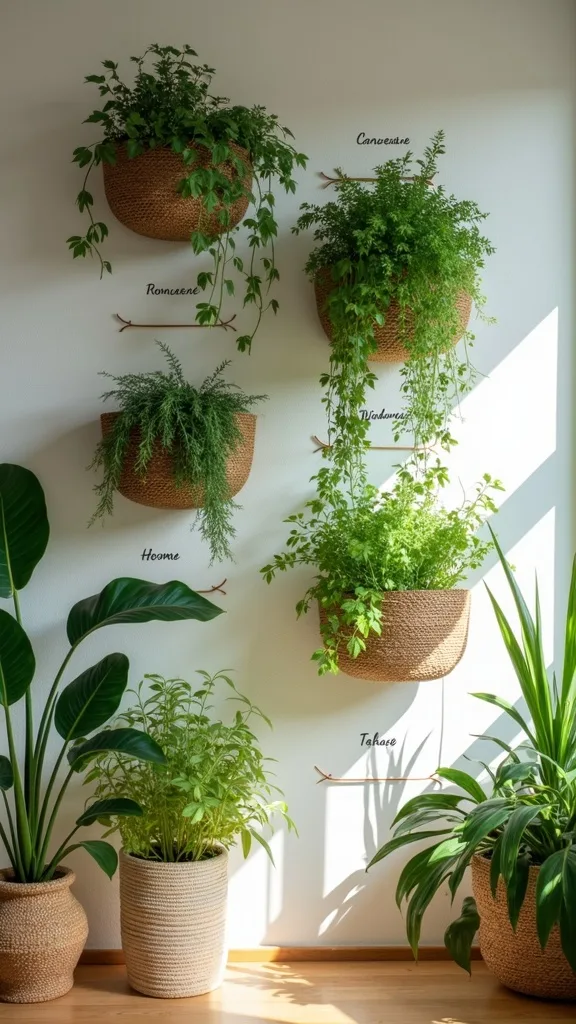
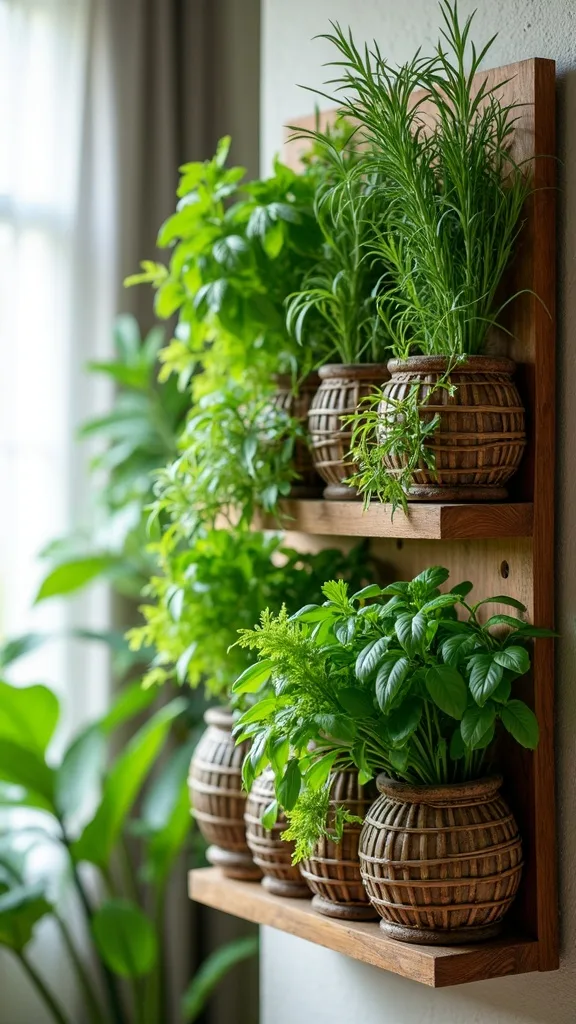
6. Can you build a vertical herb garden with a rail system?
A rail system is the quiet luxury option: sleek, flexible, and easy to clean. It works because you can slide planters around as herbs grow, and you’re not committing to a single fixed grid forever.
Install a stainless or black rail into studs (or use heavy-duty anchors on tile). Add hanging cups or mini planters with drainage plugs you can close when you’re watering in place. Keep the rail at eye level so you can check leaves for dryness without thinking, and space planters so air can move between them.
Pair the rail with a matching faucet finish—brushed nickel with brushed nickel, matte black with matte black—for that “designed” feeling. Add simple tag labels instead of big signs so the rail stays minimal.
Pro tip: run a second rail below for scissors and a tiny brush—tools hidden in plain sight make the system feel effortless.
7. What’s the best way to water wall-mounted herbs without making a mess?
Watering is where most wall gardens fall apart in real life. This works when you design for the messy moment—because kitchens are for living, not tiptoeing around drip lines.
Use pots with removable inner liners so you can lift, water at the sink, let them drain for 60 seconds, and pop them back in. If your setup is fixed, add a slim drip tray shelf under the lowest row—something you can wipe in one pass. Water in the morning so leaves dry out by evening; that simple timing cuts down on gnats and mildew.
Look for self-watering inserts if you travel or forget. Pair them with a clean, matte tray (stone composite or sealed wood) that can handle the occasional overflow.
Pro tip: avoid misting as your main watering method—it feels fancy, but it doesn’t hydrate roots and can invite fungus in a warm kitchen.
8. How do you choose the right pots and soil for indoor herbs?
Indoor herbs want two things: drainage and breathing room. This works when containers and soil team up so roots don’t sit in water, which is the fastest way to turn a fresh herb kitchen into a sad one.
Choose 3″–4″ pots for most herbs; go 5″–6″ for basil if you want it to stay lush. Make sure every pot has a drainage solution—holes plus a liner, or a self-watering base. Use an indoor potting mix amended with perlite for airflow; it keeps the soil lighter and less swampy after watering.
For finishes, matte ceramic feels substantial and wipes clean. If you love terracotta, seal the outside so it doesn’t leave a dusty ring on tile or shelves. Keep colors tight: warm white, charcoal, or natural clay.
Pro tip: avoid garden soil from outdoors—it compacts indoors and invites pests, even if it looks “natural.”
Cost & Materials Estimate
A realistic DIY kitchen herb wall setup usually lands between $80 and $220 depending on pots, lighting, and whether you add a rail or shelf.
| Item | Estimated Cost | Where to Buy |
|---|---|---|
| Set of 12 magnetic herb pots (3″–4″) | $45–$110 | Amazon |
| LED grow light bar with timer | $22–$55 | Amazon |
| Indoor potting mix + perlite (small bags) | $14–$28 | Home Depot |
| Chalkboard labels + chalk marker set | $8–$18 | Amazon |
| Herb snips + small watering can | $16–$38 | IKEA |
Total estimated cost: $105–$249 Save by skipping the fancy containers at first and splurge on the light and removable liners—those two choices make the biggest day-to-day difference.
9. Can you grow herbs indoors in a kitchen with low natural light?
Yes, but you have to be honest about the light you actually get. This works when you treat light like an appliance—something you add intentionally—so the plants aren’t trying to survive on vibes.
If your window is north-facing or shaded, use a slim grow bar mounted under a cabinet or shelf. Put the herbs that tolerate lower light (mint, chives, parsley) in the dimmer spots, and reserve the brightest zone for basil. Set a timer so the routine is automatic; consistency matters more than intensity for most home setups.
Keep the overall look soft with warm white light (2700K–3000K — the cosy, yellowish tone you see in most homes) and a fixture finish that matches your hardware. Add frosted diffusers if the LEDs feel harsh.
Pro tip: avoid placing herbs on top of the fridge “for light”—the heat cycles and dryness up there are brutal.
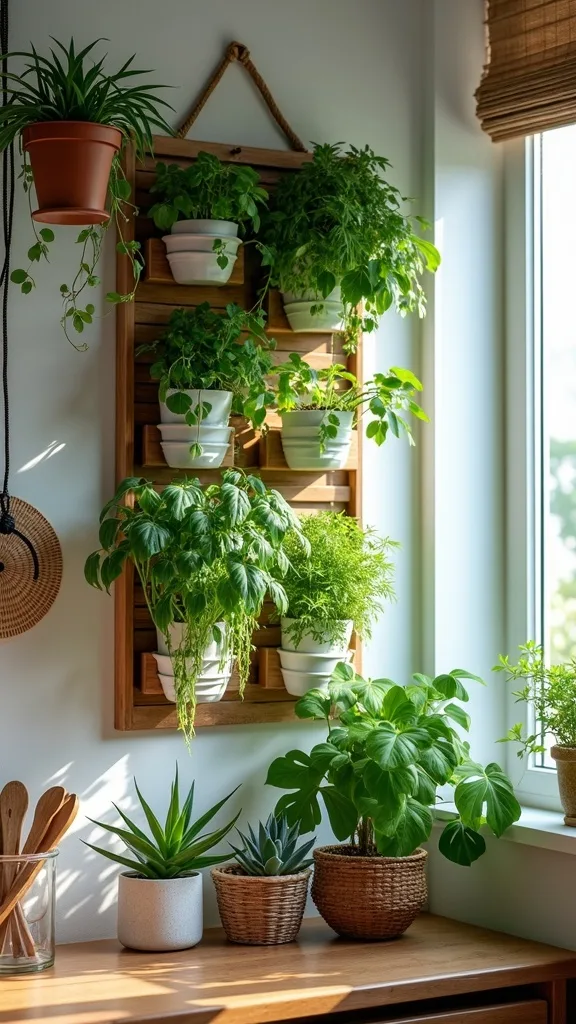
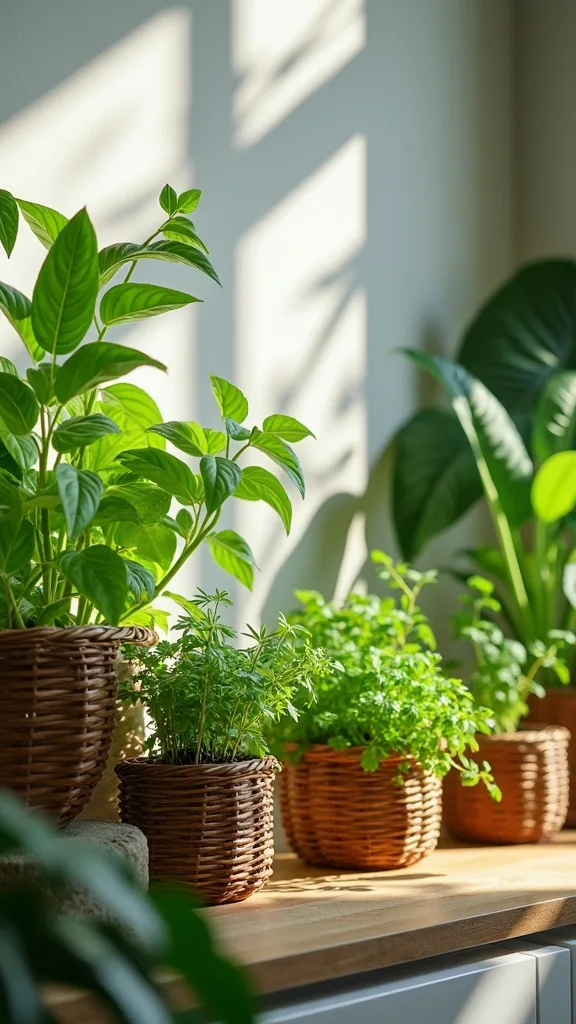
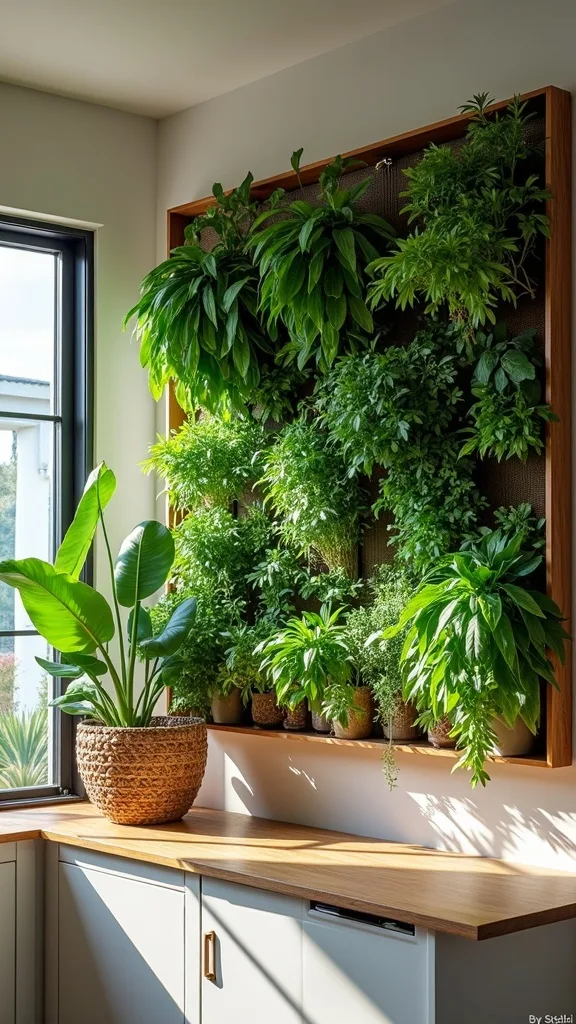
10. How do you design a fresh herb kitchen zone next to the cutting board?
This idea is about rhythm: chop, snip, toss, taste. It works because it makes herbs part of cooking, not a separate plant chore you remember once a week.
Set up a small “herb station” with a wall-mounted rack or a narrow shelf, plus a dedicated pair of herb scissors and a tiny bowl for stems. Keep it close enough that you can snip with one hand while the other holds a spoon. If you’re short on wall space, use a vertical herb garden tower on the counter’s far corner and rotate it toward the light daily.
Materials that feel good here: a marble or stone trivet as a base, matte black tools, and a sealed wood board that can handle lemon juice and olive oil. Keep labels subtle so the zone stays calm.
Pro tip: add a small compost crock under the station—cleanup gets faster, and the whole kitchen feels more “in flow.”
11. What herbs should you keep away from each other indoors?
Not all herbs want the same lifestyle. This works because separating a few key plants prevents the classic indoor herb wall problem: one pot thriving while another slowly gives up.
Keep mint alone—always. It grows aggressively and will crowd neighbors if you combine planters. Group Mediterranean herbs (thyme, oregano, rosemary) together because they like drier soil, and keep softer herbs (basil, parsley, cilantro) in a separate zone where you water a bit more often. If you’re using a grid, assign rows by watering needs so you’re not guessing every time.
Use different label colors to make care intuitive: white labels for “more water”, gray for “less water.” It’s subtle, but your future self will thank you.
Pro tip: avoid mixed “herb bowls” from the store for wall gardens—they look convenient, but the plants usually want different care and one will dominate.
12. How do you keep herbs from getting leggy indoors?
Leggy herbs are usually asking for two things: more light and more harvesting. This works because regular trimming tells the plant to branch, which gives you that lush, chef-y look you actually want in a kitchen herb garden.
Place the light source above the center of the plant, not off to the side, and rotate pots weekly if they’re on a shelf. Harvest basil from the top—snip above a pair of leaves—so it splits into two stems. For parsley and cilantro, cut the outer stems at the base to encourage new growth from the middle.
Pair your setup with a small pair of snips you keep on a hook nearby; if tools are hidden in a drawer, you’ll skip the quick trims that keep plants dense. Choose pots that aren’t too small—roots need room to support foliage.
Pro tip: if one plant is stretching, move it to the “premium light” spot for a week like a little rehab retreat.
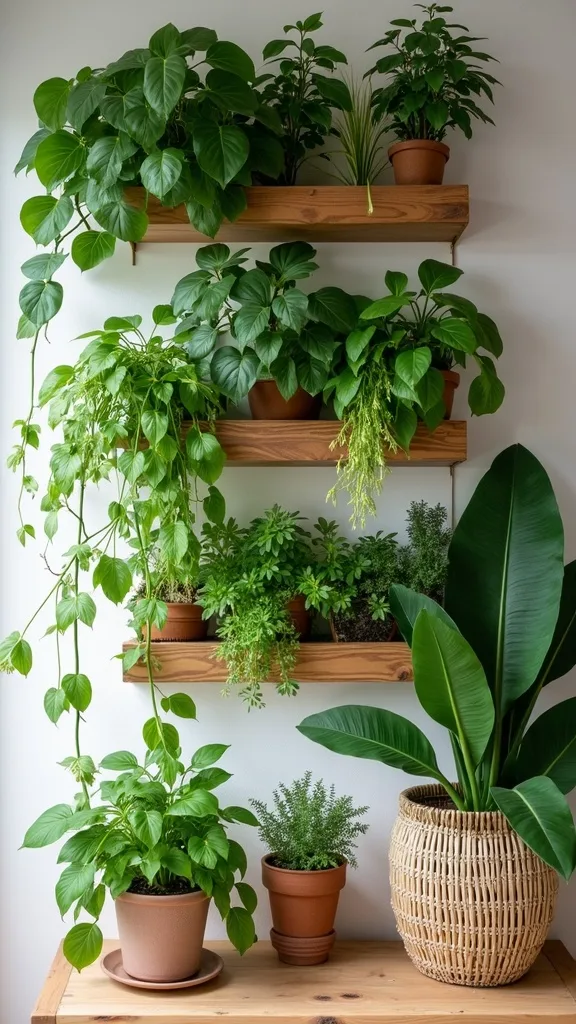
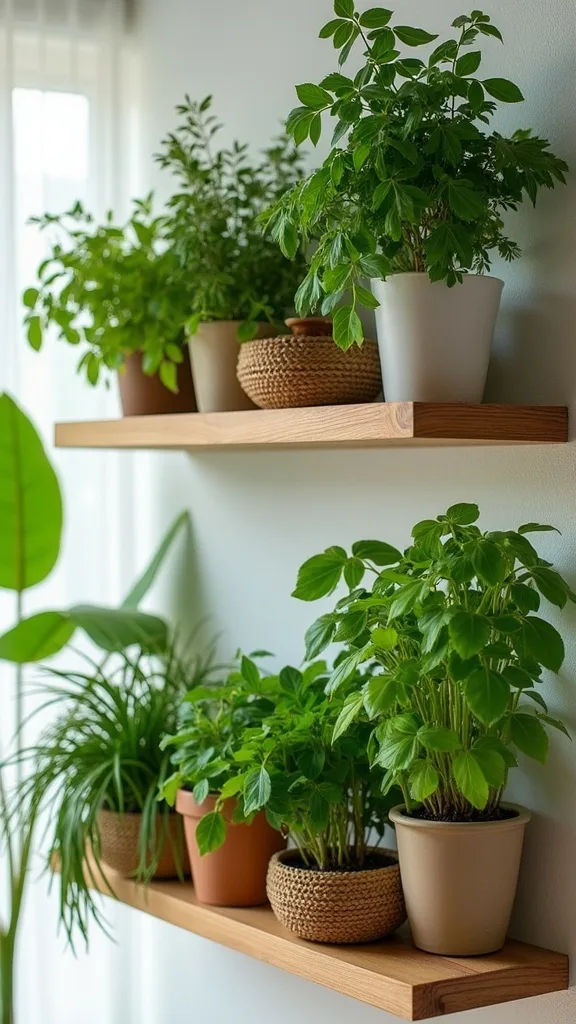
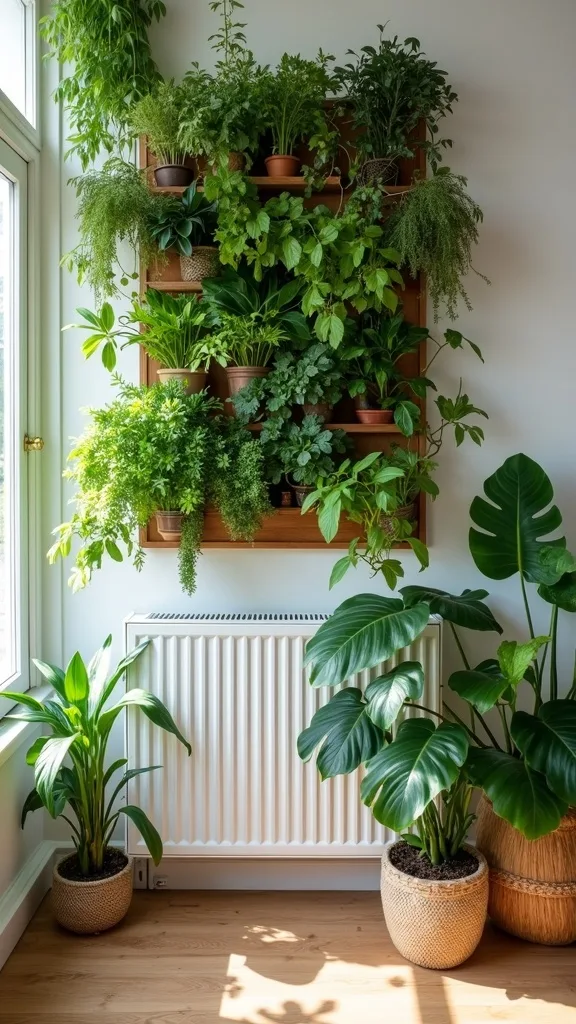
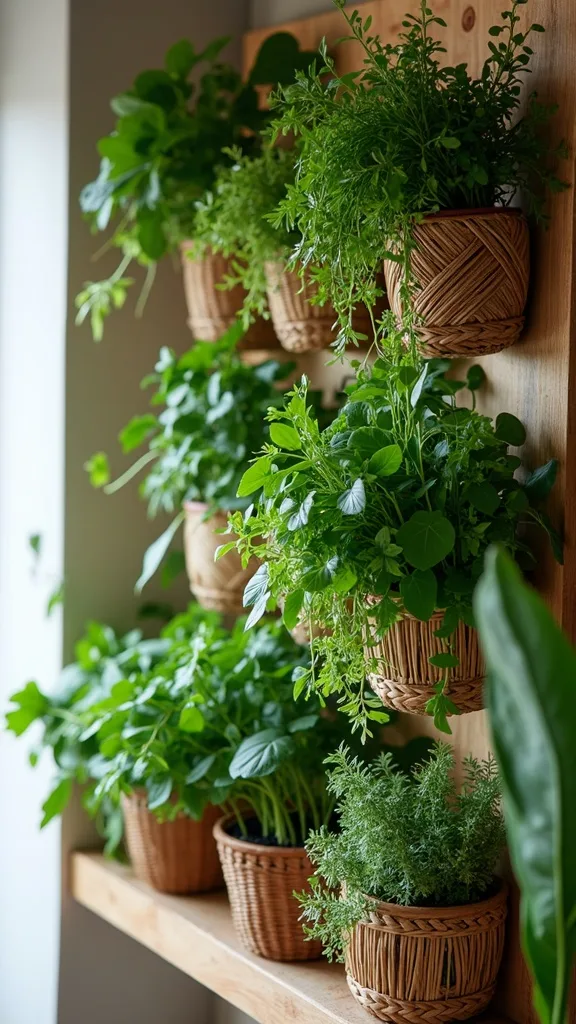
13. Is a shelf-based kitchen herb garden better than wall-mounted?
Shelves are the most forgiving option, especially in rentals. They work because you can adjust spacing, swap plants easily, and water without performing a balancing act on a ladder.
Install a 4″–6″ deep floating shelf over the backsplash (anchored properly) and line it with matching pots on a waterproof tray. Keep the shelf low enough that you can pinch leaves while you’re stirring a pot. If you have uppers, mount a light under the cabinet above the shelf so the whole zone feels integrated.
For a relaxed California feel, try a white oak shelf with a satin seal, paired with matte ceramic pots and small black label stakes. It’s warm, clean, and not precious.
Pro tip: avoid shelves deeper than 6″ for herbs—too deep means plants get pushed back, forgotten, and slowly turn into décor instead of dinner.
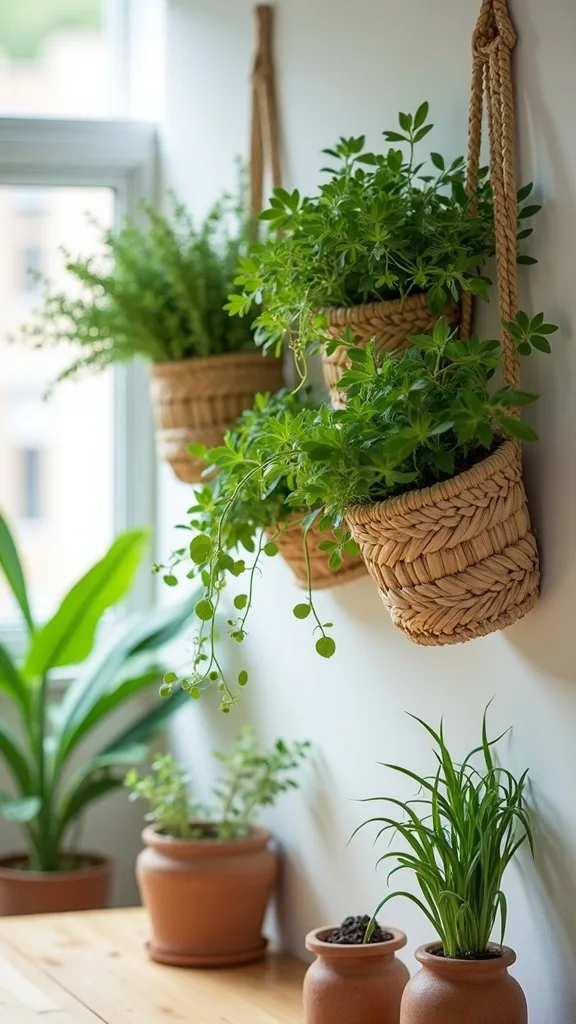
14. How do you make an indoor herb wall work in a small kitchen?
Small kitchens don’t need fewer herbs—they need better vertical decisions. This works because it frees the counter and keeps your cooking zone open, which makes the whole room feel bigger day to day.
Choose one tight footprint: a 12″ wide rail with three planters, a 2×3 magnetic grid, or a narrow corner shelf. Keep it near the sink so watering doesn’t become a project. If your backsplash is busy, go minimalist with identical pots and small, clean labels so the wall doesn’t compete with patterns.
In tight spaces, finishes should be calm: matte white pots on white tile, or tone-on-tone beige on warm stone. Let the green be the color. Add a slim light strip if the window is limited.
Pro tip: avoid hanging planters that swing into your workspace—nothing kills the vibe like bumping thyme while draining pasta.
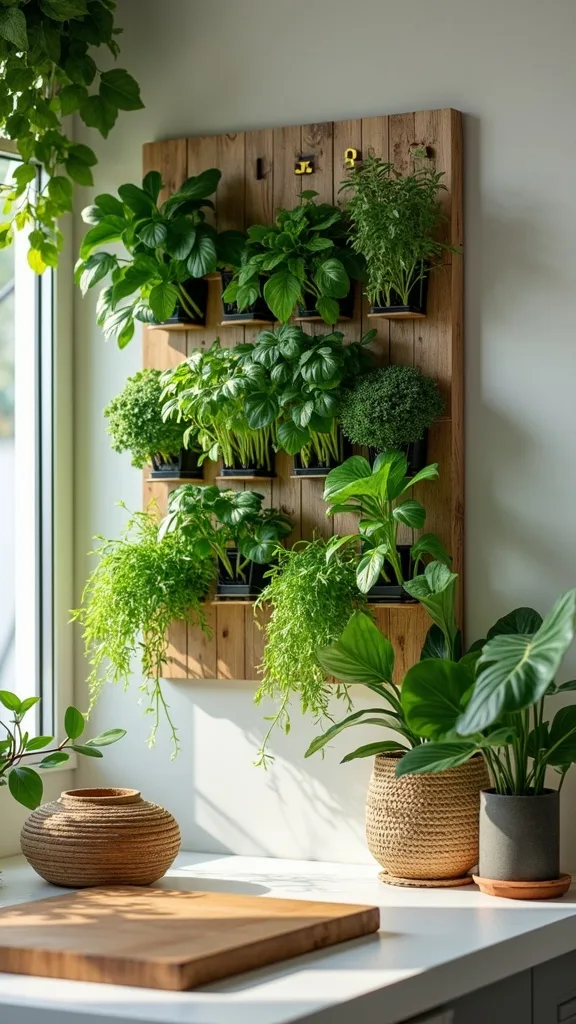
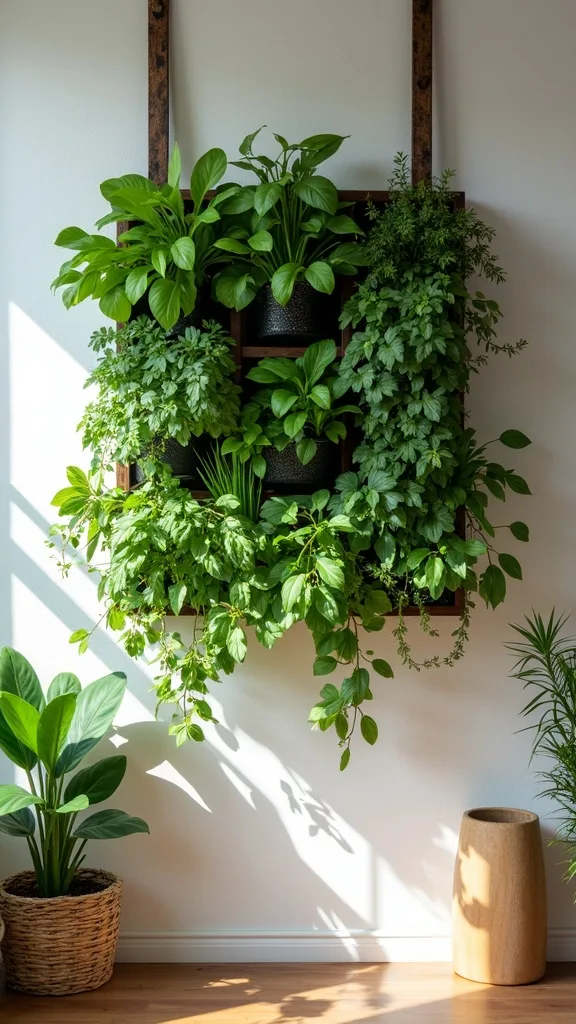
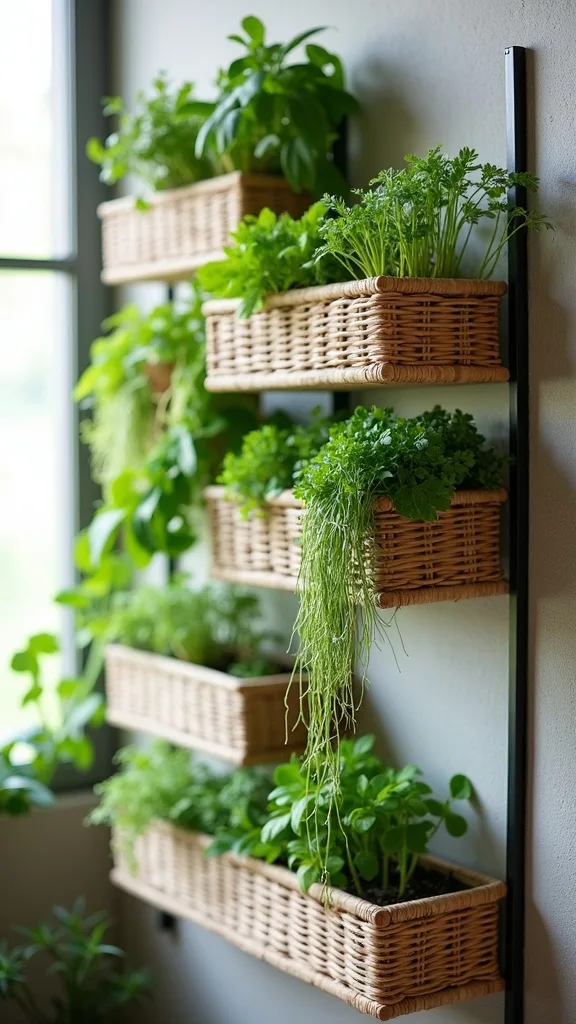
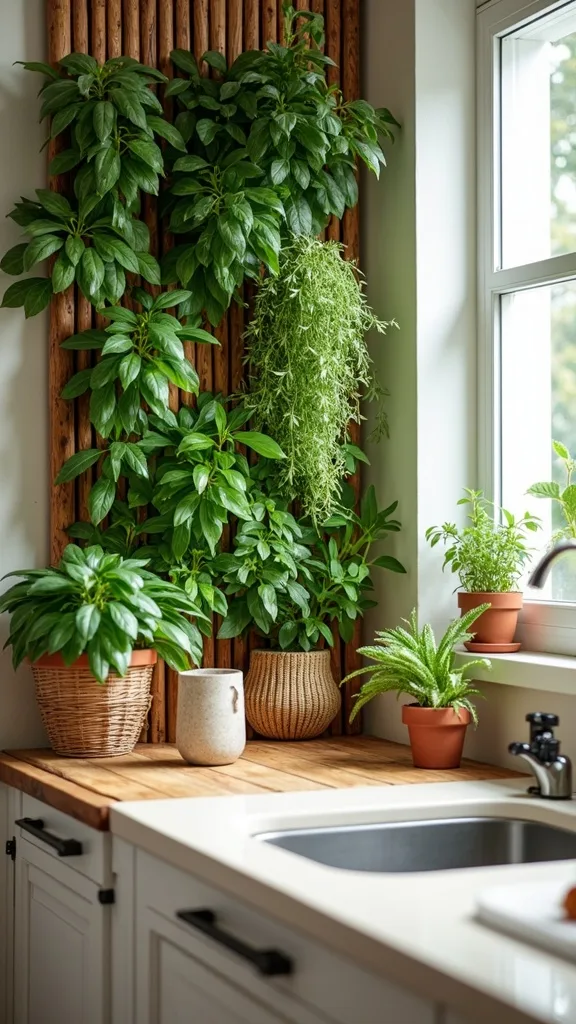
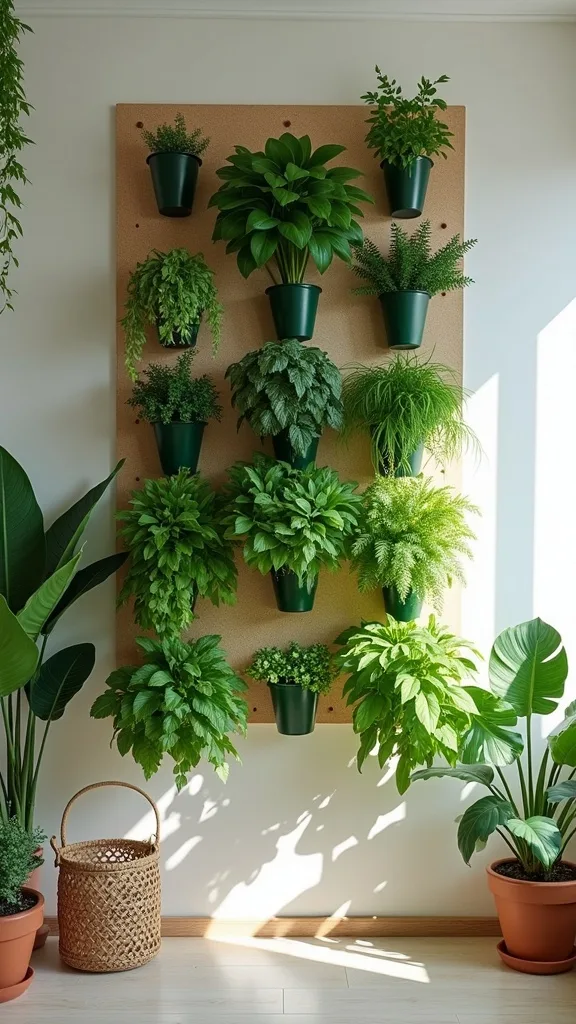
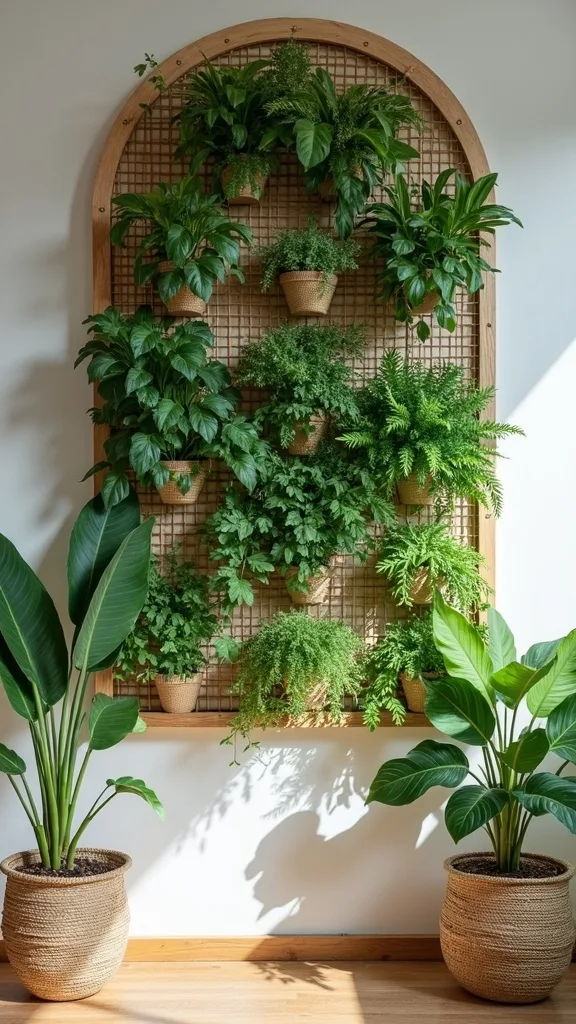
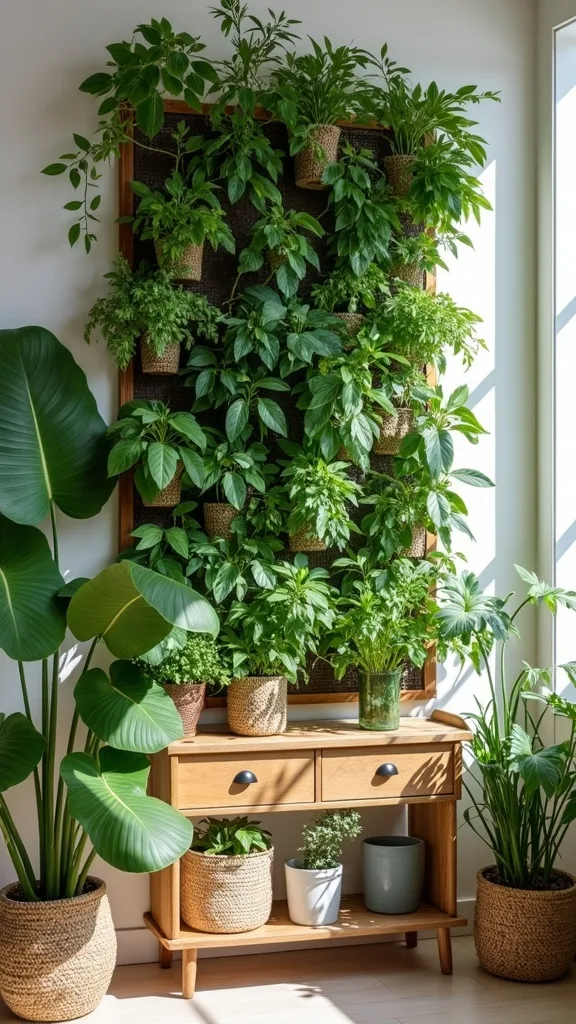
15. Can you use pegboard for a DIY vertical herb garden?
Pegboard is the flexible, DIY-friendly answer when you want a vertical herb garden that evolves. It works because you can rearrange hooks, add tools, and keep the whole system looking intentional as your needs change.
Mount a sealed pegboard panel on an open wall or the side of a cabinet bank. Use small planters with hooks and add a drip-catching shelf beneath the lowest row. Keep heavier pots closer to the bottom so the panel feels stable. If you’re near a window, angle the panel so plants aren’t shaded by upper cabinets.
Go for painted pegboard in a soft warm white or muted gray-green, paired with black hooks and simple metal cups. It feels airy, not utilitarian. Seal the board so kitchen humidity doesn’t warp it.
Pro tip: add one “blank zone” for scissors and twine—when tools have a home, the garden stays effortless instead of chaotic.
16. What’s the best backsplash material behind herbs (tile, stone, paint)?
The surface behind your herbs affects everything: cleaning, light bounce, and whether the whole setup feels crisp or constantly grimy. This works when the backsplash is easy to wipe and reflective enough to lift the greenery without glare.
White or off-white ceramic tile is the classic move because it handles splashes and makes plants pop. If you have natural stone, seal it well and keep pots on a rail or shelf so moisture doesn’t sit against the surface. Painted drywall can work too, but only if you use a scrubbable, moisture-resistant finish and keep a tray under pots.
For a subtle upgrade, choose soft matte grout in a warm gray; it hides tiny stains better than bright white. If you love a glossy tile, balance it with matte pots and labels so it doesn’t feel shiny and busy.
Pro tip: avoid untreated porous stone behind a watering zone—one season in, it’ll tell on you.
17. How do you label herbs so it looks elevated (not crafty)?
Labels can either make your herb wall feel curated or like a school project. This works because clean typography and consistent placement bring the same calm you get from good cabinetry lines.
Choose one labeling method: chalkboard stickers, small acrylic tags, or embossed tape. Place labels in the same spot on every pot—bottom center is usually the cleanest. If you cook a lot, label both the common name and a tiny note like “pinch often” for basil or “dry side” for thyme.
Keep it monochrome: white on black, black on clear, or warm gray on cream. Pair with a fine-tip chalk marker instead of dusty chalk; it stays crisp even when the kitchen gets steamy.
Pro tip: avoid oversized script fonts—hard to read quickly, and the whole point is speed while you’re cooking.
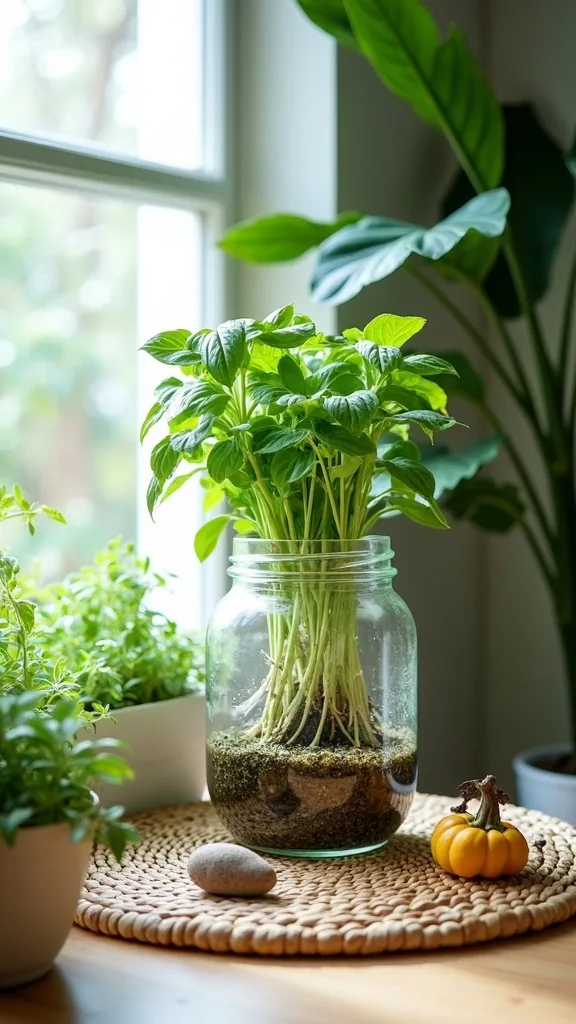
18. Can you propagate herbs in water as part of the display?
Propagation is the most satisfying little kitchen ritual, and it looks quietly luxe when it’s done with restraint. This works because you’re growing new plants while keeping the counter feeling light and intentional.
Use two or three small glass bottles (not twelve) and keep them near a window. Drop in basil or mint cuttings, change the water every few days, and move rooted cuttings into soil when roots hit about 2″ long. Keep the bottles on a small tray so water rings don’t become your new “patina.”
Choose clear ribbed glass or smoky gray bottles for a more elevated look than random jars. Pair with a brushed metal tray if your kitchen leans modern, or a sealed oak tray if it’s warmer and more organic.
Pro tip: avoid leaving cuttings in water forever—eventually they weaken; soil is where they build real strength.
19. How do you prevent fungus gnats when growing herbs indoors?
Gnats are the uninvited guests that make people quit indoor herbs. This works because it tackles the real cause—consistently damp soil—without turning your kitchen into a pest-control project.
Let the top inch of soil dry between waterings for most herbs (basil likes a bit more moisture, but still not soggy). Bottom-water pots in the sink when possible, then let them drain fully before returning them to the wall. If you’re already seeing gnats, add yellow sticky traps tucked behind pots and sprinkle a thin layer of sand on top of the soil to discourage egg-laying.
Use a fast-draining potting mix and containers with real drainage. Avoid decorative cachepots with no airflow unless there’s a removable liner inside.
Pro tip: don’t overcorrect with constant spraying—keeping the soil balanced is what makes the whole setup feel clean and easy again.
20. What’s a renter-friendly indoor herb wall option that won’t damage tile?
Renters deserve fresh herbs without the landlord stress. This works because it’s modular—easy up, easy down—and still looks intentional, not temporary.
Use a freestanding slim shelf that tucks against the backsplash, or a tension rod system between counter and upper cabinet (if your layout allows). Another solid option: a metal panel that leans on the counter and is stabilized with discreet feet, then use magnets or hooks for pots. Keep watering simple by using removable liners so you can carry pots to the sink.
Choose finishes that blend with appliances: brushed stainless or matte black. Add subtle labels so it reads like part of the kitchen’s function, not an add-on.
Pro tip: avoid adhesive hooks on textured tile—humidity plus grout lines can make them fail at the worst possible moment.
21. How can you blend herbs with decor without losing function?
The goal isn’t to “style” herbs—it’s to let them live naturally alongside your everyday pieces. This works because it keeps the kitchen feeling personal and lived-in, not staged.
Pair your herb zone with one or two supporting elements: a small wood bowl for lemons, a stone salt cellar, or a linen towel on a hook. Keep the palette consistent so the herbs feel like the freshest color in the room. If you love art, hang a small framed print above the herb rail to make it feel like a true wall moment.
Materials that play well together: natural linen, sealed oak, matte ceramic, and brushed metal. Avoid too many competing textures; let the leaves be the movement.
Pro tip: keep one empty hook or a little open space—function needs breathing room, and that’s what makes the whole setup feel luxe.
22. What’s the best way to harvest herbs so they keep producing?
Harvesting is the secret to a thriving kitchen herb garden. This works because cutting encourages branching—more stems, more leaves, more of that just-picked flavor in summer cooking.
For basil, snip above a leaf pair so it splits and fills out. For thyme and oregano, trim a few sprigs from different areas rather than scalping one side. For chives, cut near the base and let them regrow like a little green fountain. Harvest often, even if it’s just a pinch into scrambled eggs.
Keep herb scissors on a hook and a small bowl nearby so it’s a one-step habit. A dedicated cutting board for herbs (even a small one) keeps flavors clean and makes the ritual feel easy.
Pro tip: avoid taking more than about one-third of a plant at once—leave it enough leaf to recharge, and it’ll keep gifting you all season.
23. Can you combine edible herbs with microgreens for summer cooking?
Microgreens bring that restaurant finish to everyday meals, and they fit the indoor-outdoor vibe without needing a yard. This works because microgreens grow fast indoors and make even simple food feel fresh and layered.
Use a shallow tray on a sunny sill or under a small light, and sow microgreens like radish, broccoli, or pea shoots. Keep them separate from your wall herbs so watering stays simple. Harvest with scissors when they’re a couple inches tall and toss onto tacos, grain bowls, and grilled corn salads.
Choose a low-profile black tray or a warm white one that blends into the kitchen. Keep it on a washable mat so you can lift and clean in one move.
Pro tip: avoid putting microgreen trays near the stove—heat swings dry them out fast and they’ll taste bitter instead of bright.
24. What should you avoid when creating a vertical herb garden in the kitchen?
The biggest mistake is treating the kitchen like a greenhouse. This works when you design for real kitchen conditions—steam, grease, and the fact that you want to wipe everything down quickly.
Avoid placing your vertical herb garden right next to the cooktop or behind a toaster oven where heat blasts the leaves. Skip systems that require you to water on the wall with no drainage plan; you’ll resent it the first time water drips onto outlets or grout. And don’t choose containers that are hard to remove—if taking a pot down is annoying, you’ll stop caring for it.
Stick with removable planters, wipeable finishes, and a clear watering routine. Keep labels legible and the layout simple so it stays calm even when the sink is full.
Pro tip: the more “clever” the system, the more it needs maintenance—simple is what feels luxurious long-term.
25. How do you keep an indoor herb wall looking good through the whole summer?
Summer is when herbs should feel abundant, not stressful. This works because it’s a light routine: small check-ins, consistent trimming, and a setup that supports your real schedule.
Do a quick weekly reset: remove yellow leaves, rotate pots, and wipe the backsplash behind them. Refresh one pot every few weeks—swap in a new basil plant or replant parsley—so the wall stays full. If you’re leaving town, move the thirstiest herbs to the sink area and use self-watering inserts so they’re not dependent on a neighbor’s memory.
Keep a tiny watering can under the sink and a microfiber cloth in the same spot; convenience is what makes the habit stick. Choose pots that don’t show every water spot so the wall stays effortless.
Pro tip: treat it like fresh flowers—regular, small care that keeps the kitchen feeling alive and generous.
Final Thoughts
A great herb setup changes the way the kitchen feels at 6 p.m. It’s not just “plants on a wall”—it’s the ease of reaching up for thyme while the windows are open, the quiet confidence of cooking with what’s right there, and the calm of a surface that stays clear because your greenery went vertical.
Keep the choices grounded in real life: wipeable finishes, removable pots, warm lighting, and a layout that follows your sink-to-board workflow. When the system is simple, you use it more, waste less, and the whole room starts to feel like it’s working with you—like the indoor part of indoor-outdoor living.
Do one thing today: measure a 24″ x 18″ rectangle on your backsplash with painter’s tape, stand where you normally prep, and mark the exact spot your hand wants to reach for basil—then order the pots or rail that fits that zone.
What I’d Do Differently
When I first tried this, I mounted my herbs too close to the stove because it felt “chef-y” and convenient. Within two weeks, the leaves had a faint greasy film, and watering became a weird dance around hot burners and splatter zones. The worst part wasn’t even the cleaning—it was that I stopped snipping herbs because the whole area felt slightly grimy. The correct approach is to treat your herb setup like a prep tool, not a cooktop accessory: place it near the sink and cutting board, and keep at least a couple feet of distance from heavy heat and oil.
I also wish I’d started with fewer herbs and a clearer care pattern—one row that likes more water, one row that likes less—so I wasn’t guessing. If you’re on the fence, pick three herbs you actually cook with this week, give them the best light in your kitchen, and let momentum do the rest.
Products I Recommend for This Project
Here are some of my favourite products to help you bring these ideas to life:
- OGarden Smart Indoor Garden (Hydroponics Growing System) — A clean countertop option when you want dependable growth without soil mess.
- Barrina LED Grow Light Strip, Full Spectrum (4ft) — Easy to mount under cabinets or shelves, with strong, even coverage for indoor herbs.
- Fiskars Micro-Tip Pruning Snips — Makes quick, precise harvesting feel effortless, which keeps herbs bushy.
- Mr. Pen Chalk Markers (White) — Gives crisp, readable labels on chalkboard tags without dusty smudging.
- Miracle-Gro Indoor Potting Mix — Formulated for indoor containers, helping reduce soggy soil issues and gnats.