This post contains affiliate links. As an Amazon Associate, I earn from qualifying purchases at no extra cost to you.
Summer hits and suddenly the bathroom feels… loud. Sticky sunscreen bottles, a half-melted hair mask, three razors you swear you don’t own. The shower is supposed to be the cool-down zone, but the corner caddy is doing the most—swinging, dripping, and catching your sleeve like it’s personal.
This is your upgrade path: built-ins that feel tailored, not fussy. We’re talking niche placement that makes sense, tile that ages well, and little details (like rails and lighting) that turn daily rinse-offs into something closer to a spa reset.
This is perfect if you’re renovating, swapping tile, or you’re simply tired of battling bottles and want a cleaner kind of shower organization.
Inside you’ll find layout moves for small showers, design tricks for making a basic tile niche look custom, and a few “quiet luxury” upgrades that don’t require a full demo.
Below are 25 Shower Niche & Built-In Shelf Ideas that make your shower feel calmer, look intentional, and hold your everyday lineup without the clutter.
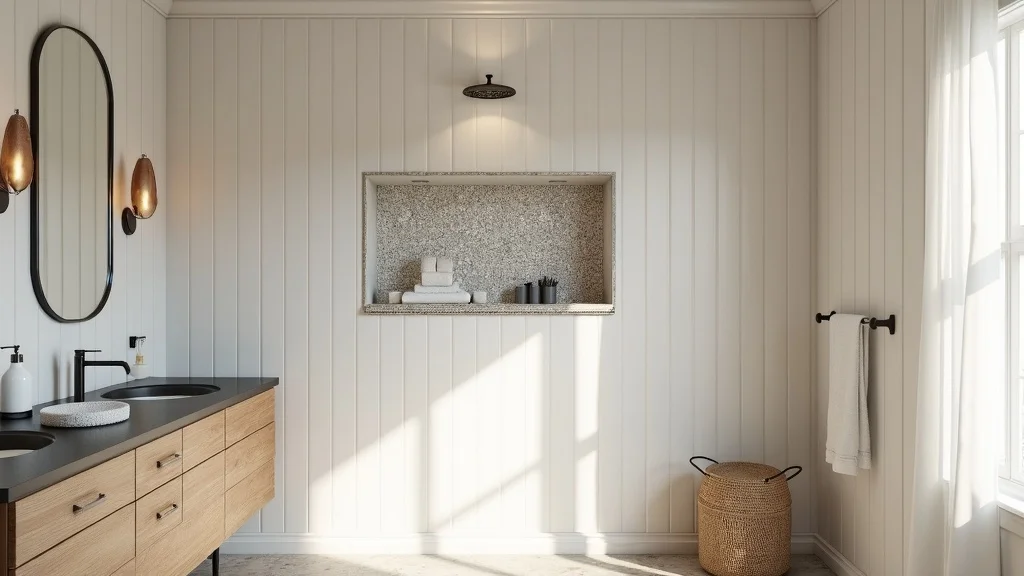
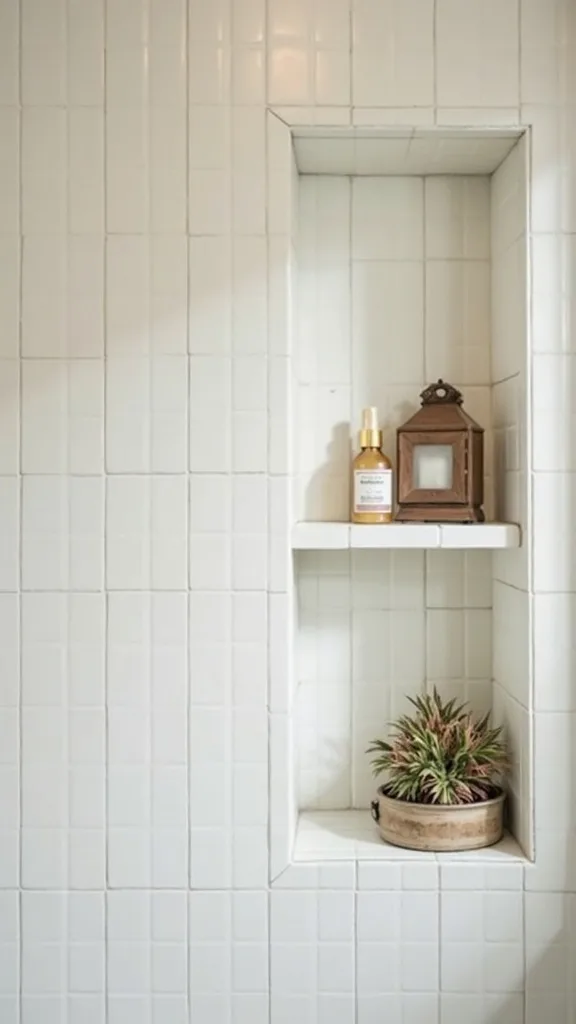
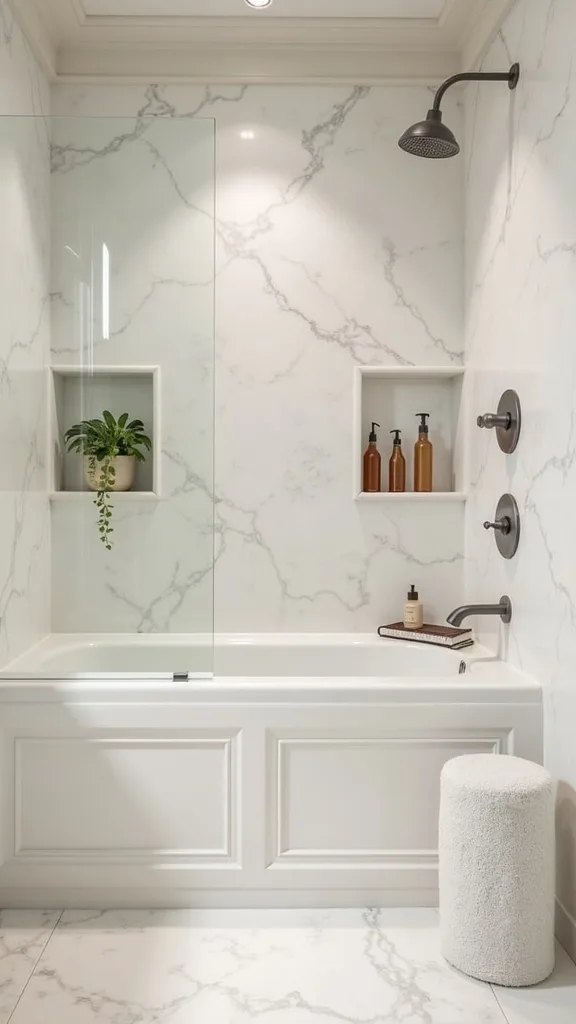
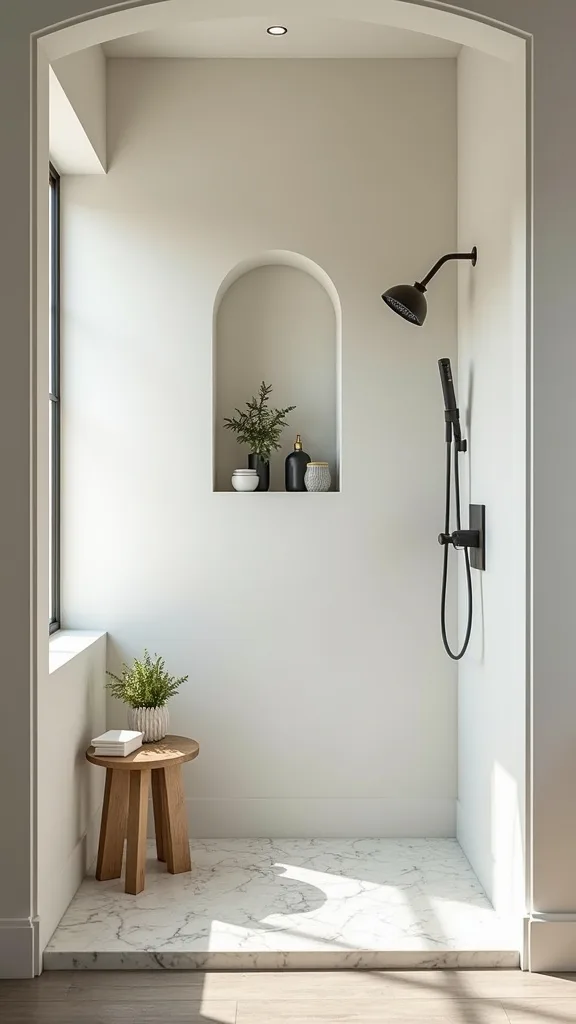
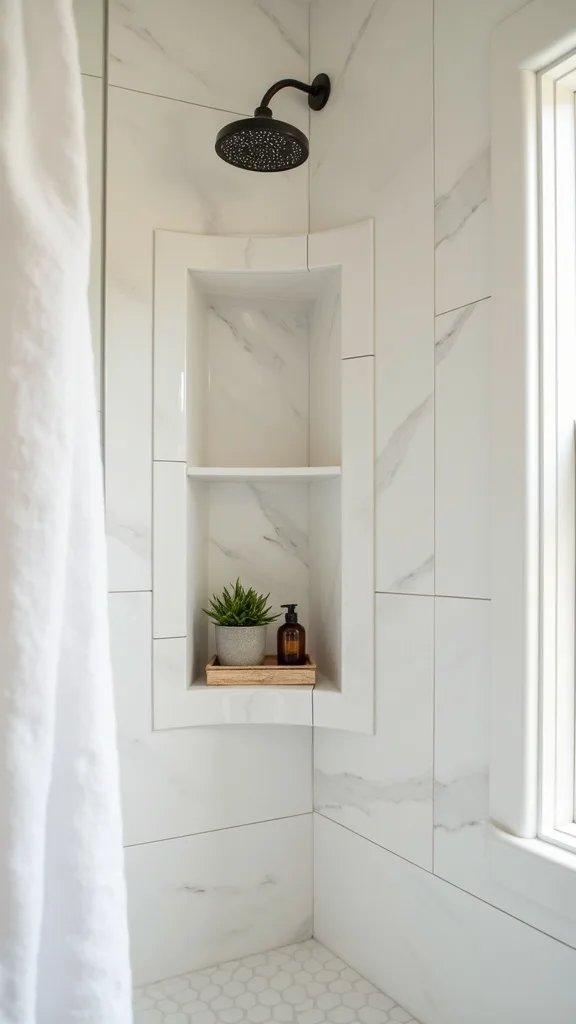
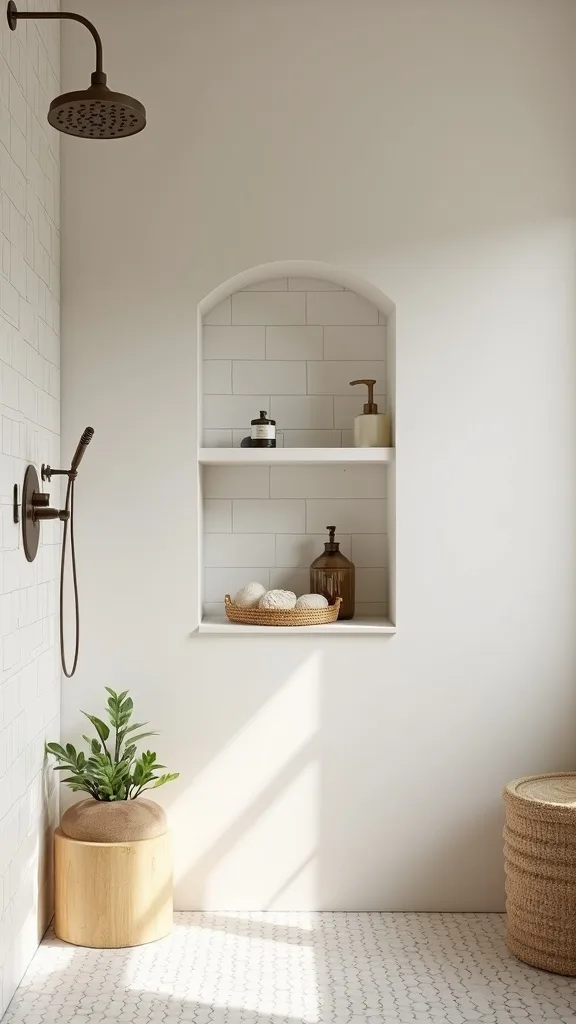
1. Double tiled niche + mosaic back panel (with a caddy rail and rainfall head)
This is the look that instantly reads “designed”: two stacked niches, each framed in field tile, with a contrasting mosaic back panel that catches water like jewelry. It works because you get separation—daily bottles up top, shave + treatment stuff down low—while the mosaic adds depth without adding clutter.
To do it, mark two openings between studs (common sizes: two 12″ x 12″ boxes, or a 12″ x 24″ over a 12″ x 12″). Set the niches so the top one lands around chest height, then run a slim caddy rail (a stainless bar) just below the lower niche for washcloths or a squeegee.
Go matte on the surrounding tile for a soft, sandy feel, and choose a glass or stone mosaic that’s slightly irregular so it ages with character. Keep grout a shade darker than white so it stays easy.
Pro tip: Add a small recessed light in warm white light (2700K–3000K — the cosy, yellowish tone you see in most homes) aimed at the mosaic; it turns your rinse into a mini vacation moment.
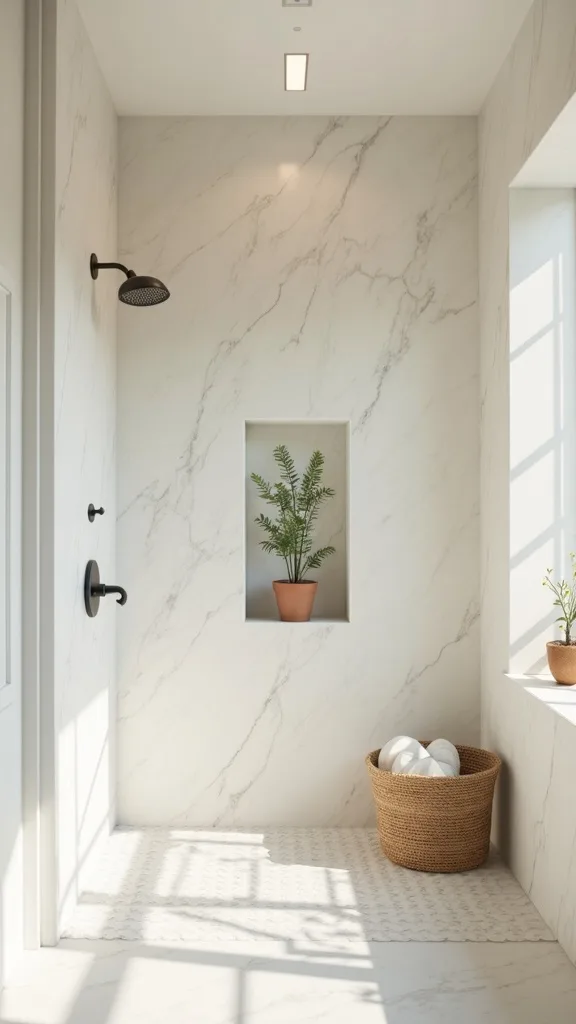
2. Where should a shower niche go so it’s actually usable?
The best placement is the one your body agrees with every morning—no bending, no reaching, no elbowing the bottle off a ledge. A niche works because it keeps your products inside the wall line, which makes even a tight shower feel smoother to move through.
Start by standing in your shower and miming your routine. Mark “grab zones” with painter’s tape: chest height for shampoo, slightly lower for body wash, and a separate spot for kids if you’ve got them. Aim to place the niche on the main plumbing wall only if you’re already opening it up; otherwise choose an adjacent wall to avoid rerouting pipes.
Use shower storage logic: keep everyday items closest to the shower head and keep razor/soap away from direct spray so they don’t turn into goo. If you’re going tile-to-ceiling, align the niche with grout lines so it looks intentional, not like an afterthought.
Pro tip: Avoid placing it where you’ll bump it during turns (usually the short wall in a narrow shower). Comfort is the real luxury.
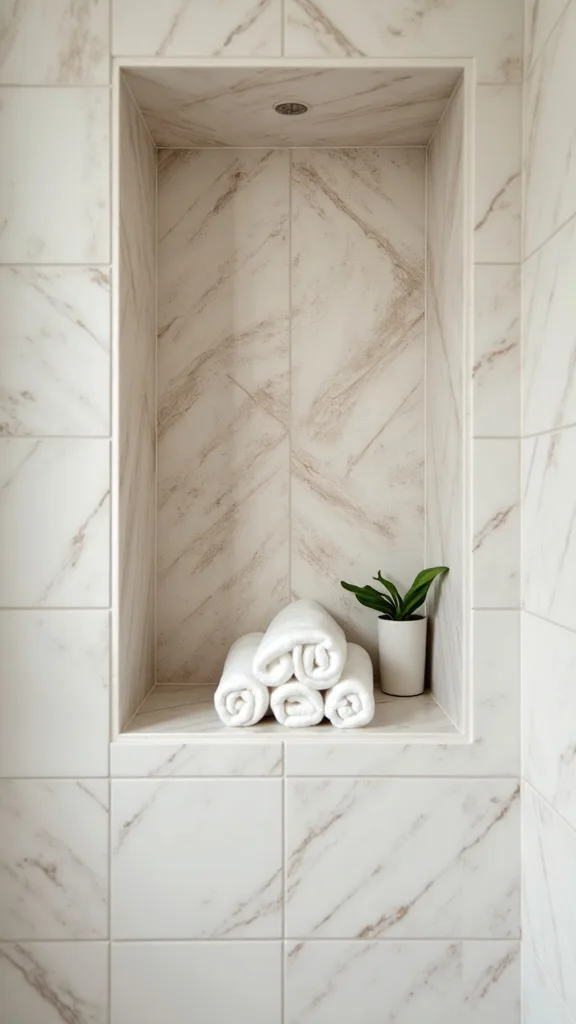
3. What size niche fits full-size bottles without looking bulky?
Most “why doesn’t this work?” niches are simply too small—cute on paper, chaos in real life. A well-sized niche holds tall bottles upright, gives your hands space, and doesn’t force you into a bottle Jenga situation mid-shower.
Measure your tallest bottle (often 10″–12″). Then choose a niche height that clears it with a little breathing room. A 12″ x 24″ rectangle is a classic because it fits multiple full-size bottles and still feels sleek. If you prefer symmetry, two 12″ x 12″ niches stacked reads clean and hotel-like.
For materials, a built in shower shelf looks best when the sill is a single piece: quartz, marble, or a porcelain slab. Pick a finish that feels good under your fingertips—honed stone is that soft, beach-rock vibe; polished is more glam but shows water spots faster.
Pro tip: Don’t oversize “just in case.” Oversized niches can look like missing tile. Size to your routine, then let the tile do the talking.
4. How do you make a niche look custom with basic tile?
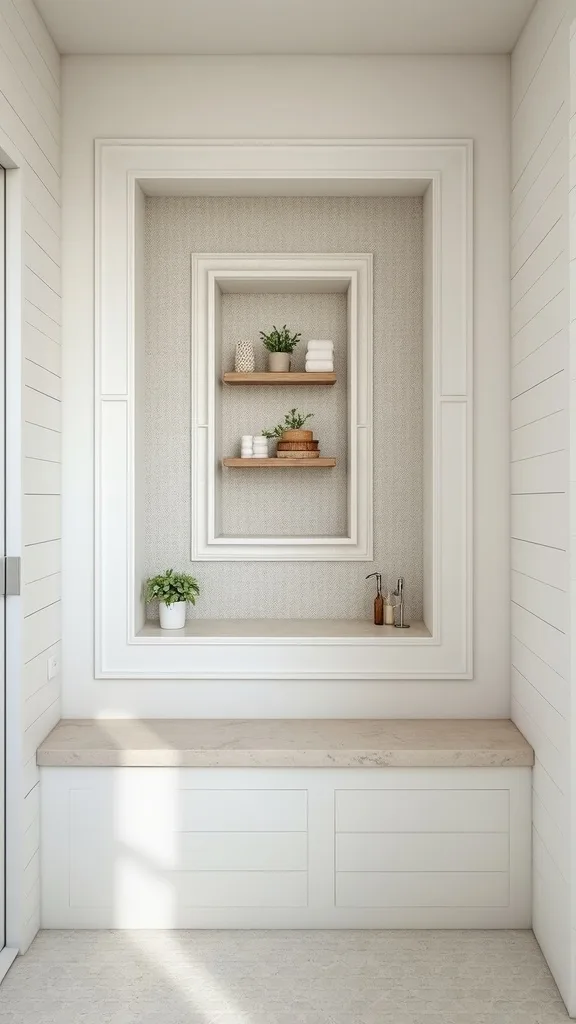
A niche looks custom when it feels integrated—like it was always part of the plan. The trick is simple: treat it like a framed moment, not a hole in the wall.
First, align the niche edges with your tile grid. If your tile is 3″ x 12″ subway, set the niche so cuts land evenly on both sides. Next, “picture-frame” it using a trim tile, pencil liner, or a single row of contrasting tile that wraps the opening. Keep the shelf line dead level so bottles don’t slowly migrate to one side.
For color, use the same field tile inside the niche but switch orientation (vertical inside, horizontal outside) for subtle contrast. Or keep the field tile outside and use a small-format tile niche mosaic inside for texture that hides water spots.
Pro tip: Choose grout intentionally. A mid-tone warm gray can make inexpensive tile look elevated, like linen instead of paper.
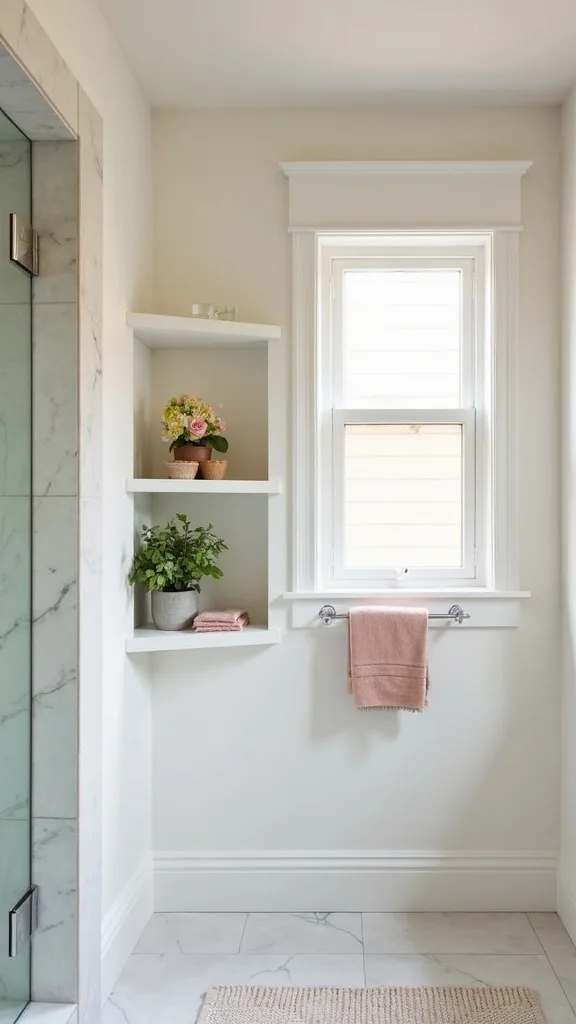
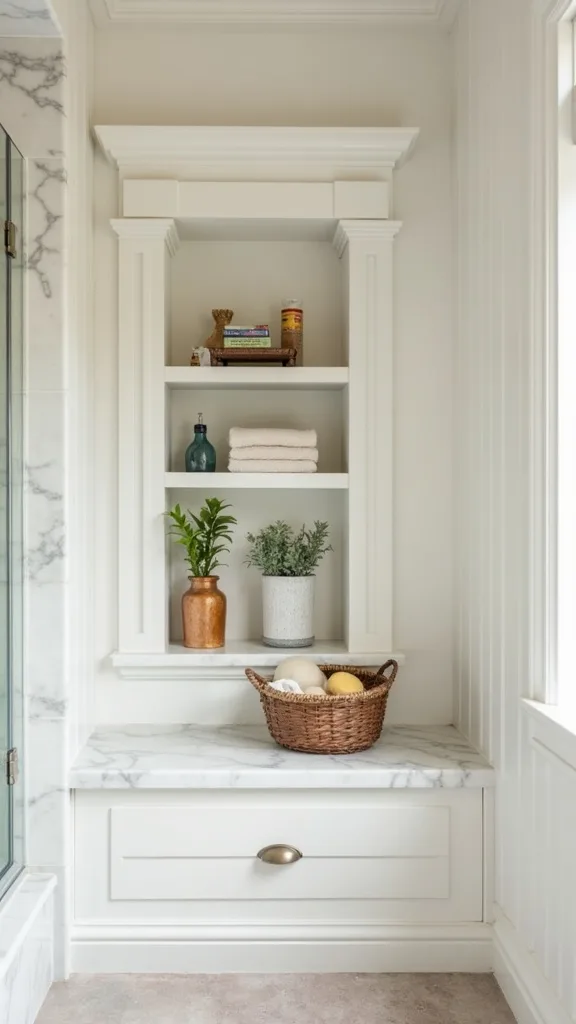
5. What’s the smartest built-in shelf alternative if you don’t want a niche?
If cutting into studs feels like too much commitment, a corner bench-shelf is the laid-back alternative. It works because you gain a landing zone without interrupting waterproofing across a wall cavity.
Build a small triangular corner shelf (or a shallow floating ledge) using a prefabricated foam shelf made for showers, then tile right over it. Place it at waist height so it catches bottles without visually slicing your wall in half. If you’re doing multiple shelves, keep them vertically aligned so the wall reads calm, not busy.
Material-wise, go for a slab top—quartz remnant, solid-surface, or a porcelain threshold piece—so it feels smooth and easy to wipe. In a steamy shower, fewer grout lines = less maintenance, more sanity.
Pro tip: Avoid tiny corner wire racks that screw through tile. They’re the fast track to leaks and rust. Built-in wins because it stays quiet and clean.
6. How do you organize two niches so bottles don’t look messy?
Two niches are a gift—if you assign them jobs. The win is visual calm: one niche becomes “daily,” the other becomes “extras,” and your eyes stop tripping over labels and caps.
Set a simple system. Top niche: shampoo, conditioner, face wash—only what you touch every shower. Lower niche: body wash, scrub, shaving cream, razor. If you share the shower, split left/right like a closet: your side, their side. Keep the tallest bottles at the edges and shorter items in the middle so the silhouette looks intentional.
Choose matching refillable bottles in amber or matte white so the niche reads like a curated tray. Add one small hook or built in shower shelf rail below for a washcloth—textile adds softness against tile.
Pro tip: Avoid storing bar soap directly on the shelf. Use a draining soap dish so you don’t get that slippery film that makes everything feel grimy by day three.
7. What tile works best inside a niche (and why)?
The niche interior is basically a splash zone, so the tile has to be both pretty and forgiving. Small formats work because they follow the slope and corners more easily, and the extra grout gives traction—less slipping, less drama.
Pick a mosaic sheet (2″ squares, penny rounds, or a tight herringbone) for the back panel, then use your field tile for the sides to keep it cohesive. If you want that California boutique-hotel vibe, try a zellige-look porcelain mosaic: slightly wavy, imperfect in a good way, and way easier to maintain than true handmade clay.
Color-wise, think sun-faded: warm whites, sandy beiges, or a soft olive that plays well with brass. If you’re going bold, keep it contained—one mosaic panel is enough.
Pro tip: Avoid super high-contrast grout with tiny mosaics unless you love visual noise. A close-match grout color makes the tile niche feel calmer and more expensive.
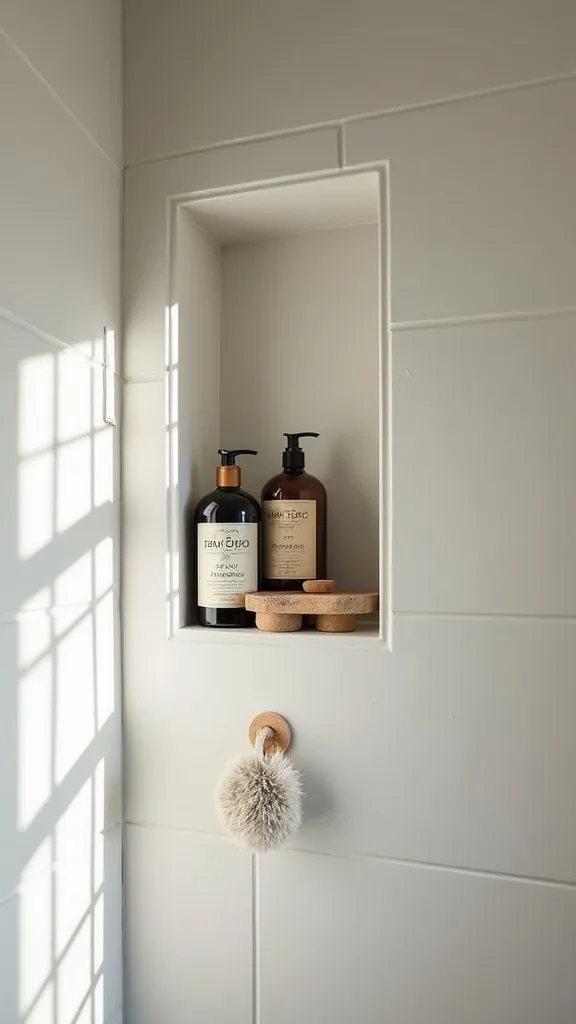
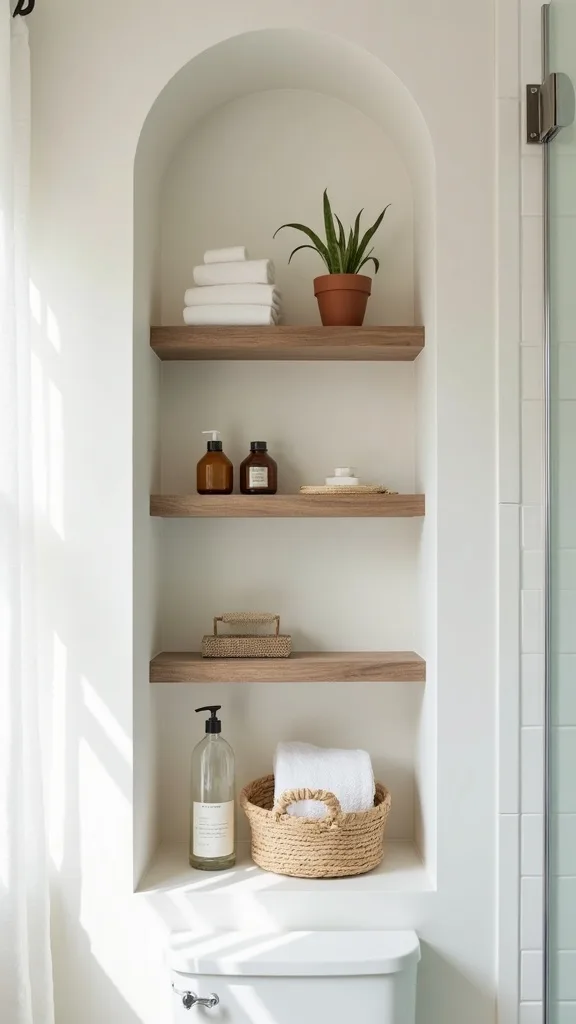
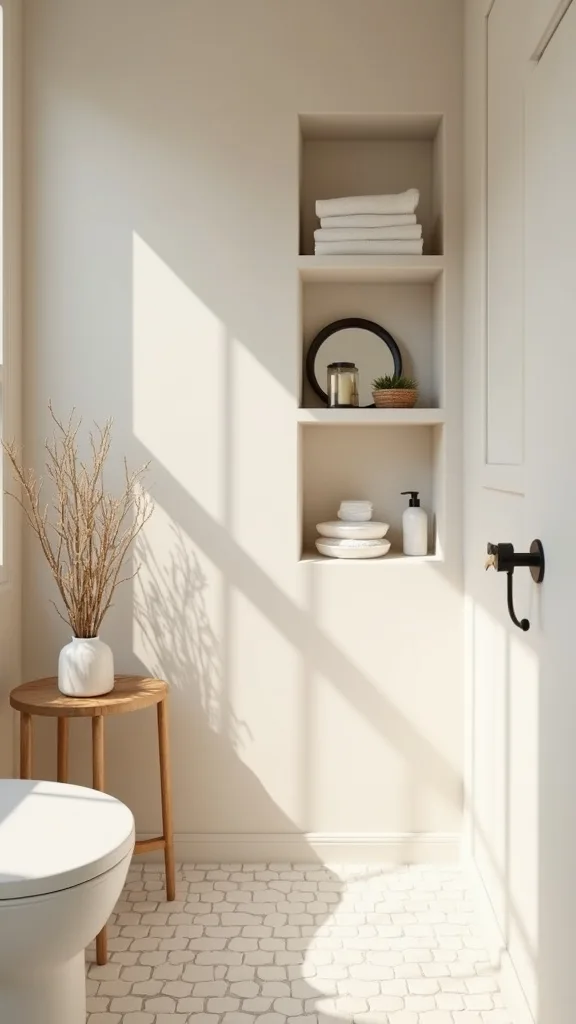
8. How do you add a shelf inside a niche without it looking clunky?
An internal shelf is the move when you want more storage but less wall cutting. It works because you turn one niche into two zones—tall bottles below, smaller stuff above—without adding a second opening.
Plan the shelf height around your bottles: set the lower opening tall enough for shampoo, then give the upper shelf enough space for face wash and a razor stand. Use a single slab shelf (quartz, marble, or porcelain) and notch it into the side tiles so it looks built-in, not stuck on. Make sure the shelf has a slight forward slope so water doesn’t pool—just enough that it dries naturally.
Keep the shelf edge thin. A chunky shelf can feel like a cafeteria tray. A 3/8″–1/2″ edge reads clean and modern.
Pro tip: Avoid glass shelves with exposed brackets in a wet zone. They collect gunk around hardware. A tiled-in slab feels seamless and stays easier to wipe.
Cost & Materials Estimate
Most niche or built-in shelf upgrades land between a simple DIY refresh and a pro-tiled feature, depending on tile choice and whether you’re opening the wall.
| Item | Estimated Cost | Where to Buy |
|---|---|---|
| Preformed waterproof shower niche (12″ x 12″ or 12″ x 24″) | $65–$160 | Home Depot |
| Waterproofing membrane/band + sealant (for seams and corners) | $45–$110 | Lowe’s |
| Mosaic tile sheets for niche back panel (8–12 sq ft) | $80–$240 | Wayfair |
| Shelf slab/threshold piece (quartz/porcelain) + edge trim | $35–$120 | Home Depot |
| Grout + thinset mortar + basic tile tools (spacers, float, sponge) | $55–$140 | Amazon |
Total estimated cost: $280–$770 Save by using a porcelain mosaic instead of natural stone, and splurge on a solid slab shelf edge because it’s what your hand touches every day.
9. What should you avoid when planning a shower niche?
The biggest avoid: putting the niche where the shower spray hits it full force all day. It seems harmless, but it turns your niche into a constant rinse cycle—labels peel, razors rust, and that “clean” look fades fast.
Instead, place the niche on the side wall opposite the shower head when possible, or at least offset it so it’s not in the direct line of water. If your layout forces it onto the plumbing wall, keep the niche slightly farther from the shower head and use a handheld sprayer so you can control splash. Also avoid placing it so low that it becomes a toe-stubber or a knee-banger when you shave.
Finish choices matter, too. Super porous stone inside a niche can stain from bright hair dyes and tinted shampoos unless it’s sealed properly. Porcelain gives you the vibe with less worry.
Pro tip: Decide your shower organization plan before you tile. A niche should support your routine, not force you to shop for smaller bottles.
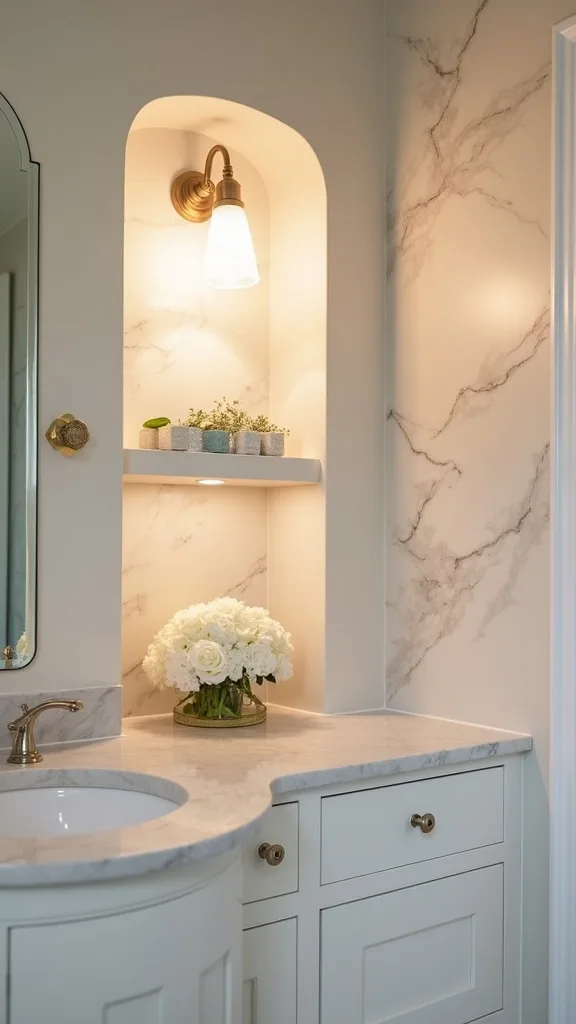
10. How do you light a niche so it feels spa-level (not surgical)?
Lighting is the secret sauce: it makes a niche look intentional even when the bottles aren’t perfectly lined up. The right glow turns tile texture into something you notice—like the way sunlight hits a pool wall.
If you’re renovating, ask for a small wet-rated recessed light aimed at the niche, or a waterproof LED channel tucked into the niche top. Keep it warm white light (2700K–3000K — the cosy, yellowish tone you see in most homes) so skin and tile look soft, not stark. Put it on a separate dimmer if you can; bright for cleaning, low for late-night showers.
Choose finishes that play well with light: glossy mosaic for sparkle, matte field tile for balance. Brass fixtures + warm light is an easy win; chrome leans cooler and sharper.
Pro tip: Avoid ultra-cool “daylight” bulbs in the shower. They make grout look harsh and every water spot feel like a personal critique.
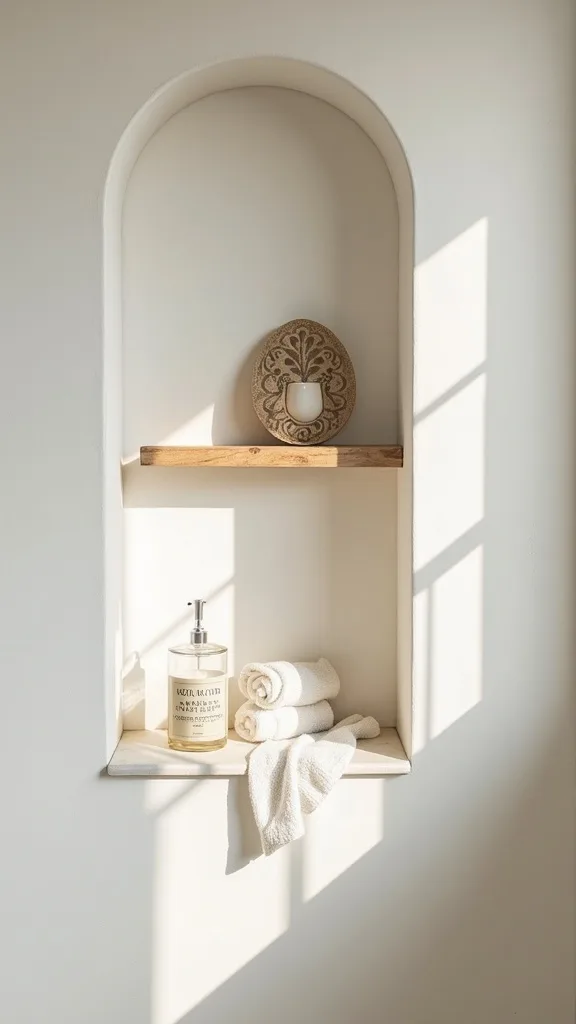
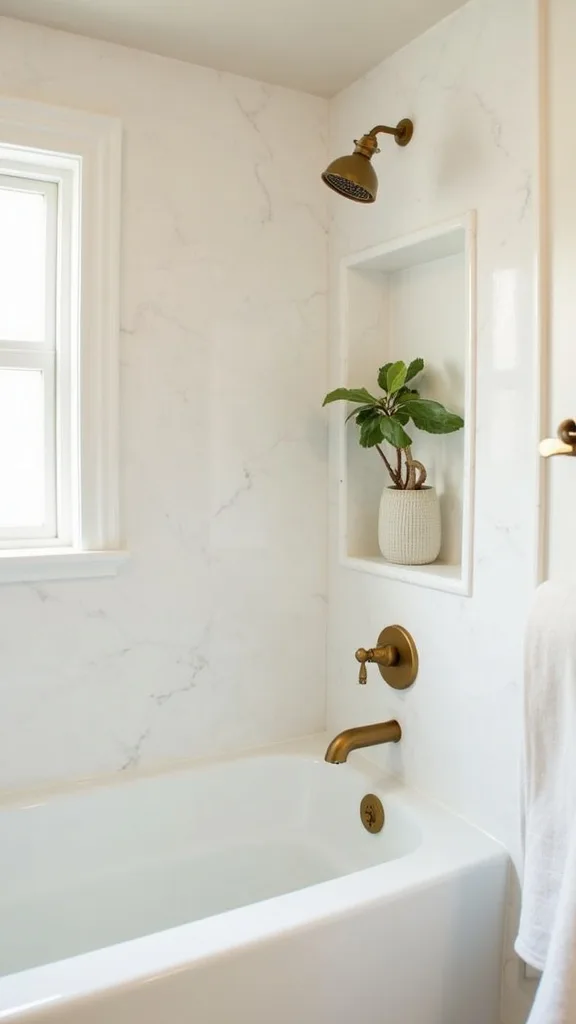
11. What’s the best niche idea for a small shower or tub-shower combo?
Small showers don’t need less storage—they need smarter storage. A vertical niche works because it stretches upward instead of widening outward, keeping elbow room intact.
Choose a tall, slim niche (think 12″ wide x 28″–36″ tall) and add one internal shelf. Place it on the long wall so it’s easy to reach from both the shower side and the tub side if you’re in a combo. Align it with your tile layout so it reads like architecture, not a patch.
For a tight space, keep the niche interior light: warm white or pale stone-look tile, with a subtle texture that hides water marks. Use matching refillable bottles so the niche doesn’t visually shrink the shower.
Pro tip: Avoid deep niches in small showers. They create shadowy “caves” that collect clutter. A slightly shallower niche with a clean shelf edge keeps the whole wall feeling open and easy.
12. How do you make a niche easier to clean?
The cleanest niche is the one you can wipe in a single pass. It works when you minimize grout lines, avoid fussy trim, and choose finishes that don’t show every drop of hard water.
Start with a slab sill and, if possible, slab sides—porcelain pieces cut to fit can reduce grout dramatically. If you love mosaic, keep it to the back panel and choose a grout color that blends. Slope the bottom shelf slightly forward so water drains out instead of sitting and leaving a ring.
Pick satin or matte fixtures if you hate polishing; they age better and feel more relaxed. For tile, porcelain that mimics stone gives you the texture without the maintenance anxiety.
Pro tip: Avoid unsealed natural marble in a niche if your products include acids (some exfoliants, certain cleaners). It can etch. If you want the look, choose marble-look porcelain and spend your energy on shower organization instead of constant babysitting.
13. Can you do a “floating” built-in shelf look without major framing?
Yes—think ledge, not niche. A floating built-in shower shelf works because it gives you the landing zone without cutting a box into the wall, and it can run long for a clean, modern line.
Install a preformed foam shower shelf or build a shallow tiled ledge along one wall, about 3″–4″ deep. Keep it long enough to hold your daily lineup, and place it at a comfortable reach height. Make sure the top is pitched slightly so water sheds forward and doesn’t sit against the wall.
Use the same tile on the face of the ledge as the wall tile, then cap it with a single slab piece for a finished edge. A quartz remnant from a local stone yard can be surprisingly affordable and feels cool and smooth under your hand.
Pro tip: Avoid a ledge that crosses the entire shower if you hate visual lines. Keep it to one “zone” so the wall still feels quiet.
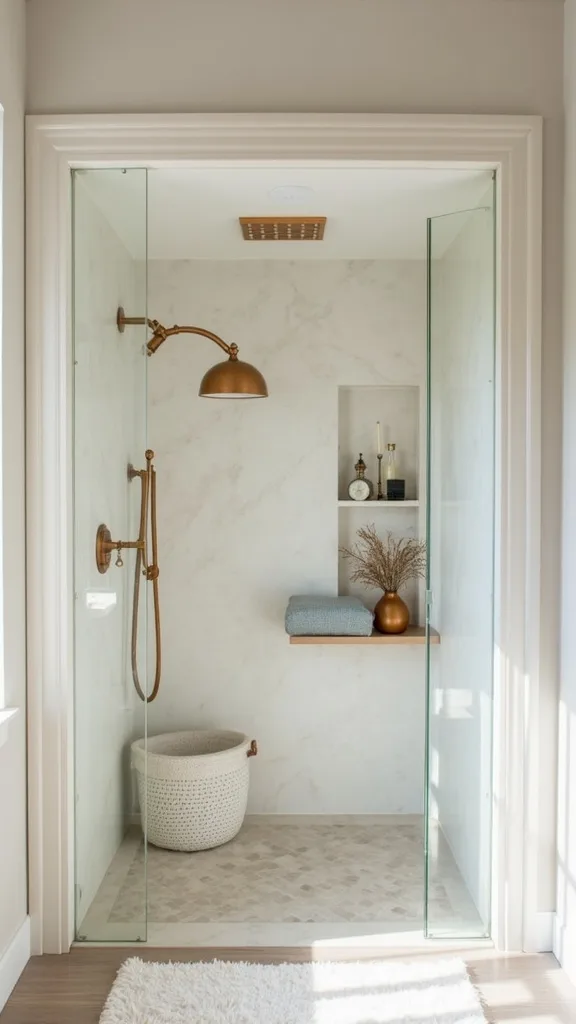
14. What niche style works with vintage or salvaged bathroom details?
Vintage bathrooms love restraint—one good detail, not ten. A simple niche with a classic trim works because it nods to old-school built-ins without turning your shower into a theme park.
Use a subway tile field and frame the niche with a pencil liner or a slim bullnose. Inside, pick a small mosaic that feels slightly timeworn—think cream penny rounds or a muted marble-look hex. Add an unlacquered brass rail beneath; it will darken and soften over time in a way that feels earned, not manufactured.
If you’re mixing eras, keep the niche geometry clean (rectangular) and let the patina do the storytelling. A thrifted teak stool outside the shower ties it together without getting precious.
Pro tip: Avoid overly trendy patterns inside a vintage-leaning space. The niche should feel like it could’ve been there forever—quiet, useful, and a little romantic in the way it ages.
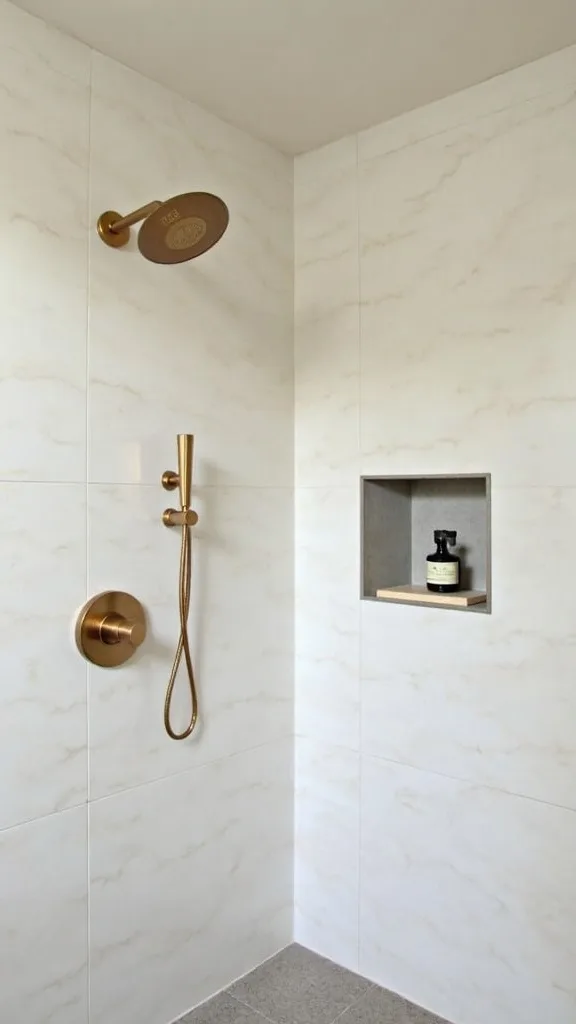
15. How do you match niche trim to your fixtures (brass, black, chrome)?
Matching isn’t about identical metals—it’s about the same vibe. A niche works visually when the edges and accents speak the same language as your fixtures, even if they’re not twins.
If you have matte black fixtures, consider a black metal edge trim (made for tile) to outline the niche cleanly. For brass, a warm-toned trim or a stone frame keeps it elevated without shouting. Chrome plays best with crisp whites and cool grays; keep the niche interior simple so chrome doesn’t feel too “builder.”
Choose one hero finish in the shower (like the rainfall head), then let the niche support it: a subtle mosaic that echoes the finish, or a shelf slab that picks up the same undertone. This is where shower storage becomes décor.
Pro tip: Avoid mixing three metals inside the shower zone. Two is plenty. The niche is small, so every finish choice shows up loud.
16. What’s the best way to add a shaving ledge that doesn’t feel bulky?
A shaving ledge is one of those practical luxuries that makes you wonder why it’s not standard. It works because it gives you a stable spot for a foot and a perch for products—without adding a whole bench.
Build a small corner ledge or a slim rectangular ledge about 12″–16″ long and 4″–6″ deep, set around knee height. Tile it to match the walls so it blends in, then cap it with a single slab for comfort. If you’re already doing a niche, place the ledge beneath it so the wall becomes one intentional “utility zone.”
Choose a slightly textured top (honed stone or matte porcelain) so it doesn’t feel slippery under wet feet. Keep grout minimal and sealed.
Pro tip: Avoid placing the shaving ledge directly under the shower stream—constant spray makes it feel slick. Offset it and you’ll use it more, with less stress.
17. How do you keep water from pooling on the niche shelf?
Pooling water is the tiny annoyance that becomes a daily one. A niche works best when it dries quickly—less soap scum, fewer water rings, and your products don’t sit in a puddle.
Ask your installer (or remind yourself, if you’re DIY-ing) to slope the niche sill slightly toward the shower. It’s a subtle angle—barely visible—but it encourages drainage. Use a single-piece sill when possible; fewer seams means fewer places for water to linger. If you’re adding an internal shelf, slope that too.
Materials matter here. Polished stone can show rings; porcelain is more forgiving. If you love real stone, seal it well and wipe it down once a week—easy ritual, big payoff for shower organization vibes.
Pro tip: Avoid a perfectly flat shelf “for clean lines.” The cleanest line is the one that stays clean, and drainage is what keeps it that way.
18. Can you add a niche in an existing shower without full demo?
Sometimes, yes—but it depends on your wall and your tolerance for patchwork. The idea works when you’re willing to remove a section of tile cleanly and you can access framing without compromising waterproofing across the whole shower.
The simplest path is during a re-tile. If you’re trying to retrofit, choose a niche size that fits between existing studs and plan for replacement tile that matches (or intentionally contrasts). A contrasting mosaic back panel can make the “new” area look like a design choice instead of a repair. Use a preformed niche box designed for showers, then waterproof every seam carefully before tiling.
If your tile is discontinued, lean into contrast: make the niche interior a feature with mosaic, then frame it neatly with trim. It becomes art + storage.
Pro tip: Avoid cutting into a wall without confirming what’s inside (plumbing, electrical). Open the access from the other side if possible. Calm planning beats surprise repairs.
19. What’s a smart niche idea for kids’ bath products?
Kids’ products multiply like beach towels. A lower niche works because it gives them independence without turning your main niche into a cartoon bottle parade.
Add a small niche lower on the wall—around kid shoulder height—on the far side from the shower head. Keep it shallow so it doesn’t become a toy bin. Use a durable, easy-clean tile inside (porcelain mosaic is your friend) and choose a slightly darker grout so it doesn’t show every bubble bath spill.
To keep it looking intentional, match the niche frame to your main niche, even if the interior tile changes. You get function without sacrificing the grown-up feel of the space.
Pro tip: Avoid storing bath crayons or sticky toys in the niche long-term. They leave residue that’s a pain to remove. Rotate toys out and let the niche stay focused on shower storage essentials.
20. How do you style a niche so it doesn’t look like a store shelf?
The goal is “collected,” not “stocked.” A niche looks best when you edit hard and let negative space do its thing—like a well-styled open shelf in a living room.
Decant into matching bottles and keep labels minimal. Choose two or three bottle heights and repeat them so the lineup feels rhythmic. Add one non-bottle element: a small eucalyptus bundle hung on a rail, or a stone soap dish that feels cool and heavy in your palm. Keep the color palette tight—white, amber, and one accent tone is plenty.
Texture is the quiet flex here. A matte ceramic bottle against glossy mosaic, a smooth slab shelf under a slightly rippled tile—those contrasts make it feel designed.
Pro tip: Avoid keeping every “backup” bottle in the niche. Store extras under the sink. A niche is not a pantry; it’s curated shower organization that makes the room breathe.
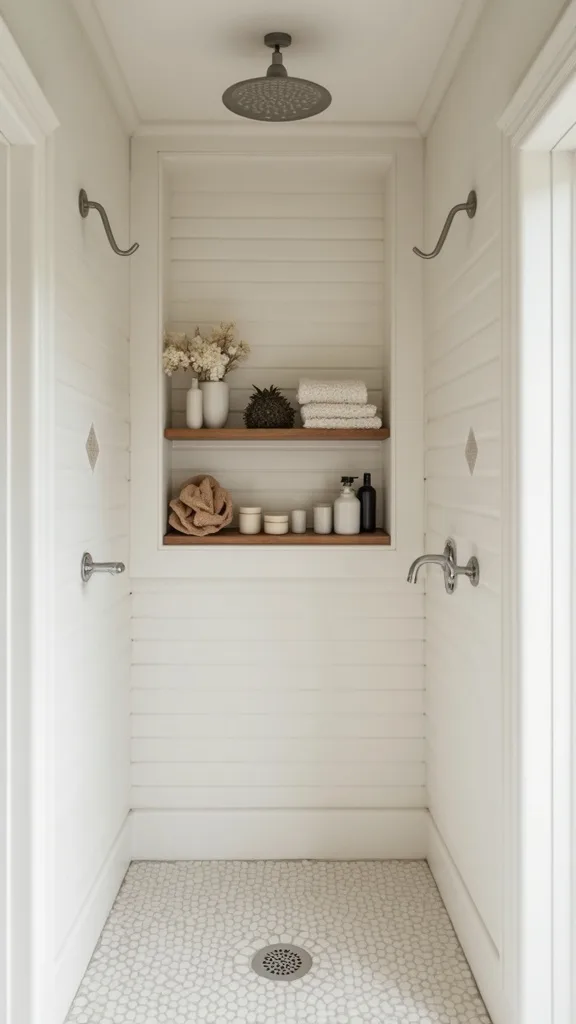
21. What’s the best niche idea for a shared shower (two people, one wall)?
Shared showers need boundaries in the nicest way. A double-wide niche or two side-by-side niches work because they give each person a lane—no bottle wars, no mystery products creeping in.
If you have the wall space, install a 24″–30″ wide niche and split it with an internal shelf and a visual divider: different bottle colors, or a subtle tile change on each half. If you want symmetry, do two separate niches at the same height—left is yours, right is theirs. Add a small hook or rail under each side for individual loofahs or washcloths.
Keep the interior tile consistent so it still reads like one design decision. A simple mosaic back panel adds just enough detail to feel special.
Pro tip: Avoid placing shared niches too low. If you’re both reaching down constantly, it gets old fast. Put comfort first and the rest follows.
22. How do you choose grout that won’t ruin the vibe?
Grout is the background music of your shower. When it’s wrong, it’s all you can hear. When it’s right, everything else feels smoother—tile looks richer, lines look intentional, and cleaning feels less like a chore.
Start by deciding if you want the tile to pop or blend. For a calm, coastal feel, choose grout close to the tile color so the surface reads like one continuous texture. For a more graphic modern look, go higher contrast—but keep it to larger-format tile where the grid feels purposeful. In niche mosaics, blend grout unless you truly want pattern.
Choose a grout that resists staining and is designed for wet areas, and seal it if recommended. It’s a small step that pays off all summer.
Pro tip: Avoid pure white grout in a daily-use shower unless you love maintenance. A soft warm gray keeps your tile niche looking fresh without constant scrubbing.
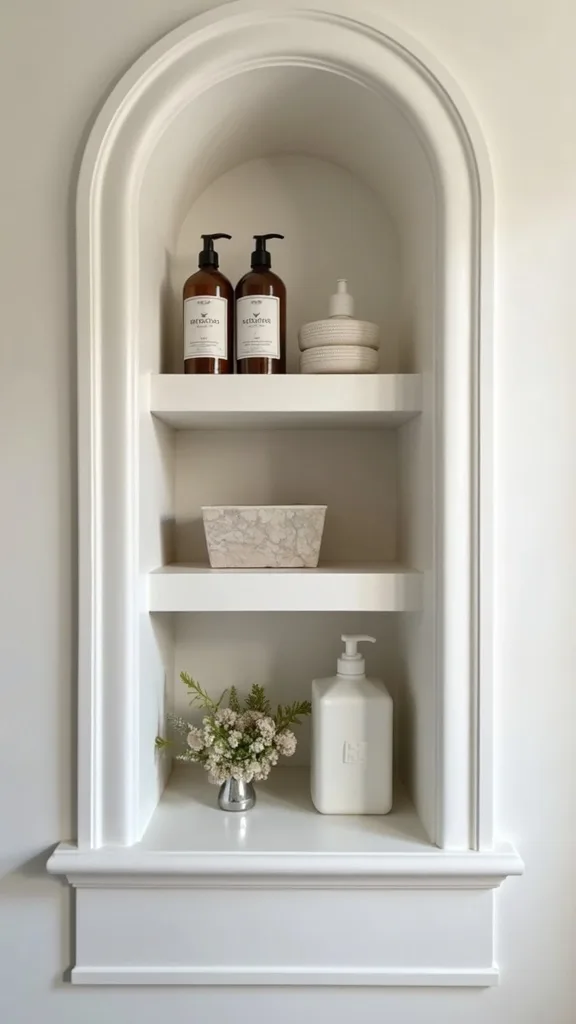
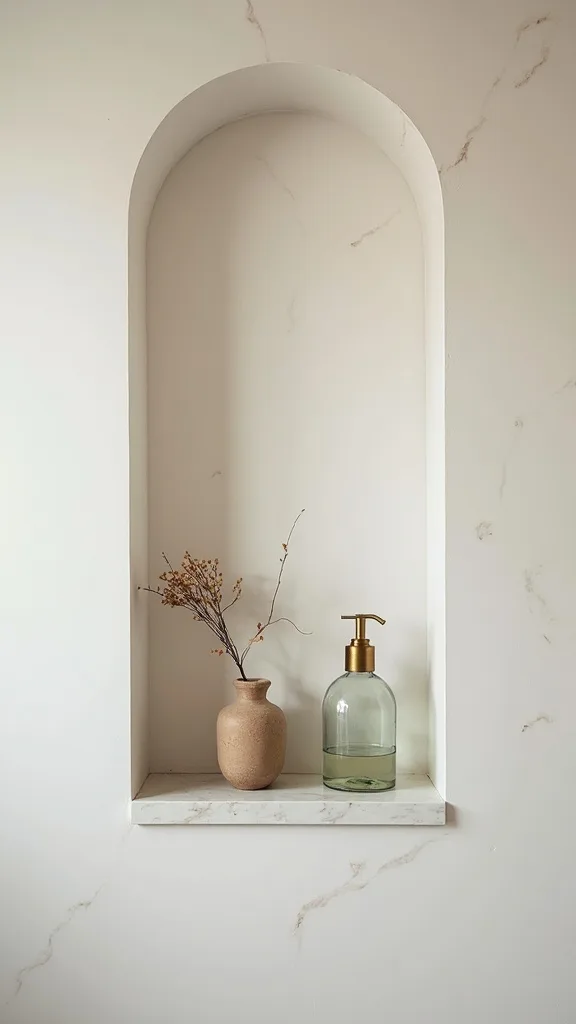
23. What’s a minimalist niche idea that still feels warm?
Minimal doesn’t have to mean cold. A tone-on-tone niche works because it disappears into the wall, letting texture do the work—quiet, intentional, and very California in that “effortless” way.
Use the same tile inside and outside the niche, then shift the finish: matte field tile on the wall, slightly glossy version inside the niche (or vice versa). Keep the shelf slab thin and match it to your vanity top if you can—small continuity move, big payoff. Limit what lives there to three or four items and decant them into matching containers.
Bring warmth with materials that age well: brushed brass, a honed stone shelf, or a soft beige grout that feels like sand. Add one linen washcloth on a small rail for a lived-in note.
Pro tip: Avoid over-trimming the niche with multiple borders. Minimalism needs restraint. Let the wall feel uninterrupted, and your built in shower shelf moment will feel calm.
24. How do you create a niche that doubles as a design feature wall?
If you want the niche to be the moment, treat it like art. This works because the niche becomes a focal point that’s also functional—your shower gets a “gallery wall” without losing usability.
Pick a bold interior tile: a deep green mosaic, a warm terracotta micro-hex, or a pearl-like glass that shifts in the light. Keep the surrounding wall tile simple and large-format so the niche reads as intentional contrast. Frame it with a crisp edge trim in a finish that matches your fixtures, and keep the shelf slab simple so the tile stays the hero.
Style it with edited bottles in neutral packaging so the feature tile isn’t fighting neon labels. Think of it like wearing one statement piece and keeping the rest clean.
Pro tip: Avoid mixing multiple bold tiles in the same shower zone. One feature niche is enough to make the whole space feel designed—and it won’t exhaust you over time.
25. How can you upgrade shower storage today without opening the wall?
Not every summer upgrade needs a demo day. A “niche-inspired” setup works because you can fake the built-in look with a tight, edited system—and then decide later if you want to commit to tile work.
Start by clearing everything out. Keep only what you use weekly, then decant into matching bottles. Add a tension pole caddy only if it’s slim and rust-resistant, or better: a removable adhesive shelf designed for tile (no drilling). Place items in zones like a niche: hair on top, body in the middle, shave on the bottom. Finish with a small squeegee on a hook so the shower stays clear.
Choose materials that feel good: brushed metal, matte plastic, or bamboo that dries fast. Keep it neutral so it reads calm, not chaotic.
Pro tip: Avoid cheap suction cups—they fail when the steam hits. A secure shelf setup is the quickest path to better shower organization, and it makes the whole room feel lighter.
Final Thoughts
A built-in niche is one of those bathroom moves that feels small until you live with it. The shower gets quieter. The floor stays clearer. Your products stop performing a daily collapse into the corner like they’re auditioning for drama.
Whether you go all-in with a double niche and mosaic back panel or keep it simple with a slim ledge, the best version is the one that matches your routine and your patience level for cleaning. Edit the bottles, choose tile that feels good to the touch, and let the details—one rail, one warm light, one clean shelf edge—carry the mood.
Do one thing today: grab painter’s tape, mark your ideal niche height on the shower wall, and measure your tallest bottle. That five-minute reality check makes every next decision easier—and when you finally step into the finished space, it feels like walking into cool shade after a hot day: calm, clean, and completely yours.
What I’d Do Differently
When I first tried this, I placed the niche exactly where it looked best on the elevation drawing—dead center on the main wall—without thinking about the shower head angle. It photographed great. In real life, the spray hammered it nonstop, and my “pretty” setup turned into a wet-label mess: razors rusting faster, soap getting slimy, and bottles constantly falling because the shelf stayed slick. The correct approach is to plan placement around water, not just symmetry—offset the niche away from direct spray, or use a handheld so you can control where the water hits.
I also wish I’d mocked up heights with painter’s tape and my actual bottles before anything was cut. Five minutes of pretending to grab shampoo would’ve saved me from a niche that sat just a little too low. If you do one thing before you start, tape it out at two heights, live with it for a day, then commit.
Products I Recommend for This Project
Here are some of my favourite products to help you bring these ideas to life:
- Schluter Kerdi-Board Shower Niche (12″ x 12″) — A preformed, waterproof niche that makes the layout feel clean and saves time on framing.
- Schluter Kerdi-Band Waterproofing Strip — Seals seams and corners so your niche stays dry behind the tile.
- QEP 7″ Professional Grout Float — Helps you pack grout tightly for a smoother finish and fewer pinholes to clean later.
- OXO Good Grips All-Purpose Squeegee — Keeps tile and glass clear with a quick swipe after each shower.
- Amber Glass Pump Bottles (16 oz, set) — Instantly upgrades shower organization and makes mismatched packaging disappear.