This post contains affiliate links. As an Amazon Associate, I earn from qualifying purchases at no extra cost to you.
I once “decorated” my deck with seven random pots I already owned, then congratulated myself… until a wind gust knocked over the tallest one and dumped soggy soil all over my outdoor rug. (The rug was beige. Of course it was.) That’s when I learned the hard truth: containers aren’t just smaller gardens. They’re tiny stages, and every pot is a prop that can either make your space look intentional—or like you panic-bought plants at the garden center.
Here is the thing: great patio container plants are only half the story. The other half is the container choice, the height mix, and a flower pots arrangement that reads “designer” from the street, not “I own a hose.” I’m going to give you specific combos, pot sizes, and layout tricks that work for real patios and decks (including the ones with zero shade and neighbors who judge).
This is perfect for renters, busy families, and anyone who wants a legit summer garden look without digging up the yard—or asking permission.
And look, you can do this with thrifted terracotta, a couple of splurgey glazed ceramic planters, and one dramatic wooden half-barrel that acts like the main character. I’ll also tell you what to avoid so you don’t create a mosquito spa or a tipping hazard.
Below are 25 Container Gardening Ideas for Patio & Deck that turn scattered pots into a cohesive outdoor “room,” using colorful garden containers, smart plant pairings, and a layout that actually holds up in summer.
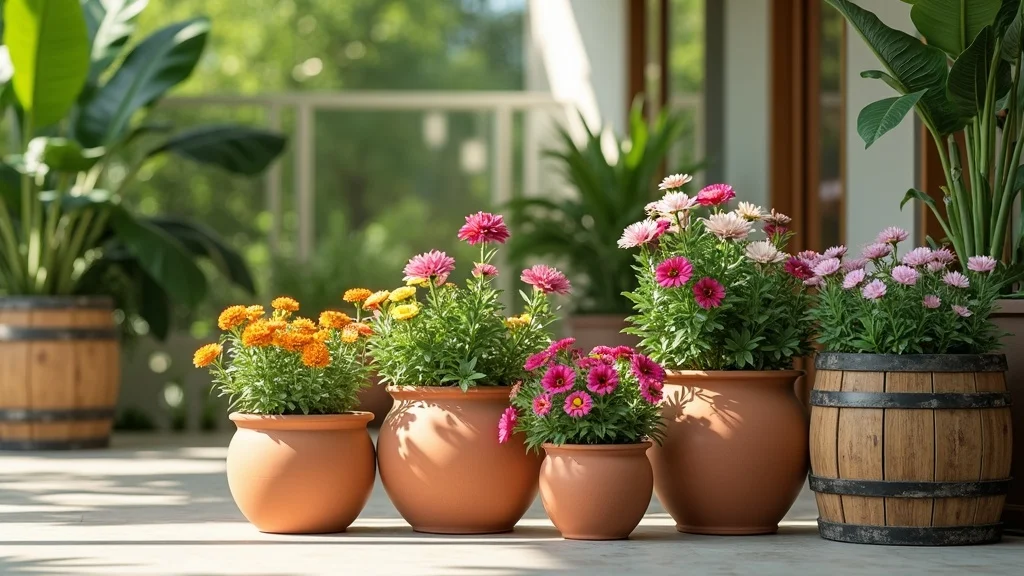
1. The Classic Trio: Terracotta + Glazed Ceramic + Half-Barrel with Zinnias & Petunias
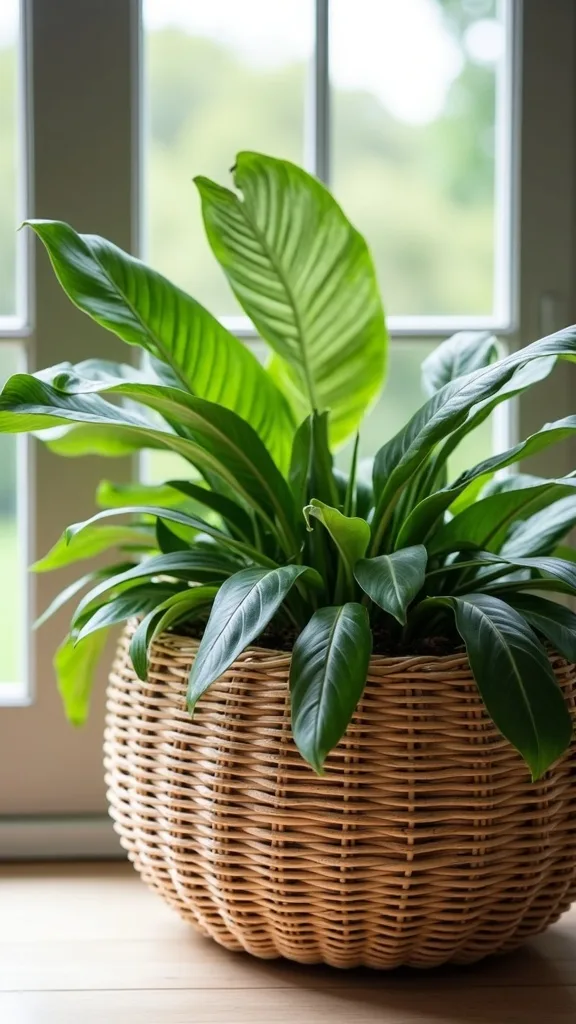
This is the look that screams “intentional summer” without screaming “I hired someone.” Terracotta grounds the scene, glazed ceramic adds shine, and a wooden half-barrel gives you that big, lush focal point that makes everything else look curated.
Start with three containers: two 12–14 inch terracotta pots, one 14–16 inch glazed ceramic planter, and one half-barrel (usually 24–26 inches wide). Plant the barrel with mixed zinnias for height and petunias spilling over the edge; add a simple filler like sweet potato vine if you want extra drape. Keep the smaller pots quieter—think one color family—so the barrel gets to be the star.
Stick to warm, summery colors: coral zinnias, magenta petunias, and a cobalt or emerald glazed pot to bounce light. If your deck is gray composite, the glaze is your secret weapon.
Pro tip: top-dress with a thin layer of pea gravel to reduce splashing soil (and the “why is dirt on my deck again?” problem) and you’ll feel like you have your life together.
2. What Patio Container Plants Actually Survive Full Sun (Without Daily Drama)?
Full-sun patios are brutal—heat bounces off decking like a skillet. The plants that thrive are the ones built for it: they don’t wilt into performance art by 2 p.m., and they keep blooming through real summer heat.
Build your pots around dependable bloomers: zinnias, petunias, lantana, marigolds, salvia, and vinca. For texture, tuck in dusty miller or licorice plant. Use a container at least 12 inches wide so roots don’t cook; small pots heat up fast and dry out even faster.
Color plan: pick one “loud” color (hot pink or orange) and one “cool” anchor (purple or white). Then choose containers that support it—terracotta warms everything up, while glazed ceramic planters reflect light and make colors look richer.
Pro tip: avoid ferns and hydrangeas in full sun containers unless you love watering twice a day. Choose tough sun plants and you’ll get compliments instead of guilt.
3. How Do You Arrange Flower Pots on a Deck So It Looks Designed?
A good flower pots arrangement is basically interior design, but outdoors and with more dirt under your nails. The goal is to create “zones” so your pots don’t look like they’re waiting for a ride.
Use the rule of threes: group three pots of different heights (short, medium, tall) and repeat that grouping along the deck edge or near seating. Put the tallest pot in the back corner or beside a chair to frame the space. Keep at least 18 inches of walking path so guests aren’t doing the sideways crab shuffle.
Choose one unifying element: same pot material (all terracotta) or same color family (all blues/greens in glazed). Then let the plants vary. That’s how you get variety without chaos.
Pro tip: place pots on risers or upside-down saucers for height—cheap, effective, and it makes the grouping feel layered like a styled shelf.
4. Colorful Garden Containers: Pick Pot Colors That Make Blooms Pop
Here is the thing: the pot is part of the palette. If your container color fights your flowers, the whole setup looks muddy, no matter how expensive the plants were.
For bright blooms (zinnias, petunias, marigolds), use either warm neutrals (terracotta, sand) or jewel-tone glaze (cobalt, forest green). Avoid bright red containers with red flowers—everything blurs into a single loud blob. If you want “colorful,” do it with one hero pot and keep the rest calm.
Try this combo: one deep blue glazed pot with white petunias + two terracotta pots with orange zinnias. It’s classic Mediterranean vibes without needing a plane ticket.
Pro tip: if your deck furniture is black metal or dark wicker, glossy glaze adds reflection and makes the corner feel less heavy—like jewelry for your patio.
5. What Size Containers Should You Use So Plants Don’t Dry Out Instantly?
If you’ve ever watered in the morning and found your pot bone-dry by dinner, the container was too small (or too shallow). Bigger pots aren’t just “more plant.” They’re more stable moisture and less daily babysitting.
Aim for 12–16 inches wide for mixed annuals, and 18–24 inches for statement planters or half-barrels. Depth matters too: at least 10–12 inches deep for most flowering plants. Use a quality potting mix (not garden soil) because it holds moisture while still draining.
Materials matter: terracotta dries faster (great for herbs, risky for thirsty flowers), while glazed ceramic and resin hold moisture longer. Mix them intentionally: terracotta for rosemary and thyme; glazed for petunias and calibrachoa.
Pro tip: if you’re committed to small pots, plant drought-tolerant options like portulaca. Otherwise you’re signing up for a summer of resentment.
6. How Do You Keep Containers From Looking Messy by Mid-July?
Mid-summer is when container gardens either glow or go feral. The difference is usually one unsexy habit: trimming.
Once a week, do a 5-minute “patio lap.” Pinch back petunias (yes, it feels wrong), snip dead blooms off zinnias, and remove any yellowing leaves at the base. Water deeply until you see it drain out the bottom—quick sips create shallow roots and dramatic wilting.
Visually, keep one “clean” element: neat pot edges, wiped glaze, or a top layer of mulch/pebbles. That single tidy detail makes the whole thing read polished even if one plant is being a diva.
Pro tip: set a phone reminder for fertilizer every 2 weeks. Bloomers in containers eat fast, and feeding is the difference between “nice” and “people stop and stare.”
7. A Small-Space Rail Planter Setup That Doesn’t Feel Like an Afterthought
Rail planters are the studio-apartment of container gardening: small, useful, and easy to overload. They work when you treat them like a border, not the whole show.
Use two to four rail planters (24 inches long is a sweet spot) and plant one repeating combo: white alyssum + purple calibrachoa + a trailing green like creeping jenny. Repetition is what makes it look designed. Then anchor the deck with one larger floor pot near the seating area.
Choose matte black or dark bronze rail planters if your railing is busy (spindles, cables). If your railing is plain, a terra-cotta rail planter adds warmth.
Pro tip: avoid planting tall zinnias in rail boxes—they catch wind, flop, and make your deck look like it’s wearing a bad hairpiece. Keep rail plants low and spill-y.
8. The “Outdoor Living Room” Pot Layout: Frame Seating Like a Designer
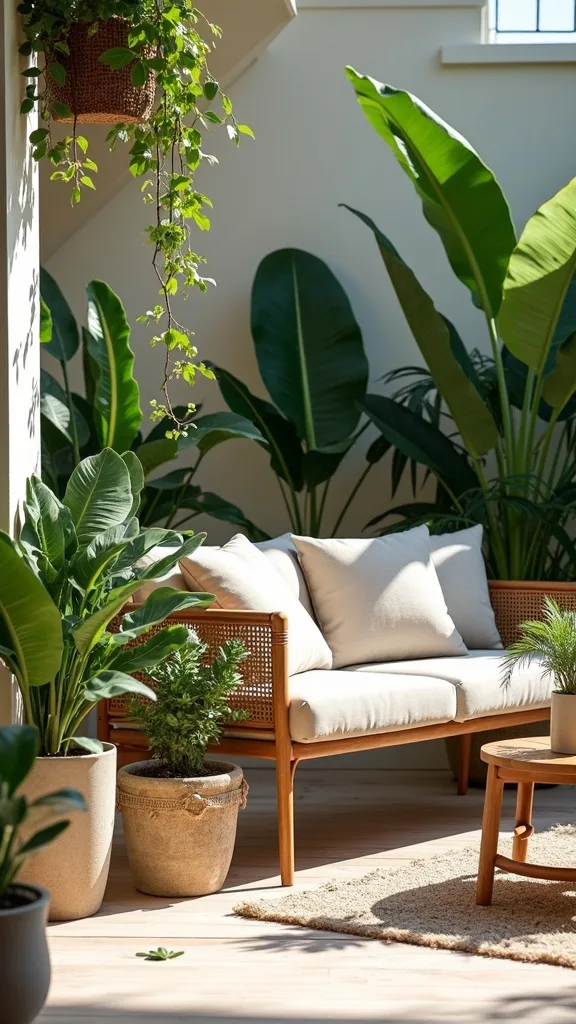
People forget containers can function like furniture. A pair of big pots can “hold” a seating area the way side tables do—without taking up table space.
Place two matching 18–20 inch planters on either side of a loveseat or at the ends of a bench. Plant something upright in the center (salvia or ornamental grass) with spillers around the rim (petunias, sweet potato vine). This creates a visual frame and makes the seating zone feel intentional.
For containers, go mixed-budget: splurge on two heavy resin planters that look like stone (they won’t crack or weigh 90 pounds), then use thrifted terracotta for the smaller accents.
Pro tip: add warm white light (2700K–3000K — the cosy, yellowish tone you see in most homes) string lights above. Plants + lighting = instant “we host now.”
Cost & Materials Estimate
A realistic 3–6 container patio setup typically costs $85–$260 depending on whether you thrift pots or splurge on glazed ceramic.
| Item | Estimated Cost | Where to Buy |
|---|---|---|
| 12–14 inch terracotta pots (set of 3) | $24–$45 | Home Depot |
| 16–18 inch glazed ceramic planter (1) | $45–$90 | Lowe’s |
| Wooden half-barrel planter (1) | $35–$70 | Home Depot |
| Potting mix (2 cu ft bag, 1–2 bags) | $14–$32 | Amazon |
| Annual flowers (zinnias, petunias, fillers; 10–16 plants) | $30–$80 | Lowe’s |
| Slow-release fertilizer (1 container) | $10–$18 | Amazon |
Total estimated cost: $158–$335 Save money by thrifting containers and buying smaller starter plants; splurge on one glazed “hero” pot for the biggest visual payoff.
9. Half-Barrel Herb + Flower Mix That Looks Decorative (Not Like a Farm Stand)
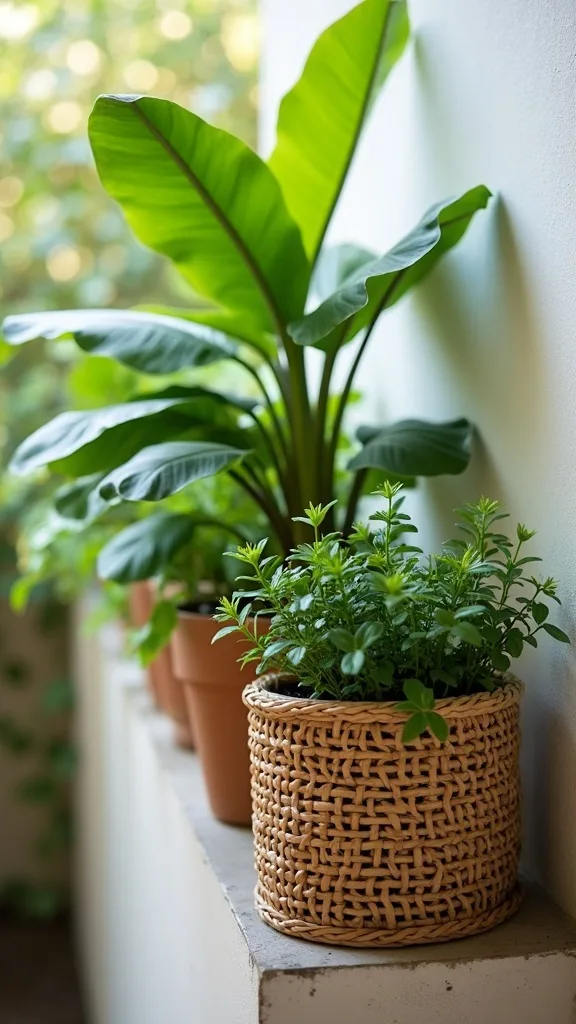
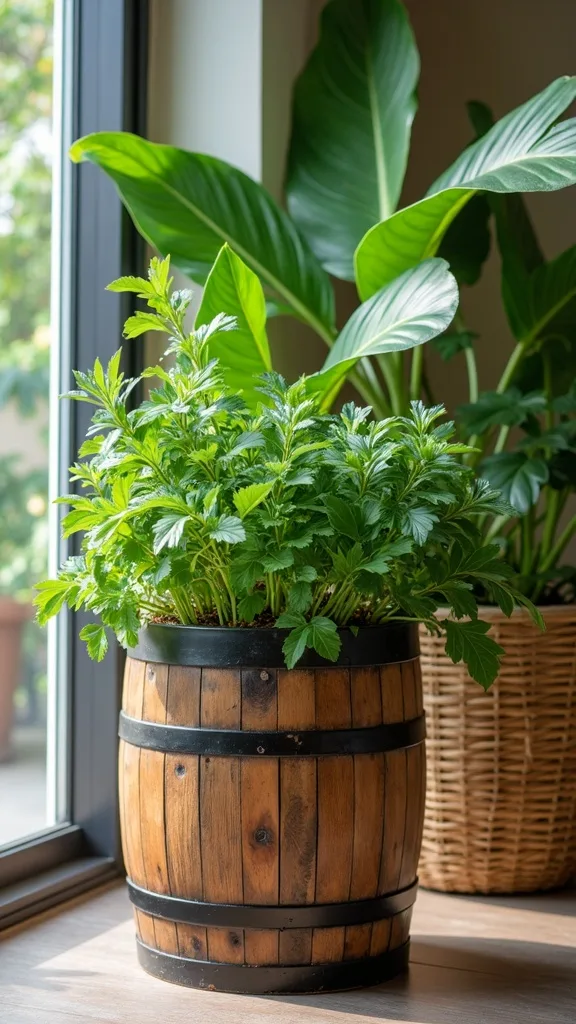
Herbs are practical, but a barrel of only basil can look a little… culinary school. The trick is mixing edible with ornamental so it reads like decor and still earns its keep.
In a wooden half-barrel, plant a center rosemary (upright “thriller”), ring it with bush basil and chives (“fillers”), and edge with trailing nasturtium or sweet alyssum (“spiller”). Keep herbs grouped so harvesting is easy, and don’t tuck mint in there unless you want it to take over like it pays rent.
Color-wise, the barrel’s warm wood loves purple basil, blue salvia, and orange nasturtium blooms. It looks like a curated cottage garden but you can also make pasta.
Pro tip: line the barrel with landscape fabric to slow moisture loss through the wood. You’ll water less and feel smug about it.
10. A Budget-Friendly “One Plant, One Pot” Strategy That Still Looks Rich
Not every pot needs to be a botanical salad. Sometimes one plant in one pot looks more expensive—because it’s clean, graphic, and confident.
Pick three identical terracotta pots (12 inches) and plant each with a single variety: all white petunias, all purple salvia, or all coral zinnias. Line them along one edge of the deck with 8–12 inches between pots. The repetition is what makes it feel like a designed installation, not leftover containers.
Want to elevate it? Paint the rims matte black or charcoal. It’s a tiny DIY detail that makes cheap terracotta look custom.
Pro tip: avoid mixing three different “one plant” pots right next to each other unless the colors are disciplined. Too many unrelated colors reads like clearance aisle energy.

11. How to Build Height Without Buying Giant Pots (The Sneaky Way)
Height is what makes containers feel layered and lush, but giant planters cost real money. The workaround is giving regular pots a platform so they play in the big leagues.
Use sturdy plant stands, upside-down terracotta pots, or even a weatherproof wood crate to lift one container 8–16 inches. Then cluster two lower pots beside it. You get that tiered “garden vignette” look without paying $150 for a single oversized planter.
Choose one tall plant for the raised pot—salvia, ornamental grass, or a zinnia variety that hits 24–30 inches. Keep the lower pots trailing and mounded for contrast.
Pro tip: secure the stand so it doesn’t wobble (ask me how I know). A tiny shim under one corner can save your toes and your dignity.
12. The No-Saucer Trick: Stop Water Stains on Deck Boards
Deck stains from saucers are the silent killer of patio vibes. You think you’re being responsible, then you lift a pot and find a ring that looks like a crime scene.
Instead of traditional saucers, use pot feet (little risers) to lift containers slightly so water drains and air circulates. For glazed ceramic, add a hidden plastic saucer inside a decorative cachepot, or use a waterproof plant caddy with a lip.
Match the hardware to your style: terracotta pot feet for rustic setups, black rubber risers for modern decks. It’s not glamorous, but it’s the difference between “fresh” and “permanent watermark.”
Pro tip: avoid letting pots sit directly on composite decking in full sun—heat builds under them. A half-inch of airflow helps roots stay happier.
13. A Pollinator Party Pot: Make Your Patio Buzz (In a Good Way)
If you want a patio that feels alive, plant for pollinators. It’s also secretly the easiest way to get nonstop movement and color without adding more decor.
Use a 16-inch glazed pot (bees love the warmth) and plant zinnias, lantana, and salvia together. Keep colors bold—hot pink, orange, purple—because pollinators are not shy. Place the pot 6–10 feet away from your dining table if you don’t want a front-row seat to bee traffic during burgers.
Add a shallow dish of water with pebbles nearby so bees can drink without drowning. Yes, you are now the responsible adult of your ecosystem.
Pro tip: avoid pesticide sprays on patio containers. If you must treat something, spot-treat early morning and keep it minimal—your flowers are basically a buffet.
14. The “Color Echo” Method: Repeat One Bloom Color Across Different Pots
Most patios look messy because every pot is doing its own thing. The fix is simple: repeat one color in multiple containers so the eye can connect the dots.
Choose one anchor color—say, magenta. Plant magenta petunias in a glazed pot near the door, add magenta zinnias in terracotta by the stairs, and tuck a magenta calibrachoa into a rail planter. Keep the rest of the palette neutral or complementary (white, purple, lime green).
This works especially well with colorful garden containers: if you have one cobalt pot, echo that blue with a smaller glazed pot or even a blue outdoor pillow so it feels intentional.
Pro tip: avoid repeating too many colors. One repeated color + one accent color is plenty. Anything more starts to look like a party store exploded.
15. A Wind-Proof Corner Setup for Exposed Decks
Windy decks turn tall plants into kites and lightweight pots into hazards. The solution is weight, width, and a layout that uses the house wall as a shield.
Pick wider containers (at least 14–16 inches) and place them in a corner where two walls meet, or beside a railing post. Use heavier materials—terracotta, ceramic, or half-barrels—over thin plastic. Plant lower, denser plants like marigolds, compact zinnias, and trailing petunias rather than tall, spindly options.
Add a layer of river rock on top of the soil for extra weight and a finished look. It also cuts down on soil blowing out.
Pro tip: avoid tall tomato cages in a windy spot unless they’re secured. Nothing ruins a summer evening like a metal cage clanging like a haunted chandelier.

16. How to Use Terracotta Without Drying Everything to a Crisp
Terracotta is gorgeous—warm, classic, and it makes flowers look like they belong in a magazine. But it’s also thirsty. It wicks moisture, which is great for some plants and a nightmare for others.
Use terracotta for Mediterranean-style plants: rosemary, thyme, lavender, and succulents. For petunias and other thirsty bloomers, either choose glazed pots or line terracotta with a thin plastic nursery pot inside (hidden hack: you get the look without the constant watering).
Keep terracotta grouped so the color reads intentional. Three terracotta pots together look curated; one lonely terracotta pot looks like you forgot it.
Pro tip: avoid sealing terracotta with a glossy sealer if you love the natural patina. Let it age—it’s like leather, it gets better with time.
17. Glazed Ceramic Planters: Where They Shine (And Where They Don’t)
Glazed ceramic planters are the statement earrings of a patio. They add polish fast, and they bounce light in a way matte pots simply can’t.
Use glaze near entrances and seating areas—places you’ll actually see up close. Choose one or two larger glazed pieces (16–20 inches) instead of many small ones; too many glossy pots can look busy. Pair them with simpler terracotta nearby so the glaze reads special.
Best colors: deep blue, green, and creamy white. They play nicely with zinnias and petunias and don’t look dated next year.
Pro tip: avoid placing glazed pots where sprinklers hit them daily—mineral spots will make them look cloudy. A quick wipe keeps them looking high-end (even if you bought them on sale).
18. A Kid- and Pet-Friendly Container Zone (So Nothing Gets Trampled)
If you have kids or a dog with zoomies, delicate containers placed along the main walkway are basically doomed. The trick is to create a “plant zone” that’s slightly protected but still visible.
Cluster your containers behind a bench, in a corner, or along the outer railing edge where traffic is low. Use heavier pots (half-barrels are great) so they don’t tip. Choose resilient plants: zinnias, marigolds, and petunias bounce back better than fussy blooms.
Visually, define the zone with an outdoor mat or a line of gravel trays under pots. It signals “this is intentional” and helps contain mess.
Pro tip: avoid placing toxic plants within nose-level reach of pets. If you’re unsure, stick with classic annuals and herbs—pretty and practical is a win.
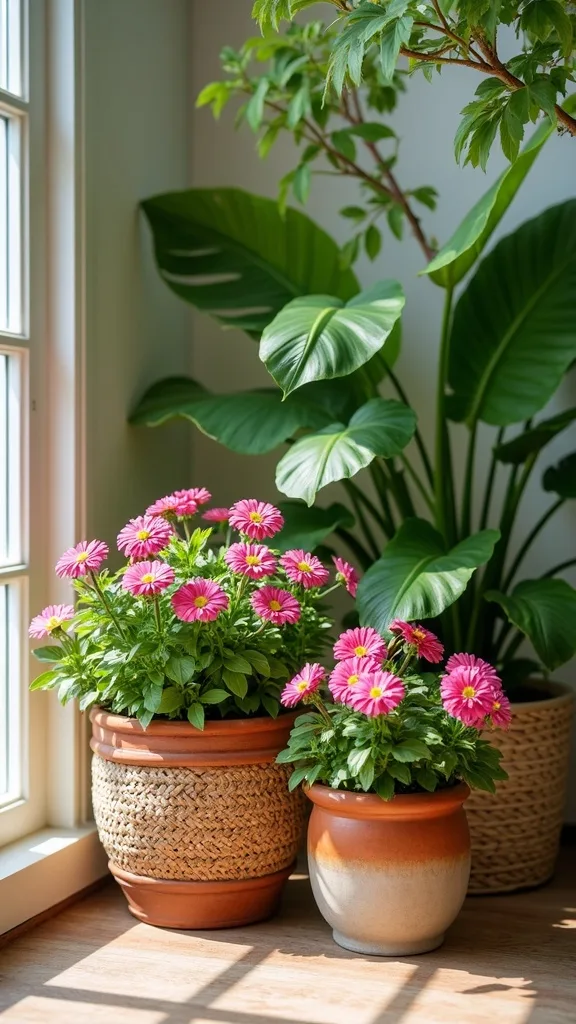
19. The “Entry Moment” Planter Pair That Makes Your Back Door Feel Styled
Your back door deserves the same treatment as the front. Two planters flanking a doorway instantly make a deck feel like an outdoor room, not an exit ramp.
Use two matching planters (18 inches wide) and mirror the planting: upright salvia or a compact ornamental grass in the center, petunias spilling around the edge, and a lime green filler for contrast. Keep the colors tied to your outdoor cushions or rug so it looks cohesive.
Go budget-friendly with resin planters that mimic stone, or splurge on real ceramic if your space is sheltered. Either way, symmetry is the luxury.
Pro tip: avoid tiny pots by a door. They look apologetic. Bigger containers feel welcoming and hold moisture better.
20. How to Create Privacy with Containers (Without Building Anything)
Sometimes you don’t need a fence—you need strategic plant height. Containers can give you a soft privacy screen that looks like decor, not a construction project.
Line three to five large planters (at least 18–24 inches) along the side you want to block. Plant tall, upright options: ornamental grass, tall salvia, or even a compact bamboo variety rated for containers. Underplant with petunias or trailing greenery so the base doesn’t look bare.
Use consistent containers for a clean line—wooden half-barrels for rustic, or matching black planters for modern. The repetition is what reads “designed.”
Pro tip: avoid placing tall privacy pots in a straight line with no variation. Stagger heights slightly so it feels natural, not like a green wall at a mall.
21. The “Thrift Store Pot” Glow-Up (Paint + One Great Plant)
Not every container needs to be a $90 artisanal masterpiece. A thrifted pot can look shockingly chic with the right paint and a confident planting choice.
Look for sturdy ceramic or terracotta with good bones. Clean it, then use an exterior-safe spray paint in matte black, warm white, or muted olive. Plant one dramatic bloomer—like a tight mound of petunias in one color—or one upright salvia for a modern look.
Keep the finish matte so it looks intentional, not craft-project shiny. Pair the painted pot with natural terracotta so the mix feels collected.
Pro tip: avoid painting the inside rim where soil stays wet. Paint can peel there; keep it to the exterior and you’ll get a longer-lasting glow-up.
22. A Dinner-Party Centerpiece Pot That Isn’t a Candle (And Won’t Melt)
Outdoor tables get cluttered fast—plates, drinks, sunscreen, the mysterious extra bowl. A living centerpiece keeps the table pretty without adding more “stuff.”
Use a low, wide bowl planter (10–14 inches) and plant compact blooms: mini petunias (calibrachoa) plus alyssum spilling over. Keep it under 10 inches tall so guests can see each other and you’re not hosting behind a floral barricade.
Choose a glazed bowl in white or deep blue so it feels like serveware. If you’re on a budget, a simple terracotta bowl works—just keep the planting tight and neat.
Pro tip: avoid strong-scented flowers right on the table. Your burgers and citronella already have opinions; let the centerpiece be the quiet, pretty friend.
23. The “One Watering Can” Rule: Design Your Pots by Water Needs
Most container gardens fail because we mix plants that want totally different lives. Then we water everything the same and act surprised when something sulks. (It’s me. I’m “we.”)
Group containers by thirst: keep thirsty bloomers (petunias, calibrachoa) together in glazed or resin pots, and keep drought-tolerant herbs or succulents together in terracotta. Place the thirsty group closer to the hose spigot so you actually water them.
Label plants when you bring them home, at least for the first month. It’s not nerdy; it’s how you avoid playing “guess who’s dying” every weekend.
Pro tip: avoid planting rosemary with petunias in the same pot. Rosemary likes it drier; petunias like consistent moisture. They can’t both be happy roommates.
24. How to Make a Summer Garden Palette Look Cohesive on a Busy Deck
Decks come with visual noise—railings, grills, furniture, maybe a kid’s water table. Your containers need a palette plan so they don’t add to the chaos.
Pick one container family (all terracotta + one glazed accent) and one plant palette (for example: coral, magenta, and white). Then repeat it across the deck in clusters. Use greenery as a buffer—sweet potato vine, licorice plant, or creeping jenny calms the color and connects pots.
If your furniture cushions are patterned, keep flowers simpler: mostly solids with one accent color. If your furniture is plain, you can go bigger on the blooms.
Pro tip: avoid buying “one of everything” at the garden center. It feels fun for 12 minutes, then your deck looks like a plant swap. Choose a plan and stick to it.

25. The Fastest Weekend Reset: Swap Pots, Not Plants
Sometimes your plants are fine—the containers are the problem. If the vibe feels off, you don’t need a full replant. You need a styling edit.
Pull all pots into one spot and sort by size and material. Put your largest (half-barrel or 20-inch planter) as the anchor, then build two clusters of three around it. Swap plants between pots if needed: trailing plants go on edges where they can spill; upright plants go in back corners.
Add one new hero container if you can: a single glazed ceramic planter in deep blue or green changes everything. Then keep the rest terracotta so the hero reads like a deliberate choice.
Pro tip: avoid scattering pots evenly around the perimeter. Clusters look styled; evenly spaced pots look like you’re protecting the deck from intruders.
Final Thoughts
Good container gardening on a patio isn’t about having more plants. It’s about having fewer, better decisions—bigger pots where it matters, repeated colors so your eye can relax, and one or two statement containers that make the whole setup feel like an outdoor-furniture showroom (but with more personality and less sales pressure).
And look, if you take nothing else from this: stop treating pots like random storage for plants. Treat them like decor you live with. Terracotta brings warmth, glazed ceramic brings polish, half-barrels bring volume, and the right patio container plants do the rest while you pretend you “just threw it together.”
This weekend, pick one corner of your deck, build one cluster of three containers (tall/medium/short), and plant a simple combo—zinnias + petunias + one trailing green. Then set a recurring reminder to water and trim once a week, and enjoy your patio like it finally got the memo that it’s summer.
What I’d Do Differently
When I first tried this, I treated my deck like a plant holding pen: I bought whatever looked cute, put each pot in its own lonely spot, and then watered everything the same amount because I assumed plants were… cooperative. The specific mistake was mixing a rosemary (loves drying out) in the same container as petunias (love steady moisture) because I thought “green is green.” By July, the rosemary was fine and the petunias were basically crunchy confetti. The correct approach is to design by water needs first—thirsty bloomers together in glazed/resin, drought-tolerant herbs together in terracotta—then style the groups like decor.
I also wish I’d known how much container size changes your life. Going from 10-inch pots to 14–16 inch pots cut my watering stress in half, and the plants looked fuller because they actually had room to root. If you do one thing before you start, pick your spot, pick your pot sizes, and commit to a simple repeating palette—then plant with confidence and let the summer do its thing.
Products I Recommend for This Project
Here are some of my favourite products to help you bring these ideas to life:
- Miracle-Gro Moisture Control Potting Mix (2 cu ft) — Helps containers stay evenly moist so you’re not watering like it’s your second job.
- Osmocote Smart-Release Plant Food Flower & Vegetable (2 lb) — An easy slow-release fertilizer that keeps summer blooms going with less fuss.
- Bloem Ups-A-Daisy Planter Insert (13 in) — Reduces soil needed in deep pots and improves drainage so roots don’t sit soggy.
- Hydrofarm GROW!T Heavy Duty Plant Caddy with Casters (14 in) — Makes big pots movable for sun, storms, or rearranging your layout without back pain.
- GARDENIX DECOR Pot Feet (Set of 12) — Lifts pots off the deck to prevent water stains and improve airflow underneath.