This post contains affiliate links. As an Amazon Associate, I earn from qualifying purchases at no extra cost to you.
Summer renovation season hits, and suddenly the kitchen becomes a work site and a dinner party at the same time. You rinse berries under a bare bulb, step around boxes, and wonder why the old basin feels like it was designed for a different life.
This guide breaks down kitchen sink styles with the clarity of a showroom, but with real-home constraints in mind. You’ll see what changes when you go single-bowl versus double-bowl, how materials behave day after day, and what a smart sink renovation plan looks like before the countertop goes in.
This is for anyone updating a farmhouse kitchen, swapping out a tired drop-in, or choosing a sink that needs to earn its footprint in a smaller layout.
Inside you’ll get apron sink ideas that actually solve problems: splashing, cabinet fit, drain placement, and that awkward moment when the disposal doesn’t line up. You’ll also get styling moves that keep the look timeless—wood, metal, linen, and light—without turning your kitchen into a theme.
Below are 25 Farmhouse Sink Ideas & Kitchen Sink Styles that anchor the room, simplify your workflow, and make every countertop detail look finished.
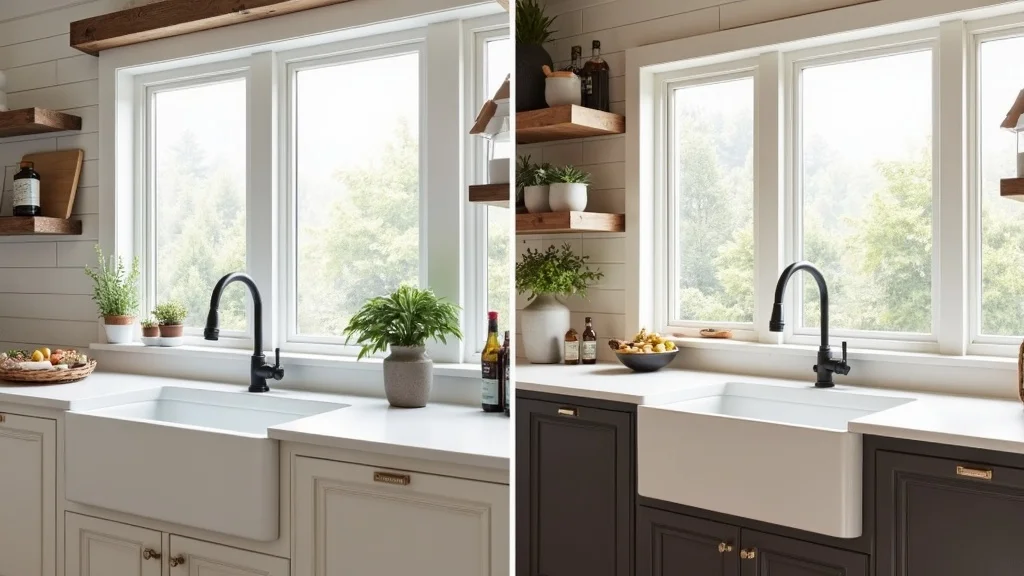
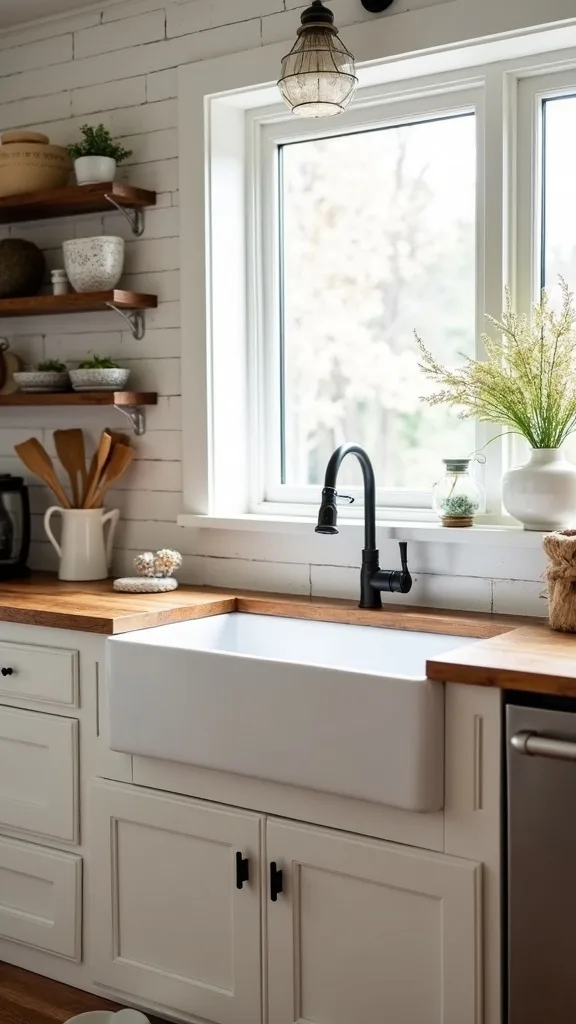
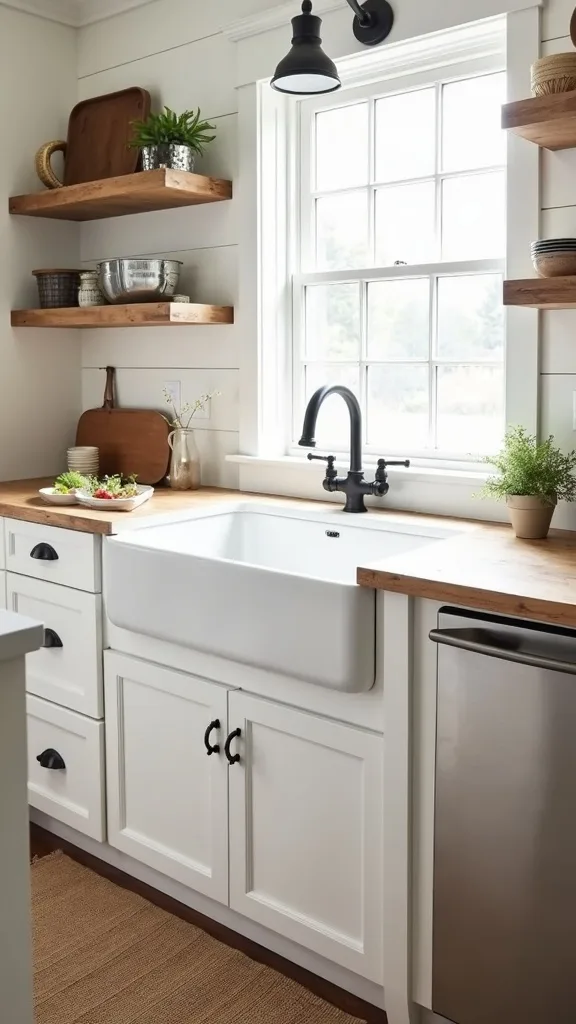
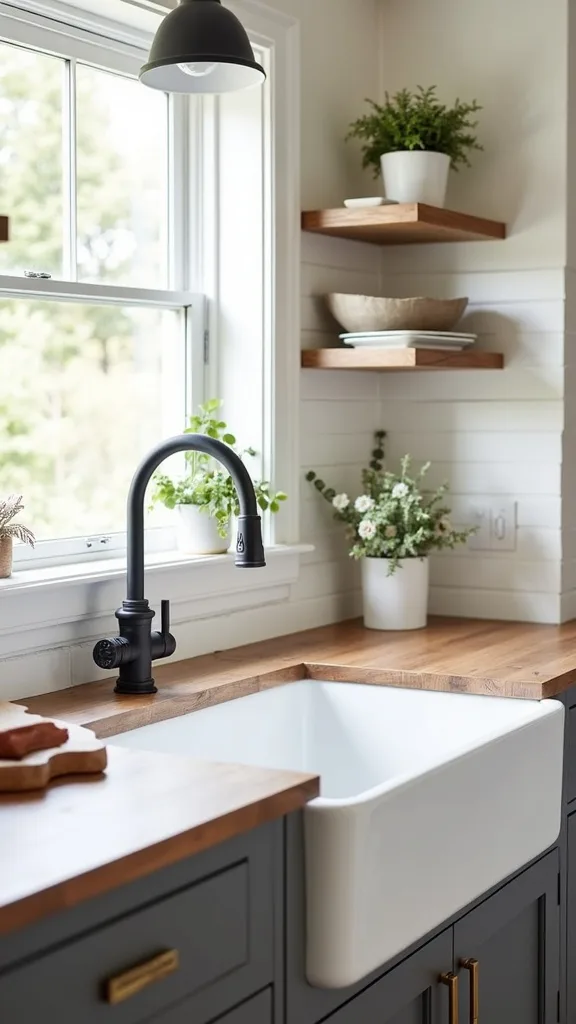
1. Side-by-side comparison: single vs double apron sink, materials, and plumbing tips
A sink choice is a workflow choice. A single bowl gives you one uninterrupted basin for sheet pans and stock pots, while a double bowl splits tasks cleanly—wash on one side, rinse on the other.
Implement it by taping out both options on your counter: a 30–33-inch single bowl versus a 33-inch double bowl, then mimic real moves like draining pasta and scrubbing a roasting pan. Ask your plumber where the drain can land; moving it even a few inches changes what fits in the cabinet and whether your disposal crowds the doors. Choose the material next—fireclay for a bright, classic face, stainless for quiet practicality, or composite granite for a matte, low-drama surface.
Keep your palette grounded: white fireclay with warm oak, brushed nickel with creamy paint, or charcoal composite with black hardware. Pro tip: if you want a double bowl, pick an offset drain so the cabinet still holds a tall trash pull-out—and the space stays calm and capable.
2. Which apron-front sink size fits my cabinet without rebuilding everything?
The bones matter first. The sink must match the base cabinet width, not your Pinterest board.
Measure the inside width of your sink base cabinet, then choose a basin that leaves room for clips, shims, and plumbing—most kitchens land best with a 33-inch sink in a 36-inch base. If your cabinet is 30 inches, commit to a 27-inch apron-front and keep the faucet centered so the room reads balanced. For a sink renovation, confirm whether your cabinet can be modified with a support rail; apron-fronts are heavy and need a firm cradle.
Material affects weight: fireclay and cast iron demand stronger supports, while stainless stays forgiving. Keep the surrounding finishes quiet—simple Shaker doors, a pale counter, and one honest metal for the faucet.
Pro tip: avoid “almost fits” sizing. A too-tight sink forces sloppy cuts and stress cracks later, and the whole kitchen will feel slightly off every time you stand at it.
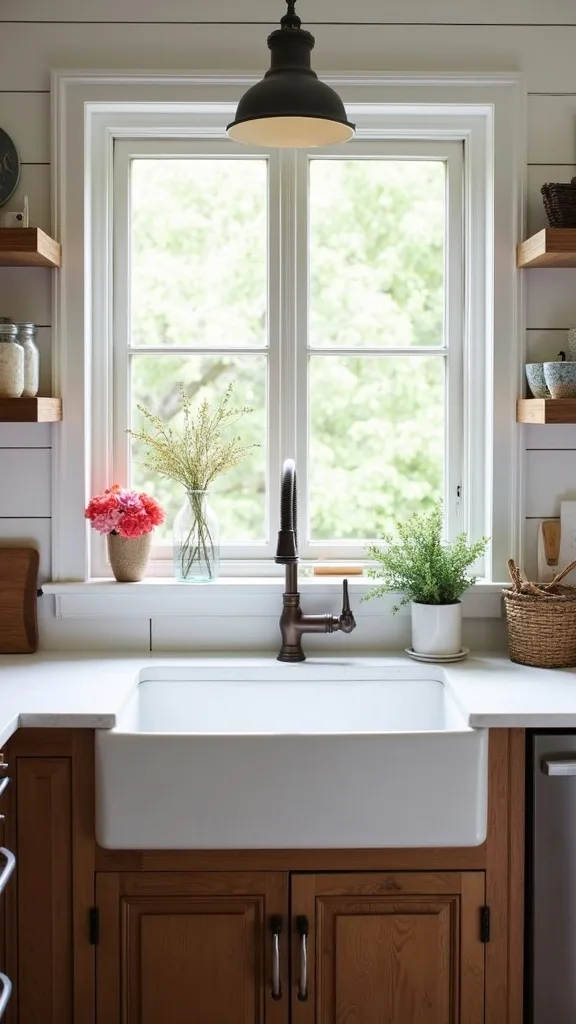
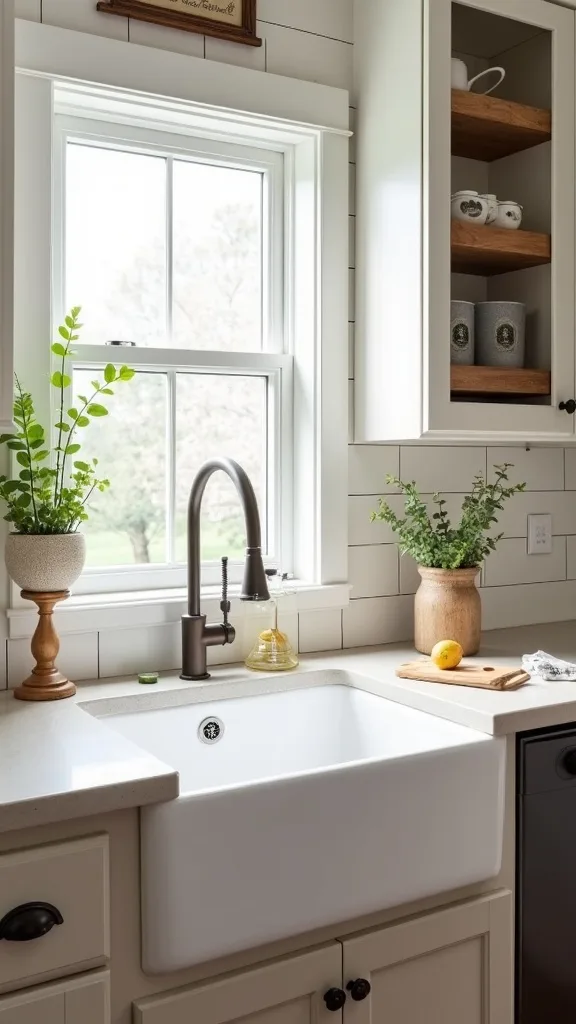
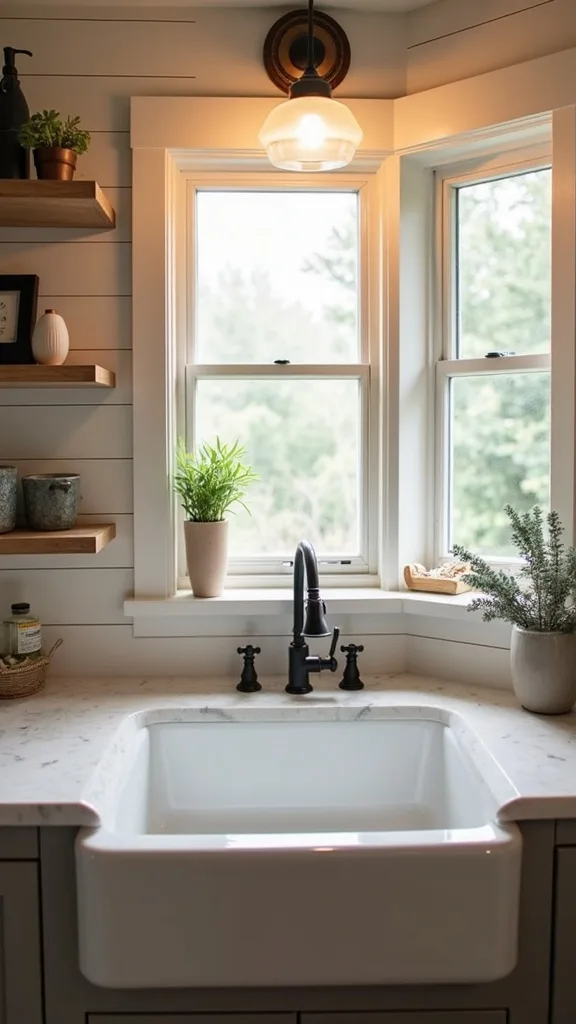
3. What’s the most timeless farmhouse look: fireclay, cast iron, or stainless?
Timeless is not a trend. It’s a surface that looks better after 1,000 meals.
Fireclay delivers that crisp apron face and bright reflection that lifts a room, especially when summer light hits the counter at 6 p.m. Cast iron feels substantial and traditional, but the enamel can chip if you treat it like a work sink. Stainless is the quiet workhorse; it suits modern and classic homes because it disappears into the routine.
Choose based on your real habits: if you stack heavy pans, stainless forgives. If you want a true farmhouse kitchen focal point, fireclay gives you that clean, architectural front. Pair it with unlacquered brass or brushed nickel so the metal ages softly instead of shouting.
Pro tip: avoid glossy white if your counters are also bright white. The sink will blur into the counter and lose its shape; a slightly creamy tone or a soft-veined stone keeps the apron line crisp and intentional.
4. How do I choose between a single-bowl and double-bowl sink for daily cooking?
This is the question that decides whether your kitchen feels effortless. The right bowl count turns cleanup into one clean sweep.
Pick a single bowl if you cook with large pans, bake on half sheets, or wash oversized vases. Choose a double bowl if you hand-wash often and like a dedicated rinse zone that keeps food bits corralled. For implementation, set a colander in one side and see if you still have room for a pan; that’s the real test, not the spec sheet.
For finishes, keep the faucet simple and tall, and add a pull-down sprayer so either layout stays flexible. Ground the area with a low-profile sink grid to protect the bottom and keep glassware steady.
Pro tip: avoid equal-size double bowls unless you truly need two full basins. A 60/40 split reads more modern and works better with a disposal on the smaller side.
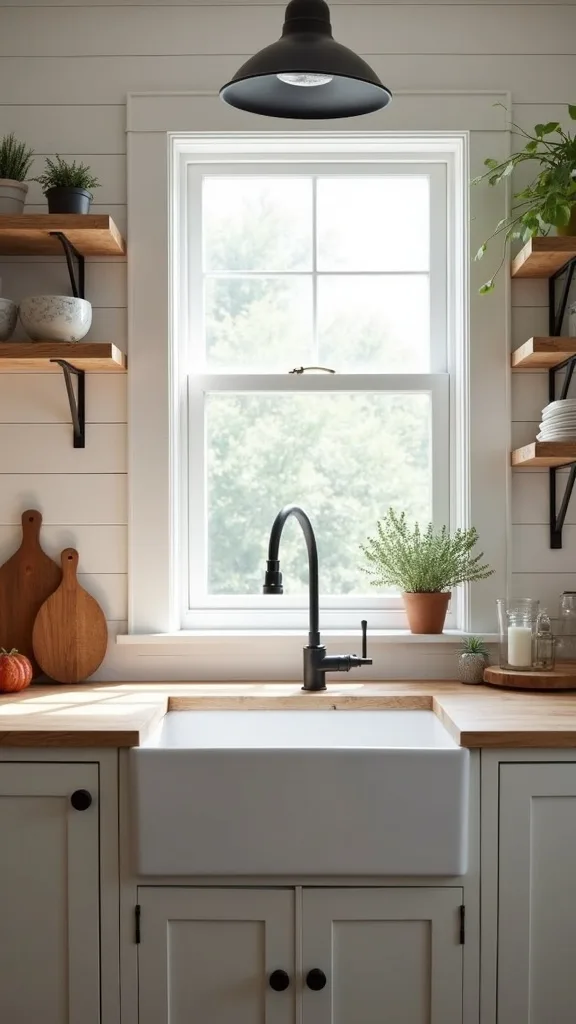
5. What’s the best sink style for a small kitchen that still wants an apron front?
Small kitchens need discipline. The sink must do more with less visual noise.
Choose a compact apron-front in the 24–27-inch range and keep the front panel plain—no fluting, no heavy trim. Use a single bowl to preserve usable space, then add accessories that create zones: a roll-up drying rack, a cutting board that bridges the basin, and a slim caddy that hides soap. If the cabinet is tight, select an offset drain to keep the plumbing tucked to one side.
Materials that help: stainless steel for a lighter visual footprint, or white fireclay if your counters are darker and need lift. Keep textiles crisp—a narrow striped runner and a simple linen towel on a hook.
Pro tip: avoid an oversized bridge faucet in a small room. It crowds the backsplash and makes the sink wall feel busy, which shrinks the whole kitchen at eye level.
6. How do I make a modern kitchen work with an apron-front sink?
Modern kitchens thrive on clean lines. An apron front can still belong there when the details stay restrained.
Choose a square-edged apron-front in stainless or matte composite granite, then pair it with slab-front cabinets or simple Shaker doors in a flat paint. Keep the counter edge slim and the backsplash quiet—one solid surface or a tight-stacked tile so the sink reads as the hero. Implementation is about alignment: center the faucet precisely, and keep the window trim and open shelves symmetrical.
Color matters: charcoal, warm white, or soft greige, then one metal finish throughout. Add a single clear glass vase with garden clippings instead of a cluster of decor.
Pro tip: avoid ornate apron detailing with modern cabinetry. The mismatch reads like two renovations happening at once, and the room loses its confident, editorial calm.
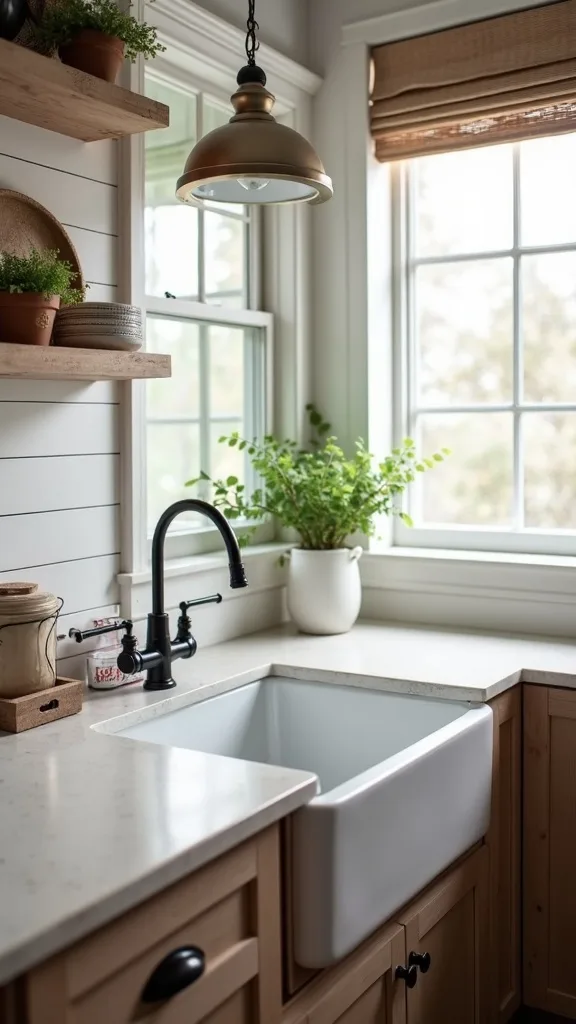
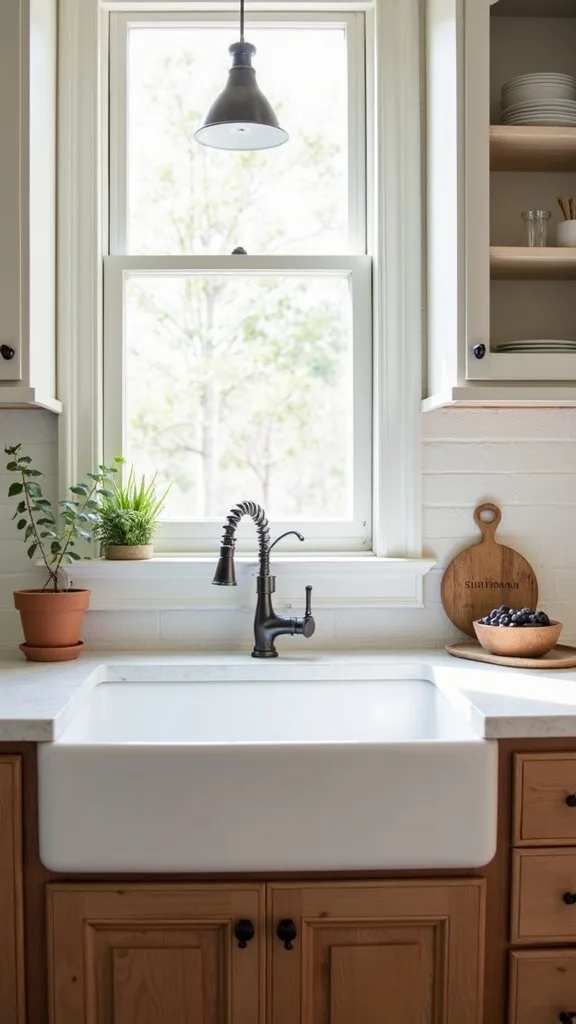
7. What apron sink ideas work best with butcher block counters?
Wood counters bring warmth fast. They also demand a sink edge that respects water.
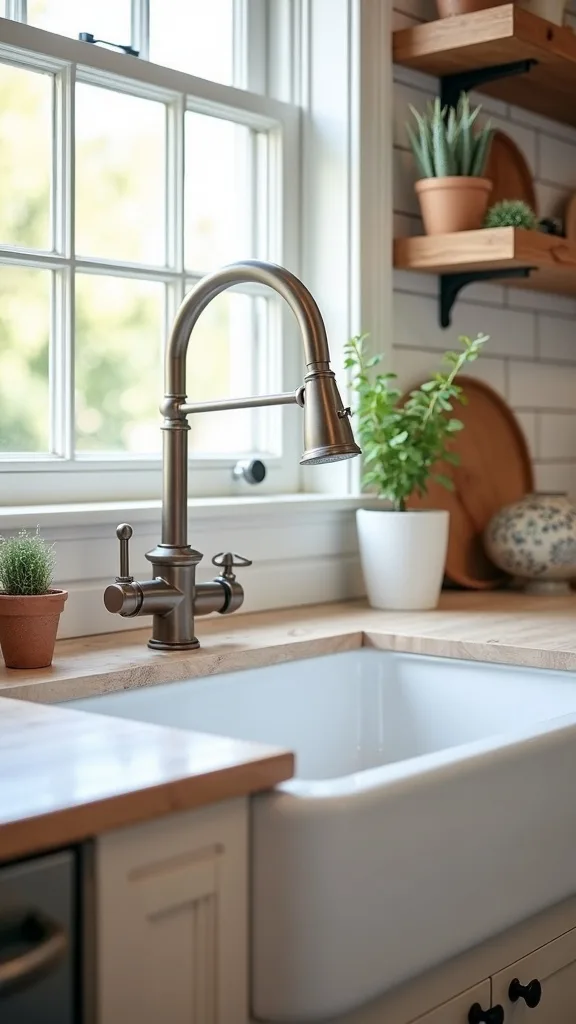
Choose a sink with a clean, well-sealed rim and plan the cutout carefully so standing water never sits on raw wood. An undermount stainless apron-front is the practical match because it lets you wipe crumbs and water straight into the basin. If you prefer fireclay, keep a tight seam and commit to routine oiling around the cutout area.
Style it with tactile layers: natural maple or walnut, a soft striped towel, and a brushed metal faucet that looks honest against the grain. Add a small tray for soap so the counter stays dry.
Pro tip: avoid placing a wooden knife block right next to the sink edge. It traps splashes, stains the block, and makes the counter feel perpetually damp instead of sun-warmed and welcoming.

8. Which sink finish hides scratches and water spots the best?
Real kitchens show marks. The goal is a finish that ages quietly, not one that demands constant polishing.
Choose a brushed stainless finish with a visible grain; it disguises fine scratches better than mirror-polished steel. For a darker look, composite granite in a matte charcoal hides water spots and looks steady against light counters. Fireclay stays bright, but it will show metal transfer from pans—easy to clean, but visible.
Implementation is simple: pair your sink with a matte faucet and a matching drain so the eye reads one calm field. Keep the area tidy with a fitted grid and a small, neutral soap dispenser.
Pro tip: avoid glossy black sinks if your water is hard. The mineral spots will show by lunchtime, and you’ll feel like you’re cleaning for the sink instead of using it.
Cost & Materials Estimate
Most sink upgrades land between a simple swap and a full cabinet-and-plumbing reset, with a realistic all-in range of $650–$3,900 depending on material and labor.
| Item | Estimated Cost | Where to Buy |
|---|---|---|
| Apron-front sink (fireclay or stainless, 30–33 in.) | $450–$1,800 | Wayfair / Home Depot |
| Pull-down kitchen faucet | $120–$380 | Amazon / Lowe’s |
| Plumber labor (swap + drain alignment) | $250–$900 | Home Depot (Pro Referral) / Local |
| Sink base reinforcement materials (rails, plywood, fasteners) | $35–$120 | Lowe’s / Home Depot |
| Sink grid + strainer set | $35–$110 | Amazon |
| Optional: new disposal (quiet model) | $120–$280 | Home Depot / Amazon |
Total estimated cost: $650–$3,900 Save money by keeping the drain location and reusing your existing faucet holes; splurge on the sink material you’ll touch every day.
9. How do I plan plumbing for an apron-front sink without surprises?
Plumbing is the invisible architecture under the prettiest sink. Plan it early and your cabinet stays functional.
Before ordering, confirm drain location and depth so the trap and disposal fit without hitting drawers or pull-outs. Ask for a rough-in plan and mark where shutoff valves and the drain line sit; a deep bowl can push everything back and steal storage. If you want a trash pull-out, choose an offset drain and keep the disposal compact.
Keep finishes cohesive: matching supply lines and a tidy escutcheon plate make the under-sink area feel as considered as the countertop. Add a small battery light inside the cabinet for quick checks.
Pro tip: avoid stacking bins directly under the drain. One slow leak will ruin everything; keep a clear “inspection zone” so you spot drips before they become cabinet rot.

10. Do I need a special cabinet for a farmhouse sink?
A true apron-front often needs cabinet changes. That’s not a downside. It’s a chance to do it correctly.
If you’re installing an apron-front, plan for a sink base designed to carry weight and allow the front panel cutout. Many standard bases can be modified with support rails and a reinforced floor, but the work must be square and solid. During a sink renovation, insist on a level cradle and shims that won’t compress over time.
Choose cabinet fronts that match the sink’s honesty: simple rails, clean paint, and hardware with a classic shape. Add a washable runner underfoot to soften the work zone.
Pro tip: avoid trusting the countertop to “hold” the sink. The sink should be supported by the cabinet structure; relying on stone and caulk invites cracks and sagging that show up months later.
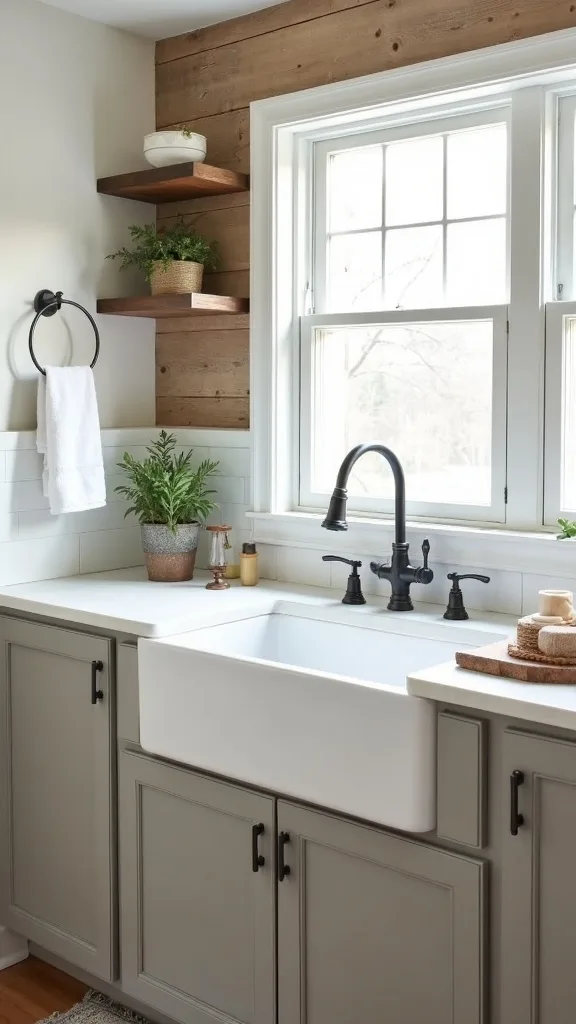
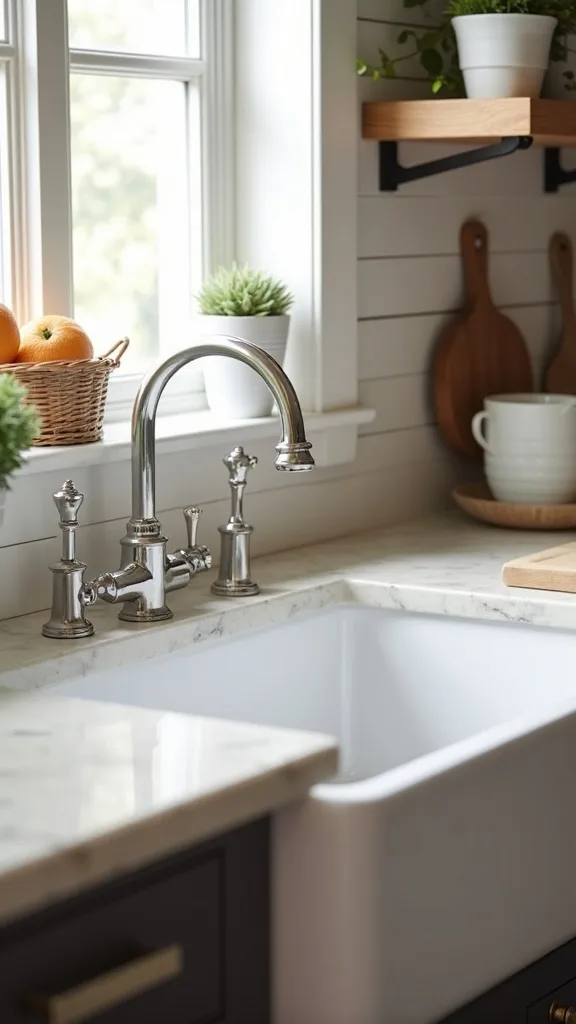
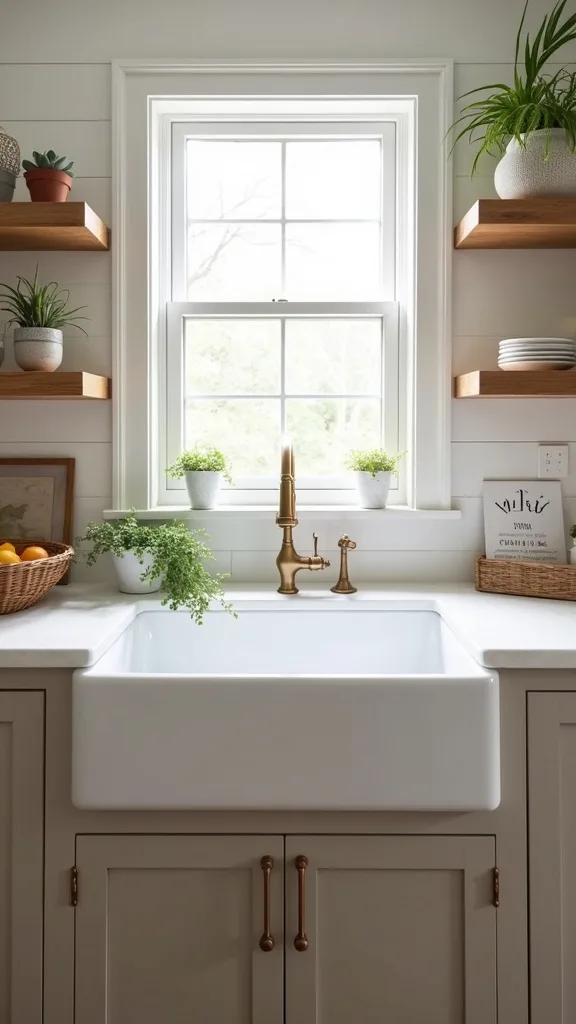
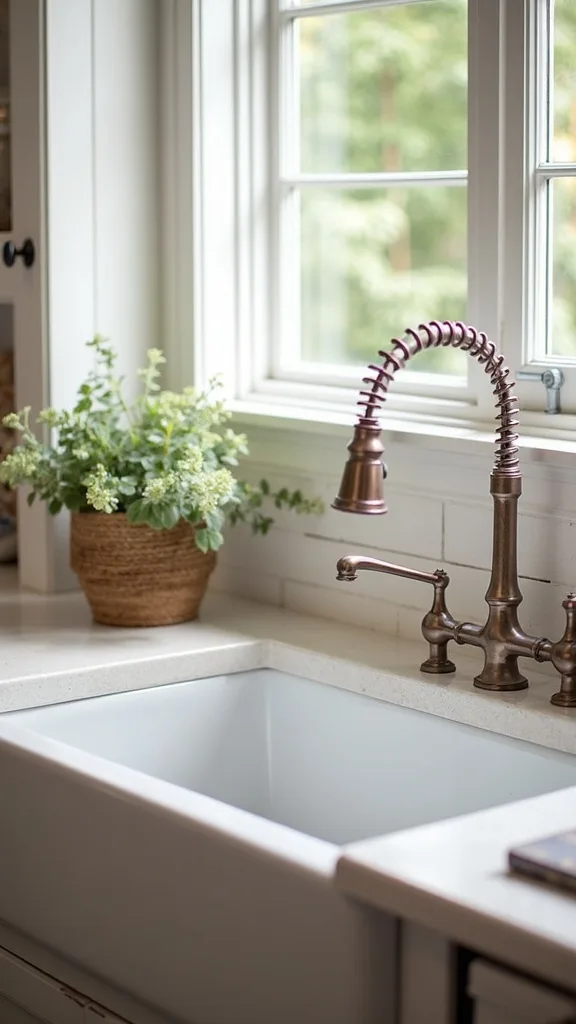
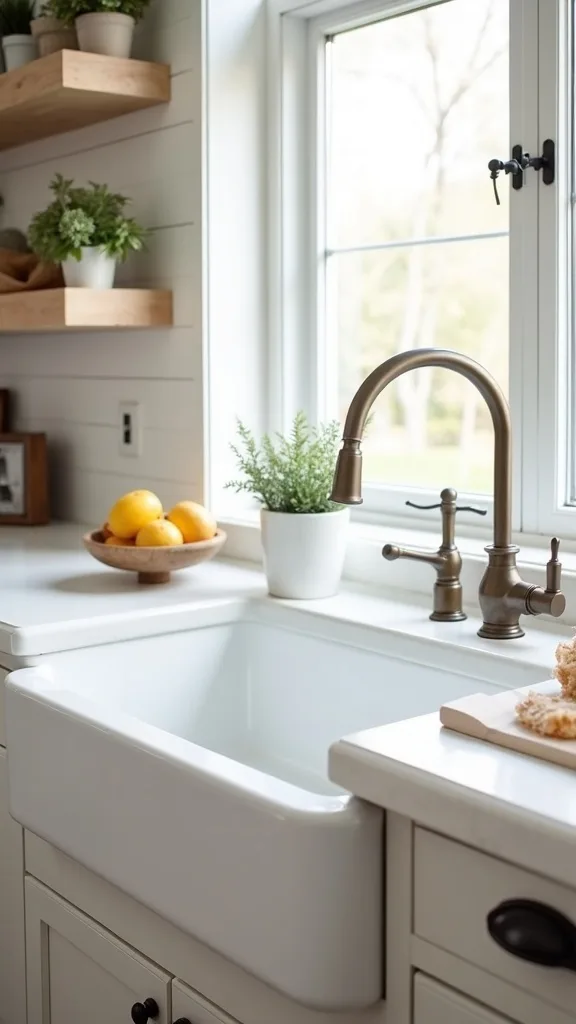
11. What faucet style looks right with an apron-front sink?
The faucet is the jewelry, but it must work like a tool. The best choice looks calm in the background and strong up close.
Pick a tall gooseneck with a pull-down sprayer for reach, then choose one finish and repeat it across the room—faucet, cabinet pulls, and light fixtures. If your sink is wide, select a faucet with a generous arc so the spray lands where you need it, not on the apron edge. Keep the handle placement easy for wet hands.
For a classic look, brushed nickel reads clean and forgiving. For warmth, unlacquered brass develops a soft patina that fits a lived-in kitchen.
Pro tip: avoid ultra-short faucets with deep basins. They force awkward angles, splash more, and make the sink feel cramped even when the counter is generous.
12. How do I stop splashing with a deep apron-front sink?
Deep sinks are a gift until the water hits wrong. Splashing is usually a faucet-and-depth mismatch, not a user error.
Choose a faucet with a controlled spray pattern and keep the aerator clean so the stream stays steady. Position the faucet so the water lands closer to the drain, not the front wall of the basin, and consider a slightly lower arc if your sink is extra deep. Add a bottom grid to break the fall and quiet the impact.
Materials help too: stainless absorbs sound better with a grid and pad, while fireclay stays louder but visually crisp. Keep the counter clear so you can wipe water in one pass.
Pro tip: avoid setting the faucet too far forward on the counter. It looks fine in photos, but it pushes the stream toward the apron and turns rinsing into a constant cleanup loop.
13. What sink accessories are worth buying (and which clutter the counter)?
The right accessories make the sink feel like a workstation. The wrong ones turn it into a storage shelf.
Invest in three pieces: a fitted bottom grid, a drain strainer that actually catches scraps, and a roll-up rack that stores flat when guests arrive. Add a bridge cutting board only if you cook daily and want prep directly over the basin. Keep soap and brush on a small tray so drips don’t spread.
Choose finishes that disappear: stainless accessories in a stainless sink, or matte black accessories in a dark composite basin. Keep textiles minimal—one hand towel on a hook, one dish towel folded on the counter.
Pro tip: avoid oversized caddies that hang inside the sink. They steal basin space, trap grime, and make your sink look perpetually “mid-task” even when the kitchen is clean.
14. How do I pair a sink with my countertop material for a cohesive look?
This is where the room becomes a picture. Counter and sink should either match in tone or contrast with intention.
If your counter is busy—strong veining or bold pattern—choose a simple sink finish like white fireclay or brushed stainless. If your counter is quiet, you can choose a darker composite sink for depth. Keep the seam line crisp and ask for a clean bead of color-matched silicone so the transition reads deliberate.
For a classic palette, pair soft white with honed stone and warm wood. For a sharper look, pair stainless with a light quartz and black hardware.
Pro tip: avoid mixing too many whites. A bright white sink against a creamy counter can look accidental; bring home samples and view them in afternoon light before you commit.

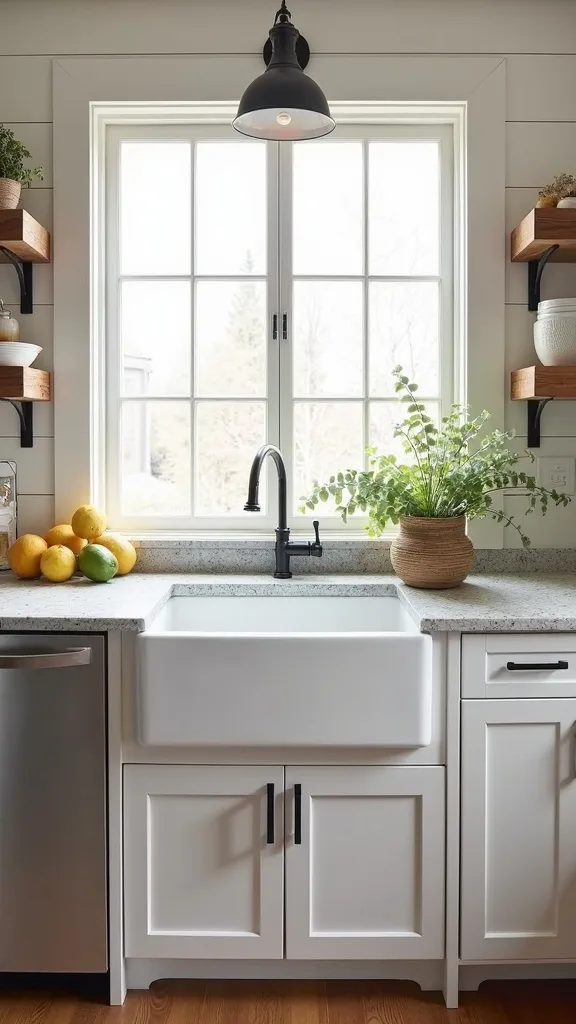
15. What’s the best sink style for a busy family kitchen in summer?
Summer means more dishes, more fruit, more sticky hands. The sink needs stamina.
Choose a large single bowl in stainless or composite granite so you can wash a grill tray and a watermelon rind without playing Tetris. Add a pull-down faucet and a simple garbage disposal switch that’s easy to reach. Keep the surrounding zone washable: a wipeable runner, a closed trash pull-out, and a backsplash that doesn’t trap splatter.
Colors should stay cool and forgiving—brushed metal, warm whites, and light oak. Add one living element: a small jar of basil cuttings by the window.
Pro tip: avoid a delicate glossy finish if your kids help with dishes. You’ll spend the season policing the sink instead of enjoying it, and the kitchen will feel tense instead of ready.
16. Can I install an apron-front sink with existing granite countertops?
Yes, but the plan must be precise. Stone is not flexible, and your cabinet face is the real constraint.
Start by confirming whether your current cutout can be modified; many apron-front swaps require cutting the cabinet front and sometimes the stone edge. Hire a fabricator for any stone work—this is not a DIY moment. Choose a sink that matches the existing cutout width as closely as possible, then use a neat trim or reveal detail so the transition looks intentional.
Stick to timeless pairings: stainless with speckled granite, or creamy fireclay with warmer stone. Keep hardware consistent so the sink reads like an upgrade, not a patch.
Pro tip: avoid forcing an apron-front into a cabinet that can’t be reinforced. If the sink settles, the stone can crack, and that’s an expensive lesson.
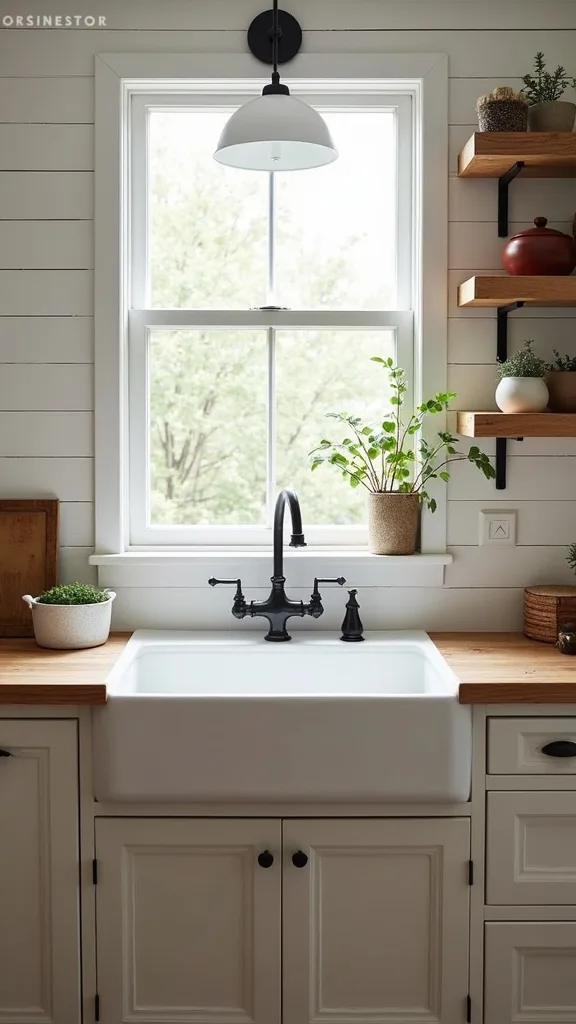
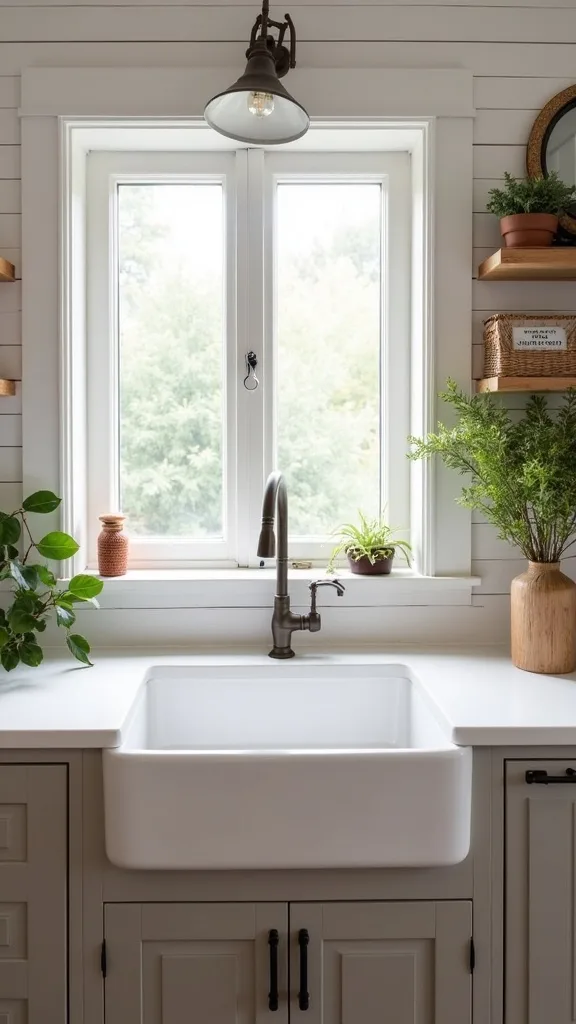
17. What kitchen sink styles feel classic without leaning overly rustic?
Classic is about proportion and restraint. You can nod to farmhouse without going full country.
Choose a plain-front apron sink with straight edges, then pair it with simple cabinet doors and a neutral backsplash. Skip decorative corbels and heavy distressed finishes; let the sink be one clean architectural note. Add warmth through textiles—a thin linen cafe curtain or a striped runner—rather than themed decor.
Materials that land well: white fireclay with polished nickel, or brushed stainless with soft greige cabinetry. Bring in wood through a cutting board that lives upright against the backsplash.
Pro tip: avoid overly ornate sink-front detailing. Fluting and heavy trim can lock you into one style era; a plain apron front stays flexible when you change paint colors or lighting later.
18. How do I choose the right sink depth for comfort and back strain?
Comfort is design. A sink that’s too deep turns dishwashing into a daily hunch.
For most adults, a depth around 9–10 inches feels balanced—deep enough for pans, shallow enough to keep your shoulders relaxed. If you’re tall or the counter is lower than standard, consider a slightly deeper bowl; if you’re shorter, keep it closer to 8–9 inches. Stand at your current sink and notice where your wrists land; that’s your body telling you what to change.
Pair comfort with softness: a cushioned runner at the sink and a faucet handle that turns easily. Keep lighting warm and steady so the work zone doesn’t feel harsh.
Pro tip: avoid choosing depth based only on “bigger is better.” The best sink is the one you can use for 20 minutes without feeling it in your neck.
19. What lighting makes the sink wall look finished during a renovation?
The sink wall is a stage. Light makes it feel designed, even while the rest of the kitchen is mid-reno.
Install one focused source over the sink—either a small semi-flush or a pair of simple sconces flanking a window. Choose warm white light (2700K–3000K — the cosy, yellowish tone you see in most homes) so the sink’s surface looks creamy, not clinical. Aim for strong brightness (measured in lumens) so you can prep and clean without shadows.
Keep fixtures simple: aged brass, black, or brushed nickel, with clear or soft opal glass. Add a dimmer so evenings feel calm.
Pro tip: avoid cool, bluish bulbs. They make white sinks look gray and every water spot look louder, which fights the relaxed, summer-kitchen mood.
20. How do I style the sink area so it feels like a finished farmhouse kitchen?
This is where textiles and objects do their quiet work. The sink can look like a tool or like a centerpiece.
Start with one towel choice and commit: a thick cotton stripe or a soft linen in oat or slate. Add a wood board leaned vertically, not flat, so it reads as texture instead of clutter. Keep soap in a single bottle and choose one brush that looks intentional.
Anchor the scene with honest materials: oak, stoneware, and a simple metal tray. Then add greenery—one small potted herb or a clipped stem in a clear jar.
Pro tip: avoid lining up multiple bottles across the backsplash. It turns the sink wall into a convenience-store shelf; one bottle and one brush keeps the whole counter looking edited and timeless.
21. What should I avoid when choosing a white apron-front sink?
White reads clean, but it punishes sloppy decisions. The wrong white becomes the loudest thing in the room.
Avoid buying without seeing the exact shade next to your counter sample. Some whites lean blue, others lean cream, and the mismatch shows most in afternoon sun. Avoid skipping a bottom grid; metal pans will leave marks faster than you expect. And avoid harsh abrasive cleaners that dull the glaze over time.
Choose a white that matches your cabinet undertone and pair it with soft metal finishes so everything feels intentional. Keep a gentle cleaner under the sink and wipe the basin dry when company is coming.
Pro tip: if you want that bright, crisp look, choose a slightly warmer wall paint. The sink will still read white, but the room will feel welcoming instead of stark.
22. How do I make a double-bowl sink feel less dated?
Double bowls can look old-school when the proportions are wrong. Modern double-bowl design is about smarter asymmetry.
Choose a 60/40 split with a low center divider so large pans still fit when needed. Use an offset drain and a clean, minimal strainer so the basin looks open. Pair it with a simple faucet silhouette and a tight backsplash pattern that feels current.
Materials matter: brushed stainless keeps it crisp, and matte composite granite makes the whole unit read like one calm block. Keep accessories minimal—one grid, one roll-up rack.
Pro tip: avoid the high, thick center divider. It breaks the sink into two tiny boxes and makes cleanup feel fussy; a low divider keeps the function without the dated look.
23. What’s the best way to add a sink to a kitchen island (prep sink vs main sink)?
An island sink changes how people move through the room. Done right, it makes summer cooking feel like a rhythm, not a traffic jam.
Choose a smaller prep sink if the island is your chopping and cocktail zone, then keep the main sink on the perimeter for heavy cleanup. If the island must hold the main sink, go single-bowl and plan the dishwasher placement so the door doesn’t block the walkway. Use a simple faucet and keep sightlines clean—no tall soap towers.
Match metals across both sinks: one consistent finish keeps the kitchen cohesive. Add pendant lighting with warm white light (2700K–3000K — the cosy, yellowish tone you see in most homes) so the island feels inviting at night.
Pro tip: avoid placing the island sink directly across from the range. Two “work stations” facing each other creates collisions, and the kitchen will feel tight even if it’s large.
24. Which backsplash choices pair best with apron-front sinks?
The backsplash frames the sink like a mat frames art. It should support the apron line, not compete with it.
Choose classic tile shapes with quiet grout lines: 3×6 subway in a stacked or simple running pattern, or a small square tile for a more tailored grid. Keep grout slightly deeper than the tile so it hides splashes and stays crisp. If you want stone slab, keep the veining subtle so the sink remains the focal point.
Pair with grounded materials: handmade-look ceramic in warm white, or a soft greige tile with a white sink for gentle contrast. Add one open shelf only if you can keep it edited.
Pro tip: avoid high-contrast grout with a busy tile near the sink. It highlights every splash zone and makes the daily work area feel visually noisy.

25. What’s the one change that makes any sink area feel custom?
Custom doesn’t mean complicated. It means every choice looks like it was made on purpose.
Add a simple, integrated ledge: a narrow stone or wood strip behind the faucet for soap and a small vase, or a built-in rail on the backsplash for a towel. Keep it aligned with the faucet centerline so the wall reads symmetrical. Then hide the messy parts—use a pull-out trash, a discreet under-sink organizer, and matching bottles.
Choose one accent material and repeat it: oak in a board and a stool, or brass in faucet and sconce. Finish with greenery that looks fresh, not staged.
Pro tip: avoid scattering decor across the counter. One ledge, one bottle, one living stem creates a composed sink wall that feels like a designer touched it—because you did.
Final Thoughts
The sink is where a kitchen proves itself. It sees peaches and potting soil, weeknight pasta and Saturday baking sheets, the quick rinse and the deep clean. Choose the bowl count that matches your rhythm, then let the material do quiet, durable work.
Keep the room timeless by building from the bones outward: a properly supported cabinet, a faucet with a clean silhouette, a towel with real texture, warm white light (2700K–3000K — the cosy, yellowish tone you see in most homes), and one living stem by the window. Skip the clutter. Let the sink wall breathe.
Do one thing today: measure your sink base cabinet opening and tape a 30-, 33-, and 36-inch outline on the counter to see what your hands actually want. Then commit to one metal finish and buy a fitted sink grid—your whole kitchen will look more custom the moment it arrives.
What I’d Do Differently
When I first tried this, I treated the sink like a standalone purchase instead of a cabinet-and-plumbing decision. I ordered a deep apron-front because I loved the crisp front panel, then realized the drain landed dead center and collided with the pull-out trash I had already planned. The fix was not cute: a last-minute cabinet rework and a plumber visit I hadn’t budgeted for. The mistake was assuming “standard” meant “fits my setup.” The correct approach is to map the under-sink space first—drawer lines, trash pull-out width, disposal size—then choose a sink with the drain position that protects storage.
I also wish I’d known how much a simple sink grid changes the day-to-day feel. It keeps dishes from clanking, protects the finish, and makes the basin look tailored instead of bare. If you’re making one decision today, measure your sink base cabinet, sketch the plumbing zone, and choose your drain placement before you click “add to cart.”
Products I Recommend for This Project
Here are some of my favourite products to help you bring these ideas to life:
- Kraus Kore Workstation 33-inch Undermount Stainless Steel Kitchen Sink (single bowl) — A durable workstation setup that adds a ledge for accessories without cluttering the counter.
- BOCCHI Classico 33-inch Fireclay Apron Front Farmhouse Sink — A classic, bright apron-front look that anchors the sink wall and pairs well with timeless hardware.
- Delta Leland Pull-Down Kitchen Faucet — A reliable pull-down sprayer that makes both single and double bowls easier to use day after day.
- InSinkErator Badger 5 Garbage Disposal — A dependable disposal option that fits many standard cabinets without dominating the under-sink space.
- iDesign Under Sink Cabinet Organizer (2-tier) — A simple way to keep cleaners and backups contained while leaving an inspection zone for leaks.