This post contains affiliate links. As an Amazon Associate, I earn from qualifying purchases at no extra cost to you.
The first time I tried to do a “quick rinse” after the pool, I somehow created a wet-footprint crime scene through the kitchen, across the living room rug, and directly onto the dog. He looked betrayed. I looked… like someone who definitely shouldn’t be trusted with white upholstery (and look, I deserved it).
Here is the thing: an outdoor shower is not just a hose with ambition. The difference between “campground rinse” and “boutique hotel ritual” is outdoor shower design—privacy, drainage, and materials that age gracefully instead of screaming for help by August.
This is perfect for anyone with a pool, a beachy backyard, kids who treat towels as optional, or simply a deep desire to keep chlorine out of the house while still feeling a little bit fancy.
Inside, you’ll find a mix of luxury outdoor shower moments (teak, rainfall, stone) and budget-smart moves (bamboo fencing, gravel bases, outdoor-rated hooks) plus one thing I beg you not to do unless you enjoy mildew as a lifestyle.
Below are 25 Outdoor Shower Ideas & Luxury Pool Bath that…
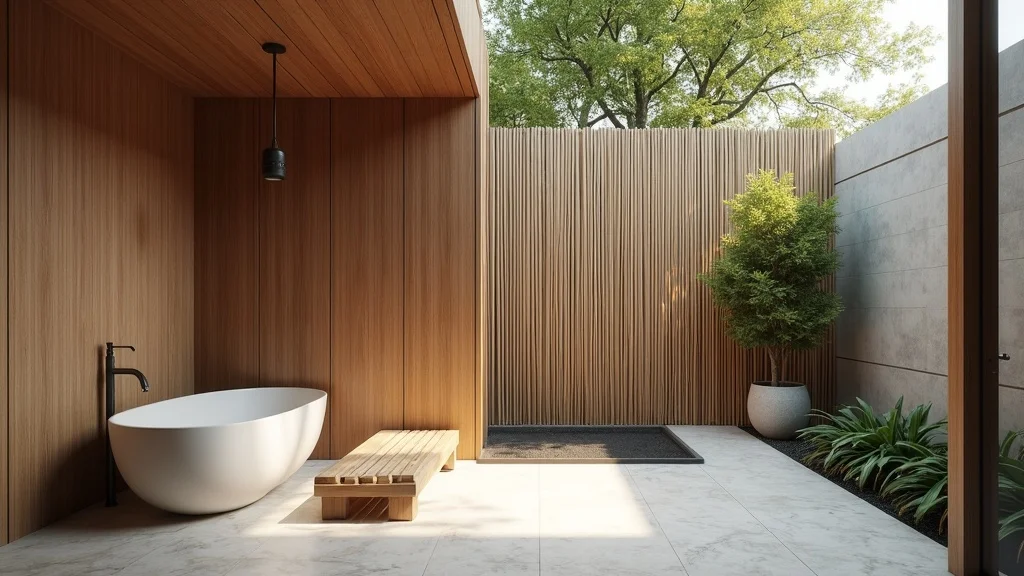
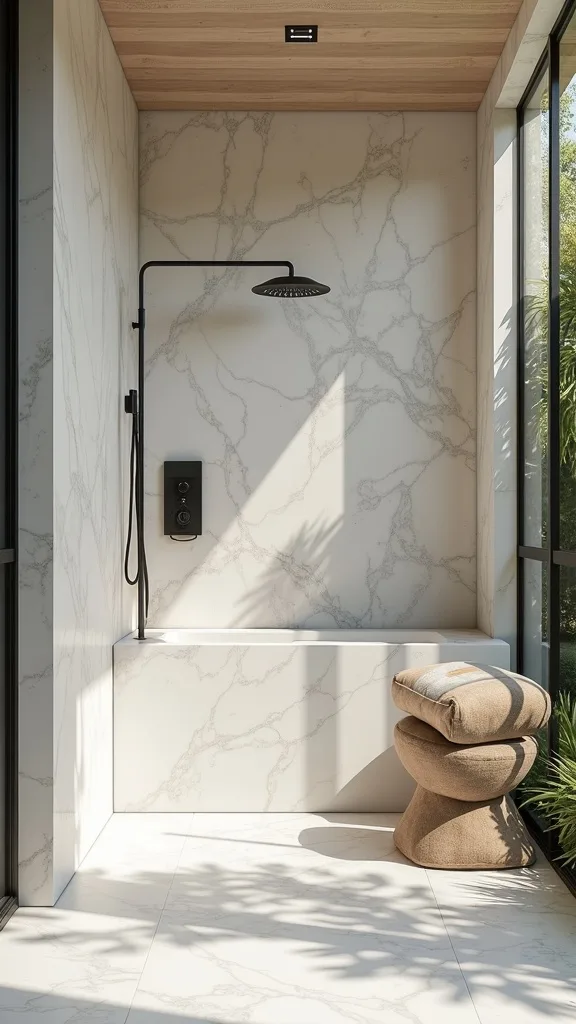
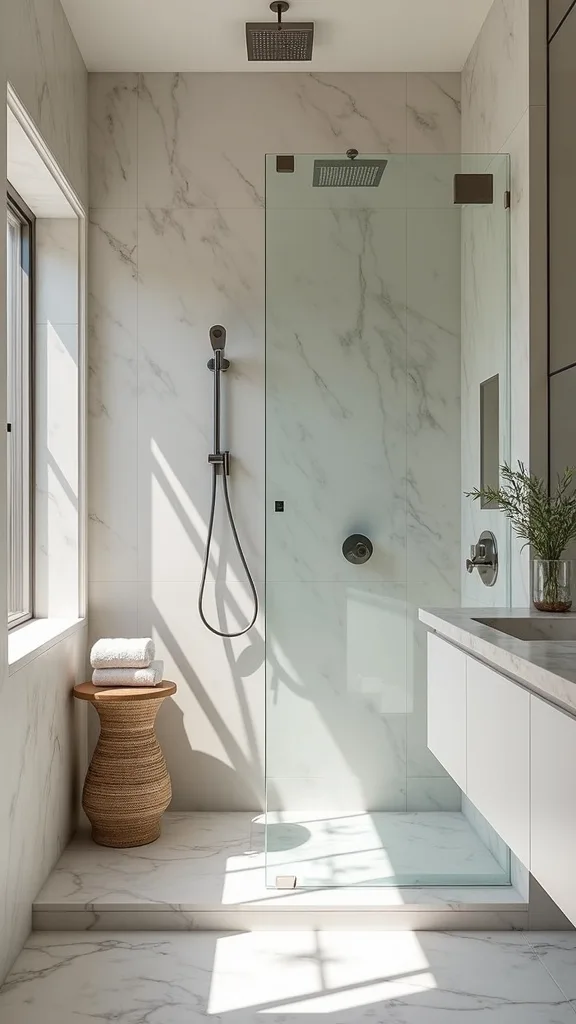
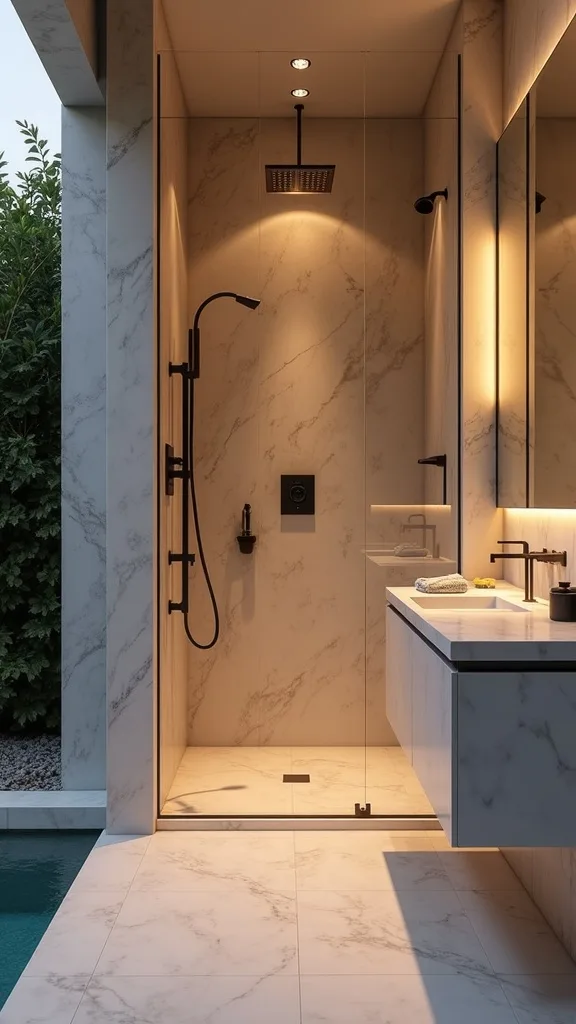
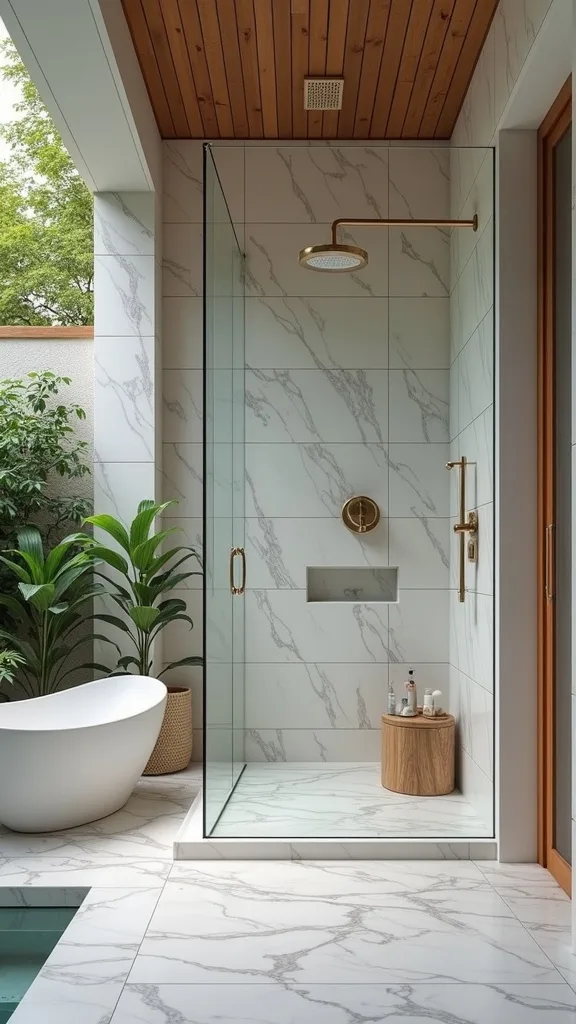
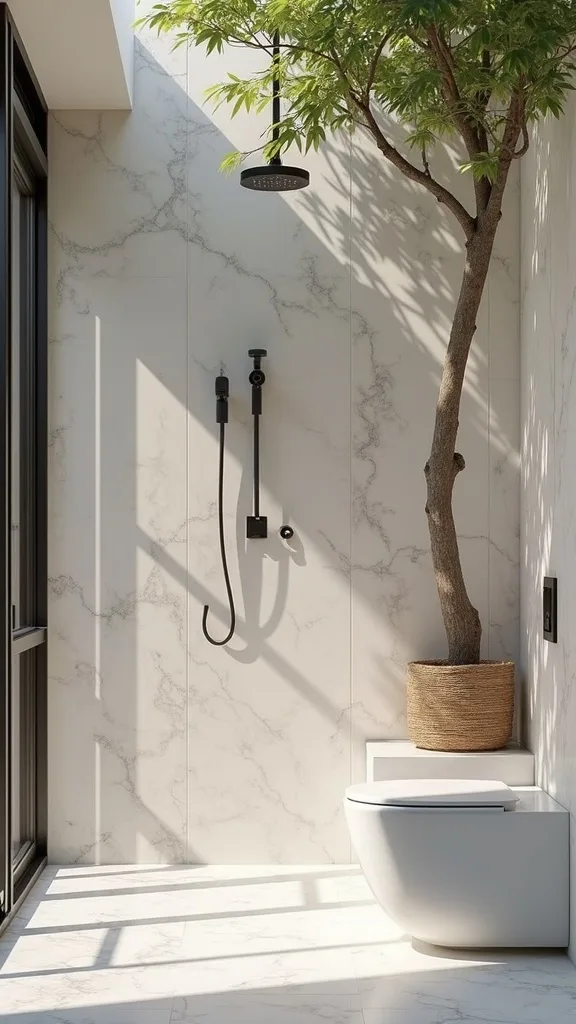
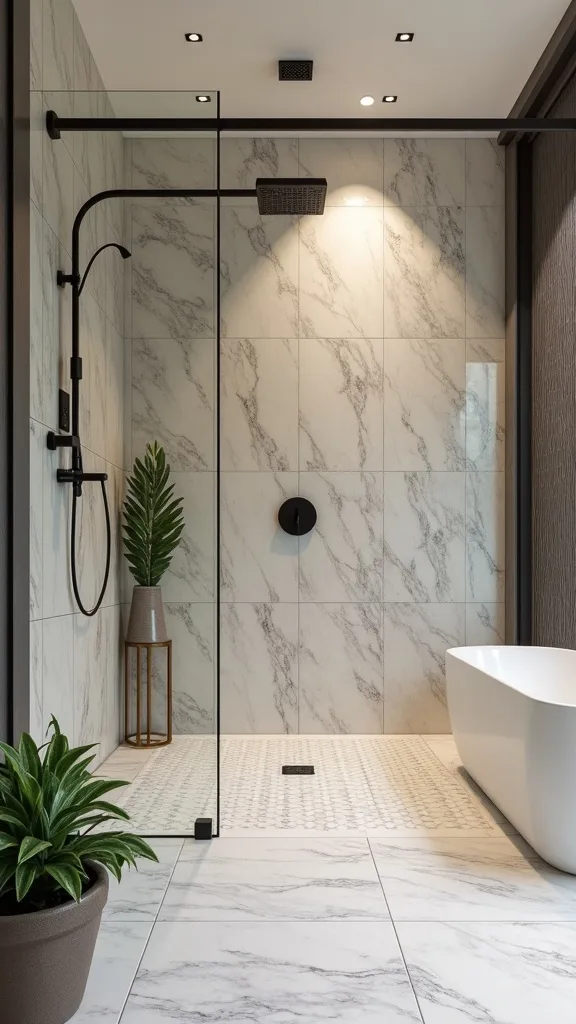
1. Teak enclosure + rainfall head + bamboo privacy + stone floor (the resort baseline)
This is the signature look for a reason: teak reads warm and tailored, stone feels grounded underfoot, and bamboo gives privacy without turning your yard into a fortress. It works because it’s tactile—every surface says “intentional,” not “afterthought.”
Implement it by setting a 36″ x 36″ (or larger) stone paver base with a slight slope so water moves away from the house, then install a simple wall-mounted rainfall head inside a slatted teak surround. Add a bamboo screen on the open side to block sightlines from neighbors and, yes, that one upstairs window.
Choose teak slats (or teak-look composite if you’re budget-minded), honed stone or pebble tile for traction, and matte black hardware for contrast. Keep the bamboo a warm honey tone so it doesn’t fight the teak.
Pro tip: add a small teak bench and one rainfall shower upgrade—suddenly it’s not just a rinse, it’s a summer shower you’ll actually look forward to.

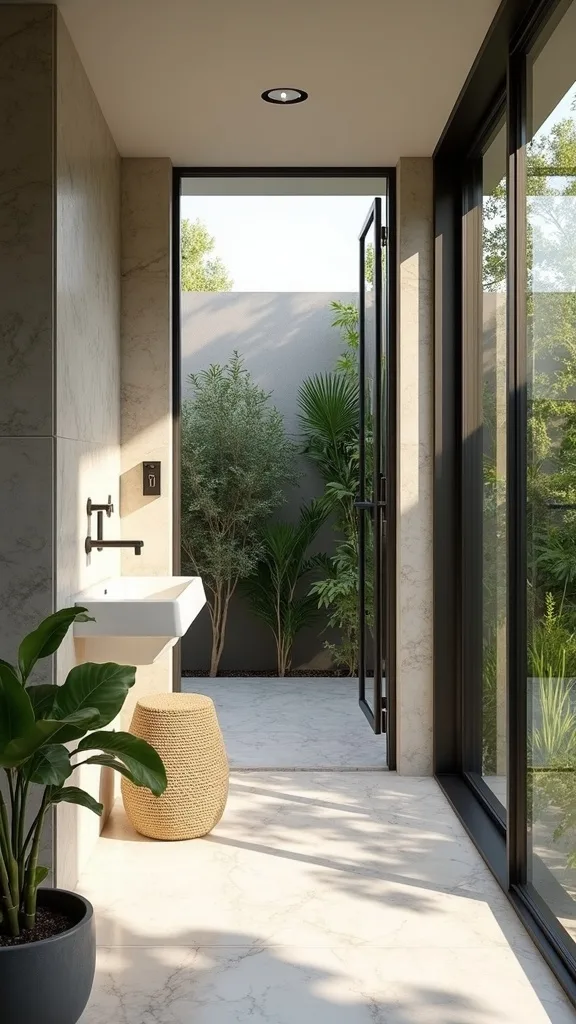
2. Where should a pool outdoor shower go (so you don’t soak the siding)?
Place it where it solves a problem: between pool and back door, but far enough from the house that spray and splash won’t rot your trim. It works because the best pool outdoor shower is a traffic-control device—people rinse before entering, automatically.
Aim for 10–20 feet from the door if you can, with a clear path that won’t become a muddy runway. Put it near existing plumbing to keep costs sane, then angle the head so water falls onto the drain zone, not the fence. If you’re starting from scratch, plan a dedicated wet zone with gravel or stone underfoot.
Materials that behave: stone pavers, pea gravel, and outdoor-rated hooks mounted on cedar or composite. If you want a luxe note, add a teak mat where you step out.
Pro tip: add a small “staging shelf” for sunscreen and goggles—when everything has a place, the rinse becomes automatic (and your house stays miraculously dry).
3. What’s the easiest DIY outdoor shower design for a weekend?
The easiest setup is a freestanding shower column with a simple privacy screen—minimal digging, maximum payoff. It works because you’re buying convenience: one unit, one water connection, one clear rinse-off spot.
Pick a spot with good drainage and lay down a 4′ x 4′ gravel pad bordered with edging so it stays crisp. Connect the shower to an outdoor hose bib (or a hot/cold mixer if you already have lines nearby), then anchor a panel screen behind it so you’re not performing for the neighborhood.
Go with a stainless outdoor shower column for durability, and use bamboo fencing or a slatted wood panel as the screen. Keep colors simple: warm wood + black or brushed metal.
Pro tip: upgrade the experience with a handheld sprayer attachment—washing sandy feet becomes weirdly satisfying, and the whole thing feels more “designed” than “temporary.”
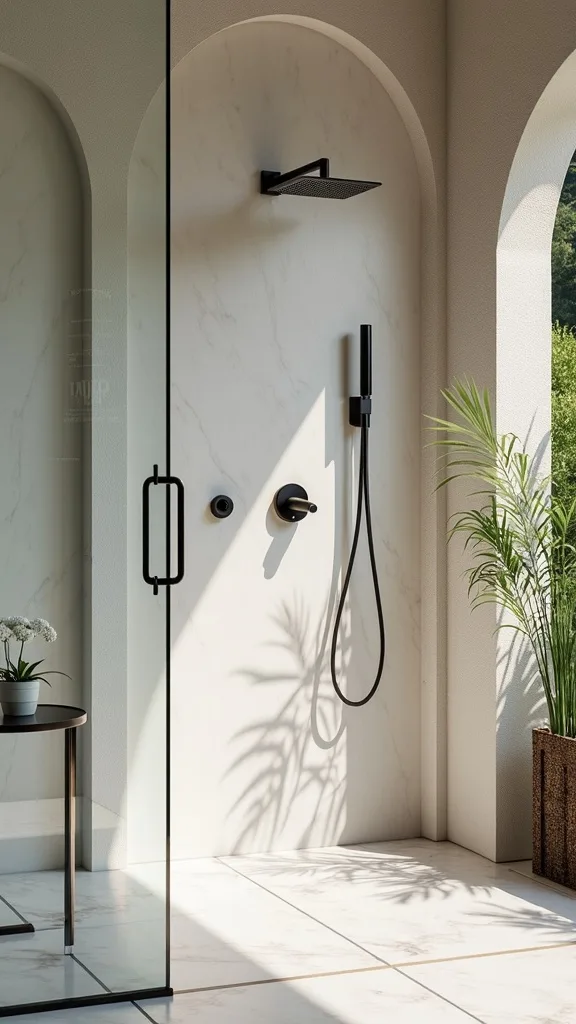
4. How do you add privacy without making it feel boxed-in?
Privacy should feel like a gentle veil, not a panic room. It works when the screen blocks direct sightlines but still lets air and light move through—because nobody wants a steamy, damp corner outside.
Use a three-sided layout: one solid wall (house or fence), one slatted panel, one planted edge. Position the opening away from neighbors and toward your own yard view. If you’re building, keep the screen around 6 feet tall; it’s enough coverage without looming.
Consider bamboo privacy screen rolls for budget builds, or horizontal cedar slats for a cleaner architectural line. Pair with a stone floor so the whole thing reads “spa,” not “storage.”
Pro tip: add a narrow transom gap at the top of the screen—light pours in, the enclosure feels taller, and you get privacy where it counts.
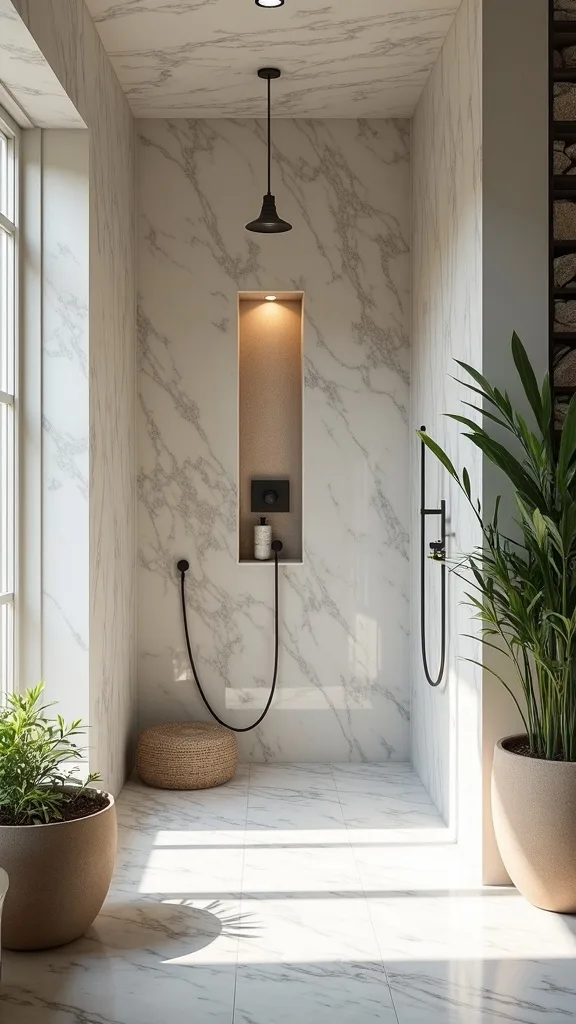
5. What flooring is best so it’s not slippery (or gross)?
The best flooring is grippy, drain-friendly, and easy to hose down—because outdoor showers are supposed to simplify your life, not add scrubbing chores. It works when water disappears fast and your feet feel stable.
For a clean build, set large-format pavers with a slight pitch, then fill joints with polymeric sand to reduce weeds. For a more tactile spa vibe, use pebble tile on a properly sloped base so water channels between stones. If you’re renting or staying cheap, a teak mat over gravel is surprisingly effective.
Choose honed stone (not polished) or textured porcelain rated for outdoor use. Avoid smooth marble—it’s gorgeous until it’s wet, then it’s basically a prank.
Pro tip: add a perimeter of river rock around the base—drainage improves, splatter looks intentional, and the whole zone feels curated instead of muddy.
6. How do you get hot water outside without a major remodel?
You don’t need a full plumbing epic to get warmth—just a smart connection plan. It works because the “luxury” part of a luxury outdoor shower is comfort, and cold-only rinses get old fast (ask anyone who’s tried it on a breezy day).
If hot water is nearby, a plumber can tee into existing lines and run them to an outdoor mixing valve. If it’s not, consider an outdoor tankless water heater mounted near the shower—still an investment, but less invasive than redoing half your house. For a budget compromise, do cold water now and design the enclosure so adding hot later is easy.
Choose frost-free hose bibs where needed, and keep finishes consistent—matte black or brushed nickel reads intentional.
Pro tip: if you’re splurging anywhere, splurge on the valve and head. The water feel is the whole point, and look, you deserve it.
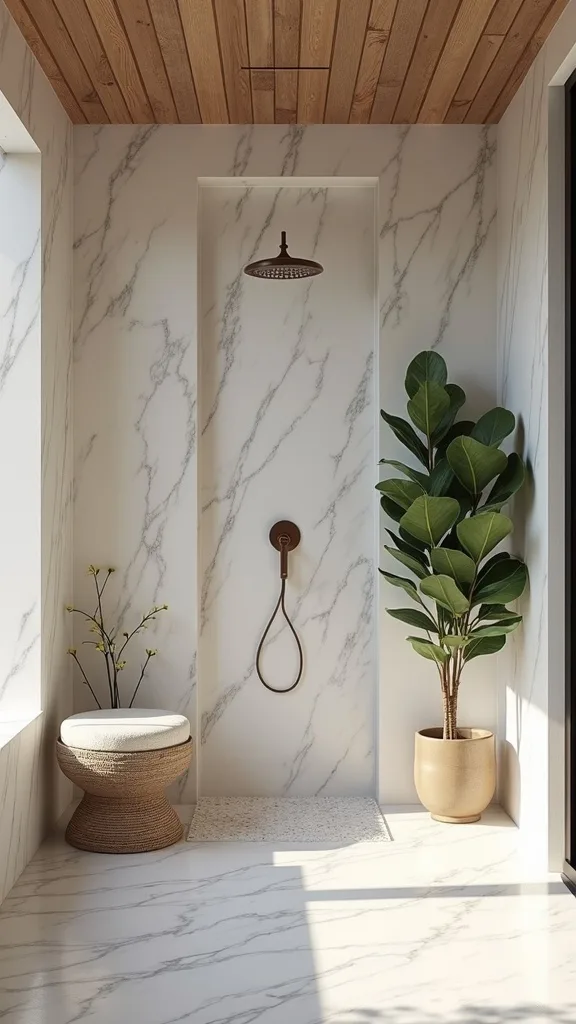
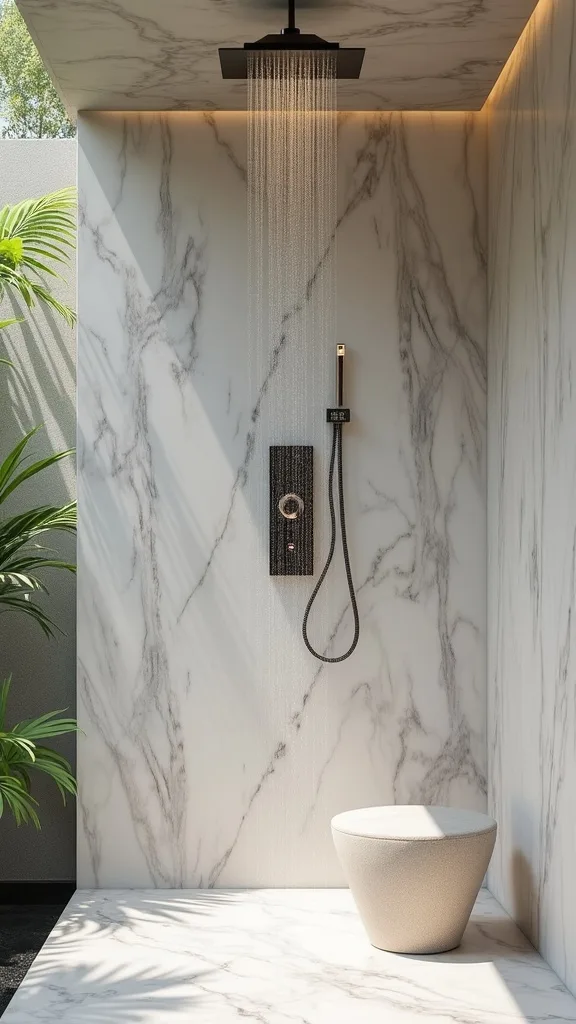
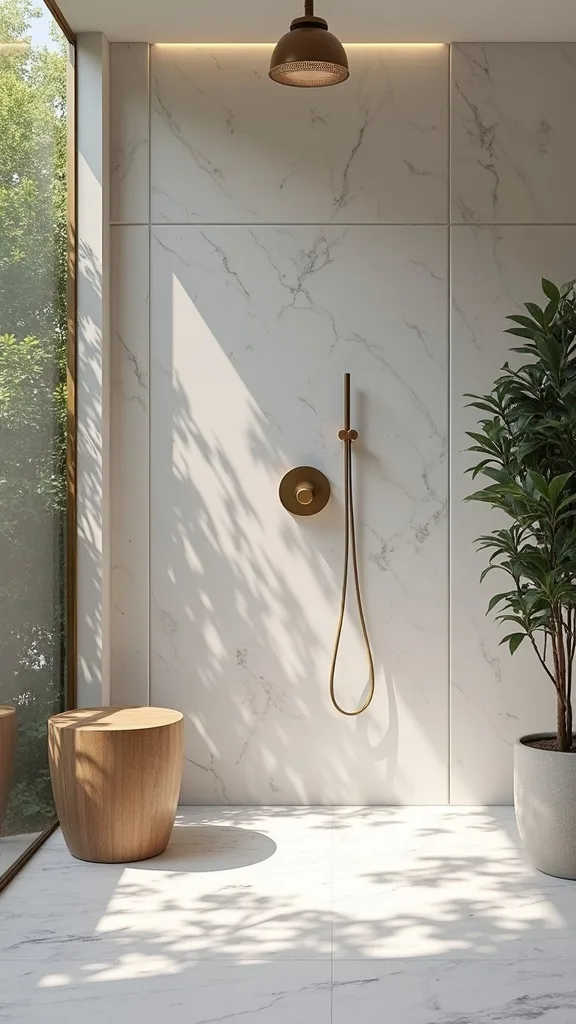
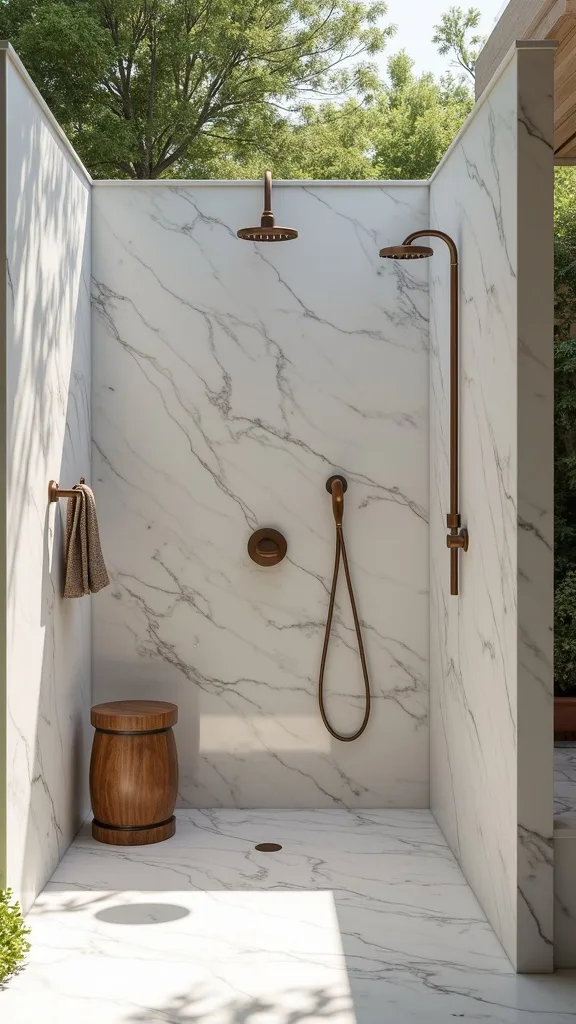
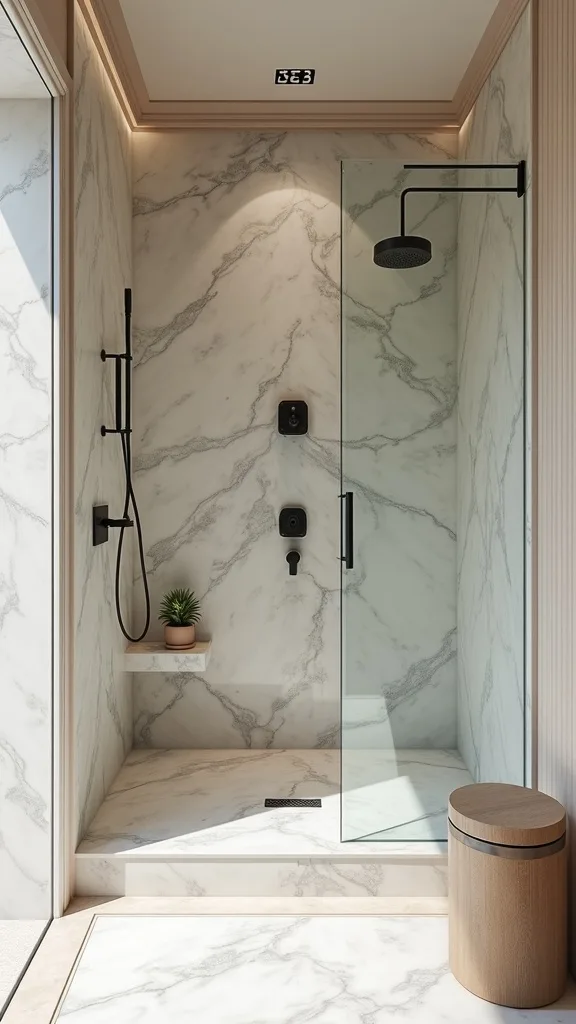
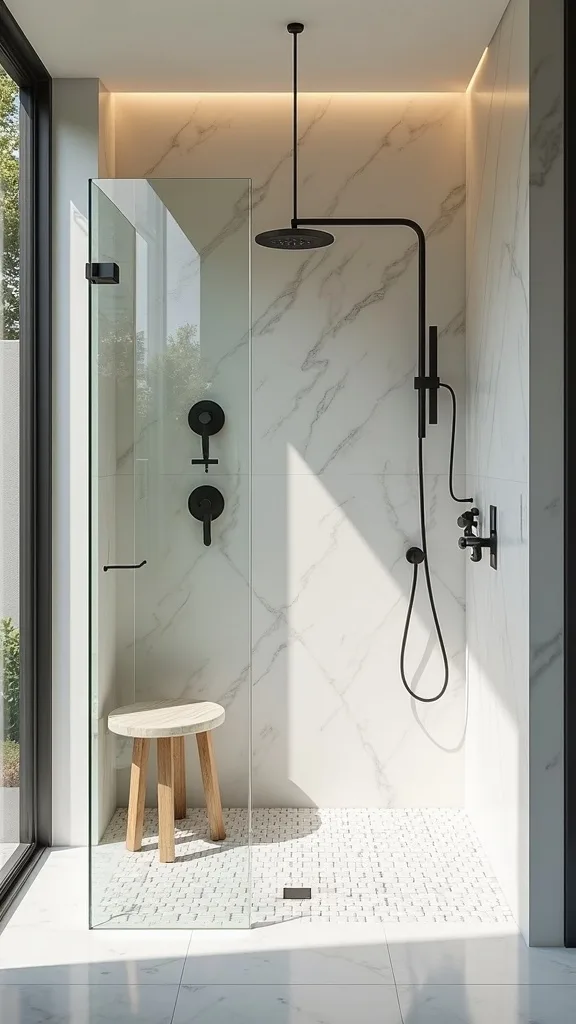
7. Rainfall head vs. handheld: which feels more high-end outdoors?
Rainfall feels like a vacation; handheld feels like real life. The best answer is both, because luxury is romance plus practicality. It works because you can do the blissful rinse, then actually clean feet, suits, and dogs without acrobatics.
Mount a rainfall head overhead (or high on a wall) and add a handheld on a simple slider bar. Keep controls easy: one lever, clear temperature marks, no confusing knobs that require a PhD. Place a hook within arm’s reach—wet towels shouldn’t migrate.
Look for outdoor-rated shower fixtures in stainless steel or brass with a durable finish. Pair with teak or cedar so the metal looks sharp, not cold.
Pro tip: choose a slightly larger head (think 8″+) if your water pressure can handle it. The water curtain is what turns a rinse into a ritual.
8. What’s the best way to drain an outdoor shower (without puddles)?
Drainage is the unsexy detail that makes everything feel expensive. It works because standing water equals slippery floors, mosquitoes, and that sour smell nobody wants to name.
If you’re doing a simple setup, build a dry well: dig a pit, fill with gravel, and direct water into it under the shower base. For a more finished look, use a linear drain tied into an approved drain line—this is where calling a pro can save you a future headache. Always slope the floor slightly away from structures.
Materials: pea gravel, landscape fabric, and stone pavers. Keep the drain area accessible so you can clear leaves.
Pro tip: avoid placing the shower where runoff heads toward your foundation. The prettiest outdoor shower design in the world is still a problem if it quietly damages your home.
Cost & Materials Estimate
A well-designed outdoor shower can land anywhere from a simple $250 DIY rinse zone to a $6,000+ built-in enclosure with hot water and premium finishes.
| Item | Estimated Cost | Where to Buy |
|---|---|---|
| Outdoor shower column (stainless or black finish) | $180–$650 | Amazon |
| Bamboo privacy screen roll + framing lumber | $90–$260 | Home Depot |
| Stone pavers or textured porcelain pavers (approx. 4′ x 4′) | $140–$520 | Lowe’s |
| Gravel + landscape fabric + edging (drainage base) | $65–$180 | Home Depot |
| Teak shower mat and/or teak bench | $55–$240 | Wayfair |
| Outdoor-rated hooks + small shelf | $25–$95 | IKEA |
Total estimated cost: $555–$1,945 Save by using bamboo + gravel now, and splurge on the valve/fixture so the daily experience feels genuinely high-end.
9. How do you make a small outdoor shower feel bigger?
Scale is a magic trick: you don’t need more square footage, you need cleaner sightlines and fewer visual interruptions. It works because small spaces feel luxe when they’re edited.
Use vertical slats to draw the eye up and keep the enclosure minimal—two sides plus planting can feel airier than four walls. Choose a single, continuous floor material so the base reads larger. Keep shelves recessed or floating; bulky corner caddies scream “gym locker room.”
Try light-toned teak or cedar and a pale stone floor to reflect light. Add one strong accent—matte black hardware or a sculptural hook.
Pro tip: hang a simple outdoor mirror (rated for exterior use) on a protected wall. It bounces light, checks sunscreen streaks, and makes the space feel intentionally “bathroom,” not “utility.”
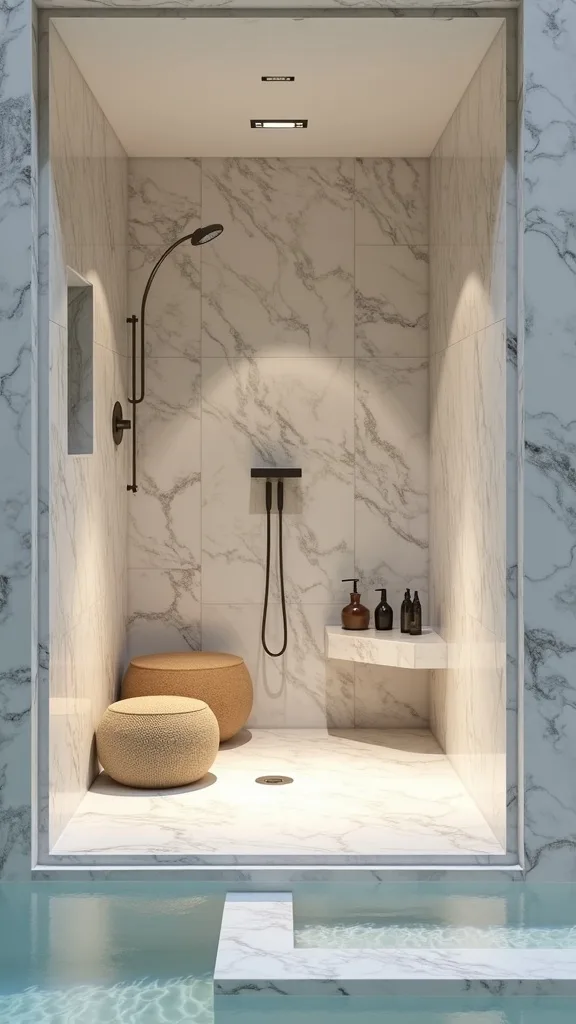
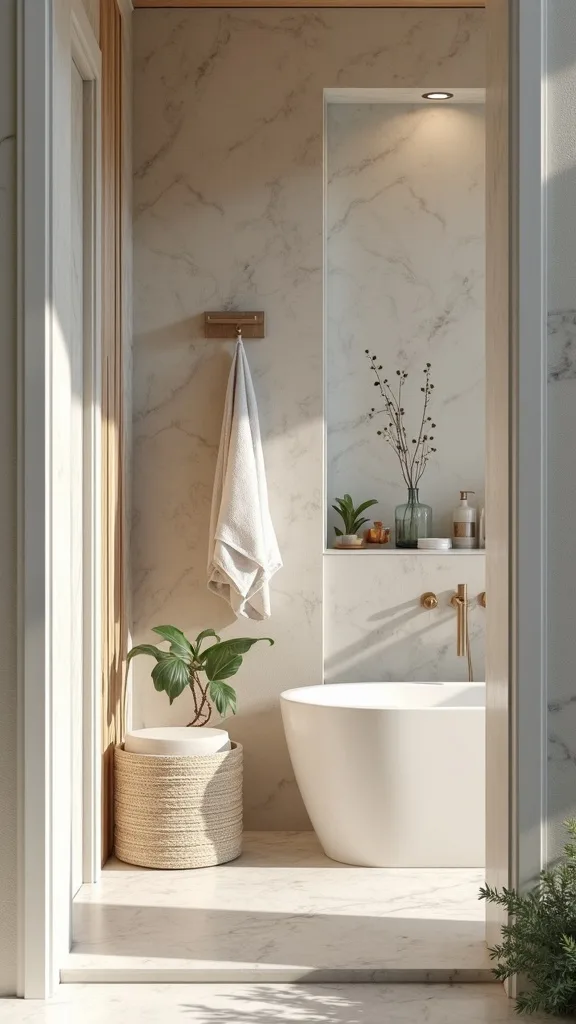
10. Can an outdoor shower double as a luxury pool bath moment?
Yes, and it’s deliciously extra—in the best way. It works when you treat the area like a mini bathhouse: rinse, cool down, lounge, repeat.
Add a teak bench and a small side table for a robe, water, and whatever book is getting damp with dignity. If you have space, place a deep soaking tub nearby (even a stock-tank style can look elevated) and use the shower as the pre-rinse. Keep the path underfoot consistent—stone to stone—so it feels like one zone.
Materials: teak bench, stone or porcelain pavers, and a bamboo screen to soften the edges. Add outdoor candles in hurricane holders for night swims.
Pro tip: keep one plush towel dedicated to this spot in a lidded bin. The “pool bath” fantasy collapses when you’re toweling off with yesterday’s crunchy one.
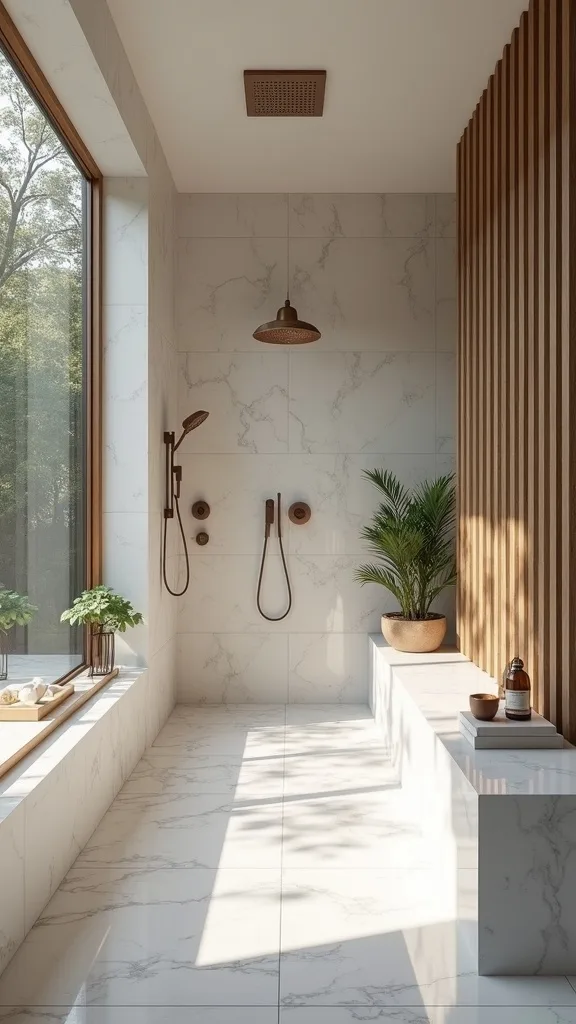
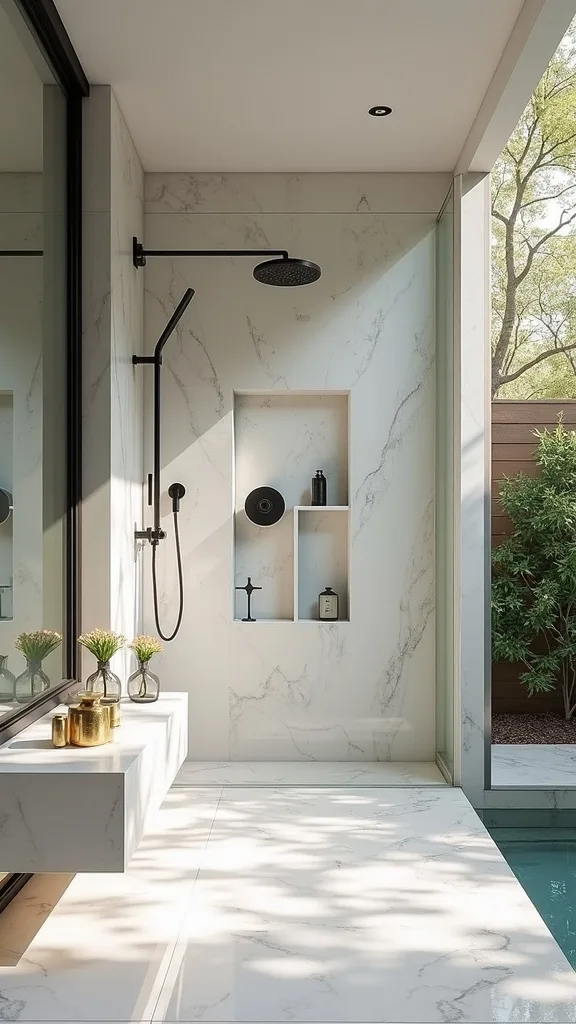
11. What finishes look most expensive outdoors (without being fragile)?
Expensive-looking outdoors is about patina, not perfection. It works because sun and water will age everything—so choose materials that get better, not worse.
Go for teak, ipe, or cedar for wood; honed stone or textured porcelain for floors; and stainless or brass fixtures designed for exterior exposure. Keep the palette tight: one wood tone, one stone tone, one metal finish. Too many finishes reads like you used leftovers (which, no shame, but let’s be strategic).
Choose matte black hardware for a modern edge or brushed nickel for classic quiet luxury. Avoid shiny chrome—it can look harsh in direct sun.
Pro tip: add a single “jewelry” piece—like a statement rainfall head or sculptural sconce. One hero detail is more convincing than ten mediocre ones.
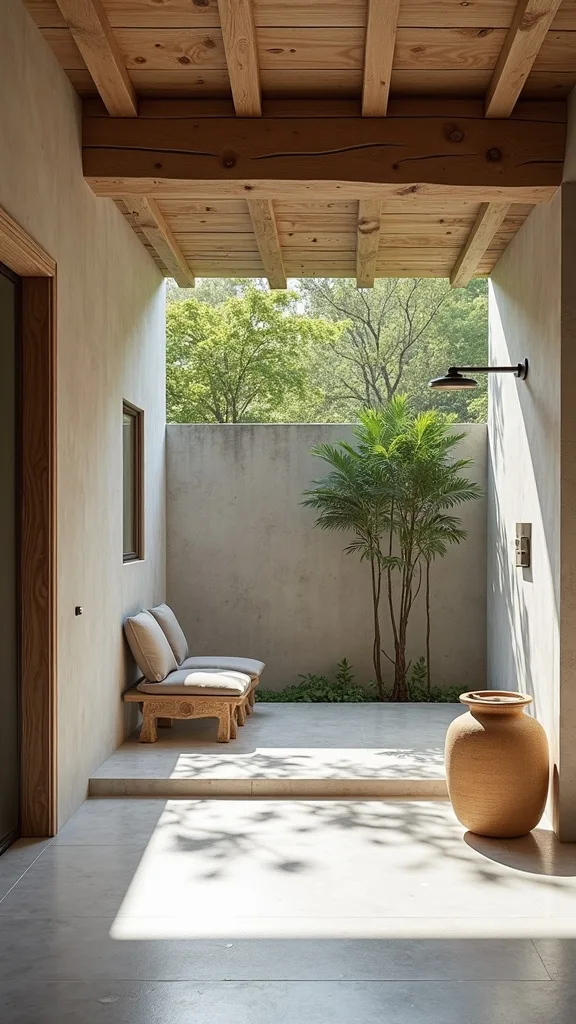
12. How do you light an outdoor shower for nighttime without feeling exposed?
Night lighting should flatter and protect—no one wants to feel like they’re onstage in wet hair. It works when the light is warm, indirect, and aimed at surfaces, not faces.
Install a downlight or sconce on the exterior wall, positioned so it washes the bamboo or slatted screen. Choose warm white light (2700K–3000K — the cosy, yellowish tone you see in most homes) so skin and wood look rich, not clinical. Add a motion sensor if you want convenience without leaving lights on.
Use outdoor-rated sconces and low-voltage path lights to mark the route back to the house. Keep fixtures in the same finish as your shower hardware.
Pro tip: avoid bright overhead floodlights. They create harsh shadows, kill the spa mood, and make every rinse feel like a late-night security interrogation.
13. What’s the best budget-friendly privacy wall that still looks chic?
Bamboo fencing is the rare budget move that reads intentional—if you frame it. It works because bamboo brings texture and vertical rhythm, which designers pay a lot for in other forms.
Mount bamboo rolls onto a simple 2×2 wood frame, then stain the frame to match nearby decking or fencing. Keep the bottom lifted slightly off the ground so it doesn’t wick moisture and rot. If you want more polish, cap the top with a slim board for a clean line.
Pair bamboo fencing with a stone or gravel base and black hooks. Add one potted plant with broad leaves (bird of paradise if you’re feeling dramatic).
Pro tip: seal the bamboo with an exterior clear coat. It slows fading and keeps the screen looking “boutique hotel,” not “temporary patio fix.”
14. How do you keep towels, suits, and sandals from turning into a pile?
Outdoor shower clutter is the fastest way to make a luxe setup feel like a public pool locker area. It works when storage is simple, vertical, and weather-smart.
Install two hooks at adult height and one lower hook for kids—because they will ignore “please hang it up” unless it’s easy. Add a narrow shelf for sunscreen and goggles, and place a lidded bin or deck box nearby for towels. Keep a dedicated tray for soap so it doesn’t slime the stone.
Use outdoor hooks in stainless steel, a teak or composite shelf, and a weatherproof storage box. Stick to neutral tones so the stuff doesn’t visually shout.
Pro tip: label one hook “RINSE” and one “DRY.” It sounds fussy, but it prevents the wet-towel-on-dry-towel tragedy that ruins the whole vibe.
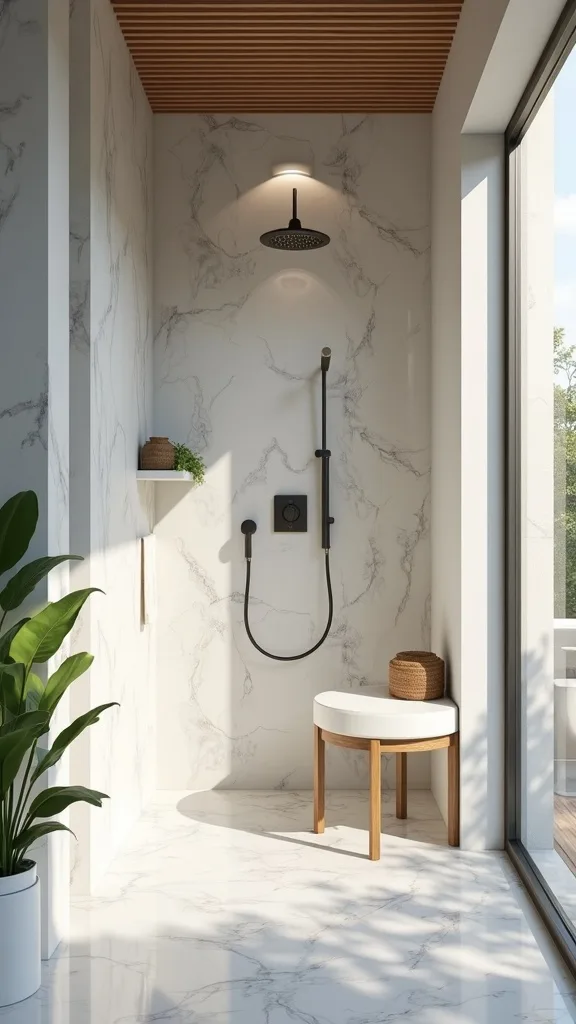
15. What plants work as living privacy (and won’t hate the splash)?
Living privacy is the most elegant kind—soft, layered, and quietly luxurious. It works because greenery disguises fences, absorbs sound, and makes the shower feel like a garden room.
Choose plants that tolerate humidity and occasional splash: clumping bamboo (in a controlled planter), tall ornamental grasses, or hardy evergreens depending on your zone. Keep them in large planters if you want control and easy maintenance. Leave airflow behind plants so moisture doesn’t sit against wood.
Try tall planters in matte black or stone-look fiberglass for a modern feel, paired with teak slats for warmth. Add drip irrigation if you’re not the “remember to water” type (I am not).
Pro tip: avoid thorny plants near the shower path. Nothing says “summer spa” like getting snagged by a rose cane in a towel. Truly humbling.
16. How do you make an outdoor shower feel like an actual bathroom?
The secret is adding one or two “indoor” cues—then stopping. It works because the mind reads mirrors, hooks, and a small shelf as bathroom language.
Add a mirror on a protected wall (or a polished stainless panel), a small ledge for soap, and a teak mat where you step out. Keep the accessories tight and coordinated so it feels styled, not cluttered. If you have power, add a sconce; if not, go solar path lights and candle lanterns.
Use teak accessories, a neutral stone floor, and one metal finish throughout. Keep bottles in amber or refillable containers—branding chaos ruins the calm.
Pro tip: add a simple robe hook just outside the wet zone. The transition from water to dry comfort is what makes it feel like a true bathing space.
17. What should you avoid so your outdoor shower doesn’t look cheap?
Avoid the sad plastic shower curtain situation. It works indoors because it’s temporary; outdoors it becomes a flapping, mildew-prone flag of regret.
Instead, create privacy with slatted wood, bamboo, or outdoor fabric panels designed for weather. Keep lines straight, hardware consistent, and the base finished—gravel contained by edging is the budget version of “architectural.” If you must use fabric, choose outdoor-rated and tension it properly so it doesn’t cling.
Choose structured privacy screens and durable hooks; skip suction-cup anything. Also avoid tiny mosaic tile that traps grime—outdoor life is messy.
Pro tip: edit your color palette to three tones max. When materials coordinate, even a modest build looks elevated—and look, “intentional” is the most affordable luxury there is.
18. How do you add a changing area without building a cabana?
A changing nook is the difference between “quick rinse” and “I can host people.” It works because you’re giving wet swimmers a dignified transition zone that isn’t your hallway.
Extend the enclosure with an L-shaped screen and add a bench just outside the spray line. Hang hooks on the dry side, not inside the shower. If space is tight, use a hinged screen panel that swings out for changing and folds back when not in use.
Use slatted cedar panels or bamboo framed in wood, plus a teak bench. Add a washable outdoor runner to guide feet.
Pro tip: include one small shelf at chest height for phones and sunglasses. People will set them somewhere—better that it’s a shelf than your wet stone floor.

19. What’s the cleanest way to blend an outdoor shower into a modern backyard?
Modern design loves restraint: crisp lines, calm materials, and no fussy trim. It works because the shower becomes a sculptural element, not a backyard gadget.
Use a black or stainless shower column against vertical slats in a single wood tone. Keep the floor large-format stone or porcelain with tight joints. Hide plumbing as much as possible—surface pipes can look intentional, but only if they’re straight and well-finished.
Choose minimalist fixtures, a matte black frame, and light stone underfoot. Add one architectural plant, like a tall grass in a rectangular planter.
Pro tip: repeat the same wood slat spacing from your fence or deck details. That subtle echo is what makes the whole yard feel designed by someone with a plan.
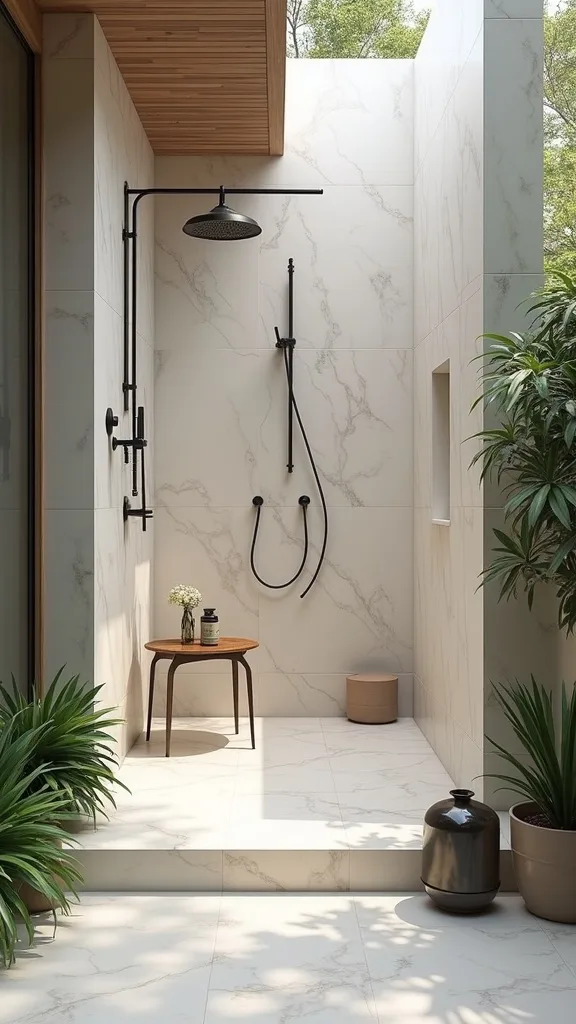
20. How can a rustic outdoor shower still feel sophisticated?
Rustic only feels expensive when it’s refined—clean joinery, honest materials, and no “theme park” props. It works because the contrast of rugged stone and warm wood feels timeless.
Build a simple timber frame, then use galvanized or oil-rubbed bronze fixtures for character. Keep the floor natural stone with visible texture. Add a woven basket for towels, but make it weather-safe by keeping it under cover.
Use reclaimed wood (sealed properly) and stone that matches your landscape. Stick to neutral textiles—cream, sand, charcoal.
Pro tip: avoid novelty signage (“Shower Time!”). The moment you label it, it stops feeling like a spa and starts feeling like a craft fair booth.
21. How do you design for kids (without ruining your aesthetic)?
Kids require two things: lower hooks and a place to stomp sand off their feet. It works because you’re designing for behavior, not hoping for manners.
Add a handheld sprayer on a lower mount and install a foot rinse spout near the base if possible. Place a scrubby outdoor mat at the entrance and a bin for toys so they don’t migrate to your “adult” lounge chairs. Keep the enclosure sturdy—kids lean.
Choose durable teak mats, simple black hooks, and a textured stone floor that won’t get slick. Use washable outdoor towels in a consistent color so it still looks pulled together.
Pro tip: give them one designated “kid shelf” for goggles and dive rings. When they own a spot, they use it—and your shower stays chic.
22. Can you do an outdoor shower in a rental or temporary setup?
Yes—think freestanding, hose-connected, and removable. It works because you’re creating a contained rinse zone without permanent plumbing changes.
Use a portable shower stand that connects to a garden hose, then create privacy with a weighted screen (planters work beautifully as anchors). Lay down a removable base: interlocking deck tiles or a teak mat over gravel in a shallow tray. Keep everything modular so it can move with you.
Choose portable shower stand, outdoor planters, and deck tiles in teak tones. Add command-style outdoor hooks only if they’re truly exterior-rated.
Pro tip: avoid setting up directly on grass. You’ll create a muddy divot that screams “temporary,” and your landlord will not share your design vision.
23. How do you keep outdoor shower maintenance low (no constant scrubbing)?
Low maintenance is a design choice, not a personality trait. It works when you avoid grime-trapping textures and give water an easy exit.
Choose larger floor pieces (pavers or big tiles) instead of tiny mosaic that collects dirt. Keep bottles off the ground with a wall shelf. Rinse the area once a week and let it dry—airflow matters more than people think.
Use textured porcelain pavers, stainless fixtures, and a simple squeegee hook (yes, outdoors). Keep wood sealed and re-oil teak seasonally if you want it golden.
Pro tip: place the shower where it gets some sun. Shade is lovely, but constant shade plus water equals moss, and moss is cute until it’s slippery.
24. What accessories make a summer shower feel truly luxurious?
Luxury is comfort, not clutter. It works when every accessory solves a real problem while looking like it belongs in a boutique hotel.
Add a teak bench, a robe hook, and a small shelf for soap and shampoo in refillable bottles. Include a lidded hamper or bin so wet towels don’t pile up. If you want a scent moment, use eucalyptus bundles hung away from direct spray so they last longer.
Choose refillable amber bottles, a teak stool, and a simple outdoor lantern. Keep textiles in white or sand for that pool-club feel.
Pro tip: one upgrade that always hits—an outdoor-rated speaker tucked out of sight. Music plus water plus warm air turns a rinse into a ritual.
25. How do you tie the outdoor shower into your pool area so it looks planned?
The shower should feel like part of the pool “suite,” not a random add-on. It works because repetition—materials, finishes, and lines—creates cohesion.
Match the shower floor to your pool coping or patio pavers, or choose a complementary stone in the same undertone. Repeat the same metal finish from pool furniture (black, bronze, or stainless). Use planting to bridge spaces: one row of planters or a small bed that visually connects shower to lounge zone.
Use matching pavers, consistent hardware finishes, and bamboo or slatted wood that echoes nearby fencing. Add a simple sign? No. Add a great towel hook? Yes.
Pro tip: create a “path moment” with two low lights and a runner of gravel. A deliberate approach makes the shower feel like a destination—because it is.
Final Thoughts
An outdoor shower is one of those rare upgrades that changes how your whole summer feels. It’s not just about rinsing off chlorine—it’s about creating a small, civilized ritual between pool time and real life. And yes, it can be both aspirational and practical: teak and stone if you want the full spa fantasy, bamboo and gravel if you want the smart, edited version.
Here is the thing: the “luxury” isn’t a price tag, it’s the sequence. Privacy so you relax. A floor that drains so you don’t tiptoe. A hook and a bench so nothing becomes a soggy heap. Nail those, and even a modest setup reads like a considered outdoor room instead of a utility corner.
Do one concrete thing today: mark a 4′ x 4′ rectangle where you want the shower, then lay down a temporary gravel base and hang two outdoor hooks on a nearby fence or post—your future self (and your floors) will feel the difference by tonight.
What I’d Do Differently
When I first tried this, I treated my outdoor shower like a “hose upgrade” and put it on the prettiest patch of grass near the patio. Cute for two days. Then it turned into a muddy divot that splashed up onto my legs, and the water tracked straight back toward the house. The mistake wasn’t the fixture—it was ignoring drainage and the walking path. The correct approach is to design the shower like a tiny outdoor bathroom: a defined base (pavers or gravel contained by edging), a slight slope so water moves away, and a path that keeps wet feet off your indoor floors. Once I fixed the base, everything else suddenly felt expensive.
I also wish I’d known to plan the “dry side” from day one: hooks outside the spray line, a bench where towels stay fluffy, and one shelf at chest height for sunscreen and goggles. Those three details prevent the towel-pile chaos that makes even a gorgeous enclosure feel messy. Pick your spot, mark a 4′ x 4′ footprint, and build the base first—then the fun styling choices actually stick.
Products I Recommend for This Project
Here are some of my favourite products to help you bring these ideas to life:
- VINGLI Freestanding Outdoor Shower (Stainless Steel) — A clean, modern shower column that’s easy to place near the pool for quick rinses.
- Amgo Bamboo Fence Panel Roll (6 ft H) — Budget-friendly privacy with a warm, spa-like texture (frame it and it looks custom).
- Giantex Teak Shower Mat (Indoor/Outdoor) — Instantly upgrades the “step out” moment and keeps feet off hot stone or wet gravel.
- KES Stainless Steel Robe Hooks (Wall Mounted) — Durable hooks that won’t rust after a season of wet towels and swimsuits.
- LEONLITE Outdoor Wall Sconce (Warm White Light 2700K–3000K) — Adds flattering, resort-style glow for evening rinses without harsh spotlight vibes.