This post contains affiliate links. As an Amazon Associate, I earn from qualifying purchases at no extra cost to you.
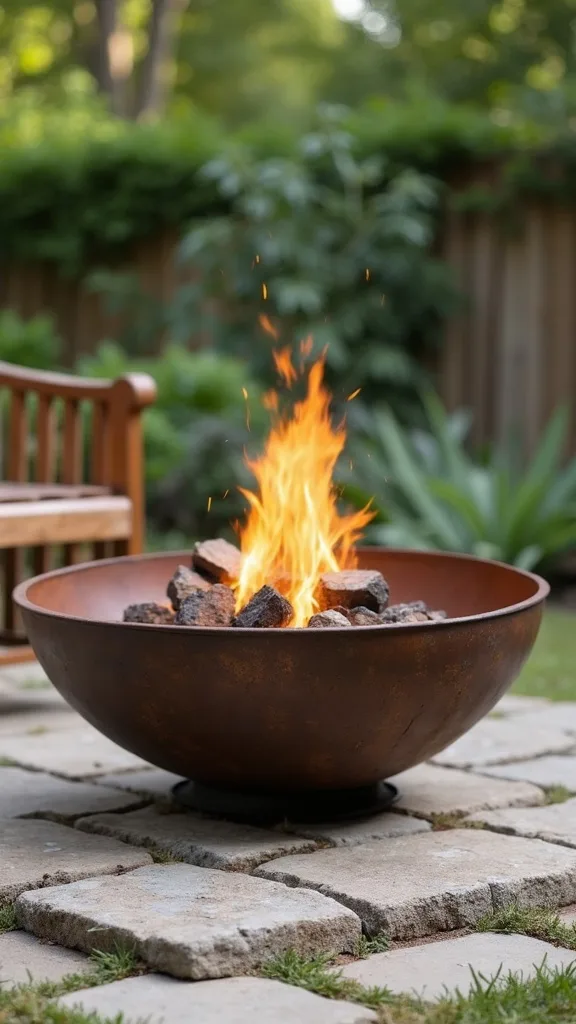
The “after” looks like a magazine patio: a clean fire feature, tidy seating, and that glow that makes even a bargain set of chairs feel intentional. The actual cost for my first setup? $72.18, and yes—it started with a rusty bowl that looked like it had been living behind a shed since 1997.
Pinterest is pushing backyard fire setups hard for 2026, but most of the viral photos skip the boring parts: safe spacing, heat-proof surfaces, and not turning your lawn into a crispy circle. I’m giving you the pretty ideas and the unglamorous specifics—what to buy, what to thrift, and what to avoid so you don’t waste a Saturday (or your eyebrows).
This is perfect for renters, first-time homeowners, and anyone who wants a cozy outdoor moment without pouring concrete, pulling permits, or babysitting high-maintenance stonework.
Inside you’ll find quick builds using pavers, a grill ring, a metal wash tub, tabletop propane, and even a “fake built-in” look that’s basically boxes and patience. Every idea includes thrift-store and discount-store swaps because resourcefulness is a skill, not a compromise.
Below are 25 8 Backyard Fire Pit Ideas for Beginners 2026: Easy Assembly, Low Maintenance, Safe & Stylish Options that make beginner backyard fire pit ideas feel doable, keep your backyard fire setup low-drama, and still look like you planned it.
Products I Recommend for This Project
Here are some of my favourite products to help you bring these ideas to life:
- Sunnydaze 30 Inch Steel Fire Pit Bowl — A simple, sturdy starter bowl that looks clean on a paver pad and is easy to maintain.
- HY-C Fire Pit Spark Screen (30 Inch) — Helps keep embers contained so you can relax and not hover over every pop.
- Fire Sense Fire Pit Mat (Fire Resistant) — A practical base for patios or decks to protect surfaces and define your fire zone.
- Stanbroil Lava Rock for Gas Fire Pits (10 lb) — A fire-safe filler that hides soot and levels out the look around the burner area.
- Amagabeli Fire Pit Tools Set (Poker, Tongs, Shovel, Brush) — Keeps your setup tidy and makes tending the fire feel controlled instead of chaotic.
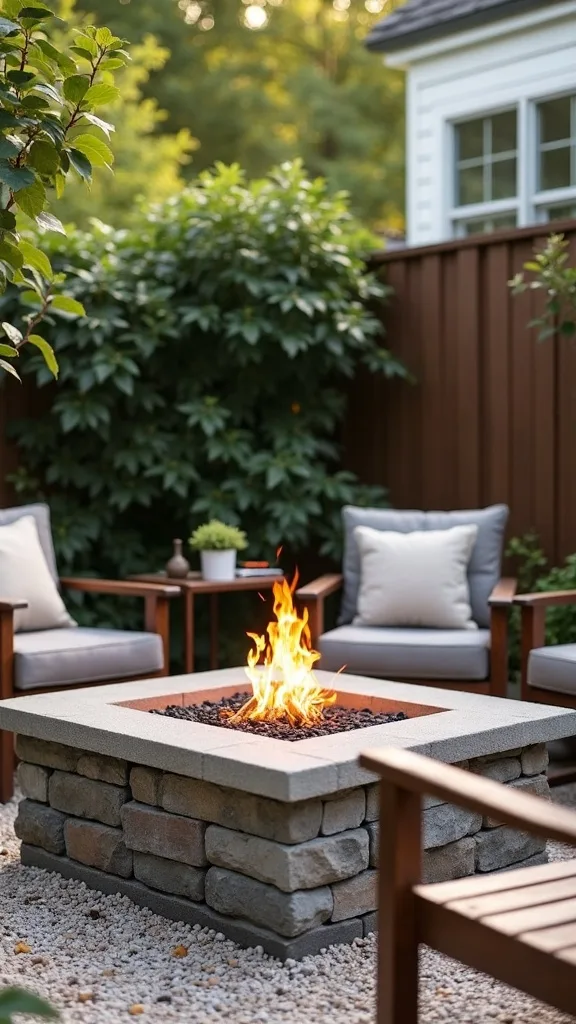
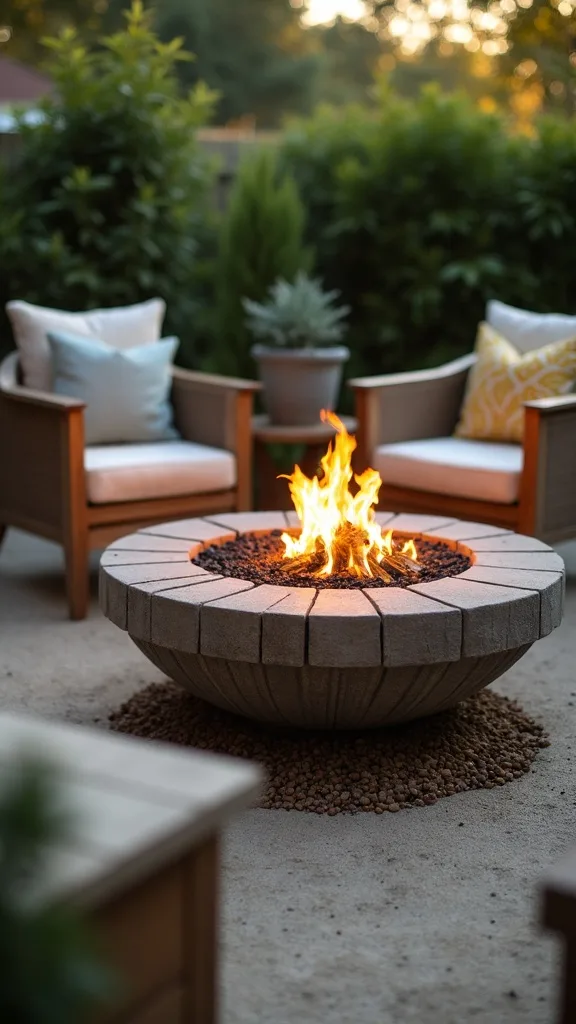
1. The “hassle-free, looks-finished” starter setup (minimal tools, minimal upkeep)
This is the baseline look I wish someone had handed me: a simple pit, a defined surface, and a tidy perimeter so it reads like a “zone,” not a campfire accident. It works because the style comes from the border and pad—not from an expensive fire bowl.
Set a 36-inch square of concrete pavers or a pre-made fire pit mat on level ground, then center a basic steel fire bowl on top. Keep a 5–10 foot clear zone (no hanging branches, no patio umbrellas) and you’ve already solved 80% of beginner mistakes. If your yard slopes, shim pavers with leveling sand so the bowl sits flat.
Go neutral: gray pavers, black bowl, and one warm accent like rust-colored cushions. Shop it smart: a used bowl from Facebook Marketplace, pavers from Habitat ReStore, and play sand from the discount hardware aisle.
Pro tip: add a $6 thrifted metal tray as a “spark catcher” under your fire tools—tiny detail, big grown-up energy, and it makes the whole setup feel intentional.
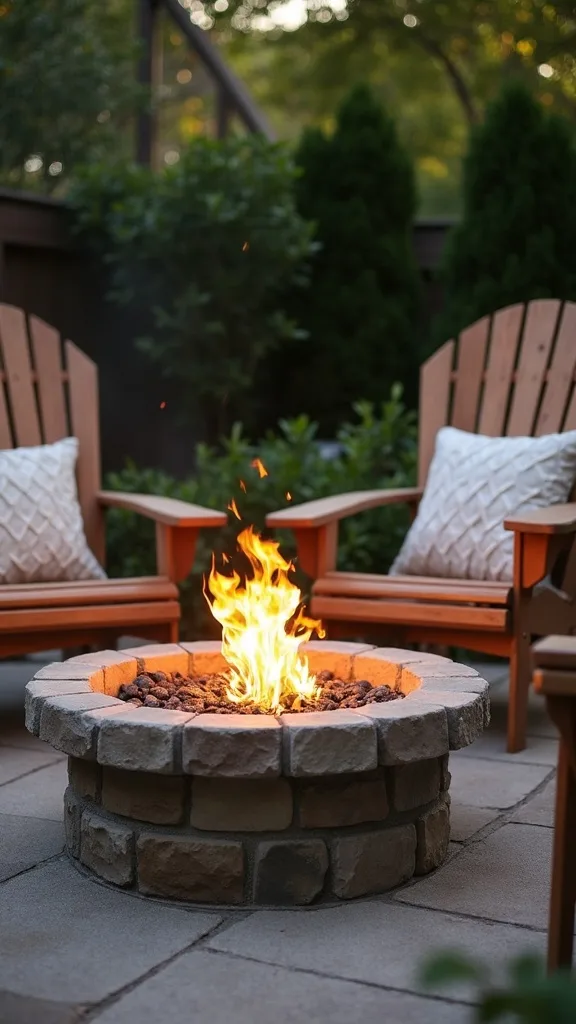
2. Thrifted steel fire bowl on a paver “rug” (the $30–$90 win)
A basic steel bowl can look shockingly polished when it’s framed like decor. This works because the pavers act like an outdoor rug—clean edges, clear purpose, and easy maintenance when ash happens.
Lay 12″x12″ concrete pavers in a 3×3 grid (about 36″ square). Brush sand into the seams so they don’t wobble. Center your bowl, then place two chairs at a slight angle instead of straight-on—instant Pinterest composition without buying anything new.
Materials: black steel bowl, gray pavers, and one thrifted basket for kindling (metal or ceramic only—skip wicker near heat). Alternatives: Dollar Tree has small metal buckets that work for ash tools; Ollie’s often has discounted pavers in odd lots.
Upgrade suggestion: spray-paint the bowl with high-heat paint (read the label; it’s made for grills) and add a $12 bag of lava rock around the base to hide soot marks and make your setup look “designed,” not assembled.
3. Smokeless-style portable pit without the price tag (how to fake the look)
Smokeless pits are trending because they’re cleaner and less fussy, but the brand-name versions can hurt. This idea works because you get the same tidy silhouette and easier lighting without paying full retail.
Look for an off-brand double-wall “smokeless” fire pit on Amazon or at Costco endcaps, then place it on a heat-proof pad or paver base. Use kiln-dried wood (it lights faster and smokes less) and keep pieces small—think wrist-thick, not log-cabin chunks. Empty ash once it’s cold; the cleaner it stays, the more “new” it looks.
Style it with matte black accessories: a simple log holder and a plain poker set. Thrift alternative: a stainless stock pot lid can become a quick cover when you’re done (only when fully cool).
Pro tip: add a $9 thrifted planter stand to lift your wood bucket off the ground—less damp wood, less smoke, and your backyard fire nights start easier.
4. Propane tabletop fire bowl for renters (no ash, no hauling wood)
If you want “fire” without the cleanup, tabletop propane is the beginner cheat code. It works because there’s no ash, no ember chasing, and you can shut it off like a lamp—especially helpful in tight spaces.
Choose a compact tabletop fire bowl rated for propane, set it on a sturdy outdoor table, and keep it away from railings and anything fabric. Hide the propane tank under the table with a ventilated cover or a thrifted metal plant stand (never fully enclosed). You’ll get the glow for dessert or a late-night chat, then turn it off and go inside.
Materials: tabletop propane bowl, fire glass or lava rock, and a long lighter. Budget swaps: search “used fire table” on Marketplace; people unload them cheap after one season. Discount stores often have outdoor side tables that look higher-end with a can of spray paint.
Upgrade: add warm white light (2700K–3000K — the cosy, yellowish tone you see in most homes) string lights above for a layered look that feels like a mini outdoor room.
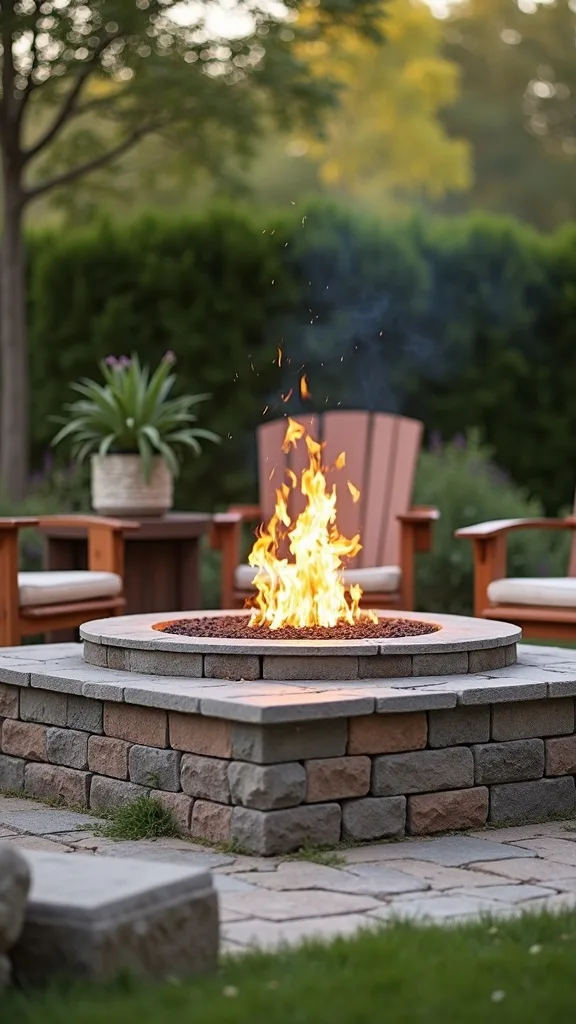
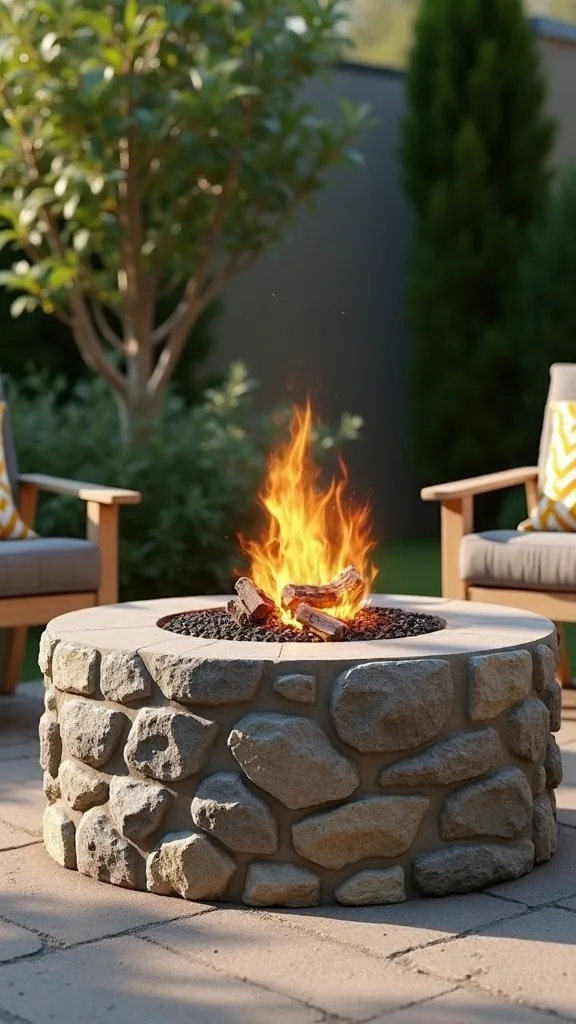
5. The “grill ring + block wall” classic (beginner-friendly and hard to mess up)
This is the most forgiving DIY build because the metal ring does the safety work and the blocks do the styling. It works because you’re not free-styling a circle—you’re building around a fixed shape.
Buy a 30″–36″ steel fire ring (often sold for campfire pits), then stack landscape blocks around it on level ground. No mortar needed for a first build; just stagger the seams like bricks. Keep the top course even so you don’t end up with a wobbly “leaning tower” situation.
Choose blocks in charcoal or sandstone tones. Thrift/discount options: check Habitat ReStore for leftover pavers; ask contractors in your neighborhood groups—people give away extras. DIY alternative: use reclaimed bricks if they’re solid (no crumbling).
Pro tip: cap the top with matching capstones for a smooth finish—it’s the difference between “yard project” and finished patio feature, and it also saves your shins.
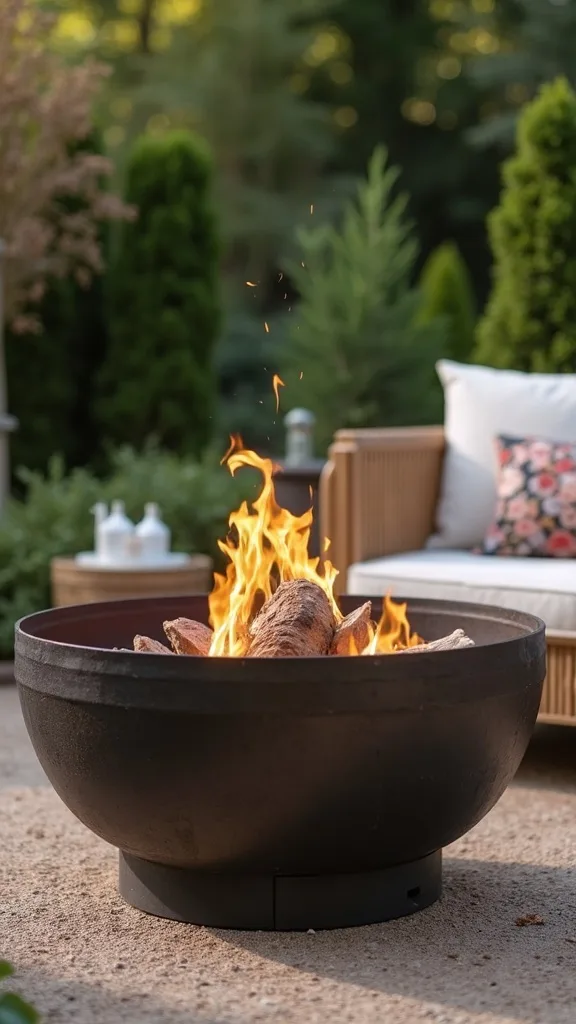
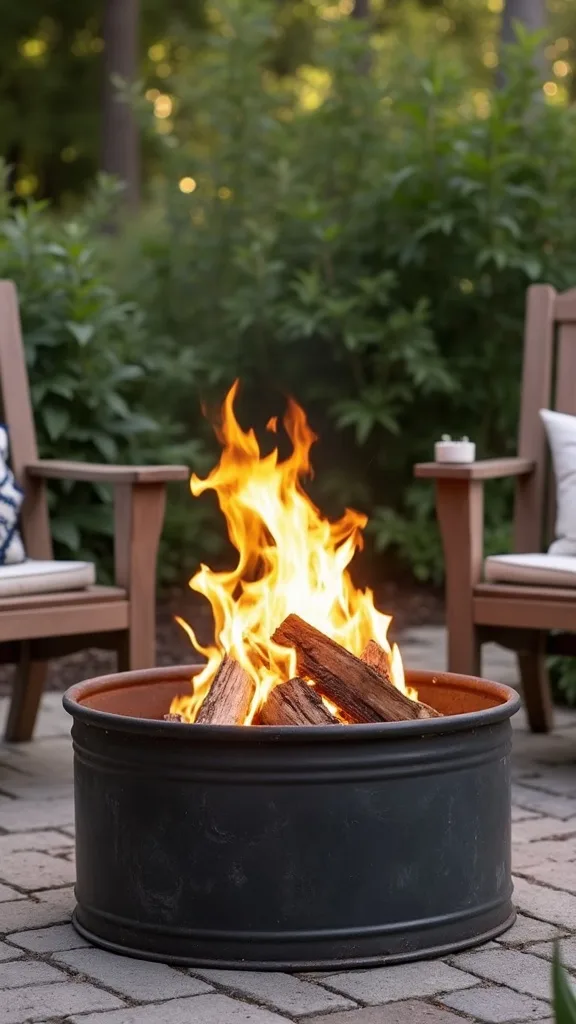
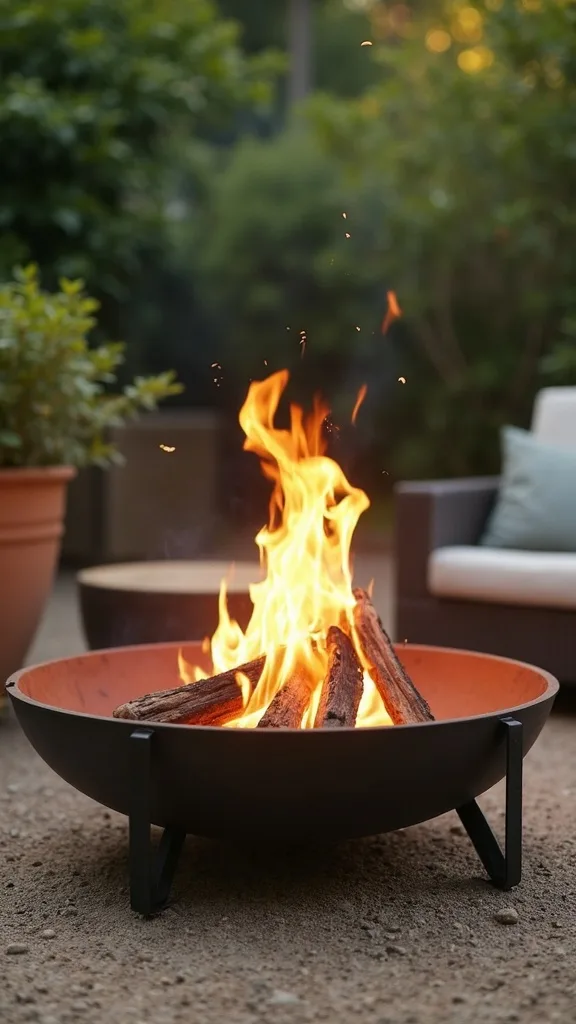
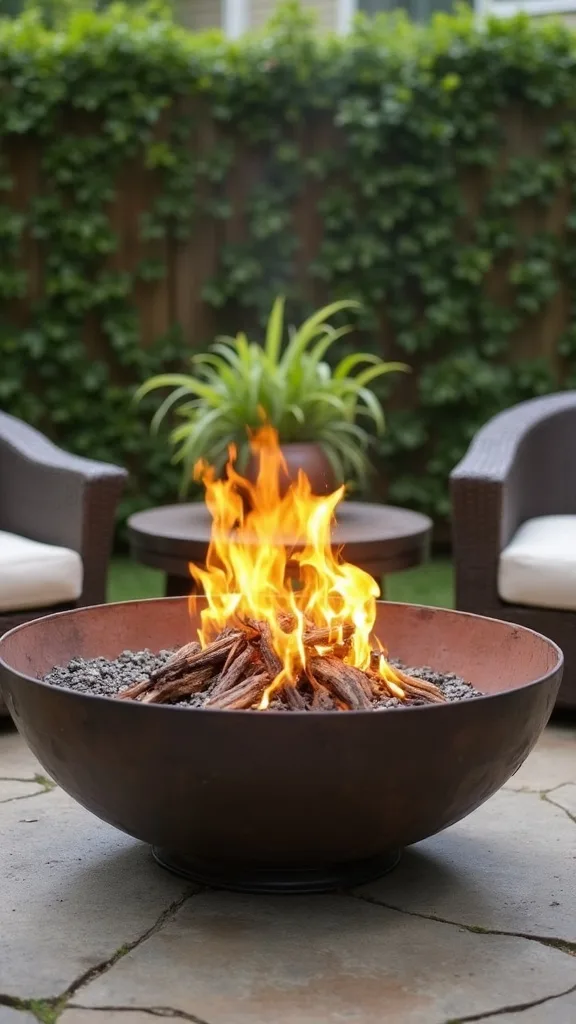
6. Metal wash tub fire pit (the ugly-before, charming-after upcycle)
A galvanized wash tub is not cute when you find it. Mine had a dented rim, mystery paint drips, and the vibe of an abandoned farm auction. This works because the shape is generous, it’s portable, and the “vintage” look reads intentional once you style around it.
Drill a few drainage holes if it’s solid-bottom (so rainwater doesn’t sit), then set it on a ring of pavers to protect grass. Add a bed of sand and a few fist-sized rocks before wood—this helps distribute heat and keeps the bottom from scorching. Keep the fire smaller than you think; tubs are wide, but you don’t need a bonfire to get cozy.
Materials: tub, pavers, sand, and a simple spark screen if you can find one used. Thrift alternative: a metal beer tub works in a pinch (skip anything with plastic handles near heat).
Upgrade suggestion: surround it with pea gravel in a 4′ circle for a crisp look and less mud—resourceful and polished at the same time.
7. Chiminea for small patios (contained flame, less wind drama)
Chimineas are underrated for beginners because the fire stays contained and wind doesn’t scatter embers as easily. It works especially well on patios where you want a defined flame without a wide open bowl.
Place the chiminea on a fire-resistant pad, not directly on wood decking unless the manufacturer says it’s safe. Use smaller splits of wood and feed it gradually—chimineas like a steady, smaller burn. Keep the opening facing away from foot traffic so no one bumps it while it’s hot.
Look for clay or cast iron. Thrift score: I see chimineas at estate sales constantly because they’re heavy and people don’t want to move them. Discount alternative: big-box end-of-season clearance is your friend in late summer.
Pro tip: add a thrifted metal plant caddy with wheels underneath (rated for weight) so you can reposition it when guests arrive—easy hosting, zero heavy lifting, and a setup that feels thought-out.
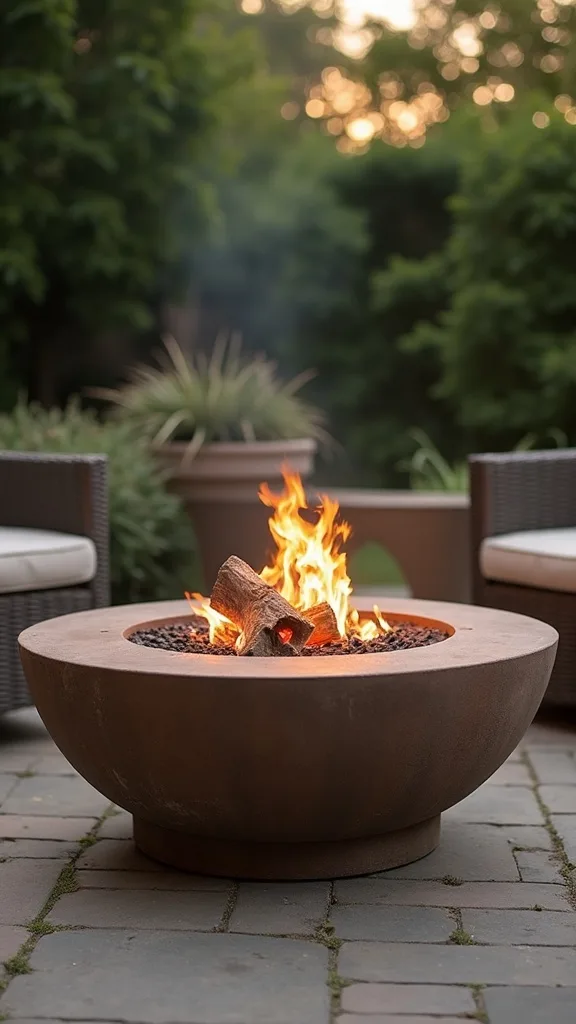
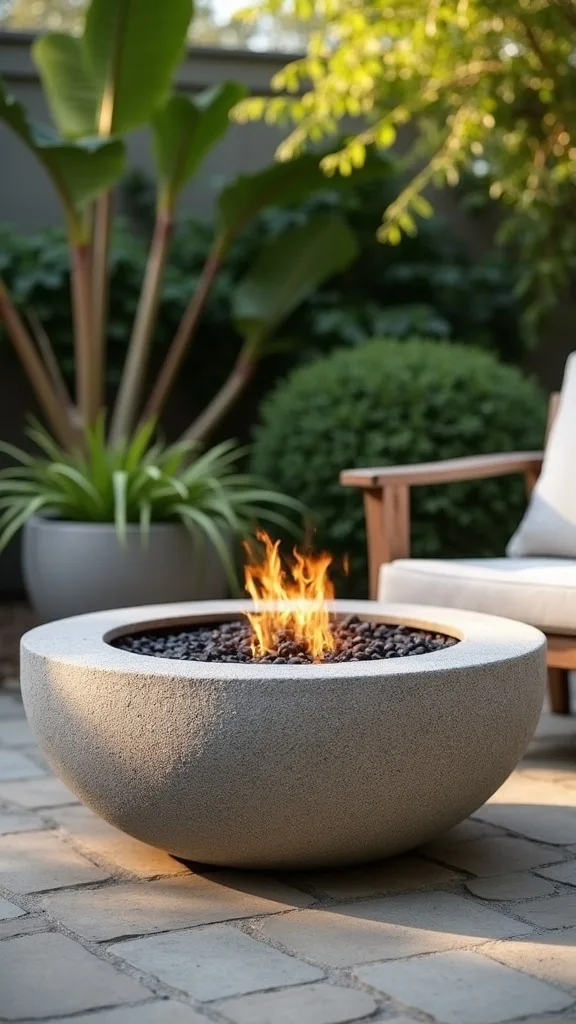
8. Concrete bowl look with a $10 mixing tub (yes, really)
The modern concrete bowl trend is everywhere, and the price tags are rude. This works because the silhouette is what you’re paying for—and you can fake that shape with a heavy-duty mixing tub and smart styling.
Use a black rubber mixing tub from Home Depot or Lowe’s as the outer “bowl,” then place a smaller steel fire bowl inside it on bricks so heat isn’t sitting directly on rubber. Keep the flame modest and always monitor—this is a vibe hack, not a commercial-grade unit. Set the whole thing on pavers, not grass.
Style: surround with light gravel and two chunky lanterns (thrifted metal, not glass near heat). Discount alternatives: Dollar General sometimes has oversized plastic planters—skip those for heat, but use them as decor farther back.
Upgrade: build a simple wood slat screen behind the seating (kept well away from heat) so the area reads like a designed outdoor nook, not a random corner.
Cost & Materials Estimate
Most beginner-friendly fire pit setups land between a quick $60 refresh and a more finished $350 zone, depending on whether you choose wood or propane and how much surface you build.
| Item | Estimated Cost | Where to Buy |
|---|---|---|
| Steel fire bowl (26″–30″) | $35–$120 | Home Depot / Amazon |
| Concrete pavers for a 36″ pad (9 pieces, 12″x12″) | $18–$45 | Lowe’s / Home Depot |
| Fire-resistant mat (deck/patio use) | $24–$60 | Amazon |
| Spark screen (fits 26″–30″ pit) | $28–$70 | Amazon / Wayfair |
| Lava rock or fire pit sand (safe filler/base) | $12–$35 | Home Depot / Lowe’s / Amazon |
| Fire tool set + gloves (basic) | $22–$55 | Amazon / Home Depot |
Total estimated cost: $60–$350 Save money by thrifting the pit and chairs; splurge on the spark screen and a good heat-proof base for peace of mind.
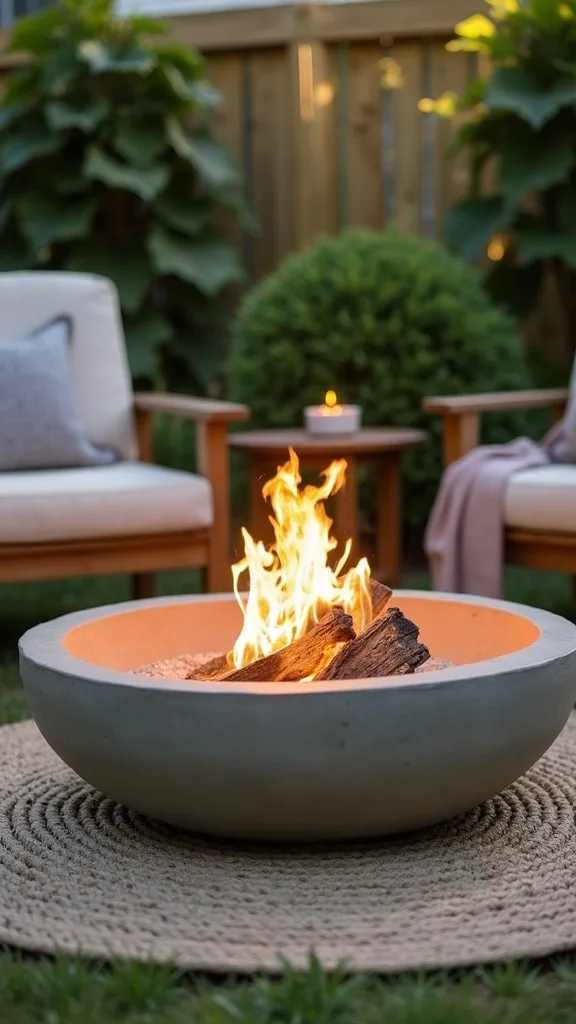
9. No-dig pea gravel fire pit zone (the cleanest beginner “build”)
If you want a fire area that looks permanent without actually being permanent, gravel is your move. It works because it defines the space, drains well, and hides the inevitable ash dust that shows up after a few weekends.
Mark a 6′ circle, lay landscape fabric, then pour pea gravel and rake it level. Place pavers under the fire bowl legs or base so it doesn’t sink. Add two stepping stones leading in—small detail, big “planned” energy.
Materials: landscape fabric, pea gravel, edging (optional), and your pit. Thrift/discount: check local Buy Nothing groups for leftover gravel bags and edging bricks. DIY alternative: use broken concrete pieces (“urbanite”) as a rustic border if you like that look.
Pro tip: keep a lidded metal ash bucket nearby—clean-up takes two minutes, and your space stays guest-ready instead of looking like last weekend’s campout.
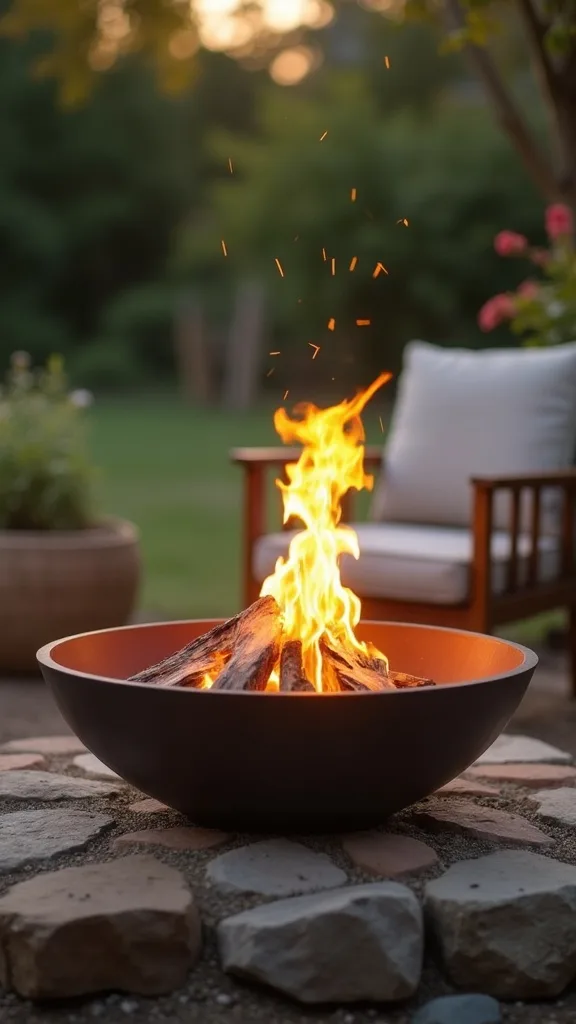
10. The “two-chair angle” layout that makes any pit look expensive
You can have the cheapest pit on earth and still make it look styled with the right layout. This works because angled seating creates a conversation triangle and makes the fire feel like a focal point, not an obstacle.
Place two chairs at 10 o’clock and 2 o’clock around the pit, then add a small side table at 4 o’clock. Keep the open side facing your house or walkway so it feels welcoming. If you only have mismatched chairs, paint them the same color—instant set.
Materials: two chairs, one side table, and one outdoor cushion each. Thrift options: metal patio chairs are common at Goodwill; replace seats with $7 chair pads from Walmart. DIY alternative: concrete block + wood plank makes a sturdy side table.
Upgrade: add one outdoor throw per chair in the same color family—cozy reads intentional, and it makes even a simple backyard fire night feel like an event.
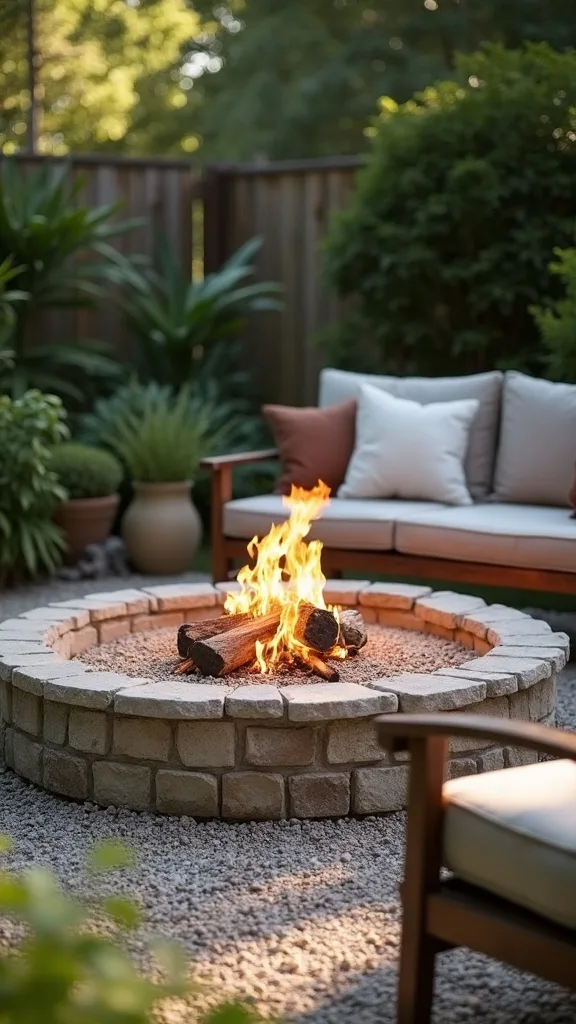
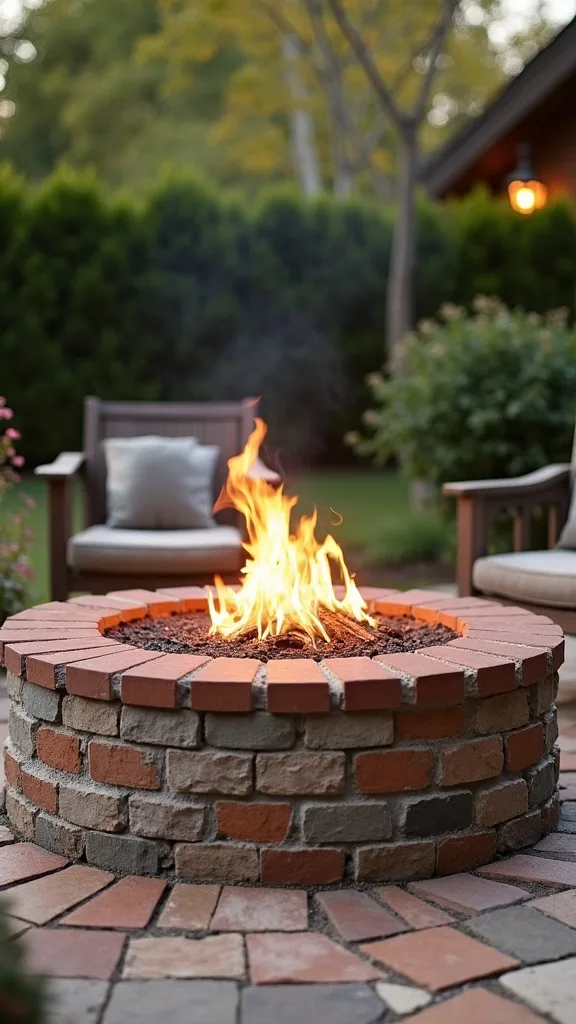
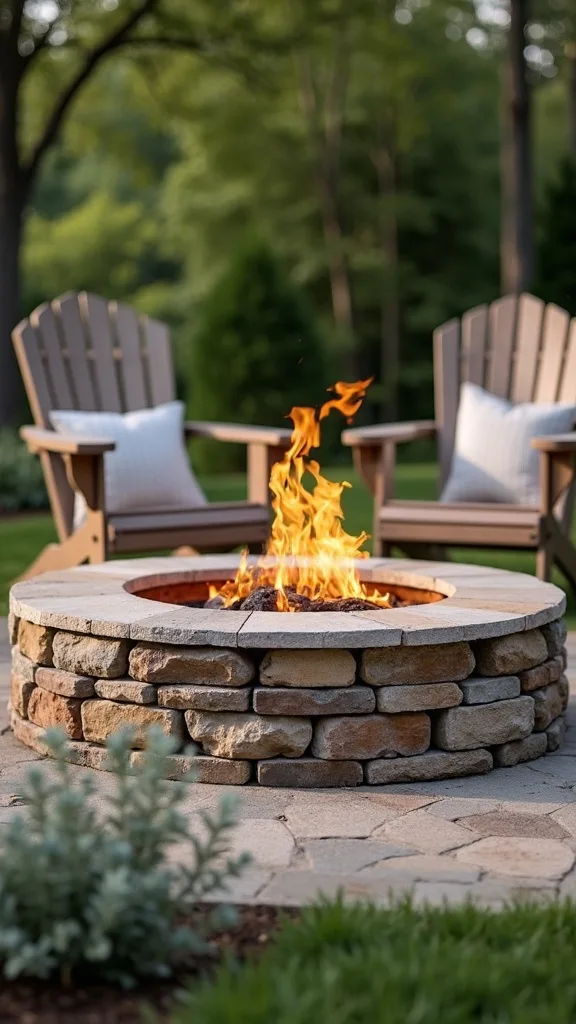
11. Brick ring with reclaimed pavers (the “free materials” flex)
This is for the scavengers who love a good curb alert. It works because reclaimed brick has instant character, and a simple ring is forgiving even if pieces aren’t perfectly matched.
Find solid bricks or pavers, then dry-stack them in a circle around a metal ring or bowl. Keep the inner diameter at least 30″ so the fire isn’t cramped. If bricks wobble, level the base with sand and tamp it down; don’t “force” uneven pieces into place—your ankles will remember.
Colors: mixed red and tan brick looks classic; all-gray looks more modern. Thrift/discount: Habitat ReStore is gold for random pavers. DIY alternative: ask a local mason for leftovers—they often have a pile they’ll happily unload.
Pro tip: top the ring with cap bricks (even mismatched) so the edge feels finished and you can rest a mug there safely—small upgrade, huge payoff.
12. Deck-safe setup (how to do it without tempting fate)
Deck fires can be safe-ish when you treat heat like the enemy it is. This works because you’re creating layers: non-flammable base, contained fire, and clear space—no shortcuts.
Use a propane fire table or a raised fire bowl rated for deck use, and place it on a fire-resistant mat that extends at least 18″ beyond the pit on all sides. Keep it away from railings and siding; 6′ is a comfortable buffer if your space allows. Keep a small extinguisher or a bucket of water nearby, not “somewhere inside.”
Materials: deck-rated fire mat, propane unit, and wind guard if it’s breezy. Budget swaps: look for used propane tables; people sell them when they move. Discount: Aldi sometimes drops seasonal patio accessories that work great.
Pro tip: skip the clutter. A deck setup looks more upscale with less stuff—one tray, one lantern, one plant—so the fire is the star.
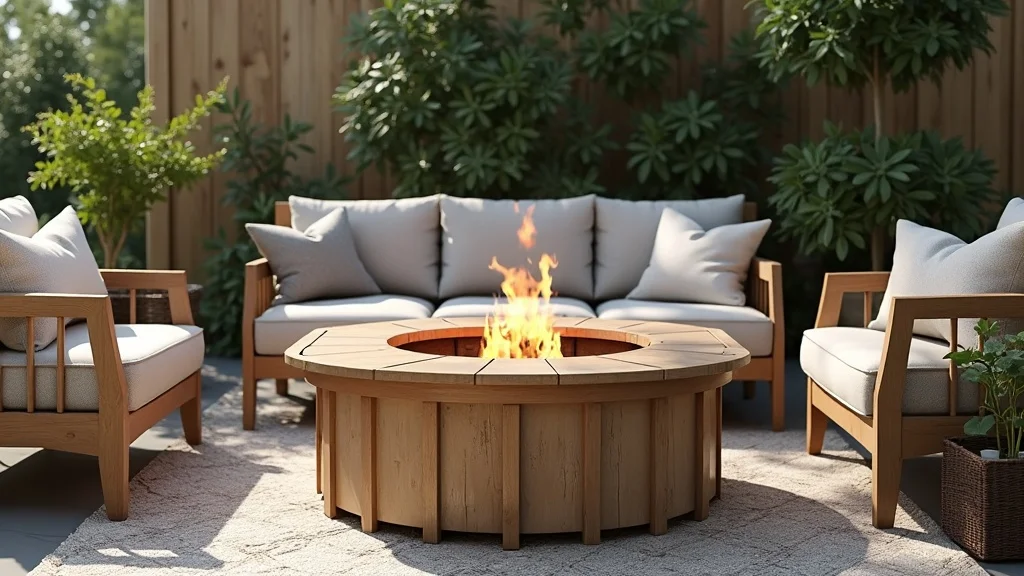
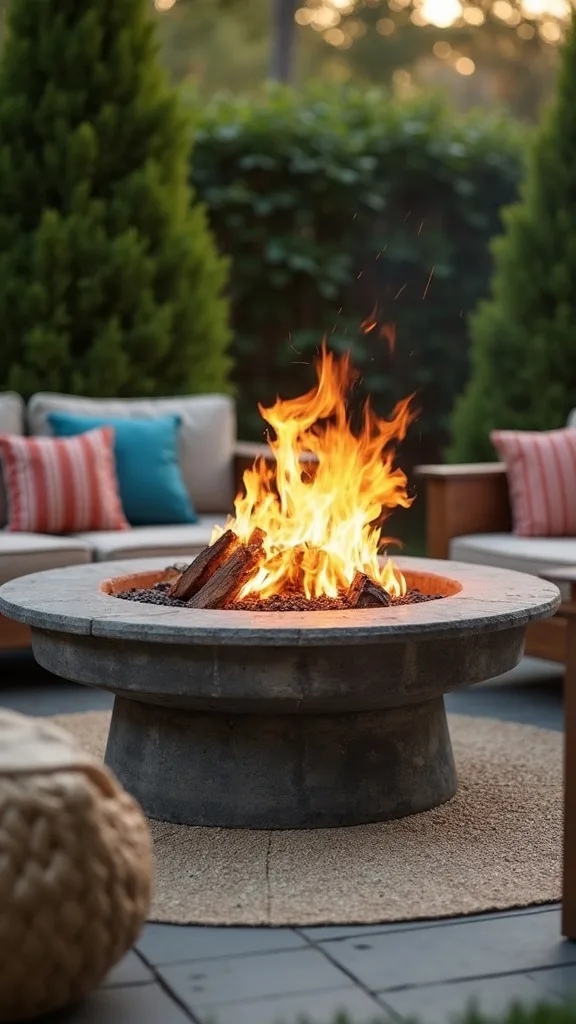
13. Solo Stove surround dupe (the “built-in” look without the build)
That clean, built-in surround look is Pinterest catnip. This works because the surround gives you a visual “table” and a safety buffer, even if your pit is portable.
Create a square surround using four outdoor storage benches or weatherproof cube stools placed around a central smokeless pit, leaving a 12″–18″ gap from heat. Top the benches with a stone-look tray (thrifted serving tray or a leftover tile board) to make it feel cohesive. Keep anything fabric off the inner edge.
Materials: four sturdy pieces, one pit, and one consistent color. Thrift alternative: use metal patio stools and paint them black. DIY: build four simple box frames from 2x4s and cover with cement board (kept away from direct flame).
Upgrade: add a heat-resistant stone tile strip on the inner edge—little detail, big “I know what I’m doing” energy.
14. Fire pit with a gravel “moat” (easy cleanup, tidy edges)
A gravel moat keeps ash and stray bits from landing in grass, and it looks crisp in photos. It works because it creates contrast—dark pit, light gravel, clean circle—without fancy materials.
Dig a shallow ring (2″–3″ deep) around your pit area, line it with landscape fabric, then fill with small gravel. Keep the inner circle for your pavers or mat. This also helps with drainage so you’re not lighting a fire next to a muddy mess after rain.
Materials: landscape fabric, gravel, and edging stones if you want a sharper border. Thrift/discount: leftover gravel is everywhere on Marketplace. DIY alternative: use broken brick as edging—imperfect is fine; it reads rustic.
Pro tip: put one lidded metal can nearby for trash and spent matches. A clean zone makes your fire pit feel like an outdoor living room, not a campsite.
15. The “one weekend” cinder block fire feature (painted to look intentional)
Cinder blocks are not glamorous. That’s exactly why this works: when you paint and cap them, they transform from “construction leftovers” into a modern, modular fire feature.
Dry-stack blocks into a rectangle with an open center for a steel bowl or ring. Keep the open holes facing inward so the outside looks cleaner. Paint the exterior with masonry paint in charcoal or warm gray and let it cure fully before heat is anywhere nearby (read the label for cure time).
Materials: cinder blocks, masonry paint, a steel ring/bowl, and cap stones or pavers for the top. Thrift alternative: sometimes blocks are free at curbside remodel piles—ask first. Discount: check Home Depot “oops” paint shelf for masonry paint deals.
Upgrade: add a thin line of stone-look peel-and-stick tile on the outer face (away from heat) for texture—budget creativity that looks custom.
16. Ring of Adirondack chairs (how to do it cheap without buying a set)
Adirondack chairs scream “summer,” but buying four new ones is a fast way to blow the budget. This works because matching color matters more than matching brand—and paint is cheaper than perfection.
Hunt for two chairs at a time on Marketplace, then unify them with outdoor paint. Arrange them in a loose circle, leaving one wider “entry” gap so people aren’t stepping over each other. Add one shared side table in the middle of two chairs to reduce clutter.
Materials: chairs, paint, and outdoor cushions if you want softness. Thrift-store alternative: solid wood chairs can become Adirondack-ish with a cushion and a throw; don’t overthink it. Discount: Walmart and Target clearance cushions at season change are gold.
Pro tip: stick to one paint color and one cushion pattern. The hunt is fun, and the final look feels curated—not cobbled together.
17. The “tool-free” folding fire pit for tiny yards and storage headaches
If storage is your main issue, a folding pit is the easiest yes. It works because it’s portable, quick to set up, and you can store it like a lawn chair—no permanent footprint required.
Choose a folding pit with a mesh base and set it on a fire-resistant mat or pavers. Use smaller wood pieces and keep the burn moderate; these are for ambiance and s’mores, not a blaze you can see from space. Let it cool completely before folding—patience is part of the safety budget.
Materials: folding pit, mat, and a simple carry bag. Thrift alternative: camp gear shows up at thrift stores constantly, especially after summer. Discount: check Sierra/Marshalls outdoor aisles for random gems.
Upgrade: add a $15 thrifted metal serving tray for your s’mores station—makes the whole thing feel like a planned “night,” not a last-minute idea.
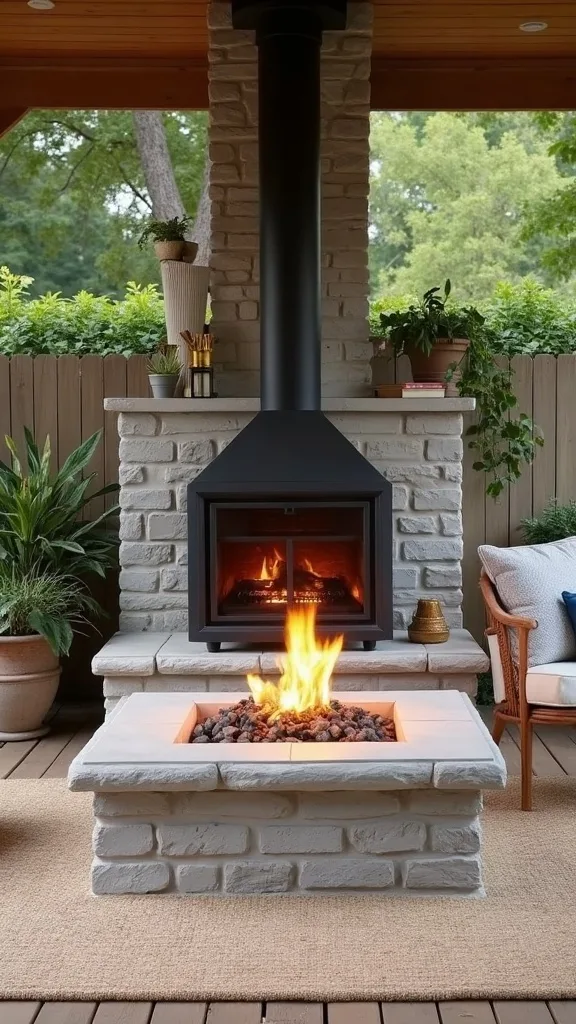
18. Fire pit + privacy screen corner (the fastest way to hide an ugly fence)
If your yard backdrop is… not great, don’t fight it—screen it. This works because a fire pit draws the eye, and a simple screen makes the whole corner feel like a destination.
Place your pit 6’–8′ away from any screen material, then add a folding privacy screen, tall planters, or a trellis wall behind the seating (not behind the fire). Use planters as the “wall” if you’re renting—no digging required. Keep plants watered; dry leaves and fire don’t mix.
Materials: screen/trellis, two planters, and gravel underfoot. Thrift alternative: old shutters make an incredible screen when screwed together and painted. Discount: Big Lots often has tall planters for less than garden centers.
Pro tip: choose one repeat color (black planters, black pit, black lanterns). Suddenly your ugly fence becomes “moody backdrop,” and you look like a genius.
19. Budget “fire pit table” using a metal bowl and a secondhand coffee table
A fire pit table is the holy grail for hosting because people can set drinks down. This works because you’re combining two cheap pieces into one high-function setup—without paying fire-table prices.
Find a sturdy metal or concrete-top outdoor coffee table secondhand. Cut a center opening only if the table is truly outdoor-safe and you know what you’re doing; otherwise, place a raised fire bowl on top with a heat barrier (like a thick stone tile) underneath. Keep flames modest and never use on a flimsy table.
Materials: table, bowl, tile heat barrier, and a long lighter. Thrift alternative: a patio ottoman with a solid tray top can work as the “table” next to the pit instead. Discount: check Wayfair open-box deals for outdoor tables.
Upgrade: add a removable spark screen so you can relax instead of hovering—peace of mind is the best kind of luxury.
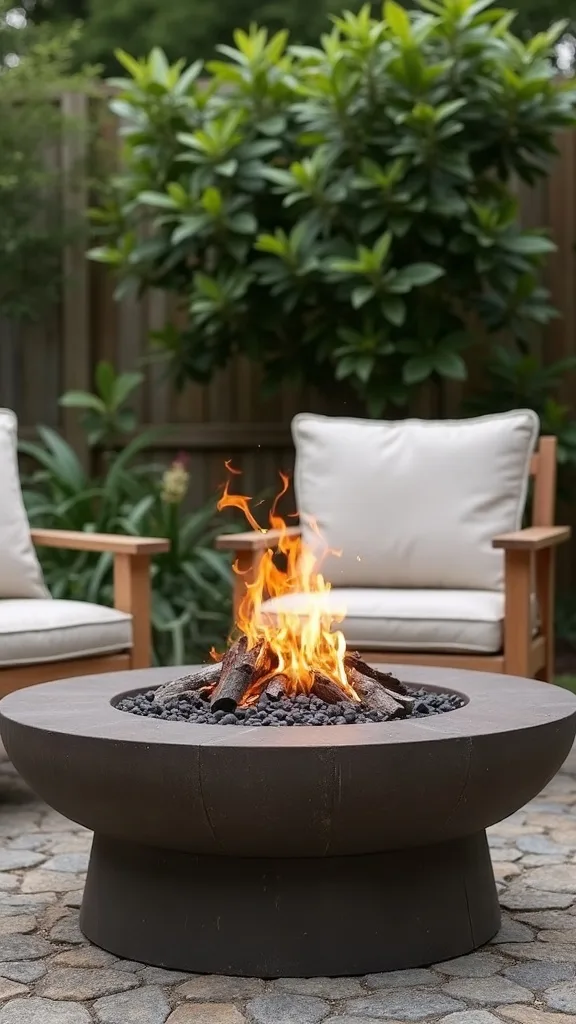
20. The “stone bowl” look with a planter (what’s safe and what’s not)
That carved-stone fire bowl look is expensive, but the shape can be mimicked. It works when you treat the planter as decor and keep the actual fire in a proper metal insert.
Use a large concrete or ceramic planter as the outer shell, then place a steel bowl inside with an air gap (bricks work) so heat doesn’t transfer directly. Keep everything on pavers and away from plants. Do not burn directly inside a ceramic planter—it can crack and pop from heat.
Materials: planter, steel bowl, bricks, and lava rock to hide the insert. Thrift alternative: heavy planters show up at estate sales because no one wants to carry them. Discount: HomeGoods-style stores often have planters cheaper than nurseries.
Pro tip: choose one texture (stone + gravel + matte black) so the setup reads modern and calm—simple materials, strong style.
21. Kid-and-pet-aware setup (how to create a safer perimeter)
If you’ve got kids or pets, the “cute” setup has to be the safe setup. This works because a defined perimeter reduces accidental bumps and gives everyone a visual boundary.
Create a 4’–6′ circle using pavers or gravel, then place seating outside that ring so there’s a buffer zone. Use a spark screen every time, even for small fires. Keep a lidded ash bucket and a small extinguisher within reach—not as decor, as insurance.
Materials: perimeter pavers, spark screen, and fire gloves. Thrift alternative: metal baby gates can be repurposed as a temporary barrier (set well back from heat). Discount: Walmart often has inexpensive leather work gloves that are great for fire tending.
Upgrade: add a low bench outside the ring for “spectator seating.” Everyone feels included, and you’re not constantly saying “back up” all night.
22. Windy-yard solution: low flame, heavy base, fewer flying embers
Wind turns a relaxing fire into a stressful one fast. This works because you’re choosing a setup that resists tipping and reduces ember travel—practical, not paranoid.
Pick a heavier pit (wider base, lower profile) and use a spark screen. Keep wood pieces shorter so they don’t roll. Position seating so the wind carries smoke away from people—move the chairs, not the fire, when possible. If it’s really gusty, switch to propane that night.
Materials: low-profile bowl, spark screen, and a wind-resistant lighter. Thrift/discount: heavy steel bowls show up used all the time because they rust a little—rust is cosmetic, price drops fast. DIY: add gravel around the base to visually “anchor” it.
Pro tip: a simple windscreen panel (placed far from heat) makes the whole zone more comfortable—your guests will stay longer, and your setup will feel effortlessly put together.

23. The “clean ash routine” that keeps a cheap pit looking new
The secret to a stylish fire pit isn’t the pit. It’s the maintenance routine you actually follow. This works because ash buildup is what makes everything look tired and neglected.
After each use, let the pit cool completely, then scoop ash into a lidded metal bucket. Wipe the rim with a dry rag and store the pit under a cover if rain is coming. Once a month, do a deeper clean: dump ash, brush, and touch up paint if needed.
Materials: ash bucket with lid, small metal scoop, and heat-resistant gloves. Thrift alternative: a metal popcorn tin can work as an ash container if it has a snug lid (label it). Discount: dollar stores sell basic metal scoops that do the job.
Pro tip: keep a “fire kit” tote—lighter, gloves, starter, scoop. When setup is easy, you use it more, and your backyard starts feeling like a real living space.
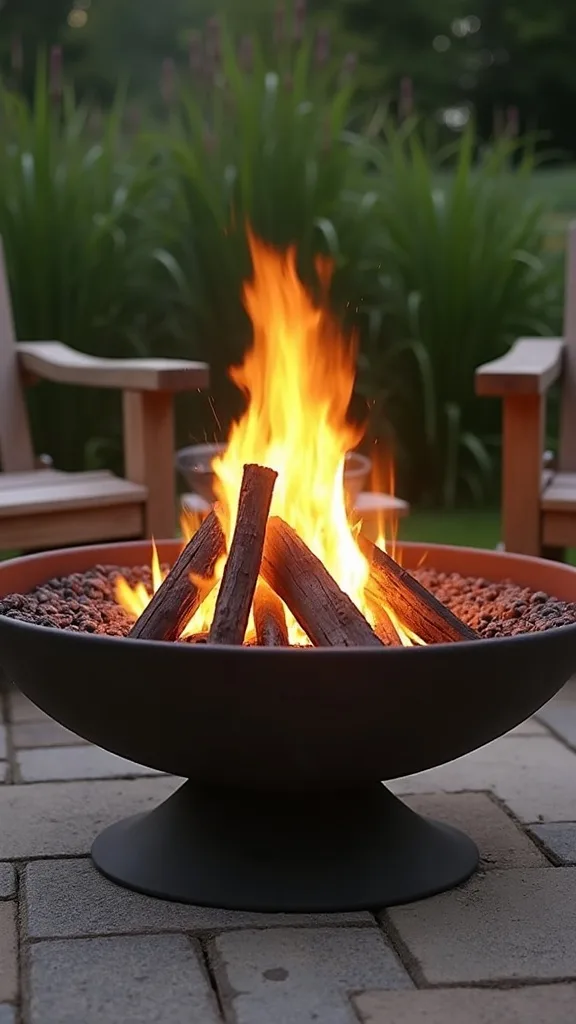
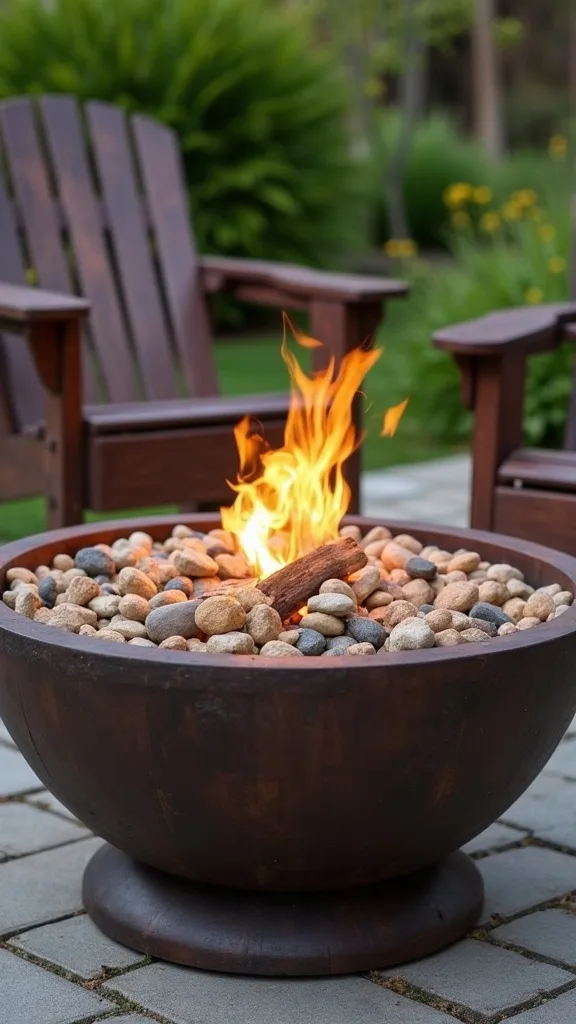
24. The one thing to avoid: “pretty” river rock inside the fire pit
River rock looks great in photos, and it’s one of the most common beginner mistakes. This works as a warning because certain rocks can trap moisture and crack or pop when heated—no one needs surprise shrapnel on a cozy night.
Avoid using random rocks from your yard or decorative river stones inside the burn area. Use materials made for fire: lava rock, fire-rated glass (for propane), or a simple sand base. If you want the “stone” look, keep decorative rocks outside the heat zone as a border instead.
Materials: lava rock, sand, and a spark screen. Thrift/discount: you can often find half-used bags of lava rock on Marketplace. DIY alternative: crushed gravel for the outer ring gives the same vibe without the risk.
Pro tip: the safest setup is the one you don’t have to overthink. Choose fire-safe fillers, and you’ll relax enough to actually enjoy the glow.
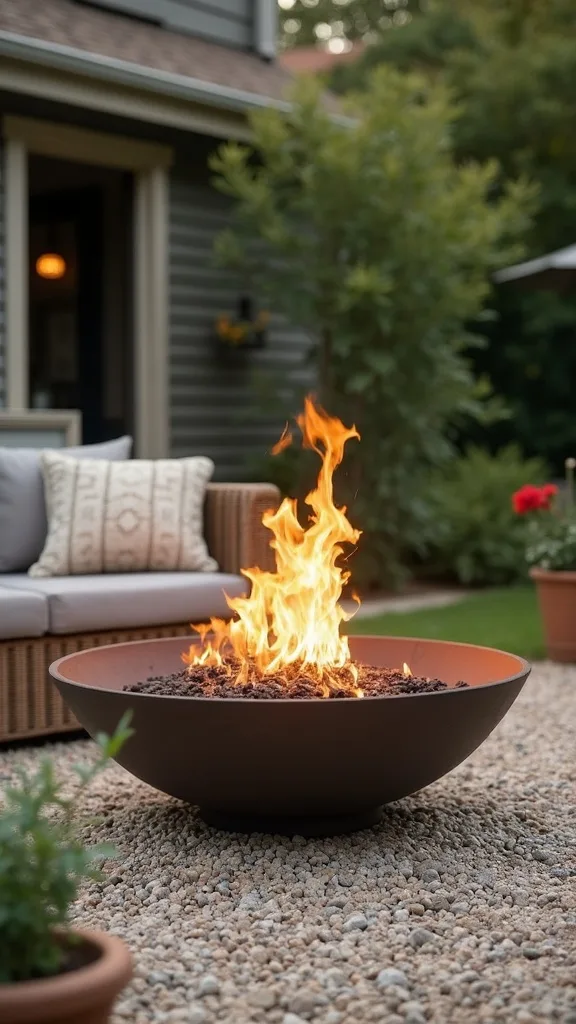
25. My $72.18 “bad-before” backyard fire refresh (real numbers, real shortcuts)
My “before photo” was brutal: patchy grass, a rusty bowl half-buried in dirt, and two plastic chairs that looked like they’d survived three college moves. This worked because I stopped trying to make the bowl impressive and made the area around it look deliberate.
I spent $29 on a used steel bowl, $24 on nine 12″x12″ pavers, and $9.99 on a bag of sand. The rest was scavenged: a thrifted metal bucket for kindling ($3.50) and a $5 side table from a yard sale. I leveled the pavers with sand, centered the bowl, and angled the chairs like I’d seen on Pinterest—done in under 90 minutes.
Colors were simple: black bowl, gray pavers, and one rust-toned pillow I already had. Discount alternative: if you can’t find pavers, a fire-resistant mat works as the base.
Pro tip: take five minutes to sweep the pavers before guests arrive. That tiny reset makes the whole setup feel high-end, even when the receipts say otherwise.
Final Thoughts
A good backyard fire setup isn’t about being fancy—it’s about being ready. When the pit is easy to light, easy to clean, and sitting on a surface that looks intentional, you’ll actually use it on random Tuesdays instead of “someday.” That’s the real upgrade.
Keep your first version simple, then let it evolve. Swap in better chairs when you score them secondhand. Add gravel when the ground turns to mud. Replace the bowl later if you want. The point is starting with a setup you can manage, not a project that demands a whole season of weekends.
Today’s action: check Facebook Marketplace for a steel fire bowl under $40, then pick up nine 12″x12″ pavers (or a fire-resistant mat) so you can build your first defined fire zone this weekend.
What I’d Do Differently
When I first tried this, I put a cheap fire bowl directly on the grass because I was “just testing it.” The next morning I had a scorched circle that looked like a crop mark, plus soggy ash glued to the lawn from overnight dew. The mistake wasn’t the bowl—it was skipping a real base. The correct approach is boring but effective: always start with a non-flammable surface (pavers or a fire-resistant mat), then define a clear perimeter so you’re not constantly stepping too close while carrying wood or snacks. That one change made my setup feel calmer, safer, and honestly more stylish, because it stopped looking like a random bowl in a yard.
I also wish I’d known how much easier fires are with smaller, drier wood and a simple “fire kit” bin (gloves, lighter, starter, scoop). Do that prep once, and your future self gets the cozy night without the scramble—so pick one base option today and set it up before the weekend.