This post contains affiliate links. As an Amazon Associate, I earn from qualifying purchases at no extra cost to you.
Are you looking for bike storage ideas that don’t steal parking space or turn your garage into a daily obstacle course? Do you want to keep helmets, pumps, balls, and pads together so summer sports actually feels easy to start (and easy to put away)?
I always start by designing one “vertical wall” that holds bikes and gear with zero floor footprint, because that’s what makes the biggest difference in real life. In this post, I’m sharing 25 practical setups—from a simple wall mounted bike rack plan to full sports equipment storage zones—so you can mix and match what fits your garage.
In my opinion, this is perfect for busy families, apartment-to-garage upgraders, and anyone doing garage organization summer resets who needs a system that stays tidy even when you’re rushing out the door.
I find that the “secret sauce” is pairing cycling storage with a gear wall: hooks for bikes, a shelf for helmets, and a pegboard for the small stuff—plus a drop zone for sweaty items. I’ll also share spacing numbers, stud-friendly mounting tips, and a few affordable product swaps that save money without feeling flimsy.
Below are 25 Bike Storage & Sports Equipment Organization that help you park 1–3 bikes vertically, corral sports gear, and keep your garage floor clear all summer long.
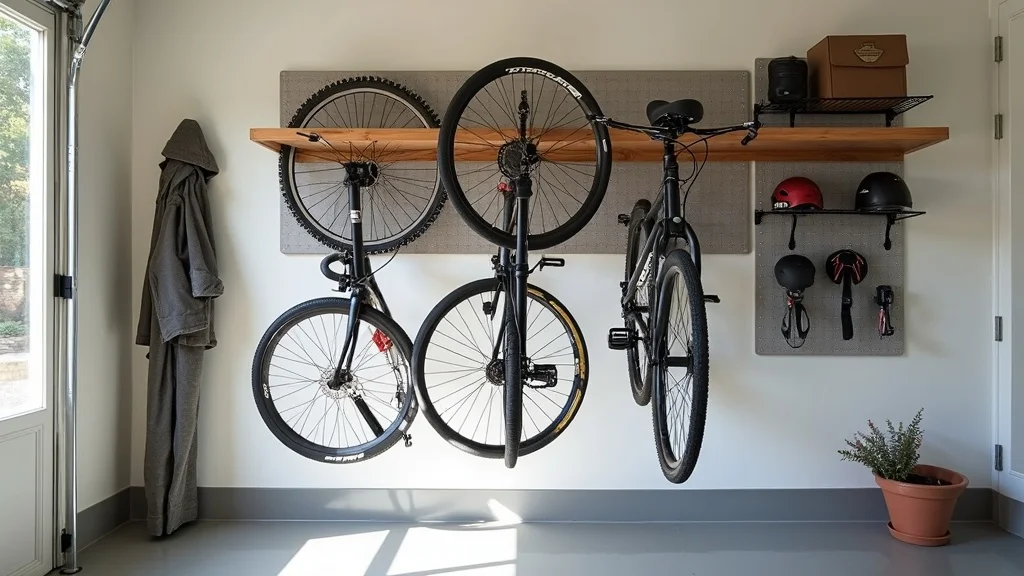
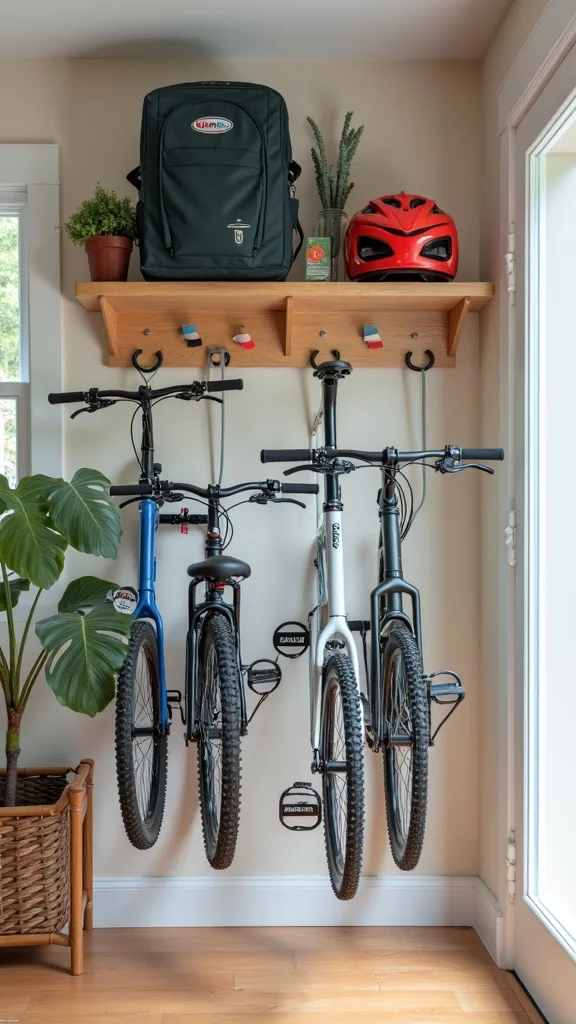
1. 3-Bike Vertical Hook Wall + Helmet Shelf + Pegboard (Zero Floor Footprint)
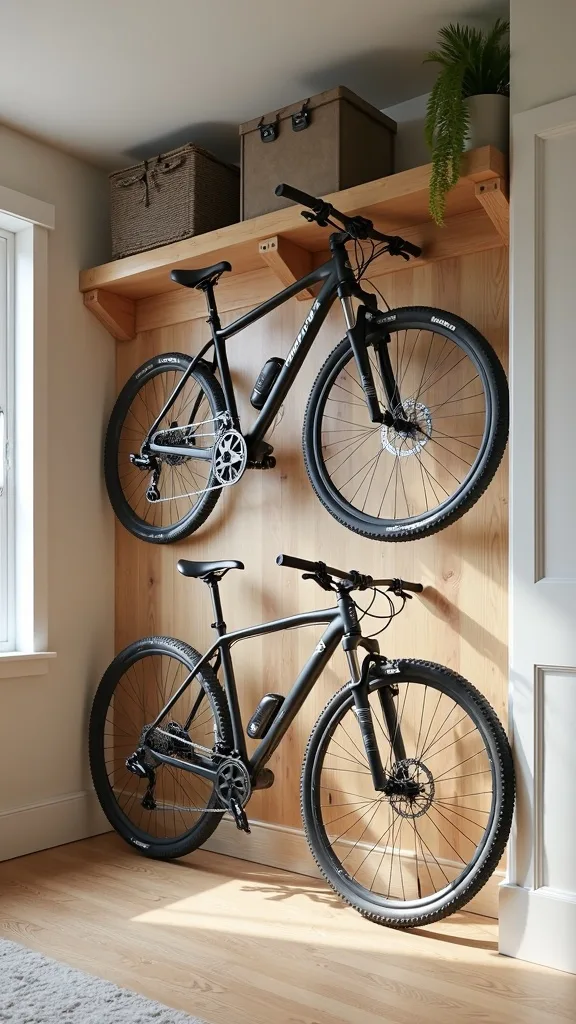
I always start by building one vertical “command wall” with vertical wall hooks for 3 bikes, a helmet shelf, and a gear pegboard because it instantly clears the floor and makes daily put-away realistic. From my experience, this layout works in most garages because it only needs about 72–84 inches of wall width and keeps handlebars from tangling.
I mount three heavy-duty vertical bike hooks into studs, spacing them 16–18 inches apart (or staggered by 8–10 inches in height if your bars are wide). Then I install a 48-inch wall shelf at about 60 inches high for helmets and a small basket, and hang a 24×48-inch pegboard beside it for locks, mini pumps, and lights.
I find that powder-coated steel hooks, a pine shelf stained in a warm walnut, and white pegboard looks clean without feeling too “workshop.” I always recommend using 2-inch wood screws plus 1-inch fender washers for the hooks if the mounting holes are oversized.
Pro Tip: When I design this look, I leave a 6-inch “tire drip gap” below each rear wheel and add a $10 boot tray under the wall—because chain lube and wet tires will mark drywall faster than you think, and this keeps the wall crisp all season.
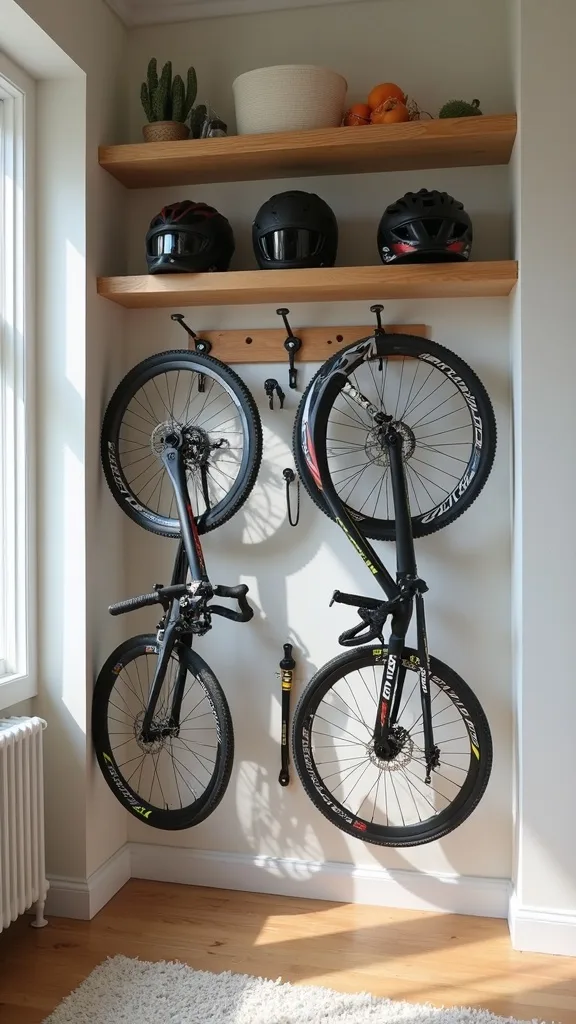
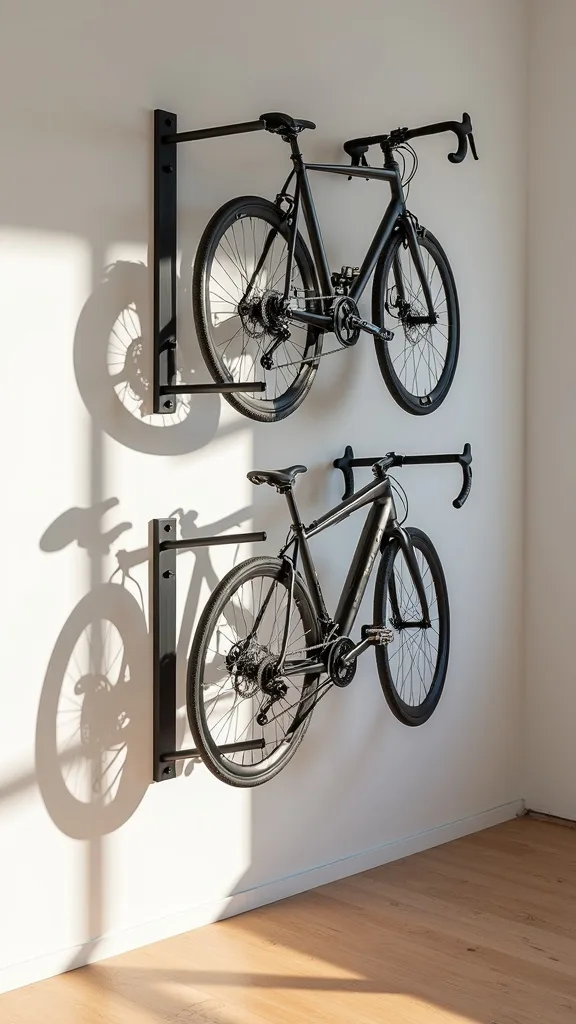
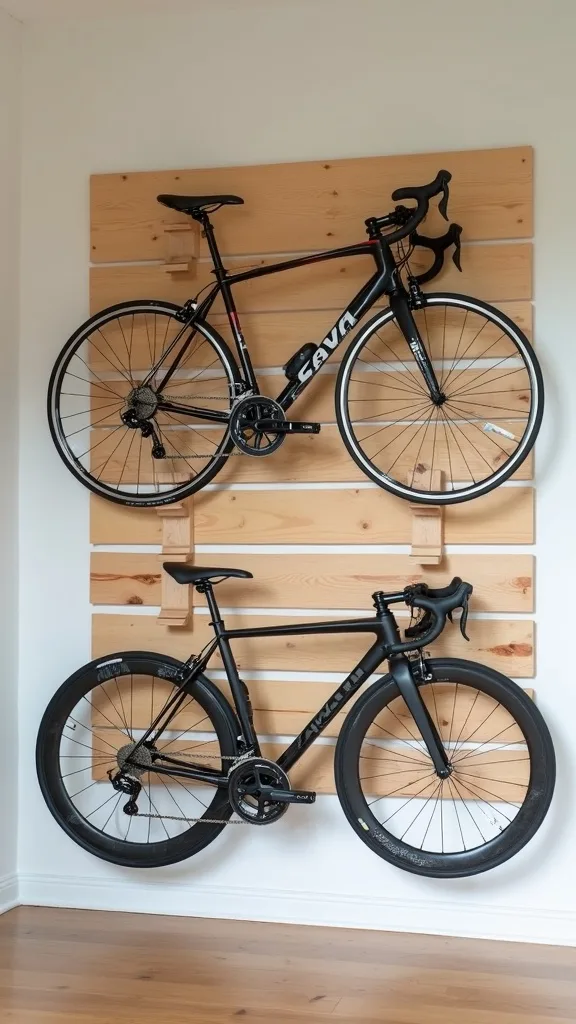
2. Staggered Height Bike Hooks to Prevent Handlebar Clashes
From my experience, the fastest way to make wall bike storage feel “annoying” is when handlebars collide every time you lift a bike. I find that staggering hook heights solves that without buying a more expensive rack, and it keeps cycling storage calm and predictable.
I always start by marking studs and planning 2 heights: one hook line at 68 inches and the next at 76 inches from the floor. Then I space the hooks 14–18 inches apart depending on bar width, and I test with the widest bike first (usually a mountain bike with 760mm bars) before I commit to drilling.
In my opinion, rubber-coated steel hooks (like Everbilt-style) are worth the extra $3–$6 per hook because they grip the rim and reduce scratches. I also like adding a small 6×10-inch label plate above each hook so kids know whose bike goes where.
Pro Tip: I’ve found that staggering works best when the higher hook holds the bike with the wider handlebars—because the extra 8 inches of lift naturally floats the grips above the neighboring saddle line, which prevents that “stuck together” moment when you’re rushing out the door.
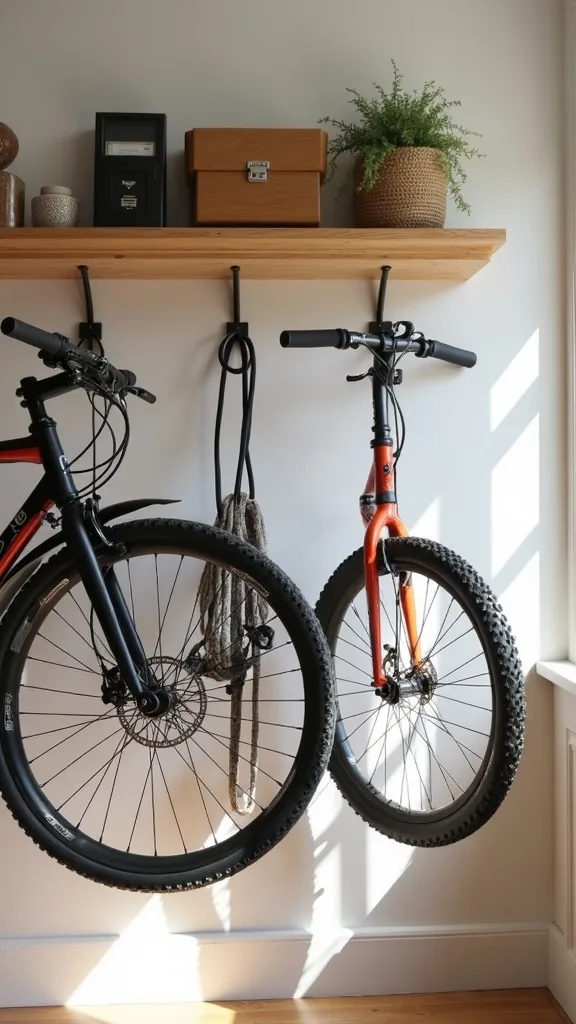
3. Wall Mounted Bike Rack Rail System for Adjustable Spacing
I recommend a wall mounted bike rack rail system when you want flexibility—especially if you’ll swap between kids’ bikes and adult bikes over the next 6–12 months. From my experience, the ability to slide hooks left or right is what keeps a garage wall from needing a full redo later.
I always start by installing a 48-inch or 72-inch steel rail into studs using lag screws (typically 5/16-inch), then I add 2–4 movable hooks depending on how many bikes you own. I keep the bottom of the rail around 60–66 inches high so front wheels lift cleanly and you’re not scraping knuckles on the floor.
I find that matte black rails look more “home-decor” and less industrial, especially paired with a birch plywood shelf nearby. If you want budget-friendly, I’ve found Gladiator or Rubbermaid FastTrack-style rails are typically $40–$120 depending on length and hook count.
Pro Tip: When I tried this in a humid garage, the rail stayed solid but the hooks squeaked—so I rubbed a tiny amount of paste wax on the hook contact points, which keeps sliding smooth without attracting gritty dust like oil can.
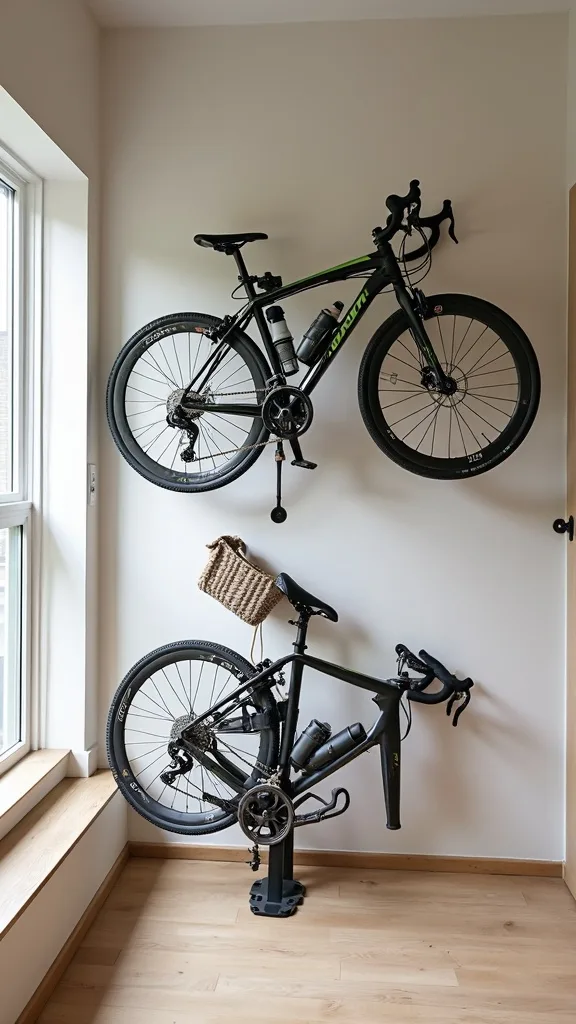
4. Front-Wheel Tray + Vertical Hook Combo for Muddy Summer Rides
From my experience, vertical hooks are amazing until you come home from a muddy trail ride and realize the front tire is now painting your wall. I always add a front-wheel tray because it keeps sports equipment storage cleaner and reduces the “I’ll deal with it later” mess.
I always start by mounting the vertical hook at 72 inches high, then I screw a small tire tray (or a DIY plywood block) at 10–12 inches off the floor so the front wheel sits in a predictable spot. I leave about 4 inches between the tire and drywall by using a 2×4 spacer behind the tray.
I find that a simple 3/4-inch plywood tray painted semi-gloss white wipes clean in under 30 seconds. For store-bought, a rubber tire tray insert is usually $12–$25 and saves time, though it costs more upfront.
Pro Tip: I’ve found that placing the tray slightly off-center (about 1 inch) helps the tire settle into the same groove every time—so the bike doesn’t twist, which is what causes most wall scuffs and surprise handlebar swings.
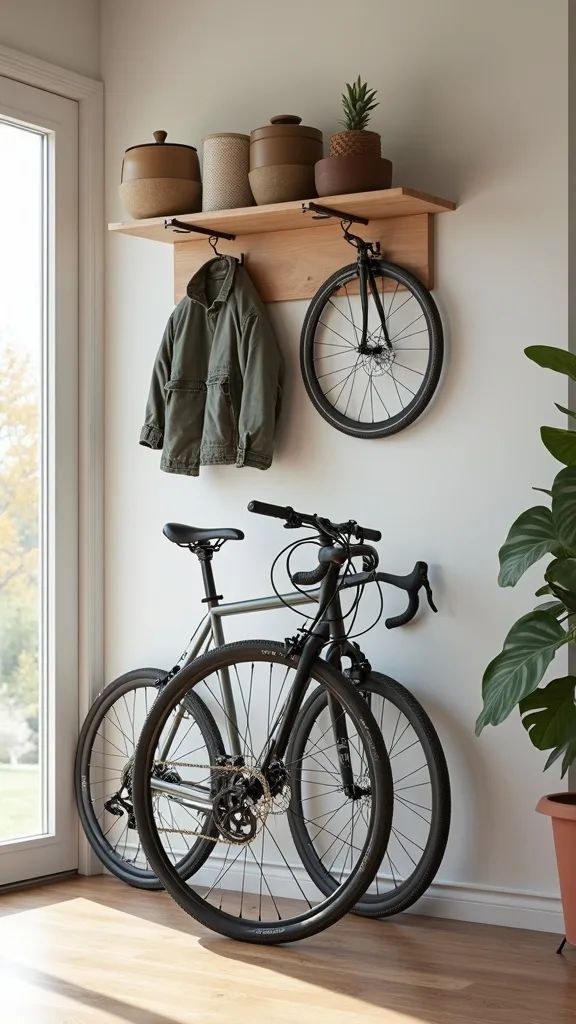
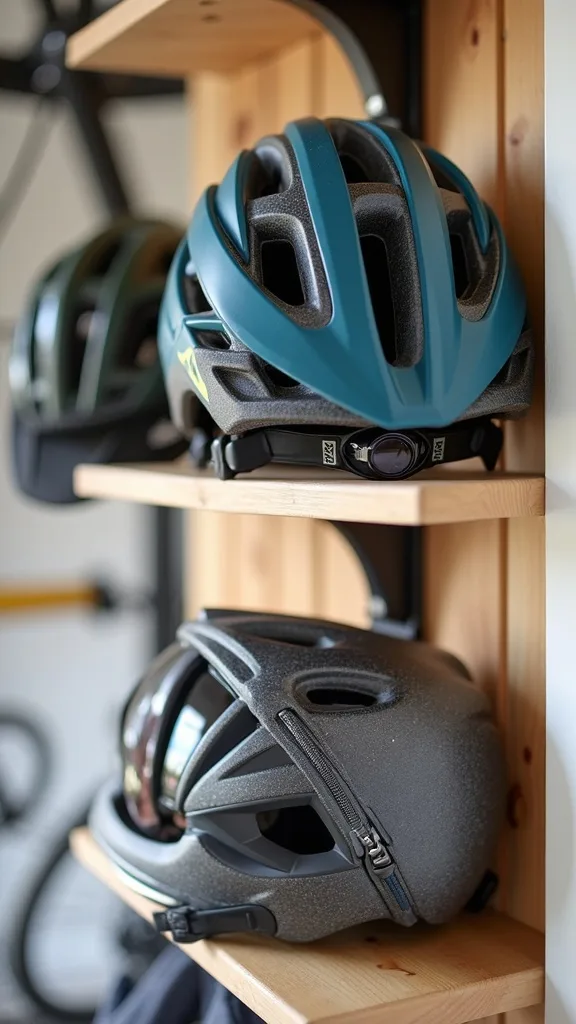
5. Helmet Shelf with Built-In Glove and Sunglasses Bins
I find that helmets are the “clutter multiplier” in summer—once they land on a workbench, everything else follows. In my opinion, a dedicated helmet shelf with small bins is one of the most affordable bike storage ideas that makes the garage feel styled, not chaotic.
I always start by installing a 36–48 inch floating shelf using a heavy-duty bracket system rated for 30–50 lb, then I add 3–4 labeled bins that are around 10×10 inches each. I mount the shelf at 58–62 inches high so kids can reach with a small step stool, and adults aren’t ducking under it.
From my experience, clear polycarbonate bins show what’s missing (like a left glove) faster than opaque baskets. I also like adding a 12-inch under-shelf hook rail for sunglasses cases and bike keys.
Pro Tip: When I design this look, I leave a 2-inch gap between bins so helmets can “air out”—because trapped sweat smell builds within 48 hours in warm weather, and that tiny spacing makes the shelf feel fresher all season.
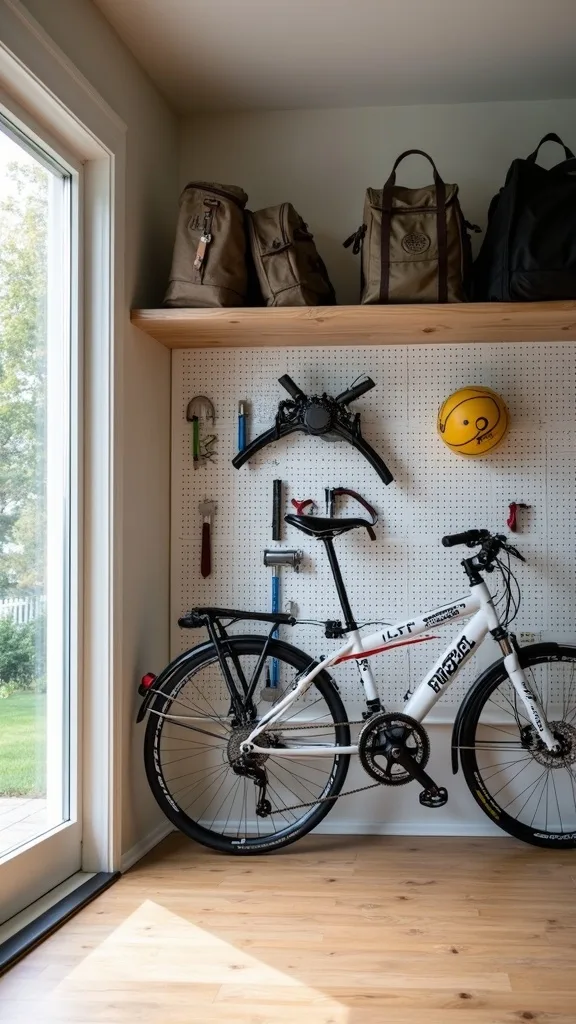
6. Pegboard Gear Wall for Pumps, Locks, and Ball Bags
I always recommend a pegboard gear wall because it turns tiny, annoying items into a visual system you can maintain in under 2 minutes a day. From my experience, a pegboard is the sweet spot between “too messy” and “too expensive custom cabinetry” for garage organization summer.
I always start with a 24×48-inch metal pegboard (or two panels for 48×48 inches) and mount it with 3/4-inch spacers so hooks seat properly. Then I assign zones: top row for pumps and floor pump head, middle for locks and lights, bottom for ball bags and knee pads—keeping frequently used items between 36–60 inches high.
I find that black metal pegboard with matching hooks looks cleaner than brown hardboard, and it doesn’t swell if your garage gets humid. I also like adding a small magnetic strip for Allen keys and a 6-inch parts cup for valve caps.
Pro Tip: I’ve found that using “closed-loop” pegboard hooks (not open J-hooks) prevents locks and pumps from bouncing off when the garage door vibrates—especially on panels wider than 24 inches.
7. No-Stud Options: Toggle Bolts and Backer Boards (When Studs Don’t Line Up)
When I tried this in an older garage, the studs didn’t align with where the bikes needed to go, and that’s a common frustration. From my experience, you can still make bike storage ideas work safely—either with a backer board or the right hollow-wall anchors—though I always acknowledge it’s a trade-off versus direct-to-stud strength.
I always start by checking the wall type: drywall over studs, or masonry. For drywall, I prefer mounting a 1×8 backer board that’s 60–72 inches long into at least 2 studs, then attaching hooks wherever I want. If I must use anchors, I use heavy-duty toggle bolts rated around 100 lb (and I keep it to 1 bike per anchor point to stay conservative).
I find that primed pine backer boards painted to match the wall look intentional, not like an afterthought. I also like using black lag screws with washers for a more finished look.
Pro Tip: I’ve found that backer boards last longer if you seal all sides (front, back, and edges) with two coats of paint—because unsealed backs can warp within 1–2 summers in humid garages, loosening your hook alignment.
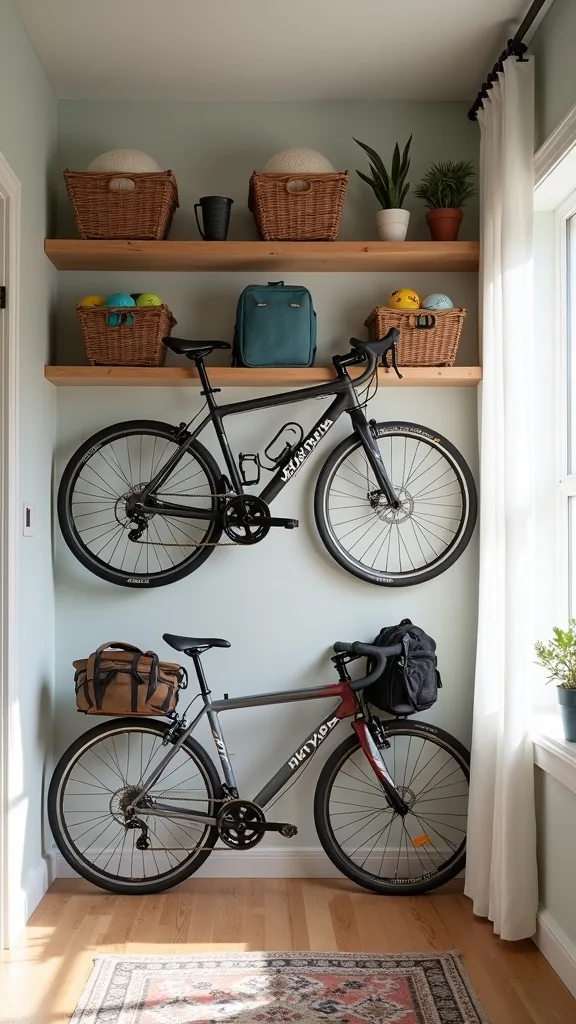
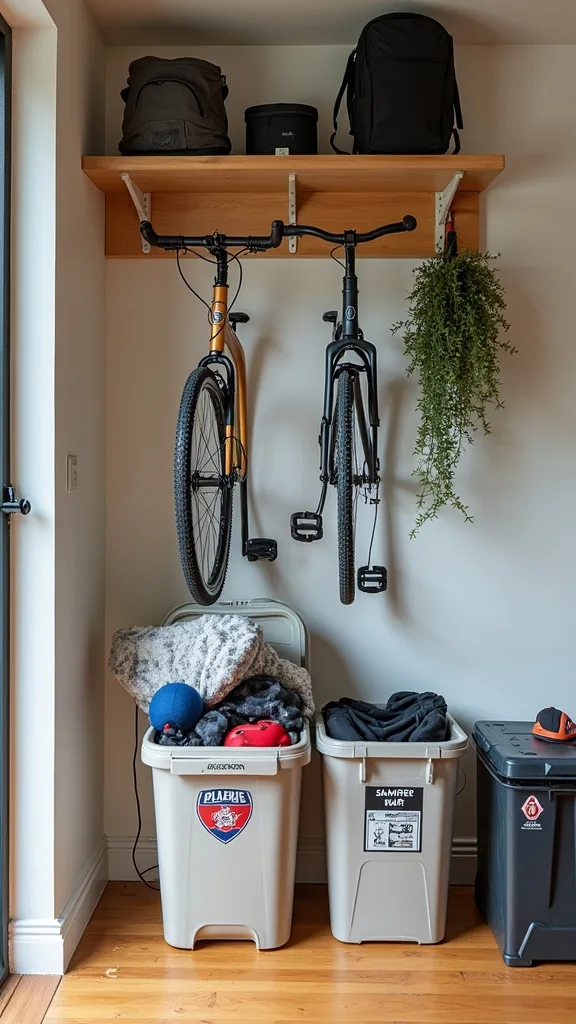
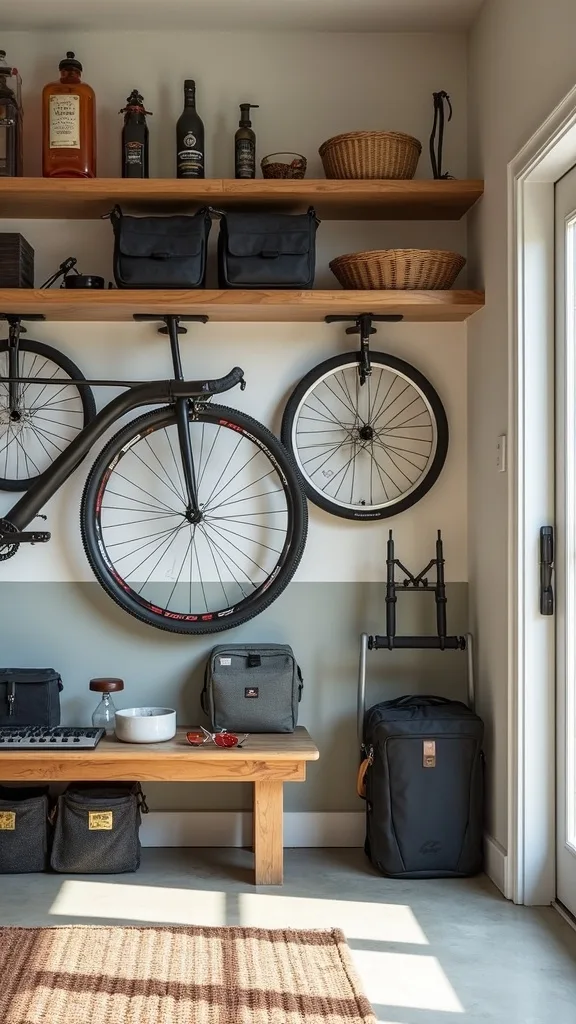
8. Ceiling-to-Wall Hybrid: One Overhead Bin Row + Wall Bike Zone
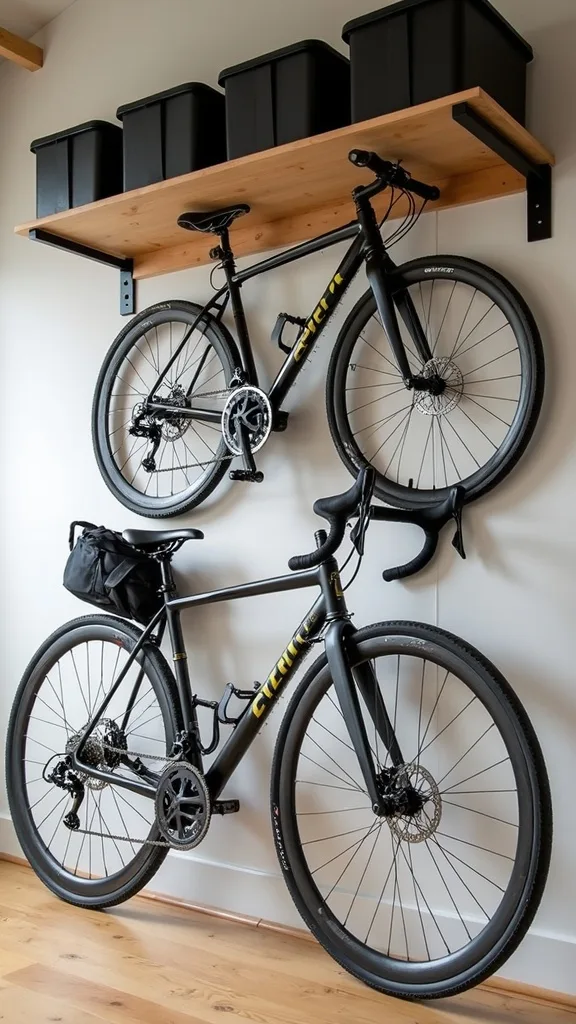
From my experience, the easiest way to keep a wall bike zone from getting swallowed by random sports gear is to give the “off-season” items a home overhead. I always pair one overhead bin row with wall bike storage because it keeps sports equipment storage layered without stealing floor space.
I always start by installing a 4×8-foot ceiling rack (or two 2×6-foot racks) above the bike wall, leaving at least 18 inches of clearance from the garage door tracks. Then I keep the bike hooks below at 70–78 inches so bikes don’t interfere with the bins. I label bins by season and limit each bin to about 30–40 lb so lifting stays manageable.
I find that clear 27-gallon totes make it easier to see soccer cones versus swim gear. For a more decor-friendly look, I’ve found black-and-yellow totes hide scuffs but still stack neatly.
Pro Tip: When I design this look, I leave a 6-inch “grab gap” between the wall and the first bin edge—because fingers need space to pull a tote down safely, and that gap prevents scraped knuckles and dropped bins.
Cost & Materials Estimate
For the majority of garages, I find a zero-floor-footprint bike-and-gear wall typically lands between $80–$320 depending on rack style and how much pegboard/shelving you add.
| Item | Estimated Cost | Where to Buy |
|---|---|---|
| 3-pack heavy-duty rubber-coated bike hooks | $18–$35 | Home Depot |
| 48-inch wall shelf + heavy-duty brackets | $35–$75 | Lowe’s |
| 24×48-inch metal pegboard kit + hooks | $45–$110 | Amazon |
| Stud finder, 24-inch level, and 2.5-inch wood screws (if you don’t own them) | $22–$55 | Home Depot |
| Boot tray + 2 clear accessory bins | $18–$40 | IKEA |
Total estimated cost: $138–$315 I save money by starting with hooks + one pegboard panel, and I splurge on sturdier brackets because saggy shelves are what make the whole wall feel cheap.
9. Family “Bike Parking Lines” with Painter’s Tape and Labels
I find that the cheapest organization tool is visual guidance, especially with kids and summer schedules. From my experience, adding “parking lines” turns your cycling storage area into a habit instead of a negotiation.
I always start by placing the wall hooks, then I use painter’s tape to mark a 24-inch wide “lane” under each bike and a 12-inch buffer between lanes for pedals. I add a name label at eye level (around 54 inches) and keep a small step stool nearby that’s about 9–10 inches tall for younger riders.
In my opinion, white tape on a gray epoxy floor looks crisp, but blue tape is easier to see in dim garages. I also like using a label maker (Brother P-touch style) because the text stays readable after 3–4 months of heat and dust.
Pro Tip: I’ve found that if you angle the tape lanes by about 5–10 degrees instead of perfectly straight, pedals naturally miss the neighboring bike when you swing the rear wheel in—tiny change, huge reduction in daily bumps.
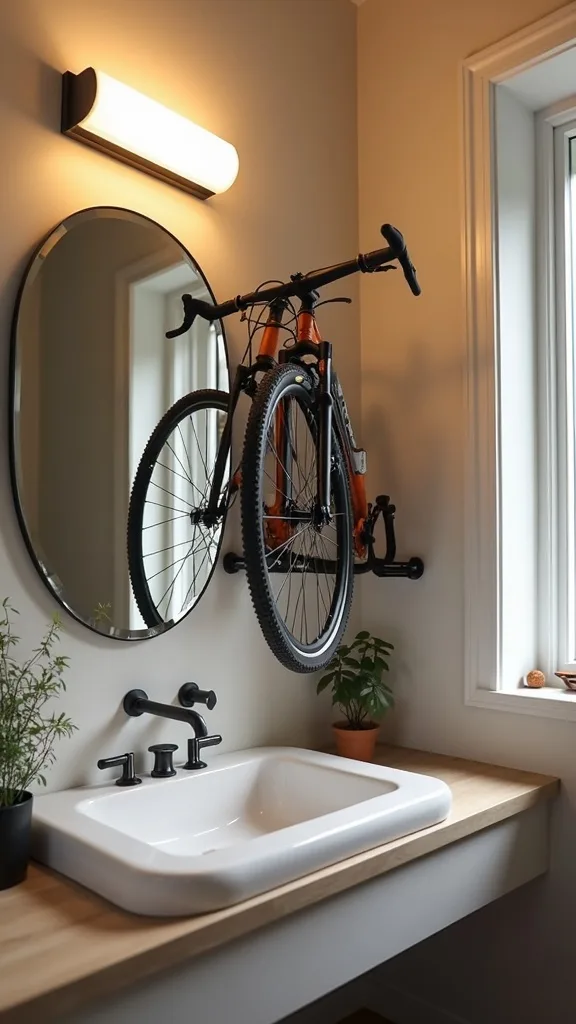
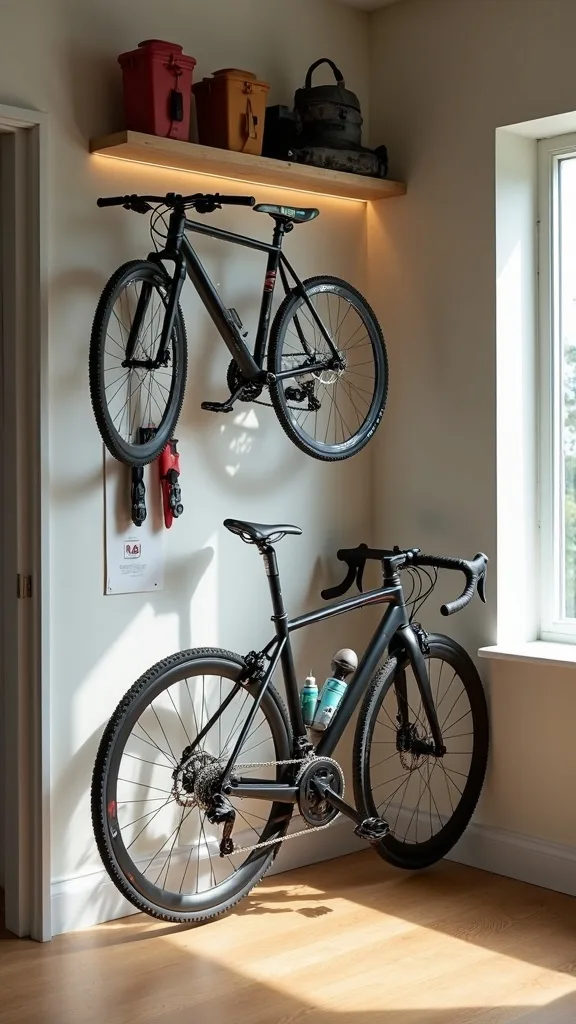
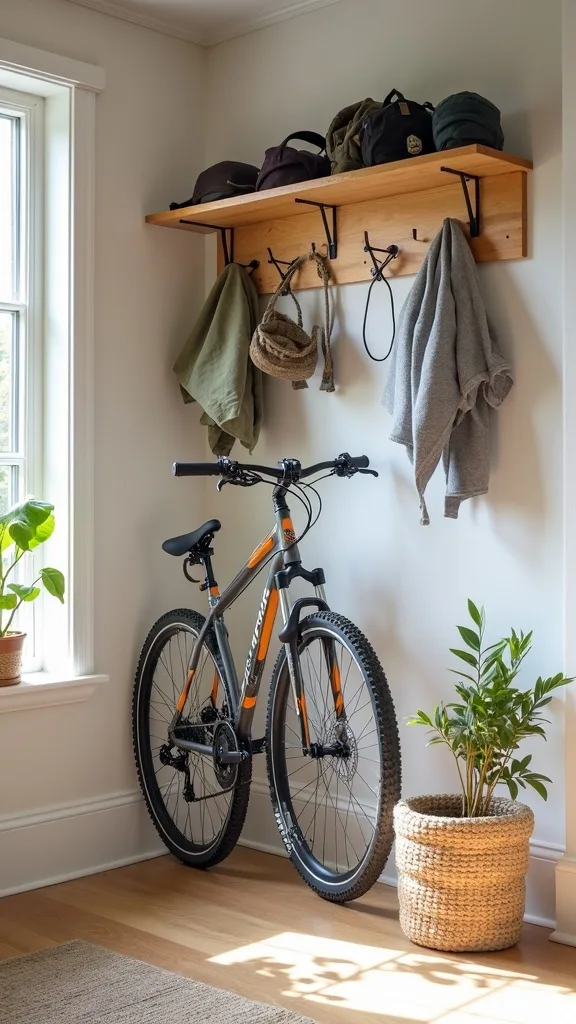
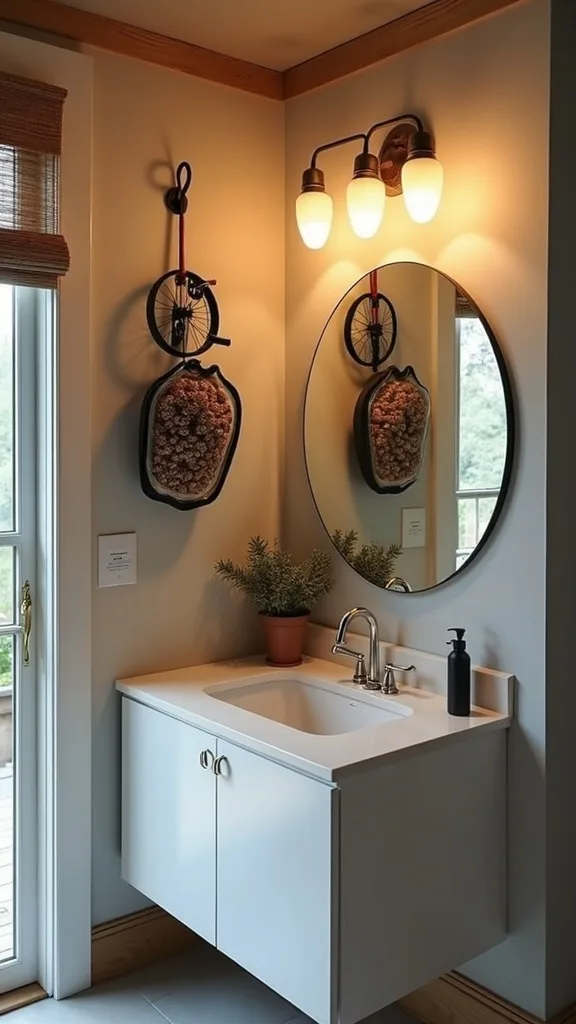
10. Corner Bike Storage Using Two-Wall Hook Placement
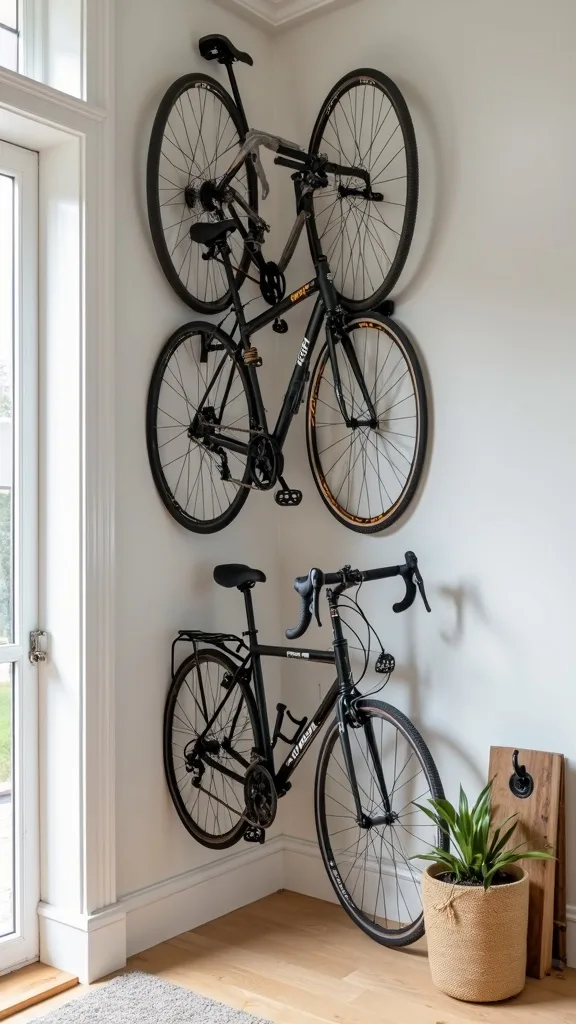
From my experience, corners are where garages hide wasted space, and I love turning them into functional storage without blocking the car door. I always recommend corner layouts when you need bike storage ideas in a tight single-car garage.
I always start by placing one vertical hook on the left wall and one on the back wall, keeping each hook about 10–12 inches away from the corner so handlebars don’t jam. I mount hooks at 72–76 inches high and stagger by 6–8 inches if the bikes have wide bars. Then I add a small 16×16-inch corner shelf for gloves and a mini pump.
I find that corner shelves in sealed plywood (3/4-inch) hold up better than MDF in humid garages. For a more finished look, I paint the shelf the same color as the wall so it reads like built-in storage.
Pro Tip: I’ve found that corner bike storage feels smoother if you hang the “most used” bike on the wall closest to the garage door—because you avoid twisting the frame around the corner, which is what causes most pedal-to-wall dings.
11. Folding Wall Bike Rack for Weekly “Park the Car” Flexibility
I recommend a folding wall rack when you need bikes up most days but want the option to reclaim wall clearance quickly. From my experience, it’s a practical compromise for garage organization summer when you’re juggling bikes, strollers, and weekend projects.
I always start by choosing a folding rack rated for 40–55 lb per bike, then I mount it into studs at about 48–52 inches high so the top tube rests comfortably. I leave at least 18 inches of side clearance per bike so handlebars don’t press into the wall when folded. Install time is typically 45–90 minutes with a drill, level, and socket wrench.
I find that racks with soft rubber cradles protect paint better than bare metal arms. Matte black hardware looks clean against white or light gray walls, especially if you add a matching hook for a helmet underneath.
Pro Tip: I’ve found that folding racks stay quieter if you stick a small square of adhesive felt (about 1×1 inch) where the arm meets the wall—because the tiny vibration from garage doors can create an annoying rattle over time.
12. Kid-Height Helmet and Pads Zone (So Gear Actually Gets Put Away)
In my opinion, the biggest difference between a neat garage and a chaotic one is whether kids can reach their own gear. I always set up a kid-height zone for sports equipment storage because it reduces the “pile on the floor” problem within 1 week.
I always start by mounting a row of 3–5 hooks at 42–48 inches high for helmets and pads, then I add a narrow shelf at 50–54 inches for water bottles and sunscreen. I keep a small bin (around 12×12 inches) for each child’s gloves and mouthguards so nothing migrates.
From my experience, rounded-edge wooden pegs feel safer than sharp metal hooks at kid height, even though they cost about $10–$20 more for a full set. I like using washable canvas bins because they can go straight into the laundry every 2–3 weeks.
Pro Tip: I’ve found that labeling bins with both a name and a sport (like “Mia—Soccer”) prevents mid-season confusion, because kids often switch activities in summer and the gear looks surprisingly similar when you’re in a hurry.
13. Ball Storage: Wall-Mounted Wire Basket Stack
I find that loose balls are the fastest way to lose garage floor space, especially in summer. From my experience, a wall-mounted wire basket stack is an affordable upgrade that keeps sports equipment storage visible and contained.
I always start by installing 2–3 wire baskets that are about 12–15 inches wide and 8–10 inches deep, mounted into studs at 36 inches, 52 inches, and 68 inches high. I keep the lowest basket for heavy basketballs and soccer balls, and the top basket for lighter items like volleyballs or swim toys. Most installs take 30–60 minutes with a drill and level.
I recommend powder-coated steel baskets because they don’t snag mesh ball bags as easily as raw wire. White baskets feel more “mudroom,” while black reads more “garage,” so I choose based on the wall color.
Pro Tip: I’ve found that mounting the baskets with a slight upward tilt (about 1/4 inch higher at the front) keeps balls from rolling out when you yank one quickly—especially if the basket is mounted above 60 inches.
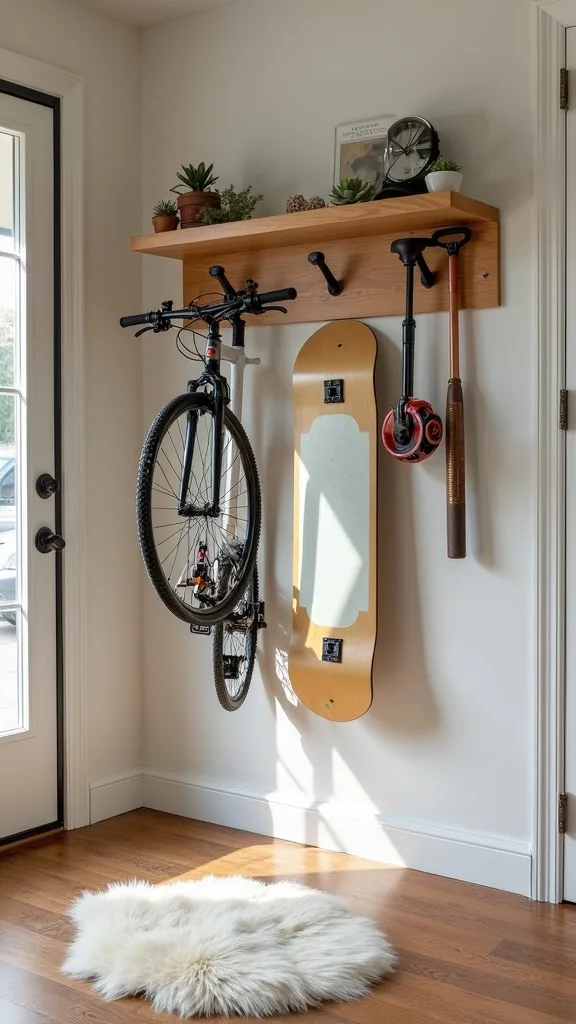
14. Skateboard, Scooter, and Bat Rack Using Multi-Prong Hooks
From my experience, long skinny gear—scooters, skateboards, bats—creates the most awkward clutter because it doesn’t sit neatly in bins. I always use multi-prong hooks to keep these items vertical and easy to grab, which complements bike storage ideas nicely.
I always start by mounting a row of 3–6 multi-prong hooks into studs at 48–60 inches high, spacing each hook about 10–12 inches apart. I assign one hook per item type and keep the “pointy” ends facing the same direction for safety. If you’re mounting on pegboard, I use locking pegboard hook clips so hooks don’t pop out.
I find that vinyl-dipped hooks prevent scratches on scooter handlebars and bat grips. For a cleaner look, I like matching hook color to the bike hooks—usually matte black or galvanized steel.
Pro Tip: I’ve found that putting a small rubber doorstop (about 1 inch thick) behind the lower end of a skateboard keeps it from tapping the wall every time the garage door opens—tiny fix, much calmer sound.
15. “Wet Gear” Drop Zone with a Boot Tray and Mesh Laundry Bag
I always recommend a wet-gear drop zone because summer sports means sweat, rain, and pool days, and that moisture can ruin the rest of your organization. From my experience, separating wet items keeps your garage organization summer efforts from turning musty within 2–3 days.
I always start by placing a 30×15-inch boot tray under the gear wall and hanging a large mesh laundry bag on a hook at 54 inches high. I add 2 towel hooks at 60 inches for jerseys and a small clip fan nearby if the garage runs humid. I empty the mesh bag every 3–4 days during peak season.
I find that mesh bags (like heavy-duty polyester) breathe better than plastic hampers, though they look a bit more utilitarian. If you want it prettier, I’ve found a lidded rattan-look hamper works, but it holds moisture longer.
Pro Tip: When I tried this, the boot tray collected gritty sand fast—so I keep a small handheld brush clipped to the pegboard; brushing the tray out weekly prevents that sand from scratching your garage floor finish.
16. Charging Station Shelf for E-Bike Batteries and Lights (Safely Organized)
In my opinion, charging is where bike gear organization can quietly become unsafe if cords sprawl across the floor. I always create a dedicated charging shelf for lights and (if you have one) an e-bike battery, because it keeps cycling storage tidy and reduces trip hazards.
I always start with a 24-inch wide wall shelf mounted into studs at 48–54 inches high, then I add a surge-protector power strip with a 6–10 foot cord mounted to the wall (not dangling). I keep chargers coiled with Velcro ties and label each one so you’re not guessing at 10 pm before a ride.
I recommend a metal shelf or sealed plywood because chargers can get warm during use, and sealed surfaces wipe clean. Warm white light (2700K–3000K — the cosy, yellowish tone you see in most homes) from a simple plug-in shop light makes it easier to see indicator lights without feeling harsh.
Pro Tip: I’ve found that leaving a 2-inch air gap around chargers prevents heat buildup, and mounting the power strip vertically keeps bulky power bricks from blocking neighboring outlets—small detail that makes charging feel effortless.
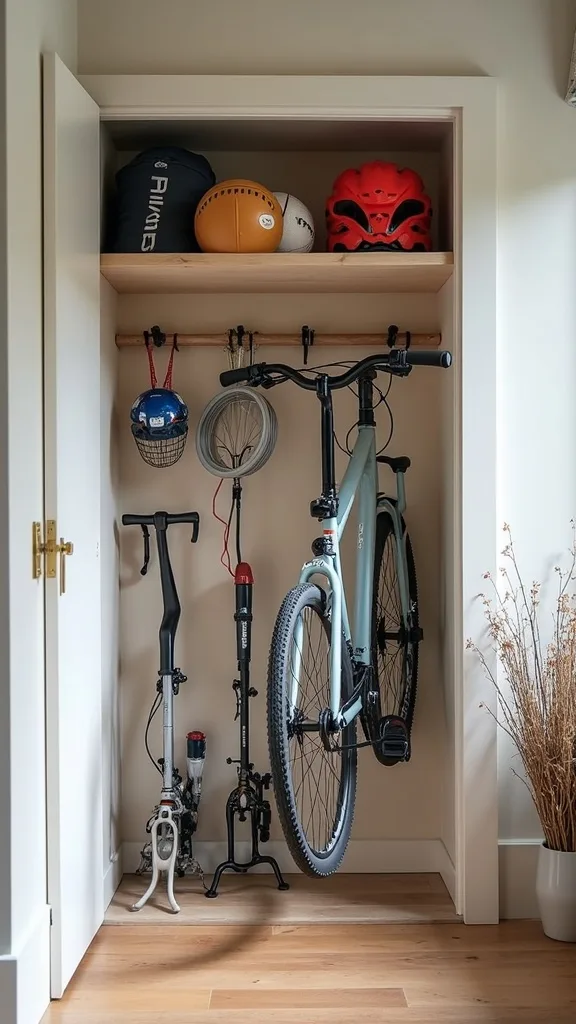
17. Micro Tool Zone: Mini Bike Repair Shelf + Magnetic Strip
From my experience, the quickest way to lose motivation for maintenance is hunting for tools. I always carve out a micro tool zone next to the bikes so basic fixes take 5–10 minutes, not an hour of searching.
I always start with a 18–24 inch wall shelf at 54 inches high and add a 12-inch magnetic tool strip below it for Allen keys and tire levers. Then I hang a floor pump on a dedicated hook and keep a small parts organizer (around 8×6 inches) for patches, valve cores, and chain links. If you have space, I leave a 24-inch clear zone under the shelf for setting a wheel down.
I find that a small silicone mat on the shelf prevents tools from sliding, and it catches grease. A simple black-and-wood palette (black strip, walnut-stained shelf) looks intentional even in a garage.
Pro Tip: I’ve found that storing tire sealant and lubricants in a shallow bin with a 1-inch lip prevents the “slow leak mess” that happens when bottles tip over in heat—because summer garage temps can thin liquids and loosen caps.
18. Seasonal Swap Bins: Summer Sports vs. Winter Sports Labels
I find that organization sticks when it matches the season, and summer is the perfect time to reset. From my experience, seasonal swap bins keep sports equipment storage from overflowing because you’re only seeing what you’ll use in the next 8–12 weeks.
I always start with 4 bins: “Summer Ride,” “Summer Field,” “Water,” and “Off-Season.” I like 27-gallon totes for bulky pads and 12–16 quart bins for small accessories, and I label the short side so it’s readable on a shelf. I store off-season bins on an overhead rack or a high shelf above 72 inches.
In my opinion, clear bins are more practical, but opaque bins look tidier; I choose based on whether you’d rather see inventory or hide visual clutter. I also keep a printed checklist inside each bin lid so restocking takes 2 minutes.
Pro Tip: I’ve found that adding a silica gel pack (about 20–40g) to bins with goggles or helmets reduces that “stale plastic” smell—especially when bins sit unopened for 3+ months.
19. DIY Slat Wall (Plywood + Furring Strips) for Modular Hooks
When I design this look on a budget, I love a DIY slat wall because it mimics store-bought systems without the price tag. From my experience, it’s one of the most flexible bike storage ideas if you’re willing to spend a weekend building.
I always start with a 4×8-foot sheet of 3/4-inch plywood and attach 1×2 furring strips horizontally every 6 inches, creating slots for hooks and small shelves. I anchor the plywood into studs with 3-inch construction screws, then I paint it satin black or warm gray for a more finished, decor-friendly look. Build time is typically 4–6 hours including paint drying.
I find that adding a clear polyurethane topcoat helps it wipe clean, though it adds cost and a bit of time. For hooks, I use slatwall-compatible bike hooks and small wire baskets for gloves and balls.
Pro Tip: I’ve found that leaving a 1/2-inch gap at the bottom of the plywood (using spacers) prevents moisture wicking from the slab floor, which is what causes the lower edge to swell and chip paint over time.
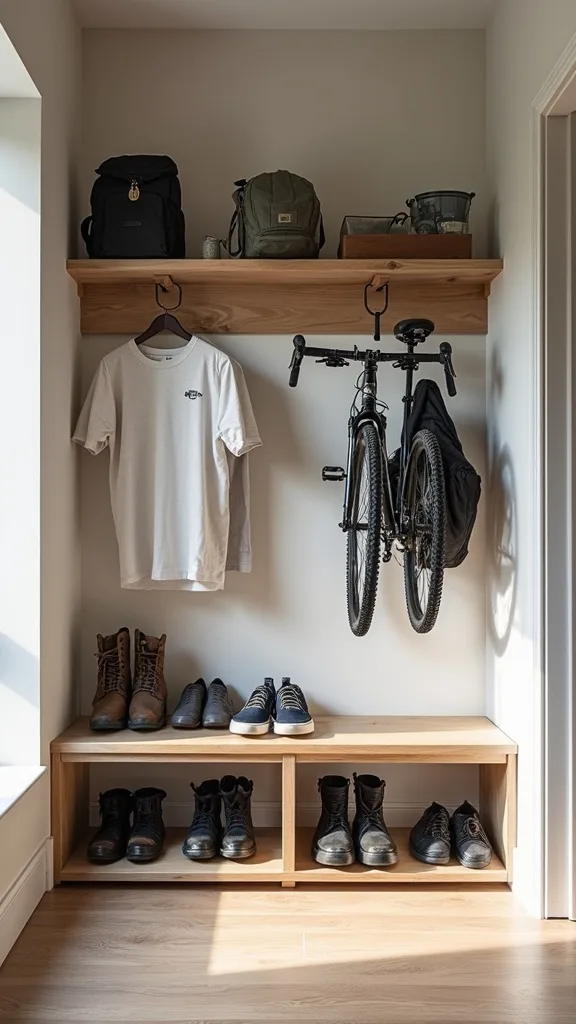
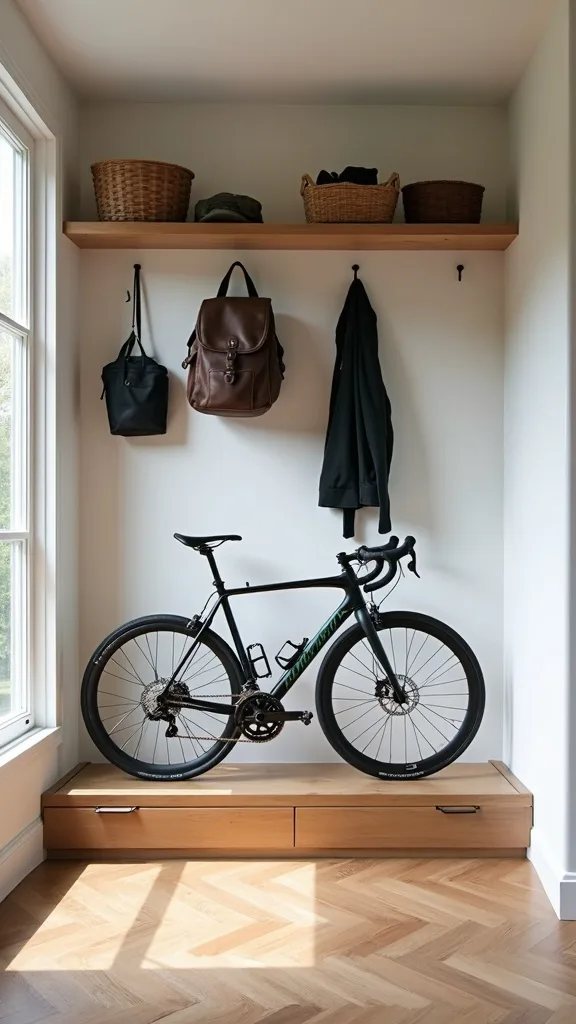
20. Bike + Sports “Launch Pad” Bench (Narrow, Wall-Hugging)
I find that a tiny bench can change everything because it gives you a place to sit, lace shoes, and stage gear—without turning into a dumping ground. From my experience, a narrow, wall-hugging bench supports garage organization summer while still keeping the floor mostly open.
I always start with a bench that’s 10–12 inches deep and 36–48 inches long, positioned under the helmet shelf but not under dripping tires. I keep the seat height around 17–18 inches so it feels comfortable, and I add 2 slide-in bins underneath for sunscreen, bug spray, and spare tubes. If you’re DIY-ing, a 2×2 frame with a plywood top takes about 2–3 hours to build.
I recommend a wipeable cushion (outdoor fabric like Sunbrella-style) because sweaty gear happens. A light oak stain warms up the garage and makes the zone feel more like a mudroom.
Pro Tip: I’ve found that adding a 1-inch front lip under the bench edge prevents bins from creeping out when you kick the bench to stand up—small detail that keeps the area looking “set” day after day.
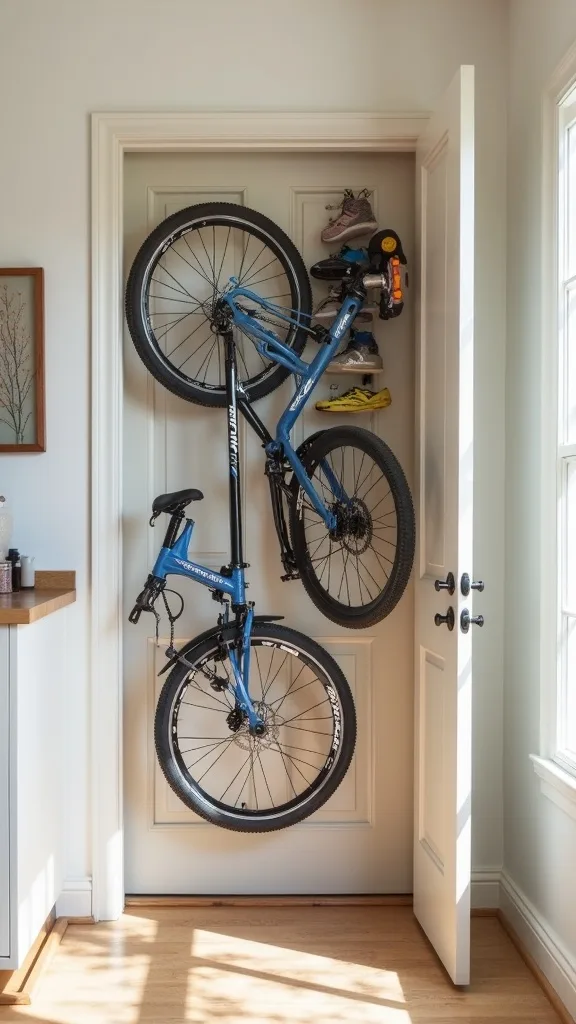
21. Space-Saving Door-Mounted Organizer for Small Accessories
From my experience, the back of the garage door (or a side entry door) is a hidden goldmine for tiny gear. I always use a door-mounted organizer for accessories because it keeps cycling storage from cluttering the pegboard with little pouches and packets.
I always start with an over-the-door rack that’s about 18–20 inches wide with 4–6 baskets, and I keep the lowest basket at least 12 inches above the floor to avoid scuffs. I store sunscreen, bug spray, bandages, chain wipes, and a small first-aid kit, and I restock every 2 weeks during peak summer use.
I find that metal mesh pockets breathe better than fabric pockets for items like damp gloves, though fabric looks softer. If your door slams, I add adhesive bumpers so the organizer doesn’t rattle.
Pro Tip: I’ve found that you should avoid storing pressurized cans (like some aerosol lubes) on sun-facing doors—because heat spikes can happen fast; I keep those on a shaded wall shelf instead for a safer, longer-lasting setup.
22. Clear “Return Basket” System for Fast Cleanups
I always recommend a return basket because real life means gear comes home in a rush. From my experience, a single “return zone” keeps sports equipment storage from unraveling when you don’t have time to put every item back perfectly.
I always start with 2 clear bins (about 14×10 inches): one labeled “Return to Pegboard” and one labeled “Return to Bins.” I place them on the helmet shelf or bench, and I set a rule that they must be emptied within 24 hours. This system takes 10 minutes to set up but saves repeated micro-messes all week.
I find that clear bins reduce “mystery clutter” because you can see exactly what needs to be put away. If you prefer a cleaner look, I use matching lidded bins, but that can slow down quick toss-ins.
Pro Tip: I’ve found that the return basket works best when it’s physically closer to the garage entry than the bike hooks—because you’ll naturally drop items at the first convenient surface, so I place the bins within 3 feet of the door path.
23. Lighting Upgrade for the Gear Wall (So You Actually Use It)
In my opinion, lighting is the overlooked reason organization fails—if you can’t see the hooks, you won’t use them. I always add a simple lighting upgrade over the bike wall because it makes bike storage ideas feel effortless, especially during early rides or late practices.
I always start with a plug-in LED shop light that’s 4 feet long, placed 12–18 inches in front of the wall so it washes light down the hooks and pegboard. I choose warm white light (2700K–3000K — the cosy, yellowish tone you see in most homes) for a friendlier feel, and I aim for brightness (measured in lumens) around 2,000–4,000 lumens for a typical single bay.
I find that motion-sensor plug adapters are worth it (usually $12–$20) because hands are often full of helmets and balls. The trade-off is occasional false triggers, but typically it’s minor.
Pro Tip: I’ve found that mounting the light slightly forward prevents “shadow bands” from handlebars on the pegboard—because the bikes themselves can block light if the fixture sits too close to the wall.
24. Color-Coded Hooks and Tape for Multi-Sport Families
From my experience, color-coding is the simplest way to reduce daily questions like “Where does this go?” I always use color cues when multiple sports overlap, because it keeps garage organization summer from turning into a mixed-up pile by mid-June.
I always start by assigning 3 colors (for example: blue for cycling, green for soccer, orange for water days) and I repeat them in at least 2 places: hook color and bin label strip. I use colored electrical tape in 3/4-inch width on pegboard hook stems and add matching label borders on bins that are 12×12 inches. I refresh tape every 3–6 months if it gets dusty or peels.
I find that limiting to 3 colors prevents visual chaos, even though it’s tempting to assign a color to every activity. Matte tape looks less shiny under garage lights and hides fingerprints better than glossy.
Pro Tip: I’ve found that putting the color strip on the “grab point” (the first 2 inches of a hook) works better than on the wall—because your hand sees the cue exactly when you’re deciding where to hang something.
25. Sunday Reset Routine: 15-Minute Maintenance That Keeps It Working
I find that the most beautiful storage system still needs a rhythm, or it slowly slides back into clutter. From my experience, a 15-minute weekly reset is the difference between “organized all summer” and “organized for two photos.”
I always start by setting a timer for 15 minutes on Sunday evening: I empty the return baskets, wipe the helmet shelf, and rehang anything that drifted. Then I do a quick safety check—tighten any hook screws that feel loose and confirm the heaviest bike still sits securely. Every 4 weeks, I also sweep under the wall and clean tire marks with a damp microfiber cloth.
I recommend keeping a small caddy (about 9×6 inches) with a screwdriver, microfiber cloth, and mild cleaner on the pegboard so you’re not hunting supplies. The trade-off is dedicating a tiny bit of wall space, but it saves time long-term.
Pro Tip: I’ve found that if you take one quick phone photo of the “ideal” wall and keep it in your favorites, you can reset to that exact layout in minutes—because you’re not relying on memory when you’re tired.
Final Thoughts
I always feel the biggest relief when bikes stop living on the garage floor and start living on a wall with a clear plan. From my experience, even a modest setup—like 2 hooks, a 36-inch shelf, and one pegboard panel—can change how often you actually ride and play, because leaving the house becomes a simple grab-and-go routine.
I find that the most affordable wins come from spacing, labeling, and giving “small stuff” a visible home, even if you’re not ready for a full rail system. In my opinion, it’s worth doing one section at a time: hang the bikes first, add the helmet shelf next, then build out the pegboard as you notice what keeps ending up on the floor.
If you try any of these bike storage ideas, I recommend taking 10 minutes to walk your normal route—door to bikes to gear to car—and adjust heights until it feels effortless. That little bit of tweaking is what makes the system stick through the whole summer.
What I’d Do Differently
When I first tried this, I made one specific mistake: I mounted my bike hooks too close together because I was trying to “fit everything” into a narrow wall section. Within 3 days, the handlebars kept tangling, and I noticed we started leaning bikes on the floor again—exactly what I was trying to avoid. The correct approach, from my experience, is to plan for real handlebar width and human impatience: I now give each bike about 16–18 inches of horizontal space (or I stagger heights by 8 inches) and I test-hang the bulkiest bike before drilling the rest. It takes an extra 10 minutes up front, but it prevents daily friction that slowly breaks the system.
I also wish I’d known earlier that “gear” needs its own wall real estate, not just a leftover hook. Now I always reserve at least a 24×48-inch pegboard area and one 36–48 inch shelf so helmets and locks don’t migrate. If you’re on the fence, I recommend choosing one wall, marking your spacing with painter’s tape tonight, and installing the first two hooks this weekend.
Products I Recommend for This Project
Here are some of my favourite products to help you bring these ideas to life:
- StoreYourBoard Vertical Bike Wall Mount (G-Bike Pro) — I like it because it holds a bike vertically without a huge rack footprint and feels stable for daily use.
- Gladiator GearTrack Pack (GearTrack Channels + Hooks) — I recommend this when you want adjustable hook spacing without rebuilding the wall later.
- Wall Control Metal Pegboard Tool Organizer Kit (32in x 16in panels) — I find it looks cleaner than hardboard pegboard and the hooks lock in more securely.
- DEWALT 20V MAX LED Shop Light — I use a bright, easy-to-mount light like this to make the gear wall usable at night and early mornings.
- Brother P-touch Label Maker (PT-D210) — I always recommend a label maker for bins and hook zones because it keeps the system consistent for the whole family.