This post contains affiliate links. As an Amazon Associate, I earn from qualifying purchases at no extra cost to you.
Are you looking for a bathroom that feels like summer without turning your home into a themed souvenir shop? Do you want a nautical look that still works on a Monday morning when the kids are banging on the door and you’re just trying to find the toothpaste?
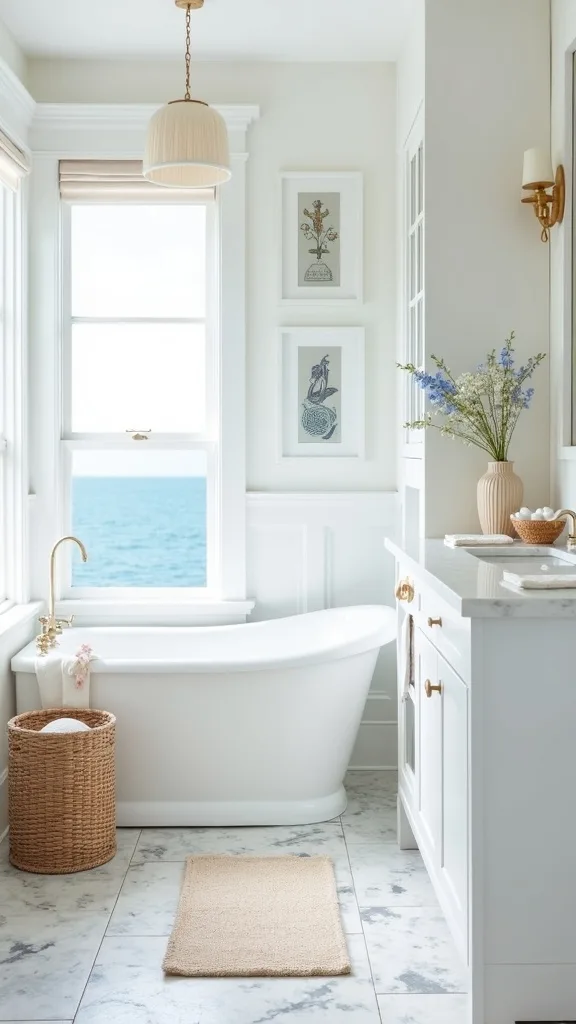
I always start by designing for real routines—wet towels, busy counters, and the fact that most of us don’t have a magazine-sized coastal home bathroom to play with. In this post, I’m sharing coastal bathroom ideas that feel calm, clean, and lived-in, using navy-and-white classics, sea-glass accents, and warm natural texture.
In my opinion, this is perfect for anyone who wants a beach bathroom vibe for summer but still needs it to be easy to clean, easy to maintain, and friendly to small spaces.
I’ll walk you through details like navy and white stripe towels, a sea glass bathroom moment (without going overboard), and simple DIY touches like a rope-wrapped mirror and a driftwood shelf that actually holds your daily essentials. I’ll also point out one common mistake I see that makes nautical bathroom decor feel cluttered fast.
Below are 25 Coastal Bathroom Ideas & Nautical Design that bring that breezy, pulled-together feeling to your home with simple steps, realistic budgets, and room for a little imperfection.
1. Start with a “hero quartet”: striped towels, sea-glass niche, rope mirror, driftwood shelf
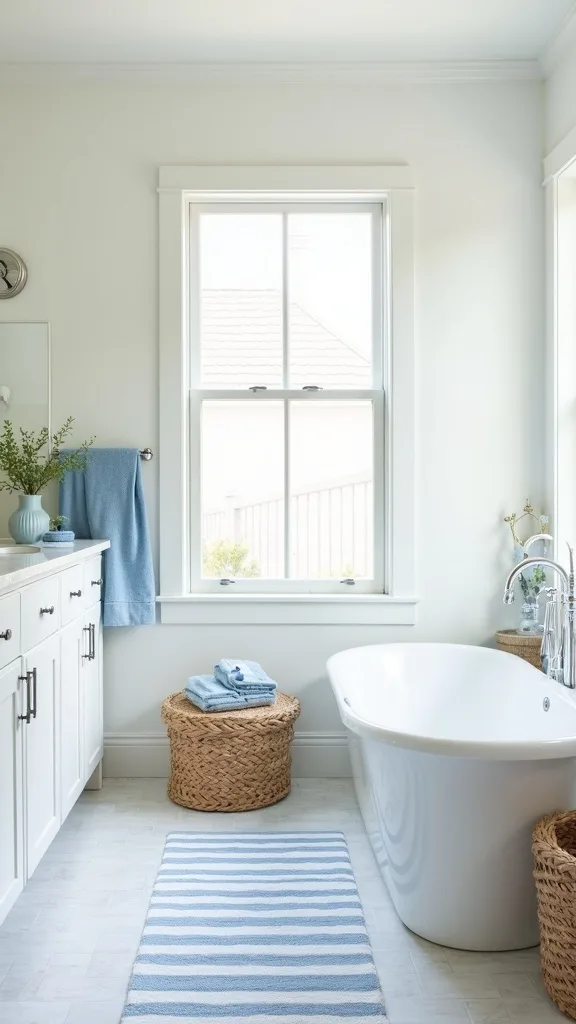
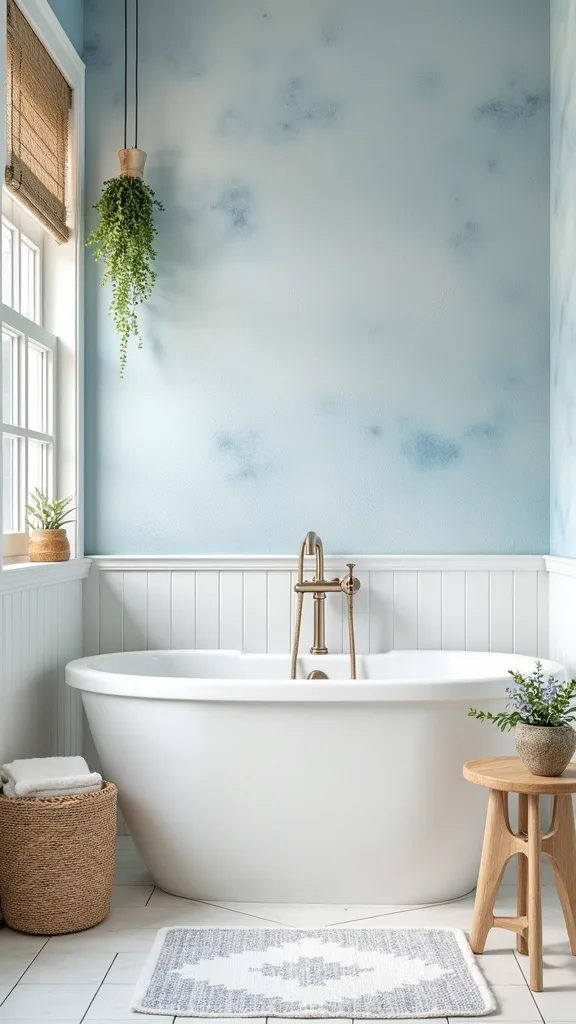
I always start by choosing 4 “anchor” elements so my coastal bathroom ideas feel intentional instead of random, and my go-to quartet is navy-and-white stripe towels, a sea glass mosaic niche, a rope mirror frame, and a driftwood shelf. From my experience, this combo balances crisp (navy/white) with warm (wood/rope) in a way that still feels like a real family bathroom.
When I design this look, I keep the towels consistent—2 bath towels and 2 hand towels—and I hang them 6–8 inches apart so the stripes read clearly. For the niche, I typically use a 12″ x 12″ mosaic sheet (or two) as an accent instead of retiling the whole shower, and I place the driftwood shelf about 54″ from the floor so it’s reachable but not splash-prone.
I find that cotton Turkish-style towels, marine-grade sisal rope, and a 24″ x 36″ mirror give the most “coastal home bathroom” payoff without feeling costume-y.
Pro Tip: I always seal driftwood with 2 thin coats of water-based polyurethane (drying 2–3 hours between coats) because raw driftwood can shed grit onto clean towels—this tiny step keeps the look breezy and the maintenance easy.
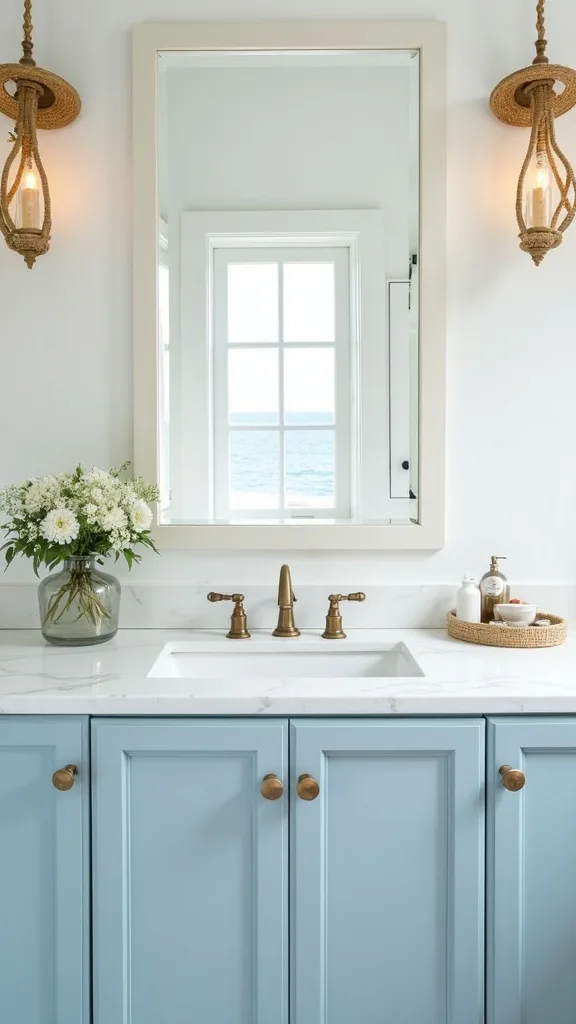
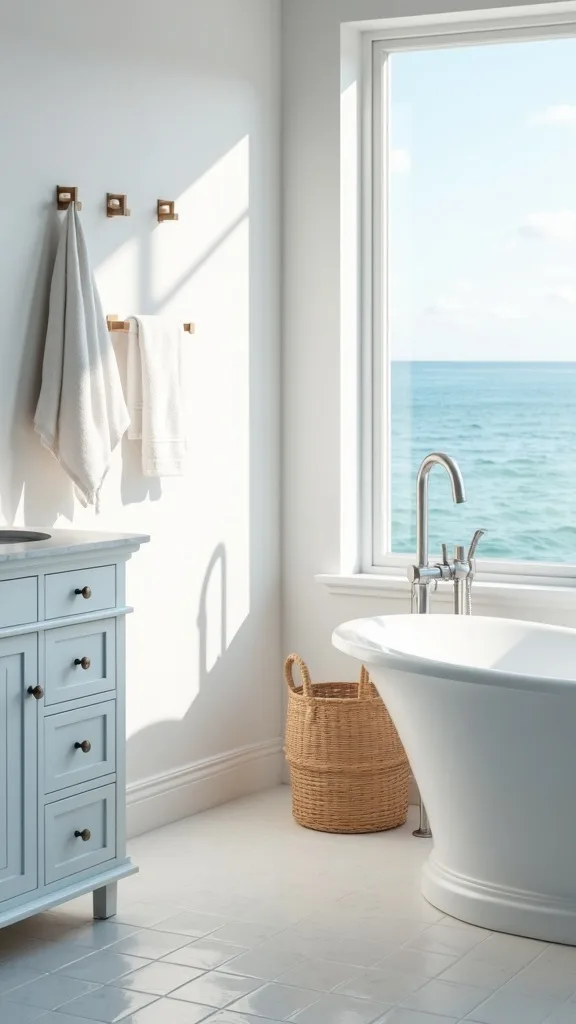
2. Pick a tight color recipe: navy, white, and one sandy neutral
From my experience, the quickest way to make a nautical bathroom feel calm is to limit the palette to 3 colors, because bathrooms already have a lot of “visual noise” (fixtures, bottles, hardware). I find that navy + bright white + sandy beige looks fresh in summer and still feels cozy once fall rolls around.
I always start by matching the navy to something you can repeat at least 3 times—like towels, a soap dispenser, and a small art print—so it doesn’t feel like a one-off. In most cases, I keep white as the biggest color (about 70% of what you see), then use navy for 20%, and reserve the sandy neutral for the last 10% through a 20″ x 30″ bath mat or a woven basket.
In my opinion, matte navy (not shiny) and warm whites (not icy blue whites) feel more livable, especially under warm white light (2700K–3000K — the cosy, yellowish tone you see in most homes).
Pro Tip: I’ve found that if your vanity is already a warm wood tone, choose a sand neutral that matches it within 1–2 shades; otherwise the room can look “striped” in an unintentional way.
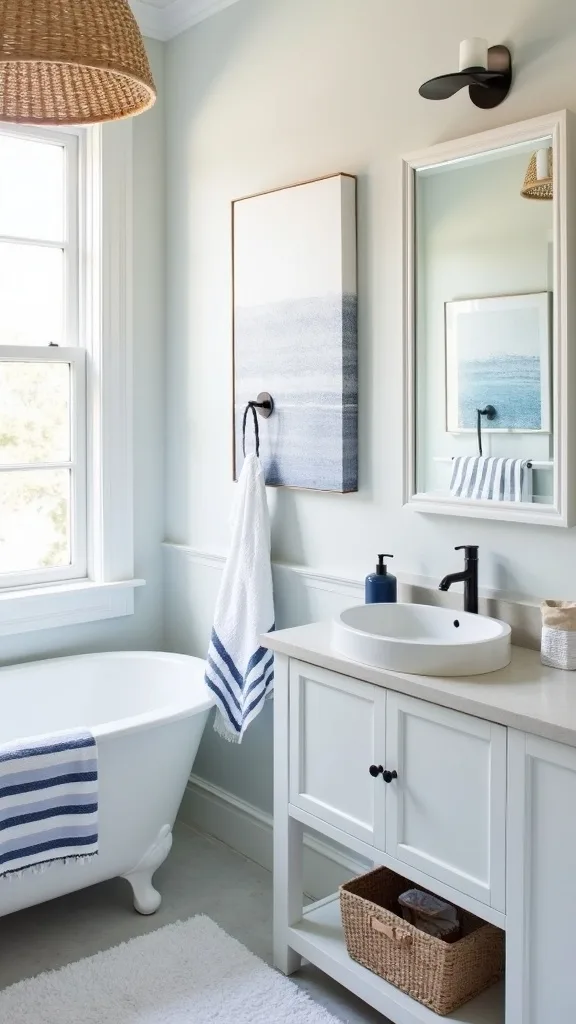
3. Use navy-and-white stripe towels like pattern—without adding busy wallpaper
I find that towels are the safest place to add pattern in a bathroom, because you can swap them in 5 minutes when you’re tired of the look. From my experience, navy-and-white stripes give a classic beach bathroom feel without committing to permanent changes.
I always recommend buying at least 4 matching pieces: 2 bath towels (27″ x 52″ is a practical everyday size) and 2 hand towels (16″ x 28″). When I tried this in a small hall bath, I kept every other textile solid—no patterned shower curtain—so the stripes could be the “statement” without the room feeling chaotic.
For materials, I look for 100% cotton or Turkish cotton around 500–700 GSM (that’s towel thickness/density in plain English), because thinner towels tend to look wrinkly on hooks and thicker ones can take 24+ hours to dry in humid bathrooms.
Pro Tip: I’ve found that hanging striped towels on double hooks (not a single hook) keeps the stripes visible and helps them dry faster—especially if your bathroom fan runs only 20 minutes at a time.
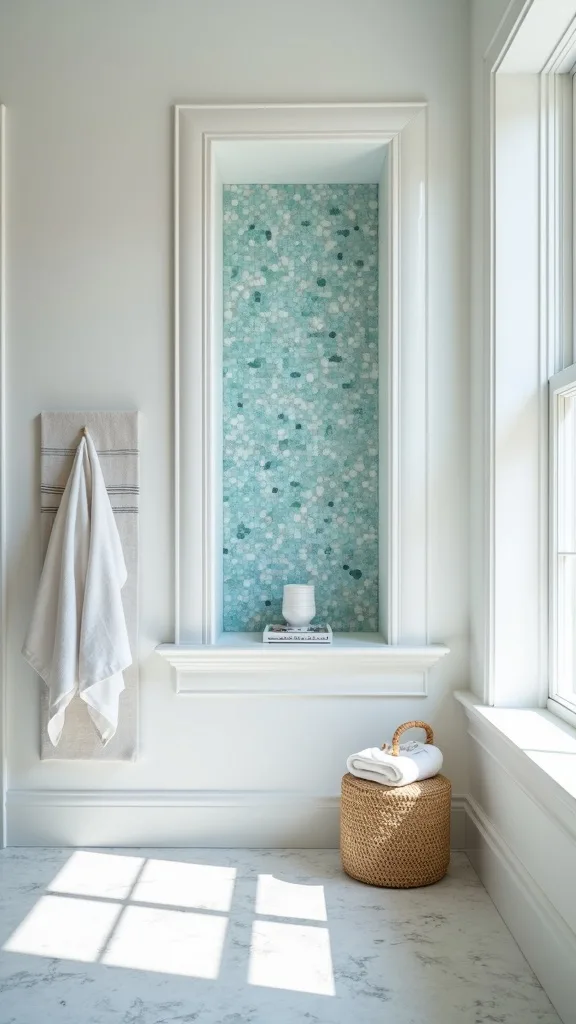
4. Create a sea-glass mosaic niche that feels like a “found” detail
In my opinion, nothing says sea glass bathroom quite like a small mosaic moment that catches the light, and I love that it can look special without being expensive. I find that a niche is the perfect place because it’s already a focal point, and you’re not committing to a full wall of tiny tile.
I always start by measuring the niche interior (a common size is about 12″ wide x 12″ tall x 3.5″ deep), then I choose 2 mosaic sheets so I have extra for cuts and future repairs. Typically, I use a pre-mounted glass mosaic on mesh plus a white polymer-modified thinset, and I grout with a stain-resistant grout in “bright white” so the sea-glass color reads true.
When I design this look, I stick to 2–3 sea-glass tones (aqua, pale green, and a touch of frosted white) and avoid strong teal, which can skew “pool” instead of “coast.”
Pro Tip: From my experience, sealing the grout 72 hours after installation (even if it’s labeled stain-resistant) makes shampoo drips wipe off in one pass instead of slowly tinting the white lines.
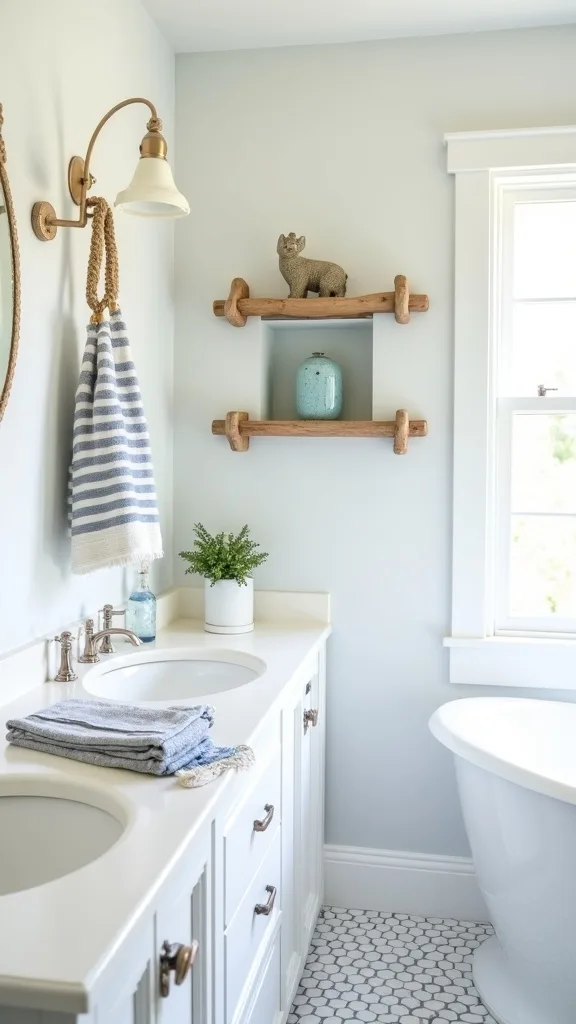
5. Wrap a mirror with rope for instant nautical character
I always love a rope mirror frame because it adds that nautical bathroom nod without needing a single anchor or ship wheel. From my experience, the texture reads warm and handmade, which helps a bathroom feel less “hard and shiny.”
When I tried this, I used a 24″ round mirror and 3/8″ natural sisal rope, and I needed about 18–22 feet to wrap the perimeter with a little overlap. I always start by dry-fitting the rope, then I attach it with a hot glue gun in 4″ sections so I can keep the rope tight and aligned (hot glue sets fast, so small sections prevent wavy lines).
I find that natural sisal looks more authentic than bright white rope, but it can shed a bit, so I keep it away from direct splash zones. If you want a cleaner look, cotton rope is softer but can look “crafty” if it’s too fluffy.
Pro Tip: I recommend sealing the rope lightly with a clear matte spray (2 light coats, 10 minutes apart) before hanging—this cuts down on shedding and keeps makeup powder from clinging to the fibers.

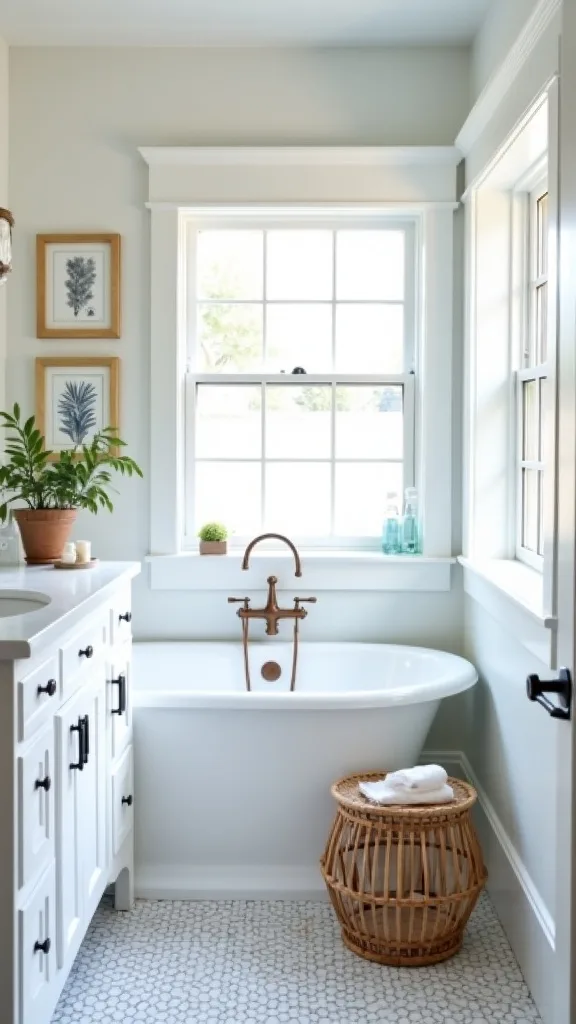
6. Add a driftwood shelf that’s pretty and actually useful
I find that a driftwood shelf is the easiest way to bring in that beach-walk texture, and it’s also a lifesaver when counter space is tight. From my experience, one well-placed shelf can hold the “daily line-up” and keep the sink area calmer.
I always start by choosing a shelf that’s at least 24″ long and 6–8″ deep, because anything shallower won’t hold a 3″-diameter canister safely. For mounting, I typically use 2 heavy-duty concealed brackets rated for 25–40 lb, and I place the shelf 10–12″ above the toilet tank or about 18″ above the vanity backsplash to avoid constant splashes.
When I design this look, I style it with only 3 items: a 6″ tall candle, a small lidded jar for cotton rounds, and a 4″ plant in a ceramic pot—simple, but it reads “finished.”
Pro Tip: I’ve found driftwood is rarely perfectly flat, so I shim the brackets with thin composite shims before tightening; that tiny adjustment keeps bottles from slowly “walking” toward the edge over time.
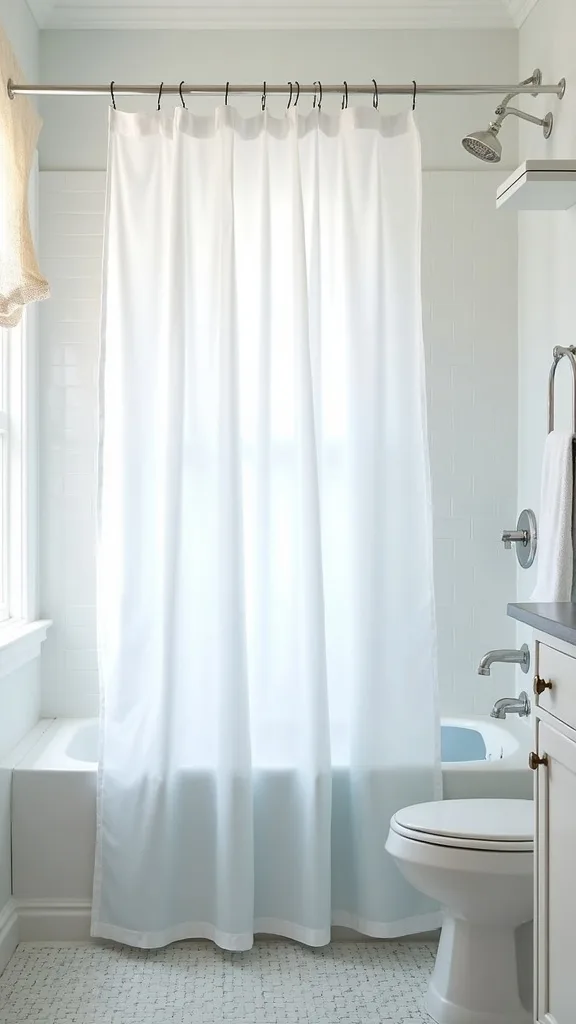
7. Choose a shower curtain that feels coastal, not cartoonish
In my opinion, the shower curtain is where a beach bathroom can go wrong fast, because novelty prints take over the whole room. I find that subtle texture—like white waffle weave—lets your navy accents and sea-glass details do the talking.
I always recommend a 72″ x 72″ curtain for standard tubs, hung so the hem sits 1″ above the floor to avoid mildew. If you want a hint of pattern, I like a thin navy border stripe (1″–2″ wide) or a ticking stripe, and I keep the rest of the room solid so it doesn’t feel busy.
From my experience, a fabric liner plus a washable outer curtain is worth the extra $15–$25 upfront because you can launder it every 2–4 weeks in summer humidity. I also use rust-resistant roller rings so the curtain glides instead of snagging.
Pro Tip: I’ve found that adding 6–8 small curtain weights (or even flat magnets if you have a metal tub) stops billowing—especially if your bathroom fan is strong and makes the curtain cling mid-shower.
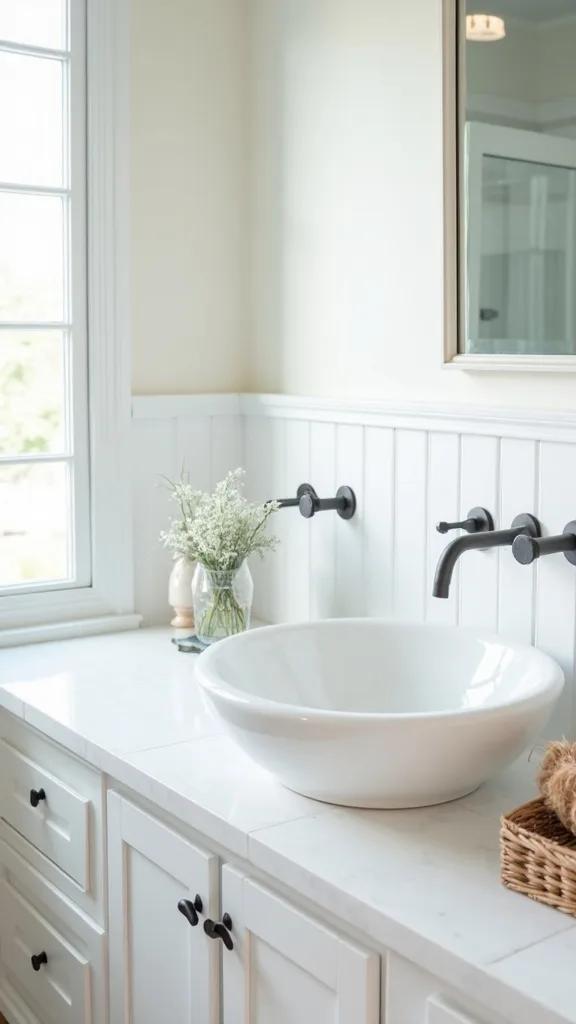
8. Swap hardware to brushed nickel or matte black for a crisp “coastal classic” feel
I always notice how much bathroom hardware affects the mood, even when everything else stays the same. From my experience, brushed nickel feels like a coastal home bathroom staple, while matte black can look more modern coastal—both work if you repeat them consistently.
I always start by counting what I need: typically 1 faucet, 1 towel bar (18″–24″), 1 toilet paper holder, and 2 towel hooks. If I’m on a budget, I replace the most visible pieces first (faucet + towel bar) and keep the rest for later, because mixing finishes can look accidental if you change only one tiny item.
I find that solid brass internals in faucets tend to last longer than all-plastic builds, but they cost more upfront ($80–$180 vs. $40–$70). For a family bath, I prefer lever handles because kids can use them with wet hands.
Pro Tip: I recommend matching your shower head finish to your faucet (even if your tub spout stays) because the eye reads those two at the same height, and mismatches there stand out more than you’d expect.
Cost & Materials Estimate
In my experience, a realistic total for refreshing a bathroom with coastal touches (without moving plumbing or replacing major tile) lands in the mid-hundreds depending on what you already own.
| Item | Estimated Cost | Where to Buy |
|---|---|---|
| Navy & white striped towel set (4 pieces) | $35–$70 | Amazon |
| Round mirror (24-inch) + sisal rope + hot glue sticks | $45–$110 | Home Depot |
| Sea-glass mosaic tile sheets (2) + grout + sealer | $60–$160 | Lowe’s |
| Floating shelf hardware + driftwood-look board (24–36 inch) | $30–$90 | Home Depot |
| Woven baskets + clear apothecary jars (3–4 pieces total) | $35–$95 | IKEA |
Total estimated cost: $205–$525 I always recommend splurging on towels and one quality mirror because you touch and see them daily, and saving on baskets and trays by shopping sales.
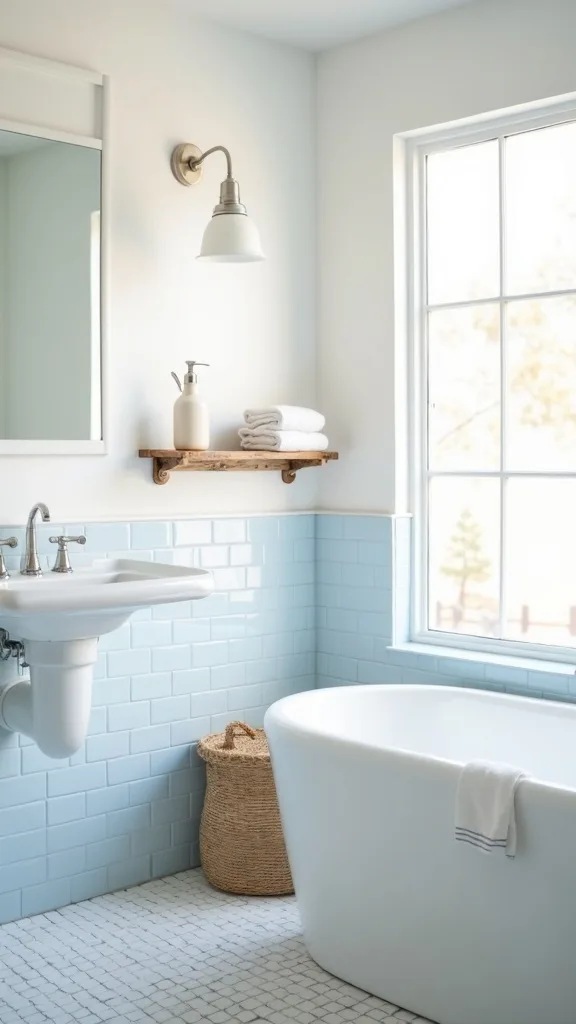
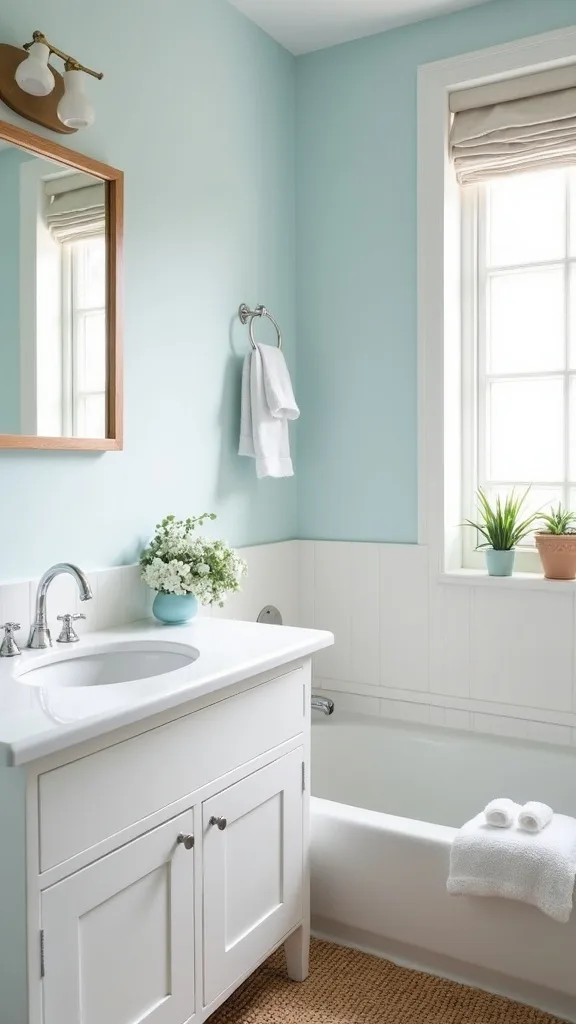
9. Bring in sea-glass color through accessories before you commit to paint
I find that people often jump straight to painting walls aqua, and then they feel stuck if it reads too bright under bathroom lighting. From my experience, it’s smarter to test sea-glass color in small, swappable pieces first.
I always start with 3 accessories in the same color family: a soap dispenser, a toothbrush holder, and a small tray (about 8″ x 4″). Then I add one textile—like a 20″ x 30″ bath rug—with a hint of pale aqua. I live with it for 7–10 days, checking it in morning light and at night under warm white light (2700K–3000K — the cosy, yellowish tone you see in most homes).
When I design this look, I choose frosted glass or ceramic in “seafoam” instead of shiny translucent teal, because sea glass is naturally softened and matte-looking.
Pro Tip: I’ve found that if your countertop has warm beige flecks, sea-glass accessories look best when they lean slightly green (not blue), otherwise the counter can make them look gray and dull.
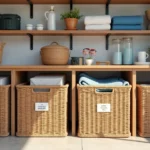
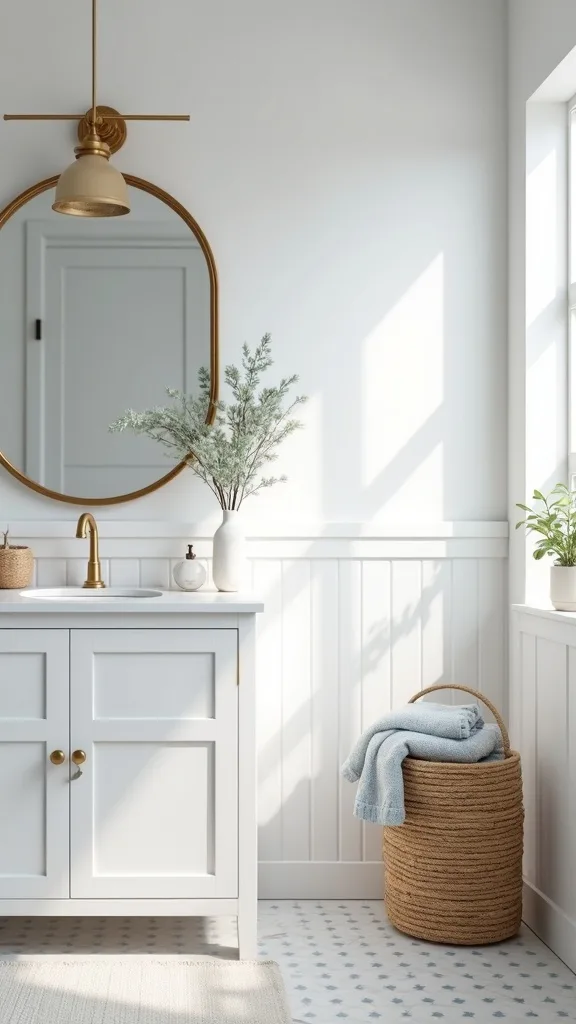
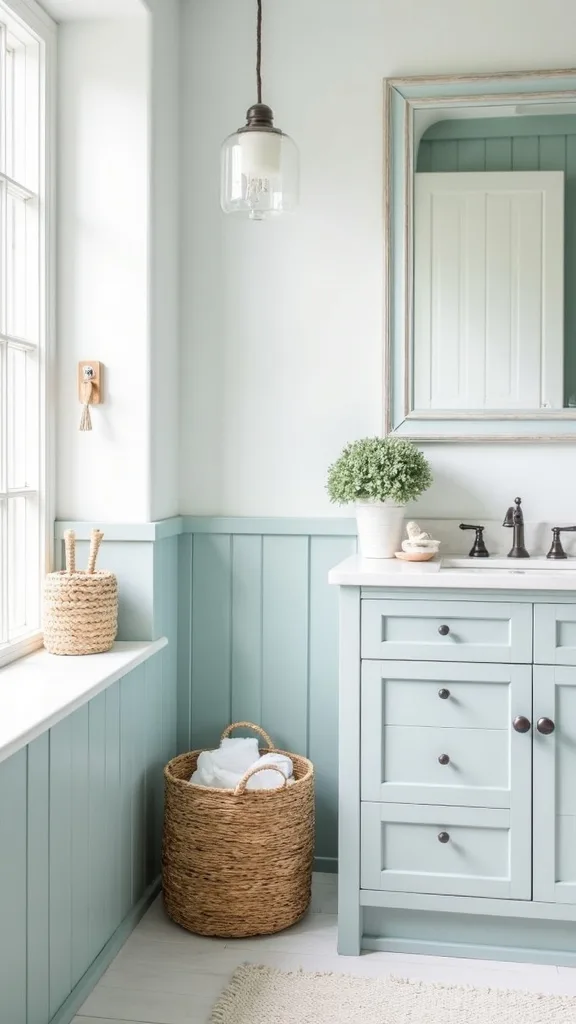
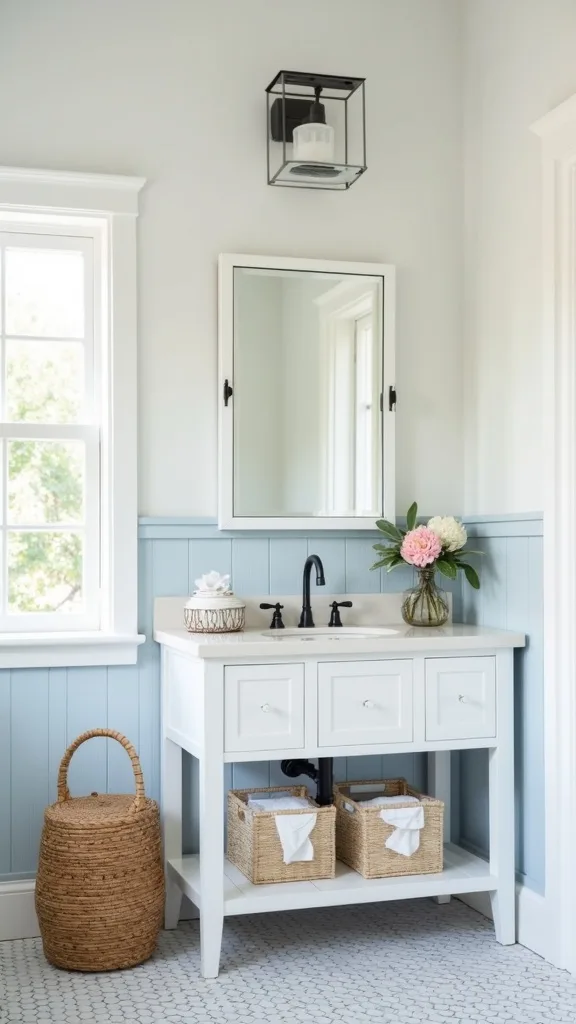
10. Use baskets to hide the not-pretty stuff (and keep the vibe calm)
I always say the fastest way to make a nautical bathroom feel relaxing is to reduce countertop clutter, because clutter fights the whole “breezy” feeling. From my experience, baskets are the easiest fix because they add texture and hide the chaos.
I always start by grouping items by routine: hair stuff, skincare, and “extras.” Typically, I use two 10″ x 10″ x 8″ woven baskets under the sink and one slim 12″ x 5″ x 4″ basket on the back of the toilet for everyday items. If you have open shelving, I like adding simple canvas bins with a 1″ navy stripe so they tie into the towel color.
I find that water hyacinth and seagrass baskets look the most coastal, but they don’t love constant dampness, so I keep them at least 12″ away from the shower edge. For super-humid baths, I switch to a plastic-lined rattan-look basket.
Pro Tip: I recommend adding a peel-and-stick label on the inside rim (not the front) so guests don’t see it, but you still find “extra sunscreen” or “bandages” in under 5 seconds.
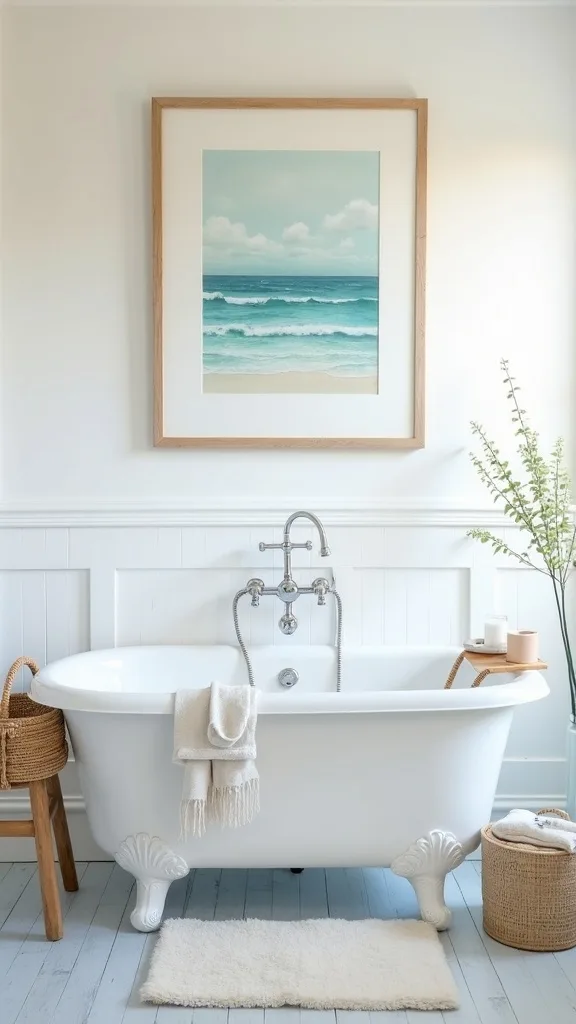
11. Choose art that feels like the coast—without literal beach signs
In my opinion, wall art is where a beach bathroom can either feel serene or start looking like a gift shop. I find that simple photography or soft watercolor prints give the mood without shouting a theme.
I always start by choosing one large piece (11″ x 14″ or 16″ x 20″) instead of lots of tiny frames, because bathrooms already have many small objects. When I design this look, I hang the art so the center sits about 57″–60″ from the floor, which typically feels right for most adults and keeps it away from splash zones.
From my experience, frames in light oak, white, or matte black pair well with navy accents. I also use acrylic glazing instead of glass in kids’ bathrooms—it scratches more easily, but it’s safer and lighter on drywall anchors.
Pro Tip: I’ve found that adding a 1″–2″ white mat around coastal prints makes the whole room feel cleaner, especially if your walls are an off-white that tends to look slightly creamy next to bright fixtures.
12. Layer lighting so the room feels like golden summer, not a blue cave
I find that lighting is the hidden make-or-break for coastal bathroom ideas, because cool bulbs can turn sea-glass tones flat and make navy feel harsh. From my experience, warm, layered lighting makes the room feel like late-afternoon summer—even when it’s a quick weekday rinse.
I always start by swapping bulbs to warm white light (2700K–3000K — the cosy, yellowish tone you see in most homes) and aiming for brightness (measured in lumens) around 800–1100 lumens per vanity bulb for most bathrooms. If you have a 2-light vanity fixture, that often means two 60W-equivalent LED bulbs. I also like adding a small plug-in night light near the floor for late-night trips.
When I design this look, I choose clear or frosted glass shades (not colored) so the light stays clean against navy accents. Trade-off: clear bulbs can show dust faster, so you may wipe them monthly.
Pro Tip: I recommend putting the vanity light on a dimmer rated for LEDs; being able to drop the light to 30% in the evening makes the whole bathroom feel more spa-like without changing a single decor item.
13. Add a subtle stripe with a runner or rug (great for long, narrow baths)
I always love using a rug to bring in pattern softly, especially when I don’t want to add wallpaper. From my experience, a striped runner can make a narrow bathroom feel longer and more “designed” with almost no effort.
I always start by measuring the walkway and leaving 3–4 inches of floor visible on each side, then I choose a runner around 20″ x 60″ for many standard layouts. For small baths, a 20″ x 30″ mat is usually enough, and I place it 2–3 inches away from the tub edge so it doesn’t stay damp.
I find that indoor/outdoor polypropylene rugs are a smart trade-off: they feel less plush underfoot, but they handle humidity and frequent washing better. If you want cozy, a cotton flatweave looks great, but you’ll likely wash it every 1–2 weeks in summer.
Pro Tip: I recommend using a thin, washable rug pad cut 1″ smaller than the rug on all sides—this prevents curled corners that catch toes, especially on tile floors that get slick.
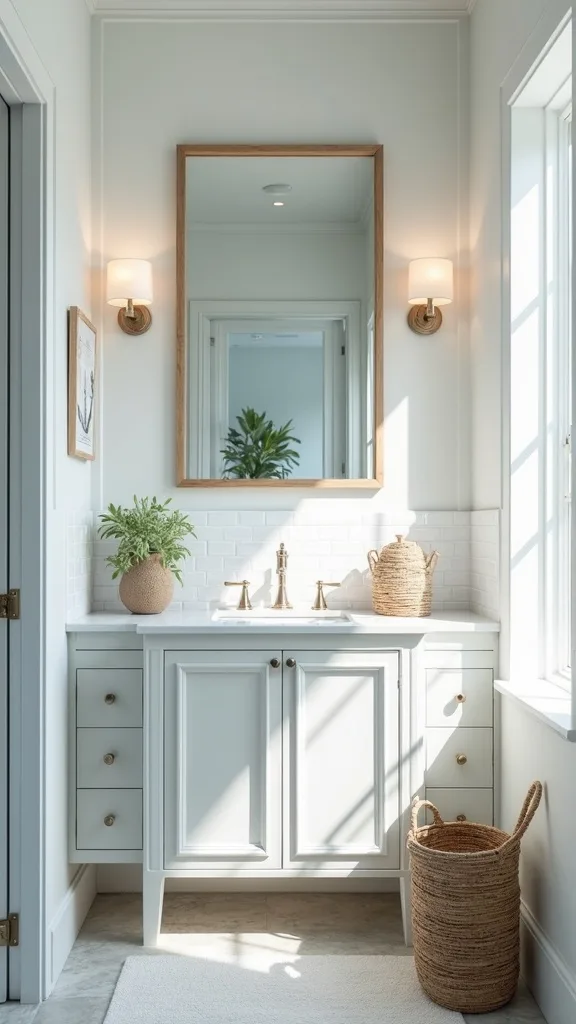
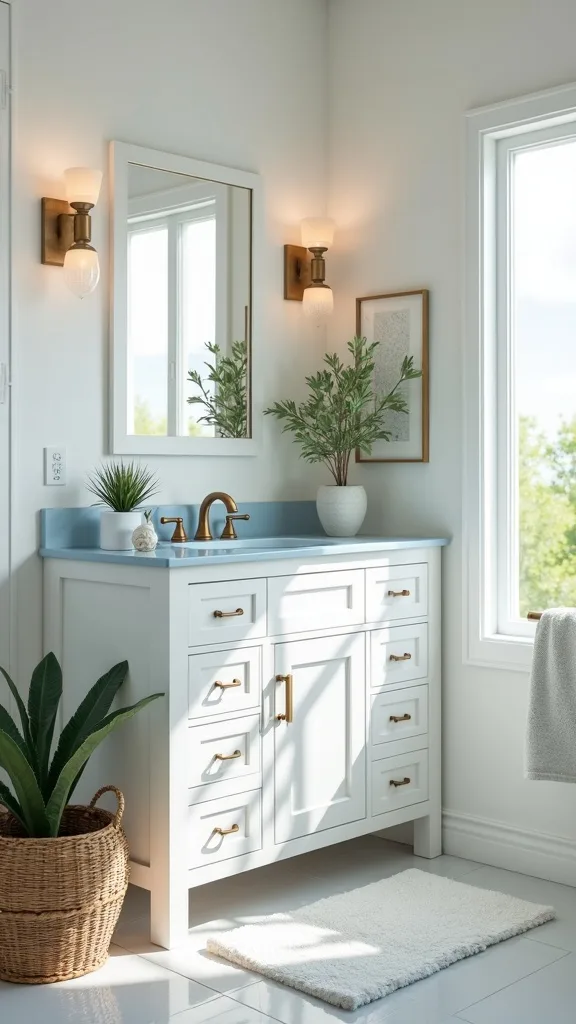
14. Style your vanity like a “landing zone,” not a storage unit
From my experience, the biggest difference between a calming coastal home bathroom and a stressful one is how the vanity top is handled. I find that you don’t need an empty counter—you just need a clear system.
I always start by limiting the counter to 5 items or fewer: hand soap, a small tray, a toothbrush cup, tissues, and one “pretty” item like a bud vase. Typically, I use a tray about 10″ x 6″ to corral the daily items, and I keep the back 4″ of the counter clear so it’s easy to wipe down in under 60 seconds.
When I design this look, I choose a tray in white ceramic or light wood, then I add one sea-glass accessory so the color feels intentional. Trade-off: wood trays need occasional wiping to avoid water rings, so ceramic is lower maintenance.
Pro Tip: I’ve found that placing the tray on the side opposite your dominant hand (right side for left-handed folks, and vice versa) reduces drips because you’re not reaching across it with wet hands.
15. Bring in “boat-inspired” texture with rope, canvas, and linen—sparingly
I find that nautical bathroom style works best when it’s about texture, not themed objects. In my opinion, rope, canvas, and linen feel quietly coastal and they age well with everyday use.
I always start with one rope element (like the mirror) and one canvas element (like a small hanging organizer). A simple canvas pocket organizer around 12″ x 20″ can hold sunscreen, bug spray, and hair ties in summer, and I hang it on a hook about 60″ from the floor so kids can reach the bottom pockets. Then I add linen-look hand towels (16″ x 28″) for that relaxed, slightly wrinkled vibe.
From my experience, the trade-off with linen blends is that they can feel less fluffy than terry cotton, but they dry faster—often within 6–8 hours in a well-ventilated bath.
Pro Tip: I recommend avoiding rope near the toilet area unless it’s sealed; unsealed rope can absorb odors over time, and that’s a problem no amount of coastal styling can fix.
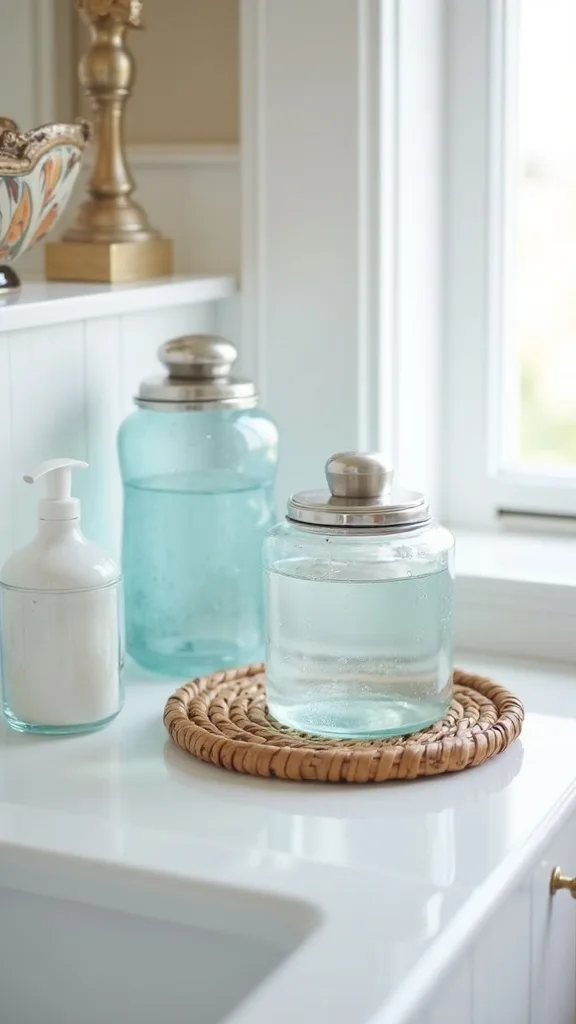
16. Use glass canisters like “beach treasures” (but keep them functional)
I always love the look of glass on a bathroom shelf because it mimics that sea-glass sparkle without clutter. From my experience, the key is making sure every container has a job, otherwise it turns into dust-catching decor.
I always start with 2 matching apothecary jars—one medium (about 6″ tall) for cotton rounds and one taller (8″–10″) for cotton swabs. When I design this look, I keep the lids on (humidity is real), and I place them on a tray so I can lift everything to clean in under 2 minutes.
I find that clear glass reads more “coastal classic,” while frosted glass leans more sea glass bathroom. Trade-off: frosted glass can hide dust but shows water spots, so you may wipe it weekly if your sink splashes a lot.
Pro Tip: I recommend adding a small silica gel packet under the cotton rounds (hidden at the bottom) in humid climates—this helps prevent that musty smell that can sneak into lidded jars.
17. Try peel-and-stick wallpaper on one wall—only if your ventilation is solid
In my opinion, peel-and-stick wallpaper can be a fun summer refresh, but I find it works best when you respect the reality of steam. From my experience, the majority of bathrooms with a strong fan and consistent use can handle it on a low-splash wall.
I always start by choosing a wall that’s at least 3 feet from the shower edge, then I measure and buy 10–15% extra for pattern matching. A subtle wave, grasscloth-look, or tiny stripe in navy/white keeps it coastal without screaming “theme.” I also clean the wall with a degreasing cleaner and let it dry for 24 hours before applying, because residue makes corners peel.
When I design this look, I pair wallpaper with solid towels and minimal decor so it doesn’t compete. Trade-off: some papers can shrink slightly, so seams may show after a few weeks.
Pro Tip: I’ve found that running a hair dryer on low heat along the edges for 30–45 seconds after applying helps the adhesive grab—especially around door trim where humidity changes are strongest.
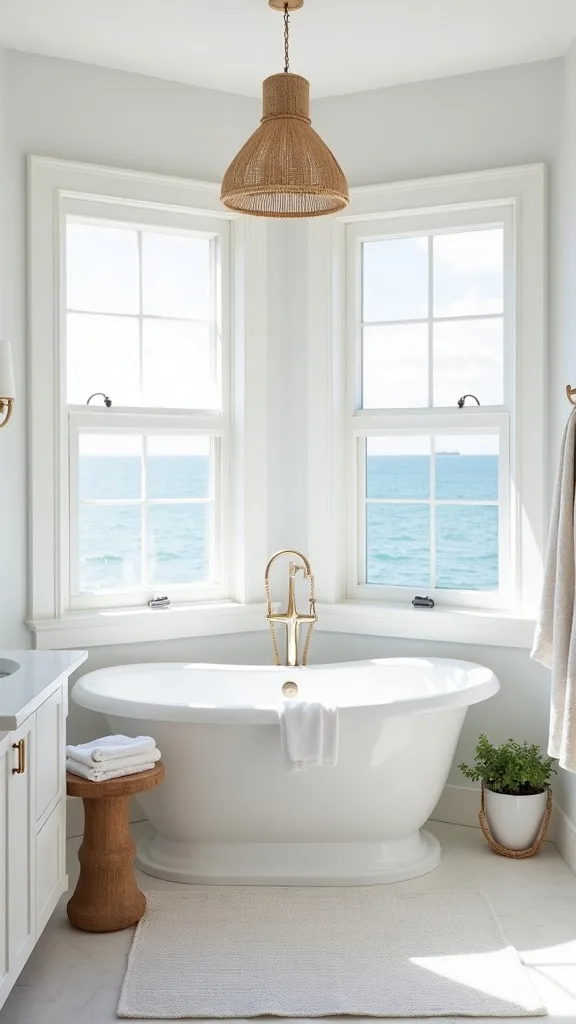
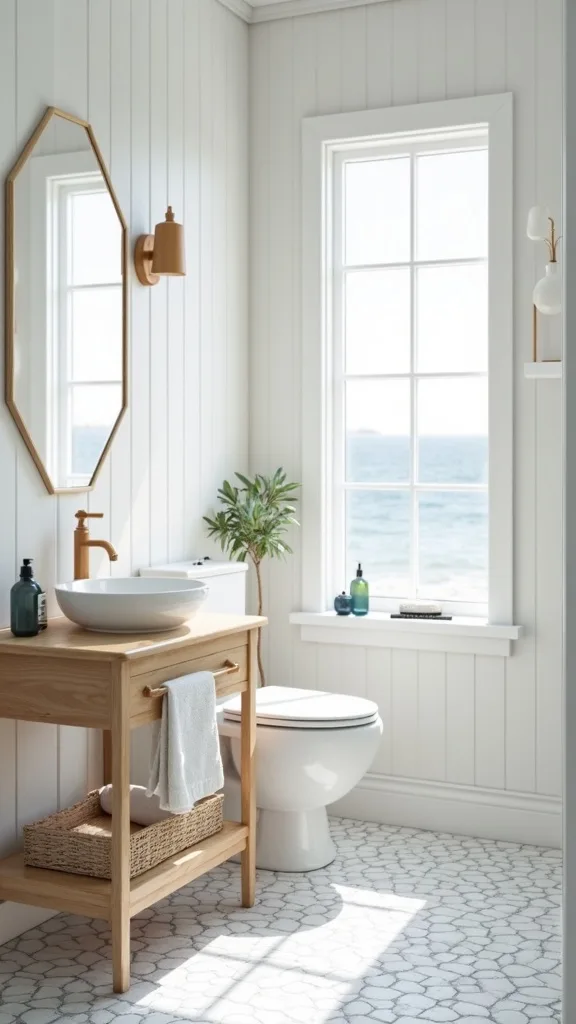
18. Bring in natural wood—then protect it like you mean it
I find that wood is what keeps a nautical bathroom from feeling cold, especially when you’re working with lots of white tile. From my experience, the trick is choosing wood pieces that can handle moisture and sealing them properly.
I always start with one wood tone and repeat it twice—like a driftwood shelf plus a small teak stool (about 18″ tall) for towels. If I’m adding a wood frame or tray, I keep it at least 12″ away from the shower opening. Typically, I seal raw wood with 2–3 thin coats of a water-based clear sealer, letting it cure for 24 hours before using it in the bathroom.
When I design this look, I avoid soft, unfinished pine in humid baths because it can warp. Trade-off: teak costs more ($60–$120 for a small stool), but it’s naturally water-resistant.
Pro Tip: I recommend sticking felt pads on the bottom of wood pieces even on tile—humidity can make wood “sweat,” and felt prevents faint water rings that show up weeks later.
19. Add a subtle scent cue that says “summer by the water” (not sunscreen overload)
I always notice that the feeling of a beach bathroom is as much about scent as it is about color. In my opinion, a light, clean fragrance makes the room feel freshly opened-up for summer without trying too hard.
I always start with one scent source, not three. Typically, I choose either a reed diffuser (3–4 oz) or a soy candle (8–10 oz), and I place it at least 10″ away from towels so oils don’t spot fabric. I find that scents like sea salt, linen, eucalyptus, or soft citrus read “coastal” in most cases, while heavy coconut can feel overpowering in a small bath.
Trade-off: diffusers are low maintenance for 6–8 weeks, but the oils can damage wood if spilled, so I always set them on a small ceramic dish.
Pro Tip: I recommend flipping reeds only once a week (not daily) in bathrooms; frequent flipping can make the scent too strong in a 40–60 sq ft space and it can start to feel more like a store than a home.
20. Use plants that tolerate humidity and low light (real life-friendly picks)
I find that greenery makes coastal bathroom ideas feel alive, like you just opened a window to salty air. From my experience, the key is choosing plants that won’t sulk if your bathroom has one small window—or none.
I always start with one plant on the shelf or vanity, usually in a 4″–6″ pot so it doesn’t crowd the sink. For low light, I’ve found pothos and snake plants do well, and for brighter bathrooms, a small fern can thrive. Typically, I water every 10–14 days, but I always check the soil first because bathrooms can stay damp longer in summer.
When I design this look, I use a simple white ceramic pot or a textured sand-colored pot and add a saucer to protect wood surfaces. Trade-off: ferns look lush but can drop leaves if the air gets too dry in winter.
Pro Tip: I recommend rotating the plant a quarter-turn every week; in bathrooms, light often comes from one direction, and rotating prevents the plant from leaning and looking “lopsided” on your carefully styled shelf.
21. Keep nautical decor subtle: one symbol, repeated twice
From my experience, the most common reason a nautical bathroom feels cheesy is too many symbols at once—anchors, shells, boats, and signs all competing. I find that one symbol repeated twice looks intentional and grown-up.
I always start by picking just one: an anchor, a sailboat outline, or a simple compass star. Then I repeat it in two places max—like a small 5″ x 7″ print and a soap dish with a tiny embossed motif. When I design this look, I keep the rest of the decor plain texture (rope, wood, linen) so the symbol feels like a wink, not a costume.
Typically, I avoid real shells on counters because soap residue and dust settle into the grooves, and cleaning them takes longer than anyone wants. Trade-off: faux resin shells are easier to wipe, but they can look less authentic up close.
Pro Tip: I’ve found that nautical symbols look more sophisticated when they’re tone-on-tone (navy on white, or sand on cream) rather than multicolor—this keeps the bathroom feeling restful instead of busy.
22. Upgrade your towels and hooks for faster drying (a summer must)
I always think about function first in summer, because damp towels can make even the prettiest beach bathroom feel a little… off. From my experience, better drying is one of the biggest “hidden” upgrades you can make.
I always start by checking airflow: I run the fan for 20–30 minutes after showers and crack the door 2–3 inches if possible. Then I switch to 2–4 sturdy hooks (rated for 10–15 lb) instead of overstuffing one bar. If you have space, an 18″ towel bar plus two hooks gives everyone a spot, and it keeps your navy stripes visible.
I find that quick-dry Turkish cotton towels are a great trade-off: they’re not as plush as hotel towels, but they dry faster and smell fresher in humid months. Typically, I wash towels weekly in summer to keep them crisp.
Pro Tip: I recommend spacing hooks at least 6″ apart; when towels overlap, the middle stays damp and that’s where that sour smell starts—especially in bathrooms without a window.
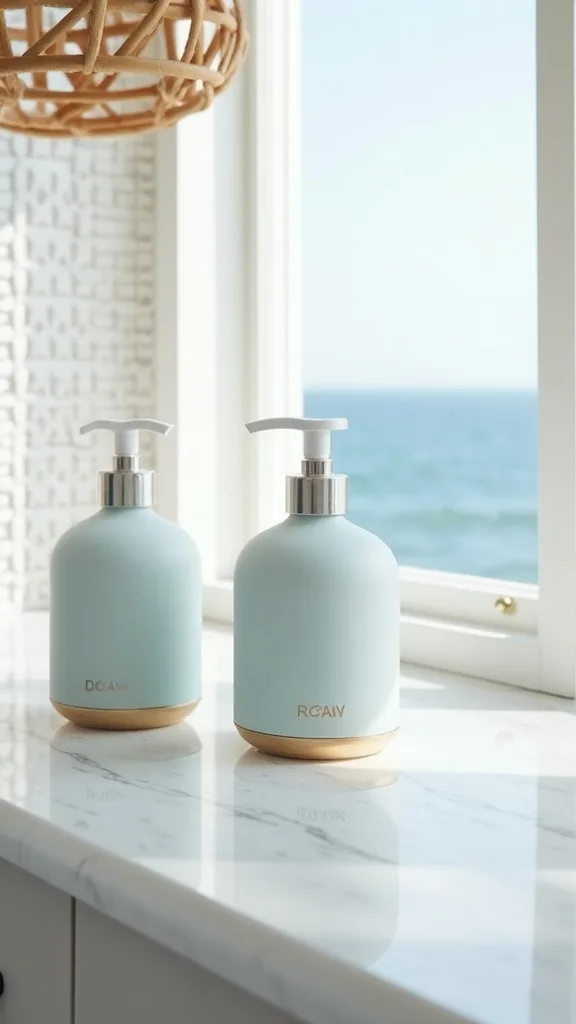
23. Make your countertop “sea-glass clean” with matching refillable bottles
I find that mismatched plastic bottles can ruin the calm of a coastal home bathroom faster than almost anything. From my experience, refillable bottles are one of those small changes with a big visual payoff.
I always start with 3 matching pump bottles—hand soap, lotion, and face wash—usually 12–16 oz each. When I tried this, I labeled them with simple waterproof labels and kept them on a 8″–10″ tray so drips don’t spread across the counter. Typically, the whole swap takes 20 minutes, including rinsing bottles and refilling.
In my opinion, frosted glass bottles in pale aqua or clear bottles with navy labels tie in beautifully with a sea glass bathroom theme. Trade-off: glass looks elevated, but it can break, so in kids’ bathrooms I use PET plastic bottles that mimic glass.
Pro Tip: I recommend trimming pump tubes by 1/2″–3/4″ if they curl at the bottom; a curled tube wastes product and makes pumps sputter, which leads to sticky drips on your “clean” tray.
24. Refresh grout and caulk so the whole bathroom looks brighter (without remodeling)
I always say the most underrated coastal bathroom idea is simply making what you already have look clean and cared for. From my experience, bright grout lines and fresh caulk instantly make white tile feel “beachy” again.
I always start by deep-cleaning grout with an oxygen bleach paste and a stiff nylon brush, letting it sit for 10–15 minutes before rinsing. If caulk is cracking or yellowed, I remove it and re-caulk with a mildew-resistant silicone, then I give it 24 hours to cure before showering. Typically, this whole refresh takes 1–2 hours of work plus drying time, and it costs far less than new tile.
I find that white or “bright white” caulk looks crisp with navy accents, but the trade-off is it shows dirt sooner, so you’ll wipe it more often.
Pro Tip: I recommend using painter’s tape to mask a 1/4″ caulk line on both sides before you apply silicone; in bathrooms, a neat line reads “new,” and that clean detail supports the whole coastal vibe.
25. Finish with one intentional “summer moment” that you can remove in September
I find that seasonal styling is what makes a home feel loved, and summer is the perfect time to let your bathroom feel a little more coastal. From my experience, one removable “moment” keeps it fun without locking you into a theme year-round.
I always start by choosing one small vignette that takes up less than 12″ x 12″ of space—like a tray on the driftwood shelf with a candle, a tiny framed shoreline photo, and a small bowl for rings. Typically, I add one extra summer item like a rolled Turkish towel or a jar of matches, and I keep it to 3 items so it doesn’t become clutter.
When I design this look, I pick pieces that store easily in a shoebox-sized bin (about 13″ x 7″ x 4″) so switching seasons takes 10 minutes, not an all-day project. Trade-off: smaller decor can get lost visually, so I keep at least one item 6″–10″ tall.
Pro Tip: I’ve found that photographing your summer vignette helps you recreate it next year in under 5 minutes—no overthinking, just a quick reset when you’re craving that beach bathroom feeling again.

Final Thoughts
I always remind myself that a nautical bathroom doesn’t have to be a full renovation to feel like summer—most of the magic comes from a few consistent choices you repeat. From my experience, if you can get your palette right (navy, white, and a sandy neutral), add one sea-glass detail, and warm it up with rope or driftwood, the whole room starts to exhale.
I find that the most livable coastal bathroom ideas are the ones that make mornings easier: towels that dry, a counter you can wipe quickly, and storage that hides the everyday clutter. In my opinion, a little imperfection is part of the charm—slightly rumpled linen towels and weathered wood are what make it feel like a home, not a showroom.
I recommend picking just one project you can do today in under 60 minutes—swap in striped towels, style a simple tray, or hang that rope-framed mirror—and then live with it for a week before you add anything else.
What I’d Do Differently
When I first tried this in a small guest bath, I made one very specific mistake: I piled on “coastal” objects (a shell jar, a boat sign, a starfish soap dish, and a rope basket) before I nailed down my color recipe. From my experience, that’s how a nautical bathroom starts to feel cluttered, even if every item is cute on its own. The correct approach I use now is to choose my 3-color palette first (for me it’s navy, white, and sandy beige), then I repeat each color at least 2–3 times before I add any themed decor. Typically, once the palette is consistent, I only need one true nautical nod—like the rope mirror—to make the whole room read “coastal” without looking like a collection.
I also wish I’d known how much humidity changes everything: baskets can get musty, towels can stay damp, and peel-and-stick edges can lift if the fan isn’t used. In my opinion, the best “upgrade” is a simple routine—run the fan 20–30 minutes, give towels their own hooks, and keep surfaces easy to wipe—because that’s what keeps the beach bathroom feeling fresh all summer long. I recommend picking one anchor element today (striped towels or a rope mirror) and building slowly from there.
Products I Recommend for This Project
Here are some of my favourite products to help you bring these ideas to life:
- Gorilla Hot Glue Gun Kit (High Temp) — I find it grips rope securely for a mirror frame when I work in small 4-inch sections.
- 3/8-inch Natural Sisal Rope (50 ft) — I always like sisal for a nautical touch because it looks authentic and holds its shape around curves.
- Rust-Oleum Varathane Water-Based Polyurethane (Clear Matte) — I recommend this for sealing driftwood shelves because it protects against splashes without adding shine.
- GE Advanced Silicone 2 Kitchen & Bath Sealant (White) — From my experience, this is a reliable mildew-resistant caulk for crisp, clean edges around tubs and sinks.
- mDesign Plastic Apothecary Bathroom Canister Set (Clear) — I like these for the sea-glass-clean look because they’re easy to wipe and less breakable than glass in family bathrooms.