This post contains affiliate links. As an Amazon Associate, I earn from qualifying purchases at no extra cost to you.
Are you looking for a way to stop stepping on pool noodles, mystery goggles, and sandy flip-flops every time you walk into the garage? Do you want to find sunscreen and towels in under 30 seconds instead of doing the pre-pool scavenger hunt?
I always start by treating summer gear like a mini “mudroom” that lives in the garage: one station, clear categories, and labels big enough to read from 6–8 feet away. In this post, I’m sharing my most reliable setup for summer sports storage and pool equipment storage, plus the thrifty sources I use when I don’t want to spend a fortune.
From my experience, this is perfect for families who are in and out of the house 2–5 times a day (pool, park, practice, beach) and need a system that still works when kids “help.”
I find that the biggest wins come from cheap, repeatable pieces—wicker bins, hook rails, and a couple of waterproof labels—so you can expand the system as your gear grows. I’ll also show you DIY options when the store-bought versions feel overpriced for what they are.
Below are 25 Summer Sports & Pool Equipment Storage that keep beach gear organization simple, make a summer gear garage feel calmer, and finally give outdoor toy storage a real home.
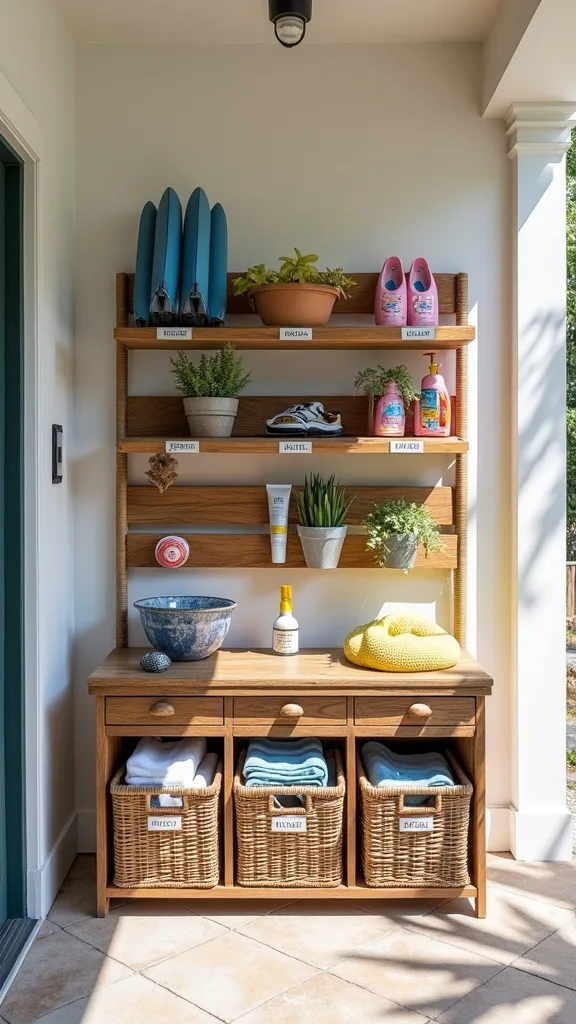
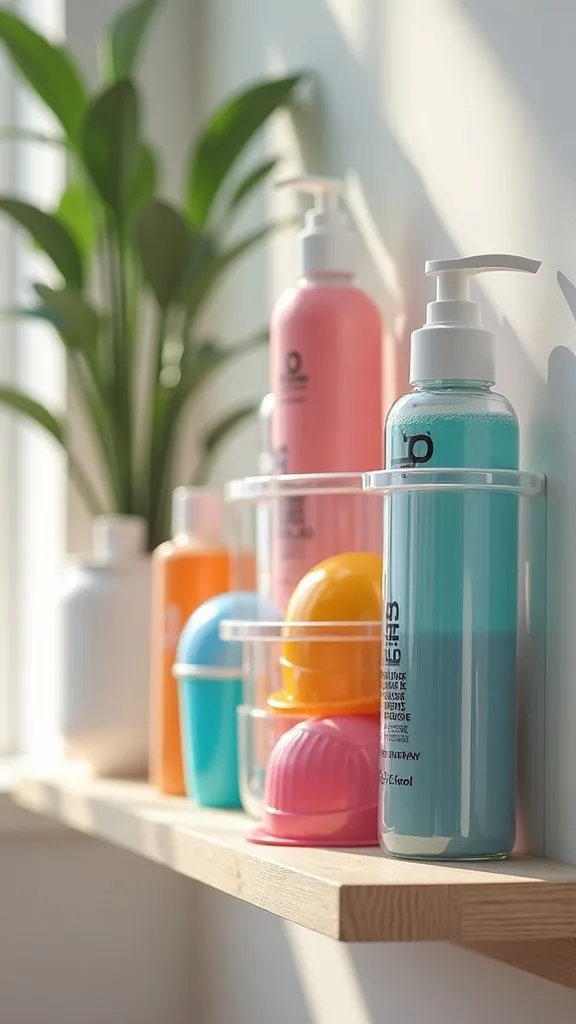
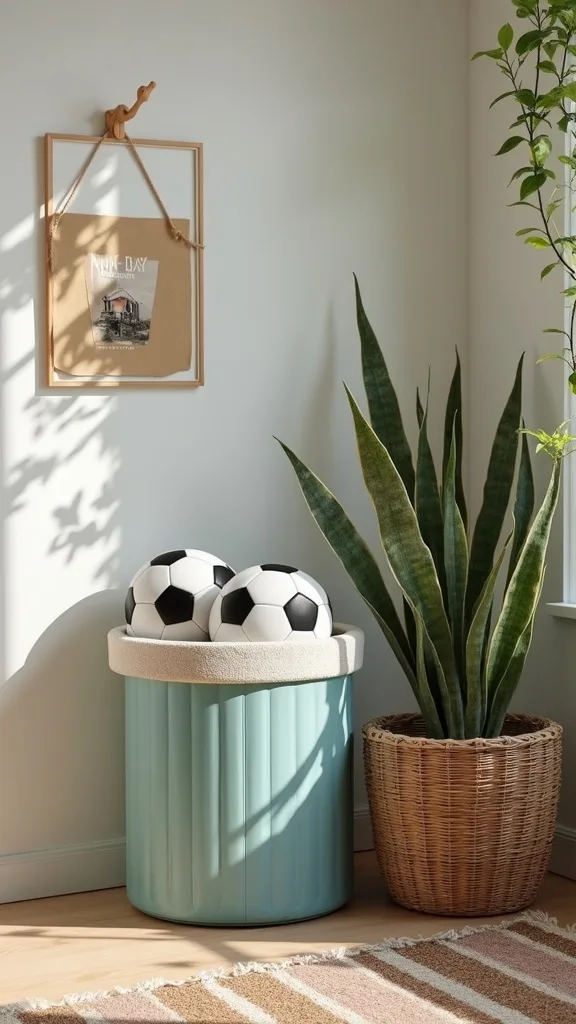
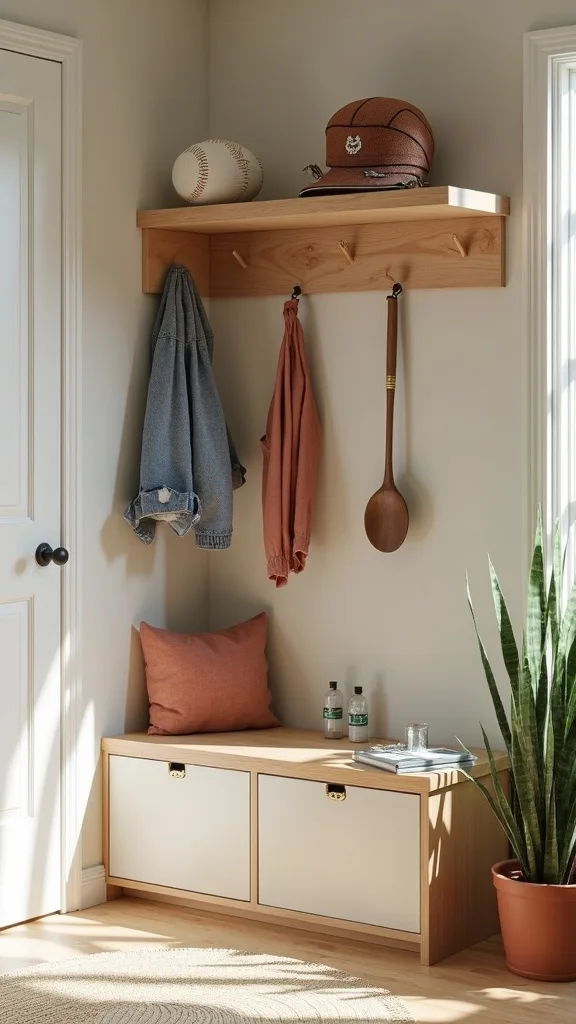
1. Outdoor wicker bin station with labeled slots (floats, goggles, sunscreen, towels)
I always start by building one “launch pad” that lives within 3–6 feet of the garage door, because that’s where hands naturally reach when everyone’s rushing outside. When I design this look, I use an outdoor wicker look (real resin wicker or synthetic rattan) so it feels like decor, not a plastic-bin pile.
To implement it, I line up 4 bins on a 48-inch-wide bench or a 36-inch metal rack: one for floats, one for goggles, one for sunscreen, and one for towels. I keep labels at least 2 inches tall and I stick them on the bin front with clear packing tape so splashes don’t peel them off within 2 weeks.
From my experience, resin wicker bins ($8–$15 each at thrift stores or Facebook Marketplace) hold up better than paper rope baskets in humid garages. I like white, honey, or gray wicker with black labels for high contrast.
Pro Tip: I find that “towels” is the bin that turns into a damp-mildew bomb, so I drill 6–8 small 1/4-inch holes in the bin base (or choose an open-weave bin) and toss in a $2 mesh laundry bag as a removable liner—easy to carry inside and wash.
2. Two-zone rule: wet gear vs dry gear (the mildew stopper)
From my experience, the fastest way to ruin a great system is mixing wet goggles and swimsuits with dry balls and hats—everything starts smelling like a locker room within 7–10 days. I always recommend creating two zones so moisture can’t migrate.
I set a “wet zone” on the right side of the station with a 24-inch-wide boot tray and a $12 over-the-door towel bar mounted at 54 inches high. Then I keep the “dry zone” on the left with lidded bins and a small 10-inch-deep shelf for sunscreen, bug spray, and bandages.
I find that a rubber boot tray ($10–$18 at Home Depot) catches drips from goggles and swim shoes, and a cheap tension rod ($8–$14 on Amazon) can become a drying bar if you don’t want to drill. For bins, I prefer polypropylene plastic for dry gear because it wipes clean in 2 minutes.
Pro Tip: When I tried this in a humid garage, I tucked a $1.25 moisture absorber (Dollar Tree) inside the dry bin and replaced it every 30–45 days—small cost, big payoff in keeping that “clean towel” smell.
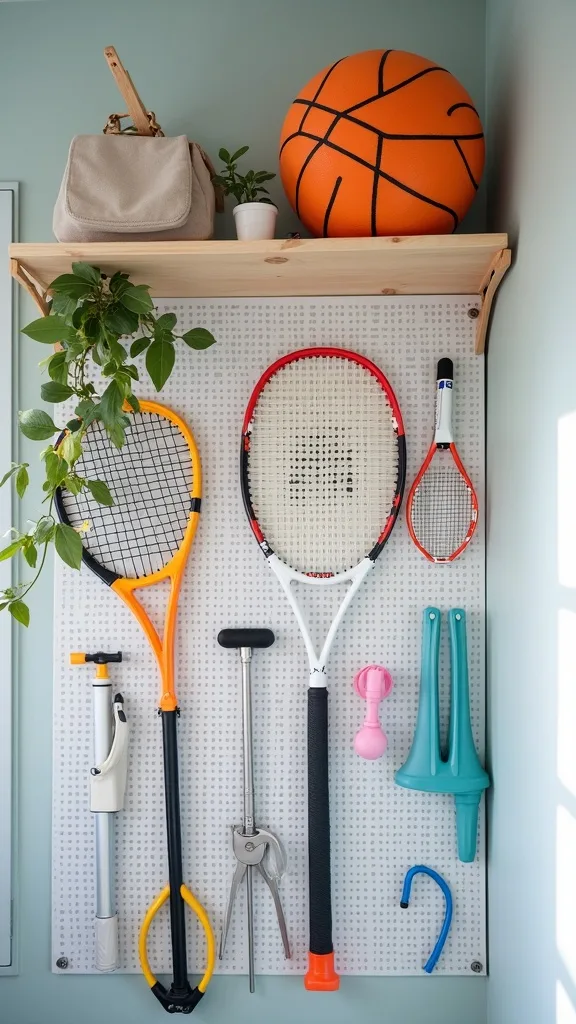
3. Thrifted pegboard wall for racquets, goggles, and pump handles
I always start by scanning thrift stores for old pegboard panels because they’re usually $5–$12 and they instantly turn blank garage wall into vertical storage. In my opinion, pegboard works best for odd-shaped summer gear that never stacks neatly.
To set it up, I mount a 2 ft x 4 ft pegboard panel on 1×2 furring strips so the hooks have clearance, and I place the bottom edge about 40 inches from the floor for kid access. I use 2-inch and 4-inch peg hooks plus a small peg basket for goggles and swim caps.
From my experience, the cheapest hooks are fine for lightweight items, but I always buy a couple of locking peg hooks ($8–$12 for a pack) for heavier things like a ball pump or a pickleball paddle bag. I paint the board leftover exterior paint (even a $6 sample pot can cover a 2×4 panel).
Pro Tip: I find that labeling the pegboard outline with a paint pen (not just a label) keeps the system intact—when the “goggles basket” silhouette is obvious, stuff magically returns to the right spot in under 10 seconds.
4. Clear shoe-pocket organizer for sunscreen, goggles, and swim caps
I’ve found that the humble clear shoe-pocket organizer is one of the fastest fixes for small-item chaos, especially when sunscreen and goggles vanish right before you leave. When I design this look, I hang it where you can see it from 6–8 feet away.
I install a 24-pocket clear organizer on the inside of the garage-to-house door using 3 over-the-door hooks, and I dedicate the top 2 rows to “adult stuff” (SPF, car keys, earplugs). The bottom 3 rows become kid zones: goggles, swim caps, nose clips, and hair ties—each pocket gets one category so it doesn’t become a junk drawer.
From my experience, the $12–$18 organizers on Amazon with reinforced seams last longer than the $5 thin vinyl ones, but the cheap version is still worth it if you replace it every season. I like clear pockets because I can do a 30-second inventory before we leave.
Pro Tip: I always recommend slipping a 3×5 index card label inside each pocket instead of sticking labels on the outside—humidity and sunscreen residue make sticky labels peel within 2–3 weeks.
5. Pool noodle corral made from a $9 laundry hamper
I find that pool noodles are the mess-makers that make a garage look “out of control” even when everything else is tidy. From my experience, corralling them vertically is the easiest visual win for pool equipment storage.
To do it, I grab a tall plastic laundry hamper (around 24–28 inches high) and cut 6–10 ventilation slits with a utility knife so wet noodles don’t trap moisture. I place it next to the wicker bin station and label it “NOODLES & FLOATS” with 2-inch vinyl letters.
I always start by checking thrift stores for hampers—$4–$9 is common—and I avoid fabric hampers because they hold damp smells. If I’m buying new, I look for a hard plastic hamper with handles so kids can drag it 10 feet to the driveway.
Pro Tip: When I tried this, I added two adhesive furniture sliders ($3) to the hamper base so it glides on concrete—kids are more likely to put noodles away if they don’t have to lift the whole thing.
6. Beach towel roll-up shelf using a 72-inch wire rack
I always recommend giving towels a dedicated home, because once towels pile up, the whole summer gear garage feels messy even if the rest is organized. In my opinion, rolling towels makes them easier to grab with one hand.
I install a 72-inch wire shelving unit (about 18 inches deep) and dedicate one shelf at eye level (around 60 inches) just for towel rolls. I keep 8–12 towels rolled tight and secured with $1 hair elastics or thrifted ribbon, and I store extra towels in a lidded bin on the bottom shelf.
From my experience, wire shelves dry faster than solid MDF shelves in humid garages, and they’re easier to rinse off if a sandy towel gets tossed up there. I like white wire racks ($45–$75 at Lowe’s) but I often find used ones for $20–$35 on Marketplace.
Pro Tip: I find that putting a $4 plastic shelf liner only under the towel shelf (not the whole unit) stops snags on terry cloth while still letting air circulate around the towels.
7. Dollar-store label system that survives sunscreen hands
From my experience, labels are the difference between “organized for a day” and “organized all summer,” especially when hands are slippery with SPF. I always start by choosing labels that can be wiped clean in 10 seconds.
I use waterproof vinyl label tape or a $6–$10 pack of laminated label sheets, and I make labels at least 1.5–2 inches tall. Then I cover each label with a strip of clear packing tape that wraps around the bin edge by about 1/2 inch—this is the part most people skip.
I find that chalk labels look cute for about 48 hours, but they smear when a wet towel brushes them. For the wicker bin station, I stick to black text on white labels so it’s readable in dim garages with one overhead bulb.
Pro Tip: I recommend adding one “RETURN HERE” arrow label on the side of the station facing the driveway—when kids approach from outside, that’s the angle they see, and it reduces wrong-bin tosses by a lot in most households.
8. Ball bin with bungee front (no more soccer balls escaping)
I’ve found that balls are the #1 escape artists in outdoor toy storage, and one runaway basketball can knock over an entire neat stack. When I design this look, I use a bin with a flexible front so kids can grab-and-go without dumping everything.
I convert a 20-gallon plastic tote into a ball bin by drilling 4 holes (two on each side) about 6 inches from the top edge, then threading a 36-inch bungee cord across the front. The bungee holds balls in, but it stretches when you pull one out—no lid wrestling.
From my experience, this works best for 6–10 balls (size 3–7), and I keep it on the floor under a 16-inch-deep shelf so it looks intentional. I like heavy-duty totes ($12–$18 at Home Depot) because thin plastic cracks when it’s dragged on concrete.
Pro Tip: I always recommend adding a small strip of duct tape over the drilled holes—bungees can saw into plastic over 2–3 months, and the tape acts like a cheap reinforcement washer.
Cost & Materials Estimate
I typically see a functional summer station land between a thrift-heavy setup and a mostly-new setup, depending on how many bins and hooks you need.
| Item | Estimated Cost | Where to Buy |
|---|---|---|
| Resin wicker-style storage bins (set of 4) | $36–$80 | Wayfair |
| 36-inch hook rail with 5–6 hooks | $18–$45 | Home Depot |
| 72-inch wire shelving unit | $45–$95 | Lowe’s |
| Waterproof label sheets or label tape + packing tape | $8–$18 | Amazon |
| Boot trays (2) | $20–$40 | IKEA |
| 3-tier metal rolling cart (optional) | $35–$75 | Amazon |
Total estimated cost: $135–$353 I find you can save the most by thrifting the bins and shelving, but I’d splurge on sturdy hooks because replacing bent hardware mid-summer is a headache.
9. Skateboard and scooter wall rail from a $12 closet rod
I find that scooters and skateboards make a garage feel cluttered because they’re long, awkward, and always in the walkway. From my experience, getting them off the floor frees up a surprising 10–15 square feet.
I mount a 48-inch wooden closet rod (or a metal one) on two heavy-duty brackets, placing it 48–52 inches high so handlebars don’t hit knees. Then I hang scooters by the T-bar using S-hooks, and I slide skateboards onto two U-hooks spaced about 6 inches apart.
I always start by checking Habitat ReStore for closet hardware—$2–$6 per bracket is common—and I avoid lightweight cup hooks that bend. For a cohesive look, I paint the rod the same color as the wall or a soft coastal blue using leftover paint.
Pro Tip: When I tried this with multiple scooters, I added a 1-inch rubber chair leg cap on each S-hook—metal-on-metal rattling gets annoying fast, and the rubber quiets it instantly.

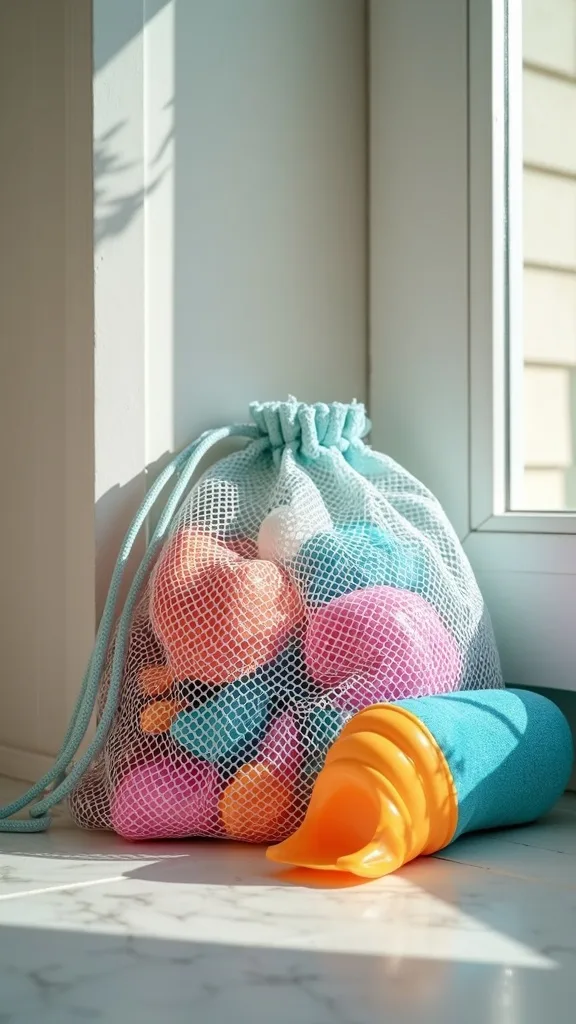
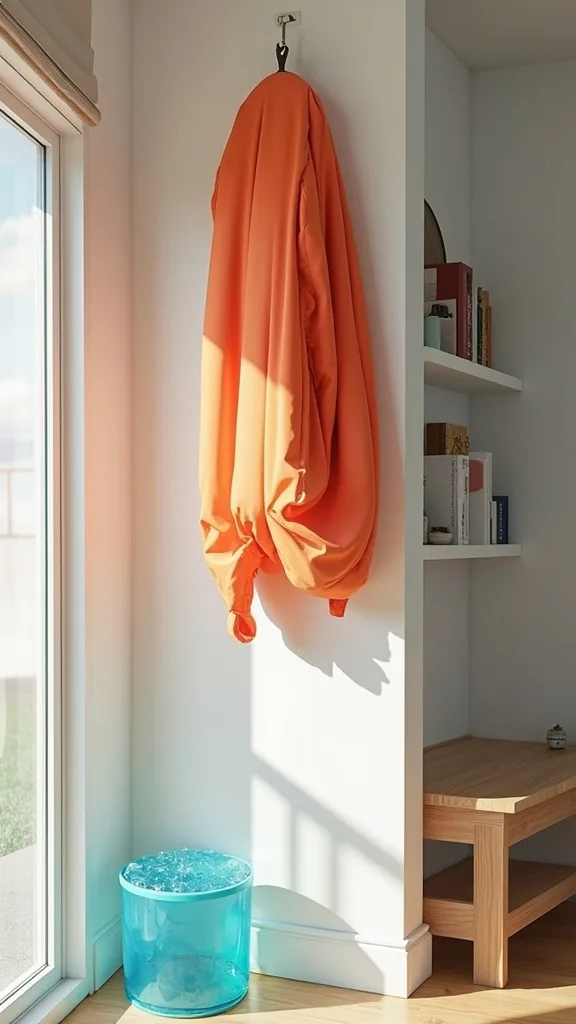
10. Mesh drying bag for goggles and swim toys (the stink-preventer)
I always recommend a dedicated drying solution for goggles and small swim toys, because leaving them in a closed bin is how you get that sour smell in under a week. In my opinion, airflow is the “secret ingredient” in pool equipment storage.
I hang a large mesh laundry bag (about 24 x 36 inches) on a single wall hook placed 60 inches high. After swimming, I toss goggles, dive rings, and small toys into the bag and let them drip-dry over a boot tray for 2–4 hours before anything goes back into bins.
From my experience, mesh bags cost $6–$12 on Amazon, and thrift stores often have them for $2–$4 near laundry baskets. I prefer polyester mesh over cotton because cotton stays damp longer in most garages.
Pro Tip: I find that clipping a $1 chip clip to the bag zipper pull makes it easier for wet hands to open—tiny upgrade, but it removes the “I couldn’t open it” excuse that derails the routine.
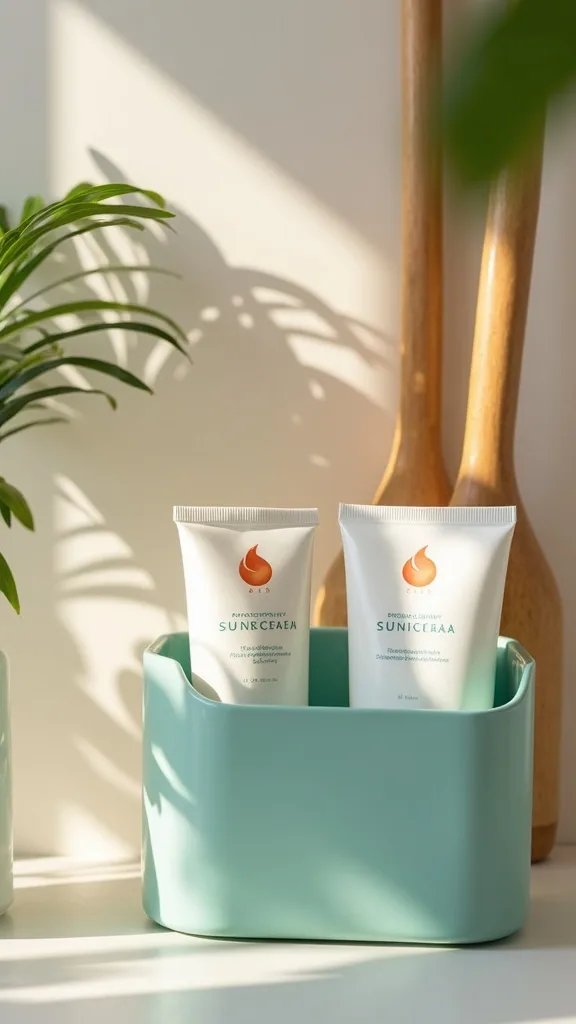
11. Sunscreen caddy with a leak-proof tray (no oily shelf rings)
From my experience, sunscreen storage fails when bottles leak and everything gets greasy, so I always start by containing the mess. When I design this look, I treat sunscreen like a kitchen condiment station—contained, wipeable, and visible.
I use a small plastic handled caddy (roughly 12 x 8 inches) and set it inside a 13 x 9-inch baking tray from the thrift store to catch drips. I keep 3–5 sunscreens, one aloe gel, and a small zip pouch of bandages in the caddy, and I store it at 48–54 inches high so little kids aren’t pumping lotion everywhere.
I find that thrifted metal baking sheets ($2–$5) clean up faster than fabric shelf liners, and the tray makes it easy to carry everything to the car in one trip. If I buy new, I look for a caddy with a solid bottom (not slotted) so it doesn’t ooze through.
Pro Tip: I recommend writing the expiration month on the cap with a paint pen—most sunscreens are good for about 12 months after opening, and the cap note stops you from reusing last summer’s half-bottle by accident.
12. DIY “grab list” board so nothing gets forgotten
I’ve found that the biggest stress isn’t storing the gear—it’s remembering it when you’re already late. In my opinion, a simple visual checklist turns beach gear organization into a habit instead of a scramble.
I hang an 11 x 14-inch frame (thrifted for $3–$6) next to the wicker bin station at about 58 inches high. Inside, I place a printed list with 6–8 items (towels, goggles, sunscreen, water bottles, hats, snacks), and I use a dry-erase marker to check things off before we leave.
From my experience, this works best when the list matches your bins exactly—if the bin says “GOGGLES,” the list should say “GOGGLES,” not “swim stuff.” I also keep a small cup with 2 markers and a microfiber cloth attached with a command hook.
Pro Tip: When I tried this, I added a “RESTOCK SUNDAY” line at the bottom—one 10-minute reset each week prevents the mid-week panic when you discover you’re down to one usable towel.
13. Garage “sand containment” bin for beach toys and shoes
I always start by assuming sand will enter the garage no matter what, because fighting reality is how systems fail. From my experience, one dedicated sand bin keeps the rest of the summer gear garage from feeling gritty.
I set a 27-gallon tote (about 30 x 20 inches) right by the entry and label it “SANDY STUFF.” Inside, I place a smaller 5-gallon bucket for shells and tiny toys, plus a hand broom and dustpan. After the beach, everything sandy goes straight in, and I shake it out outside within 24 hours.
I find that using a dark tote (black or navy) hides scuffs, and a yellow lid makes it easy to spot. If you’re thrifting, look for thick-walled totes with tight lids—thin lids warp in heat and pop off.
Pro Tip: I recommend drilling 4 tiny 1/8-inch holes in the tote corners if you store damp sand toys—just enough drainage to prevent puddles, but small enough that sand doesn’t pour out when you move it.

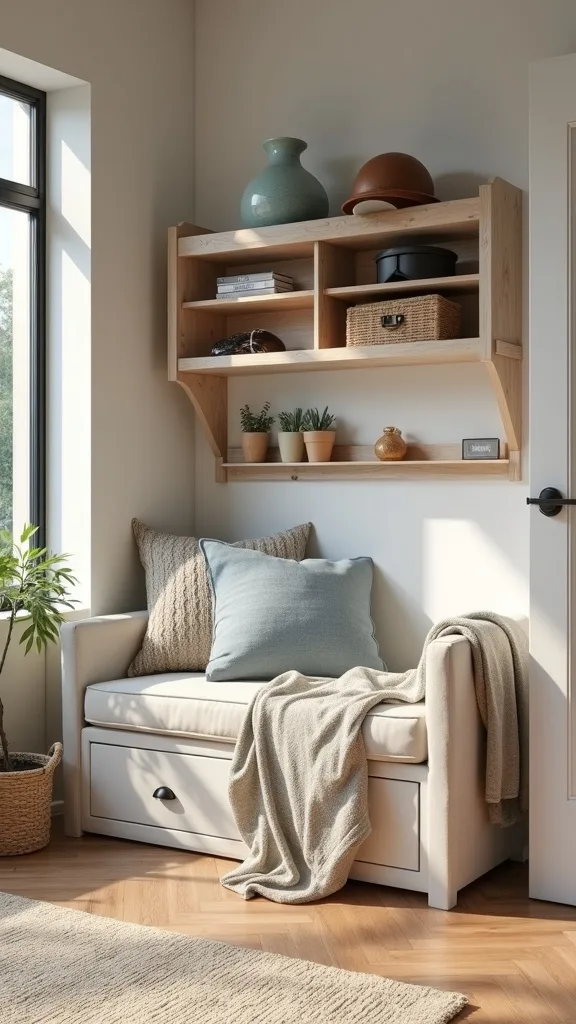
14. Floating shelf for goggles and keys (keeps counters clear)
I find that small surfaces in garages turn into clutter magnets, so I always recommend adding one intentional shelf for the essentials. When I design this look, I keep the shelf shallow so it can’t become a dumping ground.
I install a 24-inch floating shelf that’s 6–8 inches deep, mounted at about 60 inches high above the wicker bin station. I place a small tray for keys, a lidded jar for coins, and a tiny basket for spare goggles—no more than 3 containers so it stays visually calm.
From my experience, solid wood shelves handle garage temperature swings better than cheap particleboard, but particleboard is fine if it’s sealed with two coats of water-based polyurethane (about 30 minutes per coat plus drying time). I often thrift a shelf for $5–$15 and just repaint it.
Pro Tip: I always start by anchoring at least one bracket into a stud; if you rely only on drywall anchors, the shelf can slowly tilt under the weight of “just one more thing,” especially after 2–3 months.

15. Pool float “deflate and file” system using hanging pant clips
From my experience, giant floats are the reason pool equipment storage feels impossible—until you stop storing them inflated. I always start by deciding which floats are “daily use” and which are “special occasion.”
I keep 1–2 daily floats inflated in the wicker bin station, but I deflate the rest and hang them on a $10 hanging clip rack (the kind meant for pants) on a wall hook at 66 inches high. I label each clip with masking tape—“unicorn,” “lounger,” “kid ring”—so I’m not unfolding everything to find one.
I find that most floats deflate in 2–4 minutes with a small electric pump, and storing them flat reduces punctures because they’re not rubbing against concrete or bike pedals. If you don’t want to buy a clip rack, clothespins on a hanger can work, but it’s slower.
Pro Tip: When I tried this, I dusted the folded vinyl with a tiny sprinkle of baby powder before clipping—vinyl-on-vinyl can stick in heat, and the powder keeps folds from “welding” together over the season.
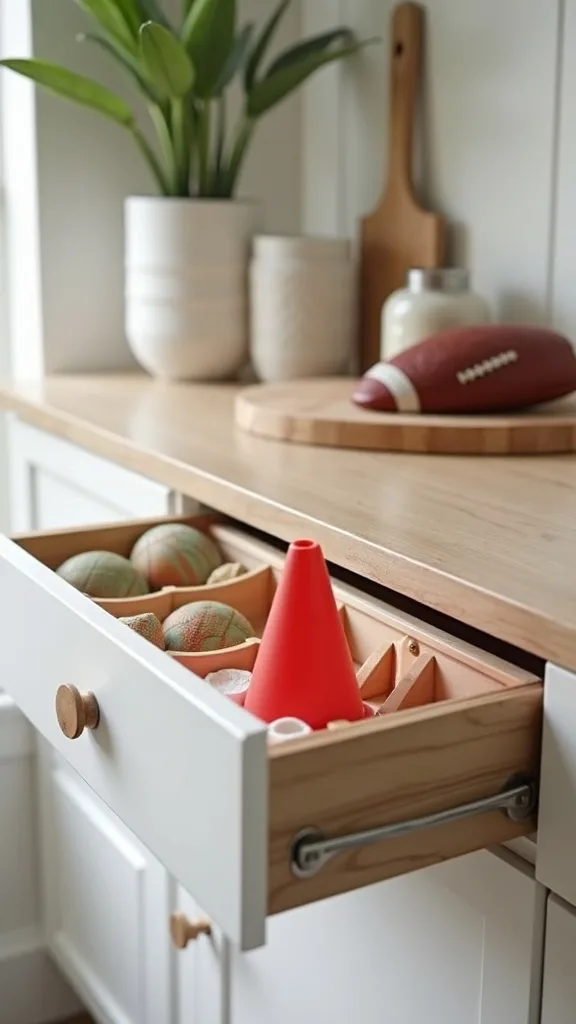
16. Sports cone and chalk drawer in a $7 utensil caddy
I’ve found that the smallest outdoor play items—cones, sidewalk chalk, jump ropes—create the biggest daily mess because they don’t have an obvious home. In my opinion, a divided caddy is the easiest fix for outdoor toy storage.
I use a plastic utensil caddy (about 10 x 6 inches) and dedicate each compartment to one category: chalk, bubbles, jump rope handles, and spare pump needles. I keep it on a shelf between 42–54 inches high so it’s reachable but not in the splash zone.
From my experience, restaurant-style caddies from discount stores run $7–$12, and I often see them at thrift stores for $2–$4. I avoid cardboard dividers because they warp when wet hands grab chalk.
Pro Tip: I recommend putting sidewalk chalk into a zip-top bag inside the caddy—chalk dust coats everything over time, and the bag keeps your labels and bins from looking “dirty” even when the system is working.
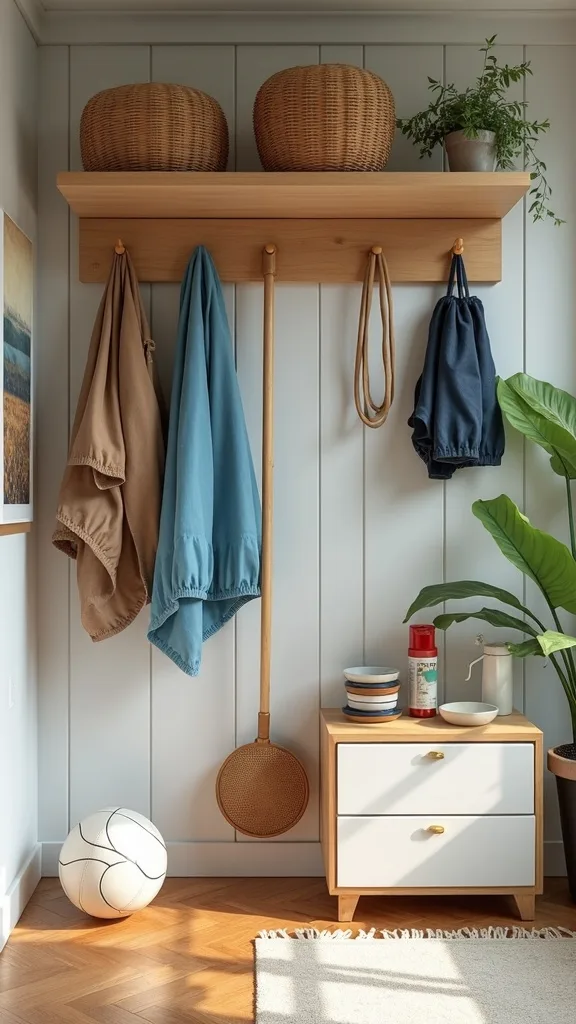
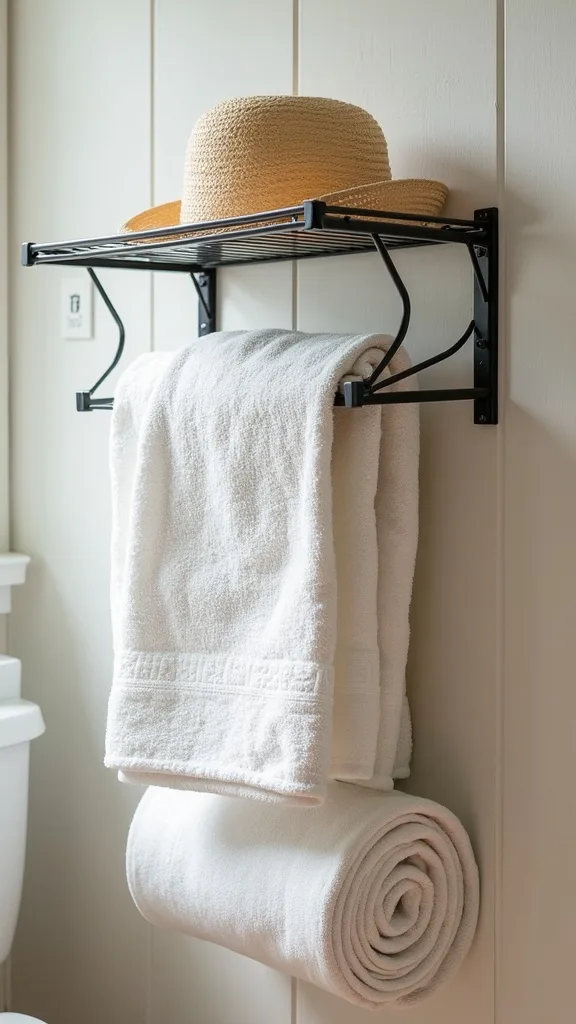
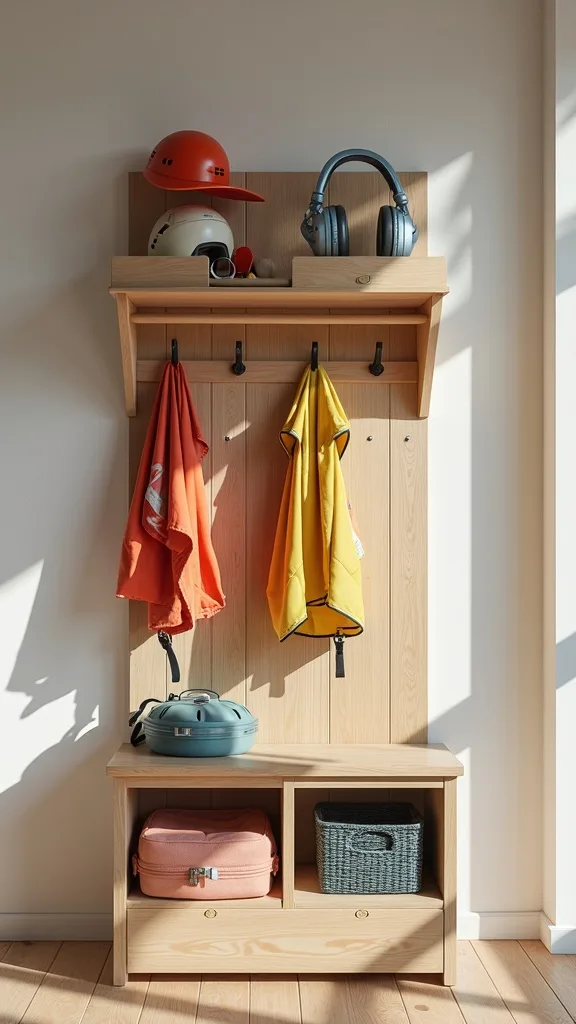
17. Helmet and life jacket hook rail (stops the floor pile)
I always recommend a dedicated hook rail for bulky safety gear because helmets and life jackets don’t belong in bins—they need airflow. From my experience, one 36-inch rail can replace an entire corner pile.
I mount a 36-inch hook board with 5–6 double hooks at 60 inches high, spacing hooks about 6 inches apart so helmets don’t overlap. I hang life jackets on the outer hooks and helmets in the center, and I keep a 24-inch boot tray underneath to catch drips from wet vests.
I find that solid wood rails from thrift stores are easy to repaint, and double hooks ($2–$4 each at Home Depot) hold shape better than thin wire hooks. If you’re renting, heavy-duty Command hooks can work for helmets, but I don’t trust them for heavy, wet life jackets.
Pro Tip: When I tried this, I added one hook labeled “WET ONLY”—it prevents someone from hanging a dripping life jacket on top of a dry helmet, which is how mildew spreads in most garages.
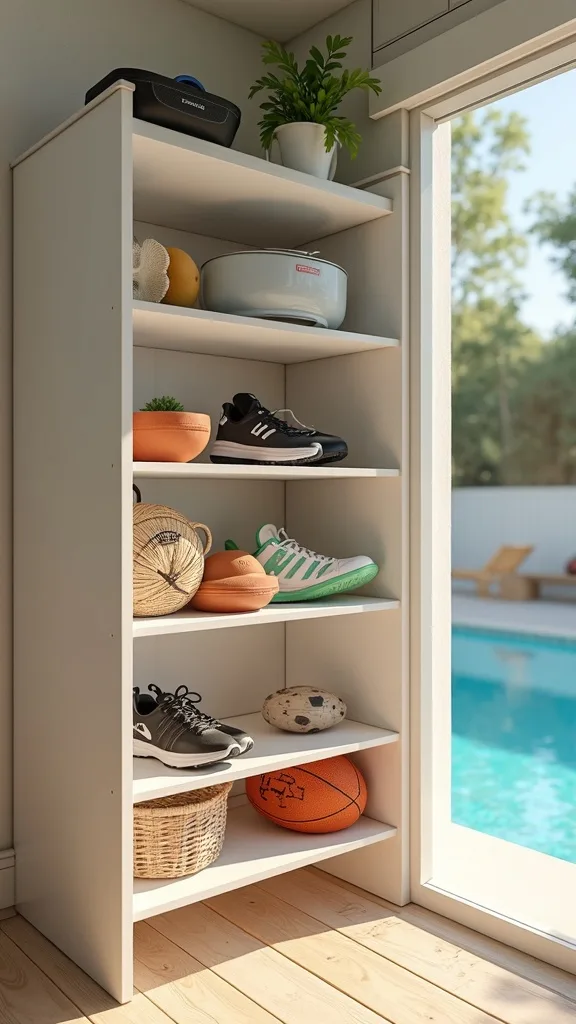
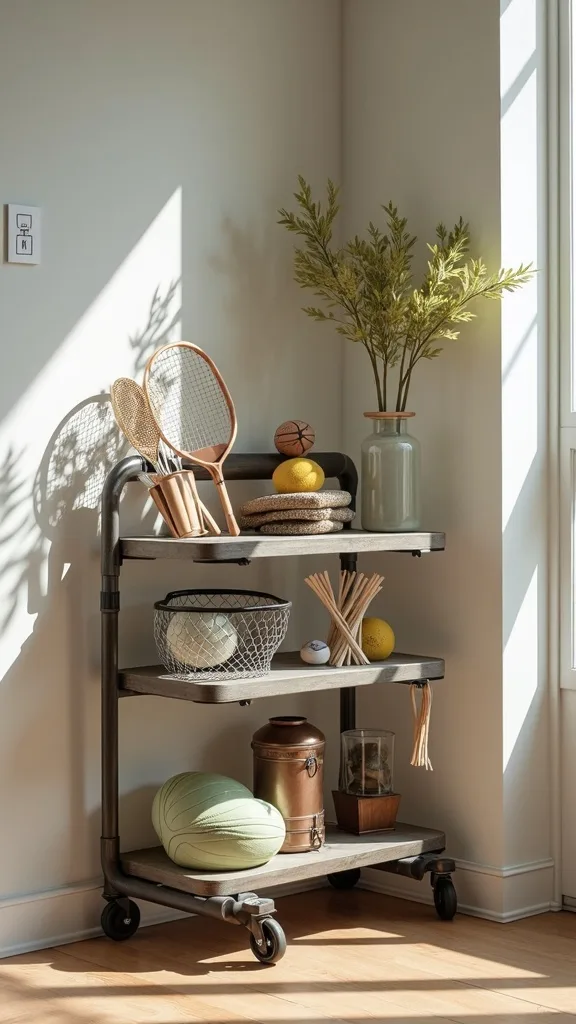
18. Rolling cart for practice gear (soccer, baseball, pickleball)
I find that a rolling cart is the easiest way to keep summer sports storage flexible, especially when your gear changes week to week. In my opinion, mobility is worth paying a little more upfront because it saves time later.
I use a 3-tier metal rolling cart (around 30–35 inches tall) and assign tiers: top for small items (wristbands, pump, sunscreen), middle for balls, and bottom for shoes or a small cooler. I park it within 2 feet of the garage door on practice days, then roll it back against the wall when we’re home.
From my experience, IKEA-style carts run $30–$60 new, but I often find them for $15–$25 on Marketplace. I add 2 small bins on the top tier to stop tiny items from sliding off when the cart rolls over cracks.
Pro Tip: I always start by tightening the caster screws after the first week—garage floors vibrate carts loose, and a quick 5-minute tighten keeps the cart from wobbling when it’s loaded.
19. Overhead tote for off-season gear (keeps the floor usable)
From my experience, the floor is prime real estate in a summer gear garage, so I always recommend moving off-season items up high. When I design this look, I only store lightweight, truly off-season things overhead.
I use an overhead garage rack (typically 4 ft x 8 ft) and store labeled totes that won’t be touched for at least 3 months—extra snorkels, winter balls, spare inflatables. I keep totes under 20–25 lbs each and I label two sides so I can read them from a step ladder.
I find that overhead racks cost $90–$180 at Lowe’s, but you can DIY a ceiling shelf with 2x4s for $40–$70 if you’re comfortable drilling into joists. The trade-off is time: DIY takes 2–4 hours, while a kit is faster but pricier.
Pro Tip: I recommend storing anything heat-sensitive (like some sunscreen backups or cheap goggles) off the ceiling—garages can get hotter near the roof, and warped goggles are a frustrating “savings” that isn’t worth it.
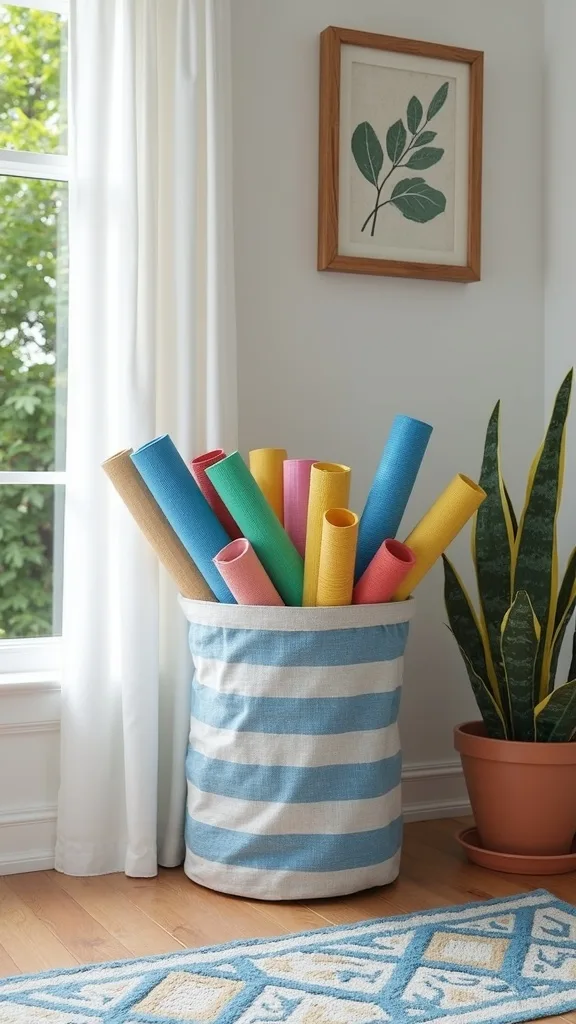
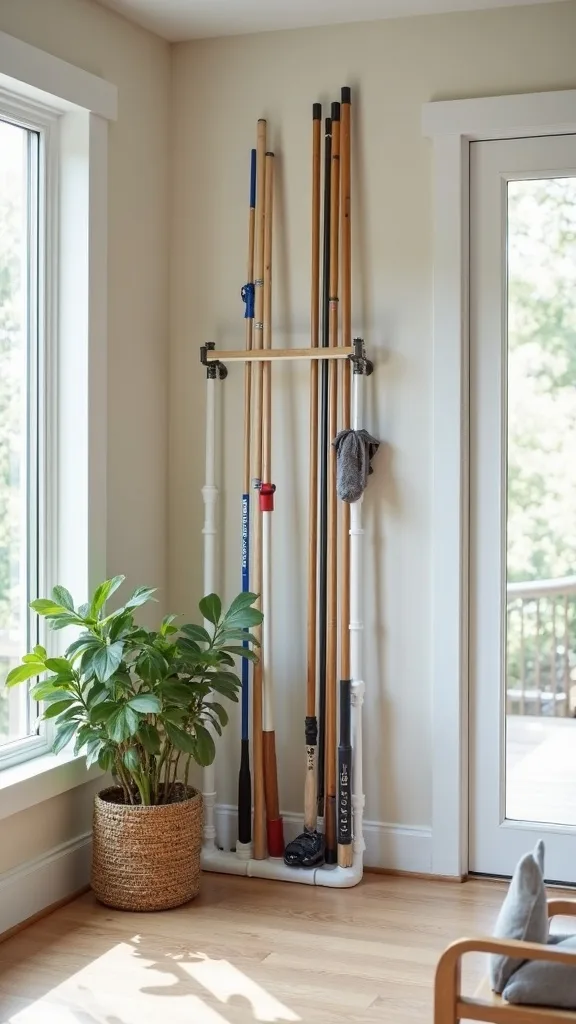
20. DIY PVC rack for pool poles and nets (no more leaning chaos)
I always start by dealing with the long, leaning tools because they make even a clean garage look messy. From my experience, pool poles and nets behave better when they’re slotted, not propped in a corner.
I build a simple PVC slot rack using a 10-foot length of 2-inch PVC pipe cut into 6 pieces (about 12–14 inches each) and screwed to a 1×6 board. I mount the board horizontally at 48 inches high so poles slide in and out easily, and I leave 3–4 inches between slots.
I find that PVC is cheap ($18–$25 total for pipe and screws) and it won’t rust in humid garages. If you’d rather buy, a wall-mounted tool organizer is $20–$40, but the PVC version fits your exact pole sizes.
Pro Tip: When I tried this, I angled the PVC slots upward by about 10 degrees using small wood shims—poles stay put even when someone yanks a net out quickly.
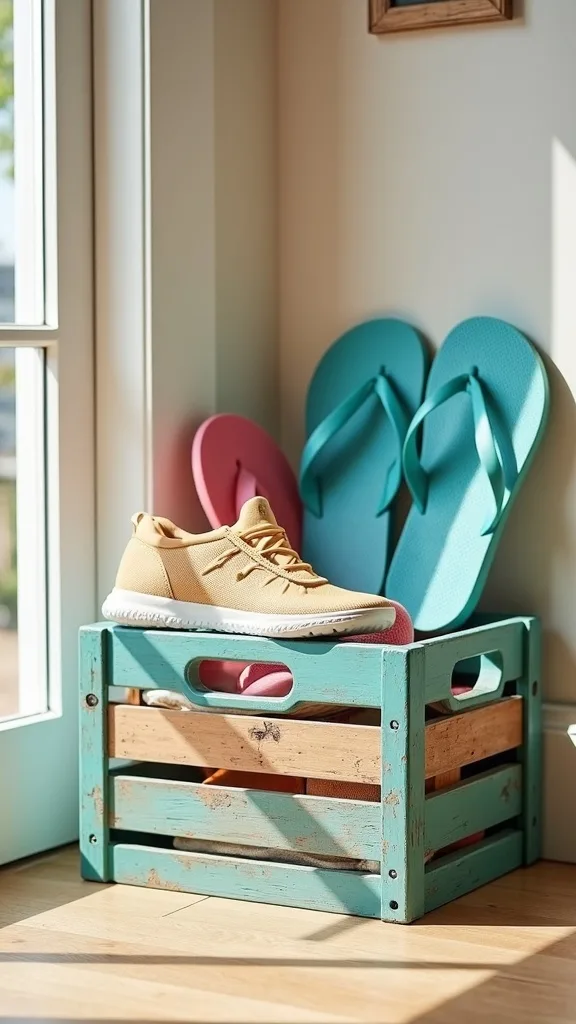
21. Flip-flop and water shoe crate with a vinegar wipe routine
I’ve found that wet shoes are the hidden stink source in beach gear organization, so I always recommend giving them a breathable home. In my opinion, a crate beats a closed bin for anything that’s worn in water.
I use a milk crate or ventilated plastic basket (about 13 x 13 inches) and keep it on a boot tray near the wet zone. I limit it to 4–6 pairs so it doesn’t become a shoe landfill, and I do a quick wipe of the tray once a week with a 50/50 vinegar-and-water mix.
From my experience, thrift stores sell crates for $3–$8, and discount stores have ventilated baskets for $6–$12. The trade-off is visual: open baskets show shoes, but they dry faster and smell better in most cases.
Pro Tip: I recommend adding one charcoal deodorizer bag ($8–$12) clipped to the crate—garages trap odors, and charcoal works quietly without adding a fake fragrance that mixes weirdly with sunscreen.
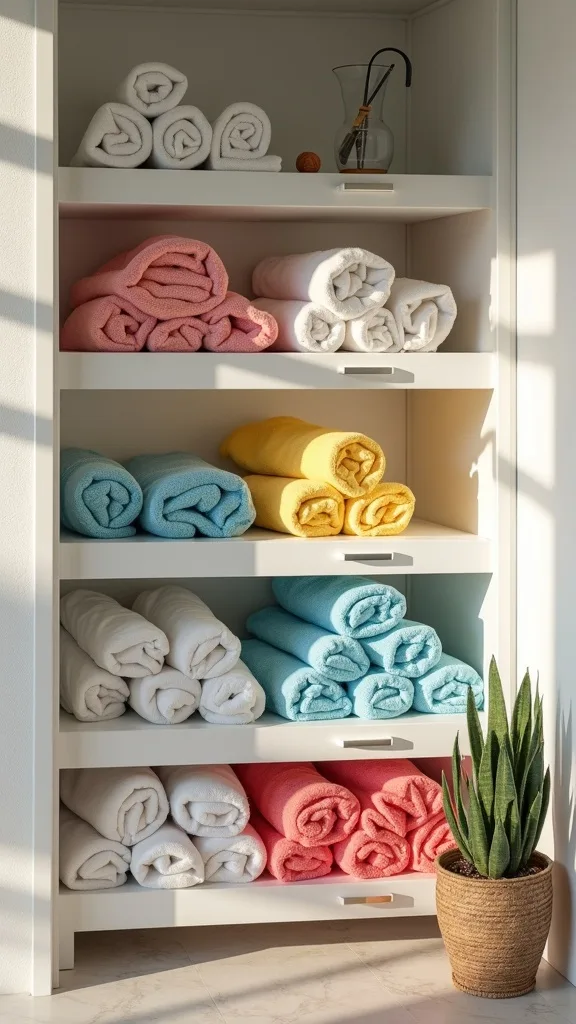
22. Color-coded towels by person (stops accidental swaps)
From my experience, towel mix-ups create extra laundry and drama, so I always start by assigning each person a color. When I design this look, I keep it simple—2–4 colors max.
I buy towels in sets of 2 (so each person has a backup) and I roll them into the towel shelf or place them into labeled wicker bins. I mark the inside tag with a permanent marker dot or a small sew-on ribbon so even similar shades don’t get confused after a few washes.
I find that discount stores often have decent bath sheets for $8–$12 each, and thrift stores sometimes have like-new towels for $3–$6 if you’re willing to bleach and wash on hot (about 60–90 minutes). The trade-off is softness: thrifted towels can be rougher, but they’re perfect for pool days.
Pro Tip: I recommend keeping one “guest” towel color in a separate bin—when friends come over, you won’t accidentally hand out someone’s designated towel and break the system.
23. Mini first-aid + blister kit built into the station
I always recommend adding a tiny first-aid setup to your summer sports storage because the real win is fewer trips back inside. From my experience, blisters and scraped knees happen when you’re already out the door.
I use a small lidded plastic box (about 8 x 6 inches) and stock it with 10 bandages, 4 blister pads, 6 alcohol wipes, and a travel-size antiseptic. I store it on the top shelf at 54–60 inches high so it’s accessible to adults but not a toy for toddlers.
I find that building your own kit costs $8–$15 if you buy store-brand supplies, versus $20–$35 for a pre-made kit that includes things you may not use. The trade-off is time: DIY takes about 10 minutes to assemble, but you have to remember to restock.
Pro Tip: I always start by taping a restock list inside the lid (bandages, blister pads, wipes)—when you open it, you’ll see what’s low immediately and you won’t discover you’re out of wipes at the worst time.
24. “One-in, one-out” bin rule for inflatables and water toys
I find that water toys multiply faster than almost anything else, so I always recommend a hard limit that matches your storage space. In my opinion, the bin decides how much you own—not the other way around.
I pick one dedicated inflatable bin (often a 50–55 gallon tote) and I commit to a one-in, one-out rule: if a new float comes home, an old one gets donated or tossed within 48 hours. I keep a small patch kit and a permanent marker in the bin so I can label repaired spots and track repeat offenders.
From my experience, this rule works best when you choose a bin size that’s realistic for your family—most households do well with one large tote plus the daily-use wicker slot. The trade-off is saying no to cute impulse buys, but it keeps the garage usable.
Pro Tip: When I tried this, I wrote the purchase month on each float with a marker near the valve—if something fails within 30 days, you’ll actually remember when and where you bought it for returns.
25. Weekend reset routine (10 minutes that keeps it working all summer)
I always start by admitting the truth: no storage system stays perfect without a tiny routine. From my experience, a 10-minute reset once a week beats a 2-hour meltdown cleanup later.
Every Sunday, I set a timer for 10 minutes and do three things: toss damp towels into the wash, empty the sand bin outside, and restock sunscreen and water toys. I also do a quick visual check from 6 feet away—if labels aren’t readable or bins are overflowing, I fix it immediately.
I find that this routine works best when you keep a small “reset kit” in the station: microfiber cloth, vinegar spray, and a spare label sheet. The trade-off is consistency—you have to actually do it—but it’s short enough that it doesn’t feel like a project.
Pro Tip: I recommend taking one quick phone photo after your reset and saving it as a reference—when the station drifts mid-summer, you can restore it in 5 minutes by matching the photo instead of re-deciding where everything goes.
Final Thoughts
I find that the most calming garages aren’t the ones with the fanciest cabinets—they’re the ones where you can walk in barefoot and not step on a rogue dive ring. If you take just one thing from my setup, I always recommend starting with the wicker bin station plus a wet/dry split, because that combo solves the daily pain (missing goggles, damp towels, sticky sunscreen) without requiring a full garage makeover.
From my experience, the thrift-first approach is what makes this sustainable: bins for $8–$15, a used wire rack for $20–$35, and labels you can actually wipe clean. The trade-off is you’ll spend a little time hunting, but you’ll save real money and you’ll end up with pieces that can be swapped as your kids grow and your sports change.
I always start by measuring one 48-inch stretch of wall or floor space today, then I pick 4 categories and label them before anything goes in. Do that one small step, and you’ll be shocked how quickly your summer gear garage starts feeling like a system instead of a summer-long scavenger hunt.
What I’d Do Differently
When I first tried this, I made one big “summer bin” and felt so proud—until week 2, when wet goggles, sandy toys, and half-used sunscreen turned it into a sticky, damp mess. The specific mistake I made was skipping the wet/dry split and assuming a lid would make it look tidy. In reality, the lid just trapped moisture, and I ended up rewashing 6 towels because they picked up that musty smell. The correct approach, in my experience, is to create a wet zone with airflow (mesh bag + boot tray) and a dry zone with lidded bins, even if you only have 4 feet of wall space to work with.
I also wish I’d known how much labels matter for real-life use. I used cute chalk tags at first, and they smeared within about 10 days once sunscreen hands got involved. Now I always start with wipeable labels that are at least 2 inches tall, and I keep a spare label sheet in the station for quick edits as gear changes. Pick one corner of your garage today, measure out 48 inches, and set up just the wet/dry split—you’ll feel the difference immediately.
Products I Recommend for This Project
Here are some of my favourite products to help you bring these ideas to life:
- IRIS USA 3-Tier Rolling Utility Cart — I find it makes practice-day gear truly grab-and-go without turning your floor into a pile.
- Amazon Basics Over-the-Door Hanging Shoe Organizer (Clear Pockets) — I use it to keep goggles, swim caps, and sunscreen visible so nothing disappears into bins.
- Command Large Utility Hooks (Damage-Free Hanging) — I recommend these for lighter items like mesh drying bags and hats when you don’t want to drill.
- Gorilla Heavy Duty Clear Packing Tape — I always use this over labels to keep them readable through humidity and sunscreen residue.
- SimpleHouseware Wall Mounted Pegboard Organizer Kit — I like this for turning one small wall section into flexible storage for paddles, pumps, and small baskets.