This post contains affiliate links. As an Amazon Associate, I earn from qualifying purchases at no extra cost to you.
Are you looking for pool area decor that feels like a private resort rather than a random collection of outdoor pieces? Do you want to host a summer pool party that looks editorial in photos but still functions effortlessly in real life?
I always start by treating the pool deck like an outdoor living room—complete with “zones,” a colour story, and a few intentional moments that make guests feel cared for. In this article, I’m sharing my go-to pool lounge ideas, from teak-and-stripe styling to lighting, towel storage, and the little details that keep the space polished all day.
In my opinion, this is perfect for anyone with a backyard pool, a shared community pool patio, or even a compact plunge pool who wants a more considered outdoor pool design without committing to a full renovation.
From my experience, the most impactful upgrades are the ones you can touch: crisp cabana stripes, a shaded lounge rhythm, and a towel station that feels like a hotel amenity. I’ll also walk you through how I choose poolside furniture spacing so it never feels cramped—even when the house is full.
I find that once you nail the “hero vignette” (loungers + umbrella + towels), everything else falls into place with ease. Below are 25 Pool Area Decor & Poolside Lounge Ideas that…
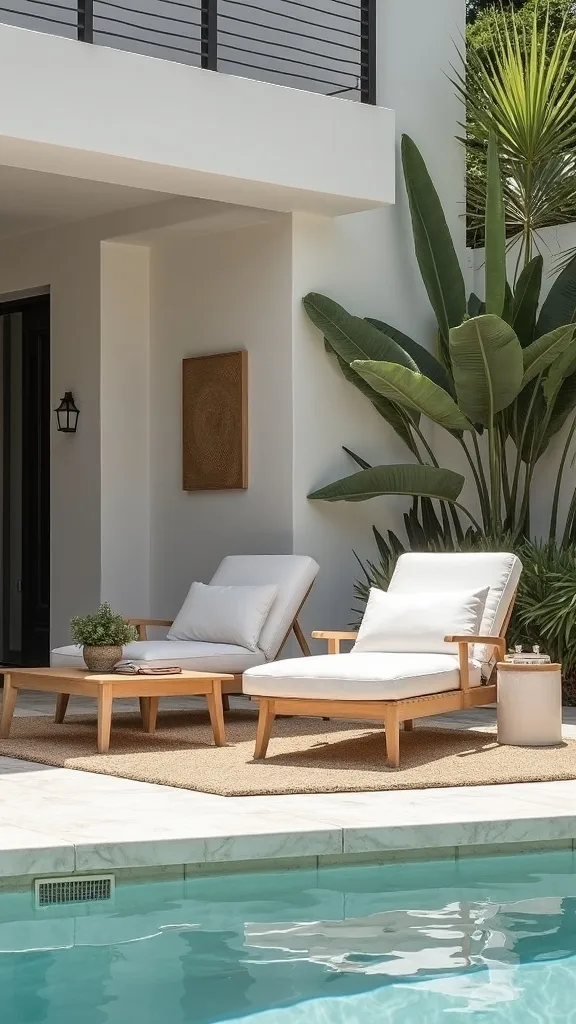
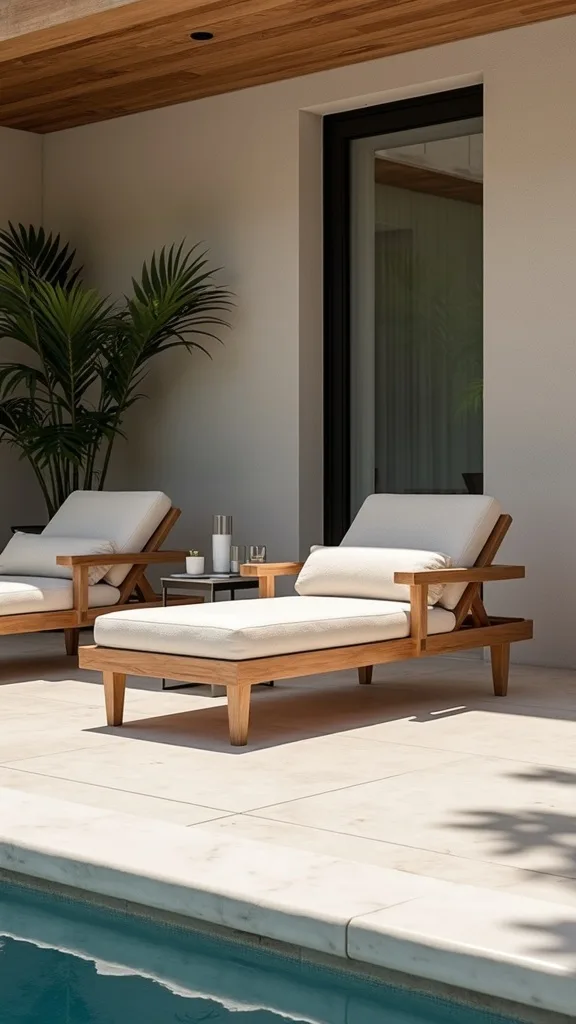
1. Style a Teak Lounge Trio with Cabana Stripes, an Umbrella, and a Fresh Towel Station
I always start by building one “hero” poolside scene, and I love doing it with teak sun loungers, crisp cabana stripe cushions, a tailored umbrella, and a towel station that feels quietly luxurious. From my experience, this works because it creates an instant focal point and a clear cue: this is where you linger, read, and reset between swims.
When I design this look, I place 2–3 teak loungers about 30–36 inches apart so people can move comfortably with wet feet and a drink. I typically set a 9-foot market umbrella (with a weighted 75–100 lb base) slightly behind the headrests, then add a slim towel rack or ladder 18–24 inches from the umbrella pole for easy reach.
I find that Sunbrella cabana stripe fabric in navy/cream or black/cream reads timeless, and I pair it with a 20″ x 20″ quick-dry lumbar pillow and a small teak side table (about 18″ wide) for sunscreen and sunglasses.
Pro Tip: I’ve found the towel station feels most “resort” when I roll 6–8 identical white Turkish towels and tuck a small lidded teak box beside them for hair ties and SPF packets—those tiny conveniences keep the vignette looking composed all day.
2. Create a Poolside “Living Room” Zone with an Outdoor Rug Anchor
From my experience, the fastest way to make pool area decor feel intentional is to anchor the lounge with a real rug moment—because it visually “frames” the seating like an indoor room. I find that this approach also helps guests understand where to set bags and where not to drip all over the dining area.
I always recommend a polypropylene outdoor rug in a 9′ x 12′ size for most medium patios, or a 6′ x 9′ if you’re working with a tighter deck. I typically keep the rug edge about 12–18 inches back from the pool coping so it doesn’t get constantly soaked, and I let the front legs of loungers or chairs sit on the rug by at least 6 inches for a tailored look.
In my opinion, a low-contrast stripe or subtle geometric in sand, ivory, and soft charcoal pairs beautifully with teak and doesn’t show sunscreen as quickly. I like adding a 24″ round concrete side table to “weight” the composition so wind doesn’t make everything feel temporary.
Pro Tip: When I tried placing a thin rug pad (about 1/8″ thick) under the rug on smooth concrete, the whole zone stopped creeping and wrinkling—just make sure it’s the open-weave outdoor kind so water can drain instead of puddling.
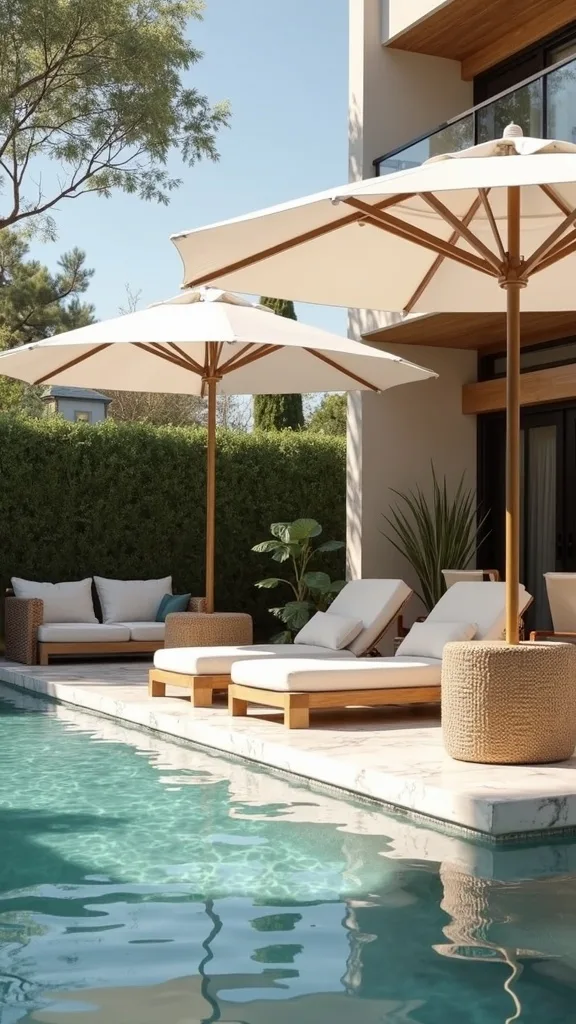
3. Use a Two-Umbrella Rhythm for All-Day Shade Without Blocking Views
I find that shade is the difference between a pool deck you admire and a pool deck you actually use at 2 p.m., and umbrellas can look elevated when they’re planned in pairs. From my experience, two smaller umbrellas feel more refined than one oversized canopy because they create a repeating silhouette without dominating the outdoor pool design.
I always start by mapping sun exposure for 15 minutes in the morning and again around 3 p.m., then I place two 9-foot market umbrellas about 8–10 feet apart. I typically choose bases in the 75–100 lb range so they don’t wobble when someone bumps past with a float, and I angle the canopies so the shade falls across the torso area of each lounger.
In my opinion, a canvas-look acrylic (like Sunbrella) in natural or fog reads sophisticated and hides water spots better than bright white. I like pairing each umbrella with a 16″–18″ round teak drink table so guests don’t balance glasses on the pool coping.
Pro Tip: I’ve found that placing the umbrella pole slightly behind the lounger head (about 10–14 inches) keeps the shade on your face without the pole interrupting your sightline to the water—small placement, huge comfort payoff.
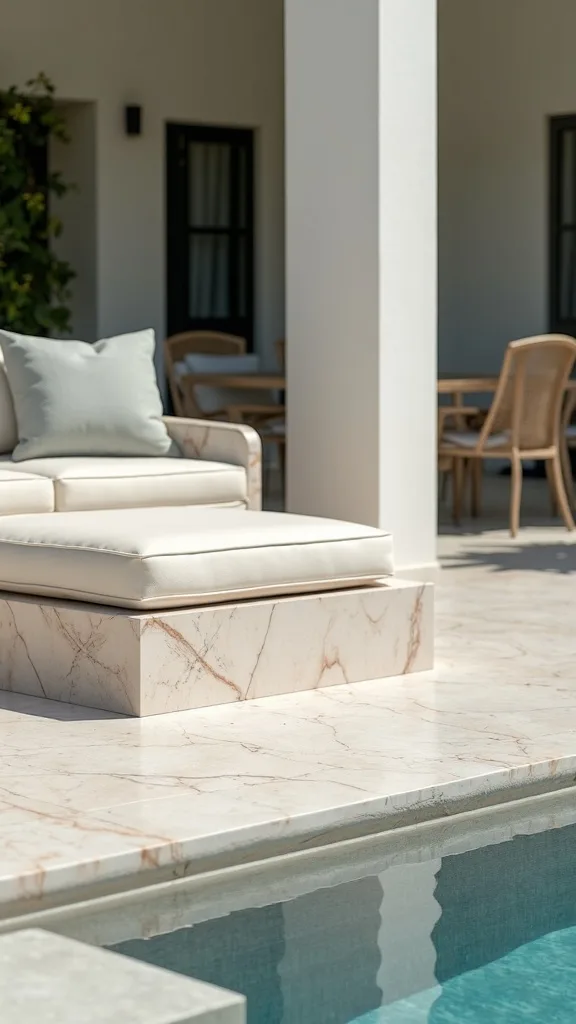
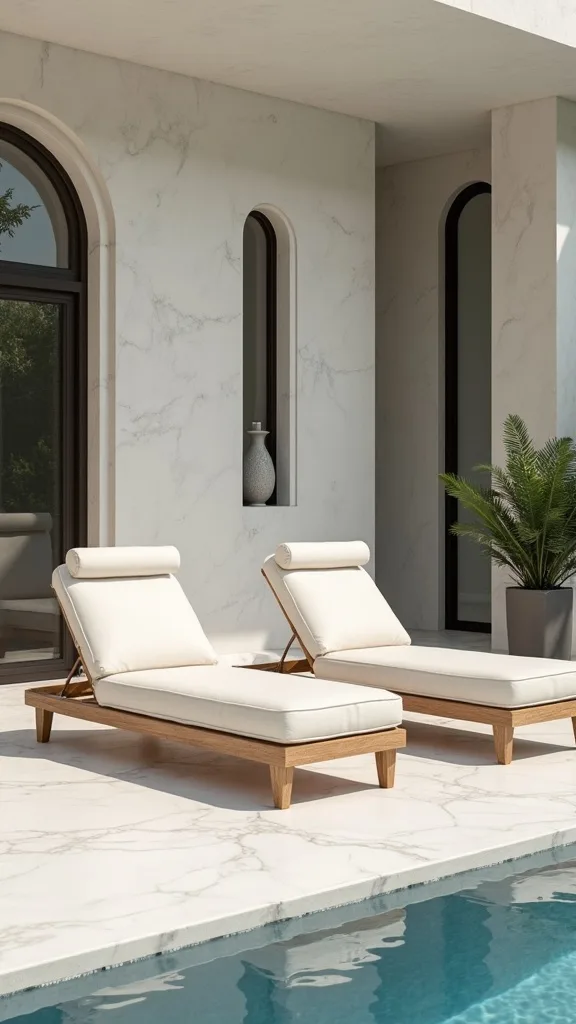
4. Upgrade Poolside Furniture Comfort with Quick-Dry Cushion Layering
When I design poolside furniture, I always prioritize comfort that dries fast, because damp cushions are the quickest way a space feels fussy. From my experience, a layered cushion strategy looks plush but stays practical for peak summer pool days.
I recommend starting with chaise cushions that are 2″–3″ thick in quick-dry foam, then adding one 12″ x 20″ lumbar and one 20″ x 20″ back pillow per lounger. I typically keep the pillow inserts as polyester (not down) so they bounce back after splashes, and I aim for covers with hidden zippers so they look tailored.
I find that solution-dyed acrylic fabric (like Sunbrella or Outdura) holds colour for the majority of sunny patios, but it costs more upfront than basic polyester—worth it if you don’t want to replace covers every 1–2 seasons. For cabana stripes, I like a 1″–2″ stripe width because it reads classic rather than carnival.
Pro Tip: I’ve found that adding a thin “sacrificial” towel layer—one folded Turkish towel at about 18″ x 36″ under your shoulders—keeps sunscreen from transferring to the cushion seams, which is where stains love to set.
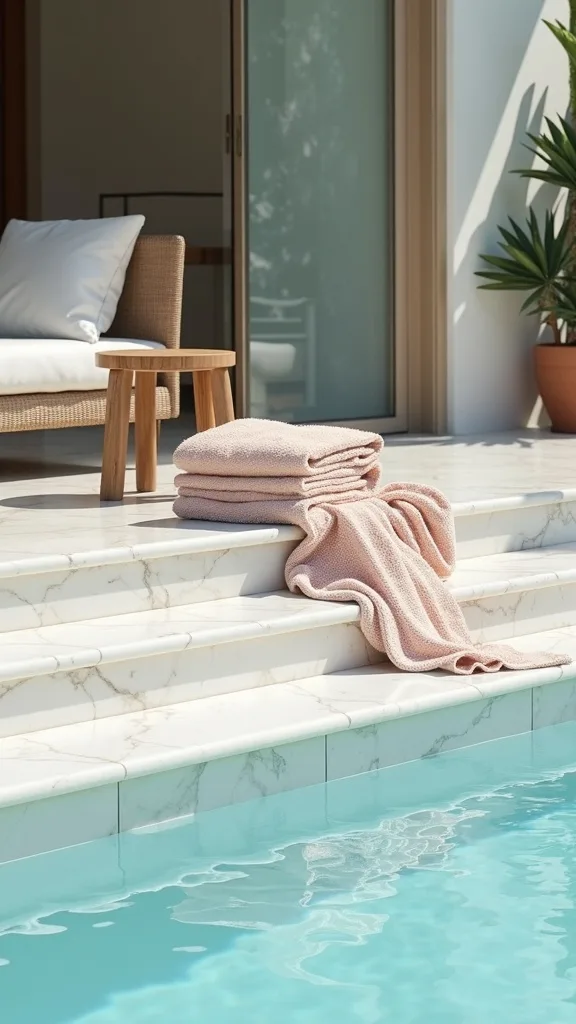
5. Build a Boutique Towel Station with a Ladder, Basket, and Hooks
I always recommend a dedicated towel station because it makes pool area decor feel curated and it keeps the indoor hallway from becoming a damp mess. From my experience, this is one of those upgrades that looks like a splurge but functions like a system.
I typically use a 60″–72″ teak or acacia towel ladder, then I add 3–4 stainless-steel S-hooks spaced about 6 inches apart for suits and coverups. I place a lidded resin basket (around 18″ x 18″) at the base for rolled towels, and I keep the whole station 3–5 feet from the pool edge so it’s convenient but not constantly splashed.
I find that white towels look crisp, but they demand more laundering—so I often mix in 2–3 sand-coloured towels for everyday use and reserve the bright whites for guests. I also like adding a small outdoor-safe tray with a 10 oz pump bottle of sunscreen and a 4 oz after-sun gel.
Pro Tip: When I tried labeling one hook “WET SUITS” with a small engraved tag, guests actually used it—and keeping wet items on one hook prevents that sour smell that can develop within 6–8 hours in summer humidity.

6. Add a Narrow Console Table for SPF, Speakers, and Sunglasses
I find that the pool deck feels most sophisticated when the “stuff” has a home, and a slim console does that without eating up walking space. From my experience, this is the secret to making outdoor pool design look styled rather than cluttered.
I always start with a weather-resistant console around 48″–60″ wide and only 12″–16″ deep, then I place it against a wall or fence line at least 4 feet from the pool for splash safety. I style it with a 14″–16″ tray for sunscreen, a small lidded box for keys, and a rechargeable speaker—then I keep cords off the deck entirely.
In my opinion, powder-coated aluminum in matte black looks sharp with teak, while a concrete-look resin console reads more coastal. I like adding 2 battery lanterns about 10″ tall so the console doubles as evening ambiance without hardwiring.
Pro Tip: I’ve found that putting a thin silicone bar mat (about 12″ x 18″) inside the tray stops slippery sunscreen bottles from tipping over—especially when the table gets a little wet and guests set things down quickly.
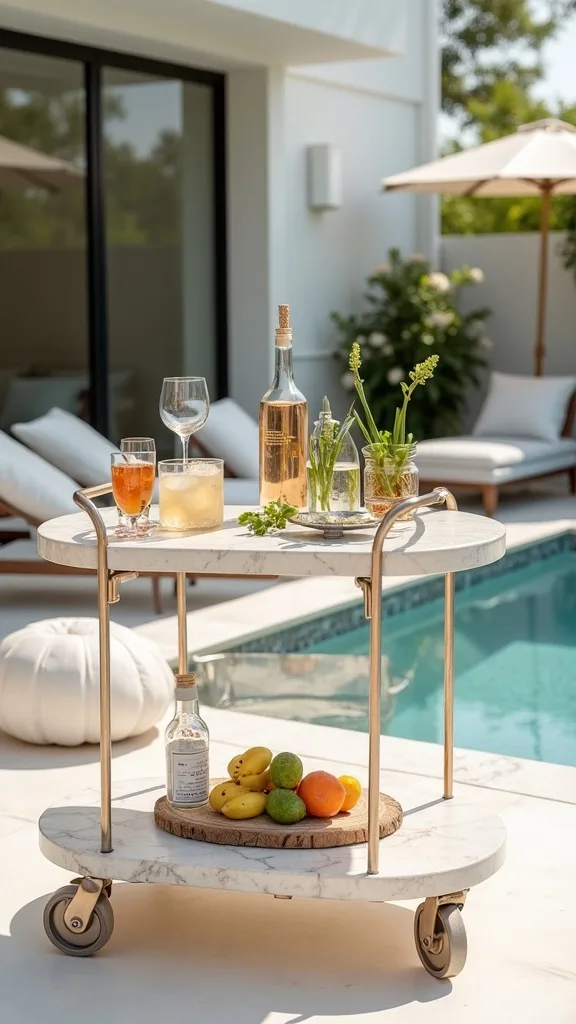
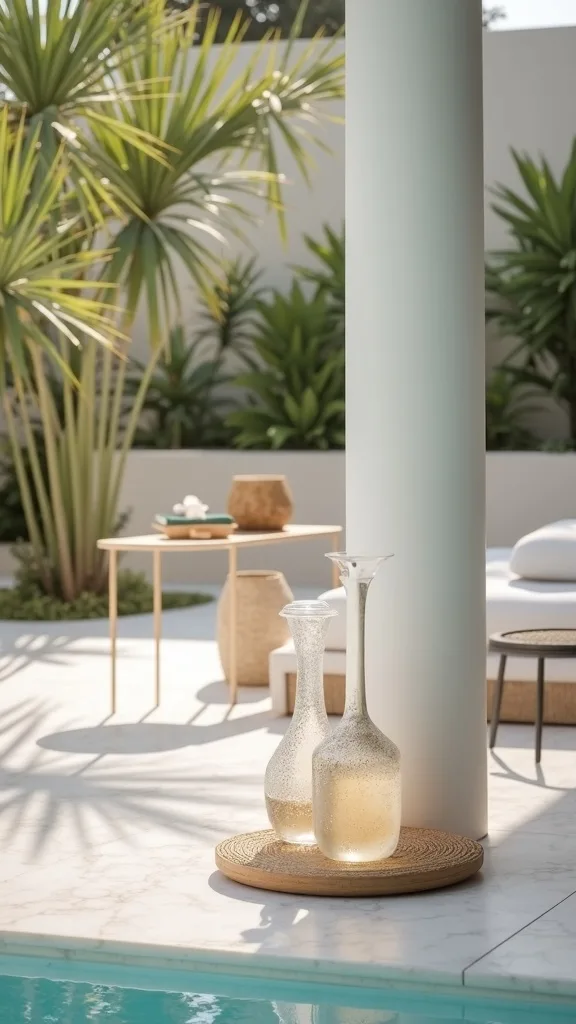
7. Create a Drink-Ready Moment with a Rolling Outdoor Bar Cart
When I host a summer pool party, I always prefer a rolling bar cart over constant trips inside, because it keeps the energy outside and the floors dry. From my experience, a cart also becomes decor when it’s styled with restraint.
I recommend a rust-resistant aluminum or powder-coated steel cart about 30″–36″ wide with two shelves, then I park it 6–8 feet from the pool edge so splashes don’t dilute drinks. I typically stock it with a 2-quart ice bucket, 8–12 acrylic tumblers, and a lidded caddy for citrus and napkins, then I roll it back under shade when the sun peaks.
I find that clear acrylic drinkware looks like glass in photos but survives real life, and I like adding a small cutting board (about 8″ x 12″) plus a serrated citrus knife so you’re not improvising. The trade-off is storage—carts need a garage corner in the off-season.
Pro Tip: I’ve found that freezing grape “ice cubes” the night before (about 2 cups for a group) keeps rosé chilled without watering it down, and guests always remember that tiny touch.
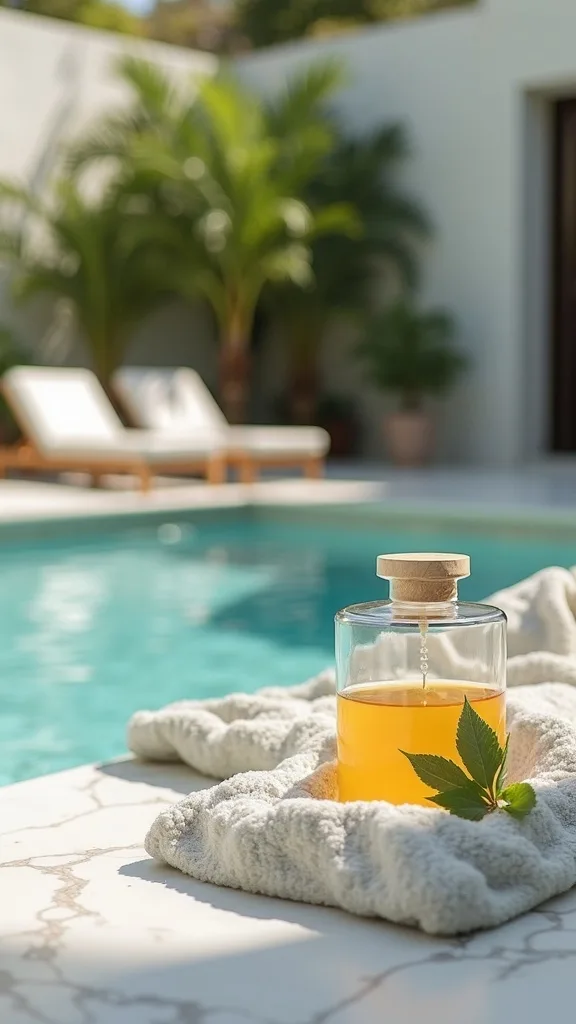
8. Use Planters to Soften Hardscape and Add Privacy at Eye Level
I always reach for tall planters when a pool deck feels exposed, because greenery adds softness and a sense of seclusion without building anything permanent. From my experience, this is one of the most flexible pool lounge ideas for renters or anyone avoiding construction.
I typically use two planters that are 18″–24″ wide and at least 20″–30″ tall, then I place them 4–6 feet apart behind loungers to create a “back wall.” I recommend drought-tolerant options like clumping bamboo (in appropriate containers), bird of paradise, or dwarf olive—just plan on watering 2–3 times per week in peak heat, depending on your zone.
In my opinion, matte black fiberstone planters look editorial with teak, while light concrete tones lean coastal. I like adding a 2″ layer of pea gravel on top of the soil to reduce splash-back and keep the surface looking clean.
Pro Tip: I’ve found that using hidden plant caddies with locking wheels under heavy planters makes seasonal rearranging realistic—otherwise a 150+ lb planter becomes “permanent” the moment you fill it.

Cost & Materials Estimate
I typically see a refined pool area decor refresh land between $300 and $3,500 depending on how much poolside furniture you’re upgrading versus simply styling.
| Item | Estimated Cost | Where to Buy |
|---|---|---|
| 9′ market umbrella + 75–100 lb base | $180–$450 | Home Depot |
| Outdoor rug (polypropylene) 6′ x 9′ or 9′ x 12′ | $90–$280 | Wayfair |
| Turkish cotton towels (set of 6–8) | $60–$160 | Amazon |
| Teak towel ladder (60″–72″) | $110–$260 | Wayfair |
| Rechargeable outdoor table lamps (set of 2) | $50–$140 | Amazon |
Total estimated cost: $490–$1,290 I always recommend splurging on shade (umbrella + base) and saving on accessories like trays and baskets, which you can upgrade over time.
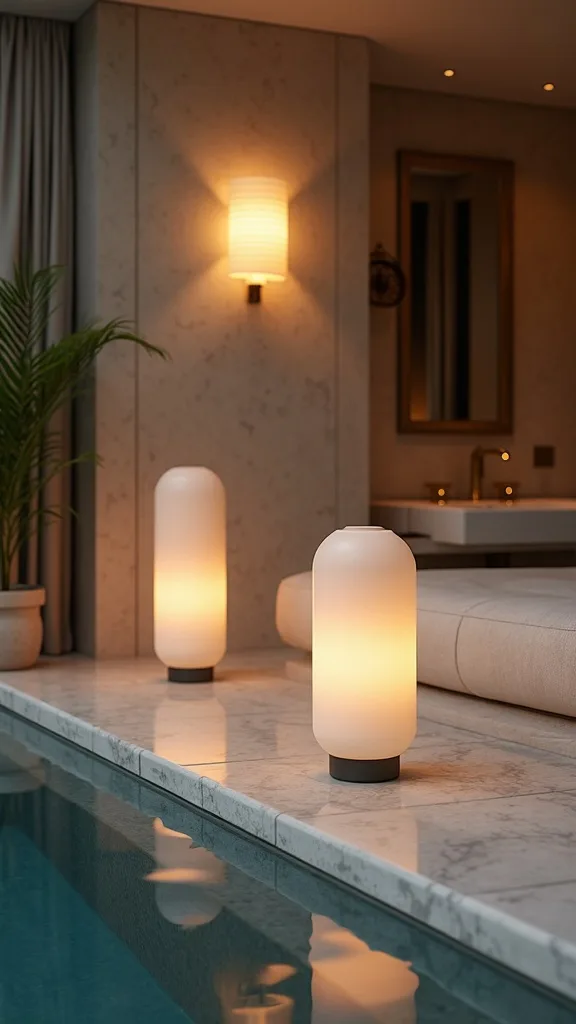
9. Frame the Pool with Low, Warm Lighting for Evening Swim Ambiance
I find that lighting is where pool area decor becomes truly cinematic, especially after sunset when the water reflects everything. From my experience, low, warm lighting feels more expensive than bright overhead fixtures because it mimics boutique hotel courtyards.
I always start with 4–6 solar or battery path lights placed 6–8 feet apart along the main walkway, then I add two lanterns near the towel station for a welcoming glow. I recommend warm white light (2700K–3000K — the cosy, yellowish tone you see in most homes) so skin tones look flattering and the deck doesn’t feel like a parking lot.
In my opinion, matte black lanterns with glass panes pair beautifully with teak and cabana stripes. I also like rechargeable LED candles in 3″ x 6″ and 3″ x 8″ sizes because they look real but won’t blow out in a breeze.
Pro Tip: I’ve found that placing lanterns slightly behind seating (about 12–18 inches) reduces glare in your eyes while still lighting faces—so conversations feel intimate instead of squinty.
10. Define Circulation: Keep a Clear “Dry Walkway” Around the Lounge
I always start by planning how people will move, because the most beautiful outdoor pool design falls apart if guests have to squeeze past loungers with dripping towels. From my experience, a clear circulation path makes even a small deck feel calm and high-end.
I recommend leaving at least 36–42 inches of walkway behind loungers and 48 inches if it’s a main route to the house. I typically position side tables so they don’t jut into the path—an 18″ round table is usually safer than a 24″ square when space is tight.
I find that painter’s tape is the easiest planning tool: I’ll tape out a 36″ “lane” on the deck for 10 minutes and walk it like a guest carrying a tray. The trade-off is that you may fit one fewer lounger, but the space will feel twice as usable.
Pro Tip: When I tried angling the outermost lounger just 10–15 degrees toward the pool, it opened the walkway visually and physically—one of those tiny layout shifts that makes the whole scene feel intentional.
11. Layer Cabana Stripes with Solid Neutrals to Avoid Visual Noise
In my opinion, cabana stripes are iconic for pool area decor, but they need a supporting cast of solids so the look stays refined. From my experience, the quickest way to make stripes feel chaotic is to mix them with too many competing patterns.
I always start with one stripe as the “hero”—for example, navy/cream cushions—then I limit the rest to 2 solids: warm white towels and a sand or taupe rug. I typically keep accent pillows to 1 per lounger (20″ x 20″) and choose a textured solid like slub ivory rather than another print.
I find that black hardware (umbrella ribs, lantern frames) acts like eyeliner for the whole space, giving it definition. If you love colour, I recommend adding it through a single controlled element—like a 10″–12″ citronella candle in deep green glass—so it reads intentional.
Pro Tip: I’ve found that matching stripe scale across items matters more than matching exact colours—if your cushion stripe is 2″ wide, choose towels with a 1″–2″ border stripe so the rhythm feels curated rather than accidental.
12. Choose Teak Care That Looks Natural, Not Orange or Over-Glossy
I find that teak is the quiet luxury hero of poolside furniture, but only when the finish looks believable and touchable. From my experience, overly shiny sealers can read plasticky in full sun, and they show water spotting more than you’d expect.
I always start by deciding whether I want a honey tone or a silvery patina, because that choice changes maintenance. Typically, if I’m preserving colour, I’ll clean and apply a teak protector every 6–12 months; if I’m embracing patina, I’ll do a gentle clean 2–3 times per season and let it age.
I recommend using a soft bristle brush, mild teak cleaner, and a clean microfiber cloth—plus nitrile gloves—so you’re not sanding away the surface unnecessarily. The trade-off: protectors cost more than basic oil, but they’re often less prone to uneven dark patches.
Pro Tip: When I tried oiling teak near a chlorinated pool, the oil grabbed airborne residue and looked blotchy within 2 weeks—so I now avoid teak oil in splash zones and use a water-based protector instead for a cleaner, more consistent finish.
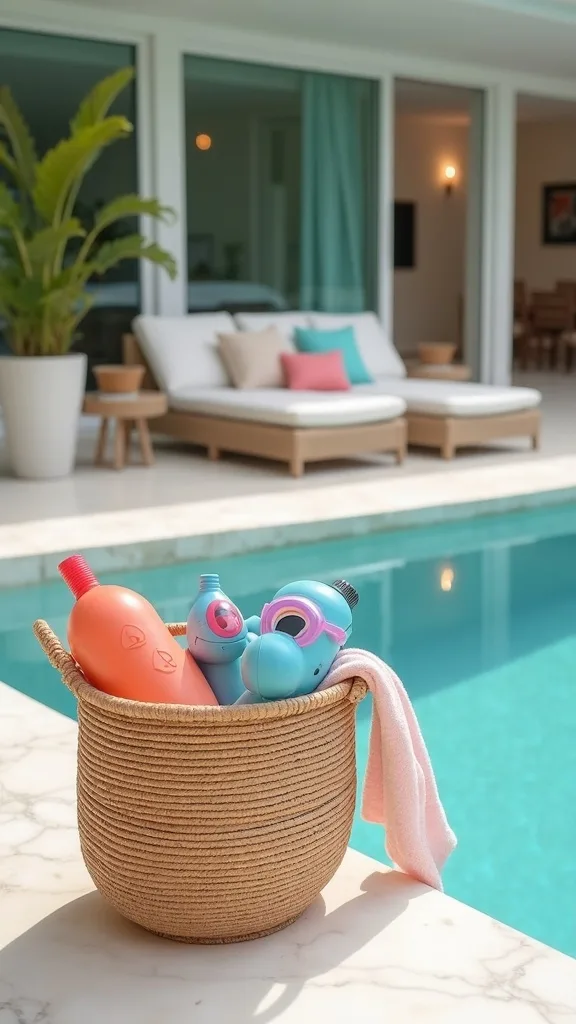
13. Add a “Wet Zone” Basket for Goggles, Toys, and Float Pumps
I always recommend giving wet accessories a designated home, because it keeps pool area decor from feeling like a scattered sports store. From my experience, one basket solves 80% of the visual clutter in a family pool setup.
I typically choose a resin or polyethylene wicker basket around 20″ x 16″ with handles, then I drill (or buy) one with drainage so water doesn’t pool at the bottom. I place it 3–4 feet from the pool steps, and I empty it every 2–3 days during peak use to prevent that damp, musty smell.
I find that separating “wet” and “dry” storage matters: I’ll pair the wet basket with a small lidded deck box for dry items like extra SPF, bandages, and phone pouches. The trade-off is you’ll see the basket—so I keep it in the same colour family as the loungers (natural, black, or soft grey).
Pro Tip: I’ve found that tossing a washable mesh laundry bag inside the basket makes cleanup instant—at the end of the day I lift the bag, hose it off for 30 seconds, and everything dries faster and smells fresher.
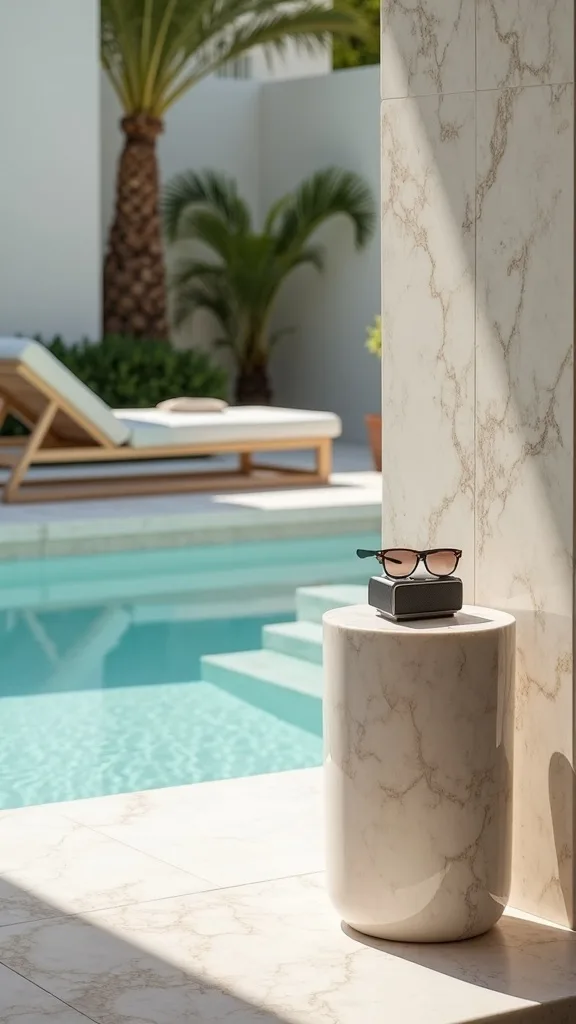
14. Use Acrylic Side Tables to Keep the Deck Feeling Light and Airy
When I design a pool lounge, I find that heavy furniture can make the deck feel crowded, even if the measurements technically fit. From my experience, clear acrylic side tables create a “floating” effect that keeps attention on the water and textiles.
I recommend choosing a UV-stable acrylic C-table about 18″–20″ tall with a 12″–14″ top, then placing one between every two loungers. I typically keep at least 24 inches between the table and the pool edge so it doesn’t become a toe-stubber during quick laps to the steps.
In my opinion, acrylic is especially chic with teak because it contrasts warm wood with clean transparency. The trade-off is scratches—so I use felt pads under anything ceramic and I wipe with a microfiber cloth rather than paper towels.
Pro Tip: I’ve found that a tiny dot of museum gel under a candle or small vase keeps it from sliding on acrylic when the table gets wet—an invisible fix that saves you from constant clinking and tipping.
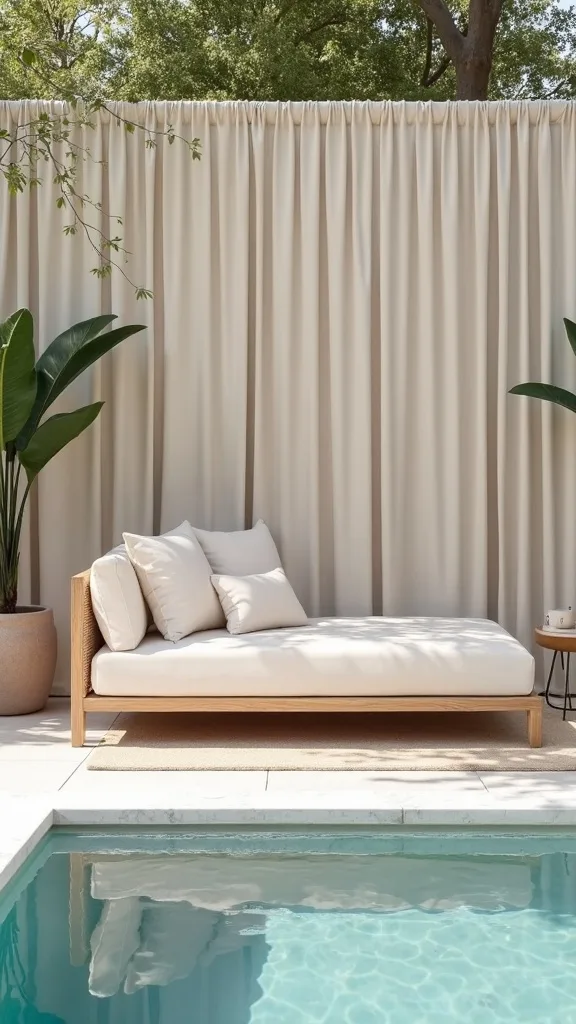
15. Introduce a Cabana-Inspired Backdrop with Outdoor Drapery Panels
I always love the romance of a cabana moment, and I find that outdoor drapery instantly elevates pool area decor without a full structure build. From my experience, fabric movement softens hard lines and makes the space feel like a destination.
I recommend installing a stainless-steel curtain rod or tension cable about 84″–96″ high on a pergola, fence return, or two posts. I typically use 2 panels per side (so 4 total) in outdoor-rated polyester, each around 54″ wide, and I keep the hem about 1″ off the deck so it doesn’t wick water.
In my opinion, warm white or oatmeal panels look timeless with navy cabana stripes and teak. The trade-off is wind—so I add discreet tiebacks and choose grommet tops for smoother sliding.
Pro Tip: When I tried weighting the bottom hem with a slim chain (about 1/4″), the panels stopped ballooning into the walkway—just stitch it into the hem channel so it stays invisible and elegant.
16. Make the Pool Steps a Feature with Matching Towels and a Small Stool
I find that the pool steps area often becomes accidental clutter, so I like turning it into a deliberate styling point. From my experience, a tiny “arrival” vignette makes the whole outdoor pool design feel considered.
I always start by placing a small teak or aluminum stool about 18″–20″ tall and 14″–16″ wide near the steps, at least 3 feet from the waterline. I stack 3–5 rolled towels on it for quick grabs, then I add a shallow tray (about 10″ x 14″) for goggles and a single 8 oz water-resistant sunscreen bottle.
In my opinion, keeping towels in one colour (white or sand) here looks calmer than mixing patterns. The trade-off is you’ll refill more often, but it’s worth it for the “hotel” feeling when guests arrive.
Pro Tip: I’ve found that placing a small teak slatted mat (about 24″ x 36″) right where people exit the pool reduces slippery footprints and keeps towels cleaner—especially when kids run straight to the lounge chairs.
17. Set Up a Sun-Safe Hydration Station That Doesn’t Look Like a Cooler Pile
When I host, I always prioritize hydration, and I find it can still look editorial if you edit the containers. From my experience, a dedicated hydration station prevents guests from dripping through the house every 20 minutes.
I recommend a 2–3 gallon beverage dispenser on a 30″–36″ high outdoor side table, positioned 6–10 feet from the pool edge. I typically provide 12–16 acrylic cups, a small lidded bin for lemon slices, and a separate 5 lb bag of ice in a covered cooler tucked under the table.
In my opinion, clear dispensers with a stainless spigot look clean and let the citrus and herbs become decor. The trade-off is refills—so I prep a second pitcher in the fridge and swap it within 2 minutes when the first runs low.
Pro Tip: I’ve found that adding a pinch of salt (about 1/8 teaspoon per gallon) makes infused water taste brighter and encourages people to drink more—especially after swimming—without turning it into a “sports drink” vibe.
18. Use Matching Lounger Headrests for a Tailored, Resort-Ready Line
I find that mismatched head pillows can make expensive poolside furniture look oddly unfinished. From my experience, matching headrests create that crisp “resort row” effect you see at high-end hotels.
I always recommend buying or sewing headrests that are roughly 12″ x 18″ to 14″ x 20″ with adjustable straps, then placing them at the same height on each lounger (I aim for the bottom edge about 18″–22″ from the top). I typically keep the strap buckles on the underside so they don’t catch hair or scratch teak.
In my opinion, this is a smart place to invest in solution-dyed acrylic because headrests get the most sunscreen contact. The trade-off is cost—expect to pay $25–$60 each—but they save your main cushions from constant washing.
Pro Tip: I’ve found that adding a removable terry cloth slipcover over the headrest (secured with hidden snaps) lets you toss just that piece in the wash every 3–4 days, keeping the whole lounge line looking freshly staged.
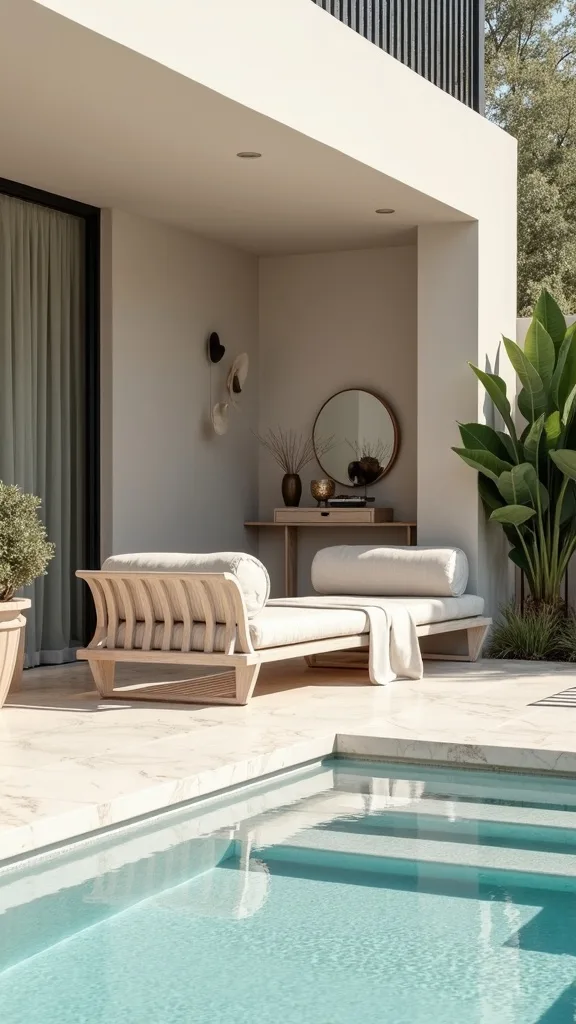
19. Curate a Poolside “Reading Nook” with One Chair and a Small Umbrella
I always like to include one slightly separate seat, because not everyone wants to lie flat, and it adds a layered feel to pool lounge ideas. From my experience, a reading nook also prevents the main lounger row from becoming the only destination.
I recommend a single outdoor club chair with a 24″–26″ seat depth, paired with a 7.5-foot umbrella and a 16″–18″ drink table. I typically set the chair 6–8 feet from the pool edge and angle it 30 degrees toward the water so it feels connected but not in the splash zone.
I find that a textured neutral cushion (oatmeal or stone) looks elevated next to cabana stripes, and I add a lightweight throw in a quick-dry weave for late evenings. The trade-off is you’ll store the throw when storms roll in, but it’s worth it for comfort.
Pro Tip: When I tried placing a small waterproof lidded jar on the side table for a phone, lip balm, and earplugs, the nook became the most-used seat—tiny “care” details make people settle in longer.

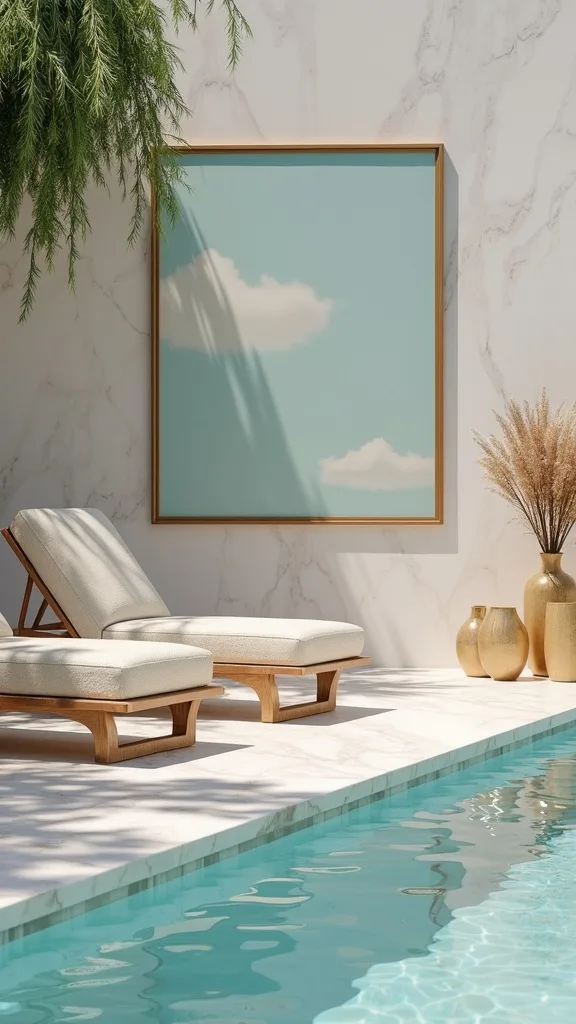
20. Choose Pool-Friendly Art: One Oversized Piece Under Cover
I find that outdoor wall space near a pool often gets ignored, but one piece of pool-friendly art can make the whole area feel designed. From my experience, the key is choosing placement and materials that can handle humidity and sun.
I always start by locating a covered wall—under an eave or pergola—then I hang one oversized piece around 24″ x 36″ or 30″ x 40″. I recommend outdoor-rated metal art or a framed print behind acrylic (not glass), and I keep it at least 8–10 feet from the pool edge to reduce chlorine mist exposure.
In my opinion, abstract line art in black and sand tones complements teak and stripes without feeling themed. The trade-off is price: outdoor-rated pieces can run $120–$400, but they last longer than indoor frames that warp within a season.
Pro Tip: I’ve found that using stainless-steel picture wire and exterior-rated wall anchors prevents rust streaks down stucco—those streaks can show up within 4–6 weeks in humid pool environments.
21. Add a Discreet Foot-Rinse Setup with a Teak Mat and Watering Can
From my experience, the most “luxury hotel” detail is also the most practical: a way to rinse feet before stepping onto rugs and cushions. I find that a discreet foot-rinse moment keeps pool area decor looking pristine longer, especially with light textiles.
I recommend placing a teak slatted mat about 24″ x 36″ near the entry door, then keeping a 2–3 gallon galvanized watering can filled with fresh water beside it. I typically add a small hook for a dedicated rinse towel (one 20″ x 30″ hand towel) and refresh the watering can once per day during heavy use.
In my opinion, this is a low-cost alternative to installing an outdoor shower, though it does require a little daily habit. I like using a watering can with a removable sprinkler head so the stream is gentle and controlled.
Pro Tip: When I tried adding a few drops of mild castile soap to the rinse towel (not the water), it lifted sunscreen residue from ankles without making the deck slippery—keeping the rinse effective and safe.

22. Set the Night Mood with Rechargeable Table Lamps Instead of Hardwired Lights
I always recommend portable lighting for poolside lounging because it gives you flexibility without calling an electrician. From my experience, rechargeable table lamps make the space feel like an outdoor restaurant—soft, intimate, and polished.
I typically use 2–4 cordless outdoor-rated lamps about 10″–14″ tall, placing them on consoles and side tables 6–10 feet apart. I recommend warm white light (2700K–3000K — the cosy, yellowish tone you see in most homes) and a dimmer setting so you can shift from “party” to “late swim” in seconds.
I find that matte black or brushed brass finishes look sophisticated with teak, and I like lamps that charge via USB-C within 4–6 hours. The trade-off is you’ll remember to recharge, but that’s easier than dealing with extension cords near water.
Pro Tip: I’ve found that setting lamps slightly lower than eye level (on a 18″–22″ side table rather than a 30″ console) reduces bug attraction around faces—light placement changes the entire evening experience.
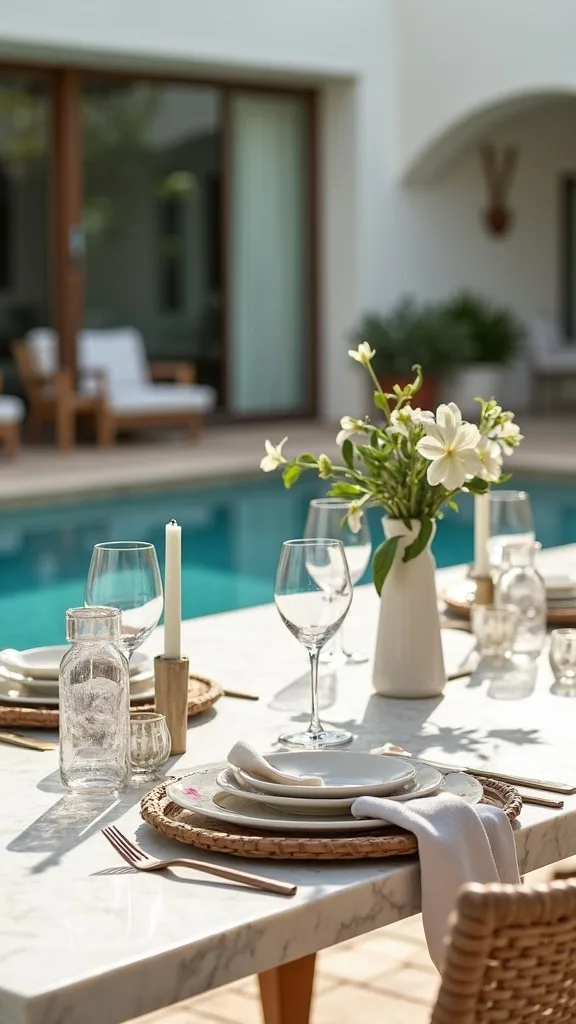
23. Plan a Photo-Ready Summer Pool Party Tablescape That’s Still Wind-Proof
When I plan a summer pool party, I always style the table for beauty and physics—because wind, wet hands, and sunscreen are real. From my experience, a wind-proof tablescape is what keeps the party looking composed after the first 30 minutes.
I recommend a low centerpiece under 10″ tall, like a 6″ ceramic bowl filled with citrus and 2–3 bud vases, so sightlines stay open. I typically use 8–12 acrylic plates, linen-look napkins clipped with small stainless napkin rings, and a table runner that’s 14″–16″ wide so it doesn’t flap as much.
In my opinion, the colour story should echo your pool area decor—navy stripes, white napkins, and a touch of green from limes or herbs. The trade-off is you’ll avoid tall florals, but you gain ease and fewer spills.
Pro Tip: I’ve found that a tiny dot of removable mounting putty under each bud vase keeps it stable on slick tables—especially on aluminum tops that get a light film of condensation in humid pool weather.
24. Use Scent Strategically: Citronella That Looks Like Decor, Not Camping Gear
I find that scent is part of outdoor pool design, but I always want it to feel refined rather than like a backyard bonfire. From my experience, the right citronella moment can be both functional and beautifully styled.
I recommend using 2–3 citronella candles in substantial vessels—around 10″–12″ wide—for the main lounge zone, placed 6–8 feet apart. I typically light them 15–20 minutes before guests arrive so the scent settles, then I keep them on stable surfaces like a concrete side table or a low teak stool.
In my opinion, deep green, smoke, or matte white vessels look elevated with cabana stripes and teak. The trade-off is open flame—so I skip candles on windy nights and use rechargeable fan-based repellents instead.
Pro Tip: I’ve found that placing citronella slightly upwind of seating (even just 3–4 feet) works better than clustering candles together—airflow carries the barrier across the lounge instead of letting it dissipate behind you.
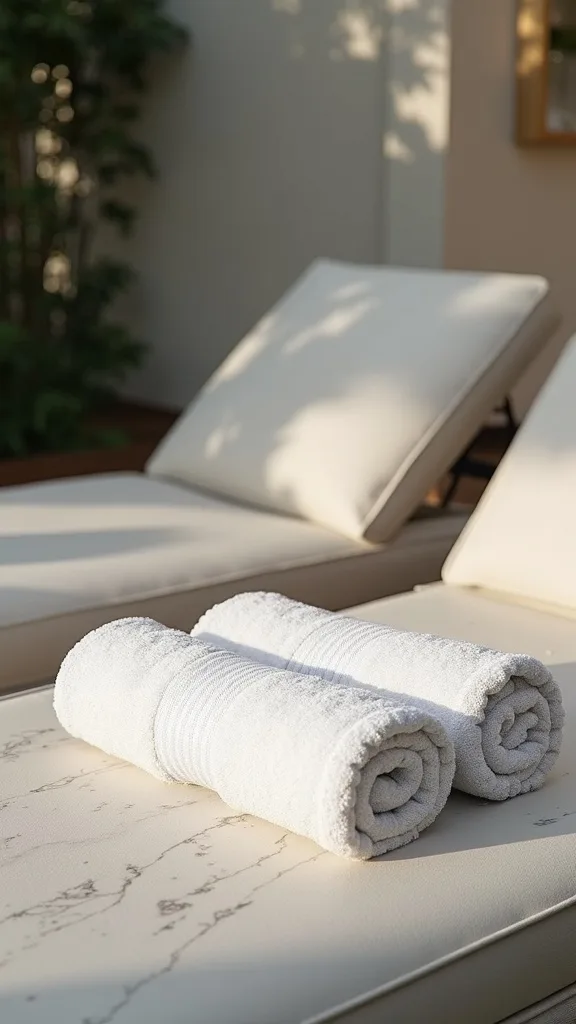
25. Finish with a Signature “Resort Fold” Towel Detail on Every Lounger
I always end my pool area decor styling with one repeatable signature detail, and my favourite is a simple resort towel fold on each lounger. From my experience, this tiny ritual makes the whole deck feel prepared—like someone thought about your comfort before you arrived.
I recommend using one oversized towel per chaise (about 35″ x 70″), folded into thirds lengthwise and then into a neat rectangle that sits under the headrest. I typically add a small 3″–4″ sprig of rosemary or a single dried palm spear tucked into the fold, and I refresh the setup in under 10 minutes for 4 loungers before guests come out.
In my opinion, bright white towels look the most “hotel,” but they require bleach-safe laundering—so I keep 8–12 towels in rotation to avoid panic washing. I also like a small woven tag or ribbon in navy to echo the cabana stripe without adding another pattern.
Pro Tip: I’ve found that folding towels while they’re still slightly warm from the dryer (about 5 minutes after the cycle ends) creates sharper edges that hold their shape outside—so the loungers look freshly styled even after an hour in the sun.
Final Thoughts
I find that the most sophisticated pool lounge ideas aren’t about adding more—they’re about editing until every item earns its place. When I design a peak-summer pool setup, I always chase that effortless rhythm: teak under hand, stripes under sun, shade exactly where you want it, and towels waiting like a quiet welcome.
From my experience, you’ll feel the biggest shift when you commit to a single “hero” moment (loungers, umbrella, towel station) and then support it with practical beauty—clear walkways, quick-dry textiles, and lighting that flatters. There are trade-offs, of course: investing in better fabrics and heavier umbrella bases costs more upfront, but it saves you constant replacing and re-styling later.
I always recommend choosing just 3 ideas to start this week, then adding one upgrade every 7–10 days as you learn how you actually use the space. In my opinion, that’s how pool area decor becomes personal—and how your outdoor pool design starts to feel like a destination you can’t wait to return to.
What I’d Do Differently
When I first tried this, I made one very specific mistake: I bought my poolside furniture first and assumed the rest would “style itself.” In practice, I ended up with gorgeous loungers that felt oddly exposed at midday, plus towels and sunscreen migrating to every surface because I hadn’t planned a towel station or a dry landing spot. The space looked fine for 10 minutes, then it turned chaotic the moment two people swam and someone opened a bag of chips. The correct approach, in my experience, is to start with the functional trio—shade, towel storage, and a clear walkway—then choose the loungers and textiles to support that plan. Once I did that, my pool area decor stayed composed even during heavy use.
I also wish I’d known how much small sizing decisions matter: an 18″ side table is often more usable than a 24″ one near a pool, and a 75–100 lb umbrella base feels like overkill until the first gusty afternoon. If you take anything from my learning curve, I recommend picking your hero vignette, taping out your walkway, and then committing to a tight 2–3 colour palette—start today with just the towel station and one umbrella so momentum is on your side.
Products I Recommend for This Project
Here are some of my favourite products to help you bring these ideas to life:
- Sunbrella Cabana Stripe Outdoor Fabric (Navy/White) — I find it holds colour in strong sun and instantly delivers that resort-stripe look for cushions.
- ABCCANOPY 9ft Market Umbrella (with tilt) — I recommend it because the tilt helps you chase shade hour by hour without moving heavy furniture.
- Sunnydaze 80 lb Umbrella Base (Fillable) — I’ve found a heavier base reduces wobble on pool decks where people brush past constantly.
- Utopia Towels Turkish Beach Towel Set — I like these for a crisp towel station because they fold neatly and dry faster than plush bath towels.
- TomCare Outdoor Lanterns (Metal & Glass) — I use lanterns like these to add warm evening glow without hardwiring, and they photograph beautifully near teak.