This post contains affiliate links. As an Amazon Associate, I earn from qualifying purchases at no extra cost to you.
Summer hits, the sun turns sharp, and suddenly the patio feels like a skillet. Shade stops being a luxury and becomes the difference between “quick drink” and “stay awhile.” A pergola fixes that with clean lines and real presence.
This guide breaks the project into choices you can actually make: footprint, posts, roof style, and how to turn it into an outdoor shade structure that looks intentional. You’ll get step-by-step build direction, plus finishing moves that make the space feel like a room.
This is perfect for anyone who wants a backyard pergola that holds up, reads classic, and still feels personal once the plants and lighting move in.
Inside you’ll find cedar-first layouts, a few smart shortcuts for a DIY pergola, and plant-forward options like a pergola with plants that blooms into its own ceiling.
Below are 25 Pergola Build Ideas & Outdoor Shade Structure that define the bones, add textiles and light, and finish with greenery that climbs.
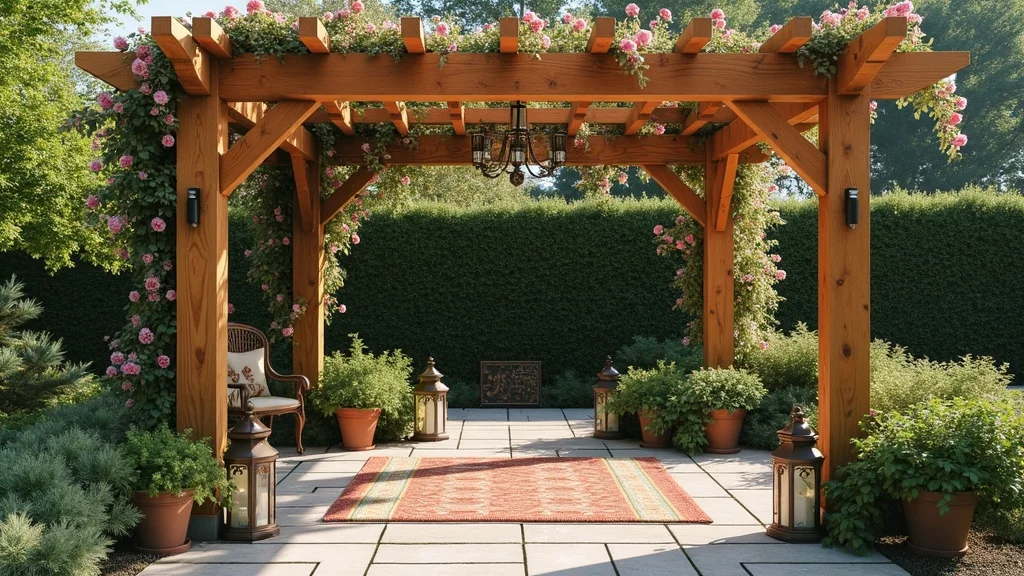
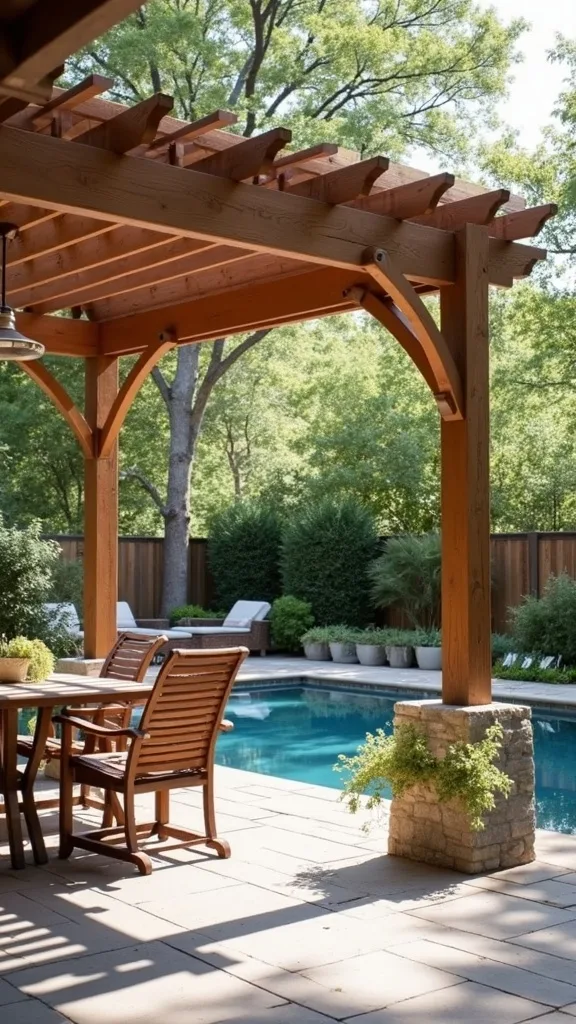
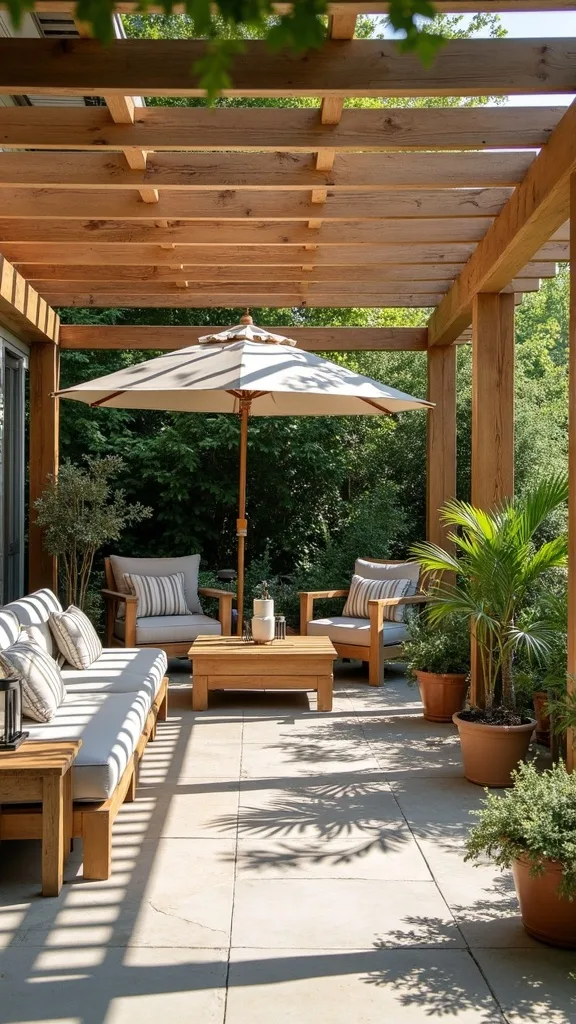
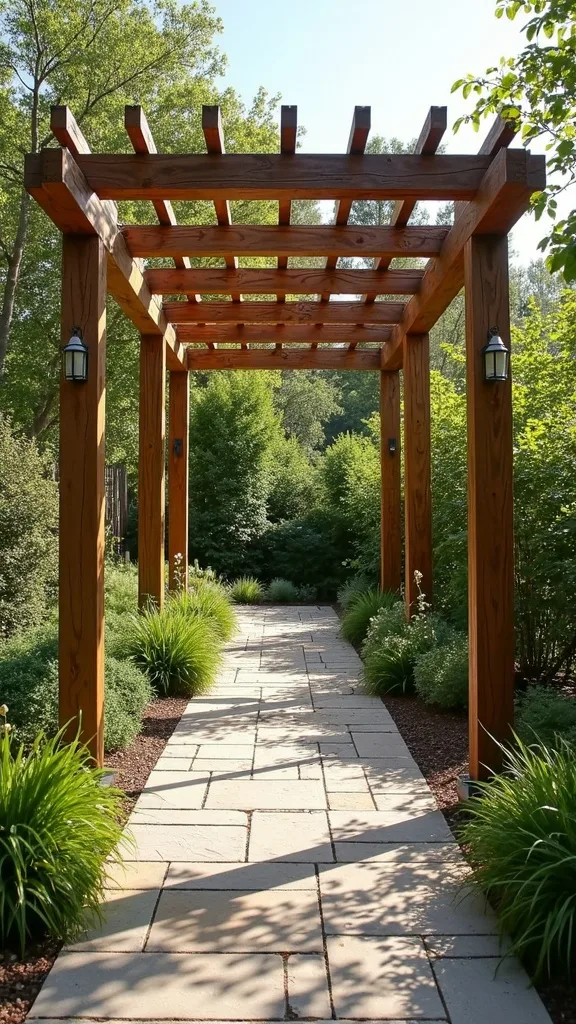
1. Cedar frame + wisteria, climbing roses, lanterns, and an outdoor rug
This is the classic outdoor room formula: a cedar rectangle overhead, flowers climbing up the posts, and light pooling onto a rug at night. It works because it reads finished from every angle—structure first, then softness, then glow.
Set four 6×6 cedar posts in concrete footings, then bolt on 2×10 beams and 2×6 rafters for a clean grid. Keep the interior at least 10′ x 12′ so a dining table or sofa group fits without pinching the walkway. Add stainless-steel eye hooks under the beams for lanterns, then run a simple chain so the lanterns hang straight.
Choose a low-pile outdoor rug in a faded stripe or warm neutral to echo cedar’s honey tone. Plant wisteria on one corner and climbing roses on the opposite corner so the canopy fills in evenly.
Pro tip: train vines onto discreet wire guides for a ceiling that looks deliberate, not wild—your pergola will feel like a room with a living roof.

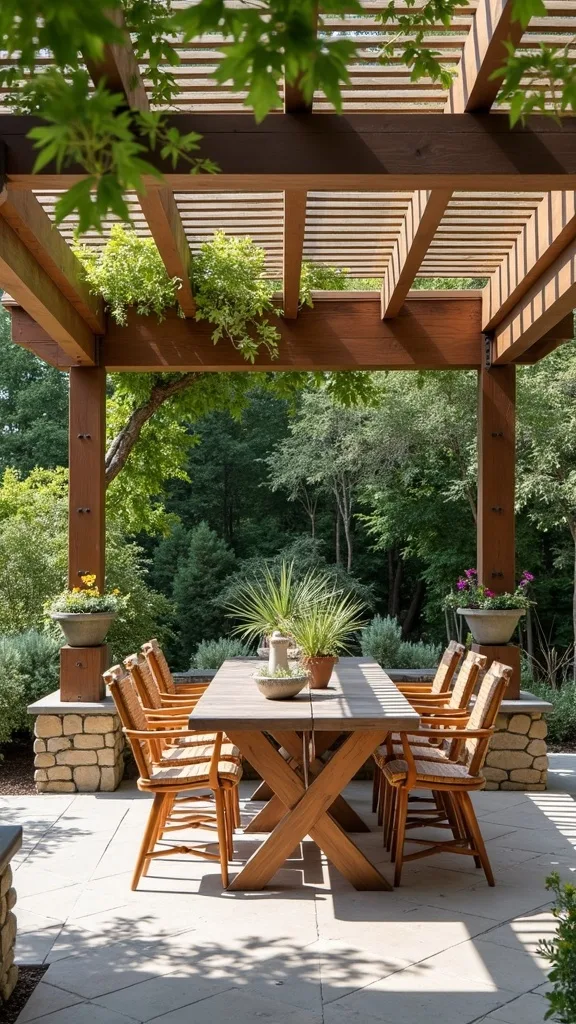
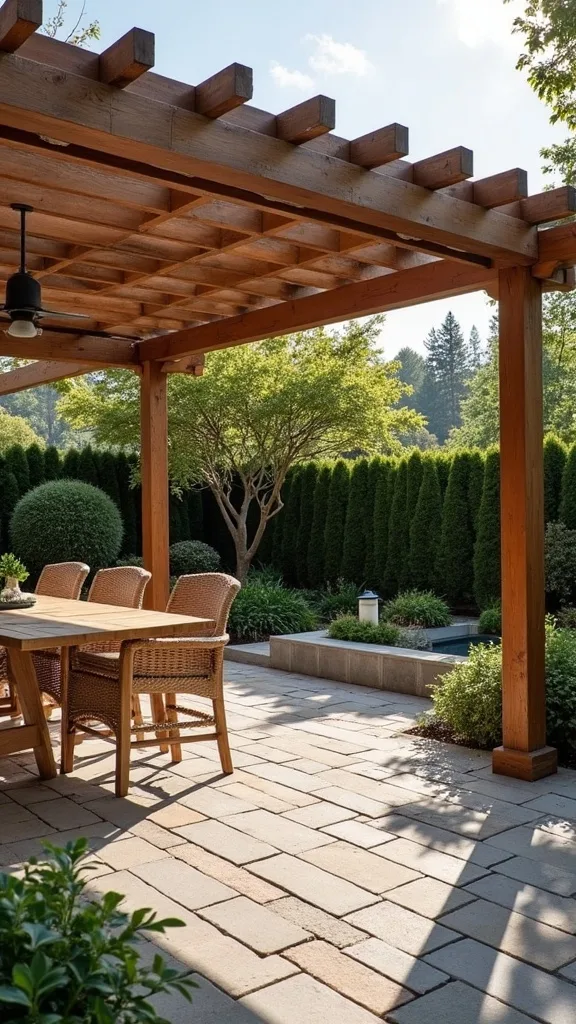
2. What size pergola fits a dining table without feeling cramped?
A dining pergola succeeds or fails on spacing. It works when chairs slide back without hitting posts and when serving space stays open at the ends.
Start by measuring your table, then add 36″ of clearance on all sides for chairs and traffic. For a standard 72″ x 36″ table, a 12′ x 14′ pergola footprint feels right. Mark it with string in the yard first, then stand inside the outline and mimic pulling out a chair—this quick test prevents expensive “almost fits” mistakes.
Use cedar posts and beams for longevity, then keep the rafters aligned to the table orientation so the lines feel calm. Lay a flatweave outdoor rug under the table to soften chair scrape and define the zone.
Pro tip: center a long, narrow lantern row over the table instead of one big fixture—multiple points of light make dinner feel intentional and balanced.
3. How do you anchor a pergola so it doesn’t wobble?
A pergola should feel immovable when you lean on a post. Stability comes from the ground connection and from triangulation up top.
Set posts in concrete footings below the frost line in your area, then use heavy-duty post bases so wood stays off wet soil. Add diagonal braces at each corner—two per corner if you’re in a windy zone—then through-bolt beams to posts instead of relying on screws alone. After the frame stands, push on each post; if it moves, add bracing before you add anything pretty.
Choose hot-dip galvanized or stainless hardware so it won’t streak your cedar. Keep the base clean with a gravel border or pavers so splashback doesn’t stain.
Pro tip: don’t skip corner braces for a “sleeker look”—a sleek pergola that sways will never feel like a real outdoor room.
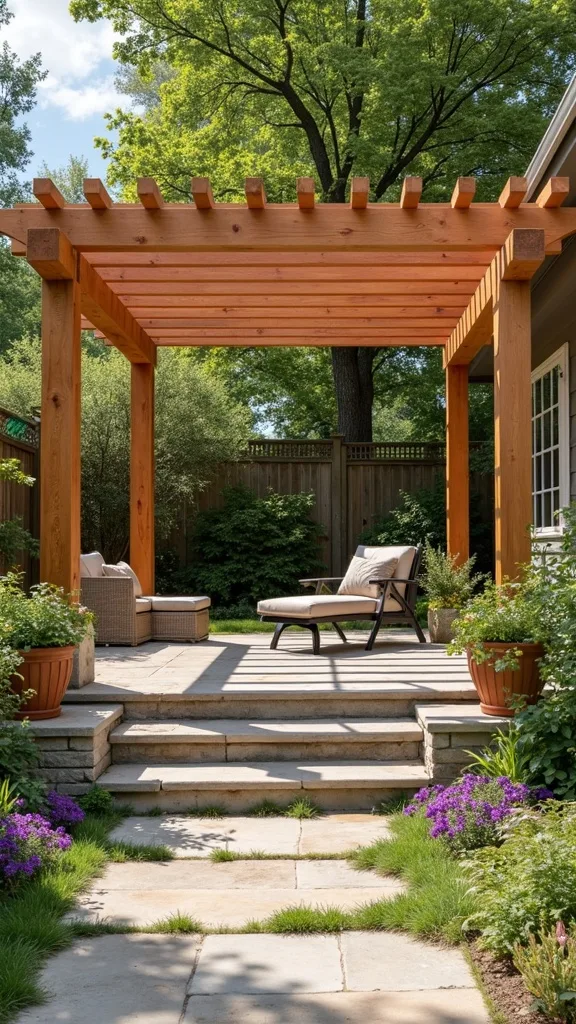
4. Can a DIY pergola be freestanding instead of attached to the house?
A freestanding build gives you freedom. It works because you can place shade exactly where you use it, not where the house happens to be.
Pick the spot by watching the sun for one day: morning coffee, midday glare, late-afternoon heat. Stake a rectangle, then orient the rafters perpendicular to the strongest sun angle to cast better shadow lines. Build the frame as a self-supporting box: four posts, double beams, evenly spaced rafters, and corner bracing.
Finish the floor zone with compacted gravel and large pavers, then add an outdoor rug on top for comfort underfoot. Keep furniture low and wide so the structure feels grounded.
Pro tip: leave a 3′ planting strip on one side for a pergola with plants—greenery makes a freestanding structure feel anchored to the yard, not dropped onto it.
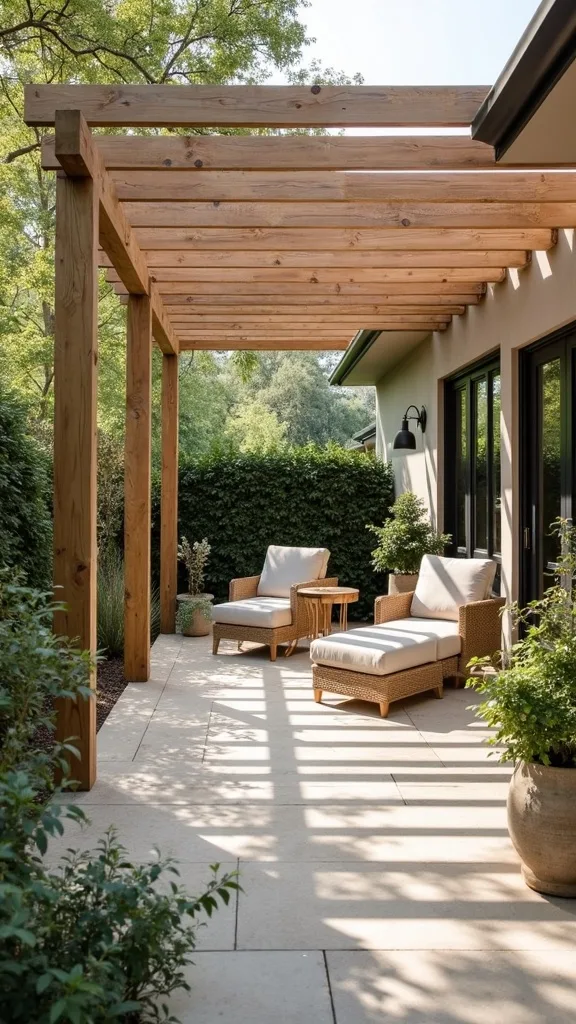
5. What’s the simplest roof style for real shade?
The simplest shade upgrade is a tighter rafter pattern. It works because you keep the pergola’s airy look while cutting the harsh overhead sun.
Space 2×2 or 2×3 purlins across the rafters at 6″–8″ apart (closer spacing equals more shade). Pre-stain the wood before you install it so you’re not brushing stain overhead later. If you want a stronger block, add a second layer of purlins perpendicular to the first to create a subtle lattice.
Stick with cedar for a consistent tone, then add weatherproof cushions in canvas neutrals to keep the look timeless. Use black powder-coated hardware for a crisp contrast.
Pro tip: avoid clear polycarbonate panels if you hate greenhouse heat—more “roof” can mean more trapped warmth, which defeats the point of summer shade.
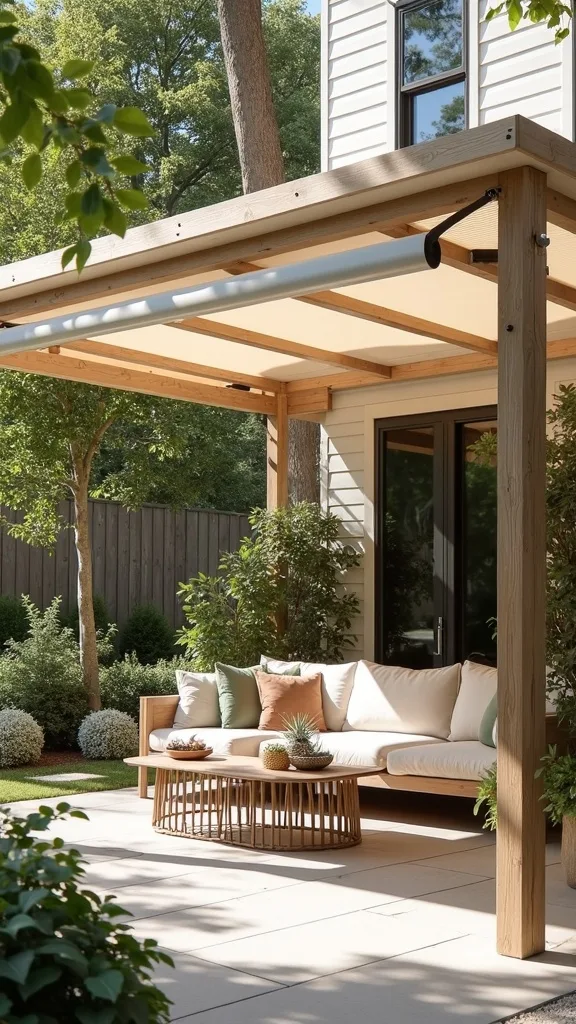
6. How do you add a retractable canopy without it looking flimsy?
A canopy works when it looks tailored, not temporary. It succeeds because you control sun and open sky with one pull.
Install stainless-steel cable runs under the rafters, then clip on grommeted outdoor fabric panels that slide like curtains. Keep panels wide enough to overlap by a few inches so the canopy reads as one continuous surface. Add a simple cleat on a post to tie the canopy off neatly when it’s open.
Choose solution-dyed acrylic fabric in sand, flax, or soft stripe—these colors age well against cedar. Ground it with a textured rug and a solid dining set so the canopy feels like part of a complete room.
Pro tip: avoid thin patio “shade sails” inside a pergola—they flap, sag, and make a sturdy frame feel like a campsite.
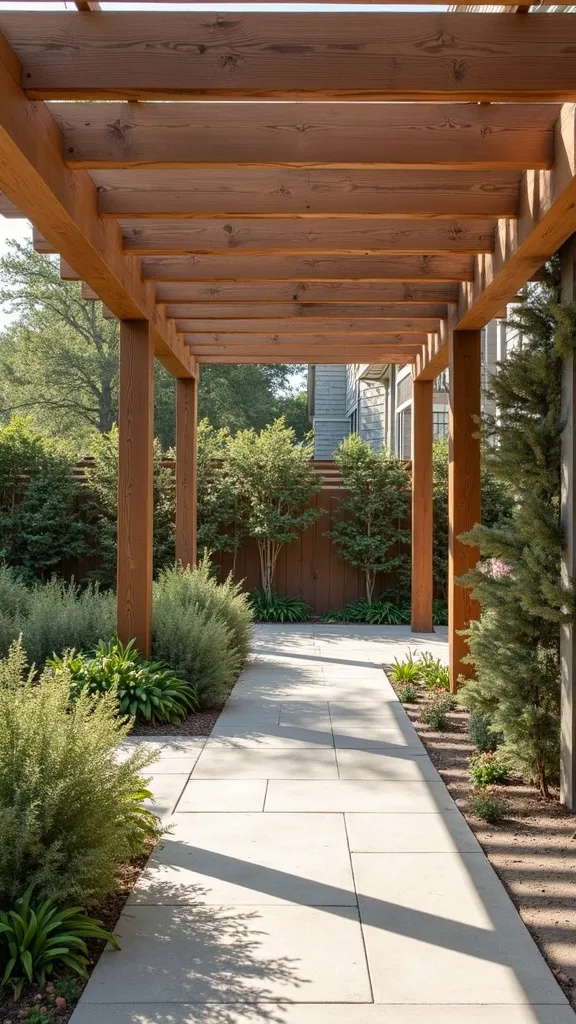
7. What’s the best pergola layout for a narrow side yard?
A side-yard pergola should act like a hallway with a ceiling. It works when the structure guides movement and creates a destination at the end.
Run a long rectangle—think 8′ x 16’—parallel to the fence line. Keep posts tight to the edges so the walking path stays clear down the middle. Add a bench at one end and a small bistro set at the other, then connect them with a runner-style outdoor rug.
Use cedar with a slightly deeper stain so it stands up visually to fencing. Add wall-mounted lanterns on the fence or house side to keep the path lit.
Pro tip: don’t place posts in the middle of the walkway “to save lumber”—you’ll create a daily obstacle that makes the space feel cramped instead of curated.
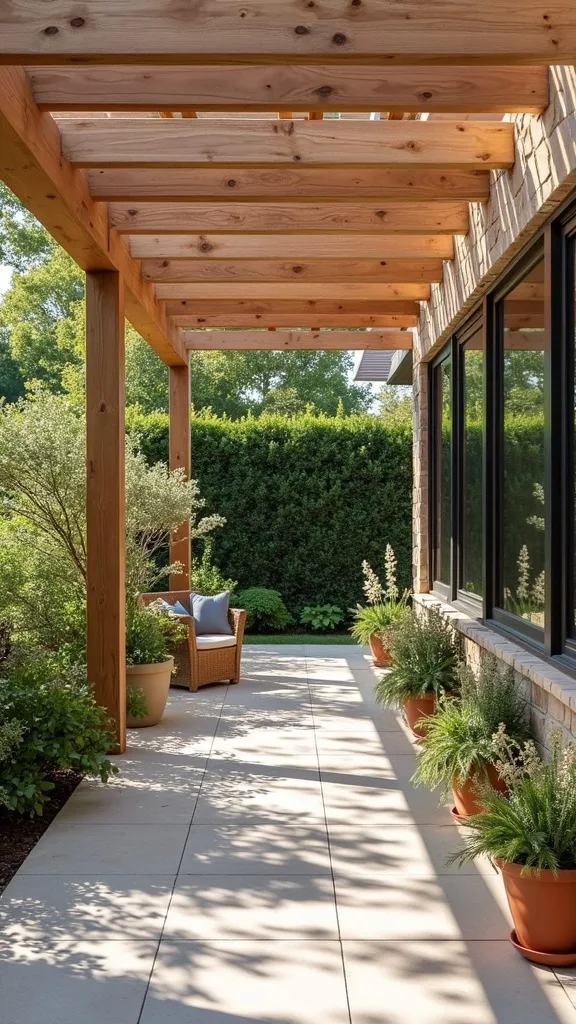
8. How do you build a pergola over a patio without drilling into the slab?
You can build over an existing patio and still keep it solid. It works when you anchor to heavy bases and add bracing that resists racking.
Use surface-mount post bases rated for the load, then attach them with concrete anchors sized for your slab thickness. Position bases near slab edges where concrete is often strongest, and keep posts perfectly plumb before tightening hardware. Add diagonal bracing at the top corners to compensate for not setting posts in footings.
Choose thicker beams—double 2x10s reads substantial and reduces bounce. Add planter boxes at the post bases to hide hardware and bring in greenery.
Pro tip: avoid placing anchors into cracked or spalling concrete—repair first, or you’ll chase loose bolts all summer.
Cost & Materials Estimate
Most cedar pergola builds land in the $1,200–$3,500 range for a typical 10′ x 12′ to 12′ x 14′ footprint, depending on footings, shade layer, and lighting.
| Item | Estimated Cost | Where to Buy |
|---|---|---|
| Cedar posts (4) — 6x6x10′ | $260–$520 | Home Depot |
| Cedar beams/rafters bundle (2×10 beams + 2×6 rafters) | $420–$1,050 | Lowe’s |
| Concrete + forms for footings (8–12 bags + tube forms) | $90–$220 | Home Depot |
| Post bases, structural screws/bolts, corner brackets | $160–$380 | Amazon |
| Outdoor shade layer (canopy kit or purlin lumber) | $120–$450 | Wayfair |
| Lighting (string lights or lanterns + hooks) | $45–$180 | Amazon |
Total estimated cost: $1,095–$2,800 Save by keeping the footprint tight and using standard lumber sizes; splurge on better hardware and a shade layer you’ll actually use daily.
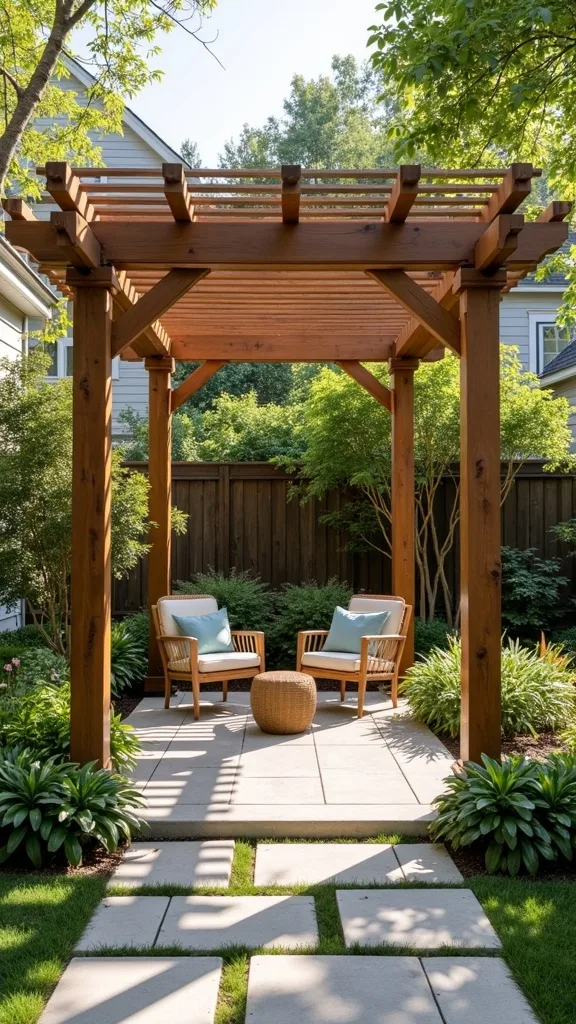
9. What’s a budget-friendly pergola approach that still looks custom?
Custom doesn’t require fancy joinery. It works when proportions are right and the finish is consistent.
Keep the footprint modest—10′ x 10′ is plenty for two lounge chairs and a coffee table. Use standard lumber sizes, then upgrade the look with a uniform stain and clean trim boards that hide end grain. Add one focal detail: a boxed beam wrap or a simple rafter tail cut repeated across every rafter.
Choose a matte cedar stain instead of glossy sealer; it reads more architectural. Add an outdoor rug and two oversized cushions to soften the edges.
Pro tip: don’t mix three different wood tones in one structure—one species, one stain, one direction of grain makes even a small build feel intentional.
10. How do you design a pergola with plants that won’t destroy the frame?
Plants make a pergola feel established fast. It works when vines are guided, pruned, and kept off joints and hardware.
Install vine supports—stainless wire or trellis panels—so growth climbs where you want it. Plant vines 18″–24″ from the posts to improve airflow and reduce rot risk at the base. Prune twice each season: once to train shape, once to keep rafters from becoming a dense, heavy mat.
Pair climbing roses for structure with a lighter vine like clematis for layered bloom. Add a drip line at the planting bed so you’re watering roots, not soaking posts.
Pro tip: avoid letting wisteria wrap tightly around beams—its growth can thicken like a cable and slowly crush the wood it hugs.
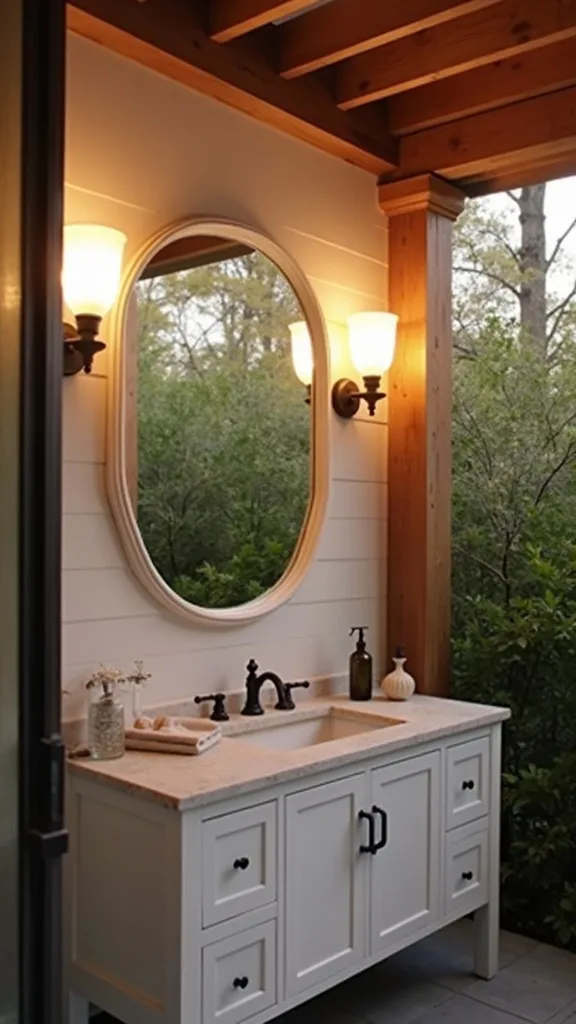
11. Where should lighting go so the pergola feels warm at night?
Lighting should make faces look good and corners feel safe. It works when you layer overhead glow with perimeter points.
Hang lanterns or pendant-style outdoor lights from the center beam line, then add string lights along the outer rafters for a soft border. Choose warm white light (2700K–3000K — the cosy, yellowish tone you see in most homes) so cedar looks rich instead of gray. If you’re using solar, place panels where they get full sun, then run the light line under the rafters.
Add black metal lanterns for contrast and a rug that picks up the lantern finish. A couple of battery candles on the table completes the scene.
Pro tip: don’t rely on one bright fixture—one harsh pool of light makes the space feel like a parking lot instead of a retreat.
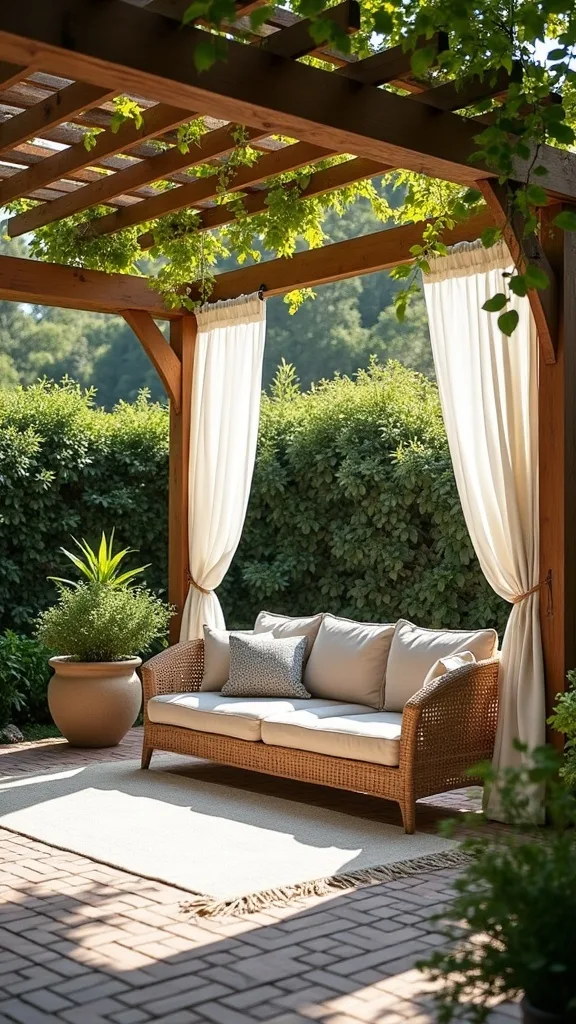
12. How do you add privacy to a pergola without building walls?
Privacy is a feeling, not a fortress. It works when you block sightlines at seated height and keep the top open.
Add outdoor curtains on two sides using a simple rod or cable system under the beams. Keep panels long enough to kiss the floor so they hang straight and look tailored. For a sturdier option, install a slatted cedar screen on the neighbor-facing side, leaving 1″ gaps for airflow.
Choose linen-look outdoor curtains in warm white to brighten shade. Add a textured rug and low planters to soften the base.
Pro tip: avoid thick plastic “weather curtains”—they trap heat, stick to skin, and turn your pergola into a sweaty box in July.
13. What’s the best way to place posts so furniture layouts stay flexible?
Post placement decides whether the space feels open or awkward. It works when posts frame the seating zone instead of cutting through it.
Lay out your furniture first: tape or chalk the sofa, chairs, and table footprint on the patio. Place posts outside the main circulation line, aiming for at least 30″ of clear path around seating. If you want maximum flexibility, go slightly larger and keep posts near corners so you can rotate layouts season to season.
Use cedar posts with simple base trim to make them feel finished. Anchor the room with a large outdoor rug that sits fully under front legs of seating.
Pro tip: don’t center posts on the “perfect” patio midpoint if it bisects your best layout—function should win every time.
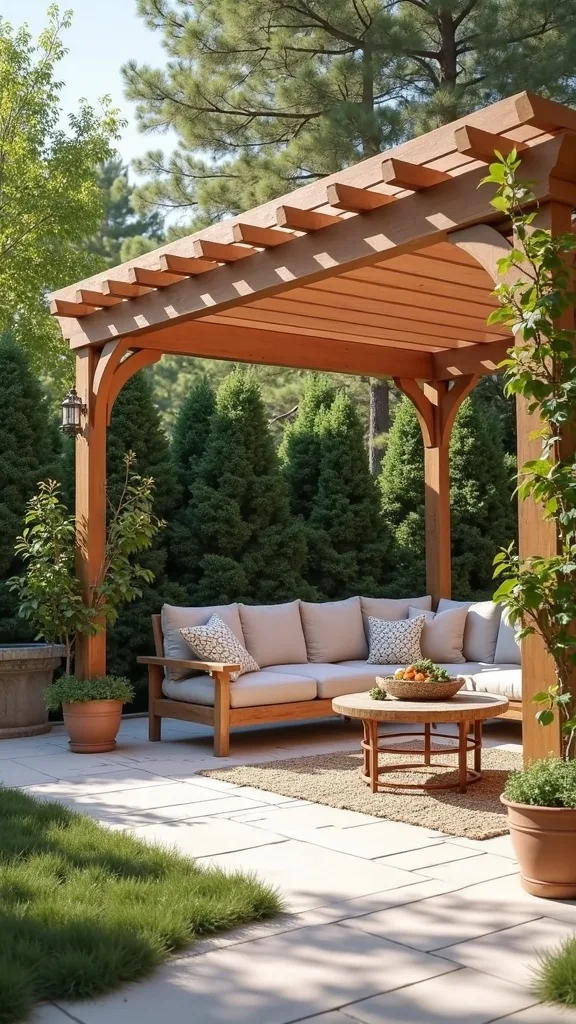
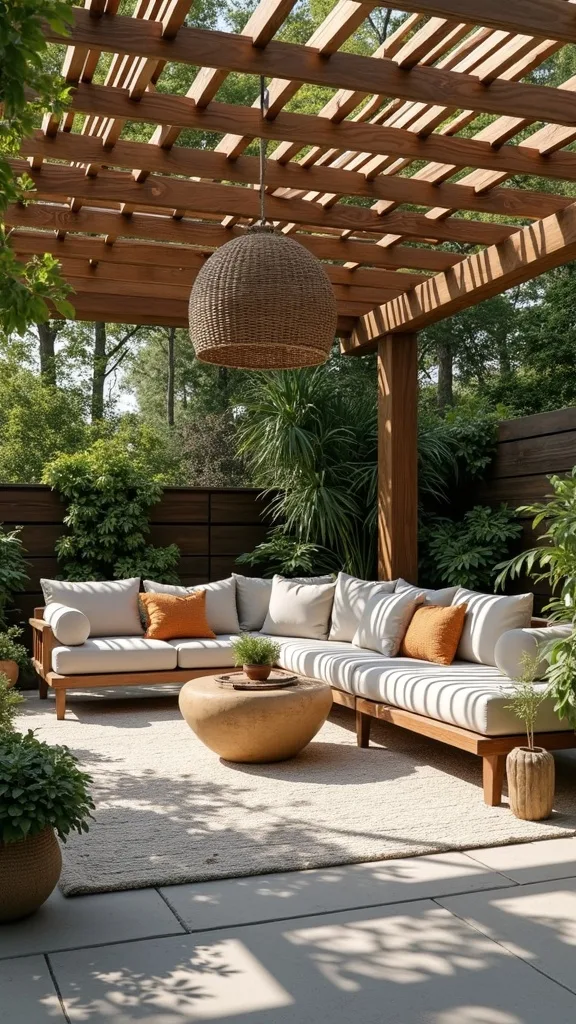
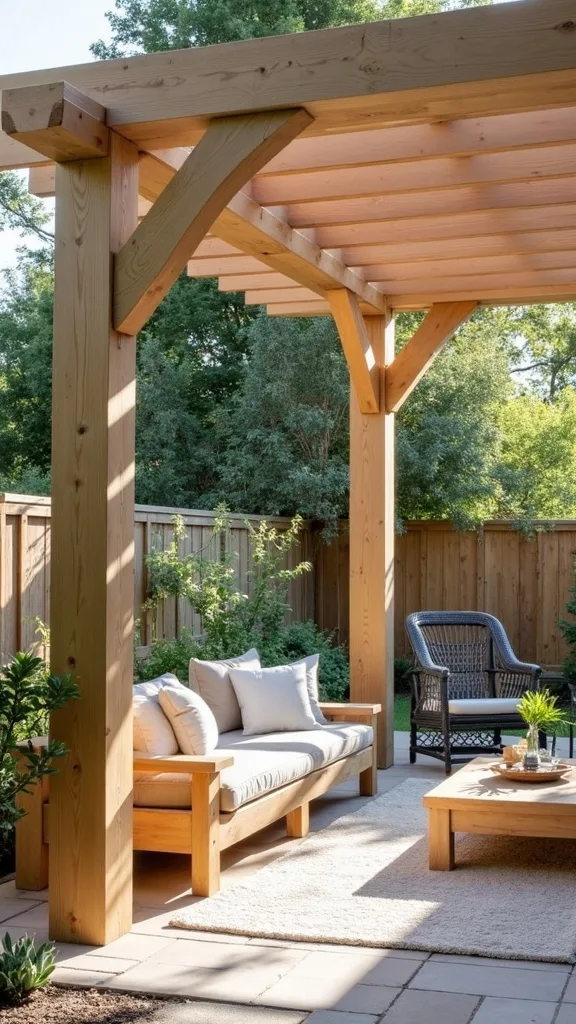
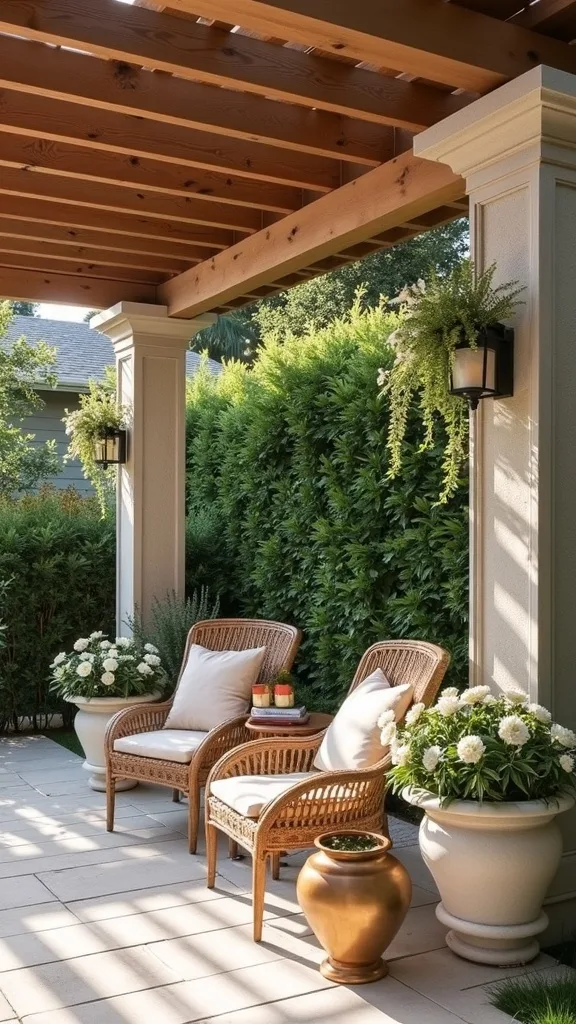
14. How do you create a pergola lounge zone that feels like a living room?
A lounge pergola needs comfort cues. It works because the overhead frame gives you a ceiling, and the textiles give you warmth.
Start with deep seating and a coffee table, then place the rug first so every piece relates to it. Add two side tables for drinks—this is what keeps people seated. Finish with a throw basket and a simple tray so the space reads styled, not scattered.
Choose performance fabric cushions in canvas or oatmeal, then add one patterned pillow that echoes garden colors. Use lanterns or a low chandelier-style fixture for evening glow.
Pro tip: keep furniture legs visible—bulky skirted pieces can make an outdoor space feel heavy and dated, even under a beautiful frame.
15. Can you build a pergola over a grill or outdoor kitchen safely?
You can, but it needs smart planning. It works when heat and smoke have a clear path up and away from the structure.
Position the grill at the edge of the pergola, not dead center, and leave generous overhead clearance so heat doesn’t bake the rafters. Use a vent hood if you have a built-in kitchen, and keep the ceiling above the cook zone more open—wider rafter spacing or a partial pergola that stops short of the grill line. Add task lighting aimed at the prep surface.
Use non-flammable finishes around the cook area: stainless surfaces, stone, and metal fixtures. Keep textiles like rugs farther from grease splatter.
Pro tip: avoid hanging fabric canopies near a grill—wind plus flame is not a “cozy patio moment.”

16. How do you choose cedar stain so it stays timeless?
The right stain makes cedar look like architecture. It works when the tone matches your home’s existing materials.
Pull cues from what’s already fixed: roof shingles, brick, siding, or stone. Test two or three samples on offcuts, then view them morning and late afternoon—the sun changes everything. Aim for a warm, mid-tone cedar or light walnut that won’t swing orange.
Pair the stain with black or bronze hardware for crisp definition. Add a neutral rug and keep the furniture palette restrained so the wood stays the hero.
Pro tip: avoid ultra-red stains on cedar—they date fast and fight the natural greenery you’re trying to highlight.
17. What’s a smart way to add rain protection without losing the pergola look?
Rain protection should feel integrated. It works when the cover is subtle and the edges are clean.
Use a sloped, clear polycarbonate panel system on top of the rafters, then add a simple gutter on the low side to direct water away. Keep the slope slight so the pergola still reads flat and modern from the yard. If you want a softer option, install a retractable waterproof canopy that closes only when needed.
Choose clear roofing panels only if you also plan side shade—clear roofs can amplify heat. Add lanterns underneath so the ceiling still glows at night.
Pro tip: don’t leave panel edges unfinished—trim and cap them, or the whole build will look like an afterthought.
18. How do you make a small pergola feel bigger?
Scale tricks matter in tight yards. It works when you keep the frame light and the floor plane continuous.
Use slimmer rafters and fewer visual breaks, then extend the rug beyond the seating group to stretch the “room.” Paint or stain the pergola to match the fence if you want it to recede, or keep it cedar and match furniture tones so the eye moves smoothly. Add mirrors only if they’re outdoor-rated and placed away from direct glare.
Choose low-profile seating and a round coffee table to soften corners. Keep planters tall and narrow so they don’t eat floor space.
Pro tip: avoid chunky, dark furniture under a small structure—it compresses the volume and makes the pergola feel like a lid.
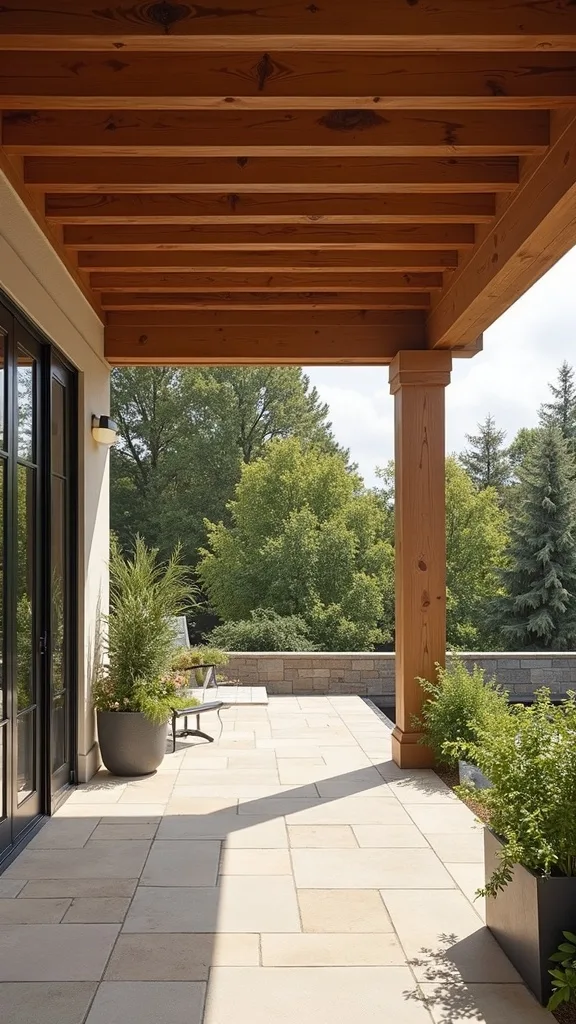
19. What’s the best footing and floor combo for a clean, mud-free zone?
A pergola should not turn into a dirt ring. It works when the base is intentional and easy to hose off.
Build the frame first, then create a defined floor: pavers over compacted gravel, a small concrete pad, or a deck platform. Keep the finished surface slightly larger than the pergola footprint so furniture legs never sit in soil. Add a gravel border around the perimeter to reduce splashback onto posts.
Layer a UV-stable outdoor rug on top to soften the hard surface. Choose planters with saucers so water doesn’t stain the pavers.
Pro tip: avoid bare mulch under seating—mulch migrates, stains cushions, and makes the space feel unfinished by mid-season.
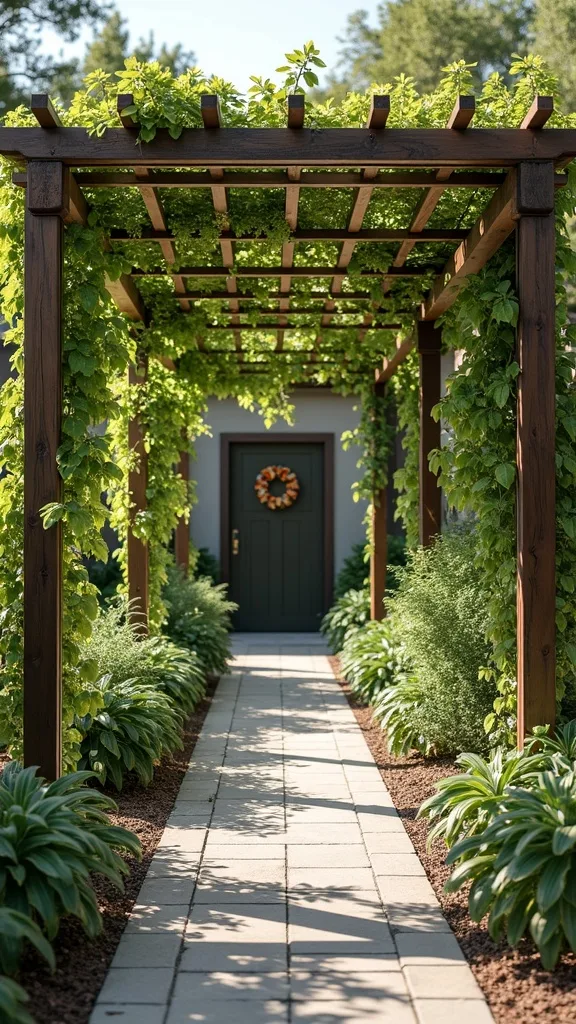
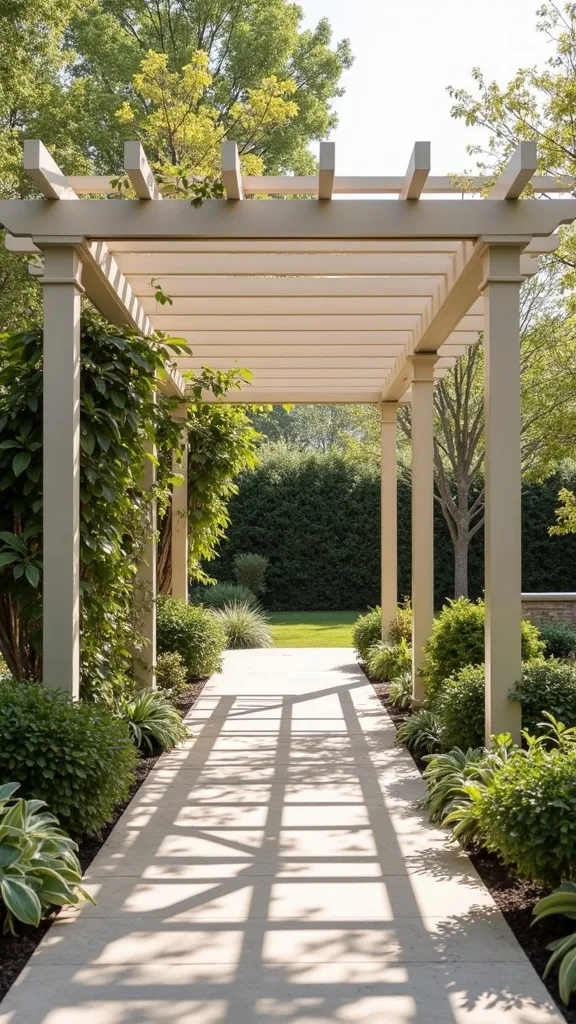
20. How do you integrate a pergola with a garden path?
A pergola can be a threshold, not just a destination. It works because it signals “enter here,” like a doorway in the landscape.
Align the pergola opening with your main path, then widen the path as it passes through so the moment feels generous. Add two matching planters at the entry posts to create symmetry, then train a climbing rose up one side for softness. Keep the interior simple—one bench or small table—so it reads like a pause point.
Use cedar for warmth and a stone or brick path for contrast. Add a pair of lanterns at eye level for evening wayfinding.
Pro tip: don’t block the entry with tall furniture—leave the centerline clear so the pergola feels like an invitation.
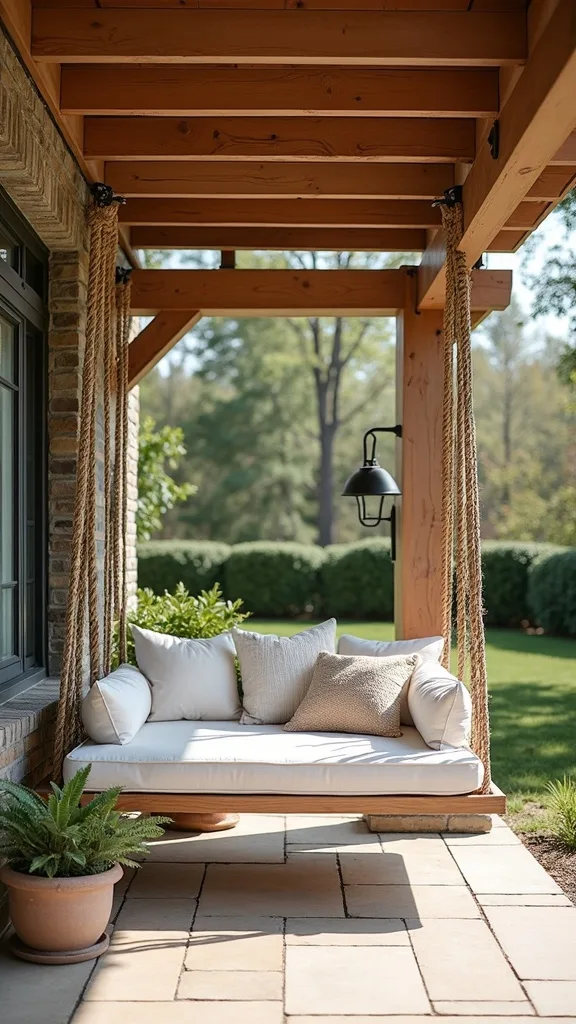
21. How do you hang a swing or daybed from a pergola safely?
A swing turns shade into a ritual. It works when the support beam is designed for movement and load, not just looks.
Plan the swing before you build so you can reinforce the beam line with an additional laminated beam or engineered support where the hang points go. Use rated hanging hardware and keep the swing centered with at least 24″ clearance on all sides. Add a rug underneath to cushion feet and visually “catch” the motion.
Choose weather-resistant rope or powder-coated chains, and use thick seat cushions in neutral canvas. Add a lantern on each side so the swing zone glows.
Pro tip: avoid screwing eye bolts into a single thin rafter—movement will loosen it, and the risk is not worth the shortcut.
22. What’s the easiest way to add electricity for fans or lights?
Power makes the space usable longer. It works when the wiring plan is clean, safe, and hidden.
Decide what you need: lights only, or lights plus a fan. Run outdoor-rated conduit along the top of a beam where it disappears, then drop the line down a post to an outlet box. If you’re not comfortable with electrical work, hire an electrician for the final connections—this is money well spent for safety.
Choose a fan rated for damp locations and bulbs that cast warm white light (2700K–3000K — the cosy, yellowish tone you see in most homes). Add lantern-style fixtures to keep the look classic.
Pro tip: avoid visible extension cords draped across rafters—they look messy and they’re not a long-term outdoor solution.

23. How do you decorate a pergola without cluttering it?
A pergola looks best when the decor is edited. It works because the structure already provides visual interest; your job is to support it.
Pick one focal textile (a rug or curtain), then keep accessories functional: lanterns, a tray, and two planters. Use repetition—two lanterns, two planters, two pillows—so the space feels composed. Store extras in a weatherproof deck box so surfaces stay clear.
Stick to natural textures like jute-look rugs, teak, and black metal. Add one ceramic accent color pulled from your blooms.
Pro tip: avoid tiny decor scattered everywhere—small objects read like clutter outdoors, especially against a big, clean cedar frame.
24. How do you plan for wind so curtains and plants behave?
Wind is the hidden design client. It works when you give fabric weight and give plants structure.
Choose curtain panels with weighted hems, and use tiebacks mounted to posts so you can secure them quickly. For vines, install sturdy trellis wire and keep growth trained flat rather than letting it billow outward. Place heavier planters at corners to anchor the room visually and physically.
Use outdoor curtain weights and rust-resistant grommets. Choose sturdier climbers like climbing roses for the windy side and lighter bloomers for the sheltered side.
Pro tip: avoid lightweight bamboo roll-up shades in gusty yards—they rattle, fray, and will make your pergola feel noisy instead of calm.
25. What’s one weekend pergola upgrade if a full build isn’t happening yet?
You can change the space fast without pouring concrete. It works because you create the “room” feeling first, then add structure later.
Start with the floor: lay a 9′ x 12′ outdoor rug to define the zone, then add two lanterns and a pair of tall planters to mark the future post locations. Install a simple freestanding shade canopy or umbrella for immediate relief, then sketch your pergola footprint around what you’ve learned you actually use.
Choose cedar-toned planters or stained wood boxes to preview the future frame. Add warm white light (2700K–3000K — the cosy, yellowish tone you see in most homes) so evenings feel finished.
Pro tip: avoid buying furniture before you set the footprint—size the pergola to the life you live outside, and the build will land perfectly.

Final Thoughts
A pergola earns its keep when it becomes the default place you land after a long day. Build the frame like it’s part of the house. Keep the lines straight. Let the softness come from textiles, then let lighting make the space usable past sunset.
Choose one shade strategy and commit to it. Slats for structure. A canopy for control. Vines for romance and seasonal change. The best outdoor shade structure is the one you can maintain without resenting it, week after week.
Do one thing today: stake a 12′ x 12′ rectangle where you want the pergola, drop a rug inside it, and sit there at 5 p.m. The final styling move is precise—hang two matching lanterns at the same height, centered over the rug, and the whole backyard reads intentional.
What I’d Do Differently
When I first tried this, I obsessed over the roof pattern and completely under-planned the footprint. I built a pergola that looked great from the yard, then realized the posts landed exactly where our dining chairs needed to slide back. The fix was annoying: I had to rework the furniture layout, and the space always felt a little pinched. The correct approach is to design from the inside out. Set your table and chairs (or your sofa and coffee table) in the exact spot first, then mark the clearance with painter’s tape or stakes, then place posts outside that “living zone.” The pergola is the ceiling. The layout is the room.
I also wish I’d planned the plant zones on day one. Vines need a bed, irrigation, and a guide wire system, and those pieces are harder to add once everything is finished and furnished. Sketch one planting strip and one lighting path before you dig a single hole, then commit. Start small, measure twice, and build the version you’ll use every night this summer.
Products I Recommend for This Project
Here are some of my favourite products to help you bring these ideas to life:
- Strathmore Heavy Duty Outdoor String Lights (48 ft, shatterproof bulbs) — Adds dependable warm ambience under beams and along rafters.
- Simpson Strong-Tie Outdoor Accents Post Base (for 6×6) — Creates a cleaner, stronger post-to-base connection for a sturdy frame.
- Brightown Outdoor Curtain String Light Clips & Hooks Set — Makes it easy to hang lanterns, curtains, or light strands neatly without sag.
- Gardzen 10-Pack Grow Bags (15 gallon) — Lets you stage climbing plants and test placement before committing to in-ground beds.
- Govee Outdoor LED String Lights (warm white options) — Gives controllable brightness (measured in lumens) for dinners, lounging, and late-night cleanup.