This post contains affiliate links. As an Amazon Associate, I earn from qualifying purchases at no extra cost to you.
Are you looking for a bedroom that feels cooler the second you walk in—without cranking the AC all night? Do you want that light airy bedroom look you see in inspiration photos, but with real-life price tags and realistic effort?
I always start by picking one “hero” element (usually curtains or bedding) and then building a breezy layer-by-layer plan around it. In this post, I’m sharing exactly how I create a cooling bedroom vibe using thrift finds, discount-store basics, and a few easy DIY tricks that take 30–90 minutes each.
From my experience, this is perfect for renters, hot sleepers, and anyone trying to stretch a summer budget while still wanting a pulled-together, grown-up space.
I’ll walk you through my favourite sources (like Habitat ReStore, Facebook Marketplace, IKEA As-Is, and HomeGoods clearance), plus DIY vs. buy comparisons so you can decide where to save and where to spend $20–$40 for the biggest visual payoff. I’m also including one common mistake I see that makes “breezy” rooms feel flat and cold instead of calm.
Below are 25 Breezy Summer Bedroom Ideas & Light Aesthetic that keep summer bedroom decor practical, affordable, and genuinely comfortable in peak heat.
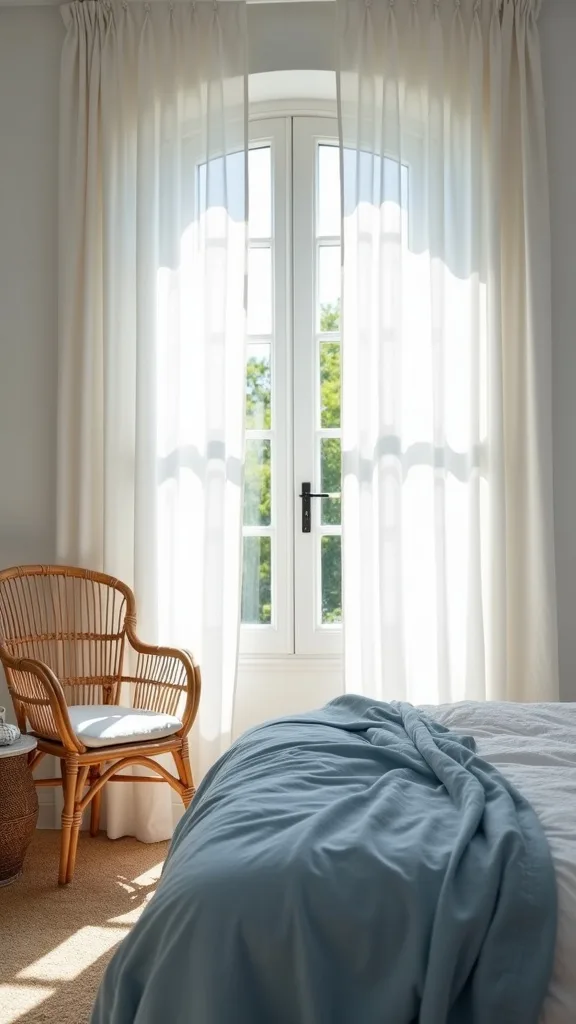
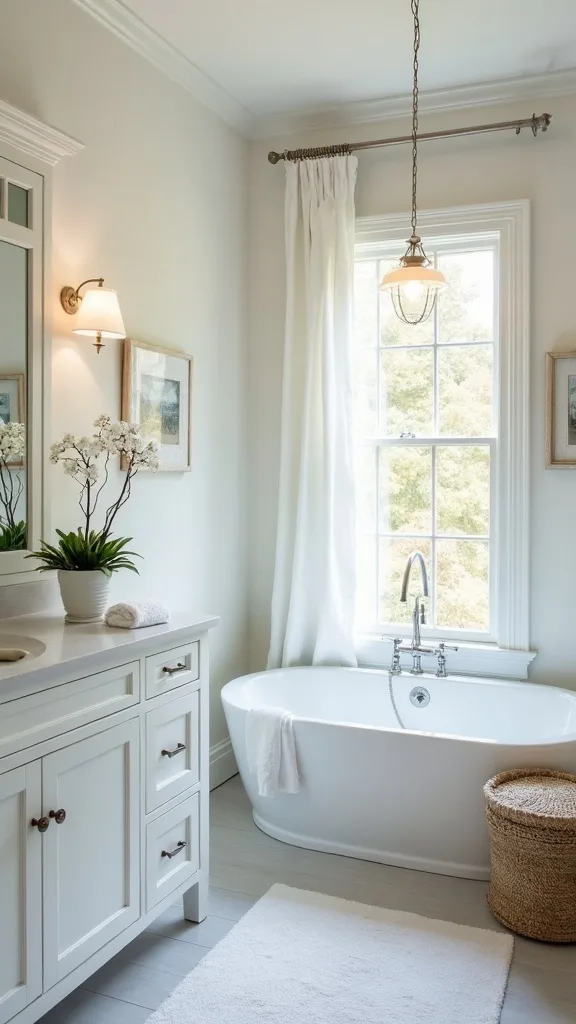
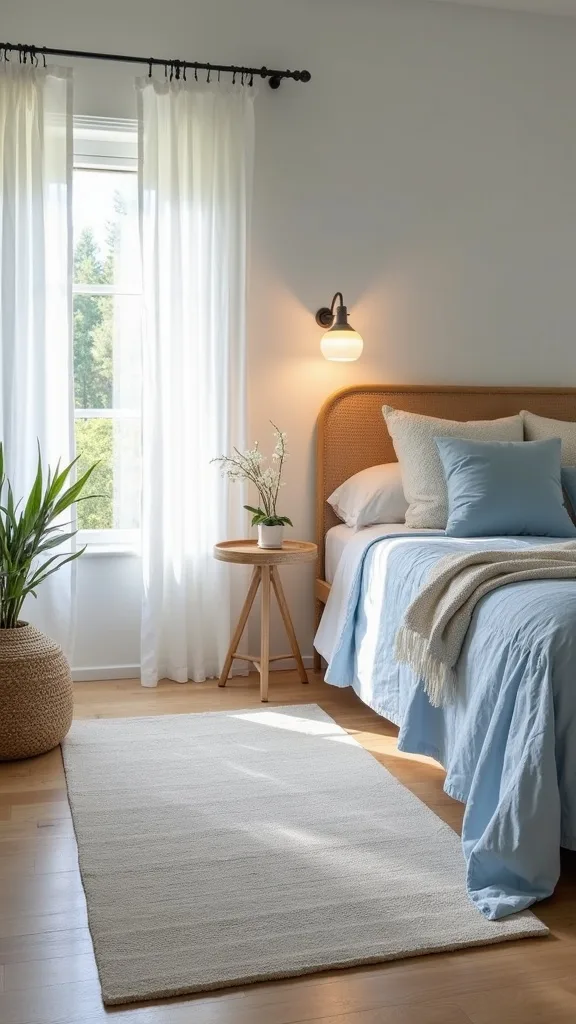
1. Start with the hero quartet: sheer linen curtains + blue-grey linen bedding + bamboo fan + pebble tray
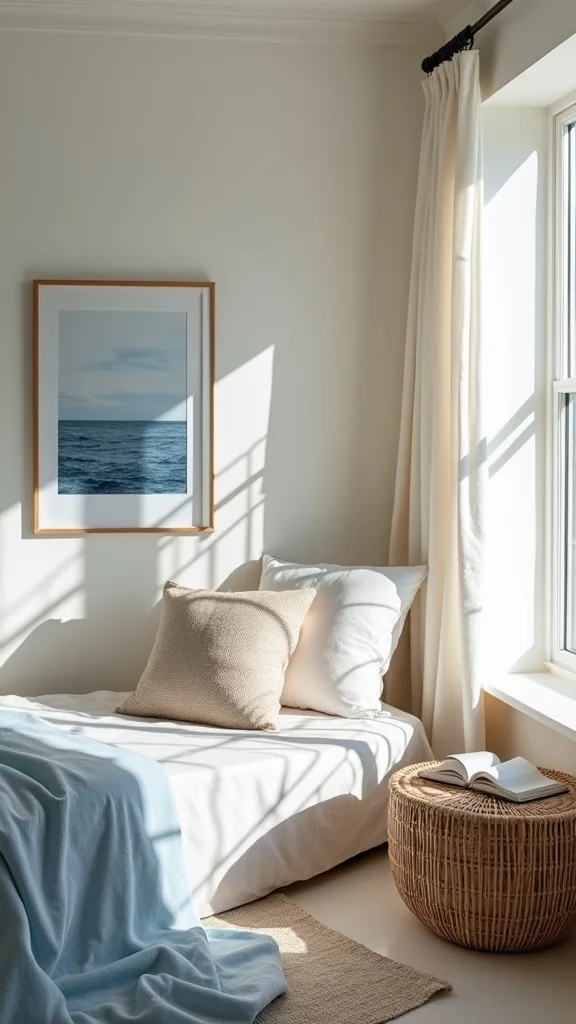
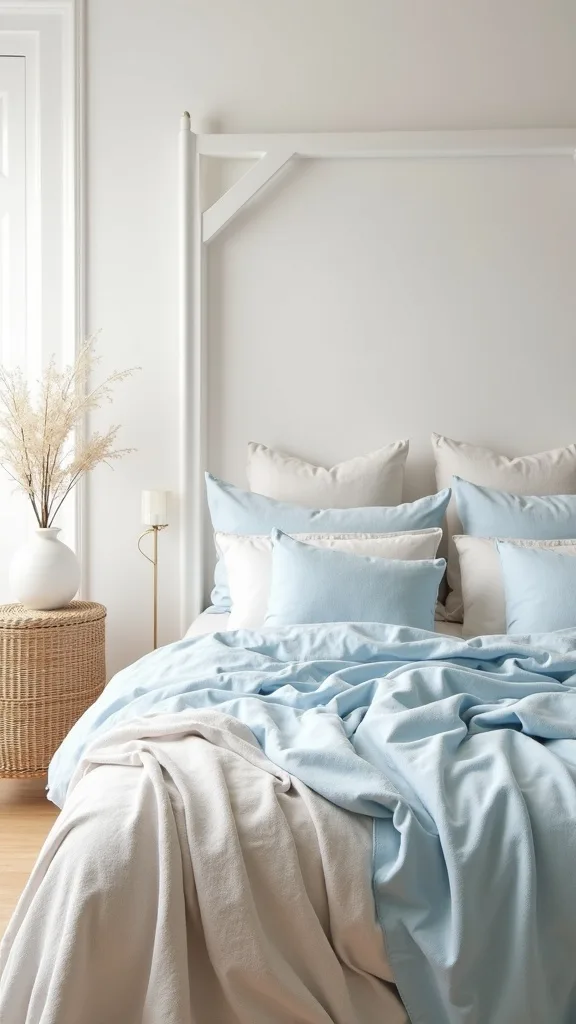
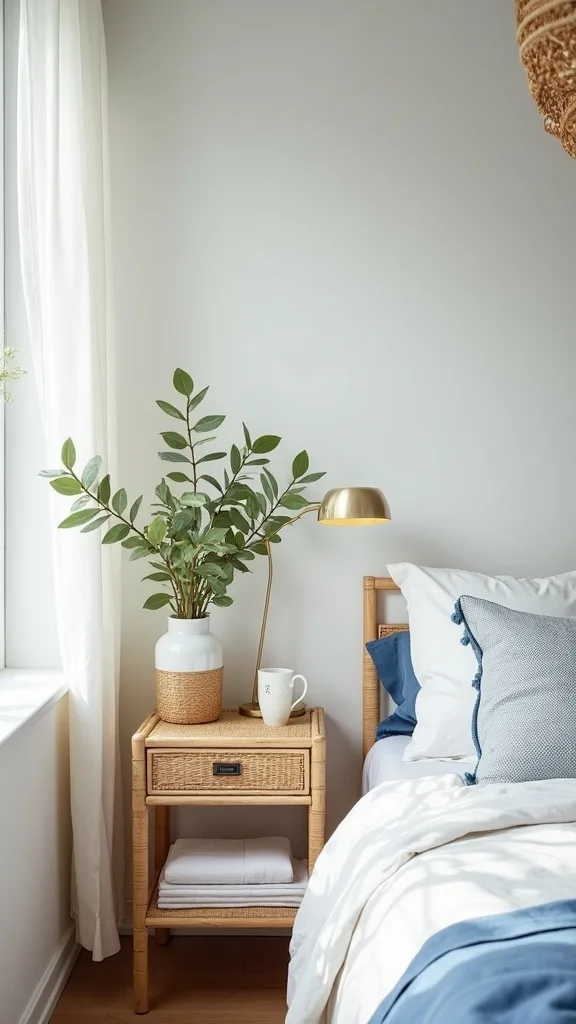
I always start by recreating the “inspiration photo” core: sheer white linen floor curtains, blue-grey linen bedding, a bamboo fan, and a pebble tray—because those four pieces do the heavy lifting for a breezy bedroom. From my experience, this combo reads like a white summer bedroom, but it still has depth so it doesn’t feel sterile.
To implement it, I hang 2 curtain panels that are 96 inches long on a rod set 4–6 inches above the window trim, then I let the hem kiss the floor by about 1/2 inch. I make the bed with a blue-grey linen duvet cover (I like a queen 90×92 inches) and add one extra 20×26-inch pillow in crisp white for contrast.
I find that a $18–$35 bamboo table fan from a thrift store or Facebook Marketplace looks more intentional than a glossy plastic one, and a $6–$12 pebble tray (or shallow bowl) adds that spa texture without clutter.
Pro Tip: I’ve found the curtains look twice as expensive when I clip-ring them with 1.5-inch brass rings and space clips 6–7 inches apart—fewer, wider clips make sheers ripple instead of hanging flat.

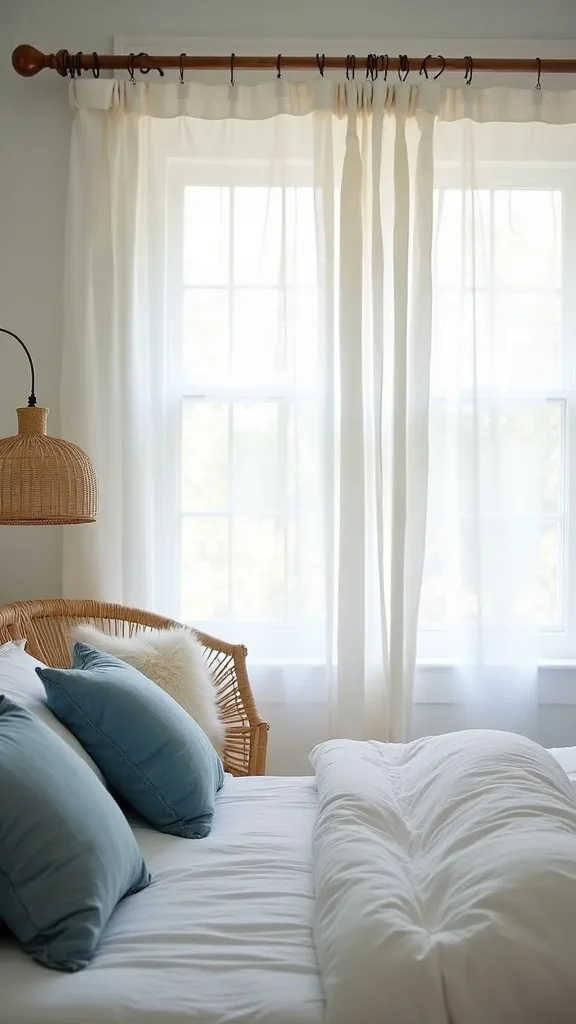
2. Hang curtains higher and wider to fake taller ceilings
From my experience, nothing makes a light airy bedroom feel more “designer” faster than raising the curtain rod—because your eye reads height before it reads colour. I always recommend this even in rentals, since you can patch 2–4 small holes later.
I mount the rod 4–8 inches above the top of the window and extend it 6–10 inches past each side so the panels stack off the glass. For most bedrooms, I use a 48–84 inch adjustable rod for small windows or a 66–120 inch rod for wider ones, and I aim for 2 panels per window so the sheers don’t look skimpy.
I find that Target clearance and IKEA (look for the As-Is corner) are great for rods in the $10–$22 range, while thrift stores often have solid wood finials you can swap on for $2–$5.
Pro Tip: When I design this look with sheers, I intentionally choose a rod that’s 1/2 inch thicker than “necessary” (like 1 inch instead of 3/4) because thin rods can bow over time and make the panels drag unevenly.
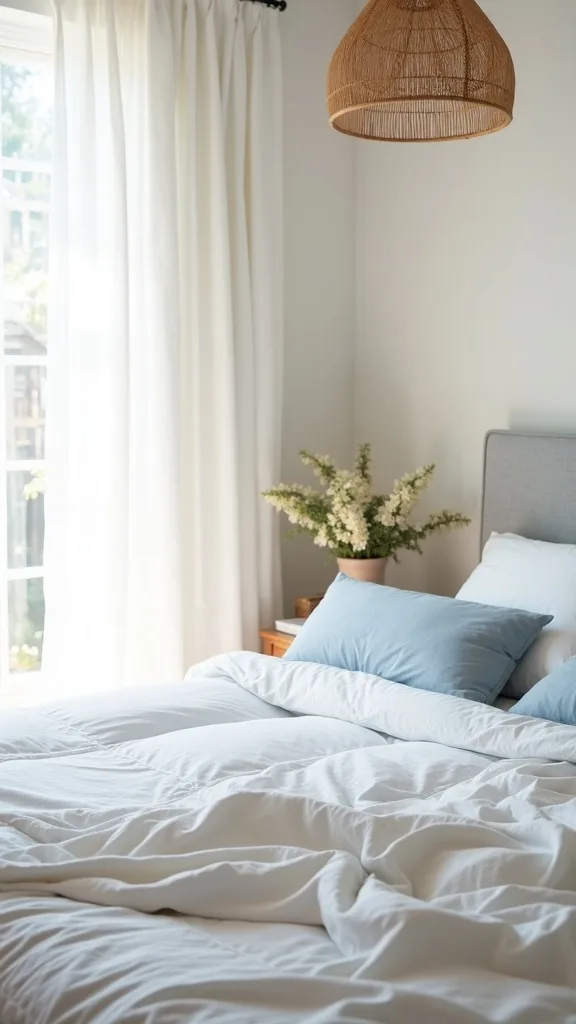
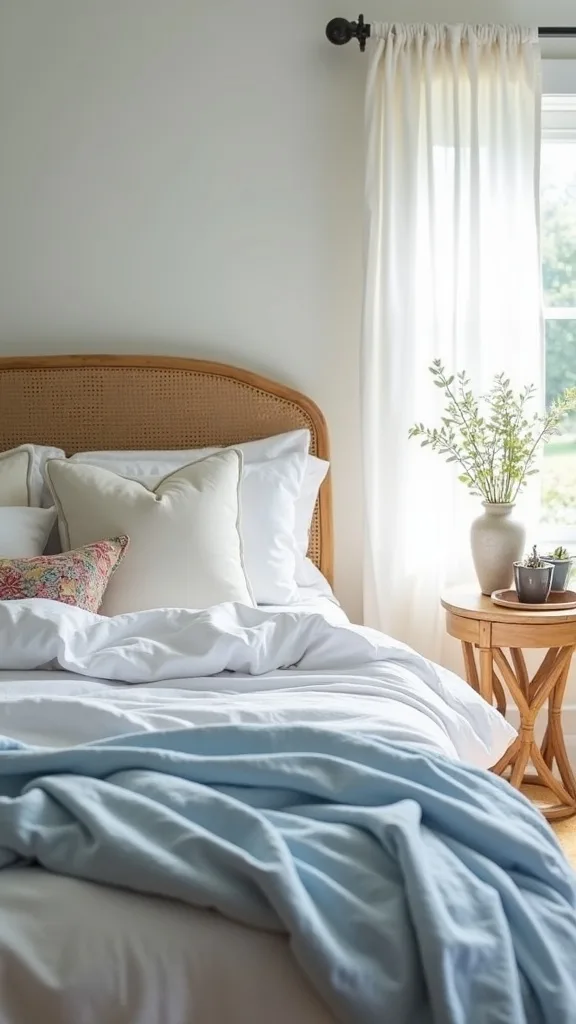
3. Swap heavy bedding for breathable layers (without buying a whole new set)
I find that the fastest way to create a cooling bedroom is to stop fighting your bedding—most people overheat because they’re sleeping under 1 thick comforter year-round. From my experience, a layered bed looks plush in photos but feels lighter on your body.
I always start by keeping the duvet insert you already own and switching just the cover to linen or cotton percale; a queen duvet cover runs about $35–$70 at IKEA or Amazon, versus $120+ for a full “new bed.” Then I add a thin cotton blanket (about 90×90 inches) folded at the foot and a top sheet you actually like touching—this matters more than people admit.
In my opinion, blue-grey linen is a sweet spot: it hides summer sweat better than pure white, but still reads airy next to white curtains. I’ve found HomeGoods clearance and thrift stores often have linen-blend shams for $6–$12 each.
Pro Tip: When I tried this with true linen, I learned to wash the duvet cover once before styling—fresh linen relaxes after 45–60 minutes in the dryer on low and looks intentionally rumpled instead of stiff.
4. Use a bamboo or rattan fan for airflow that looks intentional
I always recommend making your fan part of the decor in summer, because a visible fan is only “ugly” when it looks accidental. From my experience, bamboo or rattan styles read coastal and warm up a white summer bedroom instantly.
I place a table fan 18–24 inches from the bed (usually on a 24–28 inch nightstand) so the airflow hits your torso, not your face. If you’re using a floor fan, I angle it up about 10–15 degrees and keep it 3–4 feet from the foot of the bed to avoid drying out your eyes overnight.
I find thrift stores and estate sales have vintage-style fans for $15–$40, while new bamboo-look options on Amazon tend to be $35–$80. The trade-off is noise—older metal fans can be louder, but they often move more air.
Pro Tip: I’ve found a $6 stick-on felt pad under the fan base stops micro-vibrations that make nightstands “buzz,” especially on hollow IKEA tops.
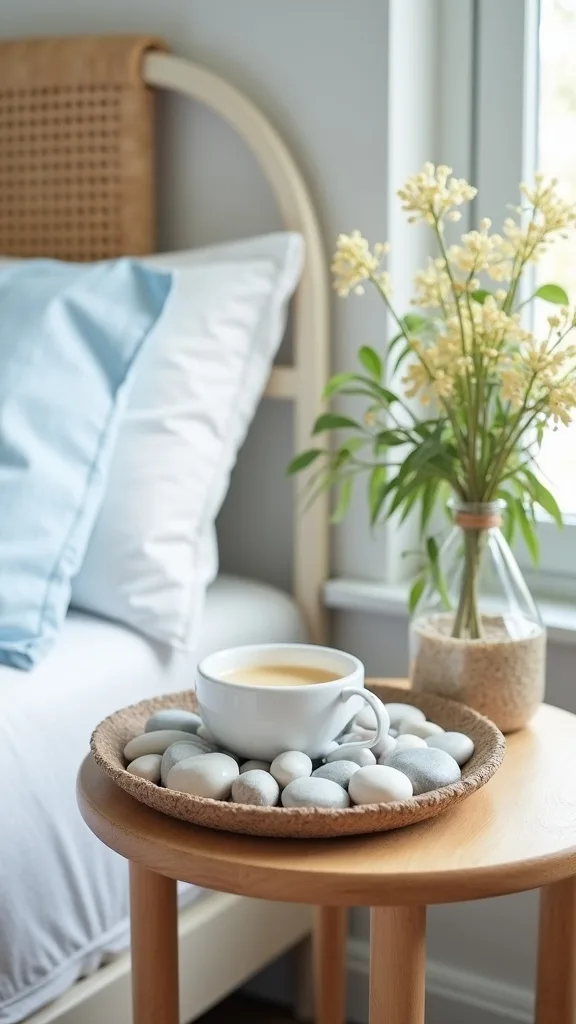
5. Create a pebble tray “cooling moment” on the nightstand
In my opinion, a breezy bedroom needs one small, tactile vignette that feels like a mini vacation—without adding clutter you have to dust. I always start by limiting myself to 3 items on a tray, because more than that stops feeling calm.
I use a shallow tray about 8–10 inches wide and add a smooth pebble cluster (real river stones, 6–10 pieces), a travel-size hand cream, and a small glass of water. If I’m thrifting, I look for stone coasters ($2–$4) and repurpose them as a tray base, then I glue 4 clear bumpers underneath so it doesn’t scratch wood.
I find that pebbles from a garden center bag ($6–$10 for 5 lbs) look the most natural when I pick mixed sizes—roughly 1–2 inches each—rather than perfectly matching stones.
Pro Tip: When I tried this on a humid week, I learned to choose a sealed tray (glazed ceramic or lacquer) because unsealed wood can warp from condensation rings in 2–3 nights.
6. Paint just one “heat wall” a soft white to bounce light
From my experience, a light airy bedroom isn’t about making everything white—it’s about making light travel. I find that painting the wall that gets the harshest afternoon sun (often the window wall) a soft white can make the whole room feel less heavy.
I always start by testing 2 sample pots and watching them for 24 hours, because white shifts wildly from morning to night. For a standard 10×12 bedroom, one accent wall usually takes about 1 quart for one coat, but I plan on 2 coats (so 2 quarts) if the existing colour is dark.
In my opinion, a warm white works best with blue-grey linen; I look for “soft white” labels rather than bright, icy whites. The trade-off is scuffs—flat paint hides wall flaws but marks easier than eggshell.
Pro Tip: I’ve found you get a smoother finish in summer humidity if you keep a small dehumidifier running for 2–3 hours while the paint cures—otherwise roller texture can dry unevenly.
7. Do the $12 “linen-look” curtain hack if real linen isn’t in the budget
I always recommend real linen when you can swing it, but from my experience you can fake the vibe for a fraction of the cost. I find that a linen-look voile gives you the same breezy bedroom softness in photos, with less wrinkling.
I buy 2 sheer panels (typically 52×96 inches) from IKEA or Amazon for $12–$28 total, then I tea-dye them if they’re too stark. My method is 2 black tea bags in a clean bucket with 1 gallon of hot water, soak for 10–15 minutes, rinse, and air-dry—this warms the white just enough to feel relaxed.
For hardware, I use clip rings ($10–$18 for a pack of 20) because they make cheap panels hang straighter. The trade-off is durability: budget sheers can snag more easily if you have pets.
Pro Tip: When I tried dyeing sheers, I learned to wet the fabric first—dry panels grab colour in streaks, but damp fabric takes the tint evenly in under 15 minutes.
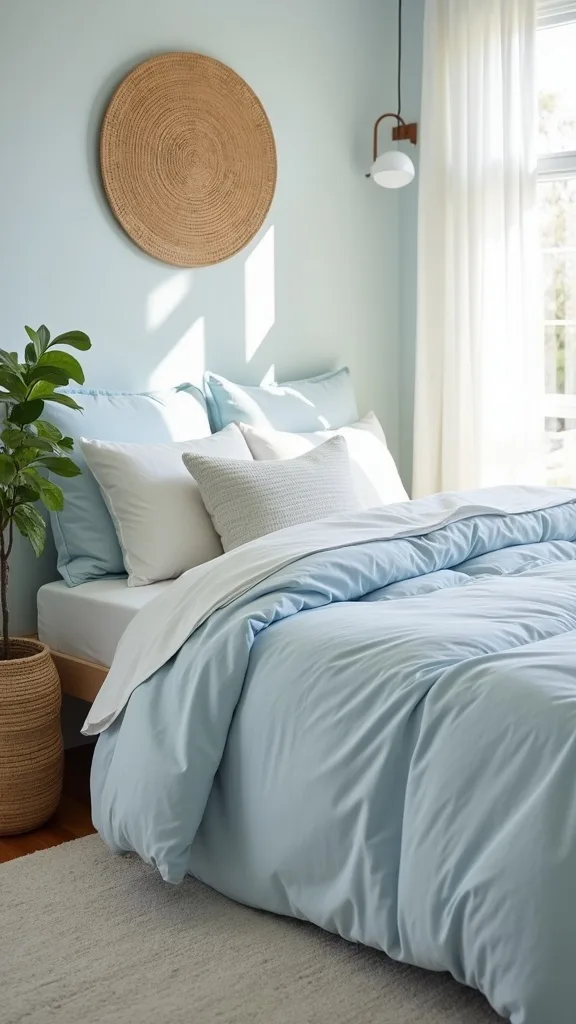
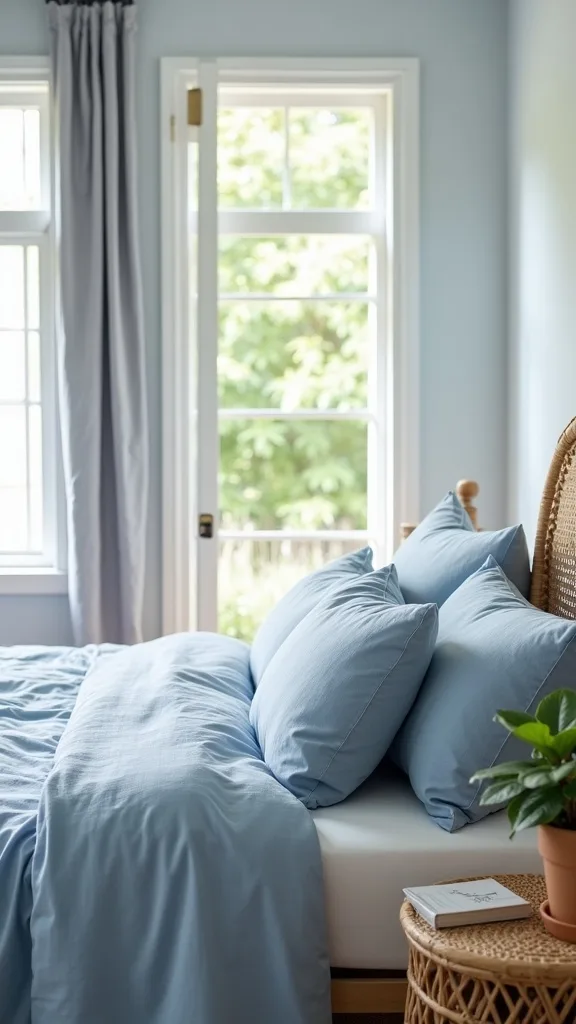
8. Choose blue-grey bedding to cool the room without going “nautical”
I find that blue-grey is the easiest colour for summer bedroom decor because it reads cool and calm without screaming theme. From my experience, the wrong blue (too bright) can make a room feel like a beach rental in a bad way.
I always start by matching undertones: if your walls are creamy, pick a blue-grey with a touch of warmth; if your walls are crisp white, a cooler slate works. I like a simple formula—1 blue-grey duvet, 2 white pillowcases, and 1 textured throw in sand or oat—so you’re only juggling 4–5 colours total.
I’ve found thrift stores often have high-quality linen-blend duvet covers for $12–$25, but I check for thinning at the foot (hold it up to a window for 10 seconds). If you’re buying new, cotton percale is typically $40–$80 and sleeps cooler than microfiber.
Pro Tip: In my opinion, the quickest way to avoid “nautical” is skipping stripes—go solid bedding and add texture (waffle weave or slub) instead of pattern.
Cost & Materials Estimate
For most bedrooms, I find you can refresh the full breezy look for about $90–$320 depending on how much you thrift versus buy new.
| Item | Estimated Cost | Where to Buy |
|---|---|---|
| Sheer white curtain panels (2–4 panels, 52×96 in) | $18–$60 | IKEA / Amazon |
| Curtain rod + clip rings (up to 120 in rod, 20–40 rings) | $22–$55 | Home Depot / Amazon |
| Blue-grey duvet cover (queen 90×92 in) or sheet set | $35–$90 | Amazon / IKEA |
| Bamboo/rattan-style table fan | $30–$80 | Amazon / Wayfair |
| Tray + pebble accents (tray 8–10 in, pebbles 3–5 lbs) | $12–$35 | Amazon / Home Depot |
Total estimated cost: $90–$320 I always save money by thrifting trays and frames, and I splurge (a little) on breathable bedding because it affects comfort every single night.
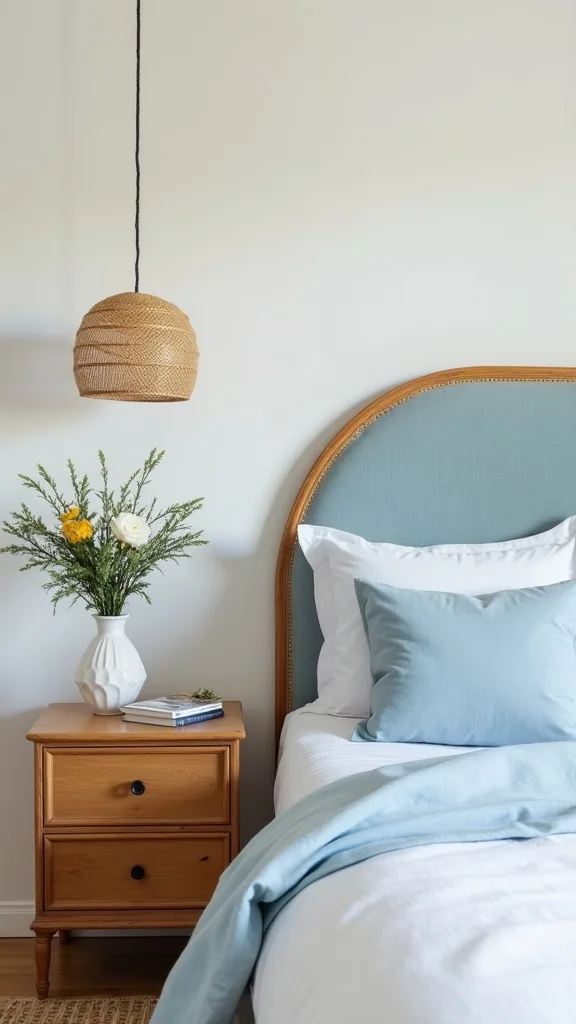
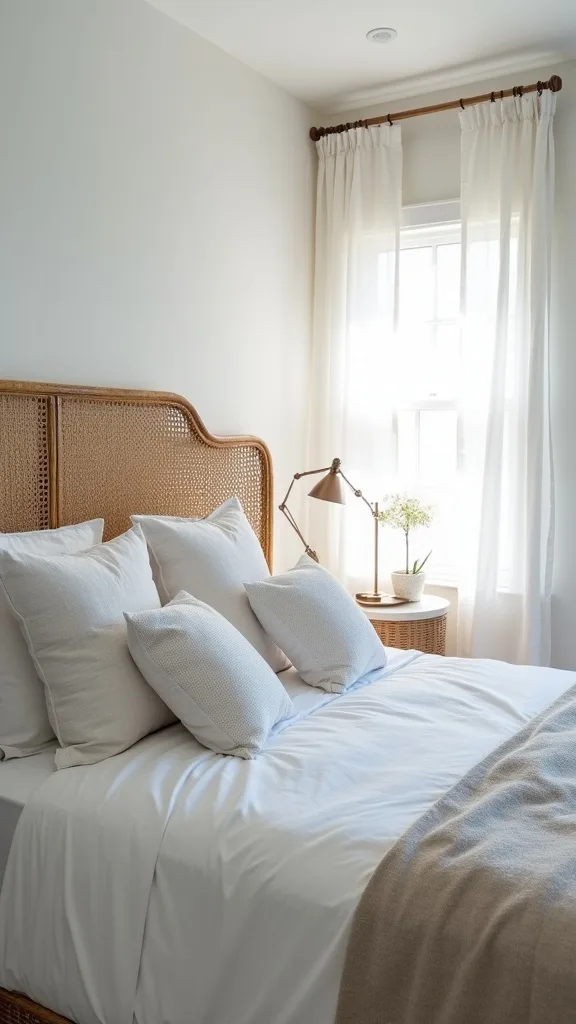
9. Edit your nightstand to a “three-item rule” for instant airy calm
I always start by clearing my nightstand completely, because clutter is the enemy of a breezy bedroom—visually and mentally. From my experience, most “before” photos look genuinely bad because they’re full of cords, half-empty water bottles, and 9 tiny items with no home.
I recommend choosing exactly 3 functional items: a lamp, a tray (8–10 inches), and one personal item (a book or a framed 4×6 photo). Then I hide the rest in a lidded box that’s about 10×8 inches—thrift stores sell these for $3–$8, and they’re a lifesaver for chargers and lip balm.
I find that a lamp with a fabric shade (around 10–12 inches wide) softens the whole corner, especially with warm white light (2700K–3000K — the cosy, yellowish tone you see in most homes). The trade-off is less “task” brightness for reading.
Pro Tip: I’ve found that swapping to a right-angle USB plug reduces cord drape by 2–3 inches, which makes the nightstand look instantly cleaner without buying new furniture.
10. Use a lightweight rug to stop the room from feeling echo-y and hot
From my experience, people skip rugs in summer thinking it will feel cooler, but I find that bare floors can make a bedroom feel loud and unfinished. A thin rug actually helps the room feel calm while still reading light.
I always recommend a flatweave cotton rug or low-pile indoor/outdoor rug in a 5×7 size for a full/queen bed, or 6×9 if you have the space. I like to pull it 18–24 inches out from the sides of the bed so your feet land on it in the morning, and I use a thin rug pad (1/8 inch) so it doesn’t slide.
I’ve found Wayfair sales and Home Depot indoor/outdoor options in the $45–$120 range, while Facebook Marketplace is great for $20–$60 if you’re willing to shampoo it. The trade-off is texture—super flat rugs can feel less plush.
Pro Tip: When I tried an indoor/outdoor rug, I learned to air it outside for 48 hours first—new synthetic rugs can off-gas, and that smell gets trapped under a bed fast.
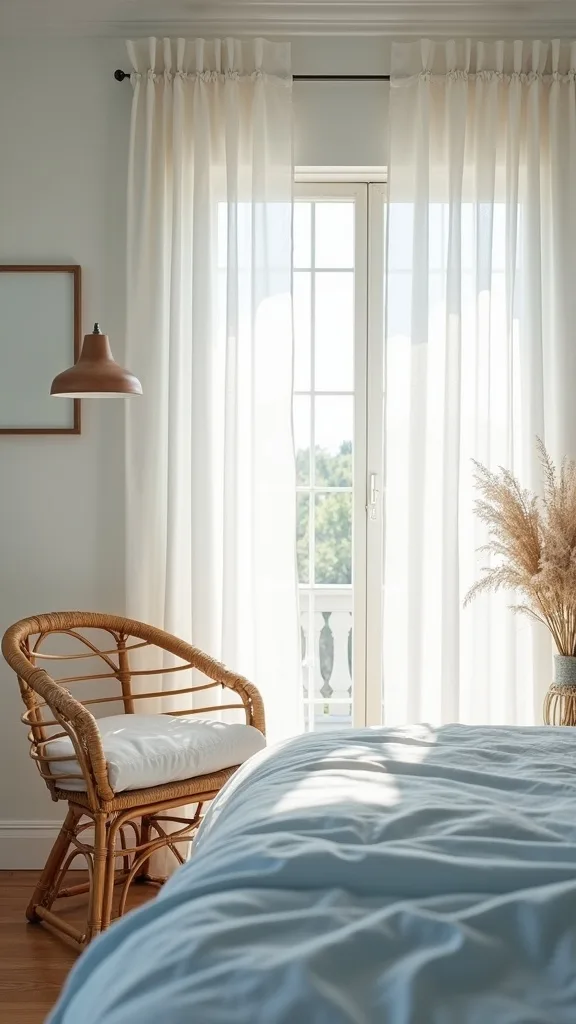
11. Add a second sheer layer for privacy without blocking airflow
I find that a white summer bedroom often fails in real life because people need privacy and end up adding heavy blackout curtains. From my experience, layering sheers solves that—soft light comes in, but you don’t feel on display.
I always start with 2 sheer panels and then add a second set of slightly denser sheers (like a semi-sheer) behind them. For one window, that’s typically 4 panels total, each 52 inches wide, which gives you enough fullness to close them without looking skimpy.
For budget, I’ve found IKEA LILL sheers are around $6–$10 per pair, and you can add a denser layer from Amazon for $18–$30. The trade-off is laundry: more fabric means you’ll wash and steam more, typically every 4–6 weeks if you have open windows.
Pro Tip: In my opinion, the cleanest look is putting the denser sheer on the inner rod and the floaty sheer on the outer rod—when the breeze hits, the front layer moves and looks intentional instead of messy.
12. DIY a “linen” headboard slipcover instead of buying a new bed
I always recommend upgrading the headboard before replacing a whole bed frame, because from my experience it’s the most visible surface in the room. I find that a linen slipcover gives you that breezy bedroom softness for under $25.
I measure the headboard width and height (a common queen is about 60 inches wide and 48 inches tall), then I cut a drop cloth 6 inches larger on all sides. I wrap it like a present, staple it on the back with a staple gun, and add 2 strips of iron-on hem tape for the bottom edge so it doesn’t fray.
Materials: a 6×9 canvas drop cloth ($12–$18 at Home Depot), hem tape ($4–$6), and a $10 staple gun if you don’t own one. The trade-off is crispness—drop cloth reads more “relaxed linen” than true linen.
Pro Tip: When I tried this, I learned to mist the fabric lightly and smooth it with a clean drywall knife—this flattens staple lines in 2–3 minutes without dragging out an iron.
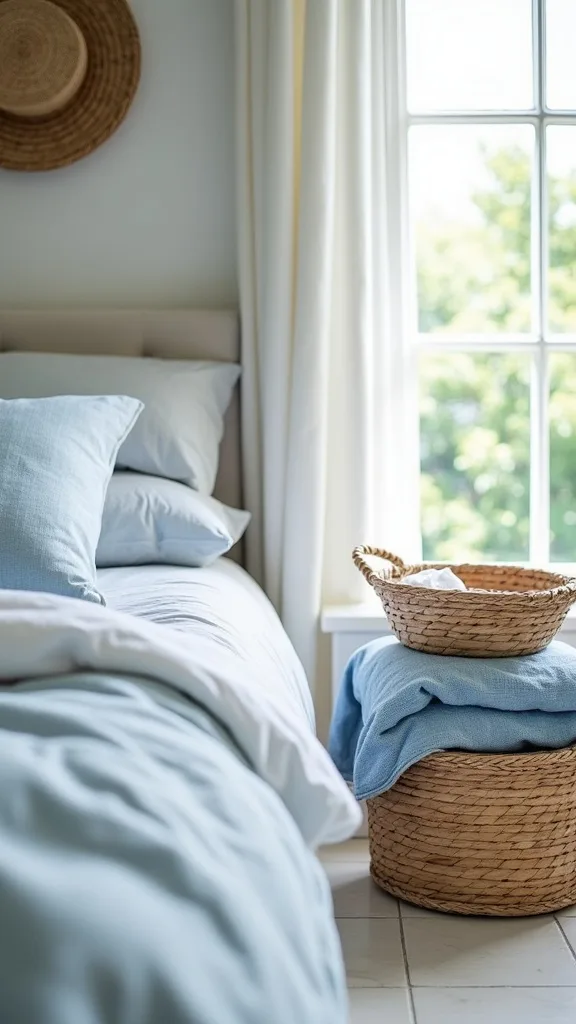
13. Keep a “cooling basket” for summer-only textiles
From my experience, the reason summer bedroom decor doesn’t stick is that winter textiles never leave the room. I always start by giving bulky throws and flannel sheets a proper off-season home so the space can breathe.
I recommend a lidded basket around 18–20 inches wide and 16–18 inches tall at the foot of the bed or inside the closet. In 10 minutes, I pack away 1 heavy throw, 1 extra quilt, and 1 set of flannel pillowcases, then I replace them with a cotton throw and one spare sheet set.
I’ve found thrift stores have great woven hampers for $8–$20, and IKEA has lidded options around $20–$35. The trade-off is dust—open baskets look cute but collect lint fast in summer when windows are open.
Pro Tip: I always tuck 2 cedar blocks into the basket (about $6–$10) because summer humidity can make stored textiles smell musty within 2–3 weeks.
14. Switch to warm white bedside bulbs to keep white from feeling clinical
I find that people chase a white summer bedroom and accidentally make it feel like a hospital—usually because their bulbs are too cool-toned. From my experience, lighting is the difference between “fresh” and “flat.”
I always start by swapping bedside bulbs to warm white light (2700K–3000K — the cosy, yellowish tone you see in most homes). For most lamps, that’s a standard A19 LED bulb; I like 800–1100 brightness (measured in lumens) depending on whether you read in bed.
I recommend buying a 4-pack for $10–$18 on Amazon or at Lowe’s, and keeping the old bulbs in a labeled zip bag for winter. The trade-off is colour accuracy—warmer bulbs can make some crisp whites look slightly creamy, which I actually prefer in summer.
Pro Tip: I’ve found dimmable bulbs are worth the extra $3–$6 because you can drop the brightness by 30–40% at night, which makes sheers glow instead of looking gray.

15. Create cross-breeze with furniture spacing (no new purchases)
I always start by looking at airflow before I buy anything, because from my experience a cooling bedroom is mostly layout. I find that even a pretty breezy bedroom feels stuffy if furniture blocks the window path.
I recommend pulling the bed 3–6 inches off the wall if you can, and keeping at least 24 inches clear near the window so air can circulate. If you have a dresser near the vent, I slide it 8–12 inches to the side so the conditioned air isn’t trapped behind it.
This costs $0, but it takes about 20–30 minutes and a second pair of hands for heavier pieces. The trade-off is symmetry—sometimes the “best airflow” layout isn’t perfectly centered, so I balance it with matching lamps or art.
Pro Tip: When I tried this in a small room, I learned to put felt sliders under bed legs (about $6–$10) so I could shift the bed seasonally by a few inches without scratching floors.
16. Thrift a vintage cotton sheet set and use it like boutique bedding
From my experience, thrifted sheets are one of the most underrated ways to get that soft, washed-in summer feel—because older cotton can be cooler than many new microfiber sets. I always start by checking fabric content tags before I fall in love with a print.
I look for 100% cotton or cotton percale, then I buy a flat sheet and 2 pillowcases even if the fitted sheet is missing. Typical thrift pricing in my area is $6–$14 for a set, and I wash on hot, then add 1/2 cup of baking soda to the rinse to strip lingering smells.
I find that pale stripes or tiny florals look fresh paired with blue-grey linen, but I keep the palette to 2–3 colours so it stays light. The trade-off is sizing—vintage sheets can run smaller, so I measure: a queen flat sheet should be roughly 90×102 inches.
Pro Tip: I’ve found the telltale sign of “good old cotton” is a slightly crisp hand-feel when dry—if it feels slick in the store, it’s often polyester and won’t breathe as well at night.
17. Make a DIY bedside carafe setup that feels hotel-fresh
I find that summer comfort is partly psychological—having cold water within reach makes bedtime feel calmer. From my experience, a simple carafe moment also adds that styled, airy look without buying decor that just sits there.
I always start with a thrifted glass carafe and tumbler (usually $3–$8 total), then I place them on a 6–8 inch coaster or small tray to catch condensation. If you don’t thrift, Amazon has carafe sets around $15–$25, but I prefer the hunt because you can find thicker glass that feels more substantial.
For a cohesive look, I choose clear glass with either a subtle ribbed texture or a simple cylinder shape, and I keep the tray in stone or glazed ceramic so it wipes clean in 10 seconds. The trade-off is refilling—if you drink a lot overnight, you’ll refill daily.
Pro Tip: When I tried this with thin glass, I learned it sweats more—thicker thrifted glass stays cooler longer and drips less onto wood nightstands.

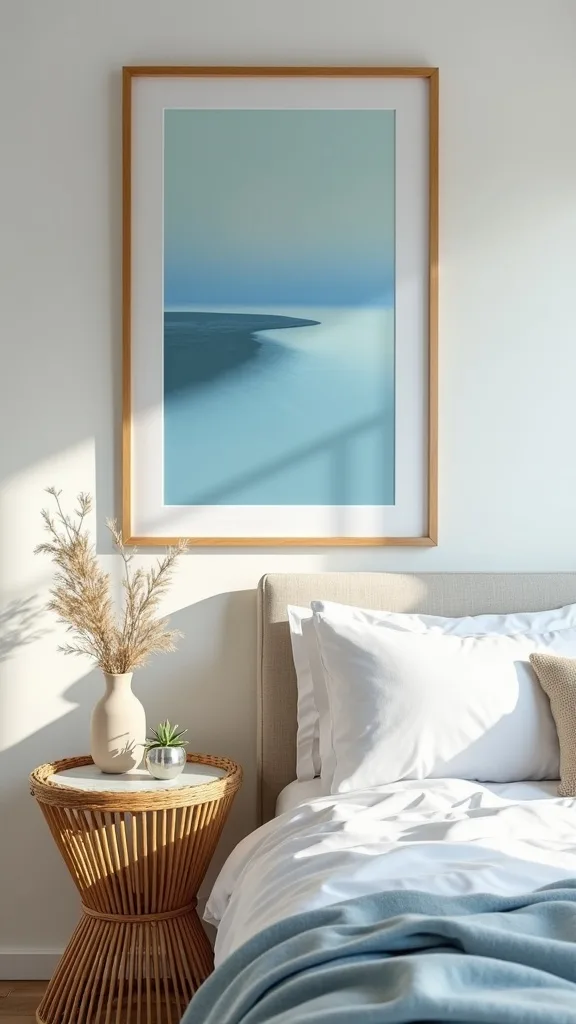
18. Use one oversized piece of art to reduce visual heat (and clutter)
I always recommend going bigger with art in summer, because from my experience lots of small frames create visual “noise” that makes a room feel busier and warmer. I find that one calm piece reads like a breath of air.
I aim for a frame that’s at least 24×36 inches above a queen bed, or 18×24 inches above a dresser, hung so the center is about 57–60 inches from the floor. I thrift frames for $8–$20, then I replace the print with a $2–$6 downloadable art file printed at a local shop.
Materials: thrifted frame, kraft paper backing, and painter’s tape to secure the new print. The trade-off is glare—cheap frames can be shiny, so I avoid placing them opposite a window if possible.
Pro Tip: I’ve found that swapping glossy poster prints for matte paper makes the whole room feel softer in daylight—gloss catches window glare and can make “white” walls look harsher than they are.
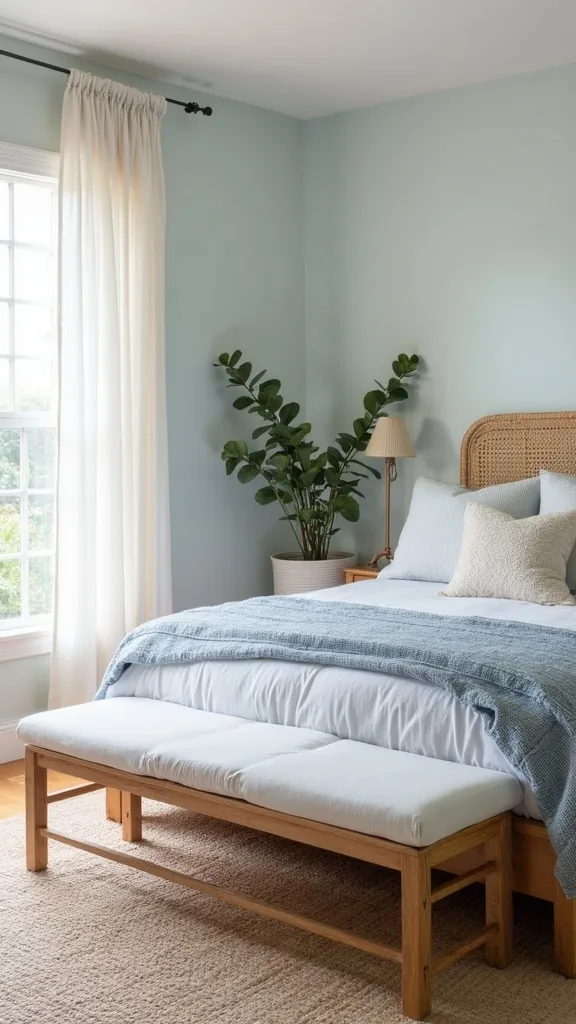
19. Add a narrow bench at the foot of the bed for breezy function
From my experience, a breezy bedroom needs a landing spot so clothes don’t end up on the floor (which instantly ruins the vibe). I always start by choosing a narrow bench so it adds function without crowding airflow.
I recommend a bench that’s 42–48 inches long and only 14–16 inches deep for most bedrooms. I’ve found Facebook Marketplace is gold for this—$25–$60 for a simple wood bench—then I sand for 15 minutes and seal with a water-based poly so summer humidity doesn’t raise the grain.
If buying new, IKEA and Wayfair often have options $60–$140. The trade-off is comfort—super narrow benches aren’t loungey, but they’re perfect for tossing a throw and tomorrow’s outfit.
Pro Tip: When I tried a bench with a fabric top, I learned it traps heat more than wood—if you run warm at night, a slatted wood bench keeps the foot-of-bed area feeling lighter.
20. Go “low scent” and natural to keep the room feeling fresh, not heavy
I find that summer rooms can feel stuffy even when they look airy, and from my experience it’s often because the scent is too sweet or intense. I always recommend a low-scent approach so the room reads clean, not perfumed.
I use 1 reed diffuser or 1 essential-oil spray—never both—placed 3–4 feet from the bed. If I’m using a diffuser, I choose a small 3–4 oz bottle and flip reeds once every 7–10 days; if I’m spraying, it’s 2–3 sprays into the curtains (not the bedding) about 10 minutes before sleep.
I’ve found citrus + cedar feels fresh in most spaces, but the trade-off is sensitivity—some people get headaches, so I keep it subtle and test for 2 nights.
Pro Tip: When I design this look with sheers, I spray the lower 12 inches only—scent rises, and this keeps it gentle while still making the curtains smell clean when the breeze moves them.
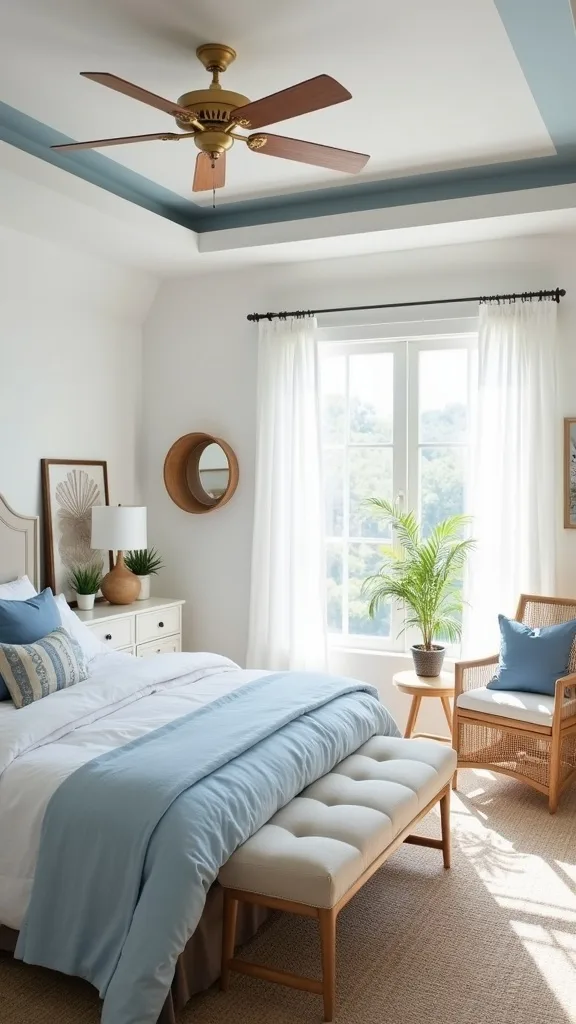
21. Use a tray ceiling “fake” with a painted border (renter-friendly option included)
From my experience, summer bedroom decor looks more elevated when the ceiling feels intentional, because the eye travels up and the room feels taller. I find that a simple painted border can mimic a tray ceiling without construction.
If you can paint, I tape a 3-inch border around the ceiling perimeter and paint it the same soft white as the walls, leaving the center ceiling its original white. This takes about 2–3 hours including drying time for one coat, and I typically use 1 quart of paint for the border.
For renters, I recommend removable washi tape in a 1–2 inch width to create the border line; it’s $6–$12 per roll and usually 2 rolls covers a 10×12 room. The trade-off is longevity—tape can peel in humidity after a few months.
Pro Tip: I’ve found the border looks most convincing when it’s slightly warmer than the ceiling—if both whites match exactly, the “tray” effect disappears in daylight.
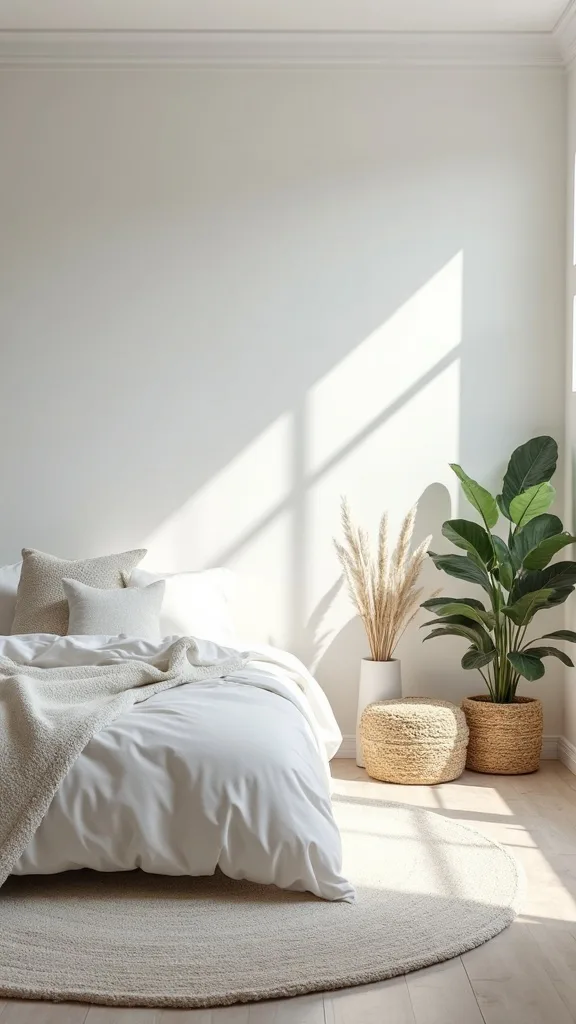
22. Common mistake to avoid: going all-white with zero texture
I always want to say this gently: from my experience, the most common mistake in a white summer bedroom is making everything the same smooth white. I find that it photographs okay but feels cold and flat in person—especially at night.
I recommend building texture in 2 places minimum: bedding and window treatments. For example, pair a slubby linen duvet with a crisp cotton percale sheet, and use a sheer linen-look curtain with a slightly denser inner sheer. That’s 4 textures right there, and it costs about $0–$60 if you thrift 2 of the pieces.
If you’re shopping, I look for “waffle,” “slub,” “matelassé,” or “gauze” in product descriptions; typically those textures hide wrinkles and add depth. The trade-off is laundry—some textured weaves snag more easily, so I wash on gentle in cold water and air-dry for 6–8 hours.
Pro Tip: When I tried an all-smooth-white setup, I fixed it instantly by adding one natural element (a $12 jute pillow or a $9 rattan tray)—warm texture is what keeps white from feeling harsh.
23. Upgrade your closet door look with a sheer panel “screen”
I find that a breezy bedroom is as much about what you don’t see as what you do see. From my experience, messy closet doors (or clutter peeking out) can ruin the calm even if the bed is perfect.
I always start by hanging a single sheer panel (about 52×84 inches) on a tension rod inside the closet opening, set 2–3 inches above the frame. This takes 10 minutes and costs around $8–$20 for the rod plus $6–$15 for the panel if you buy budget sheers.
If you want it to look intentional, I choose a slightly warmer white sheer and add 2 tie-backs made from leftover linen ribbon (each about 18 inches long). The trade-off is access—you’ll be pulling the panel aside daily, so it’s not ideal if you’re constantly in and out.
Pro Tip: I’ve found a tension rod holds better in summer humidity when you clean the inside door frame with rubbing alcohol first—oils from hands can make the rod slowly slip over 1–2 weeks.

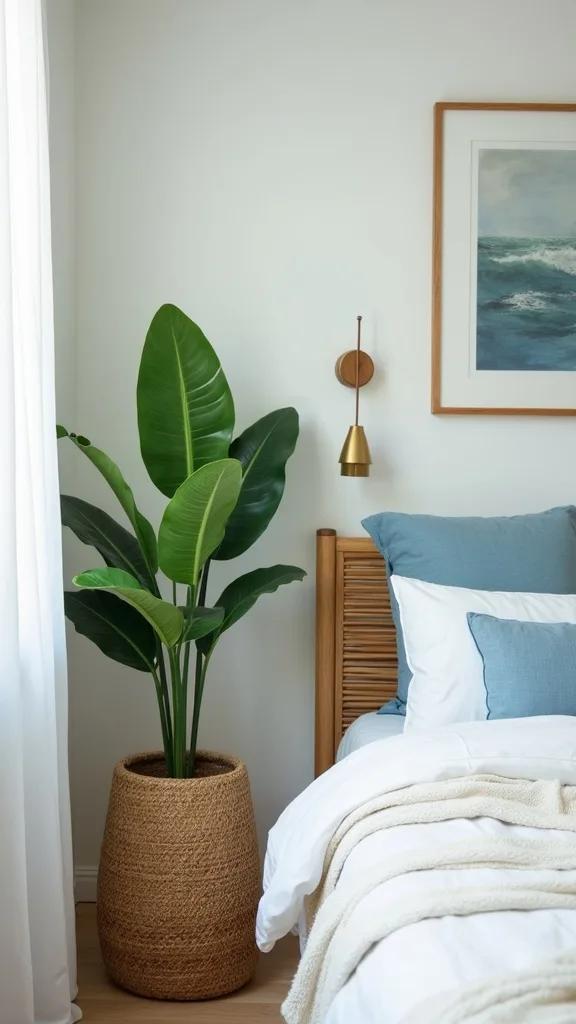
24. Bring in one “wet-safe” plant to signal summer (even if you forget to water)
In my opinion, one plant is the quickest way to make summer bedroom decor feel alive, but I always recommend choosing a variety that won’t punish you for missing a watering. From my experience, the goal is freshness, not a new chore.
I like a pothos or snake plant in a 6-inch pot placed 2–3 feet from the window, not on the sill where it can bake. If I’m thrifting, I grab a cachepot (outer planter) for $3–$8 and drop a plastic nursery pot inside so I can water in the sink and let it drain for 10 minutes.
For a cohesive palette, I choose a matte white or sandy ceramic planter to keep the room light. The trade-off is pests—open windows can invite gnats, so I avoid overwatering and keep the soil on the dry side.
Pro Tip: When I tried plants in bedrooms, I learned to top the soil with 1/2 inch of small pebbles—this ties into the pebble tray accent and helps reduce fungus gnats in summer.
25. Finish with a “two-minute morning reset” so the breezy look lasts
I always start my day with a quick reset in summer because from my experience, a breezy bedroom only looks breezy if it stays edited. I find that a 2-minute routine beats a big weekend clean every time.
My reset is simple: I shake the top sheet once, smooth the duvet with 6–8 quick passes, and open the curtains fully for at least 15 minutes to air out the room. Then I return 3 items to their homes—water glass to the sink, book to the nightstand tray, and laundry into a hamper (I like a 16–18 inch wide lidded one).
This costs $0 and keeps your light airy bedroom from turning into a pile zone. The trade-off is consistency—you have to do it daily, but it’s genuinely fast.
Pro Tip: I’ve found the bed looks instantly more “styled” if you fold the top sheet down exactly 10–12 inches and then pull the duvet up to meet it—this creates a clean band that makes even thrifted bedding look boutique.
Final Thoughts
I find that peak-summer comfort comes from a few smart swaps, not a full bedroom overhaul—especially when you focus on airflow, breathable textiles, and just enough texture to keep a white summer bedroom from feeling flat. From my experience, the biggest wins are always the same: floor-length sheers hung high, a linen or percale bed you actually want to climb into, and one intentional “cooling moment” like that pebble tray or bedside carafe.
If you want a simple next step, I always recommend doing one 30-minute task today: hang your curtains 4–6 inches higher (or add clip rings), then clear your nightstand down to three items. Typically, that alone makes the room feel lighter and more restful before you spend a single extra dollar.
When you’re ready, I’d pick one thrift stop this week—Habitat ReStore or a local charity shop—and hunt specifically for a bamboo fan, a glass tray, or a large frame. I’ve found that going in with a short list (and a $40 cap) is how you walk out with summer bedroom decor that looks curated, not random.
What I’d Do Differently
When I first tried this light, breezy summer setup, I made one mistake that I see all the time: I went too “matchy” with bright white everything—white sheers, white duvet, white rug—and my room ended up feeling flat and oddly cold at night. In my experience, the fix isn’t adding more decor; it’s adding the right kind of contrast. The moment I swapped in a blue-grey linen duvet cover (instead of pure white) and added one natural element (a small rattan tray), the whole room felt calmer and more intentional within 20 minutes. Typically, you only need 2 contrast points—one cool tone (like blue-grey) and one warm texture (like bamboo or jute)—to keep a white summer bedroom from looking unfinished.
I also wish I’d known how much curtain fullness matters before I bought my first set of sheers. I find that 2 skinny panels on a wide window look cheap no matter how high you hang them, so now I always plan for 4 panels total on larger windows and I budget $10–$18 for clip rings to get that soft ripple. If you do just one thing this week, I recommend measuring your window and committing to the right curtain width—then you can build the rest of the breezy bedroom look bit by bit.
Products I Recommend for This Project
Here are some of my favourite products to help you bring these ideas to life:
- NICETOWN White Sheer Linen Look Curtains (84–96 inch length options) — I find these give that airy, slightly textured look without the price tag of true linen.
- Amazon Basics Room Darkening Curtain Rod (up to 120 inches) — I recommend this when you need a sturdier rod for multiple sheer panels and clip rings.
- Amazon Basics Clip Rings for Curtains (1.5-inch, packs of 20–40) — I always use clip rings to make budget sheers hang like custom drapery.
- Dreo Oscillating Table Fan — From my experience, a quiet fan makes a bigger difference than fancy decor when you’re trying to sleep cooler.
- Philips LED Dimmable A19 Bulbs, Warm White Light (2700K) — I recommend these to keep a white room feeling cosy at night while still looking fresh in the daytime.