This post contains affiliate links. As an Amazon Associate, I earn from qualifying purchases at no extra cost to you.
Are you looking for bar cart ideas that don’t turn into a sticky, half-empty bottle graveyard by week two? Do you want to roll out a summer drinks station that feels “host with the most” without you sprinting back to the kitchen every 6 minutes?
I always start by treating a cart like a tiny kitchen: it needs a workflow, not just cute bottles. In this post, I’m sharing exactly how I build an entertaining bar cart that can live in my kitchen and then transform into an outdoor bar cart for patio nights.
From my experience, this is perfect for anyone hosting 2–12 people, working with a small kitchen corner, or trying to create a low-fuss patio bar without installing anything permanent.
I’ll walk you through my favorite layouts, what I stock (and what I stopped stocking after a few disasters), plus the little upgrades—like citrus garnish bowls and linen napkins—that make it look intentional without costing a fortune.
Below are 25 Bar Cart Ideas & Outdoor Entertaining Station that keep drinks flowing, cleanup easy, and your kitchen from looking like a frat party wandered through.
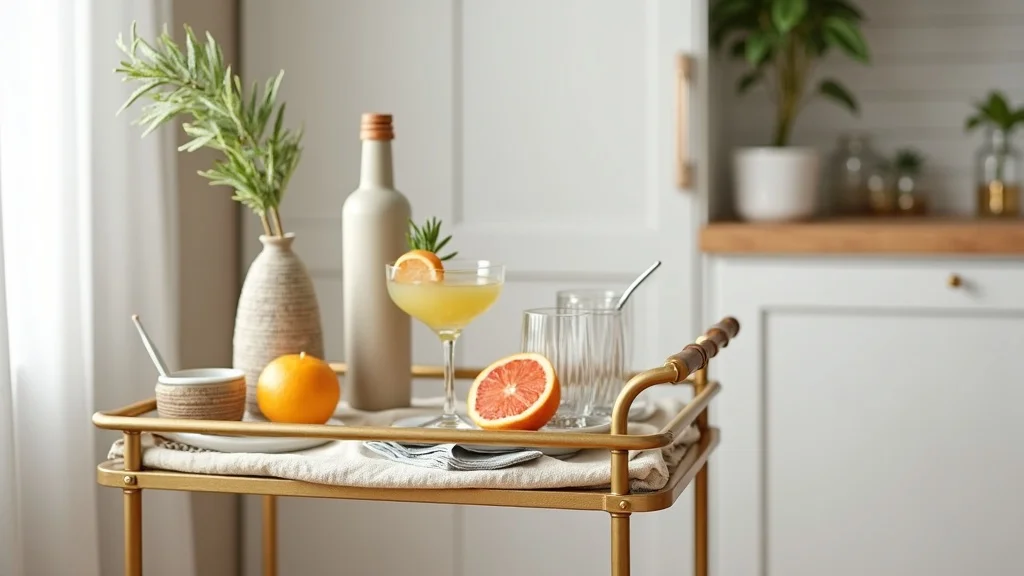
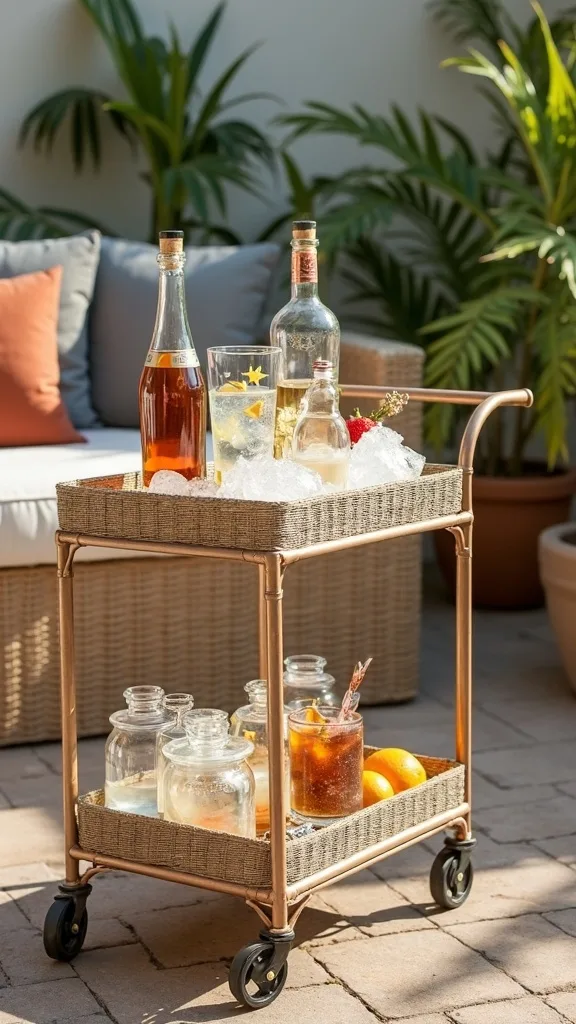
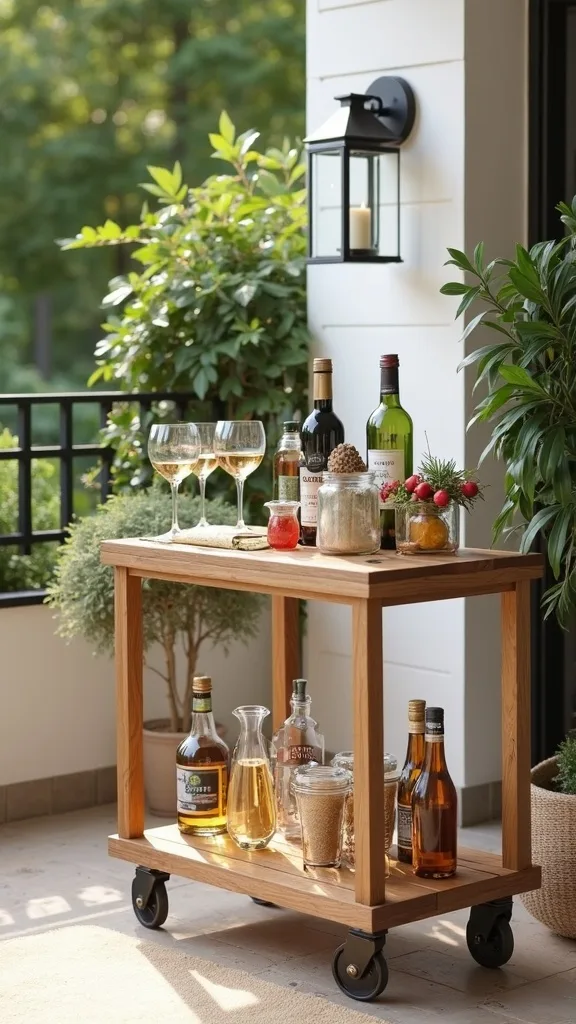
1. Gold cart “hero setup” with citrus, linen, and tools
When I design this look, I always start by making the cart feel like a mini cocktail bar, not a random shelf on wheels. From my experience, a gold bar cart reads instantly “special,” especially when I add a citrus garnish display, folded linen napkins, and a tidy cluster of glasses.
I set my 28-inch wide gold cart near the kitchen door and stage it in 3 layers: top tray for tools, middle for glasses, bottom for bottles. I keep the garnish tray to about 10–12 inches wide so it doesn’t steal elbow room when I’m muddling or pouring.
I find that a stainless cocktail shaker set, a small acacia cutting board, and two 8-ounce pinch bowls for lemon/lime wedges look polished without being precious. For napkins, I use 18×18-inch linen (or linen-look) in white or sand so spills don’t scream for attention.
Pro Tip: I always tuck a thin silicone bar mat (about 12×18 inches) under the tools on the top shelf—on a metal cart it prevents that annoying “clink-clink” echo every time someone sets down a jigger.

2. Kitchen-to-patio rolling route (so you’re not pinballing inside)
From my experience, the biggest win with an outdoor bar cart is having a planned “runway” from kitchen to patio. I always map the route first because nothing kills my hosting vibe faster than snagging a wheel on a rug and baptizing the floor in rosé.
I measure the narrowest point (mine is a 31-inch doorway) and choose a cart that’s at least 2 inches narrower, so 28–29 inches is my comfort zone. I also clear a 36-inch turning radius near the patio door so I can pivot without doing a three-point turn like a tiny beverage truck.
I find that rubber caster wheels (2–3 inches) roll over thresholds better than hard plastic. If I’m using a patio rug, I keep it low-pile under 0.3 inches so the cart doesn’t feel like it’s trudging through sand.
Pro Tip: I always roll the cart once fully loaded before guests arrive—if it wobbles, I move glass to the middle shelf and bottles to the bottom, because lowering the center of gravity fixes 90% of “why is this cart trying to tip?” moments.
3. Three-zone stocking: tools, drinks, and garnishes
I always recommend the three-zone method because it keeps decision fatigue low when people self-serve. In my opinion, most bar cart ideas fail when everything is mixed together and you’re digging for a bottle opener under a stack of napkins.
I set Zone 1 (tools) on the top shelf: shaker, jigger, bar spoon, muddler, and a bottle opener—5 tools max so it stays calm. Zone 2 (drinks) goes on the bottom shelf: I limit it to 3 bottles (like tequila, vodka, and a sparkling wine) plus 2 mixers (tonic and ginger beer) so it doesn’t become a liquor store aisle.
Zone 3 (garnishes) sits in a handled tray: 2 citrus options, 1 herb (mint), and 1 “fun” item like cocktail cherries. I find that keeping garnishes in 6–8 ounce bowls helps me refill fast without sticky chaos.
Pro Tip: I always put the opener and a small trash cup (12–16 ounces) in the exact same corner every time—guests learn the “muscle memory” and stop asking you where to toss lime peels.
4. Unbreakable glass swap for outdoor nights
From my experience, real glass outdoors is a gamble, especially once the sun sets and people start gesturing with their hands like they’re conducting an orchestra. I always keep an “outdoor set” so my summer drinks station doesn’t end with me sweeping tiny glittery shards at 11:30 pm.
I use 12–16 ounce Tritan (plastic that looks like glass) tumblers for highballs and 8–10 ounce stemless “wine” cups for everything else. I store them on the middle shelf in two neat stacks, and I cap it at 8–10 total pieces so the cart doesn’t look like a restaurant bus tub.
I find that clear unbreakables look more elevated than colored ones on a gold cart, especially with a simple white linen napkin. If I want color, I add it through citrus and a single patterned paper straw pack.
Pro Tip: I always test unbreakable cups with a lemon wedge for 10 minutes—some cheaper plastics haze or absorb citrus oils, and you’ll notice it first on clear cups under patio string lights.
5. A dedicated ice plan that doesn’t melt in 20 minutes
I find that ice is the quiet make-or-break detail of an entertaining bar cart. From my experience, a cute bowl of ice on the top shelf turns into a sad puddle within 30–45 minutes in summer heat.
I always start by choosing one ice strategy: either a 3-quart insulated ice bucket with tongs, or a small cooler tucked under the cart. If I’m hosting for 6 people, I plan on 8–10 pounds of ice; for 10–12 people, I grab 16–20 pounds so I’m not rationing cubes like it’s a survival show.
I keep the bucket on the patio side of the cart (not the kitchen side) so drips don’t trail inside. If I’m using a cooler, I park it within 2 feet of the cart and store extra cans underneath the cart to keep the shelves for “pretty.”
Pro Tip: I always pre-chill the ice bucket for 10 minutes with sacrificial ice, then dump it—starting with a cold bucket noticeably slows melt, especially on metal carts that warm up fast in sun.
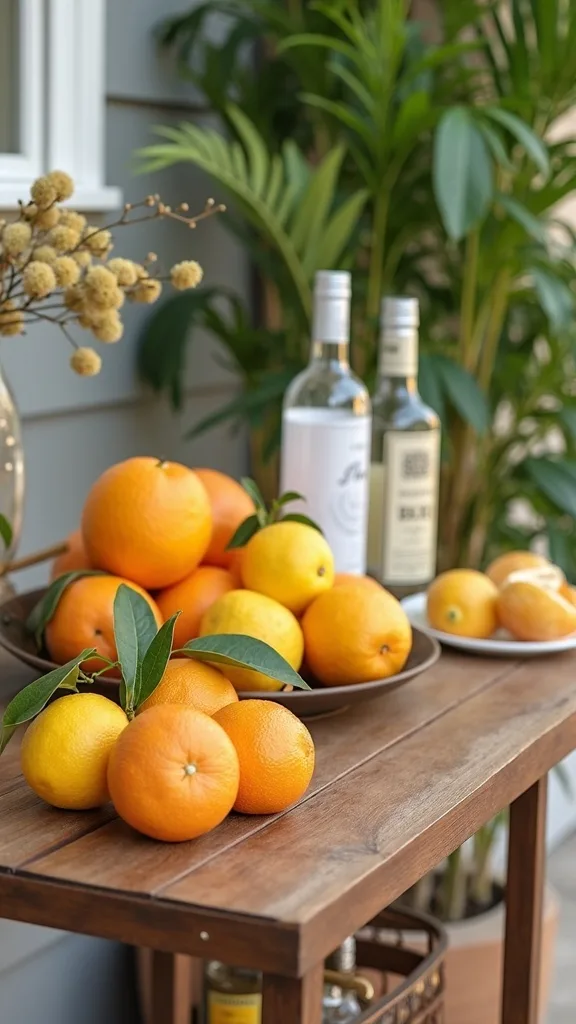
6. Citrus garnish display that stays fresh (and not fly-bait)
When I tried this the first time, I made the classic mistake of slicing all the citrus hours early and wondering why it looked tired by party time. From my experience, a garnish display works best when it’s prepped smart and covered between pours.
I always start by cutting wedges no more than 60–90 minutes before guests arrive. I use two 6-inch shallow bowls: one for lemon, one for lime, plus a small 4-inch ramekin for flaky salt or tajín so people can rim their own glass.
I find that a clear lidded container (even a basic deli container) tucked behind the “pretty bowls” is the secret weapon—refills stay juicy, and the display stays cute. If I’m outside, I place the garnish tray in the shade and keep it under a lightweight mesh food cover.
Pro Tip: I always pat citrus wedges dry with a paper towel before plating—less surface moisture means less slipping, so tongs actually grab the wedges instead of launching them like tiny wet soap bars.
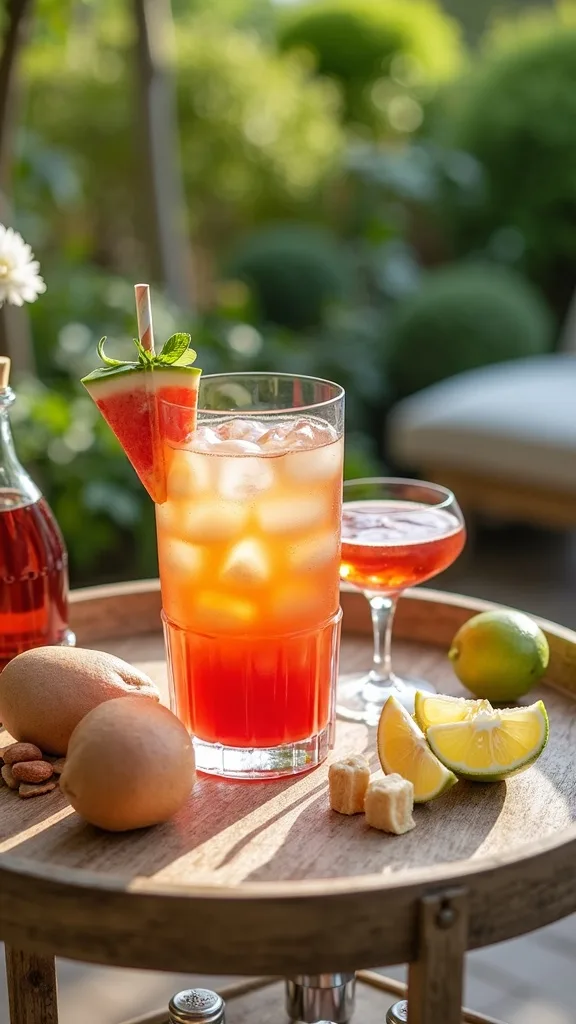
7. One signature cocktail + two backups (so you’re not bartending all night)
In my opinion, the most relaxing patio bar is the one where I’m not custom-building 14 different drinks like I’m on a reality show. I always pick one signature cocktail, then I stock two dead-simple backups that take under 30 seconds to assemble.
For the signature, I batch a margarita mix in a 64-ounce glass dispenser: tequila, lime juice, and simple syrup, then guests top with sparkling water if they want it lighter. Backup #1 is a spritz (sparkling wine + soda + citrus), and backup #2 is a zero-proof option like ginger beer with lime.
I find that printing a tiny 5×7-inch recipe card and clipping it to the cart saves me from repeating myself every 10 minutes. I also keep a 2-ounce jigger on a hook so pours stay consistent and the batch lasts 2–3 hours.
Pro Tip: I always batch without carbonation and add bubbles per glass—carbonated batches go flat fast, and you’ll end up “fixing” drinks with more booze, which is fun until it isn’t.
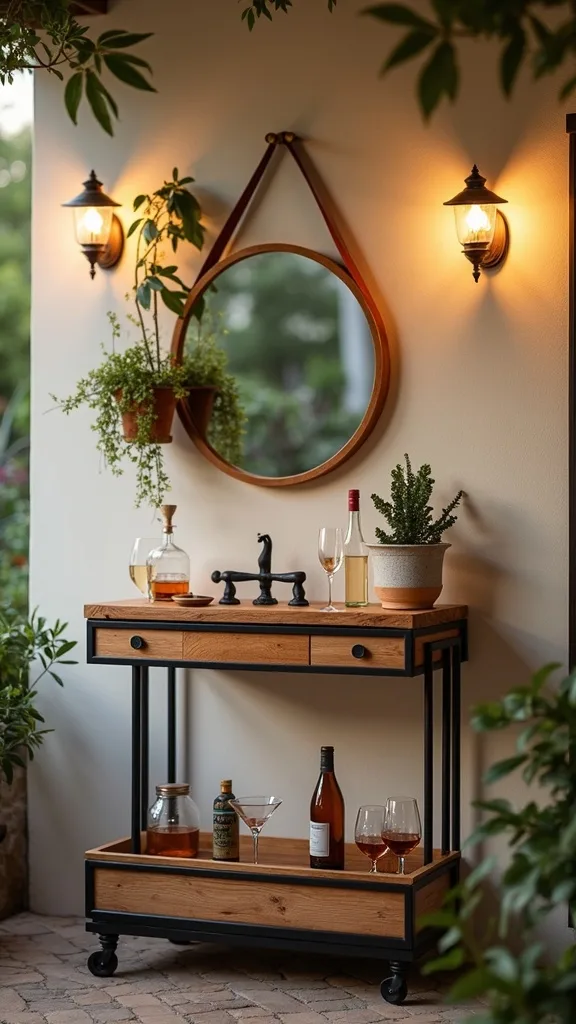
8. The napkin moment: linen that looks fancy but works hard
I find that linen napkins are the cheapest way to make bar cart ideas feel intentional, especially on a gold frame. From my experience, paper napkins either blow away outside or turn into mushy confetti the second someone sets down a sweating glass.
I keep 8–12 linen napkins (18×18 inches) folded in thirds and stacked in a low 10-inch tray, weighted with a small acrylic cube or a citrus bowl. If I’m hosting for 10 people, I put out 12 and stash 6 more in the kitchen so I can swap mid-party without doing laundry math in my head.
I always choose a tight weave cotton-linen blend because it absorbs better than “decor-only” linen. Color-wise, I stick to white, oatmeal, or pale stripe—typically they hide tequila splashes better than you’d think.
Pro Tip: I always pre-iron just the top 6 napkins and leave the rest un-ironed as backups—nobody notices the difference later, and it saves me 20–30 minutes of my life.

Cost & Materials Estimate
From my experience, a functional kitchen-to-patio bar cart setup typically lands between a modest “starter” refresh and a more complete entertaining station build.
| Item | Estimated Cost | Where to Buy |
|---|---|---|
| Gold bar cart (24–30 inch wide) | $65–$140 | Wayfair |
| Cocktail shaker set (stainless, 7–10 pieces) | $22–$45 | Amazon |
| Unbreakable Tritan tumblers (set of 8) | $24–$40 | Amazon |
| Insulated ice bucket (3-quart) + tongs | $28–$55 | Home Depot |
| Linen-look napkins (set of 12, 18×18 inch) | $16–$32 | IKEA |
| Rechargeable LED table lamp (warm white 2700K–3000K) | $25–$60 | Amazon |
Total estimated cost: $180–$372 I find that you can save the most by thrifting the cart and splurge (a little) on better wheels and unbreakable glassware for fewer headaches later.
9. Add a tiny cutting board station for quick garnishes
I always recommend a micro prep spot because it keeps the kitchen from becoming a traffic jam. From my experience, the moment you don’t have a place to cut one more lime is the moment someone uses your patio table… and leaves the knife somewhere terrifying.
I use a 10×6-inch acacia board and a 4-inch paring knife with a sheath, and I keep them on the top shelf beside the garnish bowls. If kids are around, I swap the knife for pre-cut citrus and keep the blade inside in a drawer—safety beats aesthetics every time.
I find that a board with a juice groove matters outdoors; it catches drips so they don’t run onto the metal cart and make everything slidey. I also keep a 6-ounce “discard cup” for lime ends so I’m not hunting for a trash can mid-pour.
Pro Tip: I always bring a damp microfiber cloth (not paper towels) and clip it to the cart handle—one quick wipe keeps sticky syrup from turning the cart into a lint magnet.
10. Use a tray to make the top shelf instantly portable
From my experience, the top shelf is where chaos starts—someone moves one thing and suddenly your whole setup looks like it survived an earthquake. I always corral the “active” items on a tray so I can lift and reset in seconds.
I use a 12×18-inch melamine or acrylic tray with 1-inch sides, and I keep it loaded with the shaker, jigger, opener, and two bottles I’m using most. If I need to move the cart from kitchen to patio, I lift the tray first, roll the cart, then set the tray back down—takes under 2 minutes and prevents spills.
I find that trays in white, clear, or rattan look great against gold. If you’re going for a more modern patio bar, clear acrylic keeps the visual clutter down while still looking “done.”
Pro Tip: I always add clear rubber bumpers (the tiny cabinet-door dots) under the tray corners—on metal carts, it stops the tray from “walking” as people grab bottles.
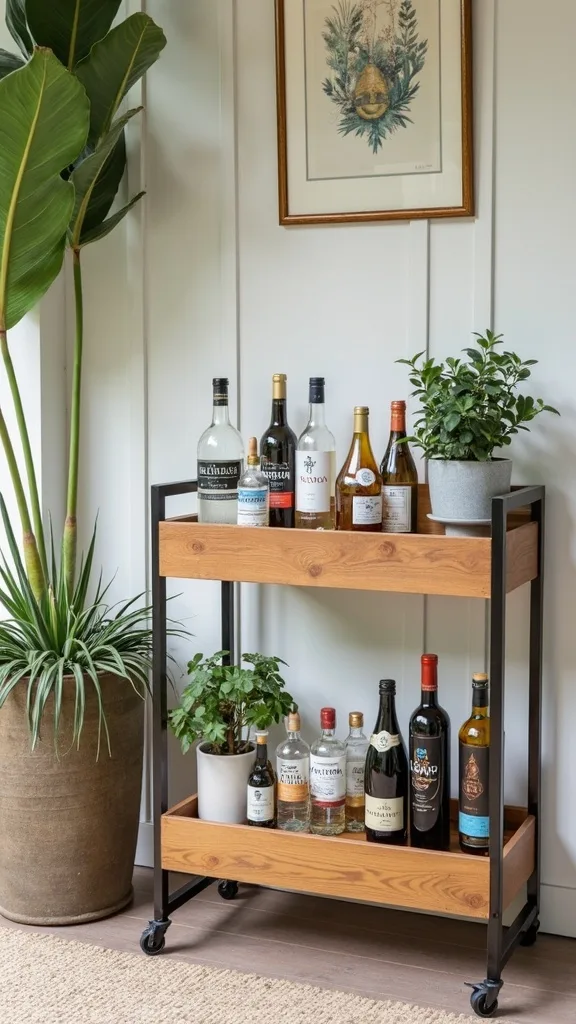
11. Bottle height rules so the cart doesn’t look messy
In my opinion, the easiest way to make an entertaining bar cart look expensive is controlling bottle height. I always group bottles by height so it reads organized, not like a recycling bin waiting for pickup.
I keep tall bottles (over 11 inches) on the bottom shelf and shorter mixers (under 9 inches) on the top tray. If I’m displaying 3 spirits, I line them up back-left to back-right and put the “pretty” label facing out—yes, I’m that person, and yes, it helps.
I find that limiting visible bottles to 5–6 total keeps the cart airy. Anything extra goes in a kitchen cabinet within 10 feet so I can restock without leaving guests alone outside for 7 minutes.
Pro Tip: I always remove pour spouts before rolling the cart—those little metal spouts love to snag towels and knock bottles like dominoes during transport.
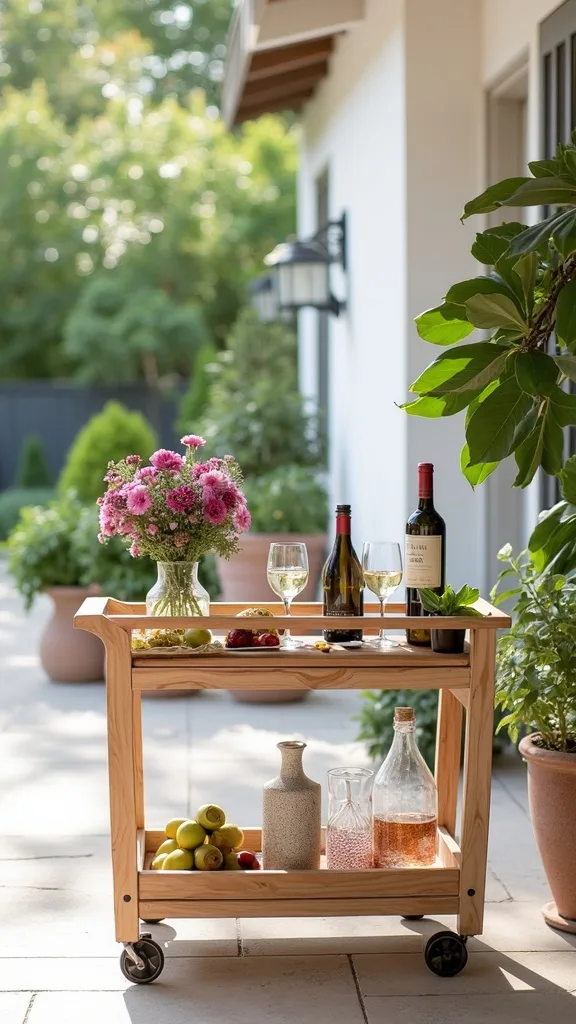
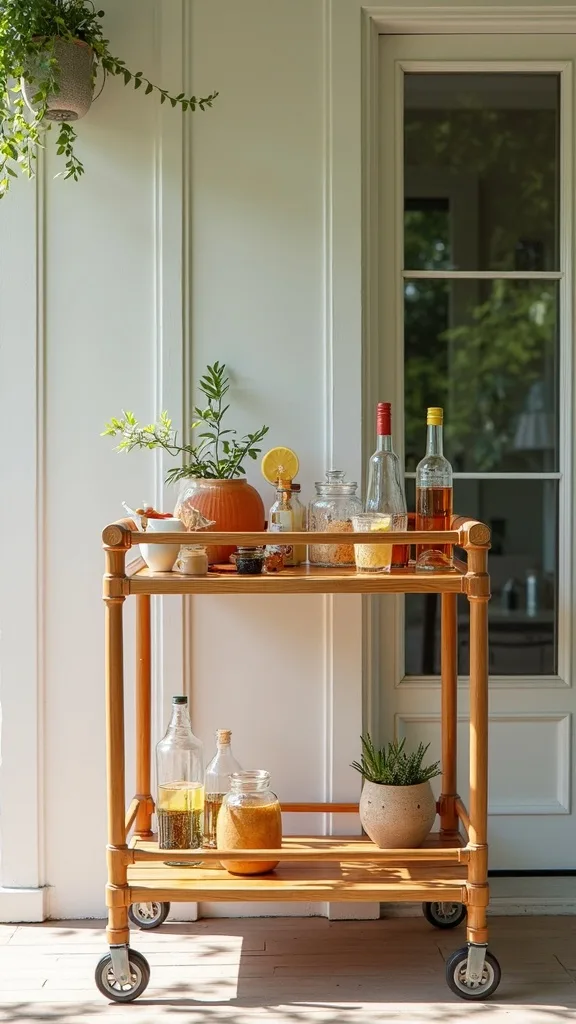
12. A summer drinks station with a built-in water option
I always include water because, from my experience, it’s the difference between “fun night” and “why do I feel like a raisin?” the next morning. When I design this look, I make water feel like part of the decor so it actually gets used.
I keep a 64–80 ounce glass carafe or drink dispenser on the cart’s bottom shelf and refill it every 60 minutes. If the cart shelf is too short, I place the dispenser on a small side table within 2 feet and keep matching cups on the cart.
I find that adding cucumber slices or orange wheels makes it look intentional, but I’m honest about the trade-off: fruit water needs a refresh within 2–3 hours so it doesn’t taste bitter. If I’m hosting longer, I switch to plain ice water with a bowl of citrus on the side.
Pro Tip: I always keep a small shaker of electrolyte packets in a discreet jar on the bottom shelf—guests who want one will quietly love you, and it doesn’t mess with the aesthetic.
13. Outdoor-friendly lighting so people can actually see what they’re pouring
From my experience, patio lighting looks romantic until someone tries to measure a shot in the dark and invents a brand-new cocktail called “Oops.” I always add a small light source right on the cart for function first, vibes second.
I use a rechargeable LED table lamp set to warm white light (2700K–3000K — the cosy, yellowish tone you see in most homes) and place it on the top shelf corner. I charge it for 4–6 hours beforehand so it lasts the whole evening, and I aim for brightness (measured in lumens) around 150–250 so it’s helpful but not blinding.
I find that a matte white lamp shade looks clean against gold and doesn’t attract bugs like some blue-toned lights do. If wind is an issue, I choose a lamp with a weighted base over 1 pound.
Pro Tip: I always position the lamp behind the jigger so it backlights the measurement lines—suddenly everyone pours accurately, and your batch cocktail lasts longer than expected.
14. A mini “trash + recycling” setup that doesn’t ruin the look
I find that the fastest way for a patio bar to look messy is garnish scraps and bottle caps everywhere. From my experience, if I don’t provide a trash plan within arm’s reach, guests will create one… on my hydrangeas.
I always set a 1.5–2 gallon lidded bin (or a cute metal ice bucket repurposed) next to the cart, no more than 18 inches away. For recycling, I use a handled tote on the bottom shelf and empty it once when it’s half full—usually after 45–60 minutes if we’re doing cans.
I keep the bin tucked behind the cart so photos still look pretty, and I line it with a grocery bag so I’m not wrestling a sticky liner later. The trade-off is one more “thing” on the patio, but cleanup is dramatically faster.
Pro Tip: I always stash a roll of washi tape in the cart and label the bins “TRASH” and “CANS” in big letters—people follow labels more than they follow vibes.
15. Use a bar caddy for straws, stirrers, and tiny tools
I always start by containing the small stuff because, in my opinion, loose straws and stirrers make a cart look like a junk drawer. From my experience, a simple caddy is the difference between “styled” and “scattered.”
I use a stainless flatware caddy with 3 compartments (about 10 inches long) and dedicate each slot: paper straws, cocktail picks, and cocktail napkins or coasters. I keep it on the middle shelf so it’s reachable but not competing with the “pretty” top shelf moment.
I find that bamboo stirrers and neutral paper straws look great with citrus and gold. Quantity-wise, I put out 20–30 straws for a group of 8–10 so I’m not restocking constantly, but I don’t dump the whole box out like a straw explosion.
Pro Tip: I always keep one compartment empty for “used but reusable” items like metal stirrers—guests will naturally place them there instead of back into the clean pile.
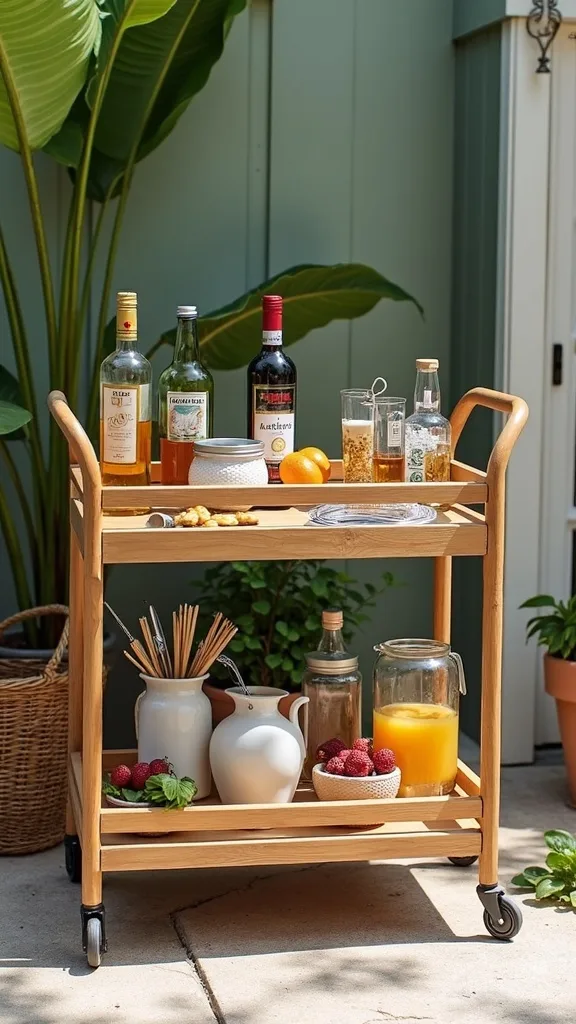
16. A compact wine + beer zone that stays cold longer
From my experience, wine and beer are the easiest crowd-pleasers, but they’re also the quickest to get warm on a summer night. I always build a cold zone that doesn’t require me to run inside every 15 minutes.
I use a galvanized tub (about 18 inches long) on the bottom shelf and fill it with 6–8 pounds of ice plus 6 bottles/cans max. If I’m serving both beer and wine, I do 4 cans + 2 wine bottles and keep backups in the fridge inside, rotating every 45 minutes.
I find that a tub with side handles is worth it because I can dump meltwater easily. The trade-off is weight—an ice tub can add 15–20 pounds—so I only load it once the cart is already on the patio.
Pro Tip: I always add a handful of rock salt to the ice tub—typically it drops the temp faster, so drinks chill quicker even if the ice is already starting to melt.
17. Make it a mocktail-friendly station without doubling your work
I always recommend building mocktails in from the start because, from my experience, more guests want a zero-proof option than they’ll admit out loud. When I design this look, I make the mocktail feel just as “real” as the cocktail.
I keep 2 zero-proof bases: club soda and a fancy mixer like Fever-Tree Ginger Beer or a grapefruit soda. Then I add one syrup (like Monin Passion Fruit) and the same garnishes everyone else gets. With that combo, guests can build 3–4 drinks in under 1 minute without me playing bartender.
I find that using the same 12-ounce tumblers and the same ice makes it feel cohesive. Quantity-wise, I plan 4–6 cans of soda for a group of 8, because typically at least 2 people will go zero-proof all night.
Pro Tip: I always label the syrup pump with painter’s tape and a Sharpie—when it’s dark, people can’t tell “simple syrup” from “spicy ginger,” and surprises are better in movies than in drinks.
18. Add a small-space side shelf using hooks and a towel bar
I find that small carts run out of surface area fast, especially once glasses and garnishes move in. From my experience, adding vertical storage is the easiest upgrade without buying a bigger cart.
I attach 2–4 S-hooks to the cart handle and hang the bar spoon, strainer, and a small towel. If my cart has a rail, I add a stick-on towel bar (about 12 inches) and hang a microfiber cloth so it’s always within reach.
I always keep hanging items under 8 ounces each so the cart doesn’t feel lopsided when it rolls. For a gold cart, I match hardware in brushed gold or clear acrylic so it looks intentional rather than “I raided the garage.”
Pro Tip: I’ve found that placing the towel bar on the short end (not the long side) prevents knees from bumping it when people crowd around—tiny detail, huge reduction in accidental towel-dragging.
19. A “spills happen” kit that hides in plain sight
In my opinion, the most underrated bar cart idea is planning for the mess before the mess happens. I always keep a tiny cleanup kit on the cart because outdoor entertaining is basically wind + sugar + gravity.
I stash a small lidded box (about 8×5 inches) on the bottom shelf with: 10–12 paper towels, a travel-size Dawn Powerwash, and a pack of disinfecting wipes. If I’m on a patio with pavers, I also keep a small handheld brush because sticky spills love to settle into texture.
I find that hiding this kit behind bottles keeps the cart looking styled. The trade-off is losing a little storage, but I’d rather sacrifice one bottle slot than spend 20 minutes scrubbing ants off a syrup spill.
Pro Tip: I always bring baby powder or cornstarch in a tiny jar—sprinkle it on a fresh spill on outdoor rugs, wait 5 minutes, then vacuum later; it pulls out sugar before it turns into a permanent sticky spot.
20. Create a “grab-and-go” garnish freezer stash
When I tried this, I felt slightly ridiculous freezing citrus… until it saved me on a last-minute invite. From my experience, having a freezer garnish stash makes a summer drinks station feel effortless, even on a random Tuesday.
I freeze 20–30 lemon and lime slices on a sheet pan for 2 hours, then store them in a zip-top bag. For herbs, I freeze mint sprigs between paper towels so they don’t blacken as quickly. On party day, I pull a handful 15 minutes before guests arrive so they’re cold but not icy.
I find that frozen citrus works especially well in spritzes and sparkling water because it keeps drinks cold without watering them down as fast as ice. The trade-off is texture—frozen wedges aren’t great for squeezing, so I still keep fresh wedges if I’m making margaritas.
Pro Tip: I always label the bag with the date and use within 2–3 weeks—after that, citrus starts tasting like “freezer,” and nobody wants a hint of leftover pizza in their drink.
21. Turn the cart into a dessert + drinks combo station
I find that pairing a tiny sweet with drinks makes people linger in the best way. From my experience, a cart that does double duty (drinks + dessert) reduces table clutter and keeps guests from hovering in the kitchen.
I use the middle shelf for a dessert tray—something like 12–18 cookies or a bowl of wrapped chocolates—while the top stays for tools and garnishes. If it’s hot (over 80°F), I choose shelf-stable treats and keep anything melty inside until the last second.
I always keep dessert portions bite-size (1–2 bites) so people can snack without needing plates. A 10-inch cake stand looks cute, but I typically go with a low 12-inch platter so it doesn’t block access to glasses.
Pro Tip: I always place desserts on the opposite side from the citrus—citrus oils can transfer scent fast, and nobody wants their chocolate tasting like lime peel.
22. Labeling that doesn’t look like a science fair
From my experience, labels are what make self-serve actually work, but ugly labels can ruin the whole vibe. I always use minimal, removable labeling so my patio bar feels intentional, not instructional.
I write drink options on a 4×6-inch acrylic sign with a chalk marker, or I clip a small card to the tray with a gold binder clip. I keep it to 3 lines max (like “Margarita / Spritz / Zero-Proof”) so it’s readable from 2–3 feet away.
I find that labeling the “weird” items matters most—like clarifying which bottle is non-alcoholic or which syrup is spicy. The trade-off is a tiny bit of prep time (about 5 minutes), but it saves me answering the same question all night.
Pro Tip: I always add one tiny note like “Mint lives in the cooler” because guests won’t open a cooler unless you explicitly give them permission—labels can reduce host-running by a shocking amount.

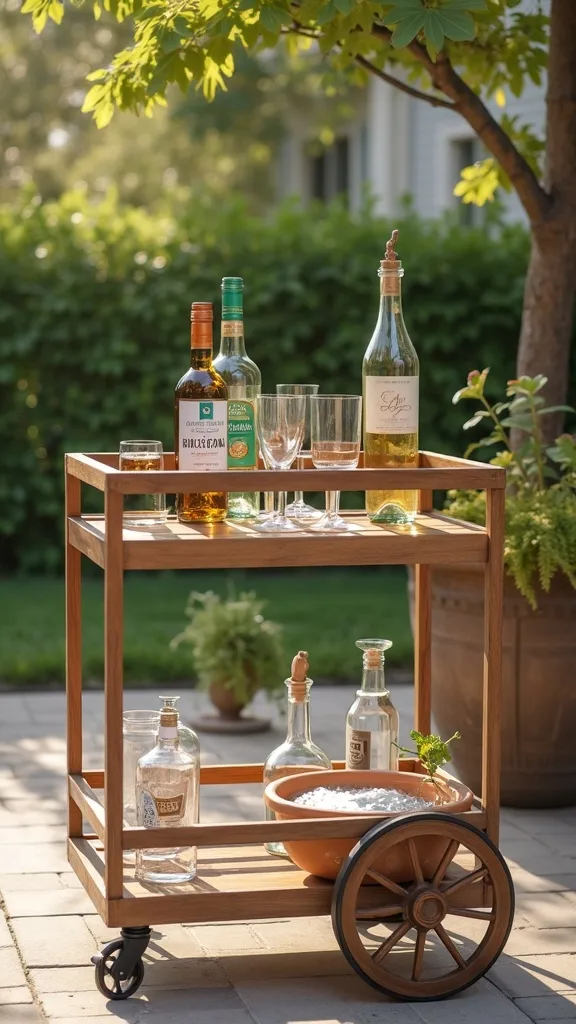
23. Weather-proofing: what I do when wind and sun show up uninvited
I always plan for weather because, from my experience, summer entertaining is basically a rom-com: it looks cute until the wind ruins your hair. When I design an outdoor bar cart, I build in a few low-key protections.
I keep a mesh food cover (12–14 inches) over garnishes, and I use weighted coasters (at least 6 ounces total for a stack) so napkins and recipe cards don’t fly. If the cart sits in direct sun, I move it every 30 minutes or park it under an umbrella—especially if there’s wine, because heat is not its friend.
I find that metal carts get hot to the touch, so I use a small towel on the handle if it’s been in sun. The trade-off is adjusting the setup mid-party, but it’s easier than serving lukewarm bubbly.
Pro Tip: I always bring two binder clips and clip the tablecloth (or a small runner) to the cart rails—this keeps fabric from flapping into glasses, which is a ridiculously common cause of accidental tipping.
24. Common mistake to avoid: over-styling the cart until it’s unusable
From my experience, the most common mistake people make with bar cart ideas is treating the cart like a photo prop instead of a working station. I always leave negative space because hands need somewhere to land a glass or set down a bottle.
I keep at least 30% of the top shelf clear—roughly a 10×12-inch open area on my cart—so someone can build a drink without juggling. I also avoid tall decor (like vases over 12 inches) that blocks access to bottles and makes the cart feel top-heavy when it rolls.
I find that one small plant (a 4-inch pot) is plenty if you want greenery. If I add candles, I use LED votives outside and keep them away from napkins by at least 6 inches, because wind + flame + linen is not the kind of drama I’m hosting.
Pro Tip: I always do a “one-hand test” before guests arrive—if I can’t grab the jigger and a glass with one hand while holding a bottle with the other, the cart is styled too tight and needs editing.
25. End-of-night reset routine so future-you isn’t mad
I always end the night with a 10-minute reset because, from my experience, waking up to a sticky cart is like stepping on a LEGO—avoidable pain. When I design this look, I build the reset into the system so it’s easy.
I start by dumping meltwater and wiping shelves with a damp cloth, then I return open mixers to the fridge within 15 minutes. I cap it at two trips: one to bring in bottles and perishables, and one to bring in glasses and the garnish tray.
I find that keeping a small bin on the bottom shelf for “to wash” tools helps—everything goes in one place, and I’m not hunting for the muddler the next day. If I used linen napkins, I toss them straight into a mesh laundry bag so citrus oils don’t stain other clothes.
Pro Tip: I always leave the cart empty overnight with shelves dry—if you store bottles on a slightly damp metal shelf, labels can wrinkle and stick, and it makes the whole setup look tired next time you roll it out.
Final Thoughts
I find that the most “successful” patio bar isn’t the fanciest one—it’s the one that makes hosting easier in real time. If you take nothing else from my bar cart ideas, I always recommend the three-zone setup (tools, drinks, garnishes) and a clear top-shelf landing zone, because those two tweaks prevent 80% of the scrambling.
From my experience, the gold cart look really comes alive when you keep the palette simple—clear glasses, citrus color, and linen texture—then let the sunlight (and later, a warm lamp) do the heavy lifting. And if something goes wrong, like a spill or a surprise gust of wind, you’ll be ready because you planned for it instead of pretending summer weather is predictable.
I always start by doing one small action today: pick your cart spot in the kitchen, measure the doorway width, and create a quick tray with your opener, jigger, and two favorite mixers. Once that’s done, rolling out your next summer drinks station is basically just adding ice and inviting people over.
What I’d Do Differently
When I first tried this, I made one specific mistake: I styled my outdoor bar cart like a magazine photo and left myself zero working space. I had a tall vase, two candle holders, a stack of napkins, and three bowls of garnishes all fighting for the top shelf, which meant every single drink required me to move something first. The moment a guest tried to help, the muddler rolled, the lime bowl slid, and I did that slow-motion reach like I was saving a falling baby… except it was just a jigger. From my experience, the correct approach is leaving a clear “landing zone” that’s roughly 10×12 inches on the top shelf and limiting decor to one small item under 6 inches tall.
I also wish I’d known how much the rolling part matters: cheap casters and a heavy top shelf make the cart feel wobbly and stressful. In my opinion, it’s smarter to keep bottles low, tools up top, and do a fully loaded test-roll through your doorway before anyone arrives—then you can relax and actually enjoy your own party, so go map your route and edit your top shelf today.
Products I Recommend for This Project
Here are some of my favourite products to help you bring these ideas to life:
- Barillio Elite Mixology Bartender Kit (Stainless Steel) — I find that this gives you the core tools (shaker, jigger, spoon, strainer) without buying random extras you’ll never use.
- Fever-Tree Ginger Beer (8-Pack) — From my experience, this instantly upgrades a mocktail or mule-style drink with less sugar than many grocery brands.
- US Acrylic Tritan Plastic Tumblers (Set of 8) — I always recommend Tritan for patios because it looks clear like glass but typically survives drops on pavers.
- OXO Good Grips Stainless Steel Ice Bucket with Tongs — I’ve found an insulated bucket buys you more time before meltwater takes over your cart.
- Zafferano Poldina Pro Rechargeable LED Table Lamp — In my opinion, a rechargeable warm-light lamp makes the cart usable after sunset without cords or harsh lighting.