This post contains affiliate links. As an Amazon Associate, I earn from qualifying purchases at no extra cost to you.
Our bathroom used to have one lonely vanity drawer that jammed if you looked at it wrong, plus a wobbly over-the-toilet rack that made the whole room feel like a dorm. Every morning was a small scavenger hunt: where did the floss go, why is the hair spray on the tub ledge again, and how do we own this many half-used lotions?
This post covers real, workable bathroom built ins—from recessed cabinets and toe-kick drawers to shelf niches and secret outlets—so your bathroom feels calm in the way fall mornings demand. We’ll walk through what we did, what we learned the hard way, and how to choose upgrades that look intentional instead of “we were out of space.”
This is perfect for anyone doing a bathroom storage upgrade in a small or builder-basic bathroom, especially if your counters have become the unofficial storage unit for everything you can’t find a home for.
Inside, you’ll find our favourite bathroom shelving ideas, the one thing we’d absolutely avoid (unless you enjoy patching drywall at midnight), and a few elegant tricks—like hidden lighting—that make even budget choices feel elevated.
Below are 25 Built-In Bathroom Storage & Cabinet Ideas that turn blank walls and awkward corners into storage you’ll actually use.
Products I Recommend for This Project
Here are some of my favourite products to help you bring these ideas to life:
- KOHLER Verdera Recessed Medicine Cabinet with Mirror — A clean, modern recessed cabinet that instantly adds hidden storage without bulk.
- DAYBETTER LED Strip Lights Warm White Kit — Easy interior cabinet lighting in warm white light (2700K–3000K — the cosy, yellowish tone you see in most homes).
- DEWALT Stud Finder with AC Wire Warning — Helps avoid the “surprise wire” moment before you cut into drywall.
- Franklin Brass Soft-Close Full Extension Drawer Slides — Makes shallow vanity drawers and pull-outs feel smooth and expensive.
- mDesign Stackable Clear Bathroom Storage Bins — Keeps cabinets tidy so your built-ins look intentional, not overstuffed.
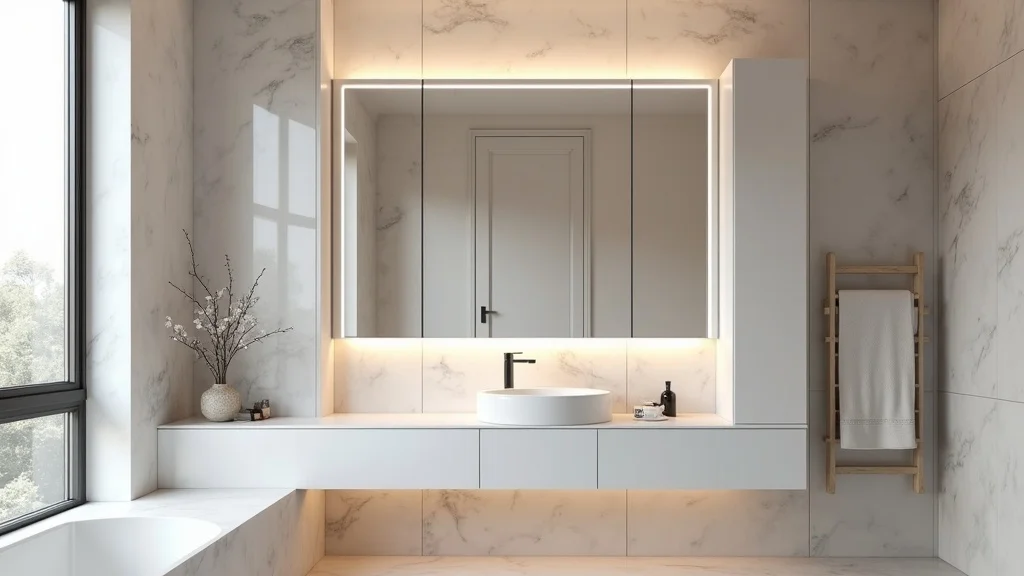
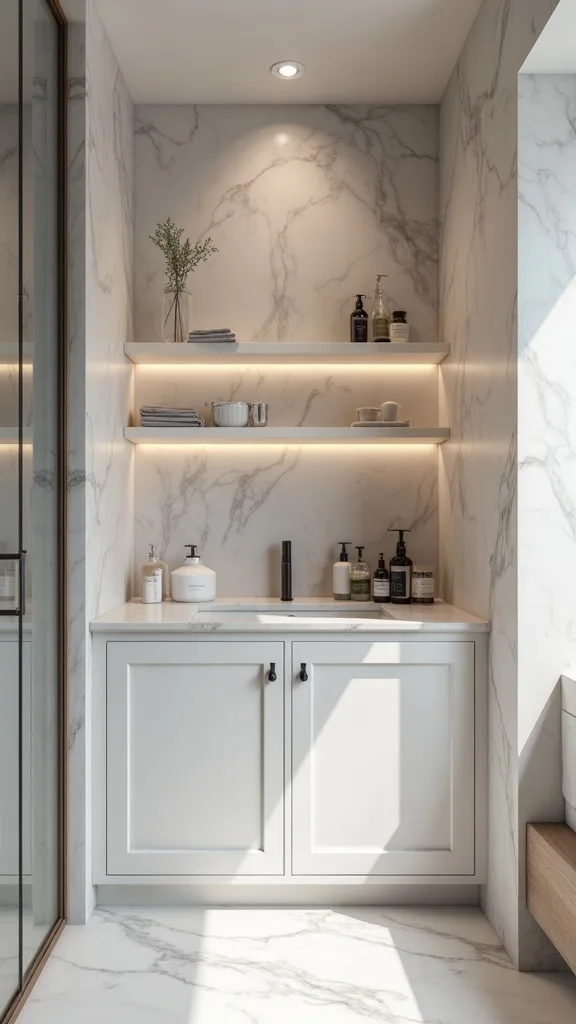
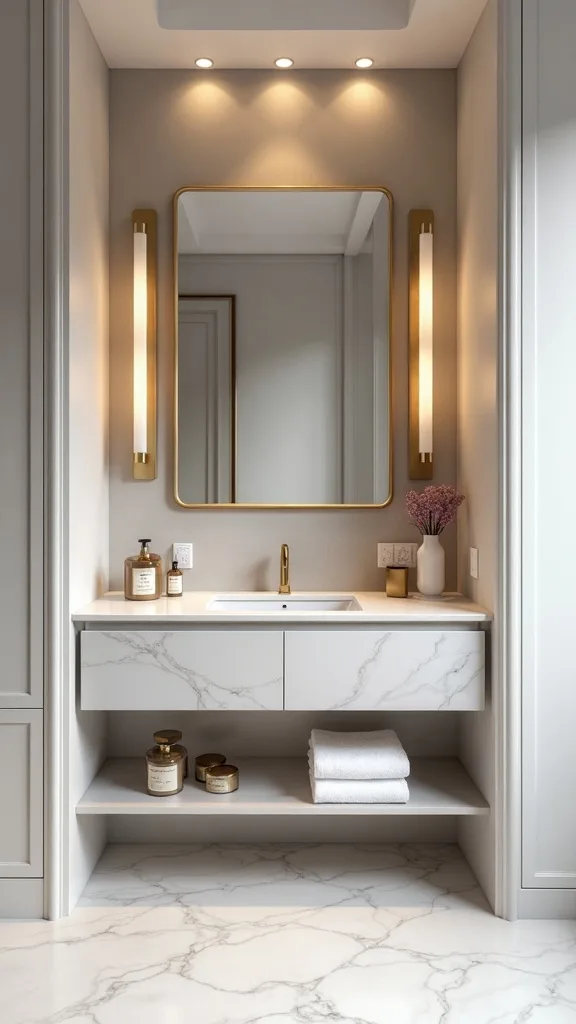
1. Recessed medicine cabinet with integrated mirror, side shelves, and interior LED strip lighting
This is the upgrade that made our bathroom feel like it finally graduated from “rental energy.” A recessed cabinet sits inside the wall, so you get storage without a bulky box hovering over the sink.
We cut the opening between studs, framed it with 2x2s, then set a mirrored medicine cabinet flush with the drywall. The almost-went-wrong moment: we hit a surprise nail plate and had to shift the opening 1 inch to the right—measuring twice is cute, but scanning for what’s behind the wall is smarter. We added slim side shelves for perfumes and the “daily lineup,” plus an interior LED strip so you can actually see the tweezers you’re about to lose.
Choose a mirror with a clean edge (it reads more polished), white or light oak shelves, and LED tape in warm white light (2700K–3000K — the cosy, yellowish tone you see in most homes).
Pro tip: put the LED on a door-activated switch so it turns on when you open it—tiny luxury, big mood, and suddenly your morning feels a little more composed.
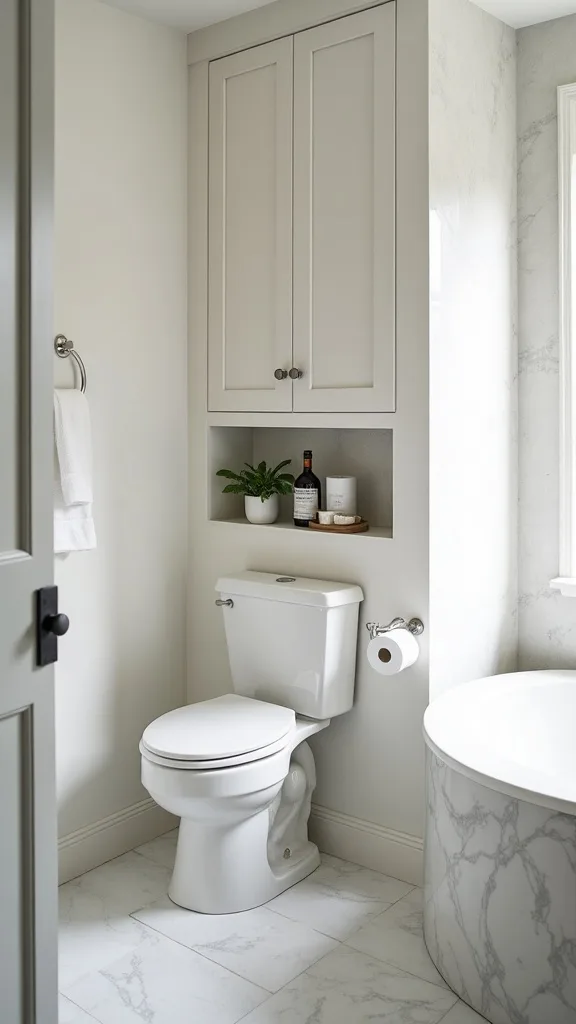
2. Between-the-studs shelf niche above the toilet (that doesn’t look like a hotel)
This idea turns that blank drywall above the toilet into storage that feels built-in, not bolted-on. Because it’s recessed, it keeps the room airy—no looming shelf threatening to bonk you during a dramatic hair flip.
Find your stud bay, cut a rectangle, and frame it so the drywall edges stay crisp. We painted the niche the same color as the wall for a seamless look, then added two shelves with a small lip so things don’t slide off when someone slams the door like they’re auditioning for a soap opera.
Use moisture-friendly paint in satin, and shelves in sealed wood or composite. Style it with rolled towels, a small tray for extra toilet paper, and one “pretend we’re fancy” candle.
Pro tip: add a thin LED puck at the top for a soft glow—fall evenings + dim bathroom lighting = instant spa energy without the spa bill.
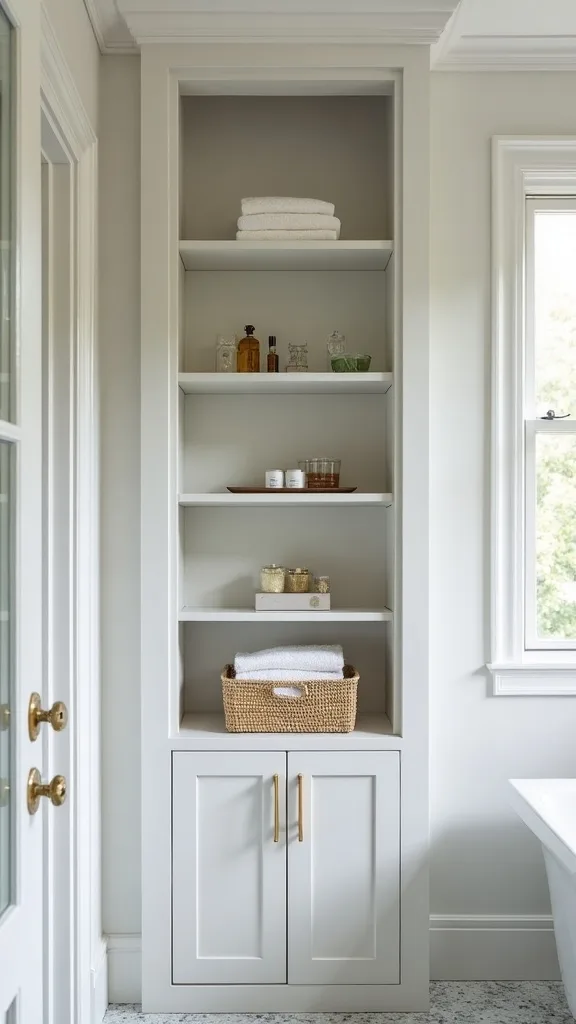
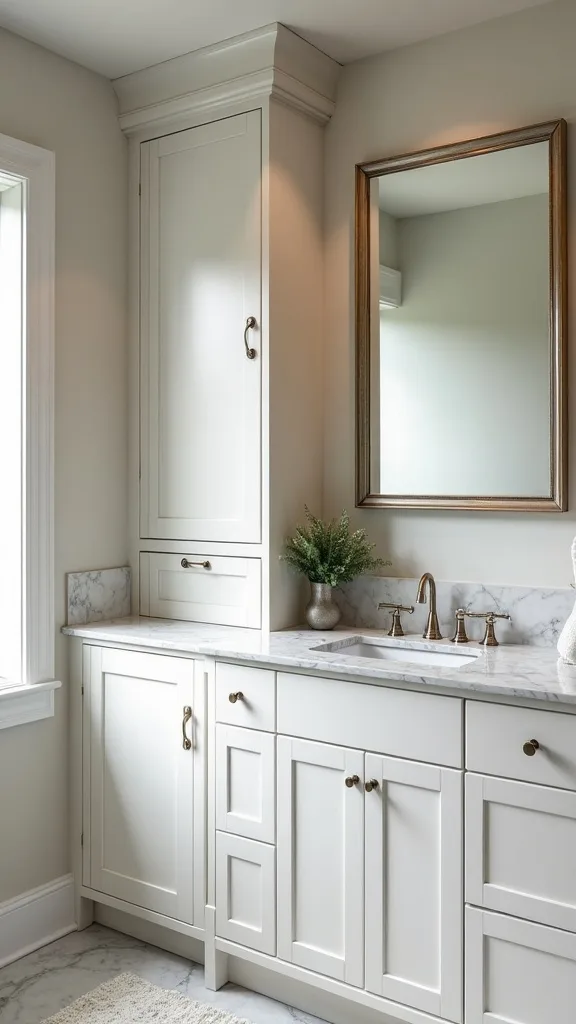
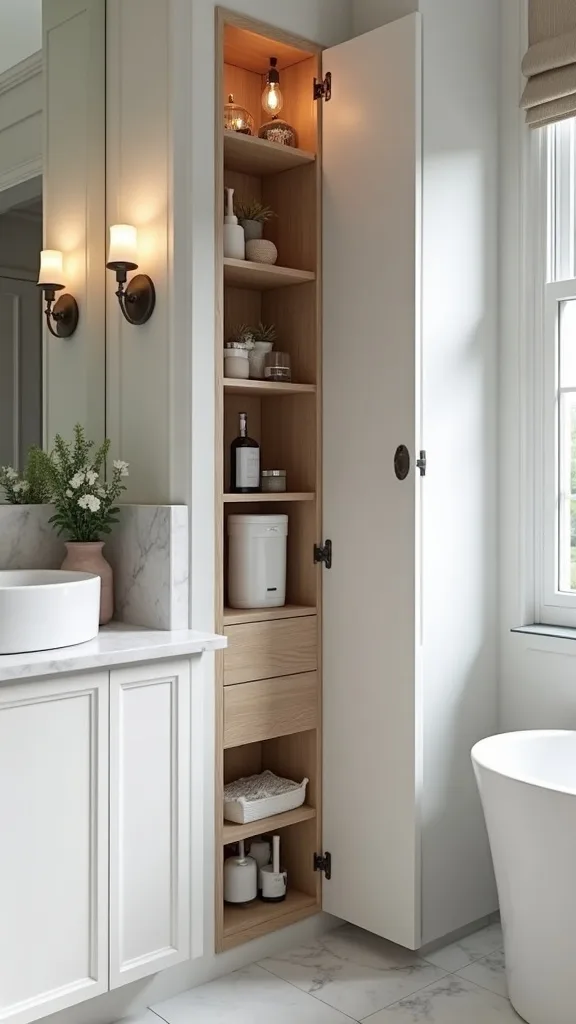
3. Tall linen cabinet built into a dead corner
A tall built-in linen cabinet is basically a closet you didn’t know you had. It’s the kind of storage that makes you feel like an adult who has matching towels on purpose.
If you have a corner with 14–18 inches of unused depth, frame a narrow cabinet box and anchor it into studs. We almost messed this up by forgetting baseboard thickness—our first dry fit sat proud by 1/2 inch, like the cabinet was trying to escape the wall. A quick trim fix saved it, but it was a humbling moment.
Go for a simple shaker-style door, matte black or brushed nickel hardware, and adjustable shelves. Add labeled bins for first-aid, travel, and “stuff we swear we’ll use.”
Pro tip: dedicate one shelf to a fall restock kit—cotton rounds, hand cream, tissues—so seasonal organization is a single, satisfying reload.
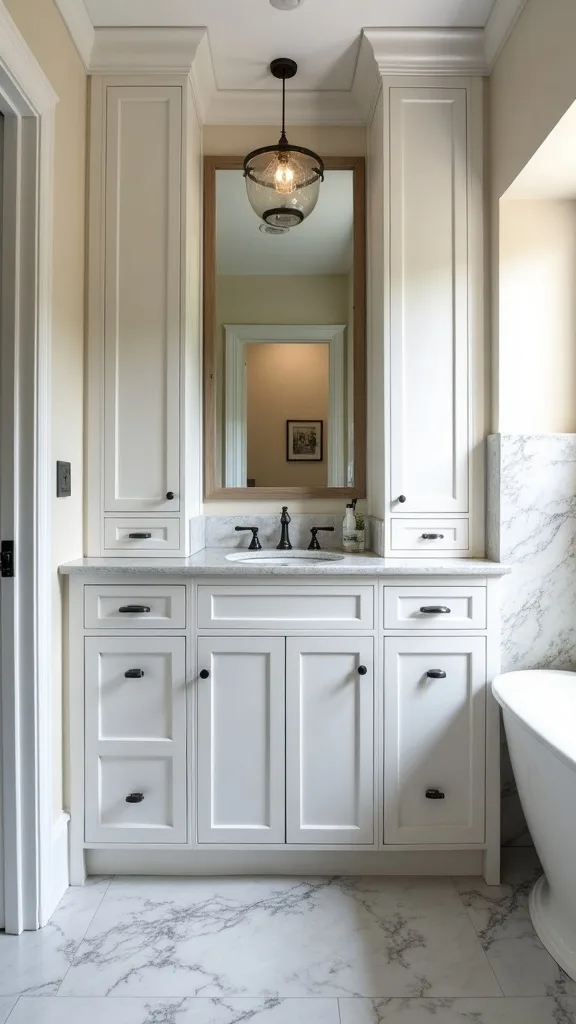
4. Drawer stack built into the vanity side panel
This is storage you feel every single morning: a slim stack of drawers where you normally have wasted vanity “cheek” space. It’s a quiet flex, and it keeps counters from becoming a product parade.
If your vanity has a blank side panel, you can retrofit shallow drawers (think 3–4 inches deep) for brushes, makeup, and backup deodorant. We mounted full-extension slides so you can see everything—no more digging like you’re panning for gold in a river of hair ties.
Choose drawer fronts that match your vanity, and add soft-close slides if you can—nobody wants a 6 a.m. drawer slam echoing through the house.
Pro tip: line drawers with a washable mat and group items by “face,” “hair,” and “teeth.” It’s oddly soothing and makes the whole bathroom feel curated.
5. Built-in hamper cabinet that hides the laundry pile
If your laundry pile is currently auditioning to be a second bath mat, this is your fix. A tilt-out or pull-out hamper cabinet keeps the mess contained and the room looking composed.
Install a cabinet base with a hinged front or a pull-out frame, then drop in a removable bag or bin. We learned the hard way to leave breathing room: our first basket was too snug and got stuck, which was funny until it wasn’t.
Pick a cabinet front that matches your bathroom cabinet style, and use a machine-washable liner. Light colors inside help you spot that one sock that’s always trying to escape.
Pro tip: add a second narrow hamper if you have kids or gym clothes—sorting as you go is the kind of tiny discipline that makes fall routines feel effortless.
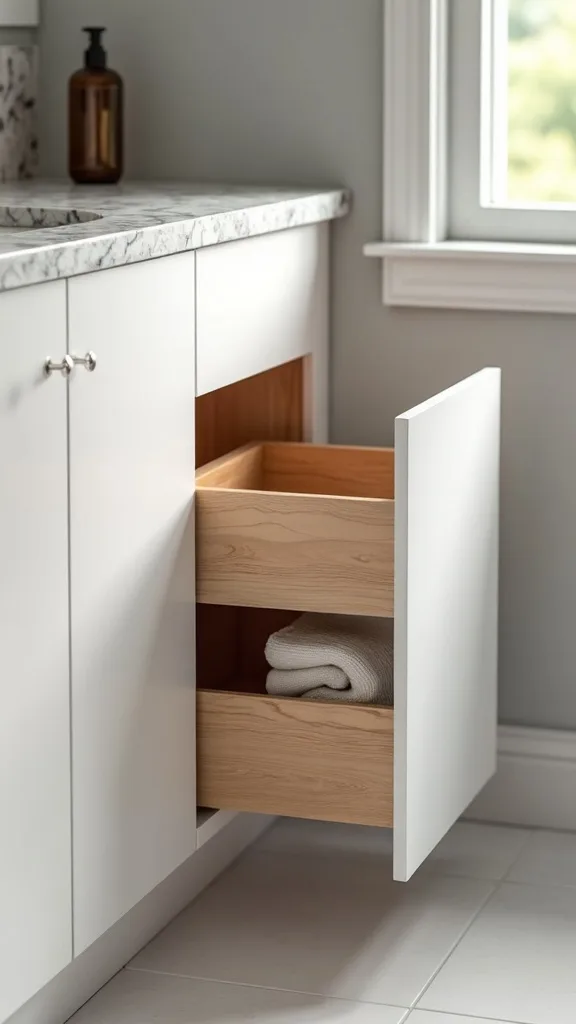
6. Toe-kick drawers for hair tools and extra towels
Toe-kick drawers are the sneakiest storage in the room. They turn that 4-inch dead zone under a vanity into a place for bulky items you don’t want on display.
You’ll need a toe-kick drawer kit or a shallow drawer box on low-profile slides. Measure the height carefully—ours was 3 3/4 inches, and yes, that 1/4 inch mattered like it was personal. We used it for a flat iron, backup hand towels, and the travel hair dryer we only remember exists when guests arrive.
Choose a drawer front that blends in, and add a small finger pull for a clean look. A heat-resistant mat inside is smart if you store tools.
Pro tip: this is a great “seasonal swap” zone—summer sunscreen out, fall hand cream and extra tissues in.
7. Recessed shelf niche inside the shower for bottles (no more corner caddy)
A shower niche is one of those upgrades that makes your bathroom feel intentional. It also stops the shampoo bottle avalanche that happens the moment you reach for conditioner.
Plan the niche between studs, waterproof it properly (waterproofing is basically a raincoat for your wall), and tile it to match or contrast. We almost placed ours too low, which would’ve turned it into a shin-banging hazard. Stand in the shower and mark comfortable reach height before you commit.
Use a solid shelf (quartz or tile) with a slight slope so water drains. Add two tiers if you’re a “multiple products per mood” household.
Pro tip: run a thin accent tile inside the niche—small detail, big impact, and suddenly your shower looks like it belongs in a magazine.
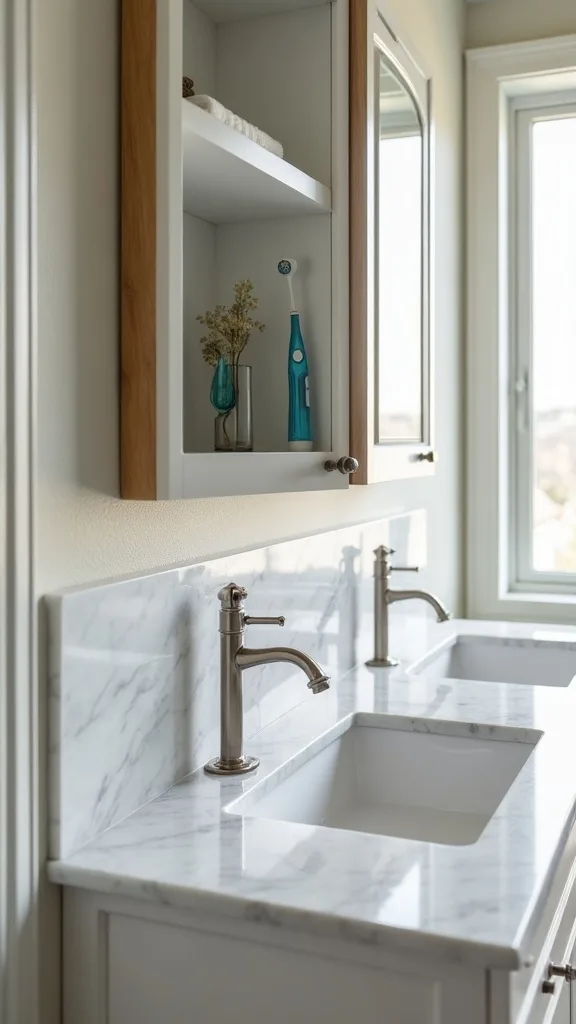
8. Mirror-front cabinet with hidden outlet for toothbrushes and chargers
This is the antidote to cord chaos. A hidden outlet inside a mirrored cabinet keeps toothbrushes and trimmers charged without turning your counter into an electronics aisle.
Choose a cabinet designed for interior outlets or have an electrician add one inside the box (we did not DIY electricity because we like our eyebrows). Route cords through a small grommet hole so doors close cleanly. The almost mistake: we placed the shelf too close to the outlet, and the plug wouldn’t fit—moving one shelf pin hole saved the day.
Go with matte white interiors so it feels bright, and add a small acrylic riser to keep items tidy.
Pro tip: add a motion-sensor nightlight in the cabinet—late-night routines become quiet and civilized instead of full overhead lighting drama.
Cost & Materials Estimate
For a typical fall bathroom storage upgrade centered around a recessed mirrored cabinet and a couple of built-ins, expect to spend $210–$980 depending on lighting and finish choices.
| Item | Estimated Cost | Where to Buy |
|---|---|---|
| Recessed mirrored medicine cabinet (16″ x 24″) | $129–$249 | Home Depot |
| LED strip kit + door switch (warm white light 2700K–3000K) | $22–$58 | Amazon |
| 1×2 and 2×2 lumber + screws for framing | $18–$46 | Lowe’s |
| Moisture-resistant drywall patch + joint compound | $24–$52 | Home Depot |
| Paint + primer (bathroom-safe satin finish) | $38–$96 | Home Depot |
| Bins, shelf liners, and organizers | $24–$179 | IKEA |
Total estimated cost: $210–$980 Save money by skipping custom doors and splurge on lighting—good light makes even simple built-ins feel elevated.
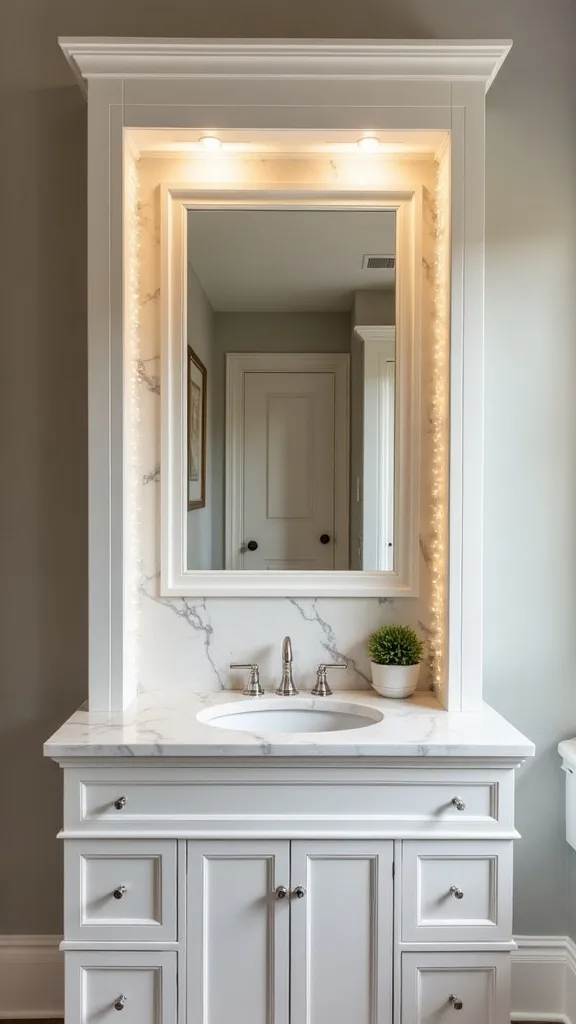
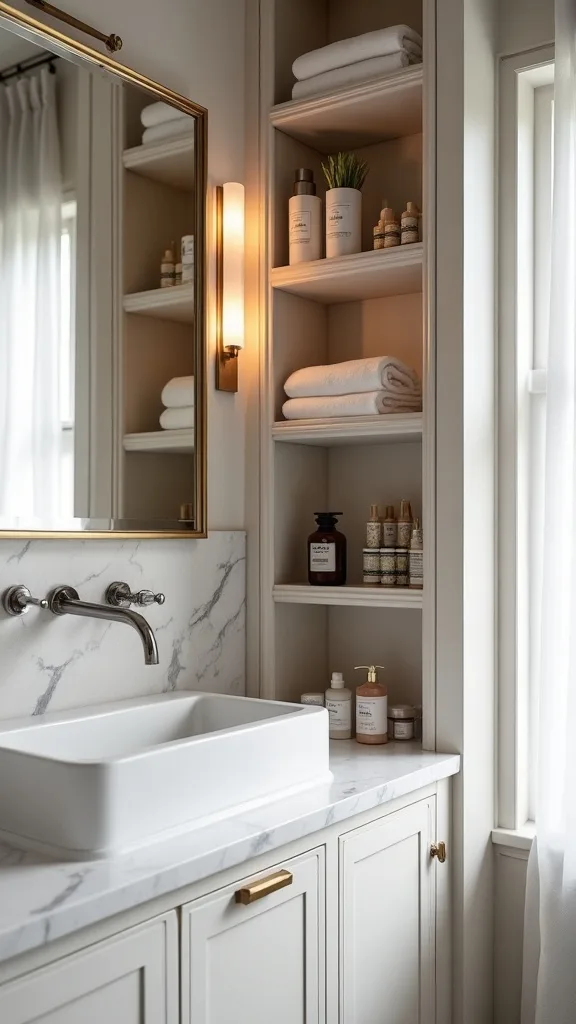
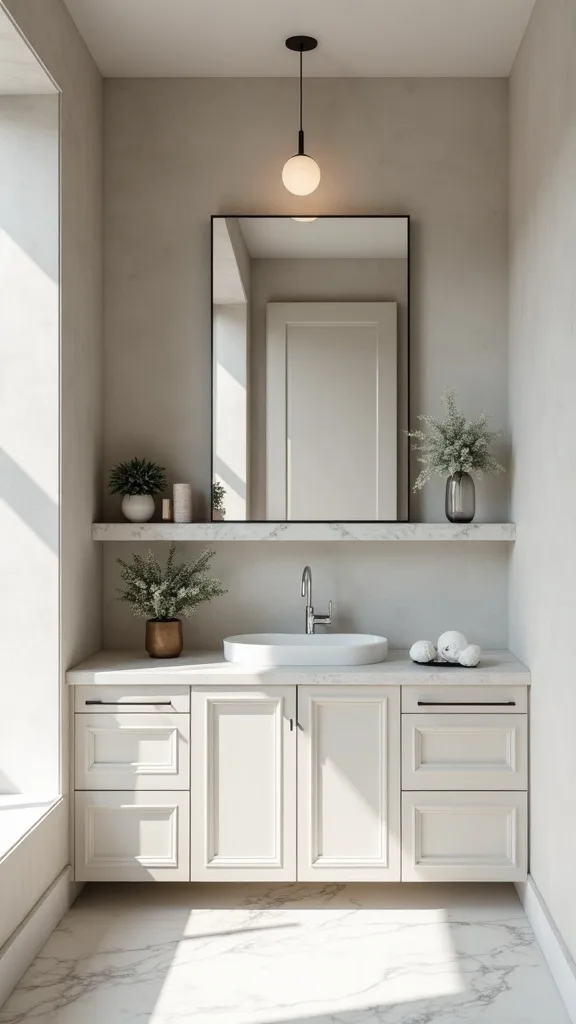
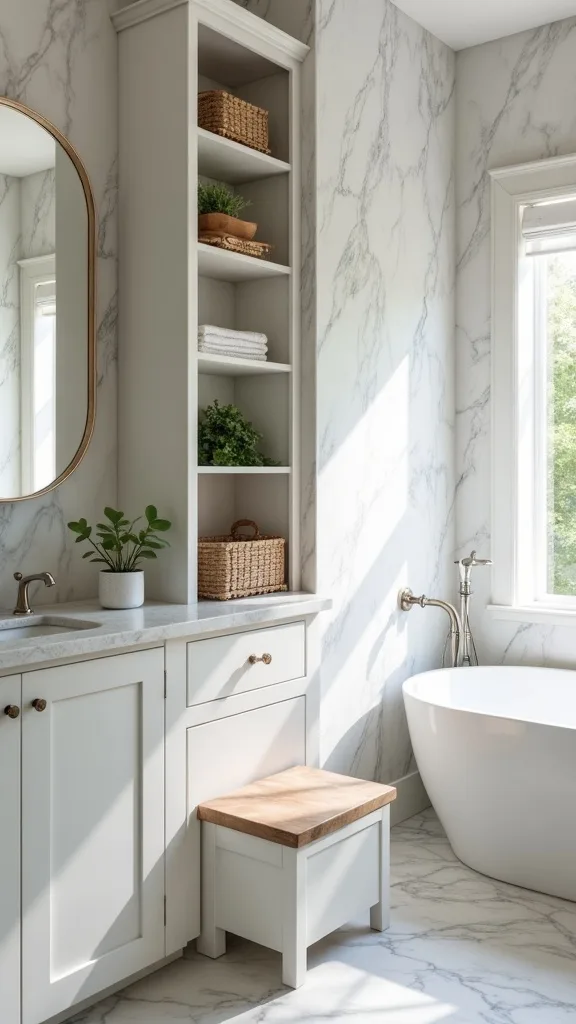
9. Built-in open shelves beside the mirror for daily essentials
Open shelves beside the mirror are for the items you actually use, not the ones you feel guilty about. They’re quick, practical, and can look elevated if you keep them edited.
Frame a narrow shelf column (4–6 inches deep), anchor into studs, and finish with trim so it looks integrated. We learned to keep the depth shallow—our first sketch was 8 inches, and it would’ve made the sink area feel cramped, like brushing your teeth in a hallway.
Use sealed wood or painted MDF, and keep a matching set of bottles on a tray to avoid visual clutter. One plant is fine. Twelve is a greenhouse.
Pro tip: install a small rail or lip on each shelf—your nice face oil shouldn’t be sacrificed to gravity.
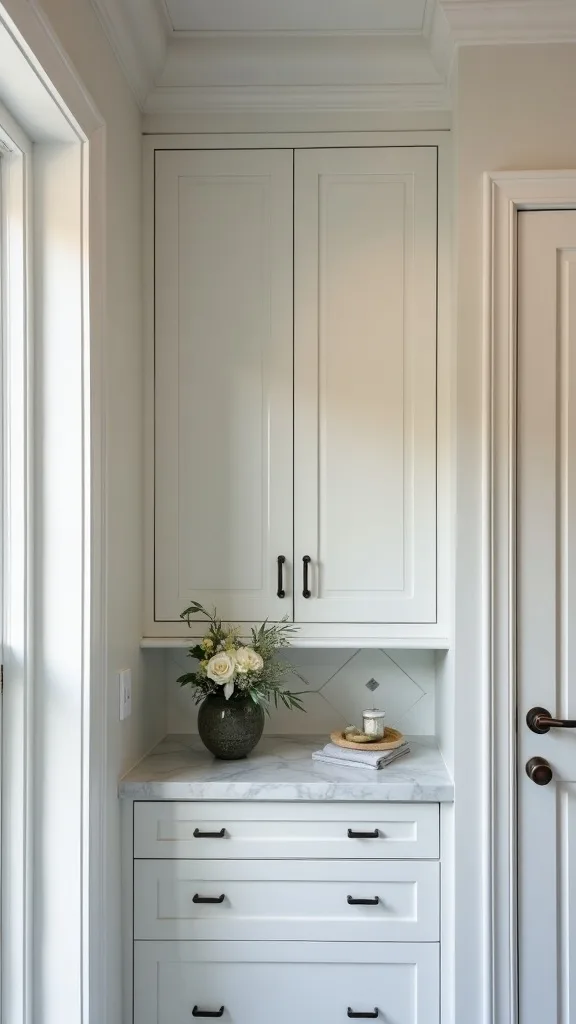
10. Built-in cabinet above the door for rarely used backstock
The space above the bathroom door is usually just… there. Turning it into a small cabinet is a smart way to store bulk items without giving up precious eye-level space.
Build a shallow box (10–12 inches deep), mount it into studs, and add a simple door. We almost made ours too tall and it looked like a weird forehead on the wall—keeping it slim and aligned with existing trim made it feel intentional.
Paint it the wall color so it disappears, and use clear bins inside for bandages, extra soap, and guest supplies.
Pro tip: label the inside of the door with what’s stored there. It’s not glamorous, but neither is buying your third bottle of mouthwash because you forgot you already had two.
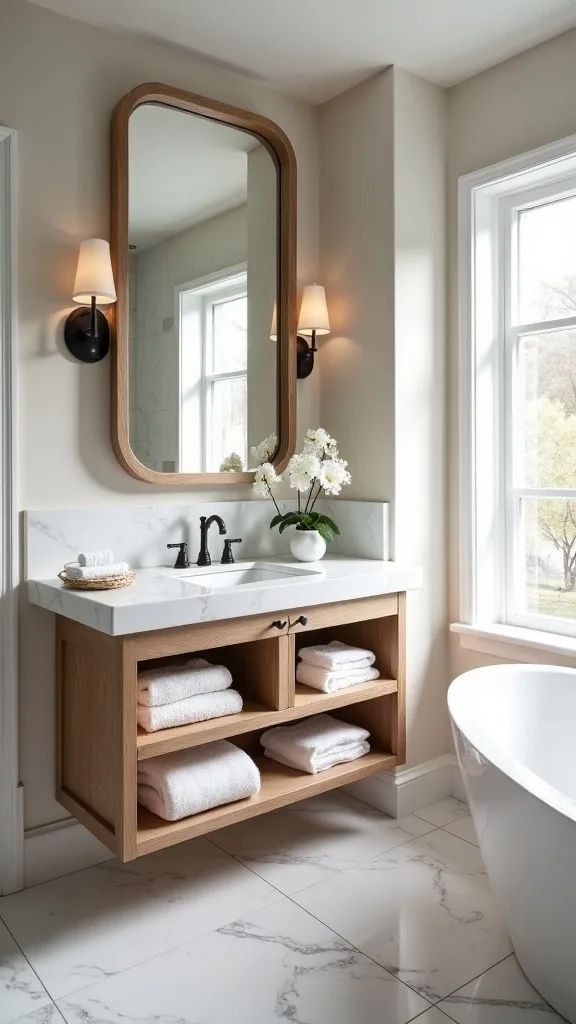
11. Built-in floating vanity with a recessed shelf underneath
A floating vanity feels modern and light, and the recessed shelf underneath is the practical part nobody tells you about. It’s where you stash baskets without making the floor look crowded.
Mount the vanity securely into studs (this is not the place for “close enough”), then build a recessed shelf cavity below the sink line. We almost skipped the shelf to save time, then realized we’d just be moving clutter to the floor like it’s a new idea.
Choose a wood tone that warms up the room, and baskets in natural fiber or washable fabric. Keep the shelf height around 8 inches so baskets slide easily.
Pro tip: add a low-profile LED strip under the vanity for soft nighttime lighting—your toes will thank you, and the room feels quietly luxurious.
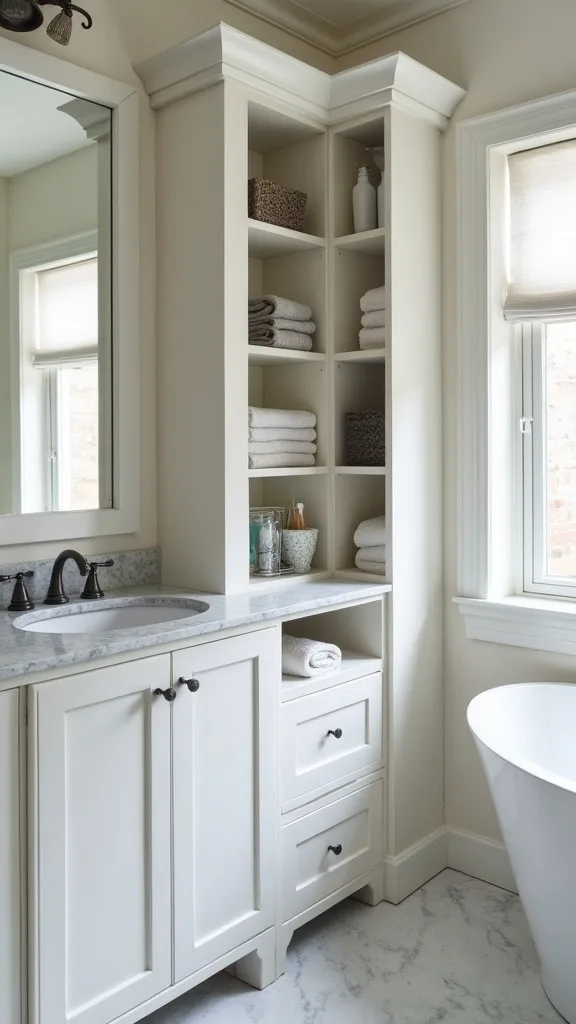
12. Built-in tower between double sinks (the peacekeeper cabinet)
If you share a bathroom, a center tower can save your relationship. It gives each person their own territory and stops the “why is your stuff on my side?” debate.
Install a narrow cabinet between sinks with drawers and one adjustable shelf. We planned ours around real items: hairbrush height, deodorant height, and the tall skincare bottle that refuses to fit anywhere else.
Match the vanity finish, and add two small drawers at the top for daily items. Use dividers so it doesn’t become a junk drawer in disguise.
Pro tip: assign shelves by person and label them for a week. It sounds silly until you realize it prevents 80% of bathroom friction.
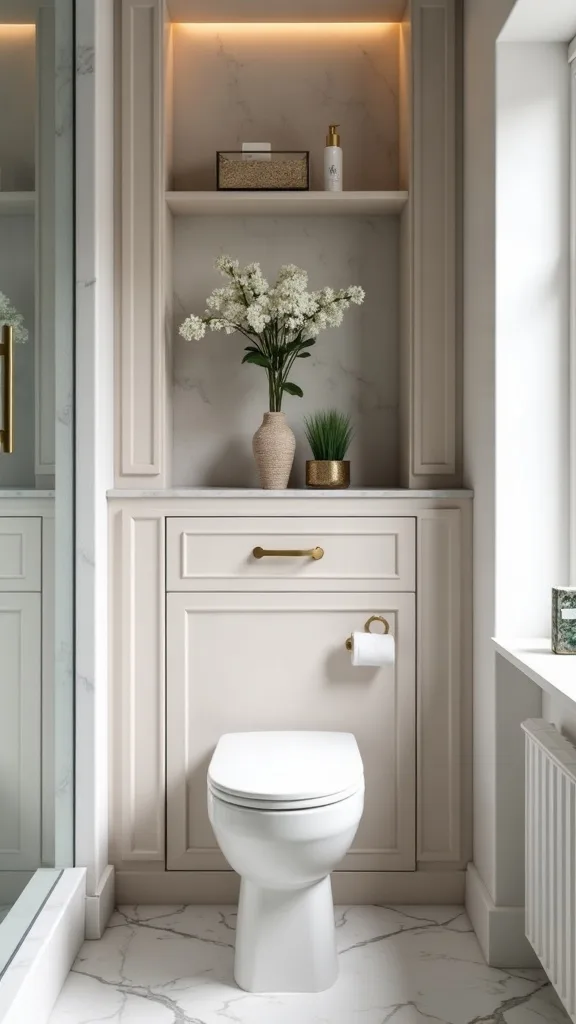
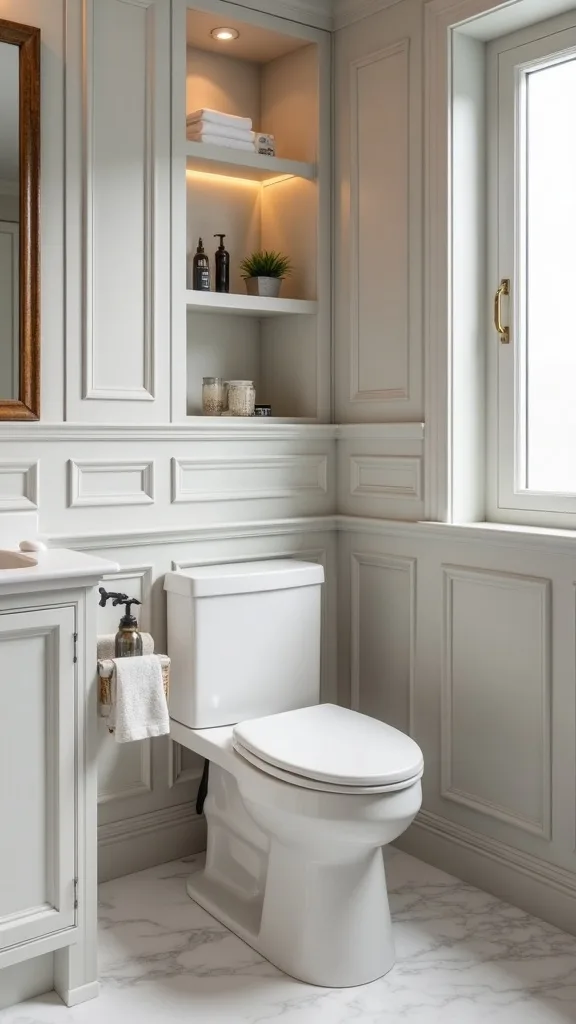
13. Recessed cabinet for extra toilet paper (that doesn’t scream “storage”)
A recessed toilet paper cabinet is the kind of detail guests notice without knowing why. It’s tidy, discreet, and eliminates the awkward “where do I put the extra rolls?” basket.
Cut a stud-bay opening near the toilet, install a recessed box, and add a small door or open face depending on your style. We learned to keep it slightly forward of the toilet tank—too far back and you’re reaching like you’re doing yoga mid-bathroom break.
Use a simple painted door, or a wood front for warmth. Inside, a vertical roll stack keeps it efficient.
Pro tip: keep one shelf for wipes or a small spray. It’s practical, and it makes the whole bathroom feel thoughtfully maintained.
14. Built-in shelf ledge (picture ledge style) for styling without clutter
A shelf ledge gives you display space without deep shelves that collect dust and chaos. It’s the “I have style” move that still respects your need for storage.
Install a narrow ledge (3–4 inches deep) along a blank wall or above wainscoting. We almost installed it too high and it looked like an afterthought—keeping it aligned with the mirror top made it feel cohesive.
Use painted wood, and style with one framed print, a small vase, and a lidded container for cotton swabs. Lids are your friend; they hide the messy truth.
Pro tip: rotate one seasonal item for fall—an amber bottle or a small branch clipping—and the bathroom suddenly feels part of the home, not a separate utility zone.
15. Built-in cabinet around a pedestal sink (yes, it’s possible)
Pedestal sinks are charming until you realize they store exactly nothing. A built-in surround cabinet gives you the look you like and the storage you desperately need.
Build a U-shaped cabinet that wraps the pedestal without touching plumbing, with doors or drawers on either side. We templated the curve with cardboard first because guessing with wood is expensive and emotionally damaging.
Match the finish to your trim, and use magnetic catches so doors stay closed. Add a moisture-resistant liner inside.
Pro tip: keep the interior organized with small bins—pedestal surround cabinets can become caves if you don’t give everything a clear home.
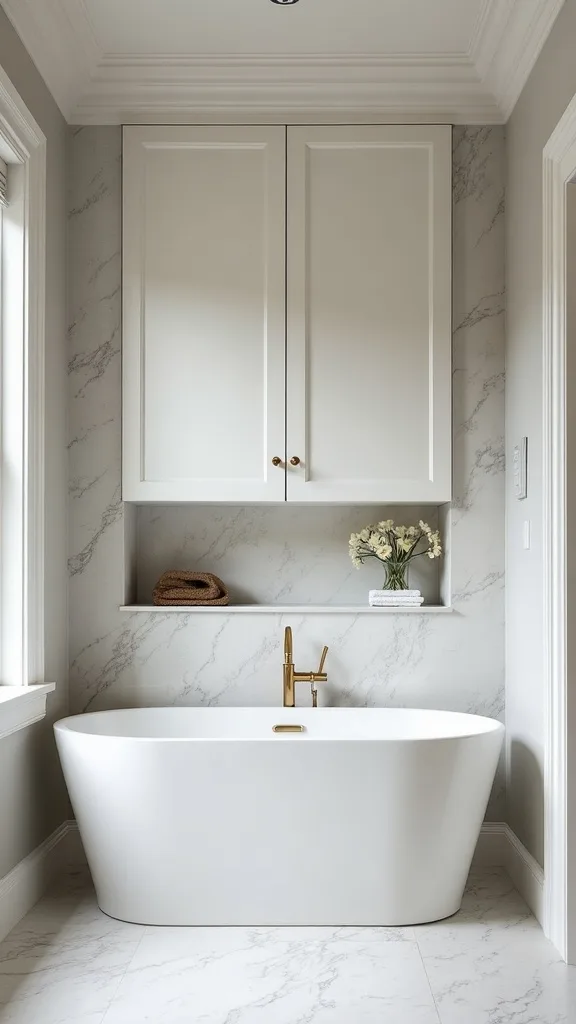
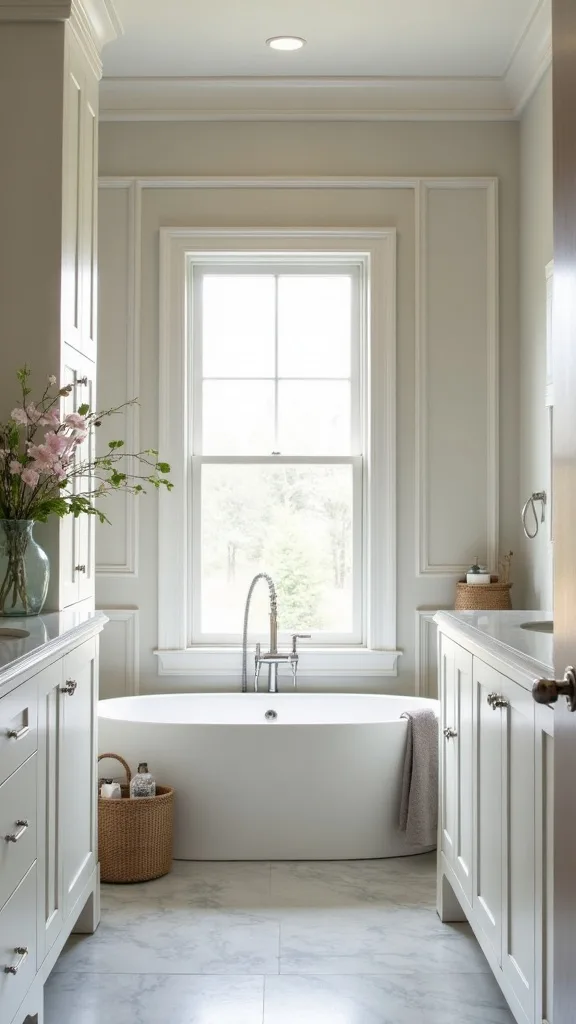
16. Built-in wall cabinet above a freestanding tub for bath rituals
If you have a tub, you deserve tub storage that feels like a ritual, not a scramble. A shallow built-in cabinet keeps salts, oils, and towels within reach without a clunky cart.
Install a recessed cabinet with a door to protect items from steam. We almost went with open shelves, then remembered we do not dust consistently enough for that level of optimism.
Choose a door with a simple profile, and store items in glass jars or matching bottles for a calm look. Add a small hook nearby for a robe.
Pro tip: include one “guest-ready” shelf—fresh towel, mini soap, candle—so fall hosting doesn’t send you sprinting through closets.
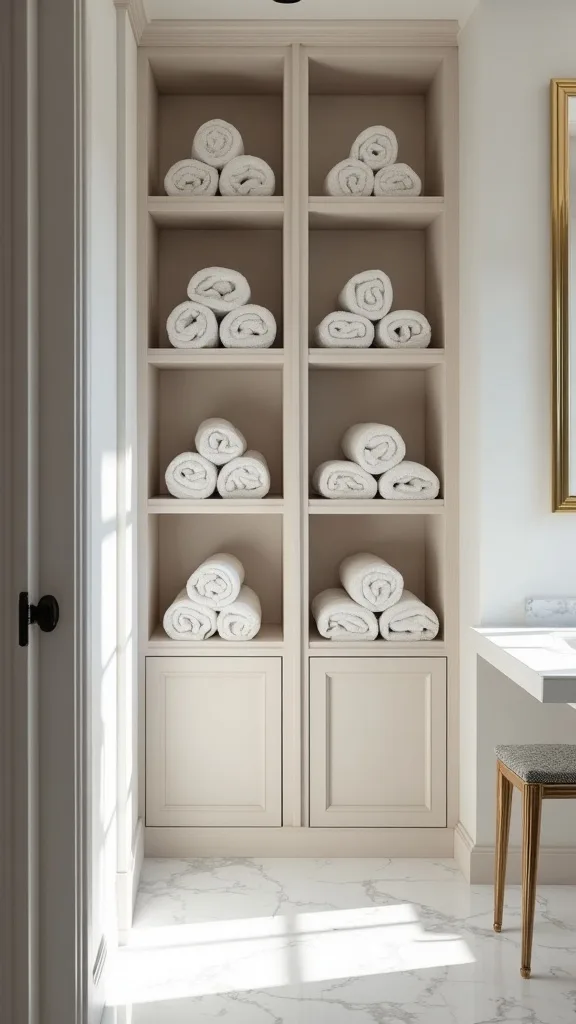
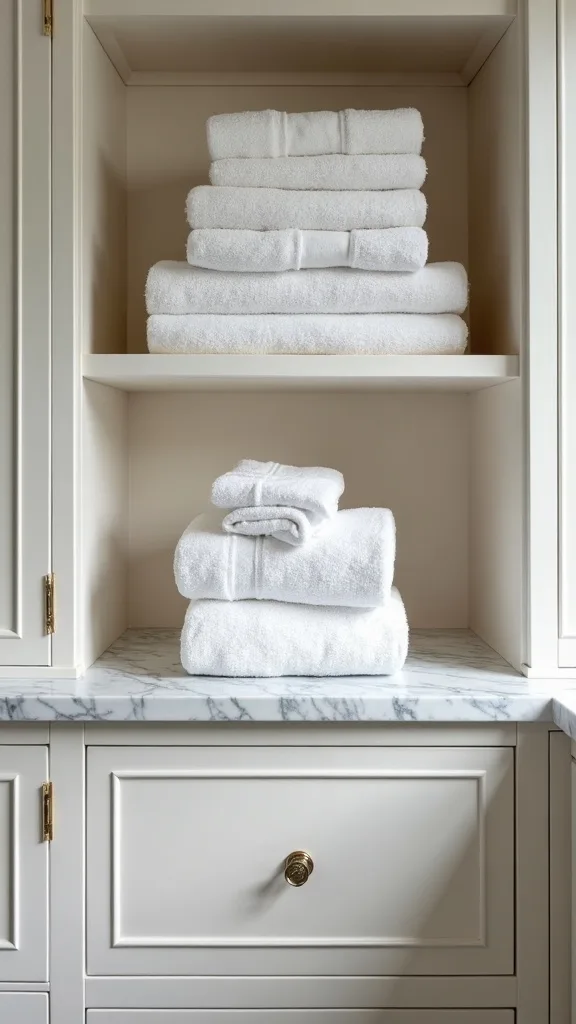
17. Built-in cubbies for rolled towels (spa look, real-life function)
Towel cubbies are equal parts storage and décor, and they make even ordinary towels look intentional. It’s a simple way to add that boutique-hotel feeling at home.
Frame a grid of openings in a recessed wall section or as a surface-mounted built-in. We learned to size cubbies for real towels: ours are 10 inches wide and 10 inches tall, and they fit rolled hand towels perfectly.
Paint the cubby interior the same color as the wall for subtlety, or go one shade darker for depth. Keep towels in two colors max so it feels curated.
Pro tip: store everyday towels in the lower cubbies and “nice towels” up high—because yes, we all have towels that are too fancy for daily life.
18. Built-in pull-out organizer next to the toilet for small items
A skinny pull-out organizer is perfect for tight gaps—think 4–6 inches wide—where nothing else fits. It’s surprisingly roomy and keeps essentials within reach.
Install a pull-out base with shelves or wire baskets. We almost ignored the gap beside our toilet until we realized it was basically a vertical void mocking us daily. This is where we keep extra rolls, spray, and the mysterious box of razors that multiplies.
Choose a finish that matches surrounding cabinetry, and use removable bins so cleaning is easy.
Pro tip: add a small divider for “guest stuff” (mini toothpaste, travel deodorant). It’s thoughtful, and it makes your bathroom feel quietly prepared.
19. Built-in shelf above the towel bar for frequently used linens
This is one of the easiest built-ins that actually changes daily flow. A shelf above the towel bar keeps clean towels close without stacking them on the toilet tank like it’s 1997.
Mount a shelf into studs, keep it 10–12 inches deep, and align it with the towel bar below. We almost placed it too low and it felt cramped—leave enough space so towels don’t brush the wall when you grab them.
Use sealed wood, and add two baskets for washcloths and hand towels. Stick to neutral textiles for that calm, editorial look.
Pro tip: add a tiny hook on the side for a hair towel. It’s a small convenience that makes mornings smoother—and smooth mornings are the real luxury.
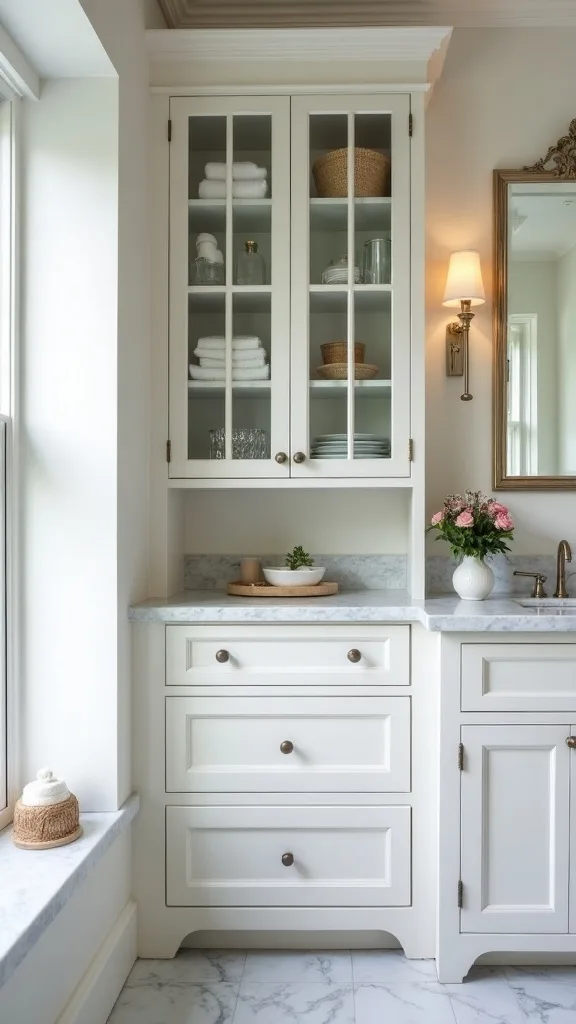
20. Built-in cabinet with glass-front doors for “pretty storage”
Glass-front cabinets let you store essentials while still keeping the room feeling open. It’s the compromise between open shelving (pretty, dusty) and closed cabinets (tidy, invisible).
Install an upper cabinet with tempered glass doors and keep the interior organized. We learned quickly: if you put random packaging in a glass cabinet, it will look like a pharmacy aisle. Decant into matching containers or at least remove the loudest labels.
Choose ribbed or frosted glass for a softer look, and use stackable acrylic bins inside so everything has a place.
Pro tip: one small interior light makes it feel like a boutique display. It’s a subtle glow that elevates the whole bathroom instantly.
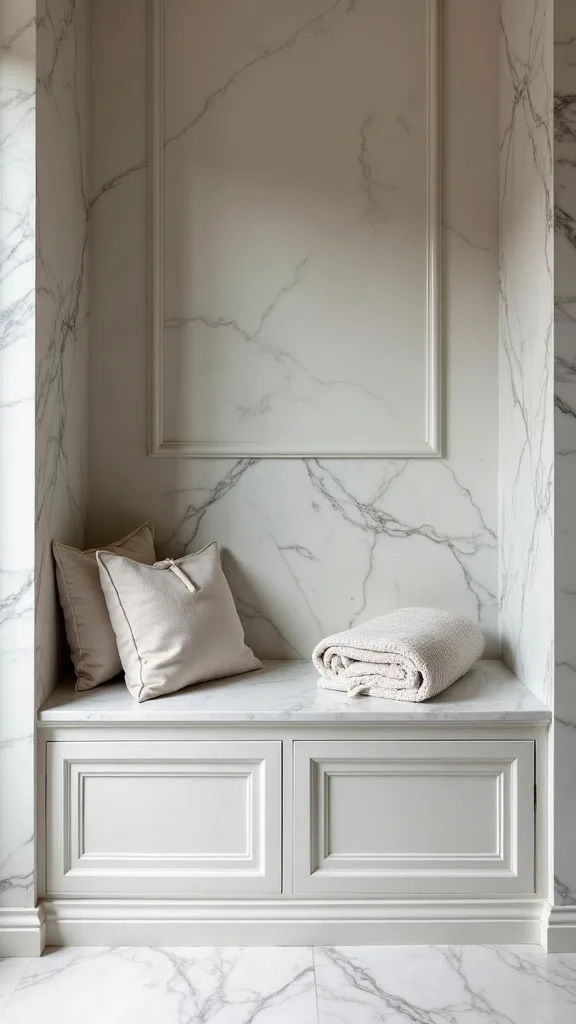
21. Built-in bench with storage (for big bathrooms or lucky layouts)
A built-in bench is part utility, part luxury. It gives you a place to sit, shave your legs, or dramatically contemplate life while a face mask dries.
Build a bench box, anchor it, and add a hinged top or drawers for storage. We almost forgot to add ventilation holes—bathrooms get humid, and nobody wants a bench that smells like damp towels.
Top it with a sealed wood slab or a stone remnant, and add two lidded baskets inside for extra towels and cleaning supplies.
Pro tip: add a cushion in an outdoor fabric (made to handle moisture). You’ll use the bench more, and it becomes a quiet statement piece.
22. Built-in cabinet framing a window (use the sides, not the glass)
If you have a bathroom window, the wall space around it is often wasted. Framing it with slim cabinets or shelves creates storage without blocking light.
Install two narrow side cabinets or shelf towers, keeping them shallow so the window remains the star. We almost covered too much trim and it made the window feel smaller—keeping a 1-inch reveal of trim preserved the airy look.
Paint cabinets the same color as the wall for a built-in feel, and use brass or black pulls for a tailored finish.
Pro tip: store everyday items low and decorative items higher. It’s practical, and it gives the whole wall a balanced, intentional rhythm.
23. Built-in recessed “appliance garage” for hair tools (no cord spaghetti)
This is for anyone whose curling iron lives on the counter like a permanent resident. A recessed appliance nook keeps hair tools accessible but hidden, which is the dream.
Create a recessed box near the vanity, add an outlet inside, and install a door or flip-up front. We almost placed ours too close to the sink—water and hot tools are a bad pairing, like socks and sandals.
Line the interior with a heat-resistant mat, and add cord hooks so everything stays tidy. A small shelf can hold brushes and clips.
Pro tip: give it a “cool down” zone—store tools only after they’ve cooled. Your cabinet (and your insurance company) will appreciate the restraint.
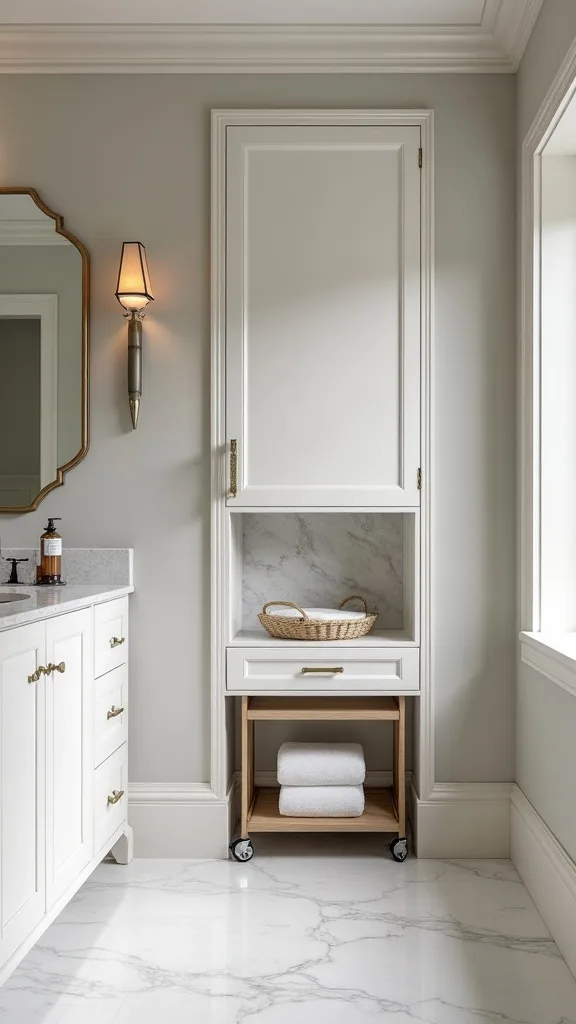
24. Built-in recessed nook for a rolling cart (so it looks intentional)
Rolling carts are useful, but they can look temporary. A recessed nook gives the cart a “parking spot” so the whole setup reads purposeful.
Frame a shallow alcove and keep the opening slightly wider than your cart—ours needed 18 inches to slide in smoothly without scraping. We almost made it exact and learned that paint thickness plus real-life wobble equals frustration.
Choose a cart in white or black metal, and use matching containers for cotton, skincare, and first-aid.
Pro tip: this is a great fall organization move—load the cart with seasonal swaps (hand cream, tissues, extra soap) and roll it out when you’re restocking.
25. Built-in cabinet with a pull-out step stool (for kids and short adults)
A pull-out step stool built into a base cabinet is one of those family-friendly upgrades that feels quietly brilliant. It keeps stools off the floor and makes daily routines smoother.
Install a step-stool slide mechanism inside a base cabinet or build a simple pull-out platform on heavy-duty slides. We almost underestimated how much weight it needs to handle—design it for real humans, not the imaginary polite people from showroom photos.
Match the front to your cabinetry, and add non-slip tread on top so wet feet don’t turn it into a cartoon situation.
Pro tip: store kids’ items in the same cabinet so the stool becomes part of a tidy routine. Independence looks good on everyone.
Final Thoughts
Once we started treating our bathroom like a room worth finishing—not just a place to brush our teeth—the clutter stopped feeling inevitable. Built-ins are sneaky like that: they don’t just store things, they set a standard. When every item has a home, the room gets quieter, and fall mornings feel less like a sprint.
The funny part is we didn’t end up with a flawless, showroom-perfect result. Our caulk line near the recessed cabinet is… expressive. One shelf is 1/16 inch out of level, which only we notice, but we notice it every day like it’s a personal challenge. And still, we’d do it again, because the function is unbeatable and the bathroom finally feels grown-up.
Do one thing today: open your current bathroom cabinet, pull everything out, and make three piles—daily, weekly, and “why do we own this.” Then measure one blank wall section (even just a single stud bay) and pick one built-in idea from this list to plan before the weekend.
What I’d Do Differently
When I first tried this, I assumed the wall behind our sink was a simple, empty cavity just waiting for a recessed cabinet. It was not. We cut the opening, felt very brave for about 90 seconds, and then met a surprise stud placement that didn’t match our hopeful measurements. The mistake wasn’t the cutting—it was planning around the mirror size before confirming the stud bay and what was actually inside the wall. The correct approach is to locate studs, check for plumbing/vents, and choose the cabinet size second (or be willing to shift your layout by an inch or two without spiraling). That one change would’ve saved us an evening of patching, re-framing, and arguing over whether “an inch is basically nothing” (it is not, in cabinetry).
I also wish we’d decided on shelf heights based on our actual products before installing the pins. We ended up moving one shelf three times because our tallest skincare bottle is apparently training for the NBA. Take 10 minutes to line up your daily items on the counter, measure the tallest, and plan from there—then pick one built-in from this list and start this weekend.