This post contains affiliate links. As an Amazon Associate, I earn from qualifying purchases at no extra cost to you.
Are you looking for kids bedroom ideas that feel playful in the daytime but still wind down easily at night? Do you want a nature theme kids room that doesn’t look “too babyish” once your kid hits the 7–10 age range?
I’m going to walk you through my step-by-step approach to building an adventure bedroom with a forest mural wall, a teepee reading nook, a pine wood bunk bed, and an animal print rug. I’ll also show you how I layer children’s room decor so it feels intentional—using repeat colors, practical storage, and lighting that supports bedtime routines.
In my experience, this guide is perfect for parents (and especially hands-on dads) who want a Father’s Day Kids Decor refresh that feels meaningful without turning into a month-long renovation.
I’ll share 25 ideas you can mix and match—like how I size a mural to a 60-inch dresser wall, how I place a rug so it doesn’t trip little feet, and how I set up a reading nook that actually gets used for more than 10 minutes. I’ll also weave in budget swaps so you can choose where to splurge and where to save.
Below are 25 Kids Bedroom Theme Ideas & Design that I use to create a fun kids room, a cozy adventure bedroom, and layered children’s room decor that grows with your kid.
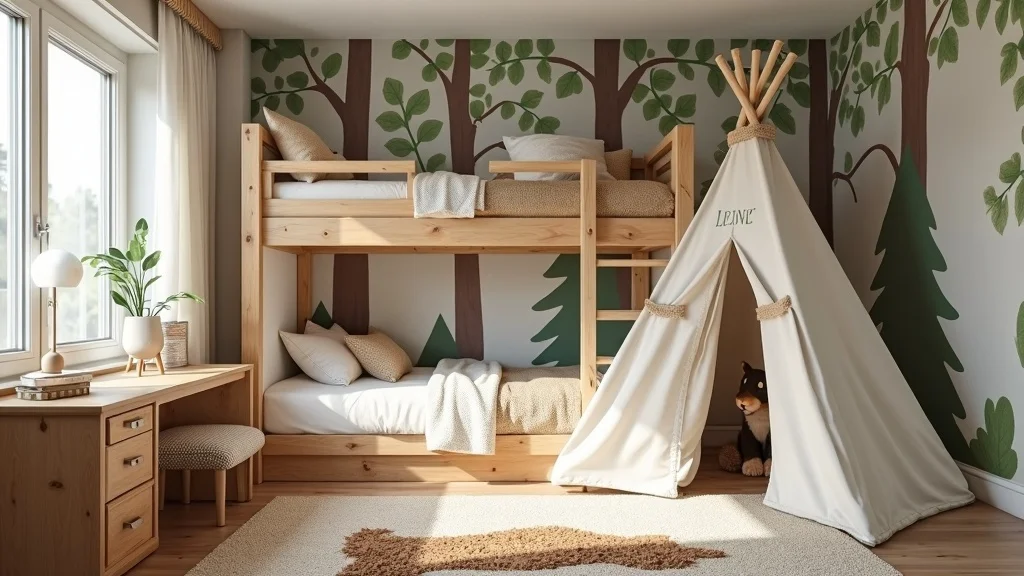
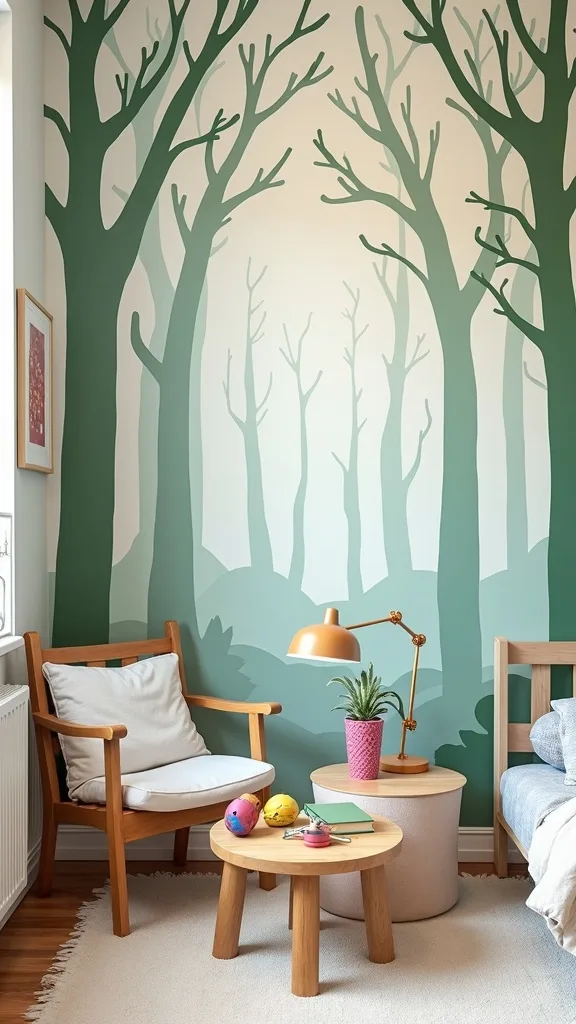
1. Start with the Forest Mural + Teepee Nook + Pine Bunk + Animal Rug “Base Scene”
I always start by building one clear “base scene,” and for this look I anchor everything around a forest mural wall, a teepee reading nook, a pine wood bunk bed, and an animal print rug so the room tells one story. From my experience, kids bedroom ideas feel calmer when I choose 1 hero wall and then repeat 2–3 colors everywhere else.
I map the mural area with painter’s tape in a 6 ft x 8 ft rectangle (or a 10 ft wide span if the bed sits on that wall) and I keep the teepee at least 24 inches from the bed ladder for safe traffic flow. I place a 5 ft x 7 ft animal print rug so at least 18 inches tucks under the bunk, which typically stops the corners from flipping up.
I like low-VOC wall paint (Sherwin-Williams Emerald or Behr Premium Plus) and a 2-gallon base color plus 1 quart each for 2 accent greens. For the bunk, I prefer unfinished pine sealed with water-based polyurethane (2 coats, 3–4 hours dry time between).
Pro Tip: When I design this look, I deliberately paint the mural 2–3 inches behind the bunk posts so the bed looks “built into the forest,” which hides minor mural imperfections and makes the whole scene feel more immersive.
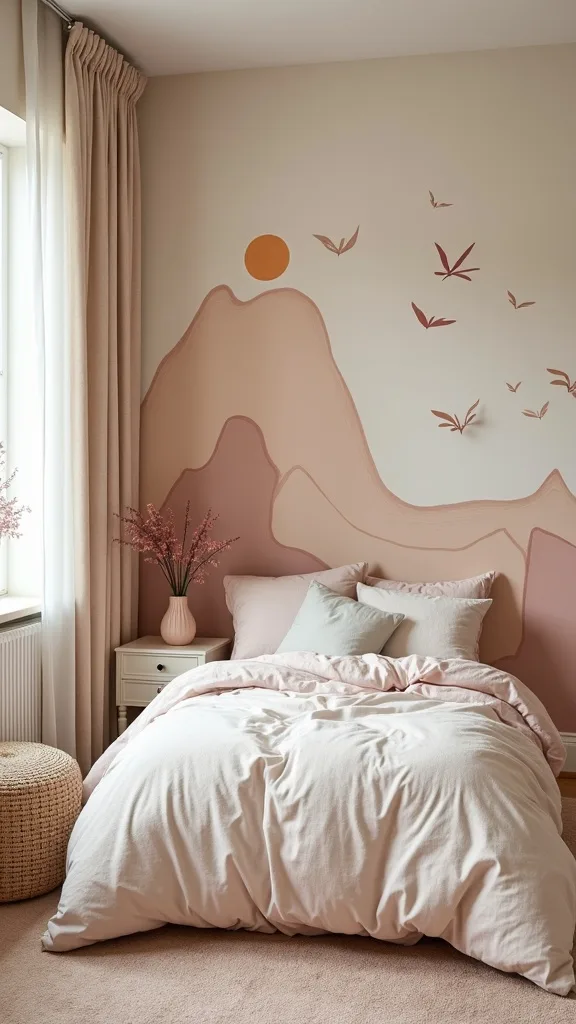
2. Pick a Nature Theme Kids Room Color Palette That Still Feels Bright
From my experience, a nature theme kids room works best when I balance earthy tones with one crisp “lift” color so it doesn’t go muddy. In my opinion, the easiest formula is 60% warm white, 30% greens/woods, and 10% a playful accent like mustard or sky blue.
I always start by testing 3 paint swatches that are at least 12 inches x 12 inches on two walls, then I watch them for 24 hours in daylight and lamp light. I keep the ceiling a clean white and use one medium green on the mural shapes, then I repeat that green in at least 2 places—like a quilt and a storage bin.
I find that Benjamin Moore “White Dove” (walls) pairs nicely with muted greens, and I’ll add black in small doses (1–2 picture frames or a 12-inch lamp base) for definition. For textiles, I like cotton canvas, wool-blend rugs, and pine or birch wood to keep the theme consistent.
Pro Tip: When I tried this with darker greens, I had better results by painting the trim 10–15% brighter than the wall color (not pure white), because it keeps the room feeling fresh while still reading as “forest.”
3. Plan the Layout Like a Mini Campground (Clear Paths First)
I find that the fastest way to make a fun kids room feel functional is to plan the walking paths before I buy a single decor item. From my experience, kids play better when I leave a clear “loop” path instead of a dead-end corner that turns into a clutter trap.
I always start by sketching the room on graph paper with a 1-inch = 1-foot scale, then I mark a 30-inch-wide main walkway from the door to the bed. If I’m adding a teepee, I reserve a 40-inch x 40-inch footprint and keep it at least 18 inches away from a dresser so drawers can open fully.
I recommend painter’s tape on the floor to test placement for 48 hours, especially if you’re choosing between a 6-drawer dresser (around 60 inches wide) and a narrower 4-drawer chest (around 30–32 inches wide). For furniture, I prefer rounded corners and solid wood or CARB Phase 2 compliant plywood for durability.
Pro Tip: When I design this look, I angle the teepee about 15 degrees toward the bed so the reading nook is visible from the pillow—kids actually use it more when it feels “inviting” from their main spot.
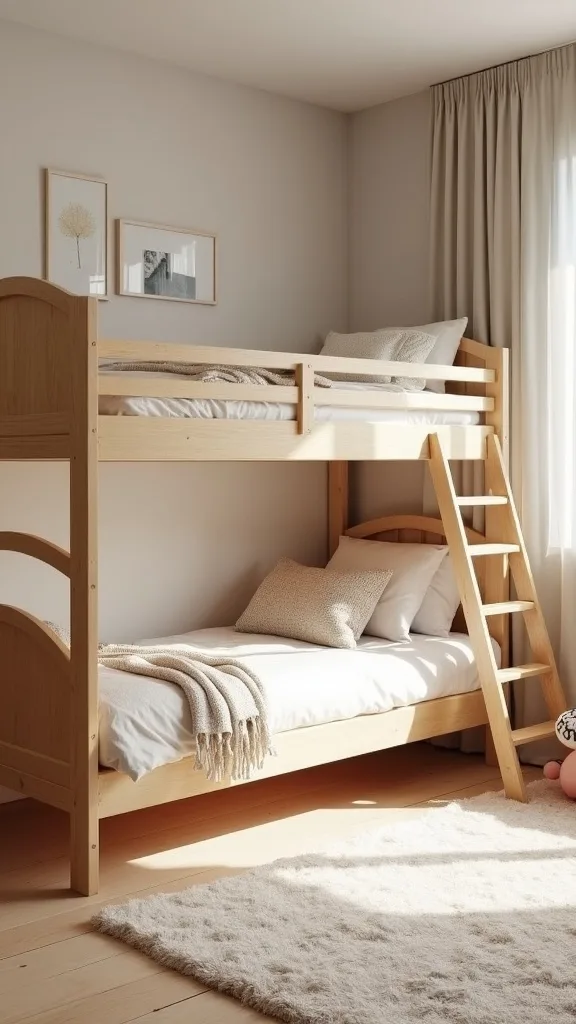
4. Choose a Pine Wood Bunk Bed That’s Safe and Grows with Them
In my opinion, a pine wood bunk bed is the backbone of an adventure bedroom because it adds vertical “treehouse” energy while freeing up floor space. I’ve found that the right bunk choice reduces future redecorating because the wood tone plays nicely with almost any nature palette.
I always check two measurements before buying: guardrails should sit at least 5 inches above the top mattress, and the ladder rungs should be roughly 10–12 inches apart for comfortable climbing. I also measure ceiling height and aim for at least 33–36 inches between the top mattress and ceiling so bedtime doesn’t feel cramped.
I recommend solid pine with a water-based sealant, plus a low-profile mattress (usually 6–8 inches thick) on the top bunk for safety. If you’re adding under-bed storage, I like 2 rolling bins that are about 28 inches long x 16 inches wide in canvas or polypropylene.
Pro Tip: From my experience, the squeak culprit is usually loose ladder bolts—after 2 weeks of use, I re-tighten every fastener and add a thin nylon washer at the joints, which quiets the bed without messy lubricants.
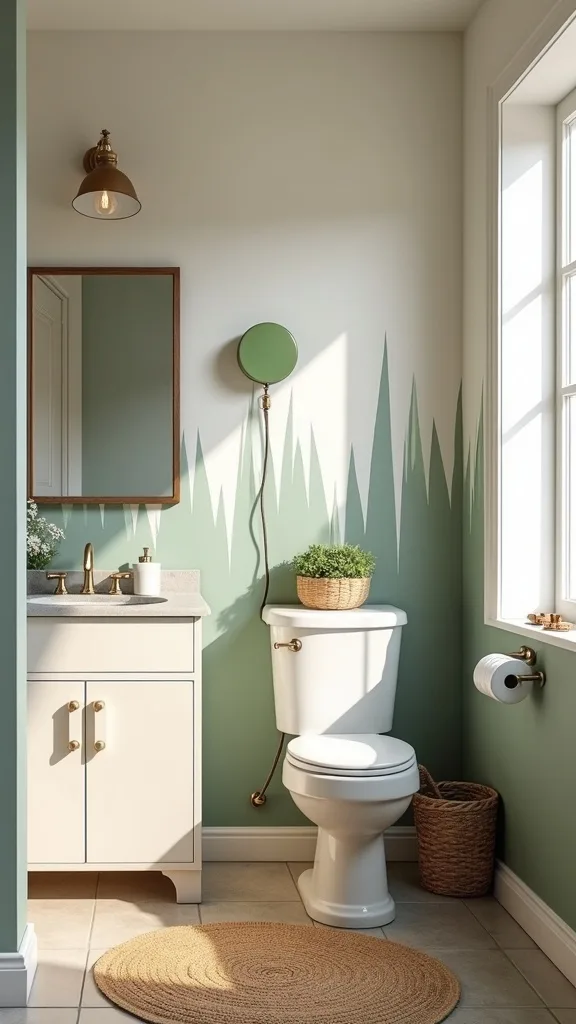
5. Paint a Forest Mural Wall Without Needing Artist Skills
I always recommend a forest mural wall when you want big impact without filling every surface with toys and prints. From my experience, simple layered shapes (not detailed trees) look the most modern and are the easiest to touch up later.
I always start by rolling a base coat and letting it cure for at least 8 hours, then I sketch 3 layers of “hills” with a pencil at about 24 inches, 48 inches, and 72 inches from the floor. I cut the edges with 1.5-inch painter’s tape and use a 2-inch angled sash brush for crisp lines.
I like using matte wall paint (it hides bumps better than eggshell), and I keep the palette to 1 warm white + 2 greens + 1 charcoal for tiny animal silhouettes. Materials I reach for: a 9-inch roller, a roller extension pole, a paint tray liner, and a small step stool (around 2 feet tall).
Pro Tip: When I tried this, I got the cleanest “mural” look by removing the tape while the paint was still slightly tacky (around 20–30 minutes after painting), which prevents peeling and gives a sharper edge.
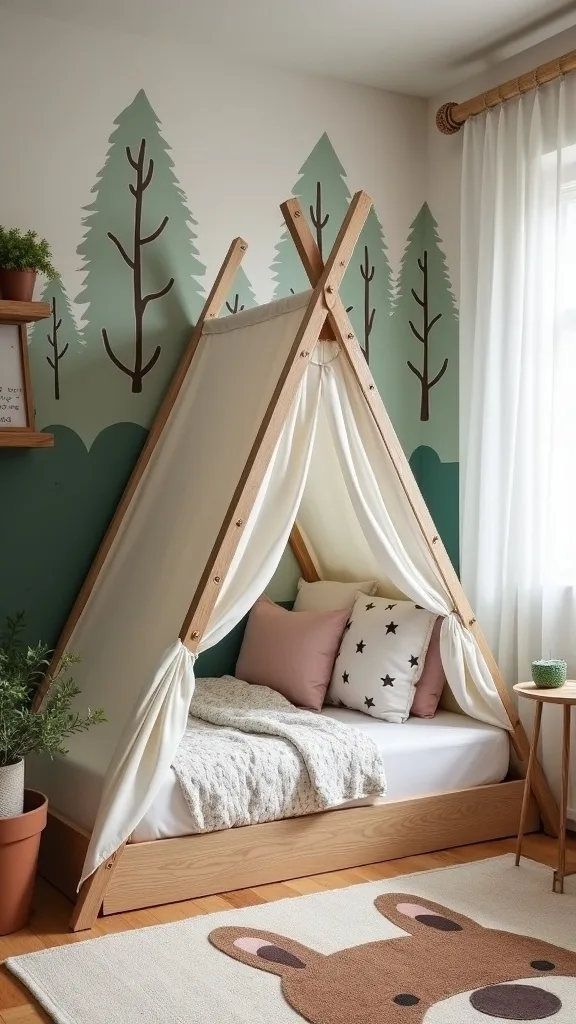
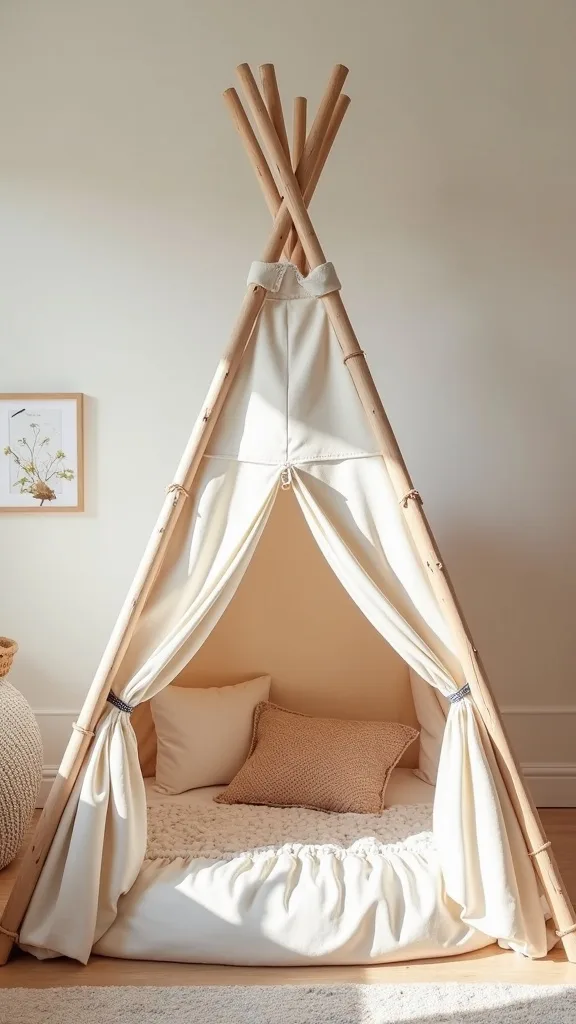
6. Build a Teepee Reading Nook That Actually Gets Used
I find that a teepee reading nook becomes the heart of a fun kids room when it’s comfortable enough for 15–20 minutes, not just cute for photos. From my experience, the secret is layering softness at floor level and adding a light kids can control.
I always start by placing a 36-inch round foam play mat or a 3 ft x 5 ft flatweave rug inside the teepee, then I add 2 pillows (one 20×20 and one lumbar around 12×20) for back support. I hang battery puck lights or a clip-on reading light at about 42 inches high so it feels like a mini “camp lantern.”
I recommend cotton canvas teepees with wooden poles, plus a small book sling that’s about 24 inches wide so covers face outward. For a Father’s Day Kids Decor touch, I’ll add a tiny “camp rules” sign on a 5×7 frame with a note from the kids.
Pro Tip: I’ve found kids stay longer in the nook when I keep the opening facing away from the door by about 90 degrees—less visual distraction means more reading and quieter wind-down time.
7. Use an Animal Print Rug Without Making the Room Feel Wild
In my opinion, an animal print rug is the easiest way to add “adventure bedroom” energy while still keeping the room grounded. I find that the trick is choosing a print with 2–3 colors max so it reads as a neutral, not visual noise.
I always start by sizing the rug to the bed: for a twin bunk, a 5 ft x 7 ft usually works, and for a full-size lower bunk I lean toward 6 ft x 9 ft. I place the rug so it extends at least 20–24 inches beyond the bed edge where feet land, which typically makes mornings feel warmer and safer.
I recommend a low-pile rug (around 0.25–0.4 inches) for easier toy cleanup, and I always use a rug pad cut 1–2 inches smaller than the rug to prevent shifting. Materials I like: recycled polyester rugs for easy spot cleaning, or wool blends if you can handle a bit more upkeep.
Pro Tip: From my experience, zebra and cheetah prints hide crumbs differently—cheetah’s mottled pattern disguises snack mess better, which matters if bedtime stories happen on the floor.
8. Layer Lighting Like a Campsite (Overhead + Bedside + Nook)
I always recommend layered lighting because it’s one of the few kids bedroom ideas that improves both playtime and bedtime. From my experience, one overhead light makes shadows harsh, while 2–3 smaller sources make the room feel safer at night.
I start with a ceiling fixture on a dimmer (if you can install one) and aim for warm white light (2700K–3000K — the cosy, yellowish tone you see in most homes). Then I add a bedside lamp around 18–22 inches tall and a nook light (puck or clip-on) so kids can read without blasting the whole room.
I like LED bulbs around 800 lumens (brightness measured in lumens) for a bedside lamp, and I use shatter-resistant plastic shades when possible. For cords, I use adhesive cord channels and keep them at least 48 inches away from the teepee entrance to reduce tangles.
Pro Tip: I’ve found a motion-sensor night light placed 6–8 inches above the baseboard near the bed reduces “wake-up panic,” because it guides kids to the door without turning on overheads.
Cost & Materials Estimate
For most bedrooms, I typically see a total spend of $250–$1,850 depending on whether you’re buying a new pine bunk bed and adding a mural.
| Item | Estimated Cost | Where to Buy |
|---|---|---|
| Solid pine bunk bed (twin-over-twin) | $380–$850 | Wayfair |
| Low-VOC wall paint + supplies (2 gal + tape/rollers) | $95–$180 | Home Depot |
| Teepee tent + floor cushion | $70–$170 | Amazon |
| Animal print rug (5×7 or 6×9) + rug pad | $120–$320 | IKEA |
| Storage system (cube organizer + 6–8 bins) | $90–$210 | Target |
| Lighting (2 lamps + night light + bulbs) | $55–$140 | Lowe’s |
Total estimated cost: $250–$1,850 I usually save money by DIYing the mural and buying bins secondhand, and I splurge on the bunk bed because sturdiness saves headaches later.
9. Add Father’s Day Kids Decor with a “Junior Ranger” Wall Moment
When I design this look for June, I love adding Father’s Day Kids Decor that feels personal instead of store-bought. In my opinion, a “Junior Ranger” wall moment celebrates dad-and-kid adventures while still fitting the nature theme kids room vibe.
I always start by choosing a 24-inch x 36-inch frame (or a set of 3 frames at 11×14) and filling it with a simple printable “Ranger Badge” design plus a photo. I hang the center of the frame at about 52–56 inches from the floor so it reads well above a dresser or toy shelf.
I recommend matte black or natural oak frames, plus a cork strip that’s about 2 inches wide for pinning ticket stubs and tiny notes. If you want a quick DIY, I’ll cut felt into 3–4 badge shapes and attach them with hook-and-loop dots so kids can “earn” them.
Pro Tip: From my experience, the wall looks more intentional when I repeat one badge color (like mustard) in exactly 2 other places—such as a pillow and a storage label—so the Father’s Day accent doesn’t feel random.
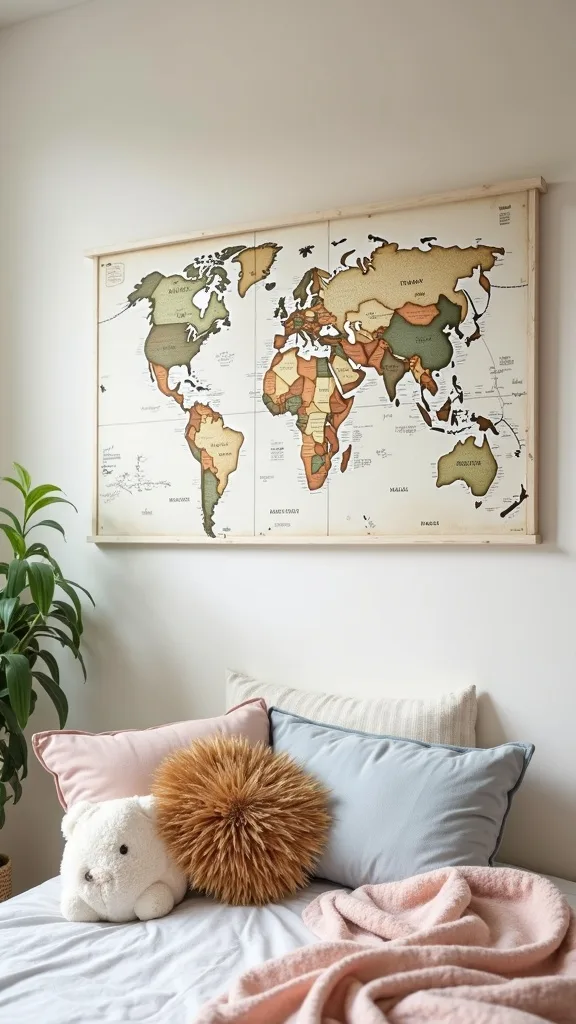
10. Create a “Trail Map” Gallery Wall That’s Not Too Busy
I find that a gallery wall can either elevate children’s room decor or make it feel chaotic, so I keep it tightly themed. From my experience, “trail map” art (national park posters, animal sketches, compass prints) reads adventurous without being loud.
I always start by laying frames on the floor in a 36-inch x 48-inch arrangement and taking a photo before I hang anything. I keep 2 inches between frames for a clean grid, and I use removable picture-hanging strips rated for 12–16 lbs so I can swap art as kids grow.
I like mixing 8×10 and 11×14 frames, with one 18×24 “hero” print in the center. For materials, I prefer acrylic-front frames over glass in kids’ rooms, and I choose matte paper prints so glare doesn’t fight the mural wall.
Pro Tip: I’ve found the gallery wall looks calmer when I limit it to 2 frame finishes (like black + wood) and repeat each finish at least 3 times—otherwise the wall starts to feel like a thrift-store collage.
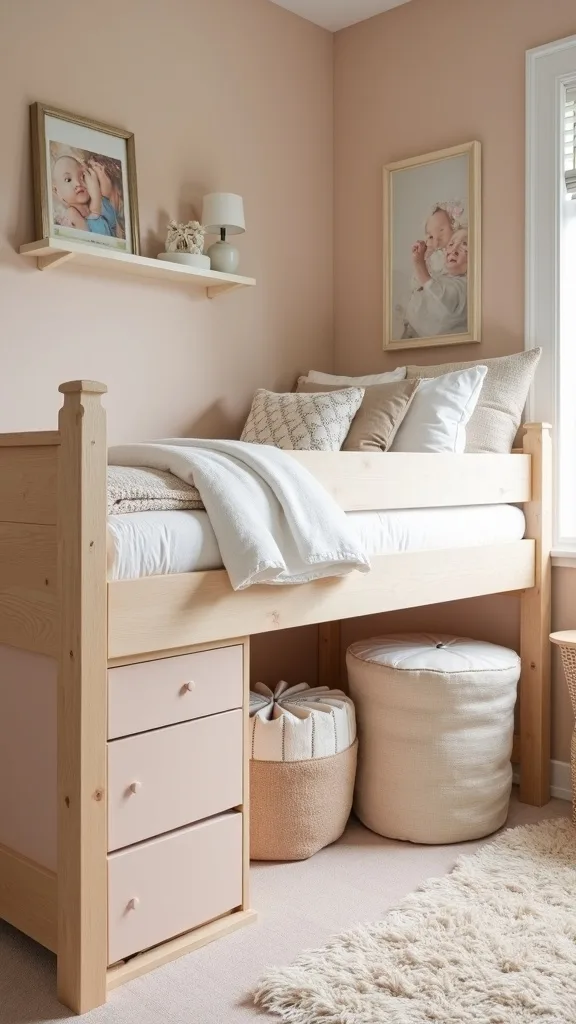
11. Use Space-Saving Under-Bunk Storage That Kids Can Manage
I always prioritize storage that kids can actually use without help, because that’s how a fun kids room stays fun. From my experience, under-bunk storage is the easiest win if you choose bins that glide and labels that make sense to a child.
I start by measuring the clearance under the lower bunk—most are around 8–12 inches—then I buy bins that are at least 1 inch shorter than that height. I like using 2–4 rolling bins (about 28–30 inches long) and I label them with both words and icons in 3-inch-tall lettering.
I recommend clear polypropylene bins for LEGO and art supplies, and canvas zip bins for dress-up clothes to reduce visual clutter. Tools I keep handy: a label maker, a tape measure, and felt pads to protect wood floors.
Pro Tip: I’ve found kids put things away more consistently when I assign “one-handed categories” (like cars, blocks, plush) so each bin can be carried or slid with one hand while the other holds the ladder or railing.
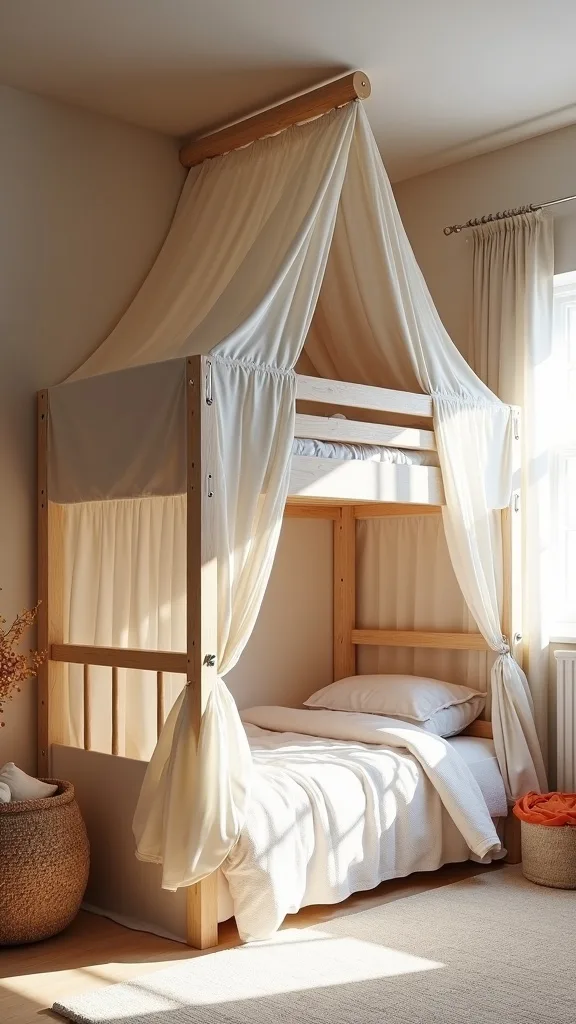
12. Make the Top Bunk Feel Like a Treehouse with a Fabric Canopy
When I design an adventure bedroom, I like making the top bunk feel like a treehouse hideout without adding anything permanent. I find that a simple canopy adds coziness and helps kids settle down faster at night.
I always start by attaching 2 tension rods (one at the head, one at the foot) and draping a twin-size muslin or cotton sheet over them. I keep the fabric at least 8 inches away from any bulb or lamp, and I secure the sides with 6–8 small curtain clips so it doesn’t sag into faces.
I recommend flame-retardant or tightly woven cotton fabric, and I choose colors that echo the mural—soft cream, sage, or charcoal. If you want extra magic, I add a 6.5-foot LED fairy light strand with a battery pack tucked into a small fabric pocket.
Pro Tip: From my experience, the canopy looks more “built-in” when I hem the bottom edge to land 2 inches above the guardrail—any lower and kids tug it like a blanket, which turns it into a nightly mess.
13. Add a Low Toy Shelf That Doubles as a “Gear Station”
I always recommend a low “gear station” shelf because it keeps toys accessible while making cleanup feel like packing for a hike. In my opinion, kids bedroom ideas work better when storage has a story behind it.
I start with a 47-inch to 57-inch wide cube organizer (like a 2×4 layout) and keep it under 30 inches tall so kids can reach the top. I add 4–8 fabric bins and leave 2 cubes open for “display” so the room doesn’t feel like pure storage.
I like using pine-stained wood or white laminate, plus canvas bins in green, tan, and charcoal. For labels, I use iron-on patches or vinyl decals about 2–3 inches wide so they’re readable from across the room.
Pro Tip: I’ve found that leaving one bin intentionally empty (labeled “trail finds”) prevents random clutter on the dresser—kids love a designated spot for pinecones, rocks, and little treasures.
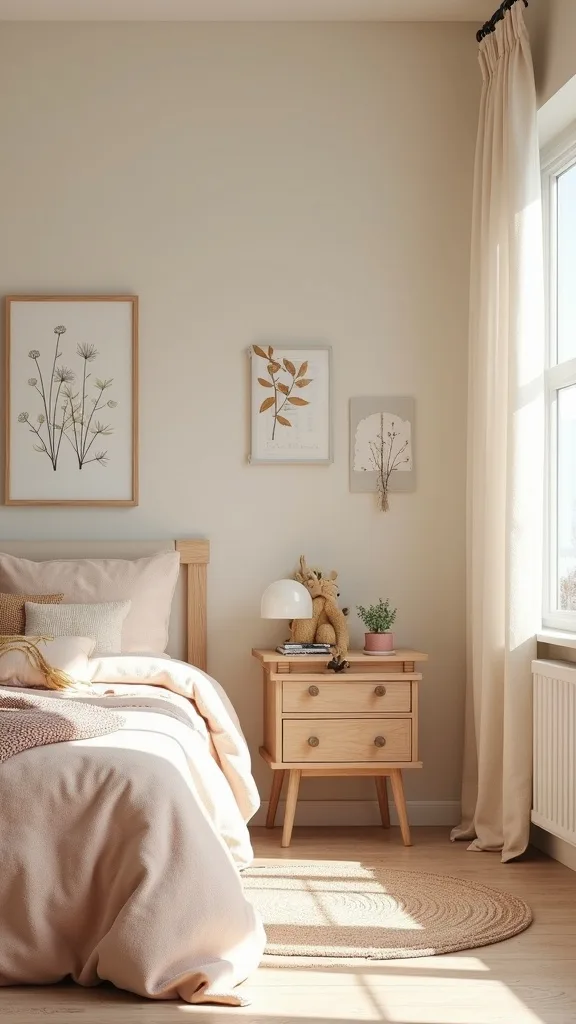
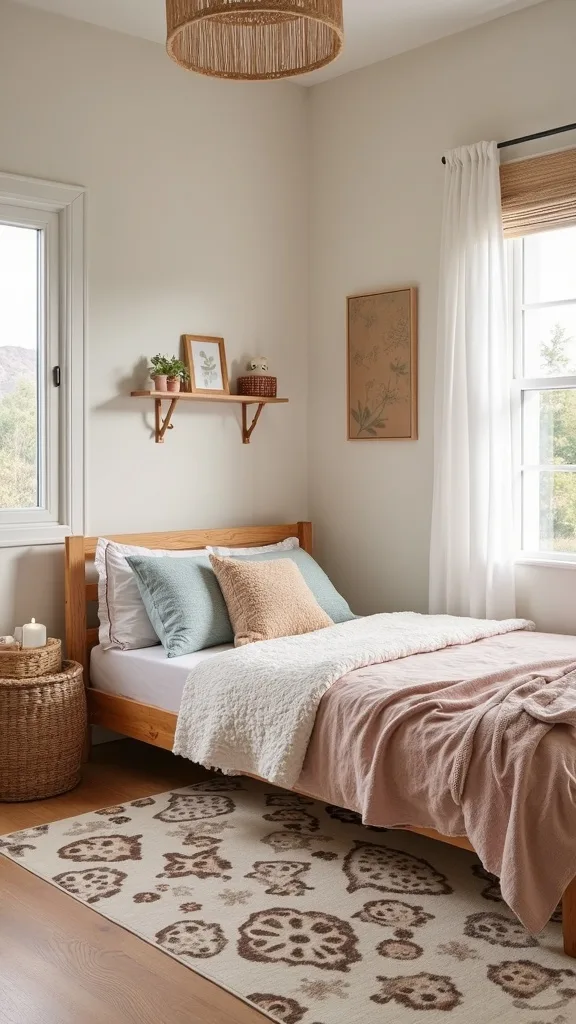
14. Choose Bedding That Hides Mess and Still Matches the Mural
From my experience, bedding is where a nature theme kids room either looks polished or starts to feel chaotic, because patterns multiply fast. I find that the sweet spot is one patterned piece and the rest in solids.
I always start by choosing a quilt or comforter in a mid-tone (like olive or charcoal) so it hides everyday smudges, then I add 1 patterned sheet set (tiny trees, stripes, or camping icons). For a twin bed, I like a 68×86 comforter, and I keep throw pillows to 2 max so bedtime setup takes under 1 minute.
I recommend 100% cotton percale sheets for breathability and a washable duvet cover if your kid is prone to spills. Colors I repeat: warm white, forest green, and a small pop of rust or mustard for that adventure bedroom warmth.
Pro Tip: When I tried darker bedding, I learned to keep at least one light pillowcase near the face—kids tend to look “tired” in photos against all-dark textiles, and a light pillow brightens the whole bed instantly.
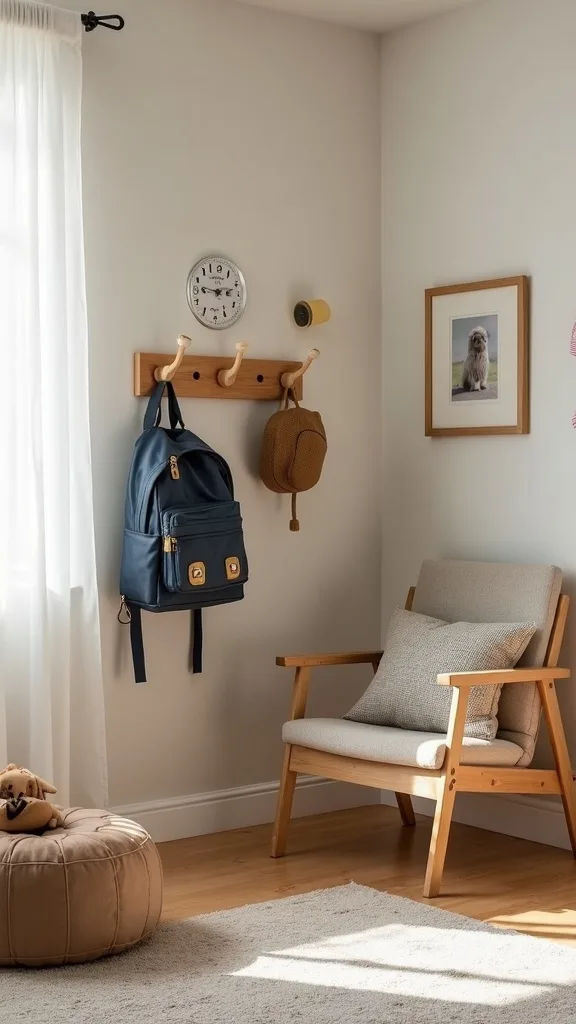
15. Use Wall Hooks at Kid Height for Backpacks and “Explorer” Gear
I always add wall hooks because they’re a tiny change with a huge daily payoff. From my experience, kids bedroom ideas fail when backpacks end up on the floor and become part of the obstacle course.
I start by mounting a 24-inch hook rail or 3–5 individual hooks at 42–48 inches from the floor (adjust for your child’s height). I space hooks about 6 inches apart so bulky backpacks and hoodies don’t overlap, and I use wall anchors rated for at least 25 lbs in drywall.
I like matte black metal hooks or natural wood pegs to match the forest mural wall, and I’ll add one “special” hook (a bear or antler shape) for a jacket or hat. Tools I use: a stud finder, a level, and a drill with a Phillips bit.
Pro Tip: I’ve found kids use hooks more when each one has a simple icon above it (boot, hat, bag) in a 3-inch decal—reading isn’t required, and the routine sticks faster.
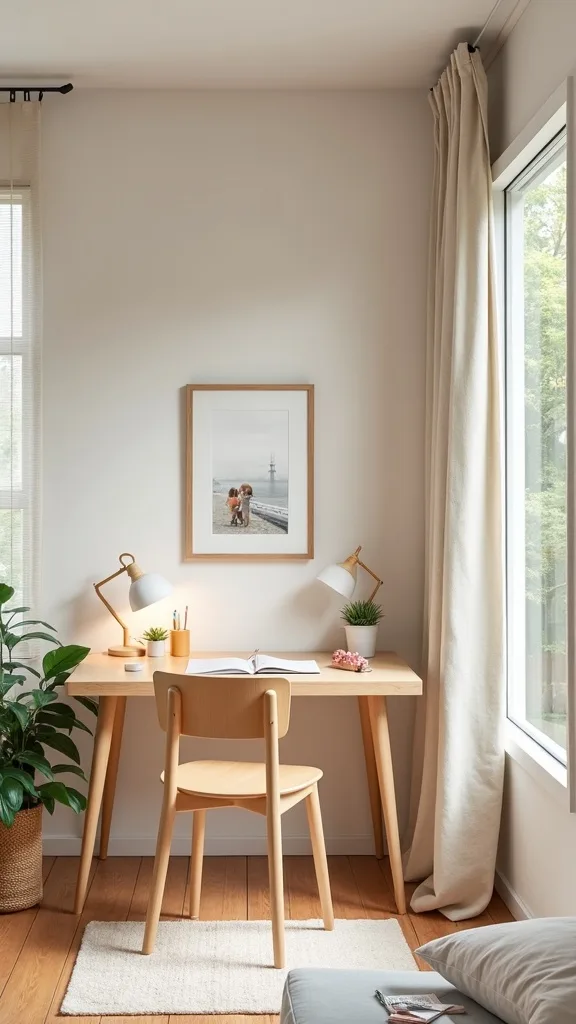
16. Create a Homework + Craft Spot That Doesn’t Fight the Theme
I find that a small desk zone keeps crafts from taking over the bed, which matters in shared rooms and bunk setups. In my opinion, the key is choosing materials that feel like “camp cabin” rather than classroom.
I always start with a desk around 40–48 inches wide and a chair that tucks fully underneath to keep a 30-inch walkway clear. I add a plug-in task lamp with warm white light (2700K–3000K — the cosy, yellowish tone you see in most homes) and a pencil cup plus a paper tray so the surface clears in under 2 minutes.
I recommend a pine or oak-look desktop, a corkboard about 18×24 inches for art, and a washable desk mat (around 18×24) to protect the finish. For storage, I like a 3-drawer rolling cart that’s about 14 inches wide to slide beside the desk.
Pro Tip: From my experience, the desk stays cleaner when I keep scissors and markers in a lidded box—open cups invite “tool explosions,” while lids create a natural stopping point after crafts.
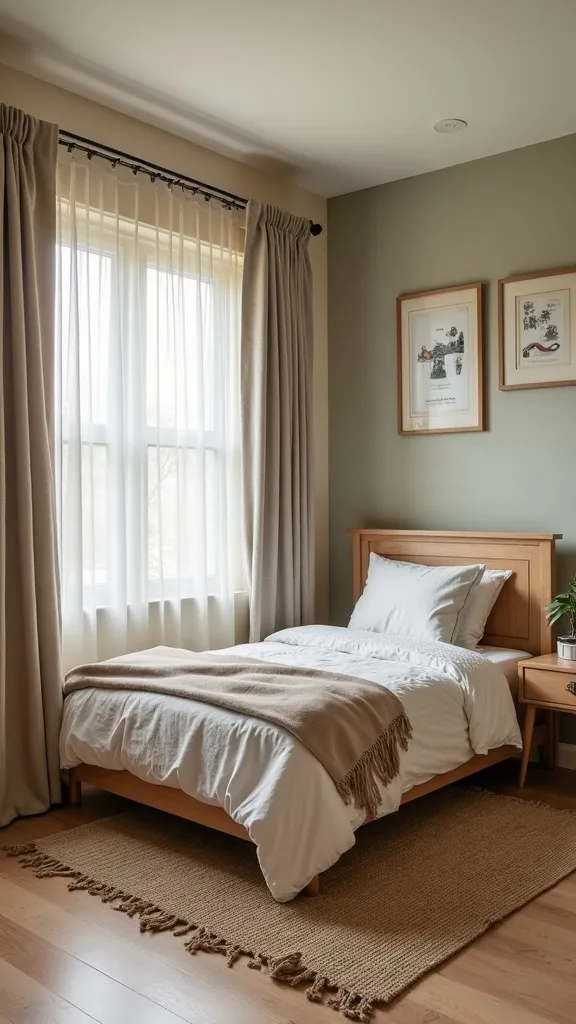
17. Add Sound Softening So the Room Feels Calm at Bedtime
I’ve found that sound is an overlooked part of children’s room decor, especially with bunks that bounce noise. From my experience, a few soft layers reduce echo and make bedtime stories feel more intimate.
I always start with one large textile (a 5×7 or 6×9 rug) and then add curtains that extend at least 4 inches past each side of the window to block light and soften sound. If the room still feels echo-y, I hang a fabric wall banner around 24×36 inches or add 2 upholstered floor cushions.
I recommend blackout curtain panels in a cotton-linen blend, plus a white noise machine placed 3–5 feet from the bed (not right beside the pillow). Trade-off wise, thicker textiles trap a bit more dust, so I plan on vacuuming the rug weekly and washing curtains every 3–4 months.
Pro Tip: When I tried this in a bunk room, I reduced creaky “noise drama” by adding a thin felt strip between the bed frame and the wall—sound travels through contact points more than most people realize.
18. Use Removable Wall Decals to Extend the Forest Beyond the Mural
I always like decals as a low-commitment way to expand a forest scene without repainting. From my experience, removable decals are especially helpful in rentals or when kids change interests every 6–12 months.
I start by placing decals at least 6 inches away from ceiling corners and baseboards so they look intentional, not like I ran out of space. I use a plastic smoothing tool (or an old gift card) and work in 12-inch sections to avoid bubbles.
I recommend matte-finish vinyl decals (gloss can look sticker-y) and I keep the scale consistent—trees around 30–48 inches tall and animals around 8–12 inches wide. Colors I repeat: the same green from the mural plus one charcoal tone so the decals blend.
Pro Tip: I’ve found decals stick best when the wall paint has cured for at least 14 days—if you rush it, the adhesive can pull paint on removal, which turns a “temporary” idea into a repair job.
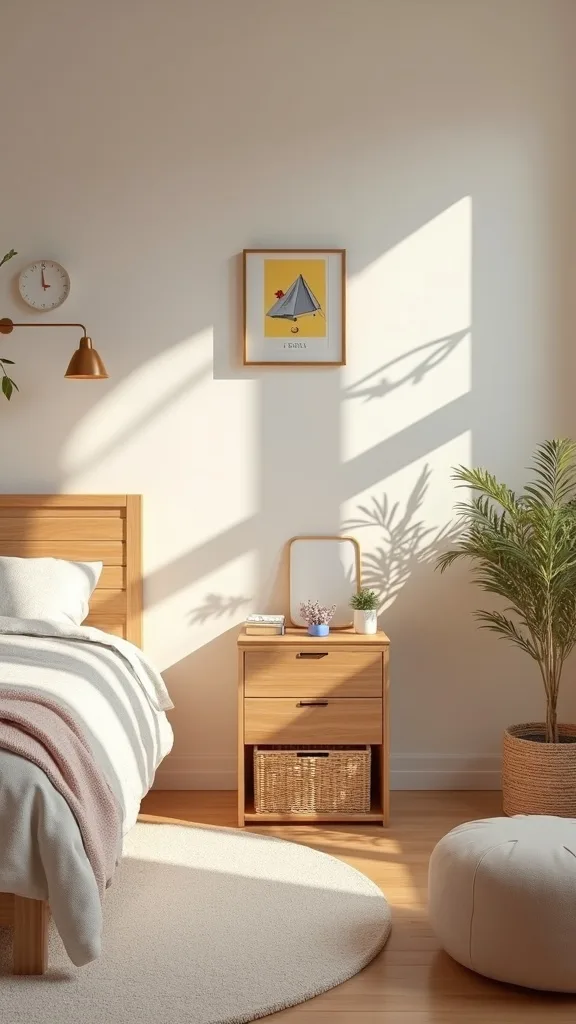
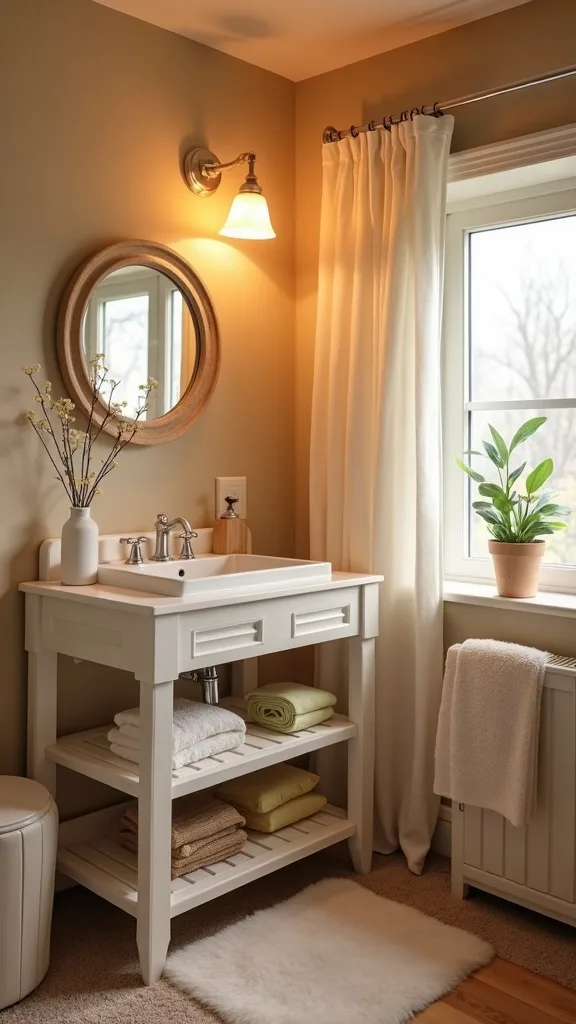
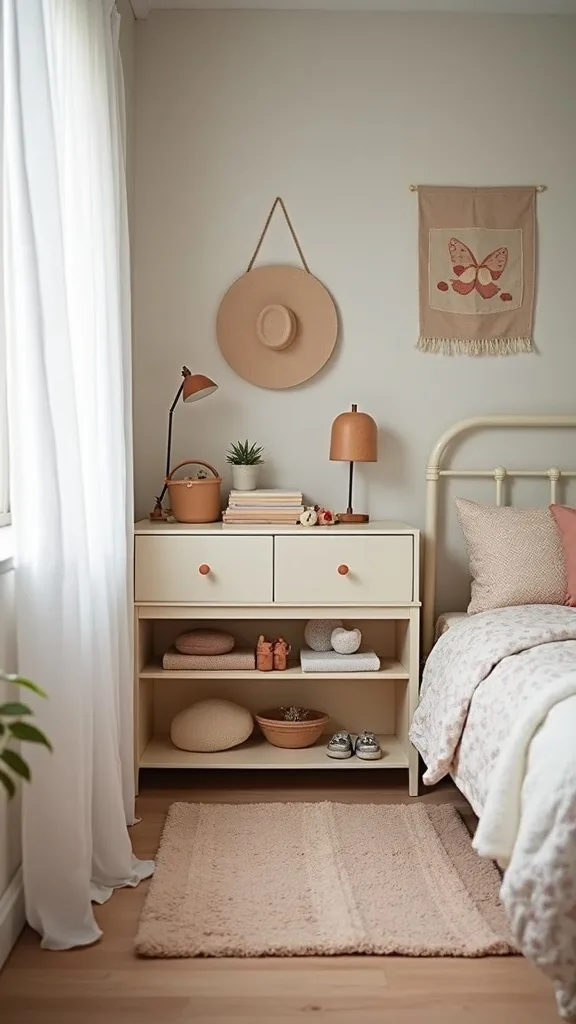
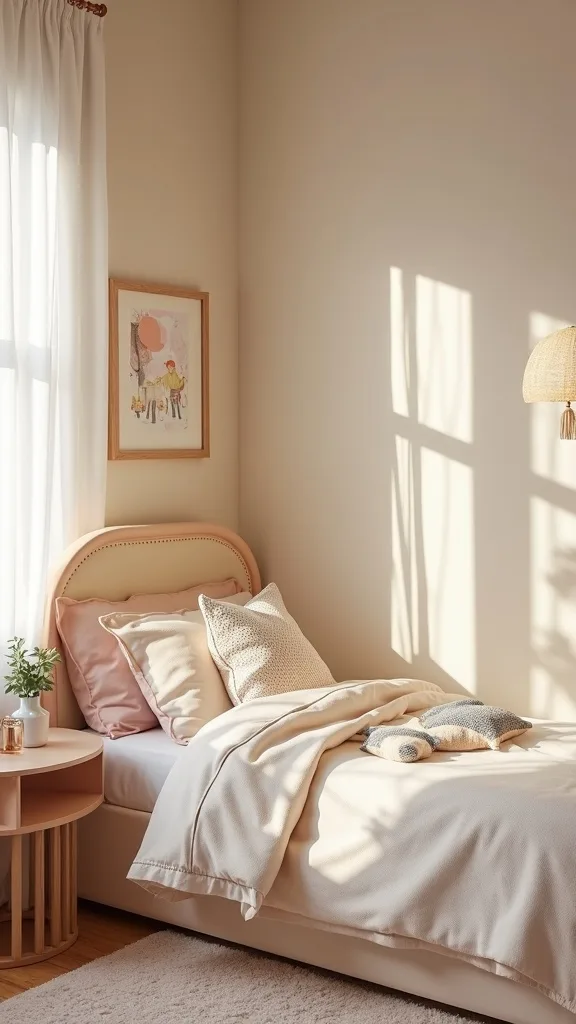
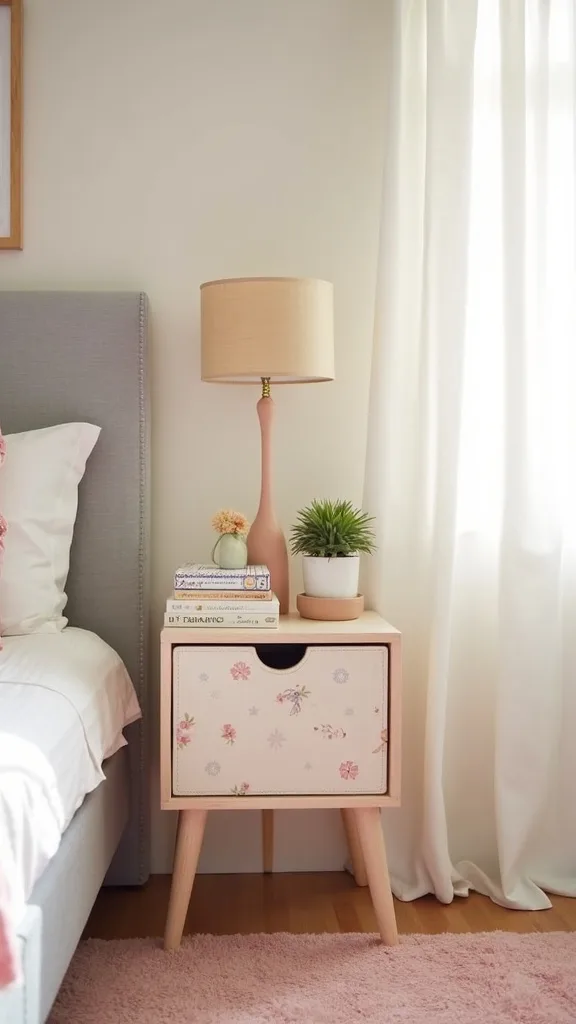
19. Make a Nightstand Alternative: Clip-On Caddy + Bedside Basket
In my opinion, traditional nightstands are overrated in small bunk setups, and I find that caddies keep essentials close without eating floor space. From my experience, this is one of the most space-saving kids bedroom ideas you can implement in under 30 minutes.
I always start with a clip-on bedside caddy about 12 inches wide for a book, flashlight, and water bottle, then I add a lidded basket on the floor (around 13 inches diameter) for plushies. I keep the basket at least 10 inches away from the ladder landing so it doesn’t become a trip hazard.
I recommend canvas or felt caddies with reinforced seams, and I like woven seagrass baskets with a soft liner so they don’t scratch wood floors. Color-wise, I choose tan, olive, or charcoal to match the adventure bedroom palette.
Pro Tip: I’ve found kids sleep better when the “stuffed animal pile” has a defined container—once the basket is full, they naturally stop adding more to the bed, which reduces midnight overheating.
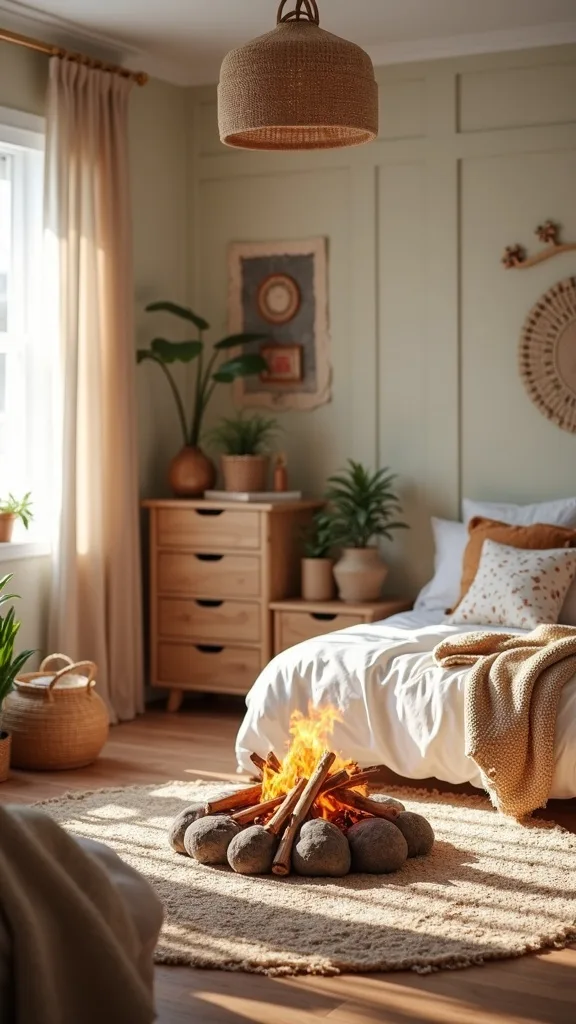
20. Use a “Campfire” Centerpiece for Play (Without Permanent Clutter)
I love adding a pretend campfire moment because it makes the room feel like a storybook without requiring more furniture. When I design this look, I treat the campfire as a “movable centerpiece” that can disappear in 60 seconds.
I start with a round tray about 14–16 inches wide, then I add felt logs (6–8 pieces) and tissue-paper flames in orange, red, and yellow. I place it on the rug near the teepee but keep at least 24 inches of open space around it so kids can sit without bumping the bunk ladder.
I recommend flame-free LED tealights (a pack of 12) and a small canvas drawstring bag to store everything when playtime ends. Trade-off: small pieces can wander, so I only use this setup for kids over about age 4 and I keep a lidded container nearby.
Pro Tip: From my experience, the campfire looks more realistic when I dust the felt logs with a tiny bit of gray fabric chalk—just enough “ash” tone to read as wood, not craft supplies.
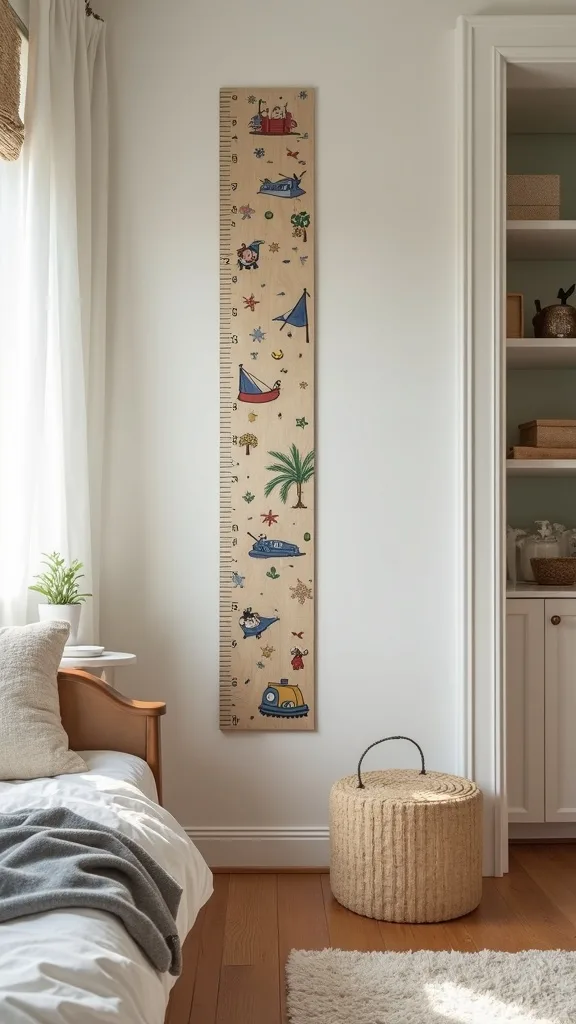
21. Add a Growth Chart That Matches the Adventure Bedroom Theme
I always recommend a growth chart because it’s meaningful decor that families actually keep. From my experience, it also fills a narrow wall space that’s too tight for furniture but too blank to ignore.
I start by choosing a wood growth ruler around 6 feet tall and 6–8 inches wide, then I mount it so the “1 foot” mark sits exactly 12 inches above the floor (most charts are designed that way). I measure twice with a tape measure and use 2 screws into studs or heavy-duty anchors rated for 30+ lbs.
I like pine or birch rulers with engraved numbers and a simple mountain or tree motif. For a Father’s Day Kids Decor touch, I’ll write the date of a dad-and-kid hike next to the height mark using a fine-tip paint pen.
Pro Tip: I’ve found it’s worth leaving a 1/8-inch gap behind the ruler using small spacers—walls aren’t perfectly flat, and that tiny gap prevents the wood from rocking and loosening over time.
22. Keep Children’s Room Decor “Editable” with a Rotating Display Ledge
I find that kids create a lot of art, and I always prefer a rotating system over taping things to the wall. From my experience, a display ledge keeps the room looking curated while still celebrating your child.
I always start with a 48-inch picture ledge (or two 36-inch ledges stacked) and mount it about 50 inches from the floor above a dresser. I keep the ledge depth around 3–4 inches so frames and books sit securely without sticking out into the room.
I recommend a pine ledge stained to match the bunk, plus 4–6 lightweight frames (8×10) with acrylic fronts. Trade-off wise, ledges can collect dust, so I plan a quick wipe-down every 2 weeks with a microfiber cloth.
Pro Tip: I’ve found the ledge looks intentionally styled when I alternate “flat” and “thick” items (frame, book, frame, small wood animal), because the height variation creates rhythm without needing more decor.
23. Use Scent Carefully: A “Forest” Vibe Without Overpowering
In my opinion, scent can support a calm bedtime routine, but I’m cautious in kids’ rooms because sensitivity varies a lot. From my experience, the goal is a subtle “fresh cabin” feel, not a strong fragrance cloud.
I always start with the simplest option: a cedar sachet in a drawer and a baking-soda carpet sprinkle left for 15 minutes before vacuuming. If I use a diffuser, I run it for only 30–60 minutes earlier in the evening (not all night) and keep it at least 4 feet from the bed.
I recommend kid-safe, low-scent approaches like cedar blocks, lavender sachets, or an unscented air purifier. Trade-off: natural scents fade faster, so I refresh sachets every 4–6 weeks instead of relying on heavy plug-ins.
Pro Tip: I’ve found cedar works especially well in a nature theme kids room because it subtly reinforces the “woodsy” story while also discouraging musty drawer smells—just don’t place it directly on painted wood, since oils can mark the finish.
24. Make It Share-Friendly: Personal Zones in a Shared Bunk Room
I’ve found shared rooms succeed when each kid gets a clear personal zone, even if the theme is shared. When I design this look for siblings, I keep the forest mural consistent but let each child choose one accent color.
I always start by assigning each child 1 bin color and 1 hook on the wall rail, then I add a small name plaque about 8–10 inches wide near their bunk. I keep personal items contained to a 24-inch-wide “zone” on the display ledge or a dedicated cube so the rest of the room stays neutral.
I recommend matching bedding in the same base color (like cream) with different accent pillows (one rust, one blue). Trade-off: too many personalized items can fight the theme, so I cap it at 3 items per child—pillow, bin, and art frame.
Pro Tip: From my experience, sibling conflicts drop when I give each child a “secret pocket” caddy on their bunk rail—one small private storage spot (even 10×6 inches) feels surprisingly powerful.
25. Finish with a 30-Minute Styling Routine to Keep the Room Looking Good
I always recommend ending with a simple reset routine, because the most gorgeous children’s room decor won’t matter if it’s impossible to maintain. From my experience, a 30-minute weekly routine keeps an adventure bedroom feeling intentional without daily nagging.
I start with a 10-minute floor sweep: toss laundry in a hamper, slide under-bunk bins back in, and return books to the 24-inch sling. Then I do 10 minutes on surfaces: clear the desk, reset the ledge with 3–5 items, and wipe the night caddy. I finish with 10 minutes of “theme check”—straighten the teepee, fluff 2 pillows, and align the rug so it sits square to the bunk.
I like using a small cordless vacuum and a microfiber cloth, plus a labeled donation bag that lives in the closet for outgrown toys. Trade-off: the routine takes consistency, but it saves time later by preventing big weekend cleanups.
Pro Tip: I’ve found kids participate more when I set a 12-minute playlist and assign “camp jobs” (ranger, packer, trail guide)—the timer makes it finite, and the theme turns chores into play.
Final Thoughts
I wrote these kids bedroom ideas the same way I tackle my own projects: I start with one strong story (the forest), I build in function (bunks, bins, and lighting), and I finish with small details that make the room feel loved. In my experience, the most successful nature theme kids room isn’t the one with the most decor—it’s the one where every piece earns its place.
If you’re decorating around Father’s Day, I always recommend adding one personal “dad and kid” touch like the Junior Ranger wall or a framed hike photo, because it makes the room feel like it belongs to your family—not a catalog. Typically, you’ll get the biggest payoff by doing the mural + rug first, then layering the teepee nook and storage once you’ve lived in the layout for a week.
I’d love for you to pick just 3 ideas from this list and start this weekend, because momentum matters more than perfection. When I design this look step-by-step, the room always comes together faster than I expect once the base scene is in place.
What I’d Do Differently
When I first tried this forest-and-teepee theme, I made one very specific mistake: I bought the rug before I confirmed the bunk bed footprint and ladder swing. In my case, the ladder landed right on the rug’s thick edge, and within 3 days the corner curled just enough to trip a sleepy kid on the way to the bathroom. The correct approach (and what I do now) is to tape the bed and ladder area on the floor first, then choose a rug size that can tuck at least 18–24 inches under the bed while leaving the ladder landing on a flatter section.
I also wish I’d known how much a single “hero” wall simplifies every other decision—once my mural colors were set, picking bedding, bins, and even frames took about 30 minutes instead of hours of second-guessing. If you’re feeling stuck, I recommend choosing your mural palette today, then buying only the rug and one set of bedding this week so you can start building momentum.
Products I Recommend for This Project
Here are some of my favourite products to help you bring these ideas to life:
- 3M Command Picture Hanging Strips (Large) — I use these to hang trail-map frames with less wall damage, which makes swapping art easy.
- Mr. Clean Magic Eraser Extra Durable — I keep these for quick scuff cleanups on mural walls and baseboards (especially near ladders).
- GE Relax HD LED Light Bulbs (Warm White 2700K) — I recommend these for cozy bedtime lighting that still feels bright enough for stories.
- Veken Ultra Quiet Cool Mist Humidifier — I like this for drier climates because it helps many kids sleep more comfortably (with regular cleaning).
- DEKOR Rug Gripper Pad (Non-Slip) — I use a pad like this under animal print rugs to reduce sliding and corner curl.