This post contains affiliate links. As an Amazon Associate, I earn from qualifying purchases at no extra cost to you.
Are you looking for outdoor kitchen ideas that feel doable for a normal weekend DIYer, not a full construction crew? Do you want an outdoor grill area that’s Father’s Day-ready and still practical for everyday backyard cooking all summer?
I always start by designing around how I actually cook outside: where I set raw food, where I plate, and where guests naturally gather. In this post, I’m walking you through 25 buildable ideas—from a cinder block base and concrete counter to smart storage, safer heat spacing, and little comfort upgrades that make a BBQ station backyard setup feel “finished.”
I find that this guide is perfect for anyone who wants a DIY outdoor kitchen that looks built-in, even if you’re working with a small patio, a tight budget, or just a couple of free weekends.
When I design this look, I lean on a few high-impact moves: a dedicated mini fridge niche, a prep zone that’s at least 36 inches wide, and pergola shade that keeps the cook from roasting at 2 p.m. I’ll also share the outdoor kitchen ideas I’ve found most forgiving when your yard isn’t perfectly level.
Below are 25 Outdoor Kitchen Build & BBQ Station Ideas that help you build a safer, smarter outdoor grill area, upgrade backyard cooking, and pull off a Father’s Day-worthy BBQ station backyard without overcomplicating the build.
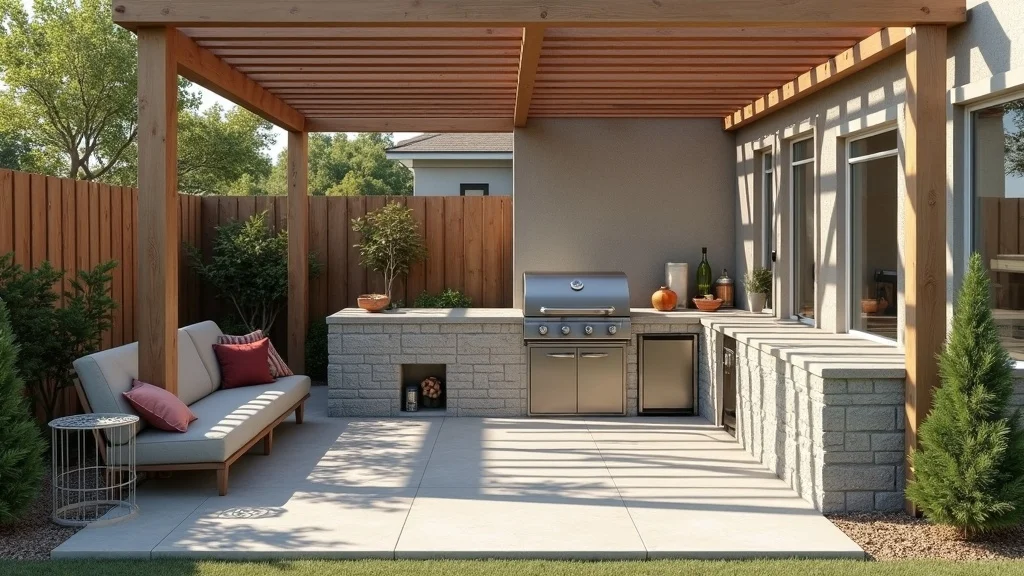
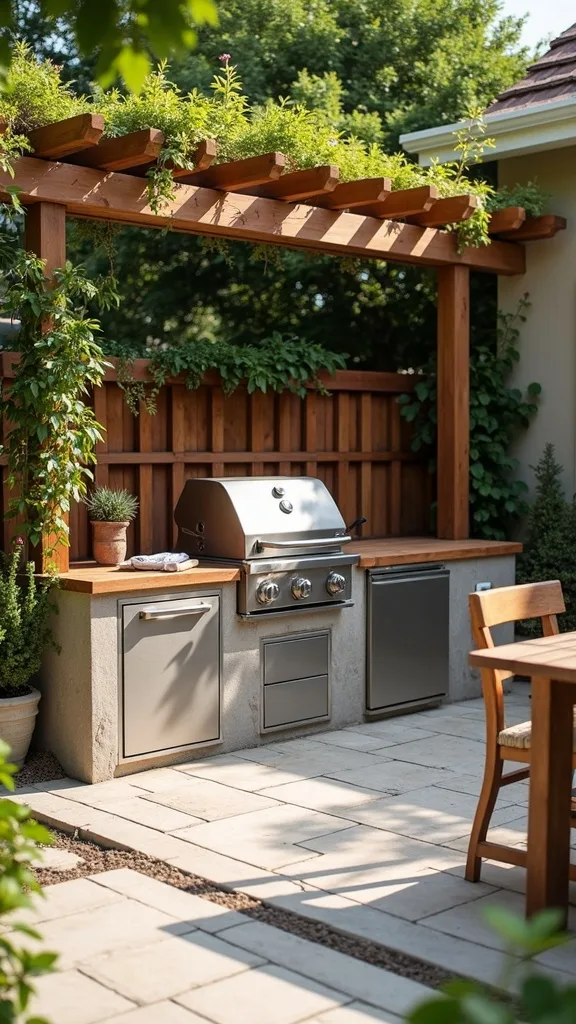
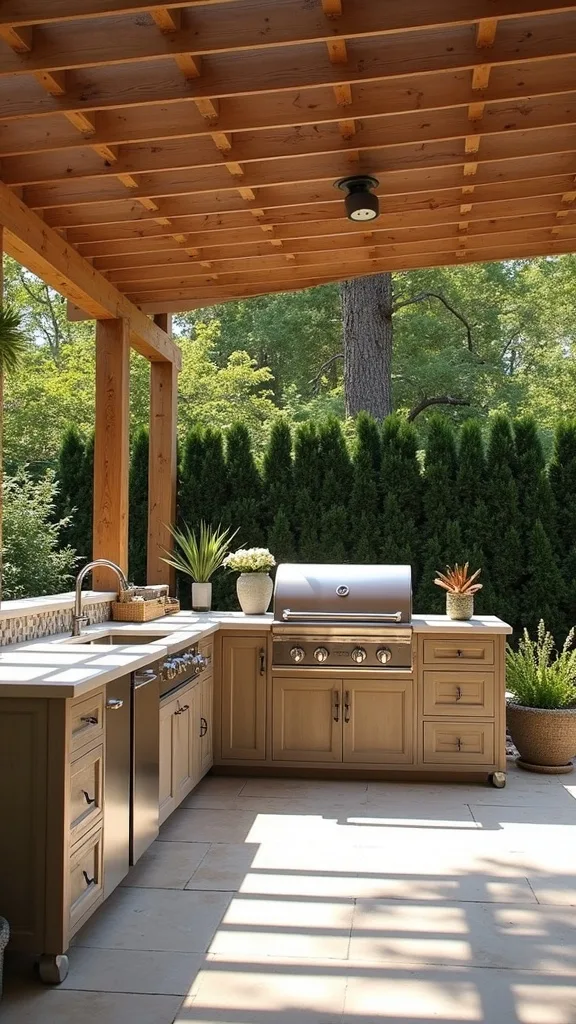
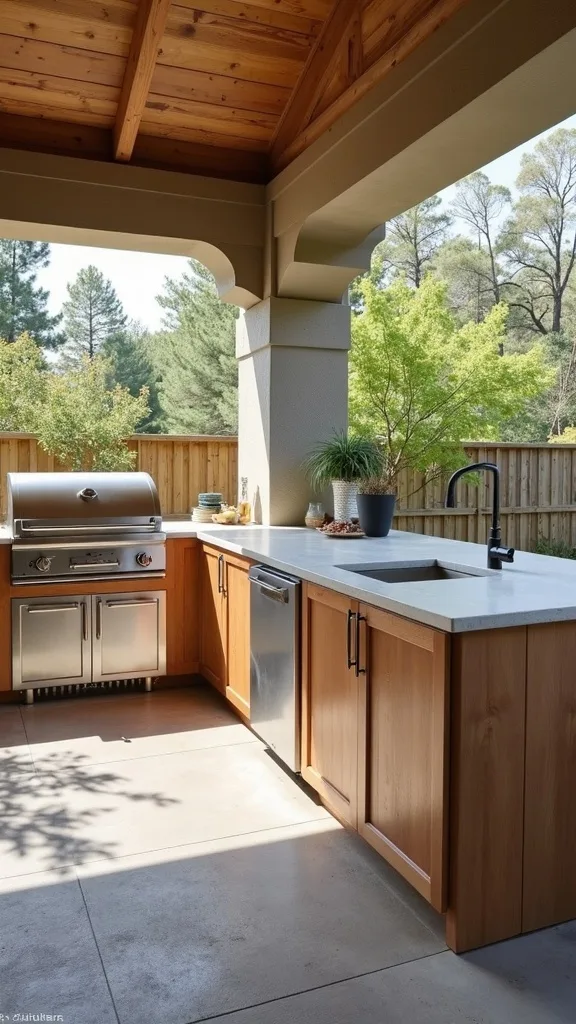
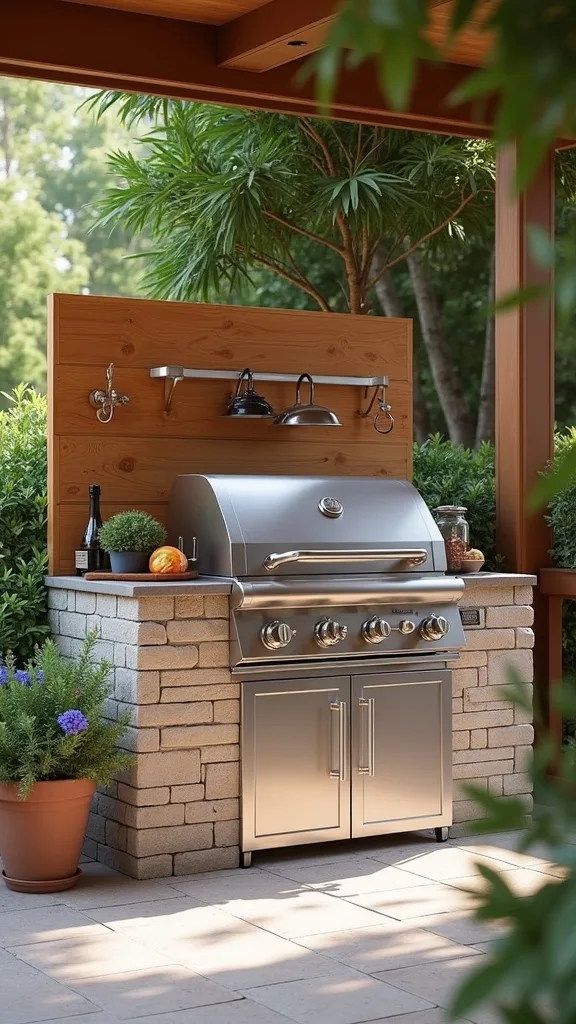
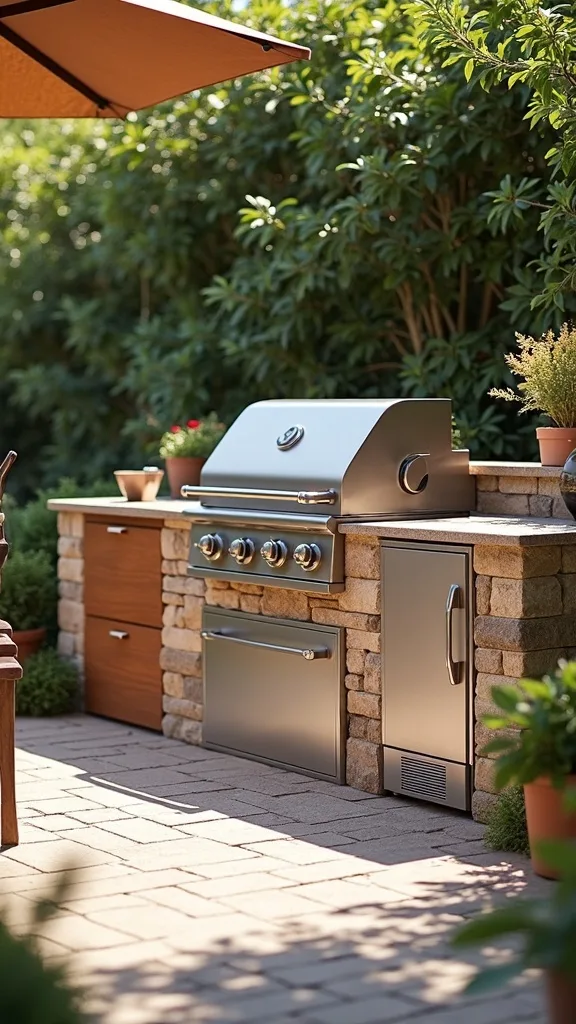
1. Cinder Block + Concrete Counter Core Build (Grill + Fridge + Pergola)
I always start by anchoring my outdoor kitchen ideas around one “hero” run: a cinder block base with a concrete counter, a built-in grill bay, a mini fridge niche, and pergola shade, because it gives me structure without custom cabinetry prices. In my opinion, this layout works in most backyards because it’s modular—if I need to adjust 6 inches left or right, I can do it block-by-block.
For a comfortable DIY outdoor kitchen, I lay out an 8–10 ft straight run with a 24–30 inch grill opening and a 24-inch niche for a compact fridge. I keep at least 36 inches of landing space on one side of the grill and a 3–4 ft walkway behind me so I’m not bumping into guests.
I find that 8x8x16-inch concrete blocks, 1/2-inch rebar, and a 2-inch-thick concrete pour (with fiber reinforcement) hold up well in typical freeze/thaw zones. For shade, I like a 10×12 ft cedar pergola stained in a warm walnut tone.
Pro Tip: From my experience, I leave a 1/2-inch gap between the grill surround and concrete counter and fill it with high-temp silicone—this tiny expansion joint prevents hairline cracks right where heat is most intense, and it keeps the whole build feeling confident.
2. Map a “Cook Line” Layout Before You Buy Anything
From my experience, the fastest way to waste money on outdoor kitchen ideas is buying the grill first and then forcing everything else to fit. I always start by taping out a full-size “cook line” on the patio so I can feel the flow before I lift a single block.
I use painter’s tape to mark a 96-inch run, then stand where the grill would sit and mimic my motions for 5 minutes—open lid, turn, plate, wash hands. I find that a 48-inch prep zone plus a 24-inch grill zone is the minimum that feels relaxed, and I keep 42 inches of clearance behind the cook for traffic.
For tools, I rely on a 25-ft tape measure, a chalk line, and a cheap laser distance measurer (usually $20–$35) to confirm squareness. If I’m planning a pergola, I mark 10×10 ft or 10×12 ft post locations so the shade actually lands over the heat.
Pro Tip: I’ve found that if I place the fridge niche within 36 inches of the prep zone (not the grill), I open it less while cooking—cold air stays in, the compressor works less, and drinks don’t end up in the “hot zone” during a busy cookout.
3. Build a Level Base That Doesn’t Wobble After the First Rain
I find that a DIY outdoor kitchen only feels “built-in” when the base stays dead level through summer storms. In my opinion, a wobbly first course of block is the root cause of 80% of the cracks people blame on concrete.
I always start by digging down 4–6 inches and adding 3 inches of compacted 3/4-inch crushed stone, then I top it with 1 inch of leveling sand. For most BBQ station backyard builds, I compact in two passes—about 5 minutes per 4×4 ft area—using a hand tamper or a rented plate compactor for $60–$90 per day.
I like using a 4-ft level and setting a string line at the finished height so each 8x8x16-inch block lands consistently. If I’m on a sloped yard, I step the base in 2-inch increments rather than trying to “cheat” with extra mortar.
Pro Tip: When I tried skipping geotextile fabric under the stone once, weeds pushed up along the edges within 2 months—now I always lay a 3×50 ft roll under the base so the border stays crisp and I’m not trimming grass against hot masonry later.
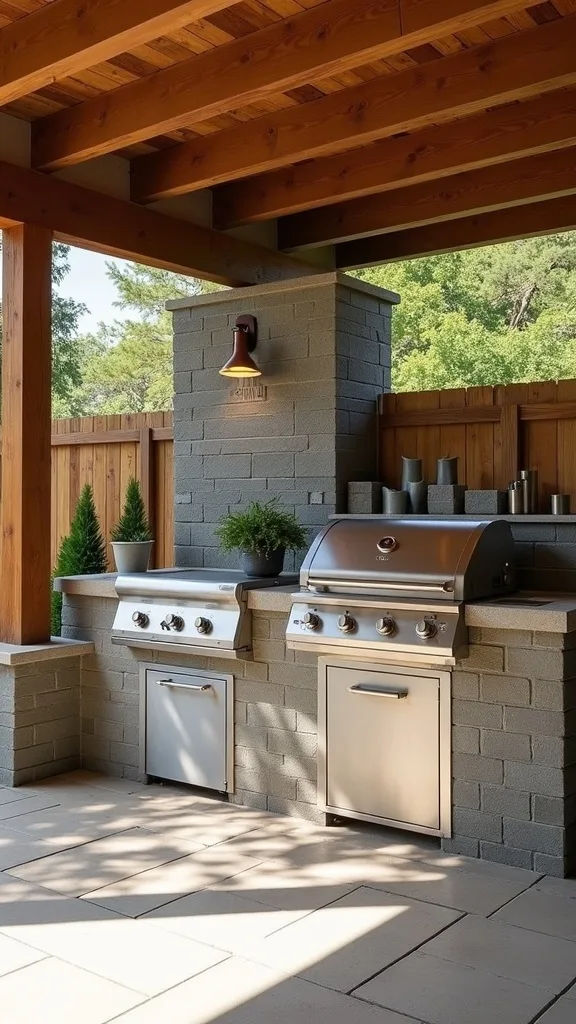
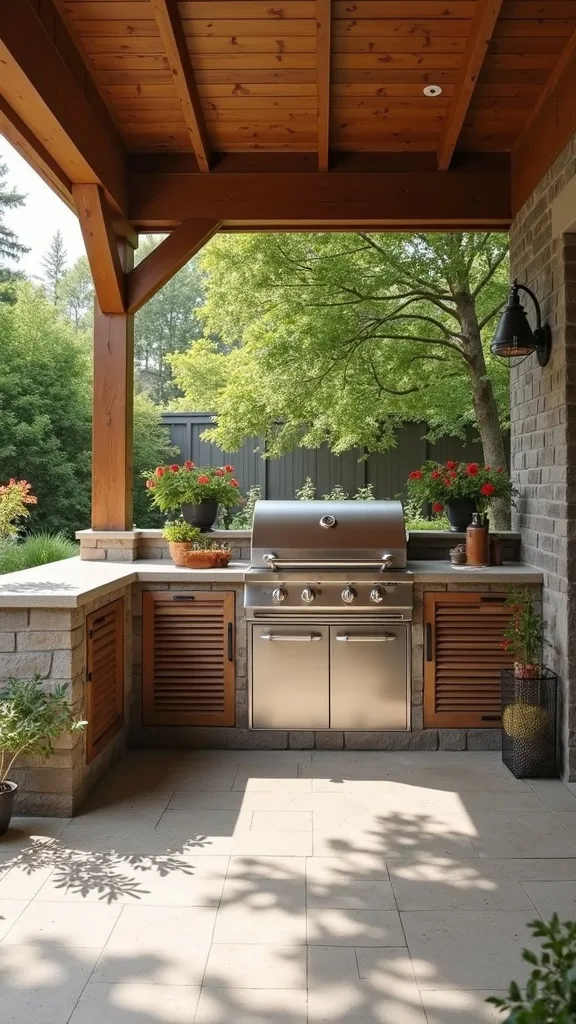
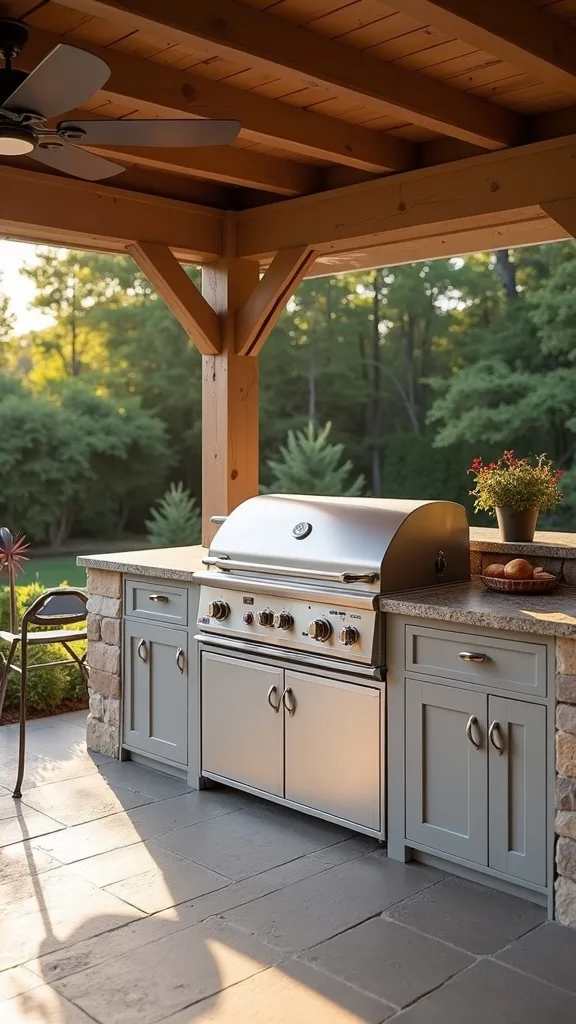
4. Create a Safe Built-In Grill Bay (Heat + Venting)
I always recommend treating the grill bay like a safety project first and a style project second, because backyard cooking gets risky when heat is trapped. From my experience, most “mystery” scorching comes from leaving too little air gap around the grill body.
I follow the grill manufacturer’s clearance guidance, but typically I plan for 2–4 inches of open air space on the sides and back of the grill insert. I set the grill opening about 34–36 inches high so the cooking grate lands near a comfortable elbow height, and I keep any wood pergola posts at least 24 inches away from the hottest edge.
For materials, I use concrete block, cement board (1/2 inch), and stainless steel vent panels (often 4×12 inches) on the front and back of the island. I find that a stainless trim kit makes the opening look intentional even if my block cuts aren’t perfect.
Pro Tip: I’ve found that adding two vents low and two vents high (not just one pair) creates a natural “chimney effect,” so the bay stays cooler during 45–60 minute cooks—my igniter wiring has lasted longer with this simple airflow upgrade.
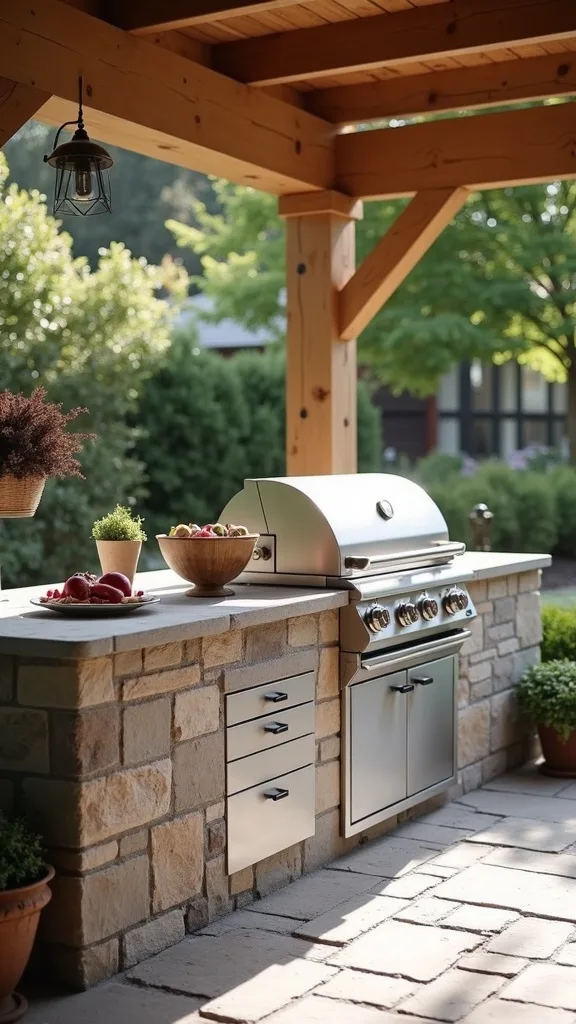
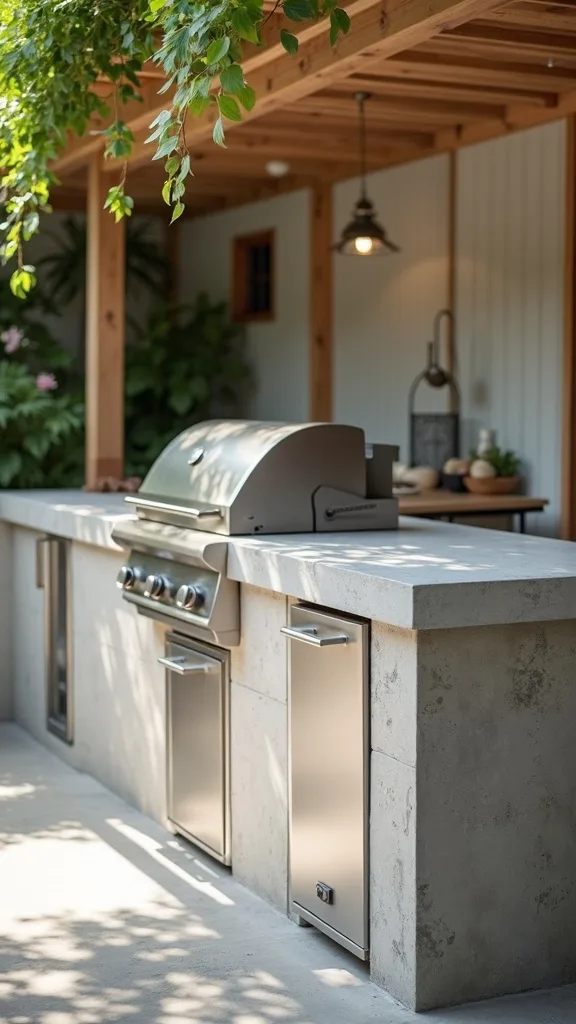
5. Pour a Concrete Counter That Feels Smooth (Not Gritty)
When I design this look, I treat the counter like the star because it’s what everyone touches—so I want it to feel smooth, not like a sidewalk. From my experience, a concrete counter can look high-end if I control thickness and finishing time.
I always start by building a melamine form and aiming for a 2-inch-thick slab with 1/2-inch rebar in a simple grid spaced about 8 inches apart. I vibrate the form by tapping with a rubber mallet for 10–15 minutes, then I let it cure at least 48 hours before I even think about moving or sealing it.
I like a concrete countertop mix (not regular bagged concrete), plus a food-safe penetrating sealer and 220-grit sandpaper for the final smoothing pass. For colour, I find that charcoal pigment hides smoke smudges better than bright white in most outdoor grill area setups.
Pro Tip: I always “cream” the surface with a steel trowel only after the sheen disappears—if I trowel too early, I trap water and get dusting later, but if I wait 20–40 minutes (depending on heat), the finish tightens up beautifully.
6. Add a Mini Fridge Niche That Actually Ventilates
I find that a mini fridge niche is one of the most satisfying outdoor kitchen ideas because it keeps me outside instead of running in for drinks every 10 minutes. In my opinion, it only works long-term if I plan ventilation and drainage from the start.
I always start by choosing the fridge size—most compact units are 19–24 inches wide—then I build the opening 1 inch wider and 1 inch taller than the manufacturer’s cutout. I leave at least 2 inches behind the fridge for airflow and route the power cord through a 2-inch grommeted hole so it doesn’t rub on masonry.
For materials, I like cement board lining, stainless vent grilles, and a simple plastic drip tray under the fridge feet. If I’m adding a door, I choose a stainless outdoor-rated access door (typically 17×24 inches) so the face matches the grill trim.
Pro Tip: From my experience, placing the fridge on a 1/2-inch rubber anti-vibration mat reduces compressor noise under a concrete counter—at night gatherings, that quiet difference makes the whole BBQ station backyard feel more relaxed.
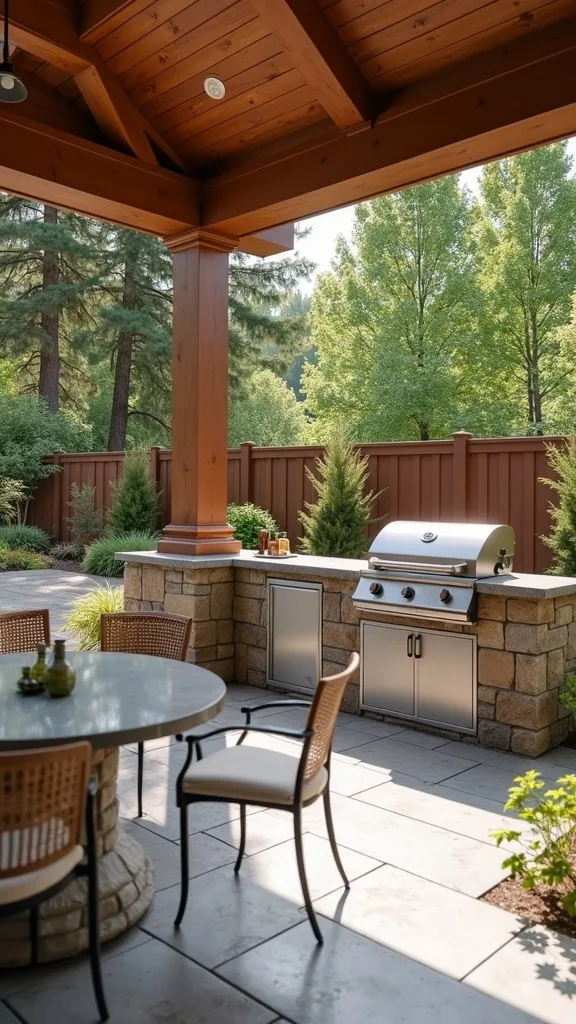
7. Pergola Shade Positioned for the Hottest Hour
I always recommend adding shade early in the plan because an outdoor grill area without it can feel brutal by mid-June. From my experience, the right pergola placement matters more than fancy details—especially for Father’s Day cookouts when everyone wants to linger.
I start by watching the sun for 2 days: I note where shade falls at 12 p.m. and again at 4 p.m. Typically, a 10×12 ft pergola with 6×6 posts gives enough coverage for an 8–10 ft kitchen run plus a 30-inch deep counter. I set posts in 12-inch-wide by 36-inch-deep concrete footings so the structure stays steady in most soils.
I like cedar or pressure-treated pine, 2×8 headers, and 2×6 rafters spaced 16 inches apart for a clean, sturdy look. For a softer vibe, I add an outdoor shade sail or UV fabric panel rated for 90% sun block.
Pro Tip: I’ve found that rotating the pergola rafters so the “open” direction faces the afternoon sun reduces glare on the grill thermometer—small detail, but it makes temperature checks easier when the sun is low and intense.
8. Design a 36-Inch Prep Zone (Your Real Workhorse)
I find that the prep zone is where my outdoor kitchen either feels effortless or chaotic. In my opinion, dedicating a true 36-inch-wide prep area is one of the highest-return outdoor kitchen ideas because it keeps raw and cooked food from competing for space.
I always start by placing the prep zone on the side of the grill where my dominant hand naturally lands—then I add a 24-inch “landing strip” on the other side for trays. I keep the counter depth at 24 inches minimum, but I prefer 30 inches if I’m regularly using sheet pans or a 18×24-inch cutting board.
For surfaces, I like sealed concrete with a removable HDPE (high-density plastic) cutting mat, plus a magnetic paper towel holder under the pergola beam. Colour-wise, I find that a mid-gray counter with matte black accessories hides sauce splatter better than glossy white.
Pro Tip: From my experience, I mark a faint 12×18-inch “raw zone” on my cutting mat with a paint pen—during big cooks, that visual boundary helps me avoid cross-contamination without thinking, and it keeps the workflow calm.
Cost & Materials Estimate
I typically see a cinder block + concrete counter outdoor kitchen land between $900 and $2,800 depending on the grill, fridge, and pergola choices.
| Item | Estimated Cost | Where to Buy |
|---|---|---|
| 8x8x16 in cinder blocks (60–90 blocks) | $120–$240 | Home Depot |
| Concrete countertop mix + melamine form materials | $180–$420 | Lowe’s |
| Stainless vent panels + access doors (2–4 pieces) | $140–$380 | Amazon |
| Built-in style grill insert (mid-range) | $350–$1,200 | Home Depot |
| 10×12 ft pergola kit or lumber package | $450–$1,100 | Wayfair |
Total estimated cost: $900–$2,800 I find that you can save by skipping the fridge at first (use a cooler niche), but I’d splurge on vents and safe clearances because fixing heat issues later is frustrating and expensive.
9. Add a Trash + Recycling Pull-Out Alternative (Without Cabinets)
I always start by planning where messy stuff goes, because backyard cooking generates packaging, paper towels, and skewers fast. From my experience, a trash plan is one of those outdoor kitchen ideas that feels boring—until you don’t have it.
I build a 16–18 inch wide niche in the cinder block base and slide in two 10–13 gallon lidded bins on a simple plywood tray. I keep the opening about 24 inches tall so I can lift bins out easily, and I place it within 48 inches of the prep zone so I’m not dripping marinade across the patio.
For materials, I like exterior-grade plywood sealed with spar urethane, plus adhesive-backed weatherstripping around the opening to reduce rattling. If I want a cleaner look, I add a stainless access door (roughly 14×20 inches) to hide the bins.
Pro Tip: I’ve found that lining the niche floor with a $10 cafeteria tray catches leaks and can be rinsed in 2 minutes—this keeps the block from absorbing smells, which is the real long-term issue with hidden trash storage.
10. Use Outdoor-Rated GFCI Power Where You’ll Actually Plug In
From my experience, the most frustrating DIY outdoor kitchen moment is realizing my blender cord won’t reach the outlet—so I plan power early. I always recommend a weather-resistant GFCI outlet (the type that trips if moisture is detected) because outdoor grill area splashes are common.
I place at least 2 outlets: one within 24 inches of the prep zone and another near the fridge niche, typically 36–42 inches above the patio so cords stay off puddles. If I’m adding under-counter lighting, I plan a dedicated low-voltage transformer location that’s 12–18 inches above ground to avoid standing water.
For materials, I use an in-use weatherproof cover, outdoor-rated conduit, and a heavy-duty extension cord only as a temporary solution. I find that hiring an electrician for 2–4 hours costs more upfront ($250–$600 in many areas) but saves me from sketchy DIY wiring.
Pro Tip: When I tried placing outlets on the grill side once, grease film built up within a month—now I place power on the prep side instead, which stays cleaner and makes plugging in appliances feel safer and less grimy.
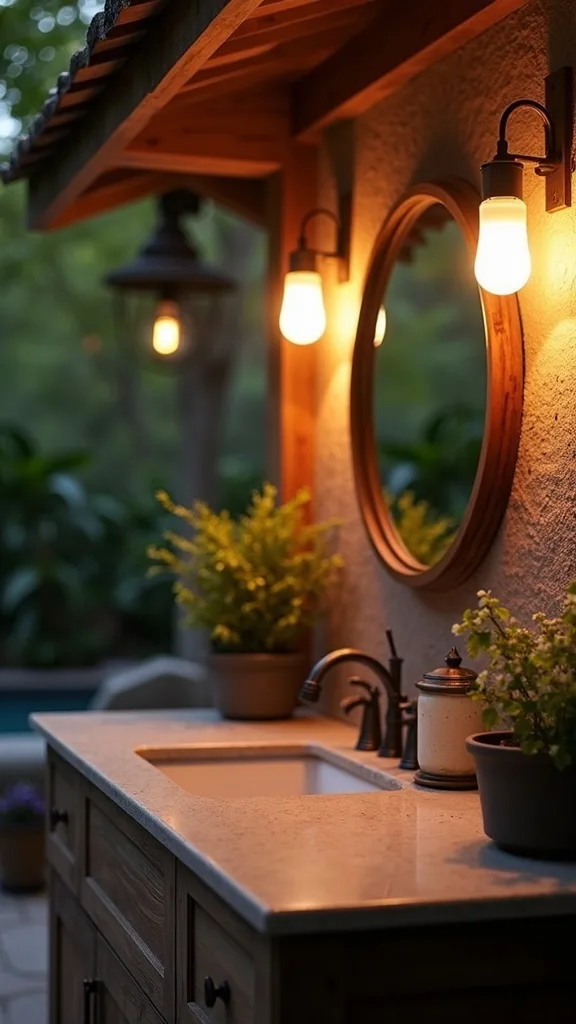
11. Plan Task Lighting for Night Grilling (Warm White, Not Harsh)
I find that lighting is what turns a daytime BBQ station backyard into a true summer hangout after 7 p.m. In my opinion, warm white light (2700K–3000K — the cosy, yellowish tone you see in most homes) looks more inviting on food than bluish light.
I always start by adding one focused task light over the grill and one over the prep zone, typically 24–30 inches in front of where I stand so my body doesn’t cast a shadow. For brightness (measured in lumens), I aim for about 800–1,200 lumens over prep and 600–900 lumens over the grill, depending on how much pergola shade I have.
I like outdoor-rated LED puck lights under a pergola beam and a gooseneck barn light with a wet-location rating. For wiring, I prefer plug-in options routed neatly with UV-resistant cable clips spaced every 12 inches.
Pro Tip: I’ve found that aiming the grill light slightly forward (about a 15-degree tilt) reduces glare off stainless lids—this makes it easier to read doneness and keeps guests from squinting when they’re chatting near the outdoor grill area.
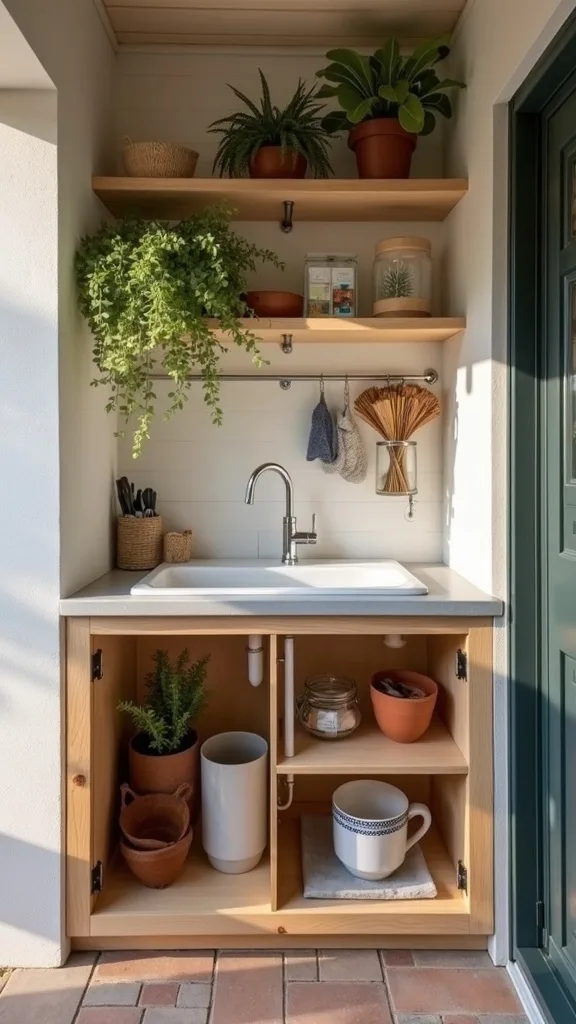
12. Add a Simple Sink (Or a Smart “No-Plumbing” Handwash Station)
I always recommend some kind of handwashing setup because it makes backyard cooking feel cleaner and more relaxed. From my experience, a full sink is amazing, but a no-plumbing station can be the right trade-off if you’re keeping the DIY outdoor kitchen simple.
If I’m plumbing, I plan a 15×15-inch bar sink and allow a 24-inch base opening, then I run a cold-water line with a shutoff and add a 1 1/2-inch drain to a dry well or existing line (where local codes allow). If I’m going no-plumbing, I set up a 2.5–5 gallon beverage dispenser with a spigot plus a bus tub for gray water, and I refresh it every 2–3 hours during parties.
I like stainless sinks, a pull-down faucet, and a silicone drying mat that rolls up into a drawer. For soap, I use a wall-mounted dispenser so it doesn’t tip in the wind.
Pro Tip: When I tried a no-plumbing station, I placed it 18 inches from the prep board and it constantly got splashed—now I keep it 36 inches away so the water stays clean longer and I’m not refilling mid-burger rush.
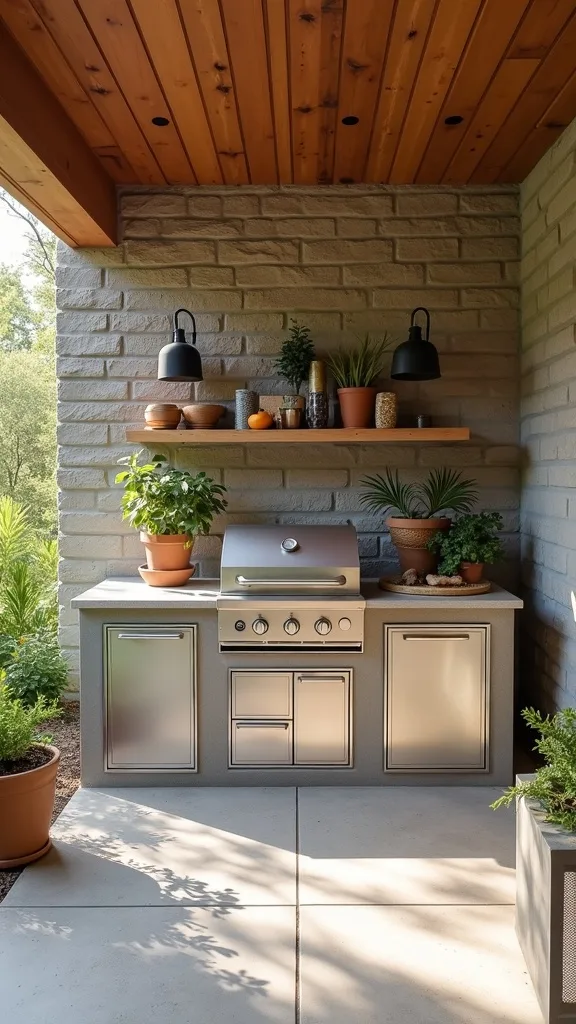
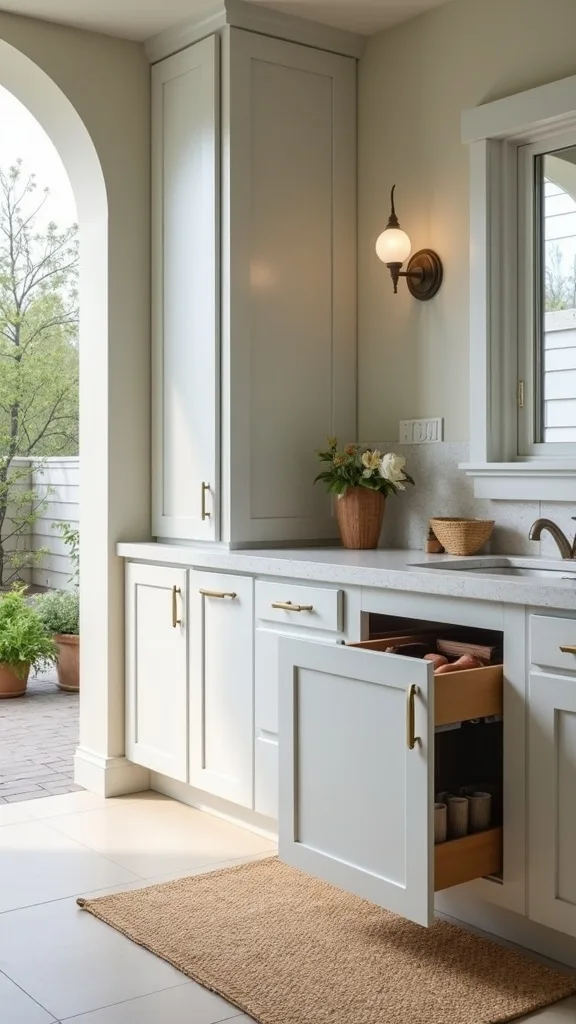
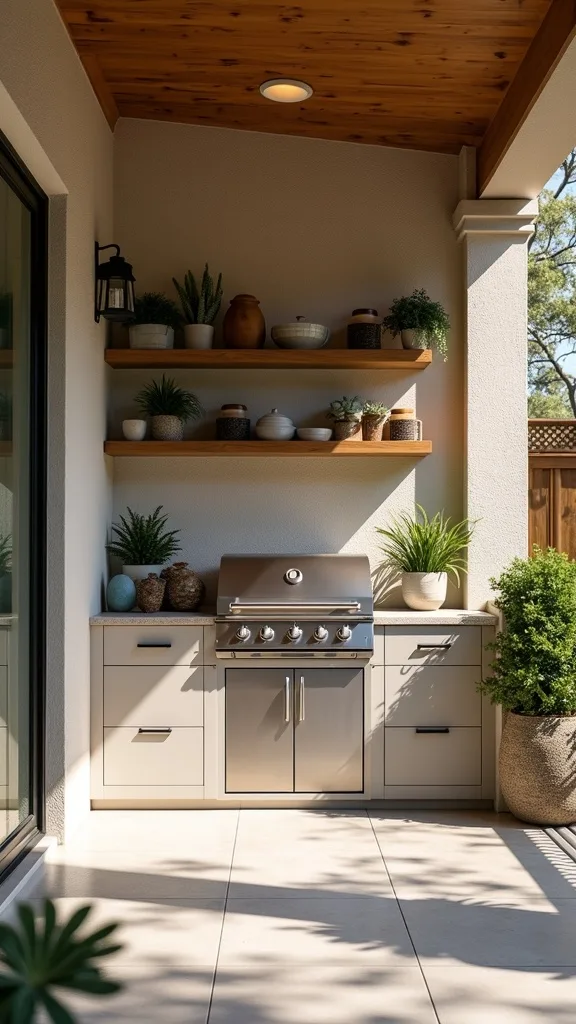
13. Weatherproof Storage with Stainless Access Doors
I find that storage is what makes an outdoor kitchen feel like a real room, not just a grill on a patio. In my opinion, stainless access doors are worth considering because they protect tools from rain better than open cubbies.
I always start by choosing door sizes that match my block bays—common options are 14×20 inches for small storage and 17×24 inches for larger compartments. I keep shelves 12–14 inches deep so they don’t become clutter caves, and I mount doors about 4 inches above the patio to avoid splashback during storms.
For materials, I like 304 stainless doors (more corrosion resistant in most climates), exterior-grade screws, and a bead of clear silicone around the frame. Inside, I use plastic bins labeled in 1-inch vinyl letters so I can grab “tongs” or “thermometers” quickly.
Pro Tip: I’ve found that adding a small desiccant container (about 750g) in each closed compartment dramatically reduces that damp “metal smell” after humid weeks—your tools feel cleaner, and the storage stays pleasant to open.
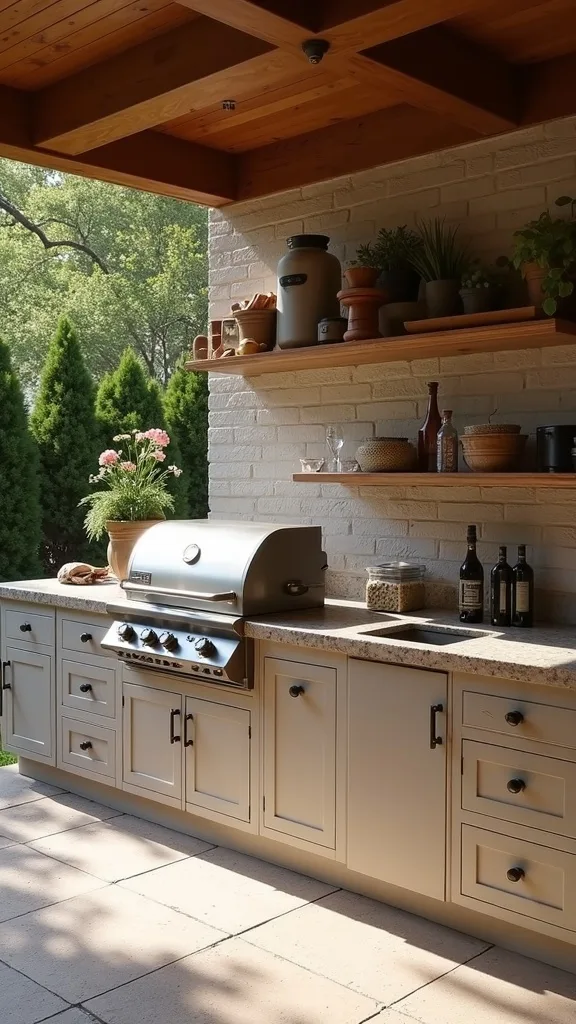
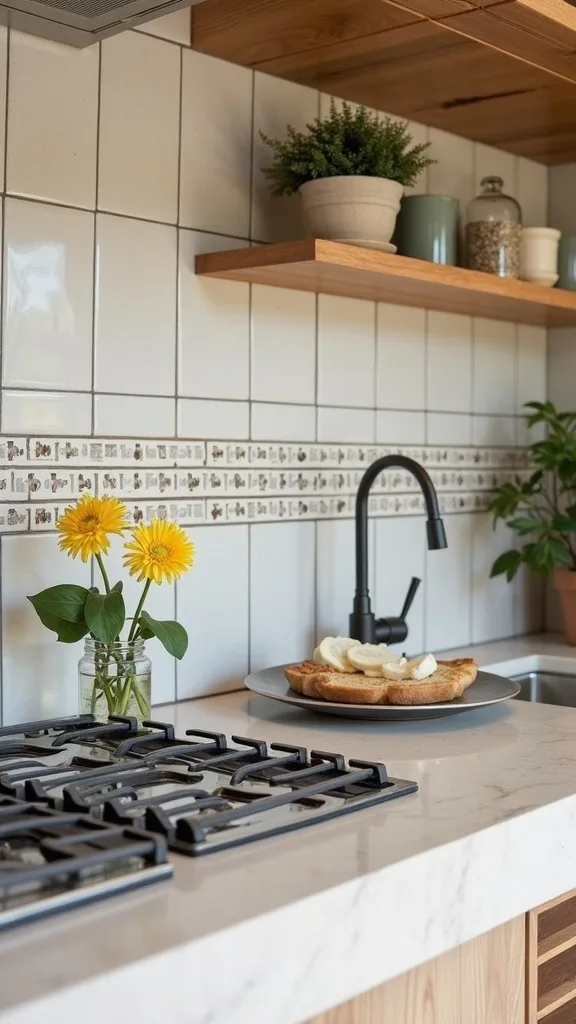
14. Backsplash Strip to Protect the Wall (Or Fence) Behind the Grill
From my experience, smoke and sauce splatter will find the nearest vertical surface—so I always plan a backsplash, even if it’s just a small one. I find that this is one of those outdoor kitchen ideas that keeps maintenance low without changing the whole build.
I install a 6–8 inch tall backsplash strip along the back edge of the counter, or I add a 24-inch tall panel behind the grill if it’s near a fence. For spacing, I keep at least 2 inches between the hot grill body and any backsplash material, and I seal seams with a heat-resistant silicone where needed.
I like stainless steel sheets (easy wipe-down) or porcelain tile rated for outdoor use with a polymer-modified thinset. Colour-wise, I find that a mid-tone grout hides smoke film better than bright white, which can yellow over a single summer.
Pro Tip: When I tried tile behind a grill, I learned to avoid tiny mosaic sheets—the grout lines trap grease—now I use larger 4×12-inch tiles so cleanup takes 2 minutes with a degreaser instead of 20.
15. Built-In Cooler Drawer for Parties (Budget Alternative to a Fridge)
I find that not everyone needs a mini fridge, and a built-in cooler can be a budget-friendly outdoor kitchen idea that still feels special for Father’s Day. In my opinion, this is a great trade-off if you entertain a few times a month but don’t want another appliance to winterize.
I always start by choosing a 48–60 quart hard cooler and building a cradle that’s 1 inch wider on each side for easy lift-out. I set the top rim about 34 inches high so guests can grab drinks without bending, and I drill a 1-inch drain hole through the base bay to route meltwater into a removable catch pan.
I like marine-grade hinges for a lid, a simple stainless pull handle, and a rubber gasket strip to reduce rattling. For looks, I paint the block base with masonry paint in a soft greige and keep hardware matte black.
Pro Tip: I’ve found that lining the cooler cradle with 1/4-inch closed-cell foam reduces ice melt on 90°F days—your ice lasts longer, and you won’t be dumping water halfway through the cookout.
16. Add a Smoker “Parking Pad” Beside the Main Grill
I always recommend planning for the extra cooker you’ll inevitably want, because backyard cooking hobbies tend to grow. From my experience, a smoker pad prevents that awkward shuffle where a hot smoker ends up too close to seating.
I set aside a 30×48-inch heat-safe pad next to the main grill run, with at least 24 inches of clearance from the pergola post and 36 inches from any upholstered furniture. If I’m pouring concrete, I thicken that section to about 3 inches and add wire mesh so it handles the concentrated weight and heat.
I like a small Kamado-style grill or pellet smoker, plus a metal ash bucket and a 24-inch tool hook rail mounted to the block. Colour-wise, I keep the smoker zone darker—charcoal paint or black tile—because ash marks happen.
Pro Tip: I’ve found that placing the smoker pad on the “downwind” side of the seating area (even just 4–6 ft difference) keeps smoke from drifting into conversations, which makes long low-and-slow cooks far more enjoyable.
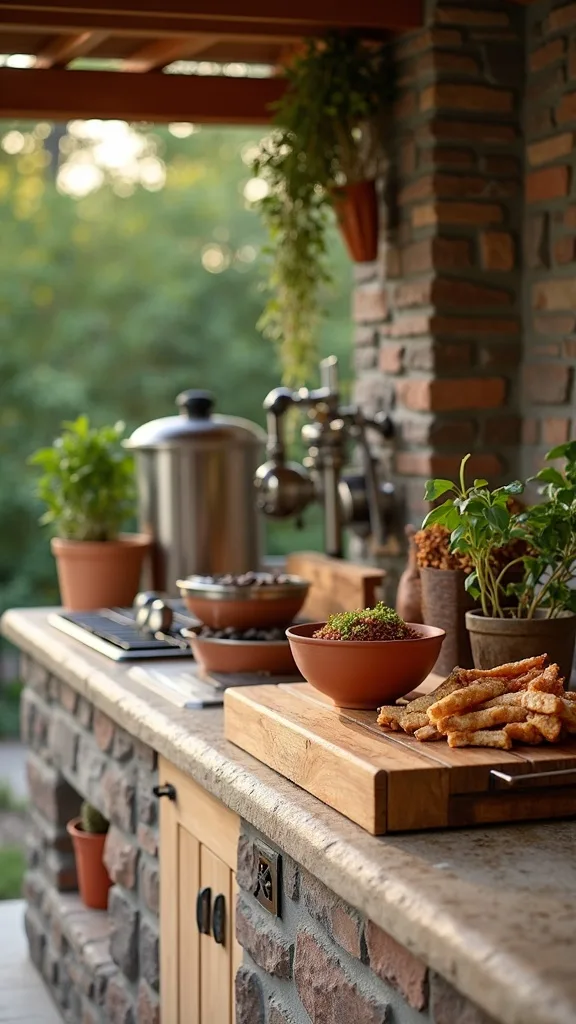
17. Create a Spice + Sauce Station That Survives Heat
I find that sauces and rubs are what make grilling feel personal, so I like giving them a real home in my outdoor grill area. In my opinion, the key is keeping them out of direct sun so they don’t separate or get funky.
I always start by adding a shallow shelf or caddy within 18 inches of the prep zone, but not directly over the grill. I keep the shelf 4–6 inches deep and about 12 inches tall clearance above it so bottles fit without tipping, and I bring everything inside if temps stay above 90°F for hours.
I like a stainless wall caddy, a 12-inch lazy Susan for rub jars, and squeeze bottles labeled with waterproof vinyl. For materials, I prefer stainless or powder-coated steel because wood shelves near grease need more frequent scrubbing.
Pro Tip: When I tried leaving spice jars outside, humidity clumped them within 2 weeks—now I decant rubs into small 4-oz spice tins with tight lids, and they stay free-flowing even through sticky summer nights.
18. Use Heat-Safe Counter “Landing Zones” with Trivets Built In
From my experience, the moment I need a safe place for a hot pan is the moment my counter gets ruined—so I build landing zones on purpose. I always recommend at least two heat-safe spots in any DIY outdoor kitchen layout.
I set one landing zone within 12 inches of the grill handle and another near plating, each about 12×12 inches. If I’m pouring concrete, I embed stainless steel bars or a cast-iron trivet flush into the surface, leaving a 1/8-inch reveal so I can clean crumbs. Typically, I keep these zones 6 inches away from the counter edge so guests don’t accidentally brush them.
I like cast iron, stainless, or even a removable granite tile insert sealed for outdoor use. Colour-wise, I find that darker trivets hide heat discoloration better than bright silver if you’re rough on cookware.
Pro Tip: I’ve found that setting the trivet slightly “proud” (about 1/16 inch above the concrete) creates a tiny air gap that reduces heat transfer—your concrete stays happier, and you worry less during fast-paced grilling.
19. Wind Break Panel for More Consistent Grilling
I find that wind is the silent troublemaker in outdoor cooking—flames flare, temps swing, and food cooks unevenly. In my opinion, a discreet wind break is one of the most underrated outdoor kitchen ideas for consistent results.
I always start by noticing prevailing wind direction over 3–5 evenings, then I add a 24–36 inch tall panel on the windward side of the grill. I keep the panel at least 6 inches away from the grill body to avoid trapping heat, and I anchor it to the block base with masonry screws spaced about every 12 inches.
I like tempered glass panels with stainless standoffs, or a simple cement board wall finished with exterior stucco. If privacy matters, I use horizontal cedar slats, but I keep them farther—typically 18–24 inches—from the hottest zone.
Pro Tip: When I tried a solid wall directly behind the grill, it made the bay hotter—now I use a panel with a 1–2 inch gap at the bottom so air can still move, which keeps the grill happier and the cook more comfortable.
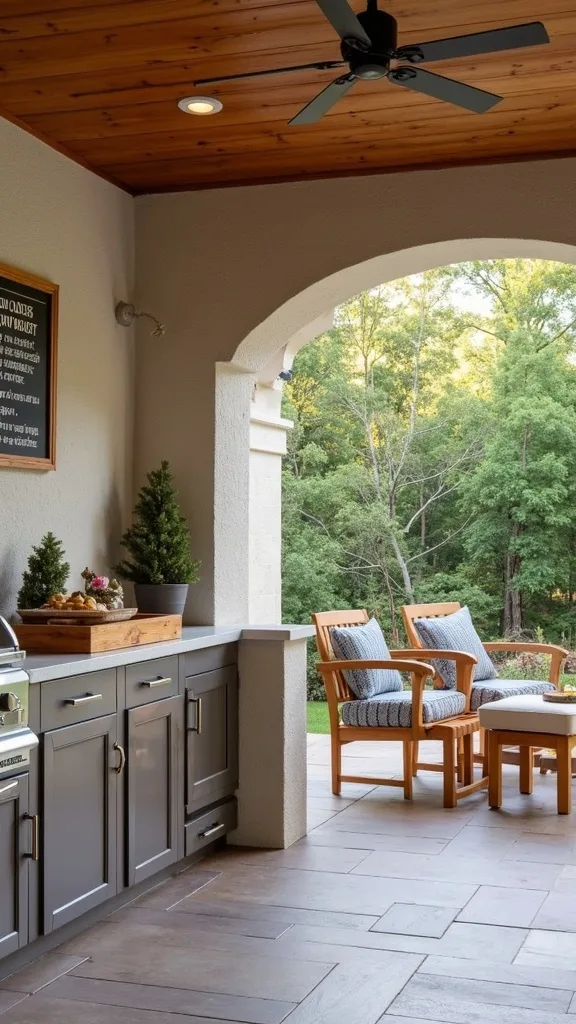
20. Add a Bar Ledge for Guests (So They Don’t Crowd the Cook)
I always recommend giving guests a designated perch, because it keeps the cook line clear and makes gatherings feel organized. From my experience, a bar ledge is the simplest way to stop people from hovering right where I need to move.
I build a 10–12 inch deep overhang on the guest side of the counter and set bar stools about 24 inches apart. I keep at least 48 inches between the bar seating and the grill face so heat and traffic don’t collide, and I aim for a bar height of about 42 inches if I’m using standard outdoor bar stools.
I like sealed concrete with rounded edges (a 1/4-inch radius) so elbows are comfortable, plus woven resin stools that can handle rain. For colour, I find that black or teak stools pair naturally with a cinder block base and cedar pergola.
Pro Tip: I’ve found that adding a narrow foot rail—like a 1-inch stainless tube mounted 7–9 inches off the ground—keeps stools from scraping the patio, and it subtly encourages guests to sit back instead of leaning into the cooking zone.
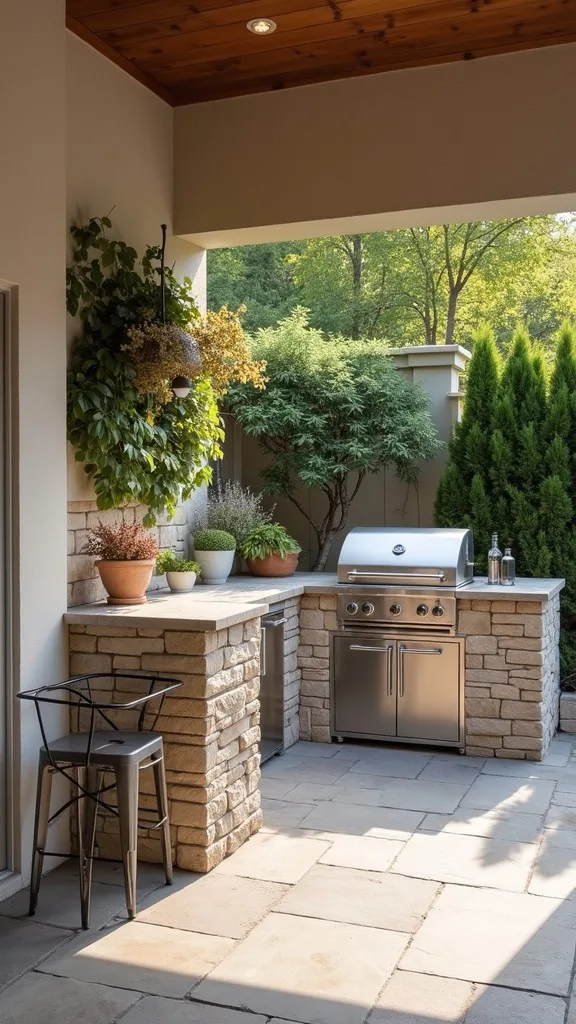
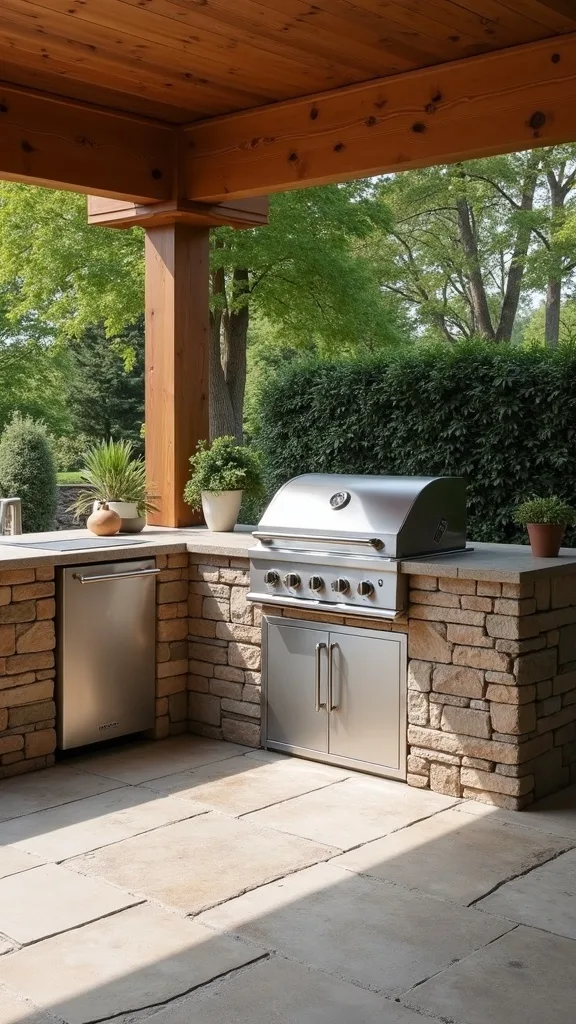
21. Outdoor-Rated Paint or Stucco Finish for the Cinder Block Base
I find that finishing the block base is what makes the whole BBQ station backyard feel intentional instead of “temporary.” In my opinion, paint is faster and cheaper, while stucco costs more upfront but hides imperfections better.
I always start by cleaning the blocks and letting them dry for 24–48 hours, then I fill major voids with mortar. For paint, I use a masonry primer plus 2 coats of elastomeric masonry paint, allowing about 4 hours between coats in typical warm weather. For stucco, I apply a scratch coat and finish coat totaling about 3/8 inch thickness.
I like colours like warm gray, charcoal, or creamy off-white, and I pair them with matte black hardware for a modern-industrial vibe. If I want a rustic look, I add a limewash-style masonry finish for softer variation.
Pro Tip: From my experience, I avoid painting the inside faces of grill and fridge bays—paint there tends to get scuffed and grimy—so I leave those areas raw block or line them with cement board for a cleaner, longer-lasting interior.
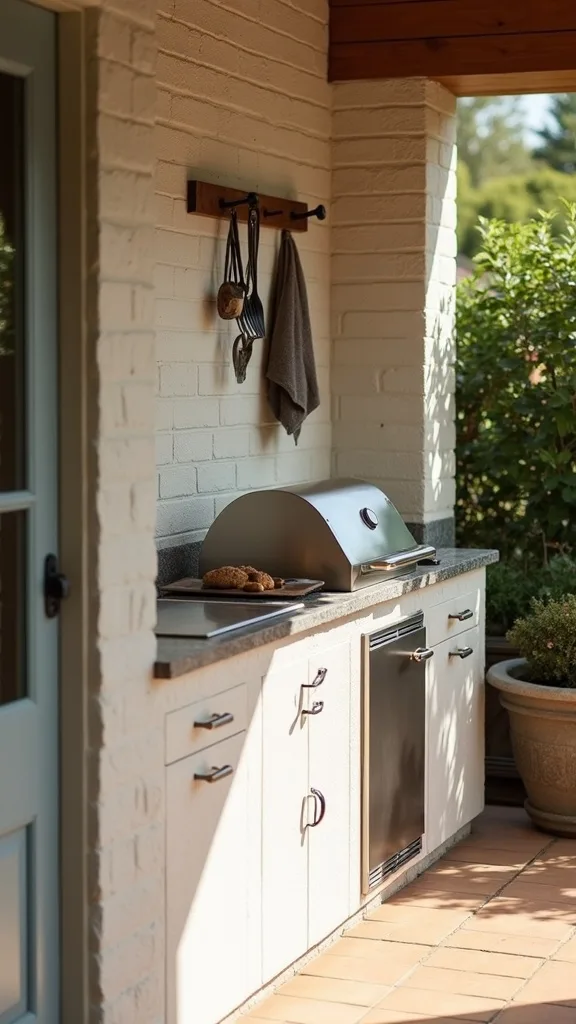
22. Add a Dedicated Tool Rail and Towel Hooks
I always start by giving my hands a “home base” for tools, because nothing slows backyard cooking like hunting for tongs. From my experience, a simple rail setup is one of the most affordable outdoor kitchen ideas with an immediate payoff.
I mount a 18–24 inch stainless tool rail on the side of the island, about 48 inches above the ground so it’s reachable but not in the splash zone. I add 3–5 S-hooks for spatulas and brushes, plus two towel hooks spaced 6 inches apart for a clean towel and a “messy” towel.
I like stainless rails (they wipe clean) and silicone-grip hooks that don’t slide around. If I’m under a pergola, I sometimes add a small wire shelf for gloves and a digital thermometer case.
Pro Tip: I’ve found that placing the rail on the prep-side end (not the grill face) keeps tools from getting heat-soaked—my silicone handles last longer, and I’m less likely to grab a hot metal shaft during a fast flip.
23. Use Pavers or a Grill Mat Zone to Protect the Patio
I find that grease splatter is inevitable, so I plan protection instead of hoping for the best. In my opinion, a defined floor zone is a smart DIY outdoor kitchen detail because it keeps cleanup predictable.
I always start by sizing the protected area at least 36 inches deep by 60 inches wide in front of the grill. If I’m using pavers, I set 12×12-inch concrete pavers on a 1-inch sand bed and keep joints tight (about 1/8 inch) for easy sweeping. If I’m going with a mat, I choose one that’s at least 36×48 inches and rated for high heat.
I like dark charcoal pavers, polymeric sand to reduce weeds, and a stiff deck brush for quick scrubbing. For mats, I prefer textured PVC or rubber that doesn’t curl at the corners.
Pro Tip: When I tried a small mat, grease still reached the edges—now I oversize the protection by 6–12 inches on each side of the grill, which catches those sideways splatters when I’m basting or flipping wings.
24. Father’s Day Finishing Touches: Signage, Seating, and a Serving Tray System
I always love adding a few Father’s Day touches because they make the outdoor grill area feel celebratory without requiring a rebuild. From my experience, the most meaningful upgrades are the ones that make hosting smoother in the moment.
I set up a simple serving tray system: two sheet pans or trays (about 18×26 inches), one labeled “raw” and one labeled “ready,” and I keep them on a 24-inch side shelf. I add 4–6 extra seats within 8–12 ft of the grill so the cook can still be part of the conversation, and I hang a small sign or menu board under the pergola at eye level (around 60 inches high).
I like melamine outdoor dinnerware, a heavy canvas apron, and a small outdoor-rated Bluetooth speaker kept 3–4 ft away from the grill heat. Colour-wise, I find navy, black, and warm wood tones look timeless for summer.
Pro Tip: I’ve found that setting a dedicated “hot tray landing” on a silicone mat near the table prevents last-minute counter crowding—guests naturally follow the system, and the cook gets a calmer, more enjoyable Father’s Day meal.
25. Easy Maintenance Routine to Keep It Looking New All Summer
I find that the difference between an outdoor kitchen that ages gracefully and one that looks tired by August is a simple routine. In my opinion, maintenance is an outdoor kitchen idea in itself—because it protects your time and your investment.
I always start by doing a 5-minute reset after each cook: wipe concrete with a pH-neutral cleaner, empty grease trays, and rinse the grill tools. Once a month (every 4 weeks), I deep clean the grill for 30–45 minutes and check silicone seams around the counter and grill trim for gaps.
I like a nylon scrub brush, a stainless cleaner for doors, and a penetrating concrete sealer touch-up every 12–18 months in most climates. For pergola wood, I typically recoat stain every 2–3 years depending on sun exposure.
Pro Tip: From my experience, I keep a small “outdoor kitchen kit” in a sealed 5-gallon bucket—microfiber cloths, degreaser, gloves, and a brush—so cleanup happens immediately; when supplies are within 3 ft of the grill, I actually do the routine and the space stays ready for spontaneous summer dinners.
Final Thoughts
I always start by reminding myself that a DIY outdoor kitchen doesn’t have to be complicated to feel custom—it just needs a smart layout, safe heat planning, and a few comfort upgrades like shade and lighting. From my experience, the cinder block and concrete approach is forgiving, budget-flexible, and surprisingly good-looking when I take time on the base and the finish.
I find that the easiest way to move forward is to pick one “core build” (grill + prep + fridge or cooler), then add the extras in stages over 2–6 weekends as you learn how you actually use the space. In my opinion, that staged approach costs a little more in repeat trips to the store, but it saves you from building features you won’t use.
When I design this look for summer, I always recommend planning your first cookout date—Father’s Day is a great target—because a deadline keeps decisions simple. I’d love for you to choose 3 ideas from the list, sketch your 8–10 ft run, and start stacking that first course of block this weekend.
What I’d Do Differently
When I first tried this, I got overly excited about the “built-in” look and made my grill bay too snug—my opening was only about 1 inch wider than the grill body, and I used just one vent pair. Within the first 3 long cooks (think 45–60 minutes each), the bay felt hotter than it should, and I noticed the underside of the counter near the grill was warming up in a way that made me nervous. The correct approach, in most cases, is to plan generous airflow: typically 2–4 inches of clearance around the grill insert plus multiple vent points (low and high) so heat can escape instead of pooling.
I also wish I’d chosen my fridge (or cooler) dimensions before stacking the first course of block—my niche ended up 1/2 inch too tight, and I had to grind a block corner to make it fit. From my experience, picking the appliances first, then building openings 1 inch larger in both width and height, saves you hours of dusty rework. Grab a tape measure, choose your grill footprint today, and you’ll be ready to lay out your cook line with confidence.
Products I Recommend for This Project
Here are some of my favourite products to help you bring these ideas to life:
- Keter XL Rolling Outdoor Storage Cabinet — I like it for weatherproof tool storage when you don’t want to build full masonry cabinets right away.
- Rutland 500°F RTV High Heat Silicone Sealant — I use it for that small expansion gap around grill trim so concrete edges don’t crack as temperatures swing.
- HOMENOTE Heavy Duty Grill Cover (60 inch) — I find a tailored cover reduces cleanup time after storms and keeps stainless looking better longer.
- LEONLITE Outdoor LED Low Voltage Spot Light (Warm White) — I like it for simple pergola task lighting without harsh glare when grilling after dark.
- ThermoPro TP19H Digital Instant Read Meat Thermometer — I rely on it to avoid overcooking, especially when wind or shade changes how the grill behaves.