This post contains affiliate links. As an Amazon Associate, I earn from qualifying purchases at no extra cost to you.
Are you looking for an easy way to make your patio feel like a little café for summer nights and the 4th of July? Do you want a lighting setup that looks intentional (not tangled) and still stays affordable?
I always start by planning the “shape” of the light first—zig-zag, perimeter, or a single statement span—because that choice decides everything from cord length to where I hide the plug. In this post, I’m sharing my most practical outdoor string lights layouts, plus the small styling moves that create real backyard ambiance without buying all new furniture.
From my experience, this is perfect for renters, first-time homeowners, and anyone who wants a weekend upgrade that feels like a full patio makeover.
I’ll walk you through café-style Edison bulb looks over a bistro table, soft fairy lights outdoor accents for railings and planters, and smart options for summer party lighting that won’t blind your guests.
I find that once your lights are up, everything else (pillows, plants, even paper plates) looks more elevated—so it’s the best “bang for your buck” step I do outside. Below are 25 Outdoor String Lights & Patio Ambiance Ideas that…
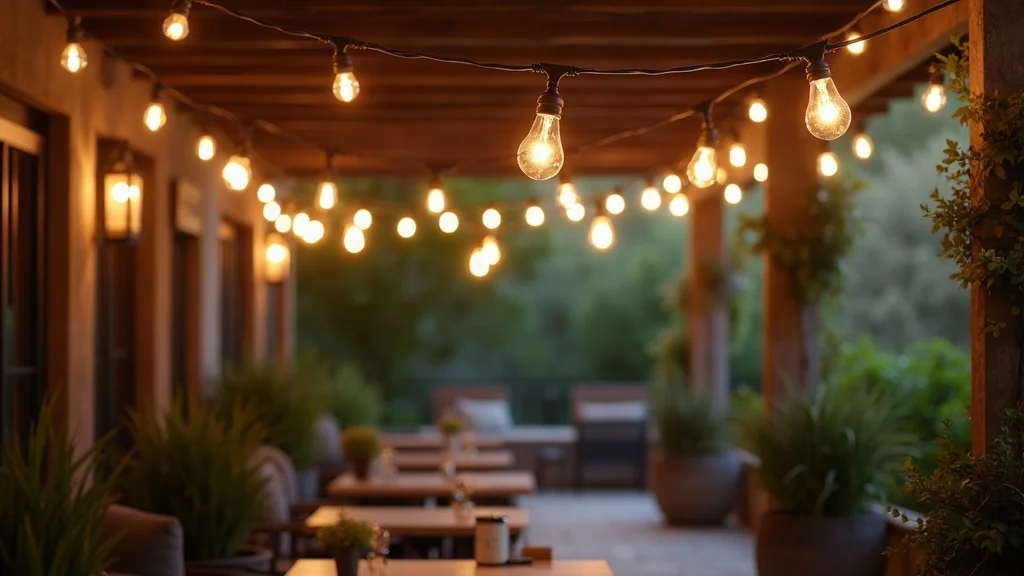
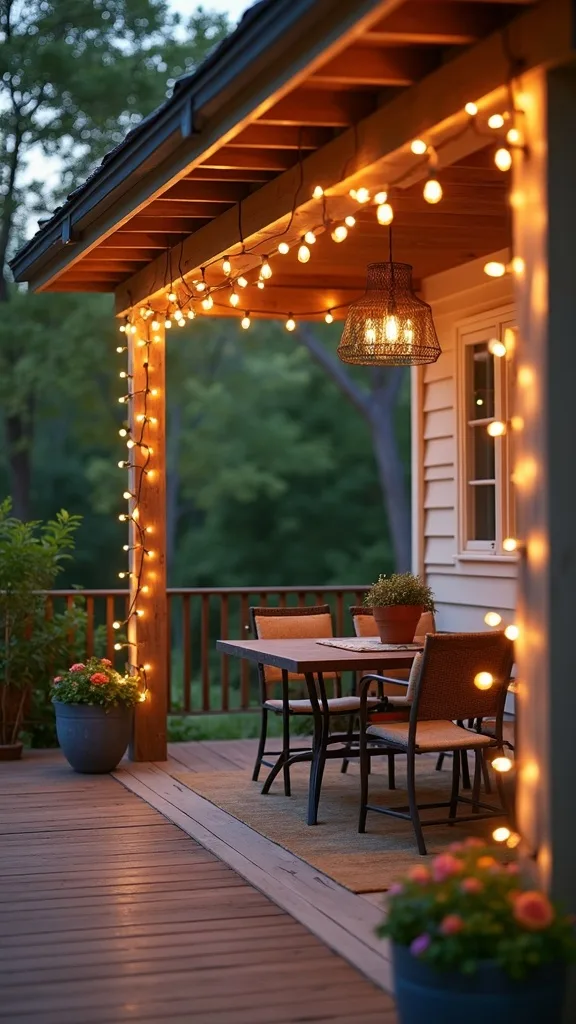
1. Café-Style Edison Bulb Spans Across Pergola Posts Over a Bistro Table
When I design this look, I aim for that café canopy feeling—patio string lights stretched cleanly between pergola posts so the bistro table becomes the “stage.” From my experience, it works because the light lands where people sit, not out in the yard where it gets wasted.
I always start by measuring the span and adding slack: for a 12 ft x 10 ft pergola, I typically use 48 ft of commercial-grade outdoor string lights and hang them 8–9 ft high. I find that a simple zig-zag with 3 runs looks balanced, and I secure each end with 1/8-inch stainless-steel eye bolts plus a 1/16-inch guide wire so the strand doesn’t droop after a few hot weeks.
In my opinion, S14 shatterproof LED Edison bulbs (warm white light 2700K–3000K — the cosy, yellowish tone you see in most homes) look most authentic, and I pair them with a black or dark-green cord to visually disappear at night.
Pro Tip: I’ve found the “sag” you actually want is about 2–3 inches per 10 ft run—any tighter looks harsh, and any looser makes bulbs swing into each other on windy nights.
2. Zig-Zag Patio String Lights Between House and Fence for Instant Coverage
I find that a zig-zag from the house to the fence is the quickest way to get big-area glow without building anything. From my experience, it works especially well for 4th of July seating because it spreads light evenly across a 10 ft–16 ft zone.
I always start by mapping 3 anchor points on the house (at 9 ft high) and 3 on the fence (at 7–8 ft high) so rain runs off instead of pooling in sockets. For most patios, I use 96 ft of outdoor string lights and plan on 6–8 attachment points using screw-in hooks and 30 lb-rated masonry anchors if I’m drilling into brick.
In my opinion, a commercial-grade strand with E26 sockets plus S14 LED bulbs is worth the extra $15–$25 upfront because it typically lasts 2–3 summers longer than thin seasonal sets. I like matte-black hooks and a dark cord for a cleaner daytime look.
Pro Tip: When I tried this on a windy fence line, I stopped bulb clacking by adding 2-inch rubber O-rings behind every third socket—tiny detail, noticeably quieter at night.
3. Perimeter Outline Lighting to Make a Small Patio Feel Larger
In my opinion, outlining the patio perimeter with outdoor string lights is the most “space-expanding” trick for small yards. I’ve found that when the edges glow, the whole footprint reads bigger—especially on a 10 ft x 10 ft concrete pad.
I always start by choosing a height line: 7 ft along a fence or 8 ft under an eave, then I run one continuous 48–72 ft strand around the border. I recommend spacing mounting clips every 18–24 inches so the cord stays crisp and doesn’t droop into sightlines.
From my experience, clear shatterproof bulbs look a little brighter, while frosted bulbs soften glare for dinner. I like warm white light (2700K–3000K — the cosy, yellowish tone you see in most homes) and a dimmer plug rated for outdoor use if I’m hosting.
Pro Tip: I find that leaving a 12–18 inch “dark gap” behind the grill area keeps smoke from fogging the bulbs, which helps them stay clearer through the season.
4. Triangle “Light Sail” Layout for Patios Without a Pergola
I always recommend a triangle layout when someone doesn’t have posts or a pergola but still wants a defined ceiling of light. From my experience, three strong anchor points create tension that looks intentional, not improvised.
I always start by picking corners about 12–18 ft apart and setting the highest point at 9 ft, then dropping the other two to 7.5–8 ft for drainage and visual slope. I use 50 ft of guide wire, 3 turnbuckles (1/8 inch), and a 48 ft patio string lights strand clipped on with 2-inch carabiners every 3–4 ft.
I find that black powder-coated hardware blends best, and I prefer shatterproof S14 LEDs so I’m not stressed about kids running around. Typically, this takes me 75–90 minutes including drilling and tensioning.
Pro Tip: When I tried this with only the light cord (no guide wire), it stretched within 2 weeks; the turnbuckle-and-wire setup keeps the “triangle” sharp all summer.

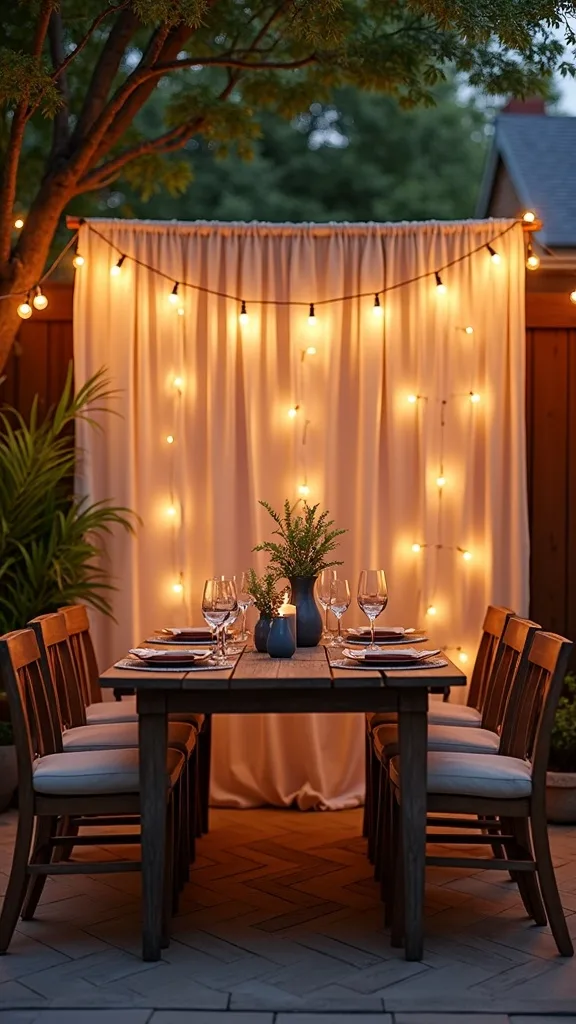
5. Curtain-Style Drops for a Fence Backdrop Behind the Dining Area
I find that curtain drops create instant “event” energy, which is exactly what I want for summer party lighting on the 4th of July. From my experience, it also hides a plain fence fast without paint or panels.
I always start by running a 16 ft outdoor-rated tension wire along the fence top at about 6.5–7 ft high, then I hang 8–12 vertical drops of fairy lights outdoor, each about 6–7 ft long. I recommend using UV-rated zip ties every 12 inches and leaving a 4-inch gap at the bottom so sprinklers don’t soak the connectors.
In my opinion, warm white light (2700K–3000K — the cosy, yellowish tone you see in most homes) looks more flattering on faces than cool white. I like green wire fairy lights because they disappear against shrubs and cedar fencing.
Pro Tip: I’ve found that staggering the drop lengths by 6 inches (for example, alternating 72 inches and 66 inches) keeps the curtain from looking like a flat grid in photos.
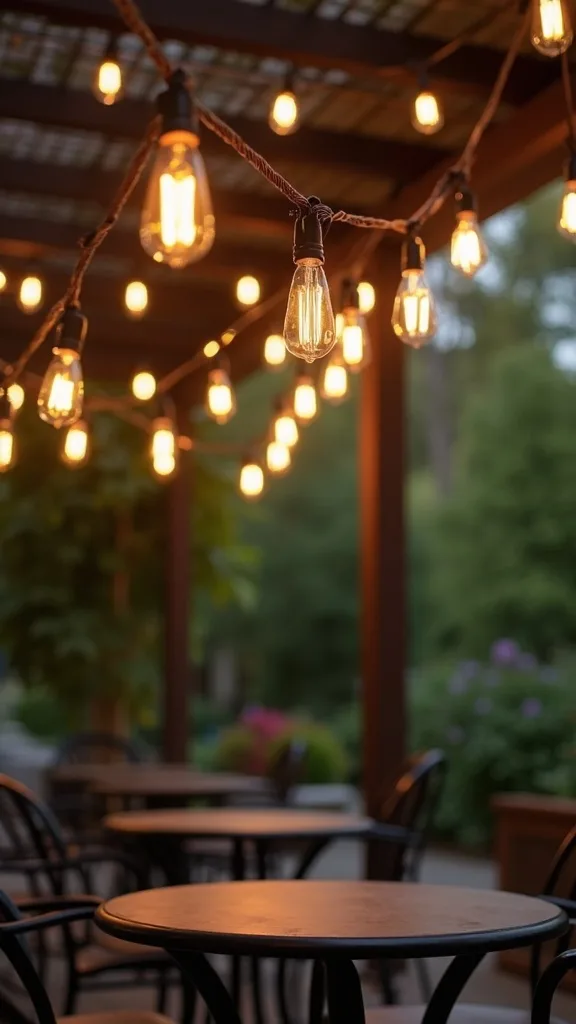
6. Bistro Table Spotlight: One Perfect Span Instead of a Whole Canopy
From my experience, a single focused span can look more polished than trying to light the entire yard on a tight budget. I find that when I highlight just the bistro table, the rest of the patio feels intentionally moody.
I always start by placing the table 24–36 inches from the fence or railing, then I hang one 24–48 ft strand centered over the tabletop at 7.5–8.5 ft high. I recommend aiming for bulbs spaced about 12–15 inches apart so plates and drinks are visible without harsh brightness (measured in lumens).
In my opinion, S14 bulbs with a slightly amber tint look great with natural wood and black metal chairs, and I pair them with a simple outdoor-rated plug-in dimmer so I can drop the glow after dinner.
Pro Tip: I’ve found that keeping the lowest bulb at least 18 inches in from the table edge prevents “head-bump zones” when people stand up and lean in for conversation.
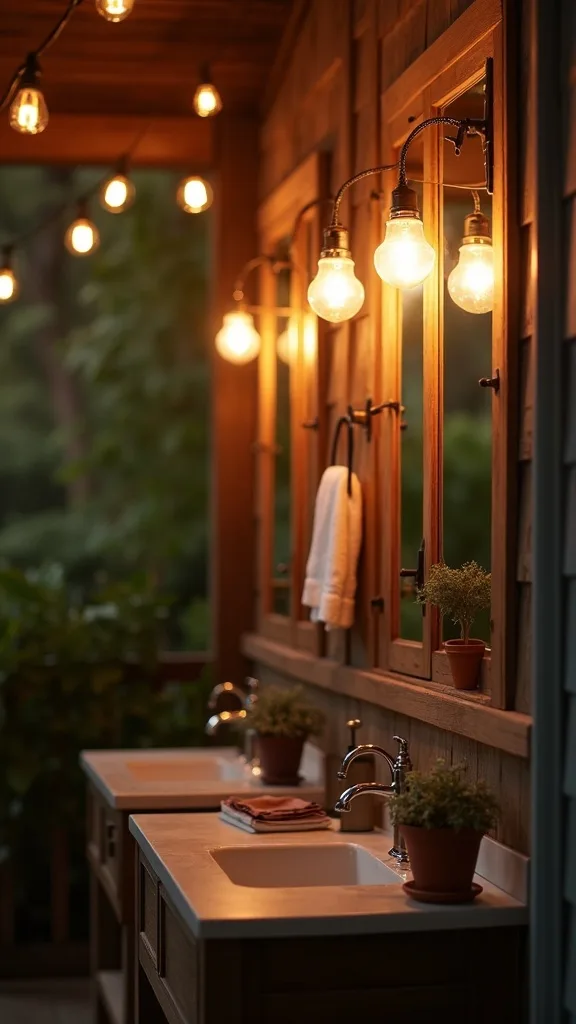
7. Wrap Pergola Beams with Fairy Lights Outdoor for Soft Fill Lighting
I always use fairy lights outdoor as “fill lighting” when Edison bulbs feel a bit too bold on their own. From my experience, wrapping beams makes the structure glow without adding visual clutter.
I always start by choosing 2 pergola beams and wrapping each with a 33 ft outdoor-rated LED fairy light strand, spacing wraps about 3–4 inches apart. I find that using clear outdoor command clips or small screw-in cup hooks every 18 inches keeps the wire snug and prevents sagging in heat.
In my opinion, warm white light (2700K–3000K — the cosy, yellowish tone you see in most homes) is the most forgiving for skin tones during dinner. I like copper-wire fairy lights on dark-stained wood, and green-wire fairy lights on white pergolas.
Pro Tip: When I tried wrapping every beam, the ceiling looked busy; I’ve found wrapping only the “front” beams (the ones you see from inside the house) gives 80% of the impact with half the effort.
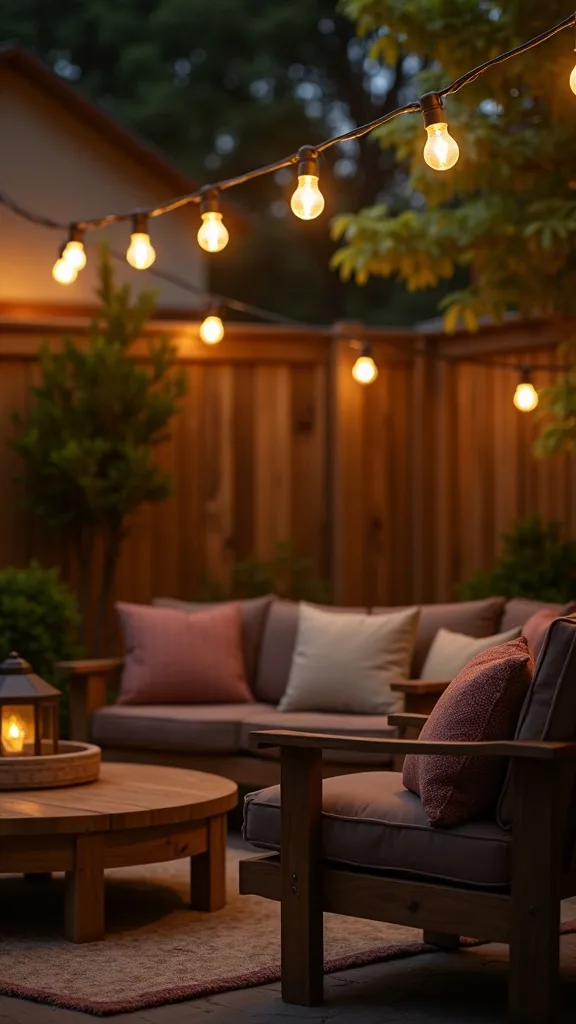
8. Lantern + String Light Pairing for Layered Backyard Ambiance
I find that pairing lanterns with outdoor string lights is how I get that layered, magazine-like glow without complicated wiring. From my experience, the lanterns add depth at eye level while the strings create the overhead “sky.”
I always start with 2 lanterns at 18–24 inches tall on the ground near seating, then I hang a 48 ft strand overhead at 8–9 ft. I recommend using LED pillar candles (3 x 6 inches) on a 6-hour timer so they turn on automatically around dusk for 2–3 weeks before I even think about batteries again.
In my opinion, black metal lanterns look great with Edison bulbs, while rattan lanterns soften modern patios. I like to repeat one finish—either all black hardware or all brushed brass—so the mix still feels intentional.
Pro Tip: I’ve found that placing lanterns slightly behind chairs (about 12 inches) reduces glare in people’s eyes while still lighting faces for photos.
Cost & Materials Estimate
I typically see a realistic total cost of $60–$220 to create a reliable patio lighting setup, depending on strand length, mounting hardware, and whether you add a dimmer.
| Item | Estimated Cost | Where to Buy |
|---|---|---|
| 48 ft commercial-grade outdoor string lights (E26 sockets) | $35–$65 | Home Depot |
| S14 shatterproof LED Edison bulbs (12-pack) | $18–$35 | Amazon |
| Outdoor-rated plug-in dimmer (LED compatible) | $18–$35 | Lowe’s |
| 1/16-inch stainless guide wire kit (turnbuckles + clamps) | $15–$30 | Home Depot |
| Outdoor extension cord (25 ft, 12/14 gauge) | $18–$35 | Wayfair |
| Mounting hardware (eye bolts, screw hooks, UV zip ties, clips) | $10–$25 | Amazon |
Total estimated cost: $114–$225 I always recommend saving money by skipping decorative extras first, and splurging on commercial-grade strands because they typically survive multiple summers.
9. Umbrella-Pole Spiral Lights for Apartments and Tiny Patios
I always recommend umbrella-pole spirals when someone needs patio ambiance without drilling holes. From my experience, it’s one of the most renter-friendly ways to get patio string lights in under an hour.
I always start by wrapping a 33 ft LED fairy light strand around the umbrella pole, keeping each wrap about 2 inches apart from bottom to top. I find that adding a second 16 ft strand along the umbrella ribs (8 ribs is common) makes the canopy glow evenly, especially for a 6–9 ft umbrella.
In my opinion, warm white light (2700K–3000K — the cosy, yellowish tone you see in most homes) feels more “restaurant patio” than cool white. I like using a small outdoor-rated battery pack tucked into a zippered umbrella cover pocket.
Pro Tip: I’ve found that a tiny strip of clear heat-shrink tubing over the battery-pack connection keeps it from wiggling loose when the umbrella tilts or rotates.
10. Post-Mounted Planters as Light Poles (No Concrete Needed)
From my experience, planter light poles are a clever workaround when there’s nowhere to anchor overhead lights. I find that the weight of the planter gives me stability without digging holes.
I always start with 2 resin planters at least 18 inches wide and 16 inches tall, then I set a 4×4 pressure-treated post inside each. I recommend filling with 50–60 lb of paver base or gravel before adding potting soil on top, and I mount an eye bolt at 8 ft high to clip the outdoor string lights.
In my opinion, black posts disappear at night, and I like planting trailing ivy or sweet potato vine to soften the base. Typically, two “poles” can hold a 48 ft strand if you also run a guide wire for tension.
Pro Tip: I’ve found that adding a 6-inch layer of pea gravel at the very bottom improves drainage and prevents the post from sitting in wet soil, which helps it stay straighter through the season.
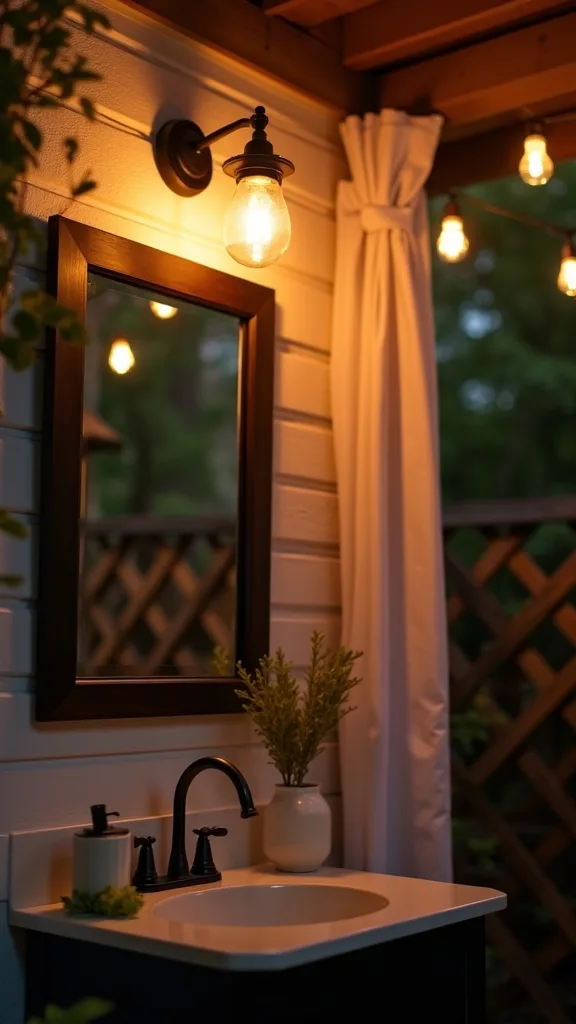
11. Deck Railing Glow Line for Safer Steps and Softer Light
I find that railing-mounted lights are the unsung hero of backyard ambiance because they make steps safer without turning the patio into a stadium. From my experience, it’s also a great solution when you don’t want overhead cords.
I always start by running a 24–36 ft strand of fairy lights outdoor along the inside of the railing at about 30–36 inches high. I recommend securing it every 8–10 inches with outdoor-rated clear clips, and I keep connectors at least 12 inches from the stair opening so feet don’t snag them.
In my opinion, warm white light (2700K–3000K — the cosy, yellowish tone you see in most homes) looks calmer on wood decking. I like green wire on composite railings and clear wire on white vinyl.
Pro Tip: When I tried mounting on the top rail, the light hit people’s eyes; I’ve found mounting 3–4 inches below the top rail gives a much softer “wash” across the deck boards.
12. Tree-to-Tree “Moonlit” Drapes for a Natural Party Canopy
When I design this look, I use trees like natural columns to create a canopy that feels effortless. From my experience, it’s one of the prettiest ways to do summer party lighting for a lawn seating area.
I always start by choosing 2 healthy trunks about 12–20 ft apart and hanging the line at 9–10 ft high using tree-friendly straps (not bare wire). I recommend a 96 ft outdoor string lights strand plus a 1/16-inch guide wire, and I leave 12–18 inches of slack so the trees can sway without stressing the sockets.
In my opinion, shatterproof LED bulbs are non-negotiable near branches, and I prefer warm white light (2700K–3000K — the cosy, yellowish tone you see in most homes) so the yard feels inviting instead of stark.
Pro Tip: I’ve found that putting the guide wire on the “tree side” of the strap (between strap and bark) reduces rubbing and keeps the strap from slowly sliding down the trunk over 4–6 weeks.
13. 4th of July Color Pop: Red, White, and Blue Accents Without Harsh LEDs
I always aim for festive without turning the patio into a blinking carnival. From my experience, the easiest way is keeping the overhead lights warm and adding color in small, removable accents.
I always start with warm white outdoor string lights overhead (one 48 ft strand at 8–9 ft high), then I weave in 2 strands of 16 ft red and blue mini LEDs along the table edge or railing. I recommend using 3–5 paper lanterns (8–10 inches) in red/white/blue hung 6 inches below the main line so the color reads but doesn’t glare.
In my opinion, the trade-off is that colored mini LEDs can look cheap if they’re the main light source, so I treat them like confetti. I like white table linens and navy cushions to echo the theme without buying single-use decor.
Pro Tip: I’ve found that placing the red/blue strands lower (around 30–36 inches high) keeps skin tones flattering in photos while still giving that holiday vibe.
14. Dimmer Control for Outdoor String Lights (The Mood Switch)
I find that a dimmer is the difference between “lights are on” and true backyard ambiance. From my experience, it also makes one setup work for dinner, cards, and late-night chats.
I always start by checking bulb compatibility: I use dimmable LED S14 bulbs and an outdoor-rated plug-in dimmer (often rated 300W–600W). I recommend mounting the dimmer 48–60 inches off the ground near the door, and I keep the cord run under 25 ft to avoid messy extension chains.
In my opinion, the trade-off is cost—adding a dimmer can be $18–$35—but it saves me from buying “another” set of lights for different moods. I like setting brightness (measured in lumens) to about 30–50% for dinner and 60–70% for serving food.
Pro Tip: I’ve found that some LED bulbs flicker below 20% on cheaper dimmers; choosing a dimmer labeled “LED+” and testing one bulb for 5 minutes before installing the whole strand prevents a frustrating redo.
15. Solar Patio String Lights for No-Outlet Zones (With Realistic Expectations)
From my experience, solar patio string lights are fantastic when there’s no outlet—if you treat them like accent lighting, not task lighting. I find that the trade-off is brightness and runtime on cloudy days.
I always start by placing the solar panel where it gets 6+ hours of sun, ideally angled upward and mounted 5–6 ft high to avoid sprinklers. I recommend choosing a 72 ft solar strand for a medium patio and planning on 6–8 hours of glow after a full charge, though typically it’s less after a rainy day.
In my opinion, warm white solar sets look more natural than cool white. I like models with replaceable rechargeable batteries (often AA-size) so I can refresh them after about 12–18 months instead of tossing the whole strand.
Pro Tip: I’ve found that wiping the solar panel with a damp microfiber cloth every 2 weeks noticeably improves charging—pollen buildup is a silent brightness killer in summer.
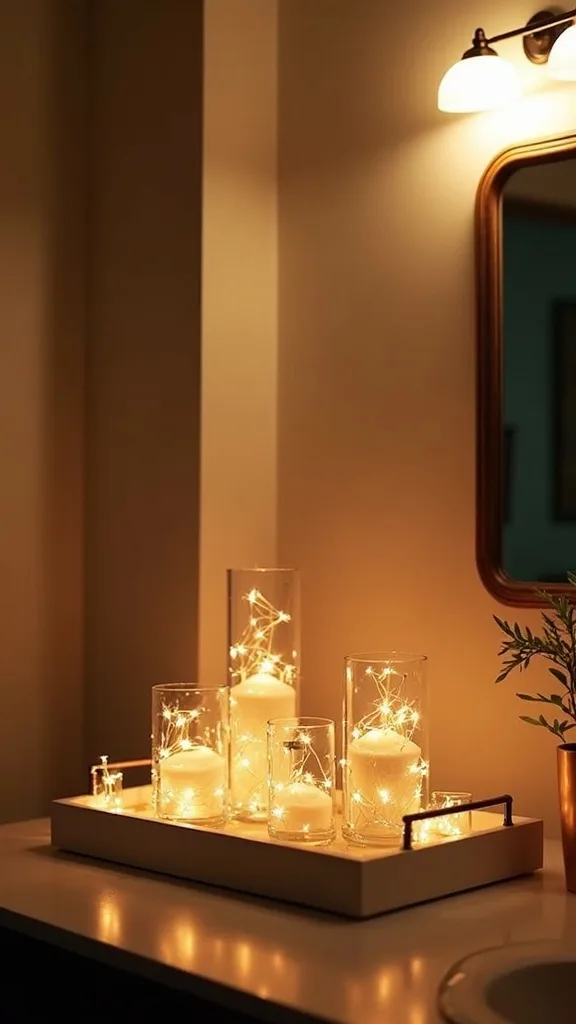
16. Battery-Powered Fairy Lights Outdoor for Centerpieces and Trays
I always use battery fairy lights when I want sparkle right on the table without cords crossing walkways. From my experience, it’s the easiest way to make even a simple snack spread feel special.
I always start with 2–3 strands of 10 ft micro-LED fairy lights and coil them into a 12–14 inch dough bowl or metal tray. I recommend using battery packs with timers (6 hours on / 18 off) and swapping batteries every 1–2 weeks if you host often.
In my opinion, copper wire looks warm against wood tabletops, while silver wire looks cleaner on white melamine or enamel trays. I like adding 3 small bud vases (about 4–6 inches tall) so the lights reflect off glass and feel brighter without actually increasing brightness (measured in lumens).
Pro Tip: I’ve found that taping the battery pack under the tray with museum putty keeps it from sliding and accidentally switching on inside a storage bin later.
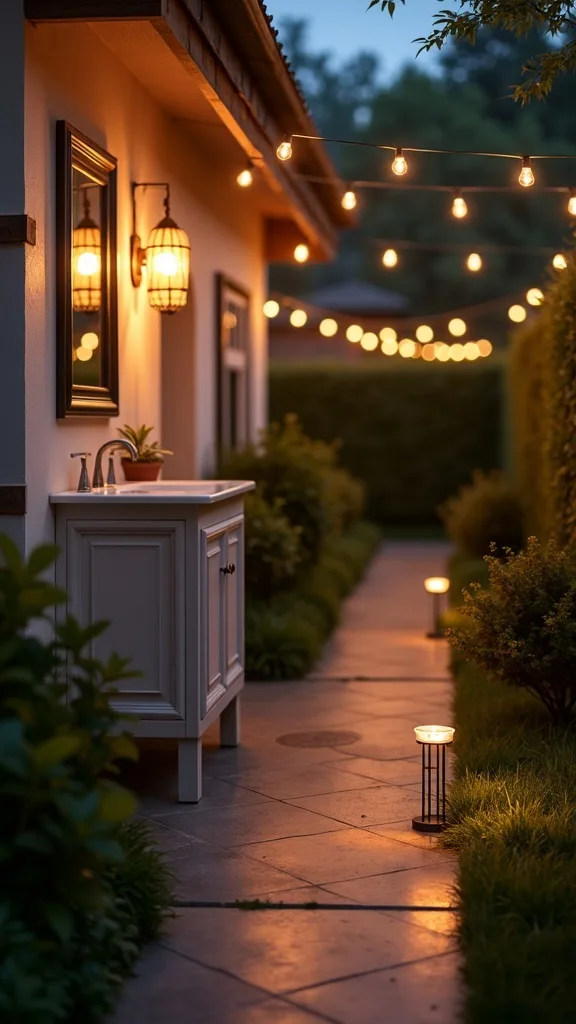
17. Pathway “Guide Lights” Using Stake Lights Plus Overhead Strings
I find that pairing overhead strings with subtle pathway lights makes the whole yard feel finished and safer. From my experience, guests relax more when they can see where they’re stepping without a floodlight blasting the vibe.
I always start by placing 6–10 solar stake lights 4–6 ft apart along the path, then I add a 48 ft outdoor string lights strand over the seating zone at 8–9 ft high. I recommend warm white stakes and warm white overhead lights so the tones match (warm white light 2700K–3000K — the cosy, yellowish tone you see in most homes).
In my opinion, the trade-off is that cheap stake lights can look spotty; I’d rather buy fewer, brighter ones and space them a little wider. I like black stakes in mulch beds and stainless stakes in gravel for a cleaner daytime look.
Pro Tip: I’ve found that angling stake lights slightly outward (about 10–15 degrees) reduces “runway dots” and creates a softer wash across the path edges.
18. Grill Zone Lighting That Doesn’t Kill the Mood
From my experience, the grill area needs its own light plan because overhead patio string lights rarely land where your hands are. I find that a small, focused light keeps food safer without turning the patio harsh.
I always start by keeping the main outdoor string lights 12–18 inches away from the grill edge and hanging them at least 8 ft high. Then I add a clamp-on LED work light (around 500–800 brightness in lumens) to a nearby post, aimed downward at a 45-degree angle, and I turn it on only during active cooking (usually 20–40 minutes).
In my opinion, the trade-off is aesthetic—the clamp light isn’t pretty—but it’s practical. I like choosing a warm-tinted LED if possible, or I hide the fixture behind a plant stand when it’s not in use.
Pro Tip: I’ve found that smoke residue builds fastest on bulbs directly above the grill; placing the strand slightly “upwind” of your usual breeze direction keeps bulbs clearer over a full season.
19. Outdoor Movie Night: Light the Perimeter, Not the Screen
I always recommend perimeter lighting for movie night because any light near the screen washes out the picture. From my experience, you can keep cozy backyard ambiance and still see snacks and steps.
I always start by hanging a 48 ft strand of outdoor string lights behind the seating area at 7–8 ft high, then I add 2 lanterns with LED candles about 10–12 ft away from the screen. I recommend keeping all lights at least 6 ft to the sides of the screen edge, and I dim to 20–30% if I’m using a projector.
In my opinion, warm white light (2700K–3000K — the cosy, yellowish tone you see in most homes) feels like a drive-in without competing with the film. I like using dark throws and low poufs so the light stays above eye level.
Pro Tip: I’ve found that placing one small light source behind the snack table (not above it) reduces shadows on food and keeps the screen area darker for better contrast.
20. Rain-Ready Setup: Drip Loops, Covers, and Safer Plug Placement
I find that weather-proofing is what makes outdoor string lights feel “set and forget” instead of a constant worry. From my experience, a few small steps prevent 90% of the annoying outages.
I always start by creating a drip loop: I leave a 4–6 inch downward curve in the cord before it reaches the outlet so water falls off instead of running into the plug. I recommend using an in-use outdoor outlet cover and keeping connections at least 12 inches off the ground, plus adding dielectric grease (a pea-sized amount) inside the plug ends if you live in a humid area.
In my opinion, the trade-off is that weatherproof boxes and covers add $12–$25, but they save time and replacements later. I like using outdoor-rated extension cords (12 or 14 gauge) when I need longer than 25 ft.
Pro Tip: I’ve found that wrapping connections with self-fusing silicone tape (not regular duct tape) stays sealed through heat swings and peels off cleanly when you need to reconfigure.
21. Hiding Cords Along Posts and Siding for a Cleaner Daytime Look
I always notice that the difference between “DIY” and “designer” is often just cord management. From my experience, hiding the run makes the lights feel built-in.
I always start by routing cords along vertical lines—pergola posts, downspouts, or fence seams—and I secure them every 12–16 inches with UV-rated cable clips. I recommend using a 25 ft outdoor extension cord in a matching color (black on dark trim, white on white siding) and leaving a 6–8 inch service loop near the plug so you can unplug without yanking clips off.
In my opinion, the trade-off is time: cord hiding can add 20–30 minutes, but it’s worth it for photos and everyday calm. I like using paintable raceway on smooth siding when clips won’t hold well.
Pro Tip: I’ve found that running the cord on the “shadow side” of a post (the side facing away from the main seating view) makes it practically invisible even in daylight.
22. Mixing Edison Bulbs and Fairy Lights Outdoor Without Visual Clutter
From my experience, mixing bulb types looks elevated when each one has a job: Edison bulbs for overhead glow, fairy lights for sparkle. I find that problems happen when both compete at the same height.
I always start by hanging Edison-style patio string lights at 8–10 ft high (one 48–96 ft strand), then I place fairy lights outdoor lower—around 30–48 inches—wrapped on railings or in planters. I recommend keeping both in warm white light (2700K–3000K — the cosy, yellowish tone you see in most homes) so the tones match even if the brightness (measured in lumens) differs.
In my opinion, black cords up high and green/copper wire down low keeps the layers distinct. I like limiting fairy light “sparkle zones” to 2–3 spots so the patio doesn’t look busy.
Pro Tip: I’ve found that if your Edison bulbs are spaced 12 inches apart, using fairy lights with 4-inch LED spacing creates a pleasing contrast—same rhythm family, different tempo.

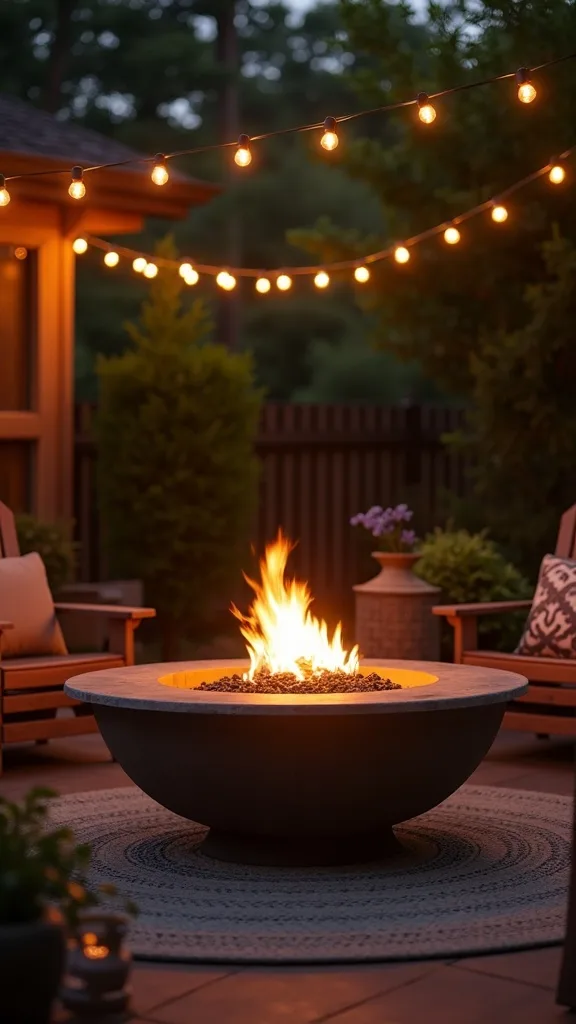
23. Creating a Conversation Circle Glow Around a Fire Pit
I find that fire pit seating can feel oddly dark because everyone faces inward. From my experience, adding a gentle overhead ring of outdoor string lights keeps faces visible and the area welcoming.
I always start by marking a circle about 10–12 ft in diameter around the pit and hanging a 48 ft strand at 8–9 ft high from 3–4 anchor points (posts, trees, or planter poles). I recommend using shatterproof bulbs and keeping the closest bulb at least 4 ft away from open flame for heat safety.
In my opinion, warm white light (2700K–3000K — the cosy, yellowish tone you see in most homes) plus one low lantern on the woodpile is the sweet spot. I like adding a dimmer so the lights can drop to 30–40% once the fire is going strong.
Pro Tip: I’ve found that placing one anchor point slightly higher (about 10 ft) creates a subtle “tilt” that helps smoke drift away from the bulbs instead of collecting under the canopy.
24. Affordable Party Upgrade: Lighted Drink Station and Serving Table
I always recommend lighting the drink station because it’s where guests gather and where spills happen. From my experience, a little focused glow makes the whole party feel more organized.
I always start with a 4–6 ft folding table and run a 10 ft battery fairy light strand under the table edge, then I add a 16 ft plug-in mini string behind it on the fence at about 5–6 ft high. I recommend using 2 galvanized tubs (around 17 inches long) for ice and keeping the lights at least 6 inches away from condensation zones.
In my opinion, warm white light (2700K–3000K — the cosy, yellowish tone you see in most homes) looks cleaner on clear cups and glass dispensers. I like adding a small chalkboard sign and a tray for bottle openers so the station feels intentional.
Pro Tip: I’ve found that placing lights behind the drink labels (not above) reduces glare on plastic dispensers, so guests can actually read “lemonade” vs “iced tea” at night.
25. End-of-Summer Breakdown and Storage So Your Lights Last Next Year
From my experience, outdoor string lights last much longer when I store them like holiday decor instead of stuffing them in a box. I find that 20 minutes of care in September saves me replacing strands in May.
I always start by unplugging and wiping cords with a dry microfiber cloth, then I let everything air out for 30–60 minutes if there’s any dew. I recommend wrapping strands around a 12-inch cord reel or a piece of cardboard (about 10 x 14 inches), and I label the length—24 ft, 48 ft, 96 ft—so setup is faster next season.
In my opinion, the trade-off is a little storage space, but it prevents cracked sockets and tangled knots. I like keeping spare bulbs (4–6) in a zip bag taped to the reel.
Pro Tip: I’ve found that storing LED bulbs loosely can cause micro-cracks over time; keeping them screwed into the sockets during storage protects the threads and reduces spring “wobble” next year.

Final Thoughts
I find that outdoor lighting is one of the rare upgrades where a small budget can create a big emotional shift—your patio starts pulling you outside after dinner instead of you defaulting to the couch. From my experience, the most affordable wins come from choosing one “hero” zone (usually the table or conversation area), then adding a second layer like fairy lights outdoor or lanterns to make it feel finished.
I always recommend doing one quick test night before you fully commit: hang a temporary line with painter’s tape, stand where your guests will sit, and check for glare and dark spots. In my opinion, that 10-minute preview prevents the common trade-off of either over-lighting (too bright to relax) or under-lighting (can’t see food or steps).
If you try even one of these ideas for the 4th of July, I’d start with a simple 48 ft strand, warm white light (2700K–3000K — the cosy, yellowish tone you see in most homes), and a clean cord path to the outlet. I’ve found that once the glow is up, you’ll naturally want to add the little touches—pillows, plants, and a playlist—that turn lighting into real backyard ambiance.
What I’d Do Differently
When I first tried this, I made one very specific mistake: I hung my outdoor string lights using only the light cord (no guide wire) across a 16 ft span between my house and fence. From my experience, it looked great on day one, but within about 2 weeks the cord stretched just enough that the bulbs started swinging into each other on windy nights, and the middle sagged to an annoying head-bump height. The correct approach—what I do now—is to run a 1/16-inch stainless guide wire first, tension it with a turnbuckle, and then clip the light strand to the wire every 3–4 ft. It costs a bit more upfront (usually $15–$30), but it saves a lot of fiddling later and keeps the line looking crisp all season.
I also wish I’d known how much placement matters compared to “more lights.” I find that lighting the table and the walk path first makes the patio feel finished, even with just one 48 ft strand, and then I add fairy lights outdoor only where I want sparkle. Pick one zone, measure it tonight, and hang your first strand this weekend—you’ll feel the difference immediately.
Products I Recommend for This Project
Here are some of my favourite products to help you bring these ideas to life:
- Brightech Ambience Pro Outdoor String Lights (48 ft) — I like the thicker, commercial-style cord because it typically holds tension better across long spans.
- Brightech Shatterproof S14 LED Replacement Bulbs (E26 base) — I recommend these when you want the Edison look with less worry about breakage around kids and pets.
- DEWENWILS Outdoor Dimmer Plug (LED compatible) — I use an outdoor-rated dimmer like this to shift from dinner brightness to relaxed late-night glow.
- Vont LED Outdoor Fairy Lights (battery pack) — I reach for battery fairy lights when I want cordless centerpieces and railing sparkle.
- HILITCHI Stainless Steel Wire Rope Kit (1/16 inch) — I find a guide-wire kit is the upgrade that keeps outdoor string lights from stretching and sagging over time.