This post contains affiliate links. As an Amazon Associate, I earn from qualifying purchases at no extra cost to you.
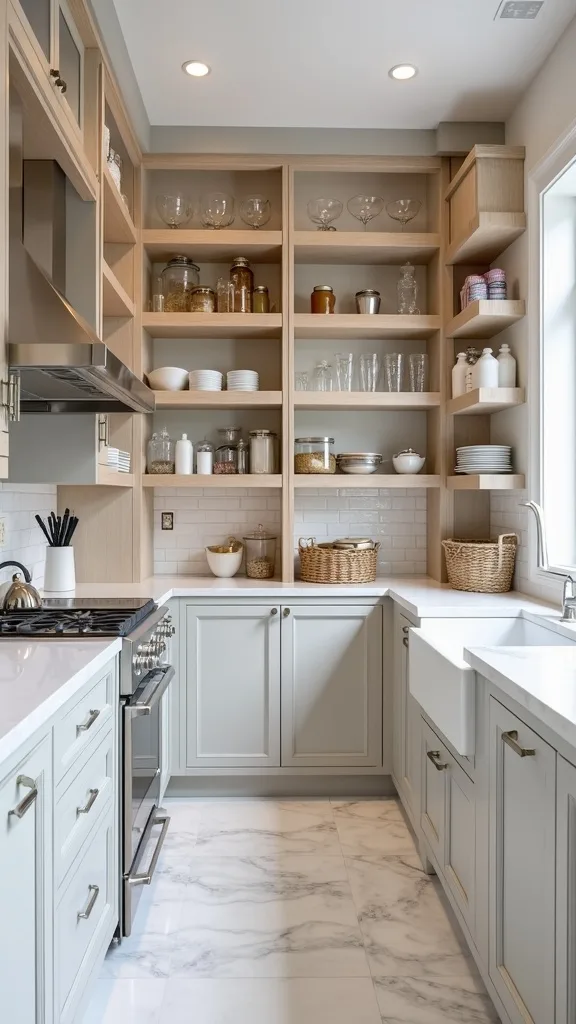
Are you looking for walk in pantry ideas that feel refined, calm, and genuinely easy to keep up with during summer meal prep? Do you want your garage pantry room design to look intentional—more like a tailored extension of your kitchen than a forgotten storage corner?
I’m sharing the exact approach I use when I design a pantry that has to perform: floor-to-ceiling storage, pull-out access where it matters, and containers that make inventory visible at a glance. I’ll walk you through layout decisions, lighting, materials, and the small details that turn a large pantry into a space you actually enjoy using.
I find this guide is perfect for anyone converting a garage nook, widening an existing pantry closet, or finally building a dream pantry that supports weekly batch cooking and grab-and-go snacks.
Inside, I’m covering everything from floor-to-ceiling shelving and pull-out drawers to glass-jar decanting, a wine rack moment, and integrated lighting that makes the whole room feel quietly luxurious.
Below are 25 Walk-In Pantry Design & Organization Ideas that elevate your pantry room design while keeping your pantry organization system realistic for everyday life.
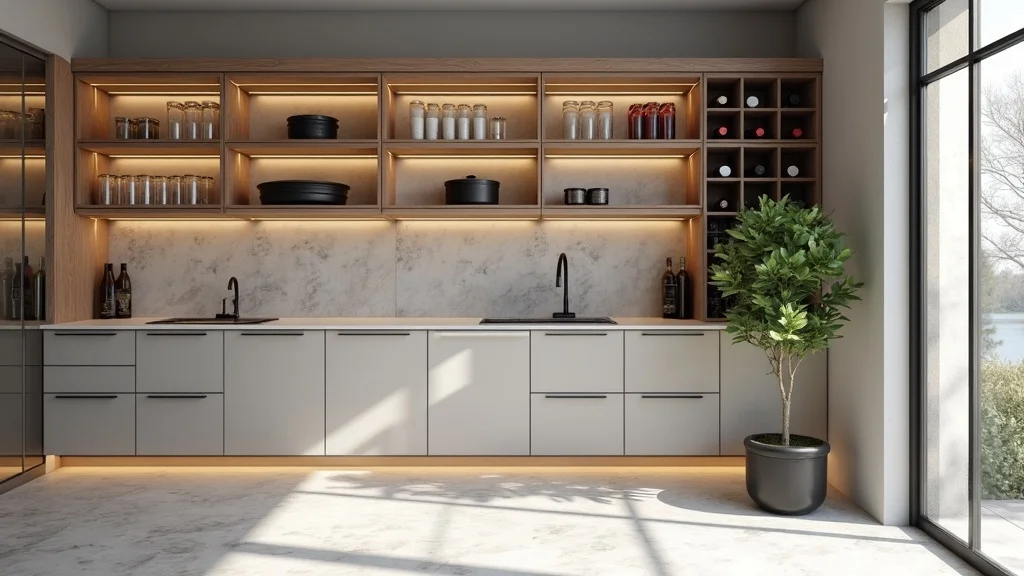
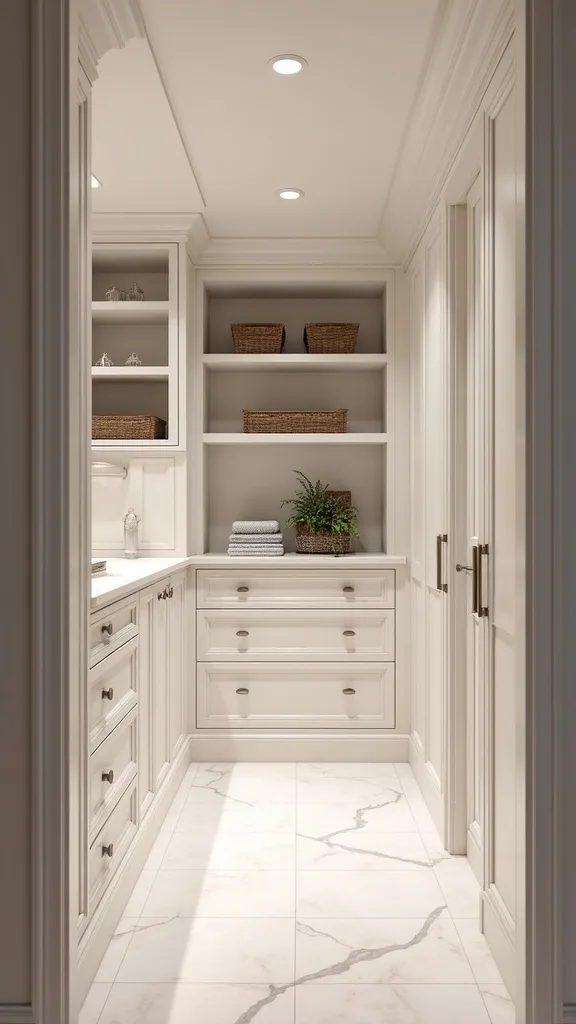
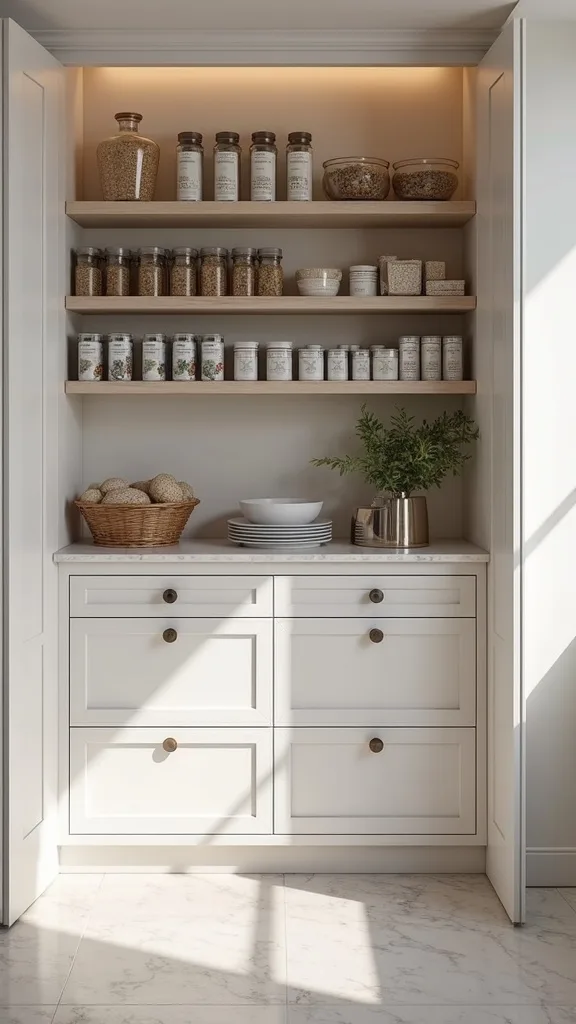
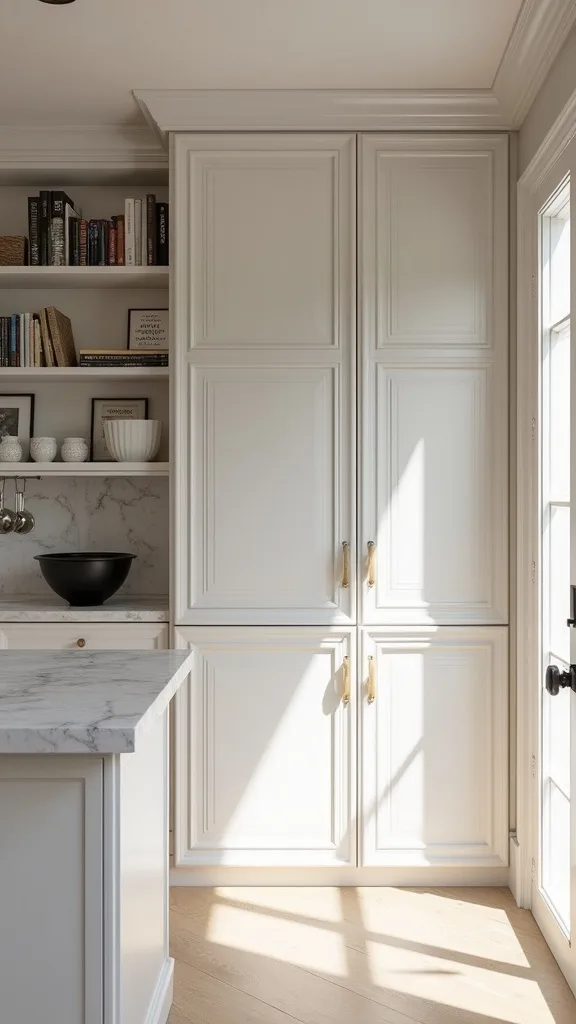
1. The Signature Wall: Floor-to-Ceiling Shelving + Pull-Outs + Glass Jars + Wine Rack + Integrated Lighting
I always start by designing one “signature wall” that sets the tone—because from my experience, a pantry feels like a dream pantry when it has one beautifully composed focal zone, not just storage everywhere. I find that combining floor-to-ceiling shelving, pull-outs, glass jars, a wine rack, and integrated lighting creates instant order and a boutique mood.
When I design this look, I plan shelves at 12–14 inches deep for cans and jars, then add 20–22-inch-deep pull-out drawers (Rev-A-Shelf style) for snacks and meal-prep staples. I typically mount a 72-inch LED channel with a diffuser under the top shelf and run it down the verticals so the light grazes labels, not your eyes.
I like 3/4-inch birch plywood with iron-on edge banding, matte black L-brackets, and 64-oz glass jars with acacia lids for grains. For the wine rack, I use a 6-bottle honeycomb insert or a 10-bottle wall rack, depending on width.
Pro Tip: I’ve found the lighting looks most expensive when I hide the LED driver on the top shelf inside a lidded box and drill a 3/8-inch cable pass-through behind the jar line—so you see glow, not cords, and the whole wall reads like a designed installation.
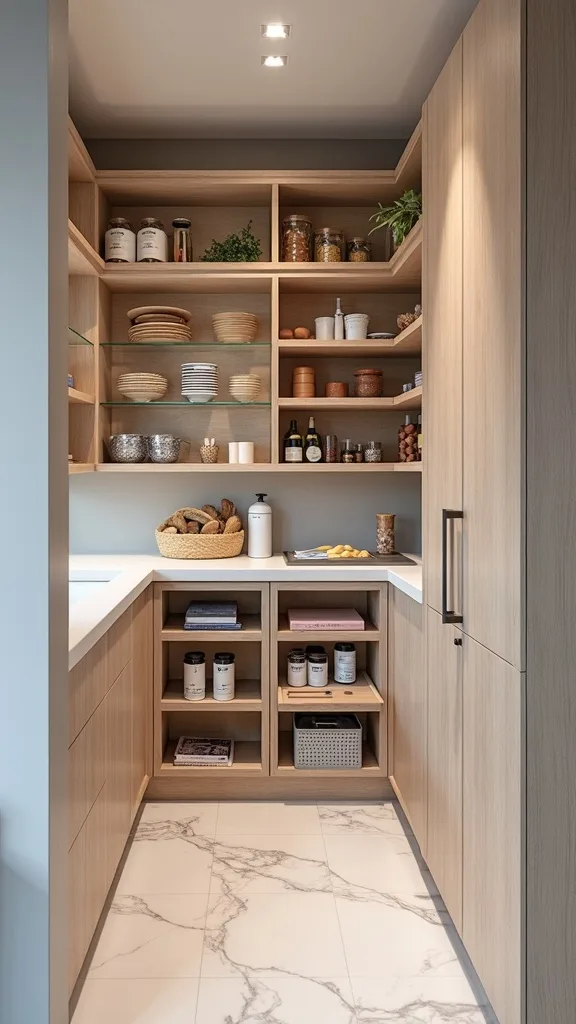
2. Garage-to-Pantry Conversion Layout With a 36-Inch Clear Walkway
From my experience, the fastest way to make a garage pantry room design feel legitimate is to treat it like a tiny room, not a storage alcove. I find that a consistent, comfortable walkway instantly changes how often you use the space—especially in summer when you’re in and out for meal prep.
I always recommend mapping the footprint with painter’s tape and protecting a 36-inch clear path from door to back wall so two people can pass without bumping baskets. If you’re doing shelving on both sides, I keep each run at 14–16 inches deep and avoid deeper shelves unless they’re pull-outs, because dead space becomes clutter within 2–3 weeks in most homes.
I like sealed MDF or primed plywood shelves, a washable semi-gloss paint (Sherwin-Williams Emerald Urethane Trim Enamel), and a rubber garage runner trimmed to 24 inches wide to catch grit. For doors, I prefer a solid-core 30-inch door with weatherstripping to reduce dust.
Pro Tip: When I tried this in my own garage, the game-changer was adding a 1/2-inch threshold sweep at the bottom of the door—typically it cuts down the fine garage dust that coats jar lids and makes your “clean pantry” feel like it needs constant wiping.
3. Zone Planning: Summer Meal Prep Stations (Proteins, Grains, Snacks, Drinks)
I always start by zoning a large pantry like I’d zone a kitchen, because in my opinion, categories are what keep a pantry organization system from collapsing during busy weeks. I find that summer meal prep is smoother when every staple has a predictable “home.”
I recommend four stations: proteins, grains, snacks, and drinks, each with a footprint of about 24–30 inches of shelf width so you’re not constantly shuffling items. For proteins, I dedicate 2 pull-out bins for jerky, tuna, and shelf-stable options; for grains, I line up 8–12 matching jars so you can see levels at a glance. I keep snacks at kid-eye height, typically 42–54 inches from the floor, so the pantry stays functional without constant requests.
I like clear iDesign Linus bins, OXO POP containers for flour and sugar, and chalk or vinyl labels (I use 1-inch label tape for clean alignment). For drinks, a 6–10 bottle wine rack plus a crate for sparkling water feels curated.
Pro Tip: I’ve found the “snack station” stays neat longer if I assign a single weekly refill window—like Sunday night for 15 minutes—so half-empty boxes don’t drift into other zones and quietly undo your layout.
4. Shelf Depth Strategy: 12 Inches for Cans, 16 Inches for Appliances, 24 Inches for Pull-Outs
From my experience, shelf depth is the quiet detail that separates elegant from chaotic—because too-deep shelves invite duplicates and expired items. I find that the right depths make even budget materials feel custom.
I always recommend 12 inches for canned goods and jars so labels stay visible in one row, then 16–18 inches for small appliances like a rice cooker or blender base. For anything deeper—paper towels, chips, backstock—I use 24-inch-deep pull-out drawers so you can access the back without unloading the front. Typically, this depth plan reduces “lost inventory” within 2 weeks because you stop stacking in layers.
I like using 1×2 pine cleats screwed into studs, 3/4-inch plywood shelves, and a satin white paint for reflectivity. For pull-outs, I rely on full-extension ball-bearing slides rated for 100 lbs so they don’t sag under bulk items.
Pro Tip: When I design deeper storage, I leave a deliberate 1.5-inch finger gap at the front edge of pull-out drawers (by setting the drawer box back slightly) so your knuckles don’t scrape on shelf lips—tiny comfort, huge daily satisfaction.
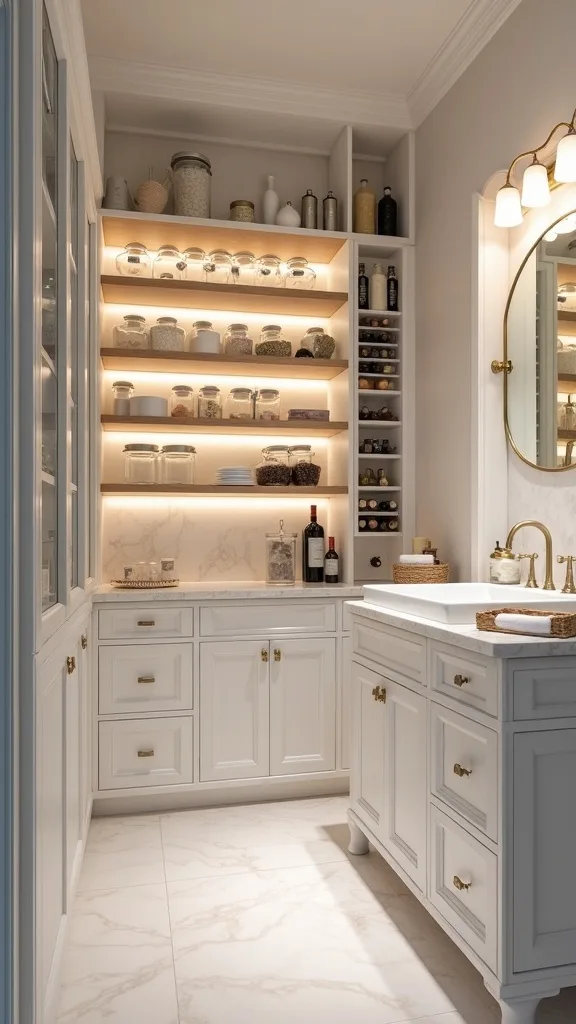
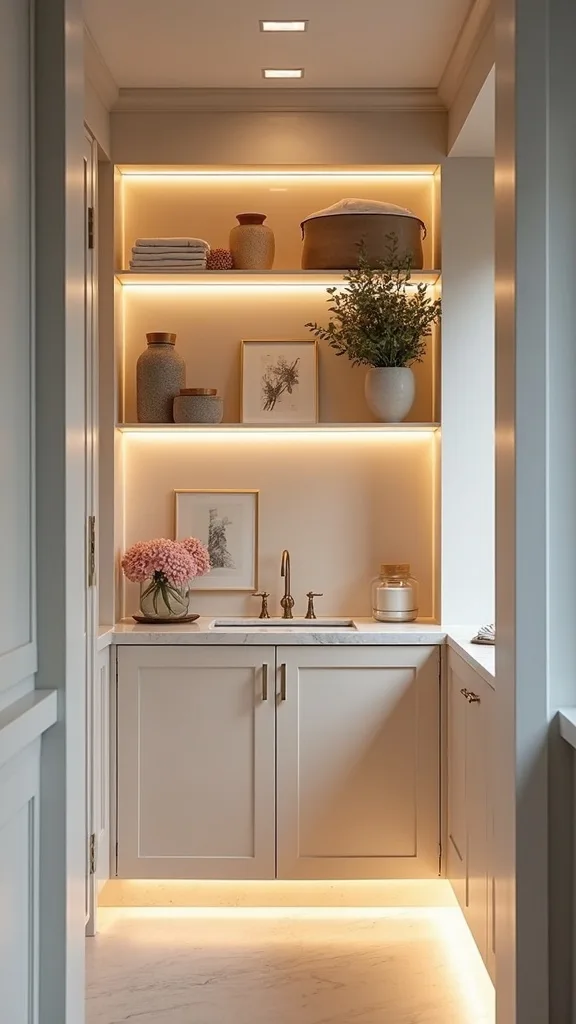
5. Integrated Lighting Plan: Under-Shelf LEDs in Warm White Light (2700K–3000K)
I find that lighting is what makes a pantry feel editorial rather than utilitarian, and from my experience it also keeps your pantry organization system honest—because you can actually see what you own. In my opinion, integrated lighting is the most “luxury per dollar” upgrade in a pantry room design.
I always recommend warm white light (2700K–3000K — the cosy, yellowish tone you see in most homes) so the pantry feels connected to your kitchen. For brightness (measured in lumens), I aim for about 800–1200 lumens per wall run, usually achieved with two 3–4 foot LED strips in aluminum channels with diffusers. I install a door-jamb motion sensor so the lights come on within 1 second—especially helpful when your hands are full of groceries.
I like Philips or Litever LED strips, Wago lever connectors, and a matte white aluminum channel to disappear against painted shelves. For a polished finish, I use a low-profile dimmer so late-night snack runs aren’t harsh.
Pro Tip: I’ve found LED strips look spotty on glossy jars unless you use a diffuser channel and mount the strip 1–2 inches behind the shelf face—this pushes the glow forward and eliminates that “dotty runway” reflection on glass.
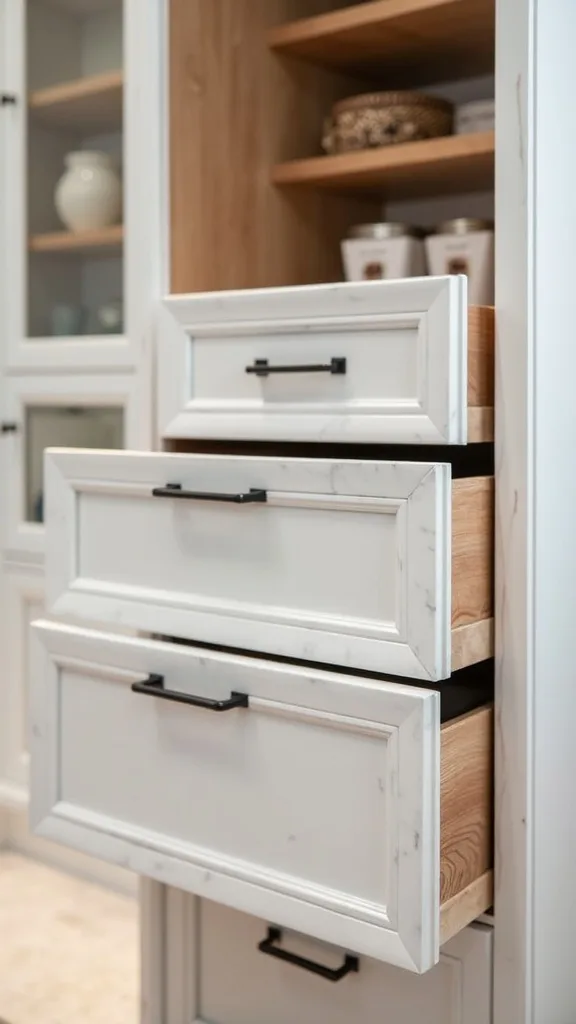
6. Pull-Out Drawer Pantry for Backstock: Full-Extension Slides and Clear Fronts
I always start by deciding what absolutely must be pull-out, because from my experience backstock is where pantries go to die. I find that turning backstock into drawers is one of the most reliable walk in pantry ideas for keeping a large pantry calm.
I recommend using 18–24-inch-wide pull-out drawers with full-extension slides so you can see everything in one pull. I typically space drawer openings at 10 inches for snacks and 14 inches for cereal and chips, and I label the drawer front so the system survives busy summer weeks. If you’re building, I like 1/2-inch plywood drawer boxes and slides rated at 100 lbs for bulk rice and canned cases.
I find clear-front bins (like iDesign or The Home Edit style) inside the drawers keep categories tight without forcing perfect decanting. For drawer faces, a simple Shaker panel in satin white reads clean and timeless.
Pro Tip: When I tried clear-front bins in drawers, I learned to leave a 1-inch “air margin” on both sides—bins packed wall-to-wall stick and scrape, but that small clearance keeps the drawer gliding smoothly even when humidity swells wood slightly.
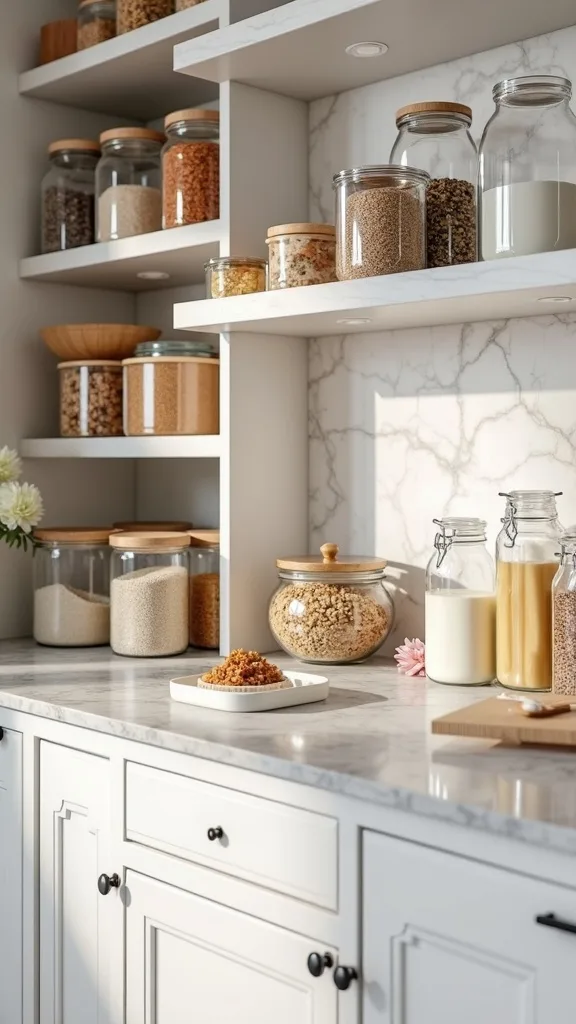
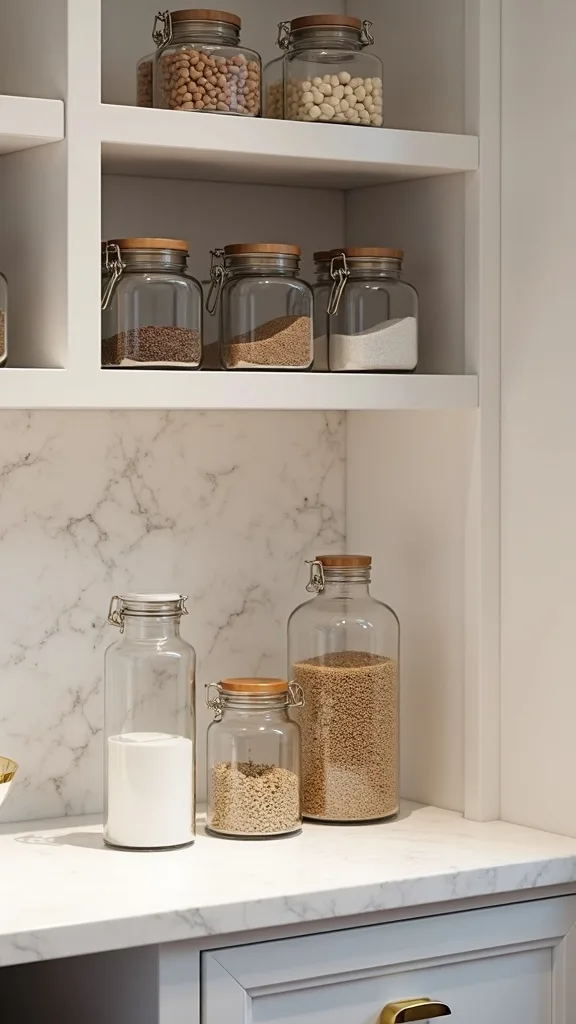
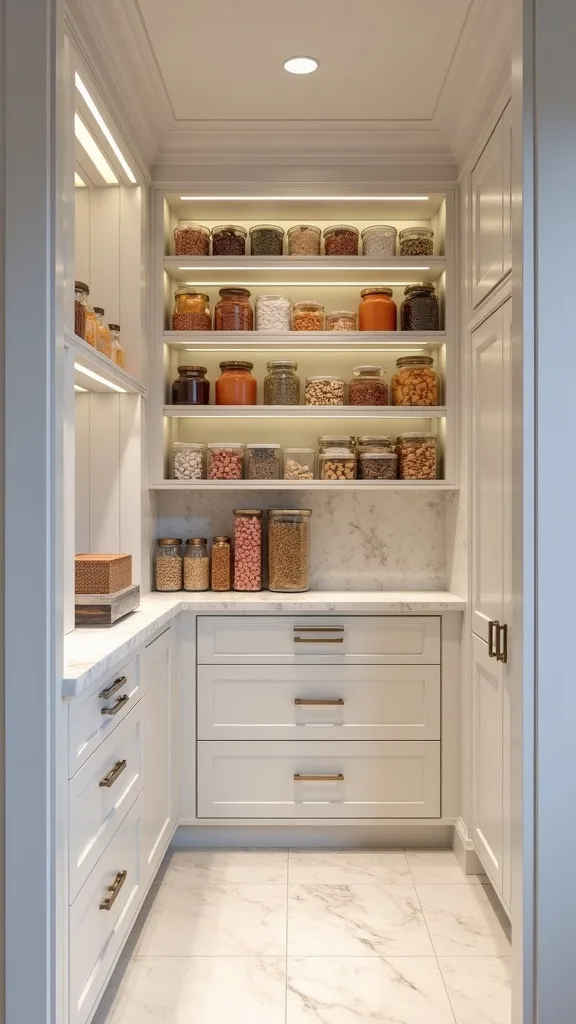
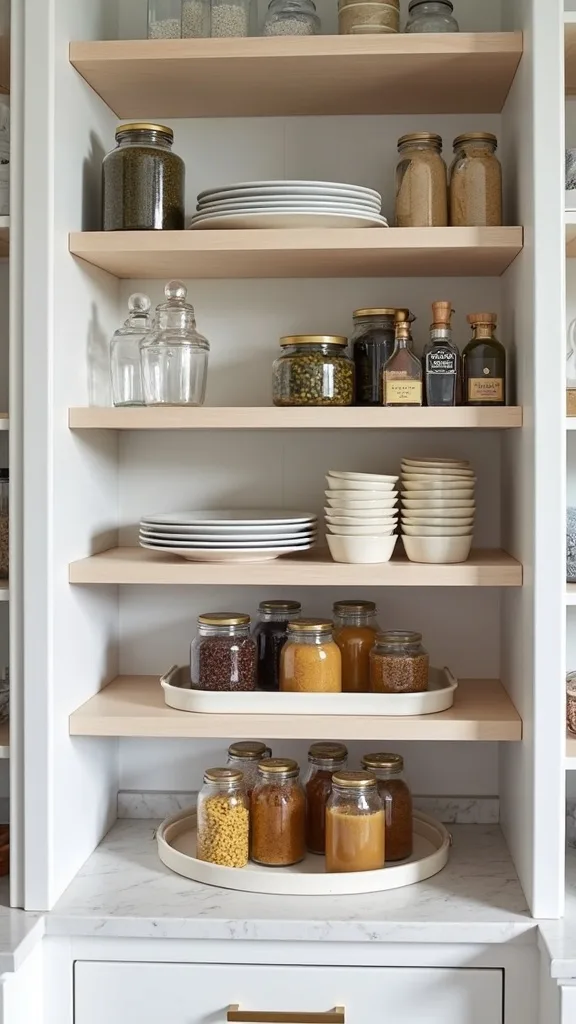
7. Glass Jar Decanting That Actually Stays Manageable
I find that glass jars are worth it when you decant selectively, not obsessively, because in my opinion the goal is a pantry you can maintain—especially during summer meal prep. From my experience, decanting just the daily staples gives you the “dream pantry” look without turning restocking into a chore.
I always recommend starting with 10–14 jars for high-rotation items: rice, pasta, oats, flour, sugar, and trail mix. I use a mix of 64-oz and 32-oz jars so quantities fit naturally, and I keep a 1-cup stainless scoop in a small crock for easy portioning. Typically, decanting this set takes 45–60 minutes once you have labels ready.
I like thick glass with gasketed lids (or acacia lids with silicone rings), waterproof vinyl labels, and a label level tool (a simple 6-inch ruler works) to keep alignment consistent. For flour, I choose containers with wider mouths to avoid dust clouds.
Pro Tip: I’ve found the secret to “always-full” jars is storing the backup bag directly behind the jar in a slim bin—when the jar hits 1/3 full, you refill immediately and never end up with three half-used bags scattered across shelves.
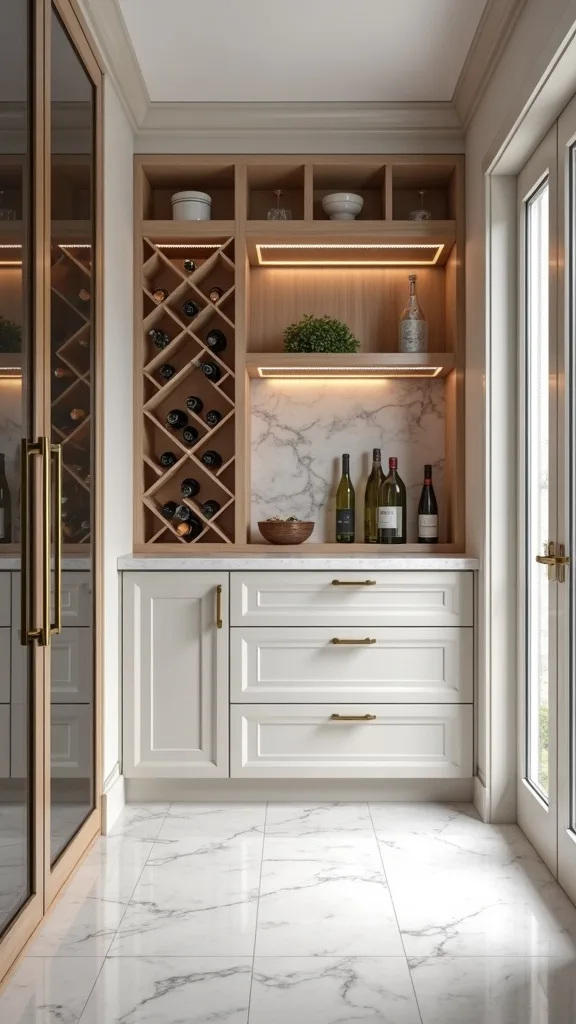
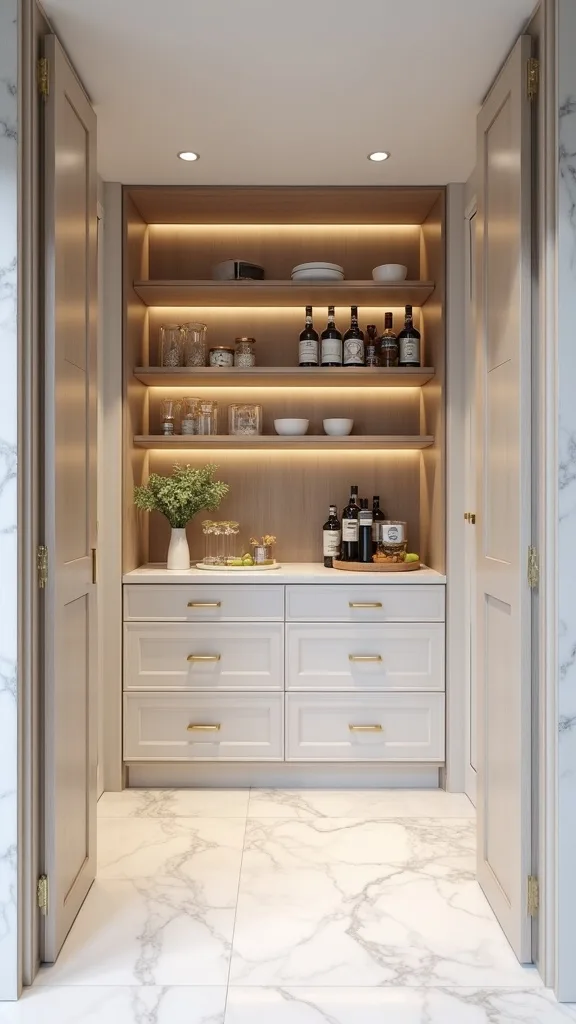
8. A Dedicated Wine Rack Nook That Doesn’t Steal Pantry Real Estate
In my opinion, a wine rack belongs in a pantry only if it’s integrated with intention—otherwise it becomes a visual interruption. I find that a small, tailored wine moment can make pantry room design feel elevated without compromising storage.
I recommend reserving a vertical slot that’s just 12–14 inches wide and 36–48 inches tall for a honeycomb or X-style rack. If you entertain in summer, I keep a second shelf above it at 10 inches of clearance for bar tools and cocktail napkins, and I add a small pull-out tray at 18 inches deep for openers and stoppers. Typically, this nook takes under 2 hours to install if you’re using a pre-made insert.
I like stained oak inserts (they hide scuffs), matte black screws, and a warm LED puck light above the rack to create a gentle glow on glass. If you don’t drink wine, I’ve found the same nook works beautifully for sparkling water.
Pro Tip: When I design wine storage in a pantry, I always angle the rack slightly away from the door swing—if bottles sit directly in the airflow path, temperature swings from frequent opening can be noticeable over 30–60 days in many garages.
Cost & Materials Estimate
I typically see a garage walk-in pantry build-out land between $350 and $3,500 depending on whether you DIY shelves or install pull-out systems and integrated lighting.
| Item | Estimated Cost | Where to Buy |
|---|---|---|
| 3/4-inch plywood sheets (4–6 sheets) + edge banding | $220–$480 | Home Depot |
| Full-extension drawer slides (6–10 pairs, 100-lb rating) | $120–$320 | Lowe’s |
| LED strip lighting kit + aluminum channels + motion sensor | $70–$220 | Amazon |
| Clear bins + turntables set (12–20 pieces) | $90–$260 | IKEA |
| Glass jar set (10–14 jars, 32–64 oz mix) + labels | $60–$180 | Amazon |
Total estimated cost: $560–$1,460 I find you can save money by DIYing shelves in plywood, but I’d splurge on quality slides and lighting because you’ll feel that upgrade every single day.
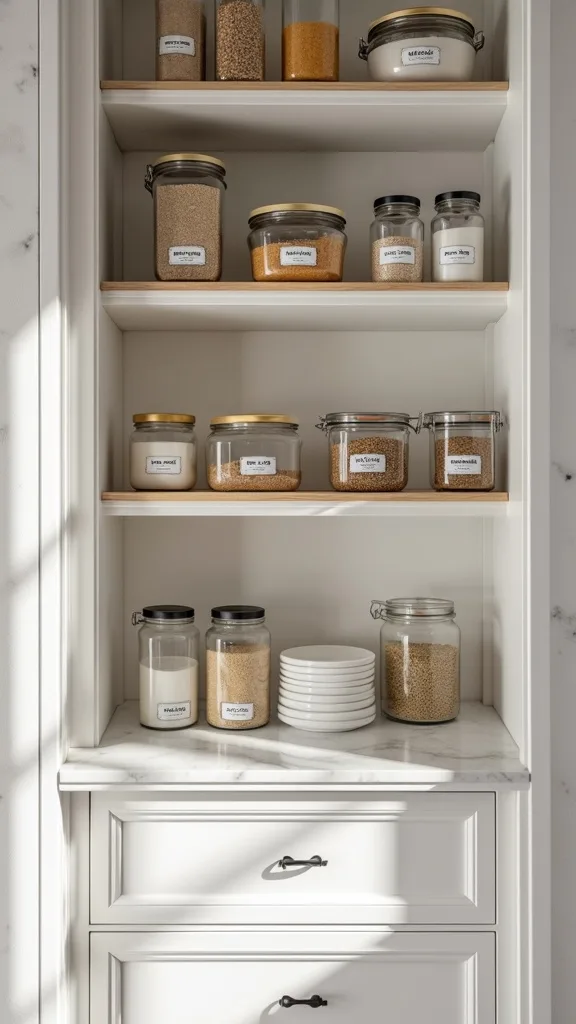
9. Labeling System: One Font, Two Sizes, Zero Fuss
I always start by picking the labeling “rules,” because from my experience labels are what make a pantry organization system resilient when life gets busy. I find that a consistent label style is what reads sophisticated—like a curated shop shelf.
I recommend using two label sizes only: 1-inch-tall labels for jars and 2-inch-tall labels for bins and drawers. I typically print waterproof vinyl labels on a Cricut Joy or Cricut Explore, then place them 1.5 inches from the bottom edge of jars so they line up visually across the shelf. For bins, I center the label and add a small “restock note” (like “2 boxes”) in tiny text so your future self knows the target quantity.
I like matte white labels with black text, or clear labels on glass for a minimal look. For quick changes, I keep a pack of dissolvable food labels for short-term summer items like popsicles or barbecue rubs.
Pro Tip: I’ve found labels last longer if you wipe surfaces with 70% isopropyl alcohol and wait 5 minutes before sticking—on pantry jars, even a thin film of cooking oil from hands can cause corners to lift within a week.
10. The “First In, First Out” Can Zone With Tiered Risers
From my experience, canned goods create the most sneaky clutter because they’re heavy, identical, and easy to stack. I find that a simple “first in, first out” zone is one of the most practical walk in pantry ideas for reducing waste.
I recommend using 3-tier acrylic or bamboo risers that are about 10–12 inches deep so you can read labels without pulling everything out. I keep soup, beans, and tomatoes each on their own riser and cap the category at 12–18 cans—anything beyond that becomes backstock and goes into a labeled drawer. Typically, setting up this zone takes 20–30 minutes, but it saves repeated “pantry archaeology” later.
I like YouCopia StoreMore risers, chalkboard dots for expiry month, and a small lazy Susan for odd-shaped jars like pesto. If you prefer a warmer look, bamboo risers feel less clinical than clear plastic.
Pro Tip: I’ve found risers slide forward over time on painted shelves, so I add two 1-inch strips of clear museum gel under the back feet—your risers stay put, and you don’t get that slow-motion tumble when you grab one can.
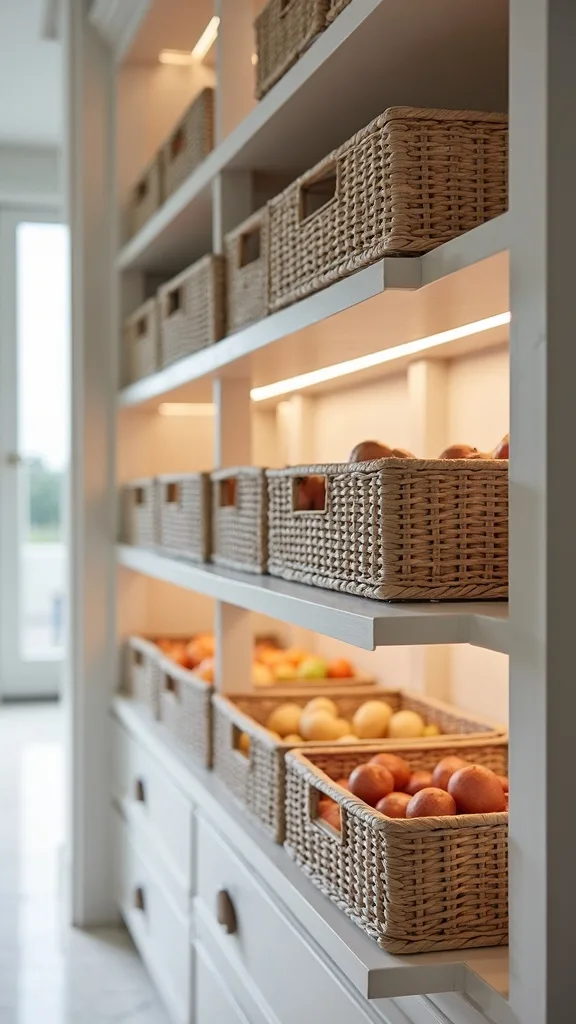
11. Bulk Bin Strategy for Summer Snacks and Pool-Day Packs
I find that summer is when snack volume spikes, and from my experience that’s exactly when a pantry organization system gets tested. In my opinion, bulk bins are the most forgiving way to stay tidy when you’re buying in multiples.
I recommend using 4–6 large handled bins (each around 10 x 14 inches) labeled by purpose: “Pool Snacks,” “Road Trip,” “Protein,” and “Treats.” I keep them on a shelf at 48 inches high so kids can reach without climbing, and I set a simple rule: the bin is the boundary—if it doesn’t fit, it doesn’t get bought this week. Typically, this prevents the “snack avalanche” that happens when boxes stack loosely.
I like iDesign bins with built-in handles, or clear The Home Edit bins if you want full visibility. For a softer, more editorial look, I use woven water hyacinth baskets but accept the trade-off: you lose instant visibility.
Pro Tip: I’ve found snack bins stay neat if you add a 5-inch internal divider (even a cut piece of corrugated plastic)—it stops pouches from slumping into a messy pile and makes the bin feel “self-sorting.”
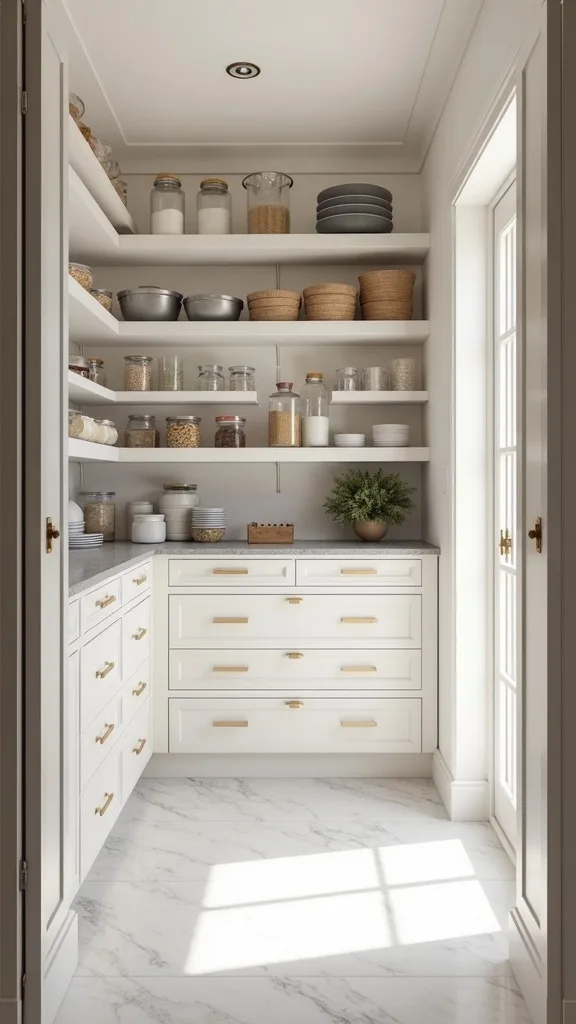
12. Counter-Height Landing Strip for Unloading Groceries
I always start by adding a landing strip if space allows, because from my experience it’s the difference between a pantry you use gracefully and one you battle. I find that a small counter makes summer meal prep feel composed—like you’re staging ingredients, not wrestling bags.
I recommend a counter at 36 inches high and at least 18–24 inches deep, even if it’s just a butcher-block slab on brackets. I keep 2 feet of clear surface dedicated to “inbox” sorting—items get decanted, labeled, or assigned a zone before they go away. Typically, this reduces half-open packages because you make decisions immediately.
I like 1.5-inch thick acacia butcher block sealed with food-safe mineral oil, matte black heavy-duty brackets, and a small tray for scissors, label tape, and a Sharpie. If you want a brighter look, a white quartz remnant is gorgeous but costs more upfront.
Pro Tip: I’ve found the counter stays usable if I mount a slim paper towel holder under it and keep a 12 x 18-inch washable prep mat on top—sticky jar rings and spice dust wipe away fast, so the pantry never feels grimy.
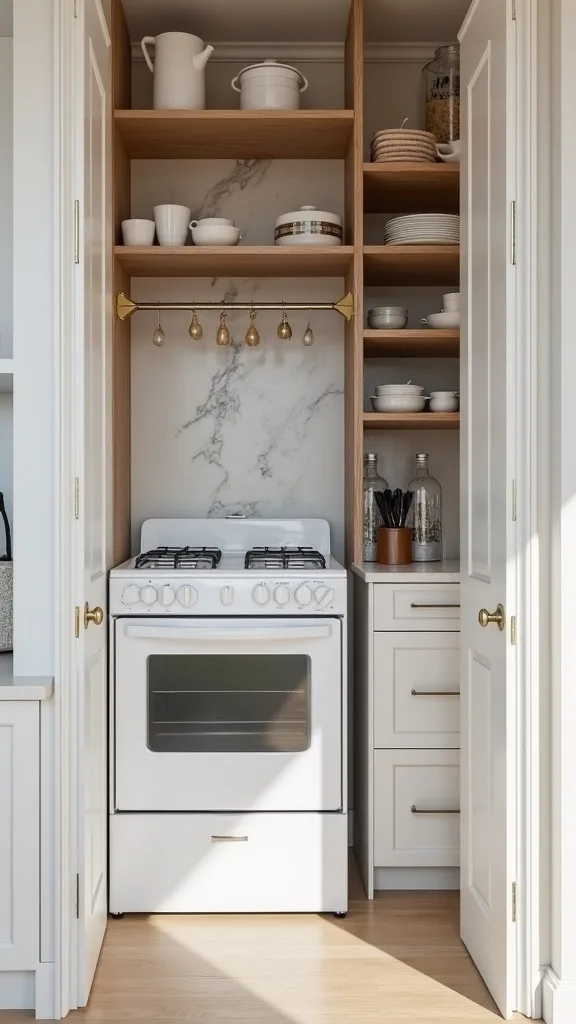
13. Appliance Garage Shelf: Keep the Heat and Clutter Contained
From my experience, appliances are what quietly hijack a large pantry—air fryers, blenders, ice cream makers—until shelves feel crowded. I find that giving appliances a defined “garage” shelf keeps the rest of your pantry room design visually serene.
I recommend dedicating one shelf run that’s 18 inches deep with 16–18 inches of vertical clearance for tall appliances. If you can, add a power strip mounted to the wall at 48 inches high so cords don’t dangle, and leave 4 inches of breathing room behind heat-producing appliances. Typically, I keep this area near the door so you can grab-and-go without walking through the whole pantry.
I like a wall-mounted surge protector (mountable Belkin style), cord clips, and a silicone heat mat under appliances that get warm. For shelves, I prefer sealed plywood because it handles vibration and weight better than particleboard over time.
Pro Tip: When I tried storing an air fryer in a closed pantry, I learned to avoid running it on a shelf unless there’s active ventilation—heat can soften adhesive labels within 30 minutes and leave a faint greasy film on nearby jars, so I store it here but use it elsewhere.
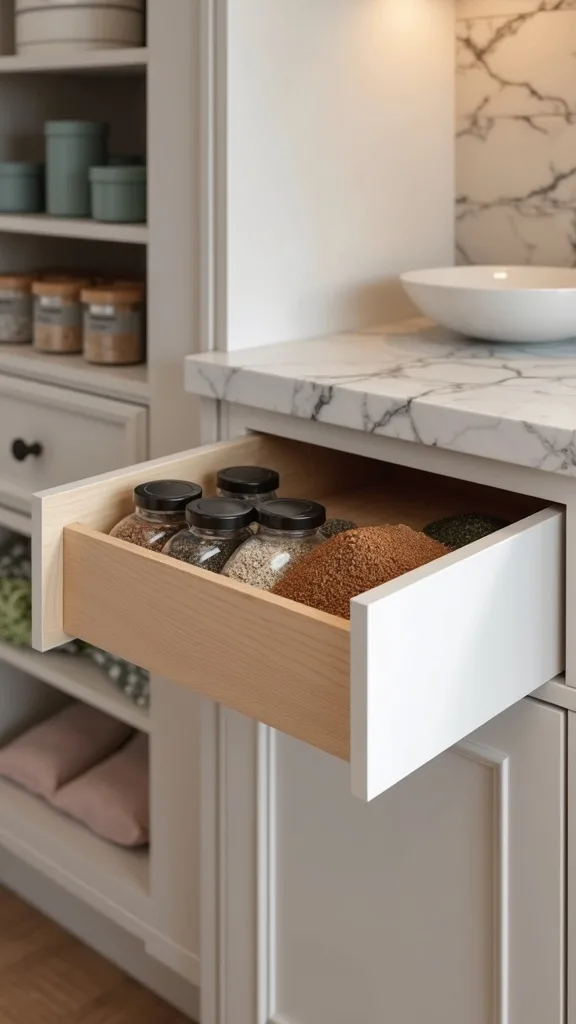
14. Spice and Seasoning Drawer With 15-Degree Angled Inserts
I find that spices look messy fast when they’re standing upright, and from my experience the “search time” adds up during meal prep. In my opinion, a dedicated spice drawer is one of the most satisfying walk in pantry ideas because it makes cooking feel effortless.
I recommend a drawer that’s at least 18 inches wide with a 2.5–3-inch tall insert so jars lie at an angle and labels face up. I typically use 30–50 matching spice jars (4-oz is my sweet spot) and alphabetize by the name you actually say—“Chili Powder” under C, not “Powder, Chili.” Typically, refilling and labeling takes 1–2 hours once, then maintenance is quick.
I like glass spice jars with shaker tops, pre-printed waterproof labels, and a small funnel set. For inserts, bamboo angled organizers feel warmer than plastic and look more intentional in a luxury-leaning pantry.
Pro Tip: I’ve found spices stay fresher when I store backup refills in a separate bin and only refill jars to about 3/4 full—it reduces clumping from humidity and keeps you from “topping off” old spice with new, which dulls flavour over time.
15. Baking Zone With a 24-Inch Mixing Bowl Shelf and Flour Safety
I always start by grouping baking supplies together, because from my experience baking ingredients scattered across zones create constant micro-messes. I find that a baking zone feels especially luxurious when it’s calm, pale, and dust-free.
I recommend dedicating 24 inches of shelf width to mixing bowls, stand mixer attachments, and parchment paper, with a second shelf above at 12 inches clearance for canisters. I keep flour and sugar in airtight containers and store them 12–18 inches off the floor to reduce moisture risk in garages. Typically, a single weekend reset keeps this zone tidy for 4–6 weeks in most households.
I like OXO POP 4.4-qt containers for flour, a stainless scoop, and a shallow bin for sprinkles and extracts. For a cleaner look, I use a white tray to corral measuring cups so they don’t wander.
Pro Tip: When I tried open flour bags in a garage pantry, I noticed they picked up odours faster; now I store flour in airtight containers and add a small cedar sachet on a nearby shelf (not inside food) to keep the area smelling fresh without risking contamination.
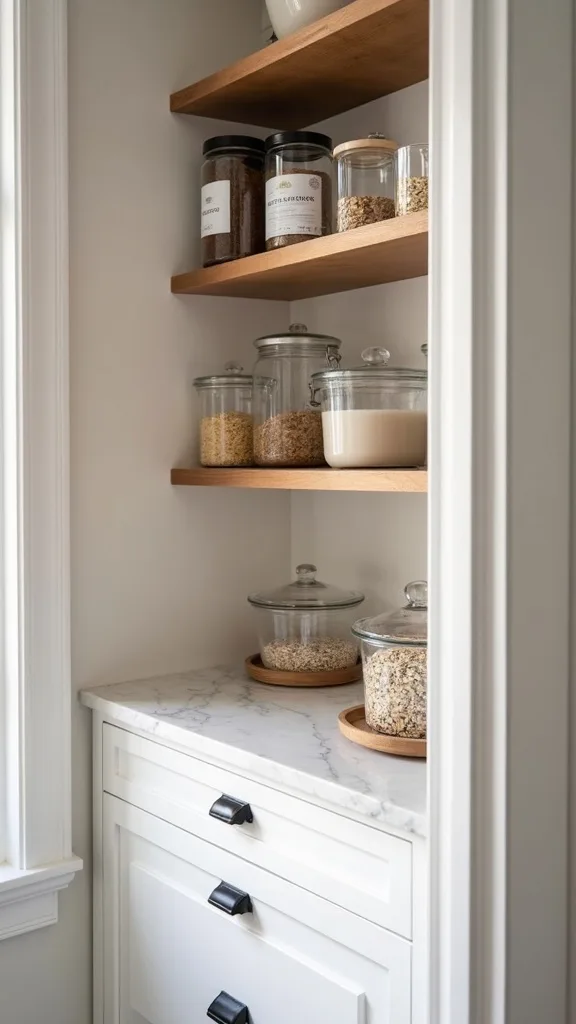
16. Breakfast Bar Shelf: Oats, Coffee, and Grab-and-Go in One Place
From my experience, mornings are when pantries get messy, because everyone moves fast and puts things back “close enough.” I find that a breakfast bar shelf is a gentle way to protect the rest of your pantry organization system.
I recommend a dedicated shelf at 40–48 inches high with 14 inches depth for coffee, tea, oats, and sweeteners. I keep 6–8 jars for granola and oats, plus a small bin for bars and single-serve packets. If you have room, I add a 10-inch lazy Susan for honey, peanut butter, and jam so nothing gets stranded in the back.
I like amber glass jars for coffee beans (they reduce light exposure), a matte black scoop, and a small tray for stir sticks and filters. For labels, I keep them minimal—just the product name—so it feels like a refined pantry room design, not a warehouse.
Pro Tip: I’ve found the breakfast zone stays cleaner if I store sticky items (honey, syrup) on a 12 x 12-inch rimmed tray—drips are inevitable, but the tray contains them so you’re not scrubbing shelf paint every few days.
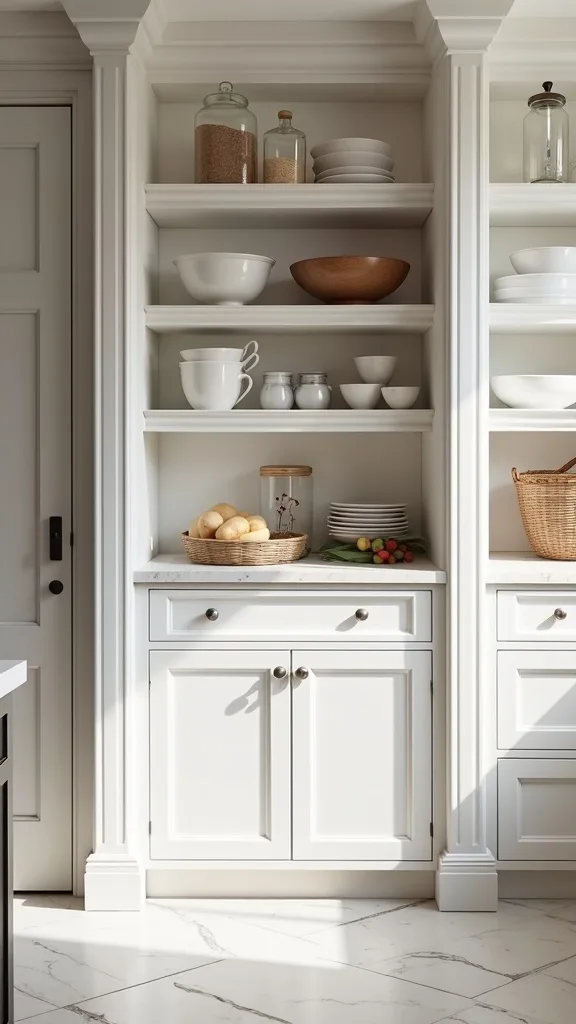
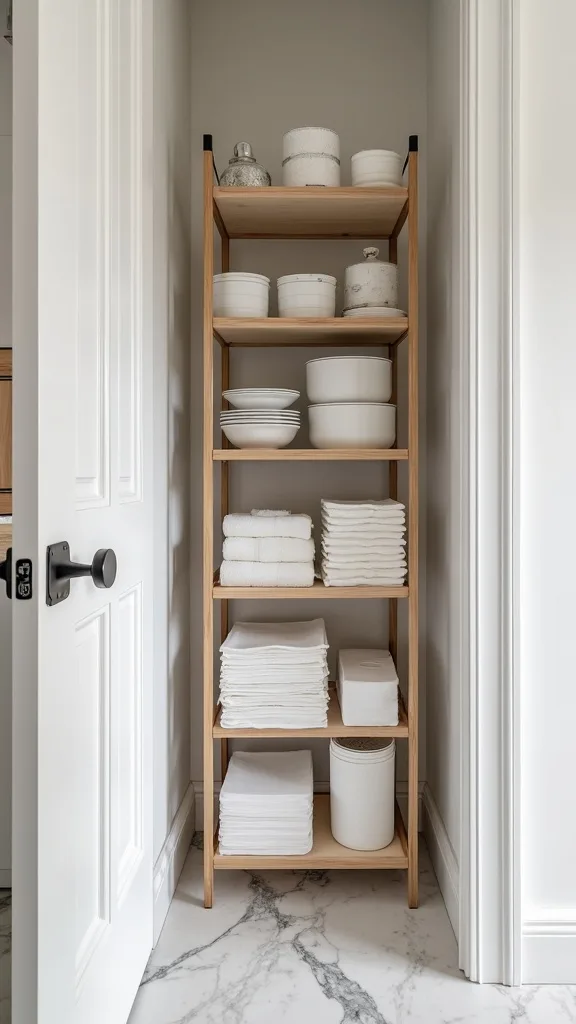
17. Paper Goods Tower: Vertical Storage for Towels, Napkins, and Plates
I find that paper goods are bulky and visually loud, and from my experience they can make a dream pantry feel like a stockroom if they sprawl. In my opinion, giving them a vertical tower keeps the rest of the pantry feeling curated.
I recommend a single tower that’s 16–18 inches deep with 5 shelves, each spaced about 12 inches apart for paper towels, napkins, and disposable plates. I keep the bottom shelf for the heaviest items and use a labeled backstock bin so you don’t end up with three open packs. Typically, this tower takes 30 minutes to set up once shelves are installed.
I like wire shelf dividers to keep stacks upright, and I use neutral bins (white or clear) so the tower doesn’t become visually chaotic. If you prefer a warmer look, I’ve found oatmeal-coloured fabric bins hide branding well but cost more than clear plastic.
Pro Tip: I always leave a 2-inch “compression gap” above paper towel stacks—if the shelf is too tight, rolls snag and tear, and you’ll subconsciously avoid putting them back neatly.
18. Deep Corner Solution: Lazy Susans for Oils, Vinegars, and Sauces
From my experience, corners are where good intentions disappear, because items drift into the dark and get forgotten. I find that a lazy Susan corner is a simple walk in pantry idea that feels instantly more polished.
I recommend using 2 turntables: a 10-inch for smaller sauces and a 12–14-inch for taller oils and vinegars. I keep them on a shelf that’s 14–16 inches deep, and I group by use—salad, grilling, marinades—so summer meal prep is faster. Typically, this setup cuts your “where is it?” time because everything rotates into view.
I like clear acrylic turntables with raised edges, or bamboo if you want a softer, more luxury pantry vibe. For oils, I prefer dark glass bottles with pour spouts, but I acknowledge the trade-off: refilling is an extra step.
Pro Tip: I’ve found lazy Susans work better when you add a thin non-slip liner and keep bottle heights within a 2-inch range—mixed heights wobble and tip when you spin quickly, which is how oil ends up on labels.
19. Produce-Friendly Ventilated Baskets for Onions and Potatoes
I always recommend a ventilated produce zone if you store onions and potatoes in the pantry, because from my experience airflow is what keeps them from spoiling early. I find that this is especially helpful in summer when garages can run warm.
I recommend 2 wire baskets or mesh bins, each around 12 x 16 inches, placed on a lower shelf 18–24 inches off the floor. I keep onions and potatoes separate by at least 12 inches because they can speed each other’s sprouting in many cases. Typically, I check this zone every 7 days and remove anything soft so one bad item doesn’t affect the rest.
I like powder-coated steel baskets, a kraft paper liner for easy cleanup, and a small clip-on label so family members don’t mix categories. If you want a more concealed look, I’ve found ventilated wooden crates work, but they can absorb odours over time.
Pro Tip: When I tried storing potatoes in solid bins, I noticed more moisture buildup; now I keep a small rechargeable silica gel pack on the shelf nearby (not touching food) to reduce dampness in humid climates.
20. Freezer Inventory Board: Keep Summer Prep Visible
I find that the pantry and freezer need to talk to each other, because from my experience meal prep fails when you forget what you already made. In my opinion, a simple inventory board is one of the most underrated walk in pantry ideas.
I recommend mounting a magnetic whiteboard or acrylic board that’s about 16 x 20 inches near the pantry door, and updating it 2 times per week (I do Sunday and Wednesday). I list freezer items with quantities—“Turkey chili x2”—and add a “use first” line for anything older than 30 days. Typically, this reduces duplicate cooking and helps you build a smarter grocery list.
I like a Quartet dry-erase board, fine-tip markers, and a small adhesive pen cup so the marker never disappears. If you prefer a more discreet look, a framed glass board in white feels sleek and wipes clean easily.
Pro Tip: I’ve found the board works best when I write in “meal units” (like 4 servings) instead of container counts—because it’s the servings that matter when you’re planning summer lunches and quick dinners.
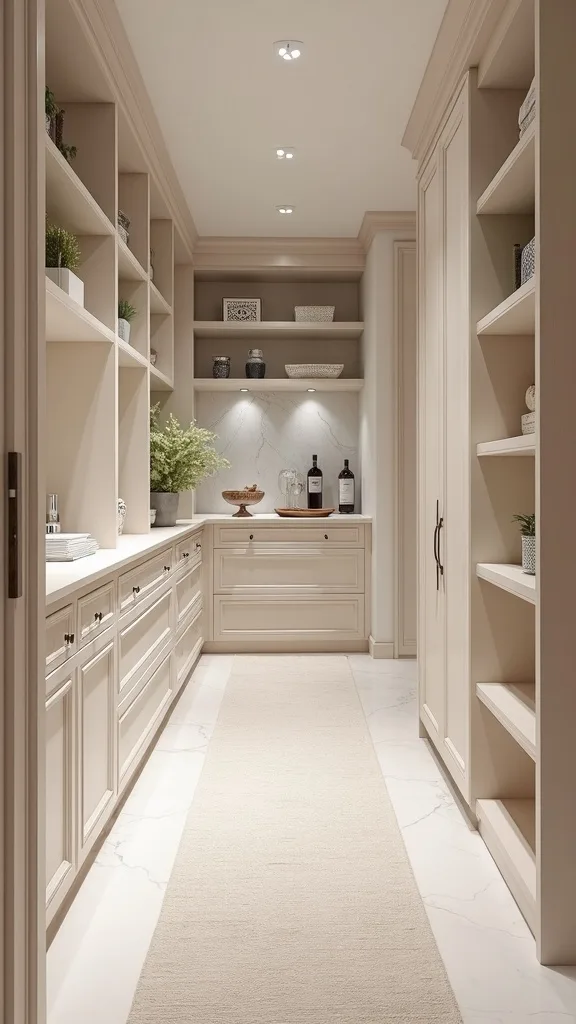
21. Aisle Styling: Keep the Center Calm With One Runner and Two Wall Colors
From my experience, a pantry feels expensive when the aisle is visually quiet, because your eye reads order before it reads objects. I find that styling the walkway is a subtle pantry room design move that makes the whole space feel considered.
I recommend one washable runner that’s 24–30 inches wide and long enough to leave 6 inches of floor visible at the ends, so it looks tailored rather than cramped. For color, I typically use two tones: a soft white on shelves and a slightly deeper greige on the back wall to add depth without darkness. Typically, a satin finish on walls handles scuffs better in high-traffic pantry aisles.
I like a low-pile Ruggable-style runner for easy washing, and I use a clear non-slip pad cut to size. If your pantry is in the garage, I’ve found a commercial-grade entry mat can be more practical, though it’s less “editorial.”
Pro Tip: I always keep the runner edge at least 2 inches away from the shelving toe-kick—if it touches, the edge curls from friction and you’ll trip when you pivot with groceries.
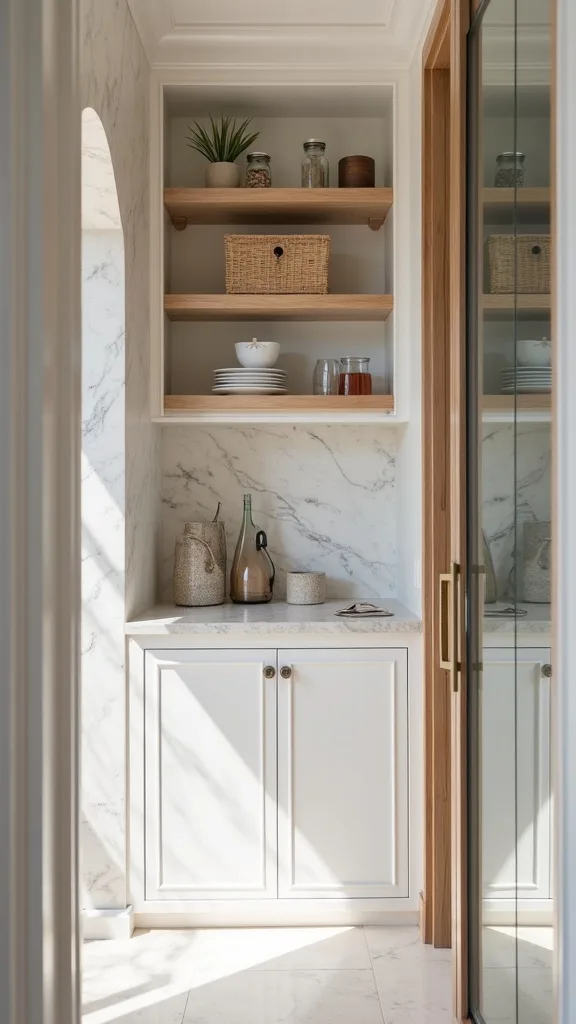
22. Back Wall Feature: Cookbook Shelf + Recipe Binder for Meal Prep
I find that a pantry becomes a lifestyle space when it supports planning, not just storing, and from my experience that’s where a dream pantry truly earns its name. In my opinion, a cookbook and recipe binder nook adds quiet sophistication and real utility.
I recommend a slim picture ledge shelf that’s 4–5 inches deep mounted at 54–60 inches high, plus a second ledge below for a binder and notepad. I keep a 1-inch recipe binder with sheet protectors for summer staples—marinades, grain bowls, freezer breakfasts—and I refresh it every 3 months. Typically, this reduces decision fatigue because your go-to meals are literally on display.
I like IKEA MOSSLANDA picture ledges, a linen binder, and brass bookends for a warm, editorial finish. If you want a cleaner look, matte black ledges tie in beautifully with black drawer pulls.
Pro Tip: I’ve found the ledges stay cleaner if you mount them on the back wall, not a side wall—side walls collect more handprints as people squeeze past, and cookbooks start to look dusty within 2–4 weeks in busy households.
23. Temperature-Smart Storage for a Garage Pantry (Chocolate, Oils, and Cans)
I always recommend planning for temperature if your pantry is in the garage, because from my experience heat swings can ruin certain foods faster than you expect. I find that a few strategic choices keep your pantry organization system safe and consistent.
I recommend keeping heat-sensitive items—chocolate, nuts, some oils—on an interior wall shelf and at least 48 inches off the floor, where temperatures are typically more stable. I avoid storing oils near the door and rotate them within 60–90 days once opened, because flavour can dull in warm conditions. For canned goods, I keep them in pull-outs so I can rotate stock monthly in 10 minutes without lifting heavy cases.
I like using airtight containers for nuts, amber bottles for oils, and a small thermometer/hygrometer so you can see patterns without guessing. The trade-off is that monitoring adds one more “thing,” but it prevents expensive waste.
Pro Tip: When I tried garage pantry storage, I learned to keep a dedicated “summer sensitive” bin—if the garage hits 85°F for several days, I move that bin indoors temporarily, and it saves chocolate and granola bars from turning into a sticky mess.
24. Restock Ritual: A 15-Minute Weekly Reset That Keeps It Pristine
From my experience, the most beautiful pantry room design still fails without a rhythm, because daily life always wins. I find that a short, scheduled reset is the most realistic way to keep walk in pantry ideas working long-term.
I recommend a 15-minute weekly reset with a simple checklist: toss empties, wipe one shelf, and refill the top 5 jars. I also do a 5-minute “inbox sweep” after grocery day—anything that doesn’t have a home gets assigned immediately. Typically, this prevents the slow creep of random items that makes a large pantry feel cluttered by week three.
I like keeping a small caddy with microfiber cloths, a gentle all-purpose cleaner, and label tape, stored on a hook at 60 inches high. For wiping shelves, I prefer a damp cloth over sprays near food, which feels safer and cleaner to me.
Pro Tip: I’ve found resets stick when they’re tied to an existing habit—like starting the dishwasher—because the pantry reset becomes part of the same 20-minute evening routine instead of a separate “project” you’ll postpone.
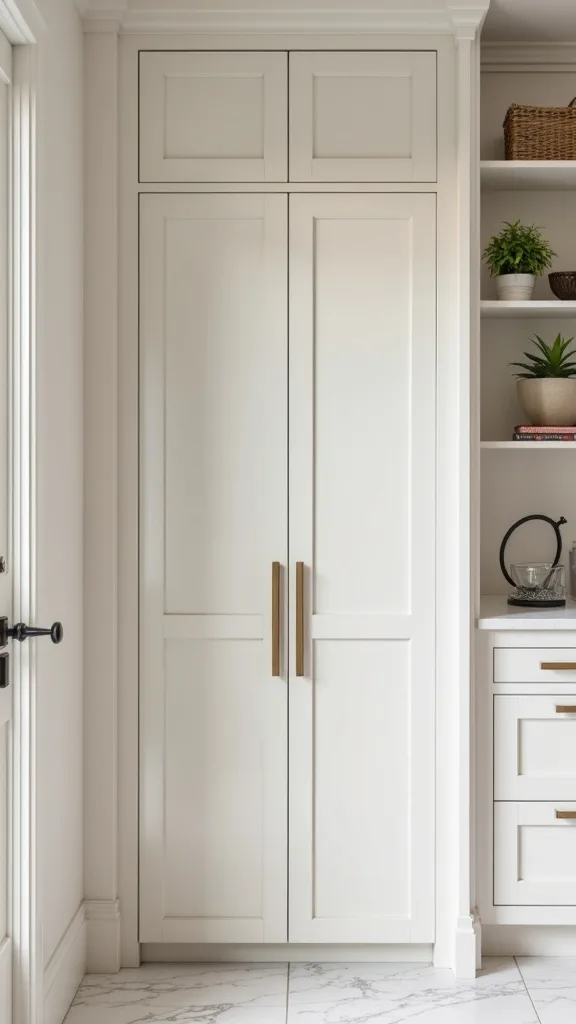
25. Finishing Touches: Matching Hardware, Toe-Kicks, and a Soft-Close Door
I find that the final 5% is what makes a pantry feel like a designed room, and from my experience this is where a dream pantry becomes believable. In my opinion, cohesive hardware and clean lines are the easiest way to make storage look custom.
I recommend choosing one pull style—like matte black 5-inch bar pulls—and repeating it across 10–20 drawers and doors for visual calm. I add a 3–4 inch toe-kick at the base of shelving so your feet tuck in comfortably, and I install a soft-close hinge or door closer so the pantry doesn’t slam in a garage echo chamber. Typically, these upgrades take 2–4 hours but make the space feel quieter and more refined.
I like brushed brass if your kitchen leans warm, but I acknowledge the trade-off: brass shows fingerprints more easily than matte black. For paint, I prefer a durable satin enamel on trim so scuffs wipe clean.
Pro Tip: I’ve found the most “custom” detail is running the same toe-kick line across both walls—even if shelves are different depths—because your eye reads one continuous base, and the whole pantry suddenly feels built-in and intentional.
Final Thoughts
I designed these walk in pantry ideas to feel aspirational, but I always keep the goal practical: a pantry organization system you can maintain when summer gets busy and meal prep becomes your lifeline. From my experience, the most elegant pantries aren’t the ones with the most containers—they’re the ones where every inch has a purpose and every category has a boundary.
If you’re building a large pantry in the garage, I find that the “luxury” comes from the details you’ll touch daily: pull-outs that glide, lighting that flatters, jars that make inventory obvious, and labels that remove decision fatigue. Typically, you can implement the core pantry room design upgrades over 1–2 weekends, then refine as your routines settle.
I always recommend starting with one wall and one zone—then letting your habits guide the rest. Once you feel that calm click into place, your dream pantry stops being a Pinterest concept and becomes the most quietly satisfying room you own.
What I’d Do Differently
When I first tried this in a garage pantry, I made one very specific mistake: I installed shelves that were 20 inches deep on both sides because I thought “more storage is better.” From my experience, that depth created a constant shadowy back row where duplicates multiplied—three half-used pastas, two open bags of rice, and cans I didn’t even remember buying. The correct approach, in my opinion, is to keep standard shelves at 12–14 inches and reserve deeper capacity for pull-out drawers only, so every inch stays accessible. Once I switched to pull-outs for backstock, I stopped losing food behind food, and my pantry organization system finally felt calm instead of crowded.
I also wish I’d known earlier how much integrated lighting changes behaviour: when the pantry is bright, I find I naturally put things back where they belong because I can see the zones and labels instantly. And I always recommend planning one “signature wall” first—floor-to-ceiling shelving with jars and a small wine rack—because it sets a design standard the rest of the room follows. Pick one wall, choose your depths, and start this weekend with a single zone you’ll use every day.
Products I Recommend for This Project
Here are some of my favourite products to help you bring these ideas to life:
- OXO Good Grips POP Container Set (airtight) — I find these make flour, sugar, and snacks easy to see and keep fresher with less mess.
- iDesign Linus Clear Storage Bins with Handles — I always recommend these for zones because the handles make weekly resets and restocking fast.
- Rev-A-Shelf Pull-Out Wire Basket Organizer — From my experience, a sturdy pull-out is the simplest way to stop backstock from disappearing into the depths.
- Litever LED Strip Lights Kit with Dimmable Driver — I like this for integrated lighting because it’s bright (measured in lumens) without feeling harsh when paired with a diffuser channel.
- YouCopia StoreMore Expandable Can Rack — I’ve found this makes “first in, first out” rotation easier, especially for soup and beans.