This post contains affiliate links. As an Amazon Associate, I earn from qualifying purchases at no extra cost to you.
Are you looking for summer entertaining kitchen ideas that feel relaxed but still organized for a real crowd? Do you want a party hosting kitchen that stays functional even when people hover around the island and the fridge door never stops opening?
I always start by designing the kitchen like a mini event space: clear traffic paths, obvious “drop zones,” and a few intentional decor moments that nod to 4th of july decor without taking over the room. In this post, I’ll walk you through 25 practical, step-by-step ideas I use for summer entertaining, especially when the kitchen island becomes the main stage.
In my opinion, this is perfect for anyone hosting a backyard BBQ, a neighborhood potluck, or a last-minute summer party home get-together where the kitchen ends up being the hangout spot.
I’ll share my favourite island layout (with a tiered fruit stand + charcuterie flow + pull-out trash bin reveal), plus drink strategies, lighting, kid-friendly tweaks, and cleanup shortcuts that typically save me 20–30 minutes by the end of the night.
Below are 25 Summer Entertaining Kitchen Ideas that help you host confidently, feed people efficiently, and keep your kitchen feeling calm—even when it’s full.
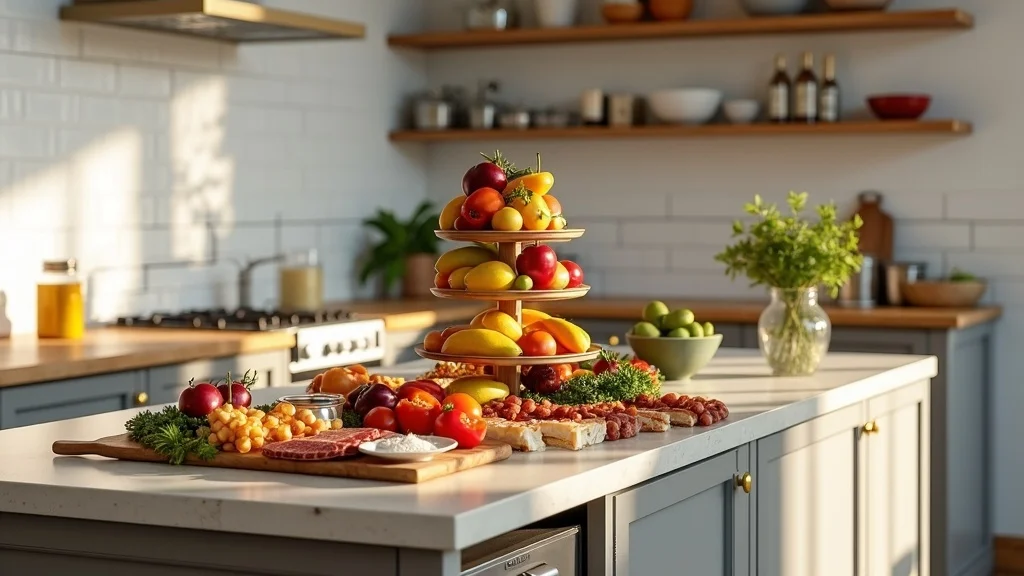
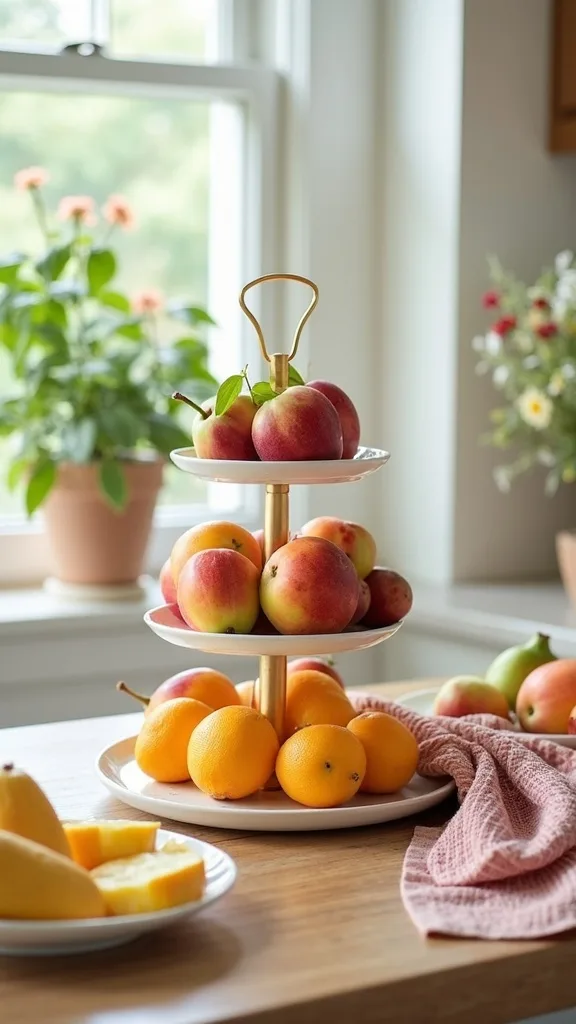
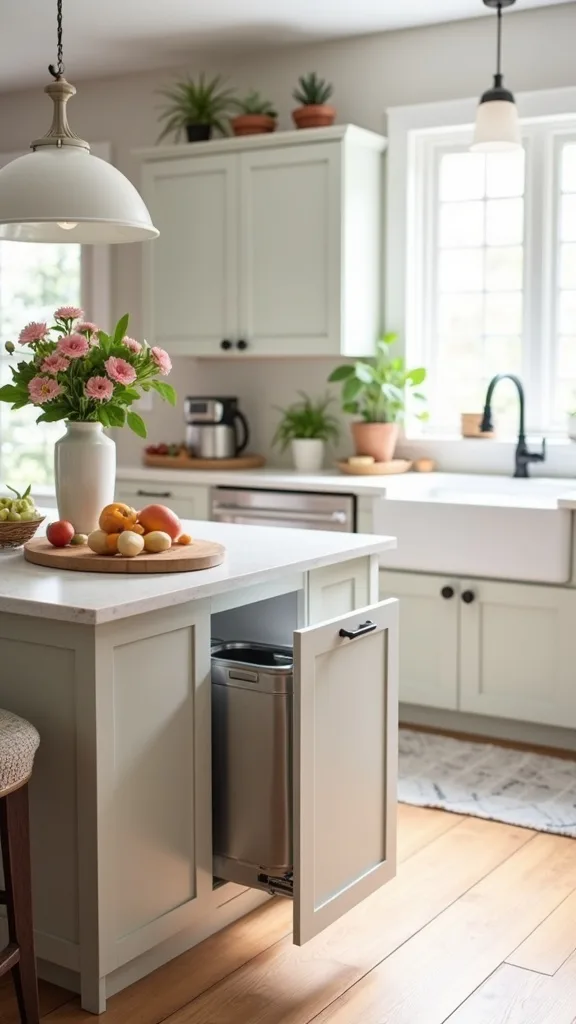
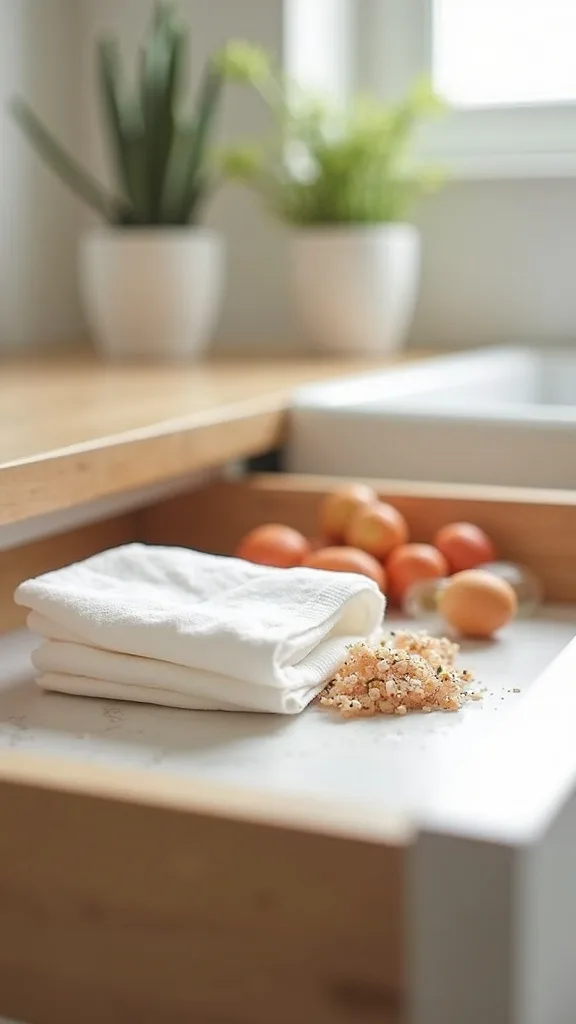
1. Island set for a crowd: tiered fruit stand, charcuterie flow, and the pull-out trash bin reveal
I always start by treating my island like a buffet line, because it keeps kitchen island entertaining from turning into a traffic jam. When I design this look, I’m aiming for “grab-and-go” food with a hidden cleanup plan, so guests feel comfortable hovering without blocking me.
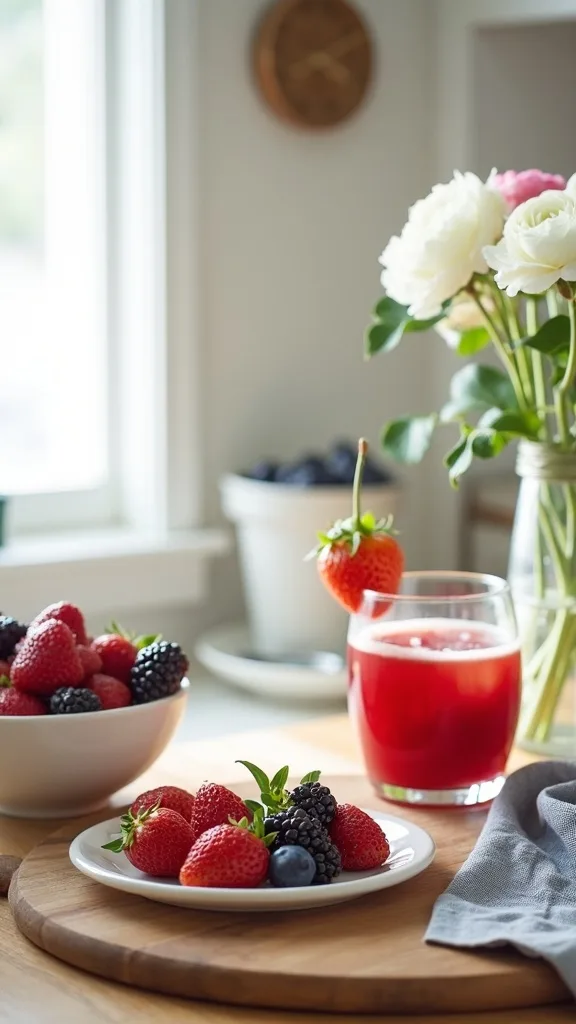
I set a 3-tier fruit stand on one end and keep it 10–12 inches from the island edge so elbows don’t clip it. Then I build a charcuterie layout in a 24–30 inch long zone using two 18×12-inch acacia boards, leaving a 16-inch “landing strip” for small plates. Finally, I open the pull-out trash bin (the reveal!) and park a 13-gallon bag inside so people instantly understand where scraps go.
From my experience, acacia or maple boards, small stainless-steel ramekins (2–3 oz), and parchment sheets cut to 12×16 inches make restocking fast and tidy. For color, I lean into strawberries + blueberries for subtle 4th of july decor without screaming red-white-blue.
Pro Tip: I’ve found the bin reveal works best when I clip a mini adhesive LED puck under the counter lip above it—set to warm white light (2700K–3000K — the cosy, yellowish tone you see in most homes)—so guests can actually see the opening and stop “hovering” with sticky napkins.
2. Create a 3-zone island map (drinks, grazing, plates) with painter’s tape first
From my experience, most summer entertaining fails when the island has no “map,” so everyone crowds the same 18 inches. I find that a quick mock layout makes the kitchen feel like a real party hosting kitchen without buying anything new.
I always start by laying 1-inch blue painter’s tape to mark three rectangles: a 20×20-inch drink zone, a 30×18-inch grazing zone, and a 16×16-inch plates/napkins zone. I walk the path from fridge to island to sink at least 3 times and adjust until I keep a 36-inch aisle clear (typically enough for two people to pass). Then I swap tape for actual items: a 2-gallon drink dispenser, a 12-inch cake stand for cups, and a 14-inch tray for napkins.
In my opinion, black melamine trays and clear acrylic risers look clean and don’t compete with 4th of july decor accents. I also like using a 72-inch kraft paper runner down the center so crumbs roll up fast.
Pro Tip: I’ve found the “plates zone” should be closest to the dishwasher, not the food—when plates are within 4–6 feet of the dishwasher, guests naturally scrape and stack, and I end the night with fewer mystery piles.
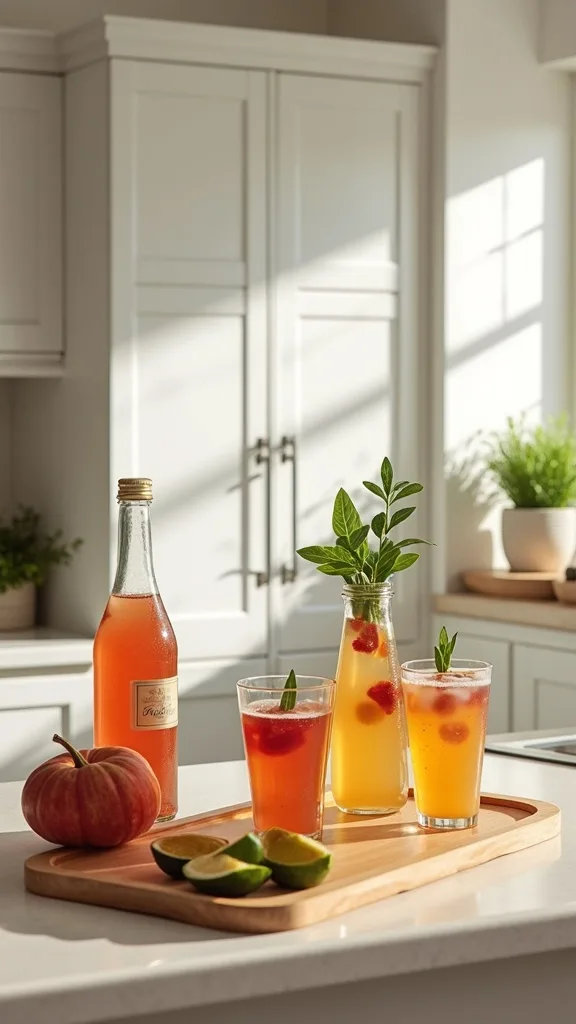
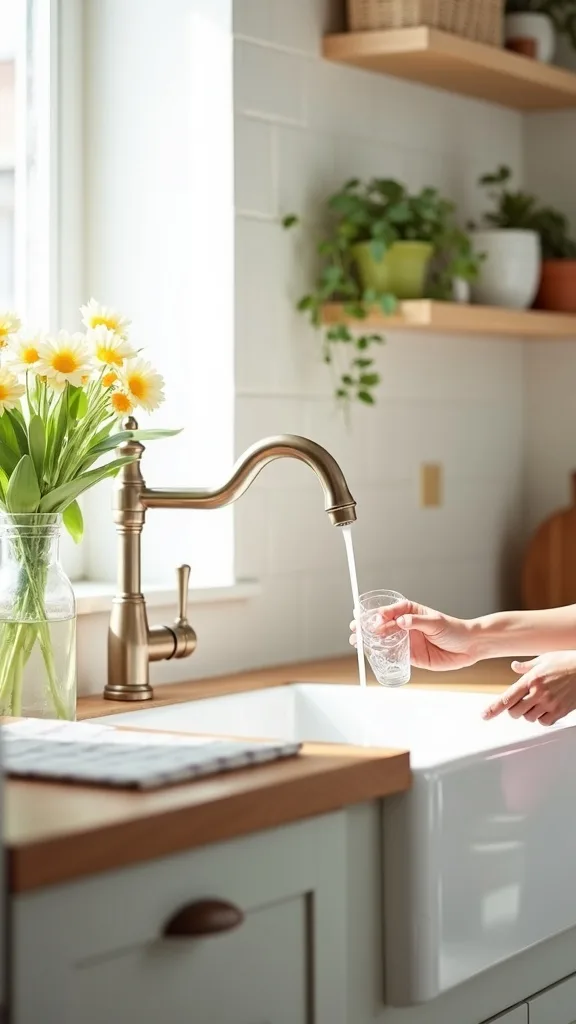
3. Set up a self-serve drink station that doesn’t block the fridge
I always recommend pulling drinks away from the refrigerator because, in most cases, that’s the #1 bottleneck during summer entertaining. I find that a dedicated drink station makes guests feel independent while I keep control of the cooking zone.
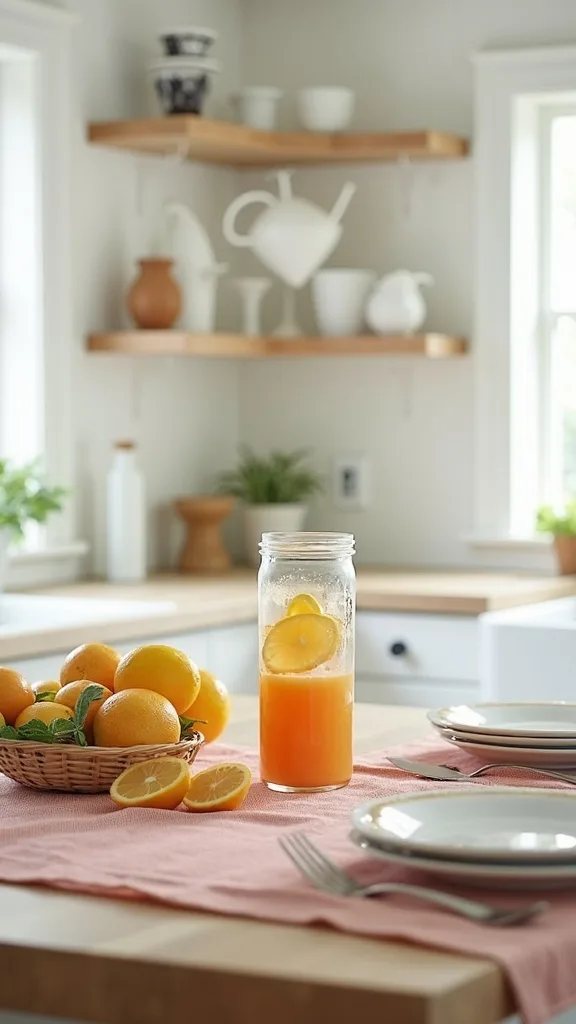
I place the drink station 4–6 feet from the fridge, ideally on the island corner closest to the living area. I use one 2-gallon glass dispenser for water with lemon + mint, plus a 1-gallon dispenser for iced tea, and I set a 12×18-inch bar mat underneath to catch drips. For ice, I bring out a 5-quart insulated bucket and refill it once every 60–90 minutes (more often if it’s hot).
From my experience, acrylic tumblers (16 oz) are safer than glass around kids, and a stainless scoop keeps hands out of the ice. I like adding a small 6-inch vase with grocery-store carnations in red/white for subtle 4th of july decor.
Pro Tip: I’ve found that putting the cups after the dispensers (not before) reduces spills—people naturally fill first, then grab a cup, and the bar mat ends up catching 80% of the drips instead of your counter edge.
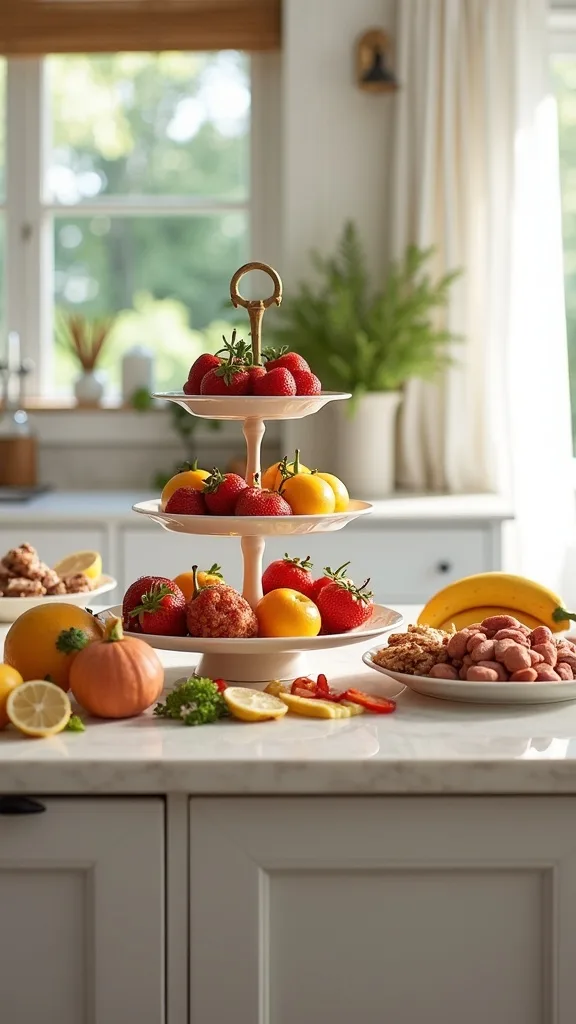
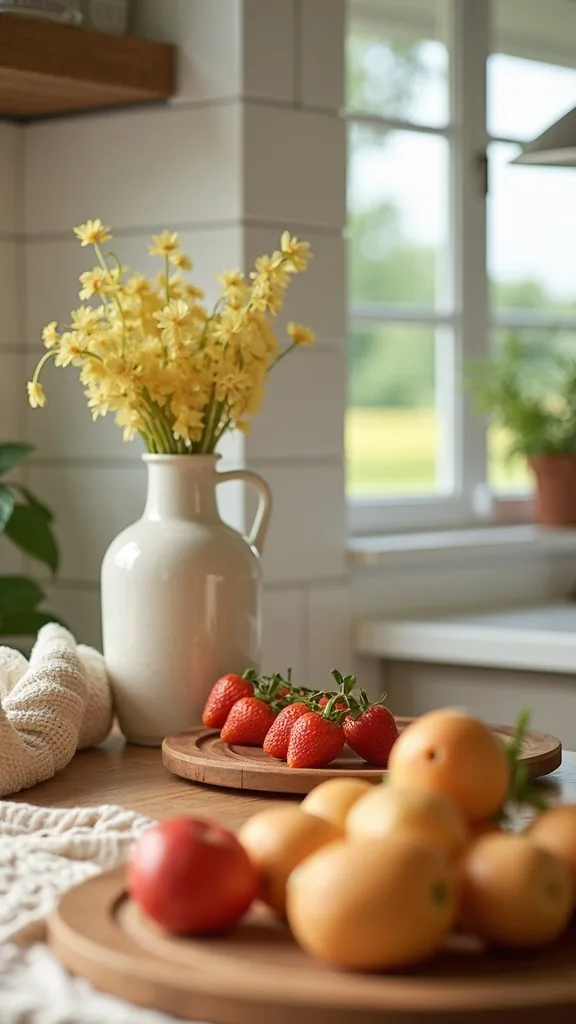
4. Use a tiered fruit stand as a “vertical centerpiece” to free up counter space
I find that going vertical is the easiest way to make a summer party home kitchen feel abundant without losing prep space. When I design this look, I use a tiered fruit stand as both decor and snack storage.
I always start with a 3-tier stand that’s roughly 14–18 inches tall so it reads like a centerpiece but doesn’t block sightlines. I load the bottom tier with heavier fruit (6–8 peaches or nectarines), the middle with 2–3 cups of cherries, and the top with a 1–2 lb mix of strawberries and blueberries for that easy 4th of july decor vibe. I keep the stand at least 8 inches from the island edge so it’s stable when kids reach.
From my experience, metal stands wipe clean faster than wicker, but wicker feels more coastal—so I choose based on whether I want “easy cleanup” or “soft texture.” I also place a small 6-inch bowl of toothpicks beside it.
Pro Tip: I’ve found fruit lasts longer on display if I line each tier with a round of paper towel under a cut-to-fit parchment circle—condensation gets absorbed, and berries stay presentable for 2–3 hours longer.
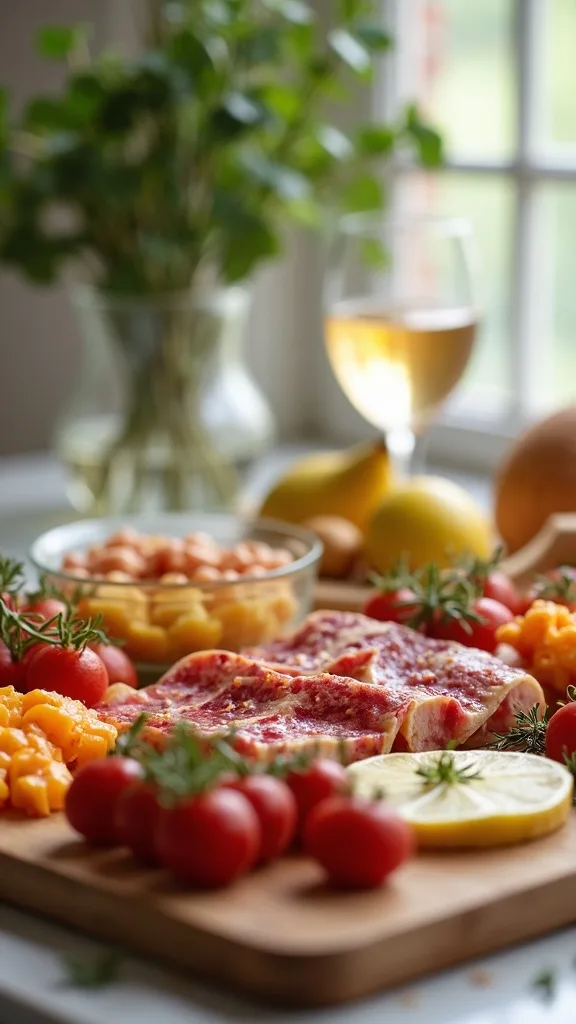
5. Build a charcuterie layout that flows left-to-right like a menu
In my opinion, the most successful charcuterie boards for summer entertaining are the ones that guide people, so they don’t hover and poke around awkwardly. I always set mine up like a “menu path” across the island.
I start with two boards: one 24×10-inch board for meats/cheese and one 18×12-inch board for fruit/crackers. I place small bowls (3–4 oz) at the “start” for olives and nuts, then fan crackers in 2 stacks about 6 inches apart, and finish with sweets (8–10 pieces of dark chocolate or mini cookies) at the end. I keep tongs at both ends and add 2 cheese knives so two people can serve at once.
From my experience, a mix of textures matters more than expensive ingredients: one hard cheese (8 oz aged cheddar), one soft (6 oz brie), and one salty crunch (6 oz roasted almonds) typically satisfies most guests. I use parchment under messy items to protect wood.
Pro Tip: I’ve found that placing the “messy” items (brie, honey, jam) on a small 8-inch marble tile keeps the board from getting greasy, and the tile can go straight into the fridge for quick reset between rounds.
6. Add a pull-out trash bin sign so guests actually use it
I’ve found that people will hold a sticky plate for 5 minutes if they’re not 100% sure where trash goes, which is not the vibe I want for a party hosting kitchen. I always make the pull-out trash bin obvious and “permission-giving.”
I open the pull-out bin about 6–8 inches during peak eating time and place a small 5×7-inch sign on a stand that says “Trash + Compost.” If I’m separating waste, I use two 8-gallon bins inside the cabinet and label them with painter’s tape. I also keep a roll of 13-gallon bags under the sink and swap the liner once it’s about 2/3 full—typically every 60–120 minutes depending on the menu.
From my experience, a charcoal odor-absorbing trash can filter helps if you’re serving seafood, but it’s an extra cost. I like using compostable plates (9-inch) because they reduce scraping time, though they can feel flimsier than melamine.
Pro Tip: I’ve found guests use the bin more when I place a small lidded 2-quart bowl beside it for toothpicks and cocktail picks—those tiny sticks are what usually end up abandoned on counters.
7. Stage a “dirty dish drop zone” with a bus tub near the sink
I always recommend a dish drop zone because it keeps the sink usable while still encouraging guests to help. From my experience, this single move makes my kitchen feel calmer within the first 15 minutes of summer entertaining.
I place a 12×16-inch plastic bus tub (or dishpan) on the counter within 12 inches of the sink and add a small sign that says “Stack here.” I set a 16×24-inch microfiber drying mat beside it for wet cups and a 10-inch tray for utensils. During the party, I do two quick “resets” that take about 3 minutes each: one at the 45-minute mark and one right before dessert.
I find that white bus tubs look more intentional, and a stainless-steel mesh strainer in the sink catches lemon slices and herbs from drink refills. The trade-off is you’ll sacrifice a bit of counter space upfront, but you gain a functional sink all night.
Pro Tip: I’ve found that putting a single 2-inch binder clip on the tub rim to hold a damp bar towel prevents the “where’s the towel?” scavenger hunt and keeps drips from trailing across your cabinets.

8. Use a washable runner on the island to catch crumbs and juice
I find that an island runner is the unsung hero of kitchen island entertaining, especially when fruit and chips are involved. I always start by protecting the surface so I can relax and stop policing every crumb.
I roll out a 16–18 inch wide washable table runner (or kraft paper) down the island length, leaving 4–6 inches of bare counter on each side for drinks. If I’m using kraft paper, I tape it underneath with 1-inch painter’s tape so it doesn’t slide. At the end of the night, I lift the runner and shake it into the trash in under 60 seconds, then wipe the counter with a gentle stone-safe cleaner if needed.
From my experience, cotton-linen blends handle condensation better than pure cotton, but they cost more upfront. For a 4th of July prep look, I choose navy stripes and add a few red napkins rather than a full flag motif.
Pro Tip: I’ve found that placing a thin silicone shelf liner strip (about 2 inches wide) under the runner at the “drink zone” stops wet cups from migrating and prevents those sneaky water rings near the edge.
Cost & Materials Estimate
In most cases, I can pull together a summer entertaining kitchen setup for about $60–$250 depending on what serving pieces and lighting I already own.
| Item | Estimated Cost | Where to Buy |
|---|---|---|
| 3-tier fruit stand (metal or wood) | $22–$55 | Amazon |
| 2-pack acacia serving boards (approx. 18×12 in) | $24–$45 | Amazon |
| 2-gallon glass drink dispenser | $28–$50 | Wayfair |
| Bus tub / dishpan (12×16 in) | $8–$18 | Home Depot |
| Rechargeable LED puck lights (2-pack) | $18–$35 | Amazon |
| Slim step trash can (10–13 gal) | $35–$80 | Lowe’s |
Total estimated cost: $60–$250 I always recommend splurging on the tiered stand or boards you’ll reuse, and saving by using kraft paper runners and simple glass jars you already have.
9. Create a utensil “toolbox” so guests don’t dig through drawers
I always start by pulling every serving tool I’ll need out of drawers, because nothing kills hosting momentum like rummaging. In my opinion, a utensil caddy is what turns a normal kitchen into a smooth party hosting kitchen.
I use a 3-compartment caddy and stock it with 2 sets of tongs, 1 slotted spoon, 1 small ladle, and 2 spreaders. I place it within 12–18 inches of the charcuterie and label each compartment with a small piece of tape (“Tongs,” “Spread,” “Serve”). If I’m serving hot food, I add a 9×13-inch sheet pan lined with a towel as a “resting tray” for tools so drips don’t hit the counter.
From my experience, stainless-steel tools clean faster than silicone, but silicone is gentler on nonstick pans—so I mix both. I also keep a stack of 25–50 bamboo cocktail picks in the caddy for fruit and cheese cubes.
Pro Tip: I’ve found that placing one extra pair of tongs at the very end of the island prevents people from “reaching across” the spread, which is where most accidental sleeve-in-dip moments happen.

10. Swap heavy decor for edible 4th of July decor on the island
When I design this look for 4th of July prep, I prefer edible decor because it doubles as food and doesn’t clutter the workspace. I find that 4th of july decor feels more grown-up when it’s subtle and functional.
I build a red-white-blue moment using 2 cups of strawberries, 2 cups of blueberries, and a 10–12 oz bowl of yogurt-covered pretzels or white chocolate bark. I place them in three clear glass cylinders (about 6–8 inches tall) so the colors stack cleanly, then I tuck two 6-inch mini flags behind the jars for height. This setup takes me about 8–10 minutes and frees up the rest of the island for real serving.
From my experience, clear glass is easier to wipe than ceramic when fingers get sticky. The trade-off is glass can chip if it’s crowded, so I keep it 8 inches back from the edge and avoid tall, top-heavy vases.
Pro Tip: I’ve found that chilling the glass jars for 20 minutes before filling reduces condensation on the outside—your labels and napkins won’t get damp, and the display stays crisp longer.
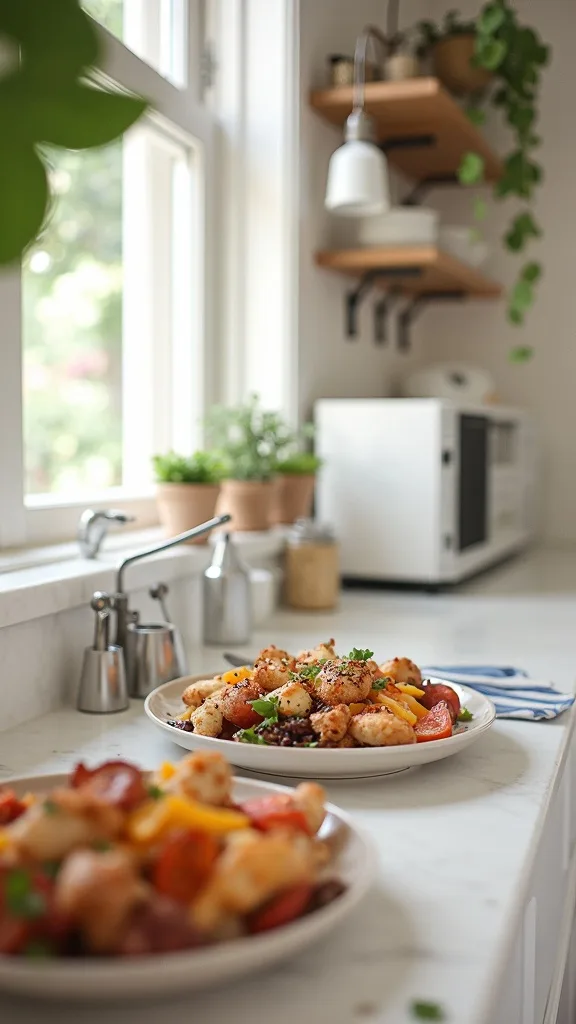
11. Plan a “hot foods live elsewhere” rule with a warming corner
I always recommend keeping hot foods off the island during summer entertaining, because steam and spills compete with grazing space. From my experience, guests prefer the island for snacks and drinks, not balancing a hot tray.
I set up a warming corner on a perimeter counter using one 6-quart slow cooker and one electric warming tray (around 20×12 inches). I keep them at least 18 inches from the wall to protect backsplash paint from heat and splatter, and I run the cords along the back edge with 2 adhesive cord clips. I also place a 9×13-inch rimmed sheet pan under each appliance to catch drips and make cleanup faster.
I find that white or stainless appliances blend into most kitchens, and a simple tent card (“Pulled pork,” “Queso”) reduces lid-lifting. The trade-off is you’ll use an outlet and lose some counter space, but you gain a safer flow.
Pro Tip: I’ve found that putting a folded cotton towel under the slow cooker lid handle keeps condensation from dripping onto the counter when guests set the lid down—this one tiny detail saves me multiple wipe-downs.
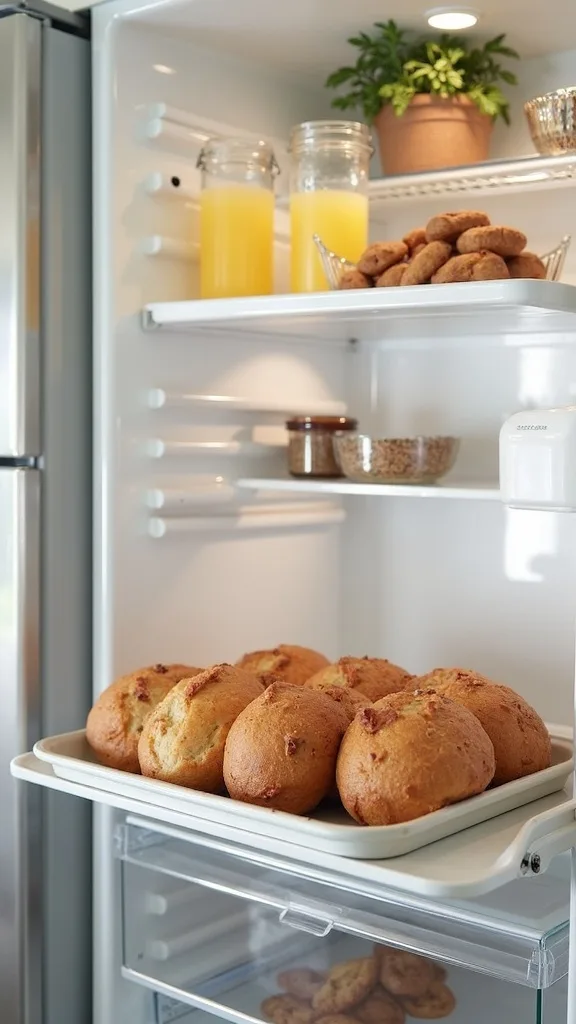
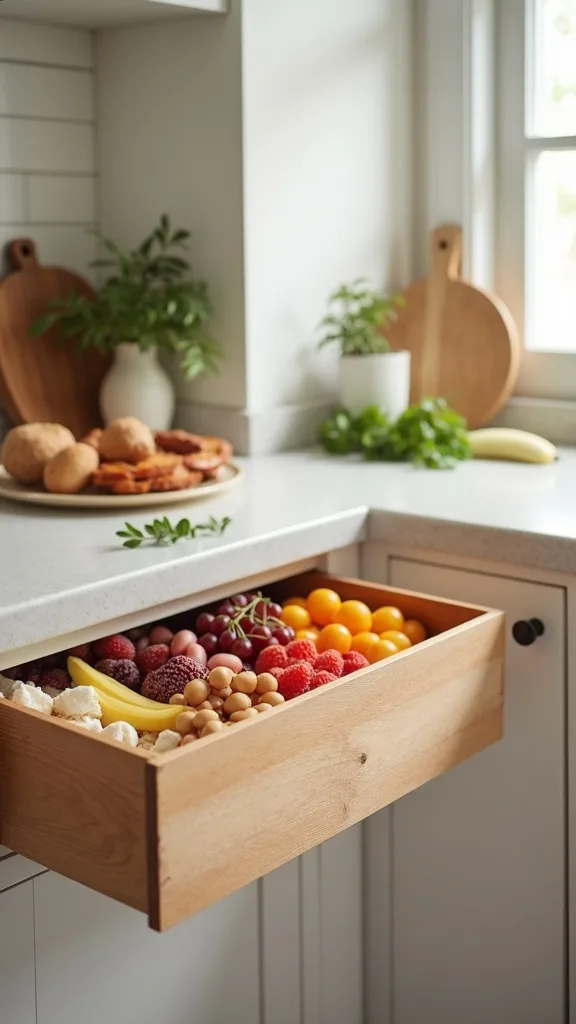
12. Use a baking sheet “refill station” in the fridge for fast restocks
I find that the easiest way to look like I have it all together is to restock quickly without rebuilding platters. When I tried this fridge refill system the first time, my summer entertaining stress dropped noticeably.
I always start by prepping refills on two rimmed half-sheet pans (about 18×13 inches). One pan holds sliced fruit and cheese cubes in 4–6 small containers; the other holds extra crackers, nuts, and garnishes. I slide the pans onto the top shelf so I can pull one out and refresh the island in under 2 minutes, then put it back without juggling bags.
From my experience, deli containers (8–16 oz) with lids keep flavors separate and prevent soggy crackers. The trade-off is you’ll use more containers, but you’ll waste less food because you refill in smaller batches (typically 1–2 cups at a time).
Pro Tip: I’ve found that placing a damp paper towel under the fruit containers on the sheet pan stops sliding when you move quickly—no more blueberries rolling into the back of the fridge.
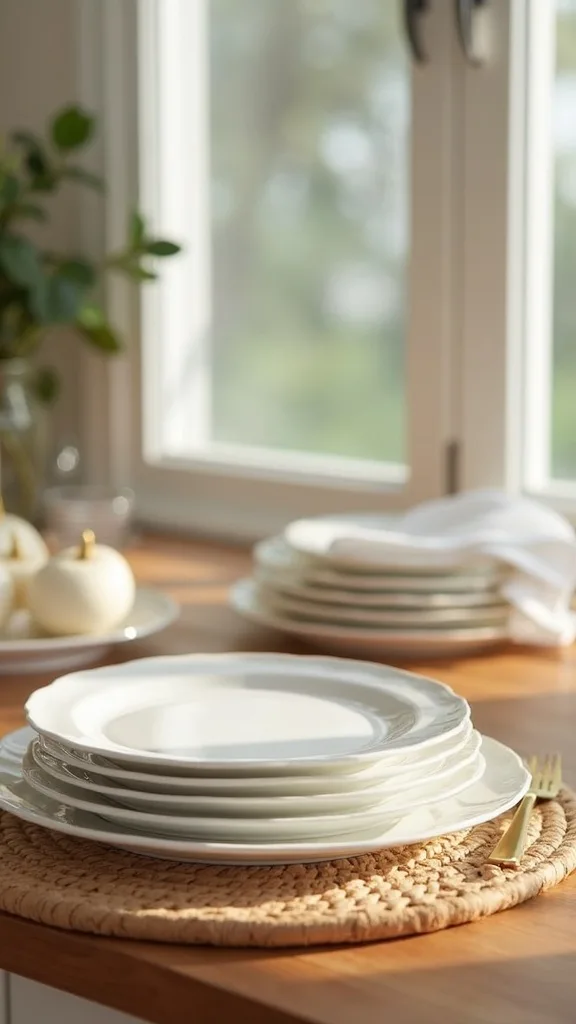
13. Set out small plates first—then napkins—so people don’t double-grab
From my experience, plate placement is a sneaky way to control mess during kitchen island entertaining. I find that when napkins come first, people grab 2–3 and then forget where they put them.
I stack 20–30 small plates (7–8 inch) at the start of the food line, then place napkins 8–10 inches after the plates. I keep a set of 12–18 appetizer forks right beside the napkins and add a small cup of toothpicks for finger foods. If I’m using disposable, I choose compostable 8-inch plates and 2-ply paper napkins because they hold up better to juicy fruit.
In my opinion, a simple navy napkin with one red striped tea towel nearby reads festive for 4th of july decor without overwhelming the kitchen. The trade-off is real plates feel nicer but increase dish volume, so I pick based on how much dishwasher space I have.
Pro Tip: I’ve found that placing a single “napkin weight” (like a smooth river stone or small acrylic block) on top of the stack prevents the whole pile from lifting when someone grabs one-handed.
14. Add two trash touchpoints: island pull-out + a slim can near the patio door
I always recommend two trash points for summer entertaining, because guests naturally migrate between the kitchen and outside. I find that relying on one bin creates a pile-up of cups on the nearest random surface.
I keep the pull-out trash bin active at the island, then I place a slim 10–13 gallon step can within 3 feet of the patio door. I line both with fresh bags before guests arrive and add a small stack of 10 extra bags under the sink. During the party, I do a quick tie-off when a bag hits about 75% full—typically once mid-party and once at the end.
From my experience, a step can is worth the slightly higher cost because hands-free matters when people are holding plates. The trade-off is you’ll see the can, so I choose stainless or matte white to blend with cabinets.
Pro Tip: I’ve found that putting a single paper towel sheet in the bottom of each empty bag absorbs surprise leaks from watermelon or melted ice—your can stays cleaner and doesn’t smell the next day.
15. Light the island for evening hosting with warm white under-cabinet strips
When I design a summer party home vibe that runs past sunset, I always prioritize lighting because it changes how “welcoming” the kitchen feels. I find that warm lighting also makes food look more appetizing in photos.
I use under-cabinet LED strips set to warm white light (2700K–3000K — the cosy, yellowish tone you see in most homes) and aim for brightness (measured in lumens) around 200–400 lumens per linear foot for most kitchens. I install them 1–2 inches behind the cabinet lip so the diode dots don’t glare in guests’ eyes. If I’m not installing, I use 2 rechargeable LED puck lights under upper cabinets and recharge them the next day.
From my experience, dimmers are worth it because you can keep prep bright early and switch to softer light later. The trade-off is dimmable systems cost more upfront, but they save you from buying extra lamps.
Pro Tip: I’ve found that placing a single puck light inside a glass hurricane on the island creates candle-like glow without heat—perfect near fruit and paper napkins, and it won’t melt anything the way real candles can.
16. Keep the sink usable with a “no cup in sink” rule and a drying mat
I always start by protecting my sink, because once it fills with cups, everything slows down—hand washing, refilling pitchers, even rinsing fruit. From my experience, this one boundary keeps my party hosting kitchen functional.
I set a 16×24-inch drying mat on the counter and place a simple tent card that says “Please stack cups here.” I also keep a 6-quart dish tub in the sink for quick rinses, so the basin stays open. Every 30–45 minutes, I do a 2-minute reset: I move cups to the dishwasher, refresh the mat if it’s soaked, and wipe the faucet area.
I find that microfiber mats dry faster than cotton, but cotton looks more “decor” if the sink is visible from the living room. The trade-off is microfiber can look utilitarian, so I choose a neutral gray or oatmeal tone.
Pro Tip: I’ve found that placing a small 8-inch squeegee under the sink lets me quickly clear pooled water around the faucet—this prevents that gritty ring that shows up the next morning.

17. Prep a kid-friendly lower counter snack bin to protect the charcuterie
I’ve found kids love the island because it’s eye-level to everything, which can be tricky during summer entertaining. I always create a kid snack option that’s easier to access than the “adult” board.
I fill one clear 12-quart bin with 20–30 snack items: applesauce pouches, mini pretzels, and 10–12 granola bars. I place it on a lower counter or breakfast table about 30–36 inches high, and I add a small stack of 6-inch paper plates. If drinks are involved, I set out 8–10 spill-resistant cups (12–14 oz) nearby and keep a roll of paper towels within 2 feet.
From my experience, this costs a bit more in snacks, but it saves the charcuterie from constant rearranging. I also like adding a small red-and-blue bowl of berries so it ties into 4th of july decor.
Pro Tip: I’ve found that putting the kid bin slightly away from the main path (even 5–6 feet) reduces collisions—kids settle in one spot instead of zig-zagging through the island crowd.
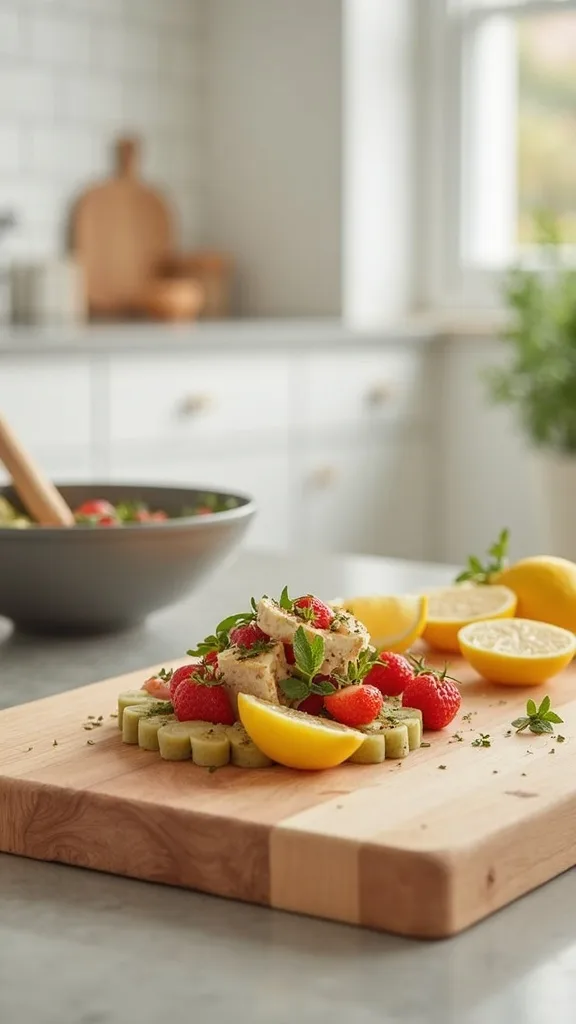
18. Use two cutting boards: one “display only” and one “working” board
I always recommend separating display and prep because it keeps your island looking intentional even when you’re actively hosting. From my experience, this is a simple trick that makes kitchen island entertaining feel polished without extra effort.
I set one large display board (around 24×16 inches) for the charcuterie and never cut on it once guests arrive. Then I keep a working board (18×12 inches, dishwasher-safe plastic) near the sink with a small paring knife and a damp towel underneath. I prep quick refills—like slicing a lemon or halving strawberries—in 2–3 minute bursts and return to the island without crumbs scattered everywhere.
I find that acacia or walnut looks great for display, while a BPA-free plastic board is easier for raw items. The trade-off is you’ll have one more item to wash, but you’ll protect your pretty board from stains and odors.
Pro Tip: I’ve found that placing a shallow 9×13-inch tray under the working board catches juice that would otherwise drip—especially from watermelon—and it keeps your counter seams from getting sticky.
19. Make a “condiment corral” so bottles don’t wander across the island
I find that sauces migrate during parties, and suddenly ketchup is next to the fruit stand. I always corral condiments so my summer entertaining setup stays neat and guests can find what they need fast.
I use a 12-inch lazy Susan or a 14×10-inch tray and group 6–8 items: mustard, ketchup, hot sauce, mayo, relish, and a salt/pepper set. I keep the corral within 18 inches of the hot-food corner (not the charcuterie) and add 2 small spoons for dips so people don’t double-dip with knives. If I’m doing a 4th of July cookout, I add a small jar of pickles and a squeeze bottle of BBQ sauce.
From my experience, decanting into matching squeeze bottles looks cleaner, but it takes 15–20 minutes and extra washing—so I only do it if I’m hosting a bigger group (10+ people).
Pro Tip: I’ve found that putting a folded paper towel under the lazy Susan keeps it from “skating” on slick quartz when someone spins it quickly—no more tray bumps that knock over bottles.

20. Set up a “napkin + stain stick” mini emergency kit in a drawer
From my experience, spills are inevitable during summer entertaining, and I feel calmer when I know exactly where my emergency supplies live. I always keep a tiny kit ready so I’m not hunting while guests stare.
I dedicate one drawer section and stock it with a stain remover pen, a 2 oz dish soap bottle, a pack of disinfecting wipes, and 2 microfiber cloths. I also keep a spare set of 20 napkins and a small roll of painter’s tape for quick labeling. This takes about 5 minutes to assemble, and I refresh it once a month during summer hosting season.
I find that having both paper towels and microfiber is key: paper absorbs, microfiber lifts residue. The trade-off is it uses drawer space, but it saves time and prevents small spills from becoming permanent marks on grout or fabric.
Pro Tip: I’ve found that keeping a single black hand towel in the kit is a lifesaver for mascara or BBQ sauce—dark towels hide stains mid-party so you’re not displaying a “crime scene” on your counter.
21. Do a 10-minute pre-party reset: clear counters, empty dishwasher, fresh hand soap
I always start by doing a short reset because it makes hosting feel lighter, even if my menu is simple. In my opinion, a 10-minute routine is more realistic than a full deep clean right before summer entertaining.
I set a timer for 10 minutes and do three things: clear 80% of counter clutter into a basket, empty the dishwasher so it’s ready for dirty dishes, and put out fresh hand soap plus a clean guest towel. If I have 5 more minutes, I wipe the island with a stone-safe spray and swap in a new trash bag. Typically, this is enough to make the kitchen feel “ready” even if the rest of the house isn’t perfect.
From my experience, citrus or light herbal soap scents feel summery, but strong fragrances can compete with food. The trade-off is you might skip decor, but you gain functional space and less stress.
Pro Tip: I’ve found that placing a small lidded 8–10 oz lotion by the sink reduces guests wiping greasy hands on towels—especially after burgers—so your towel stays presentable longer.
22. Use a cooler outside to reduce kitchen traffic (and protect your floors)
I find that the fastest way to unclog a crowded kitchen is to move some drinks outside. When I tried this for a 4th of July weekend, my party hosting kitchen instantly felt more spacious.
I set a 48–60 quart cooler on the patio and stock it with canned drinks plus 2 bags of ice (about 16 lb total). I place it 6–8 feet from the door so people aren’t dripping water on the threshold, and I add a small 12×18-inch outdoor mat underneath to catch melt. Inside, I keep only the “special” drinks on the island—like one 2-gallon dispenser and a small wine bucket.
From my experience, this saves floor cleanup, but it’s a trade-off if you want everyone inside chatting. I like it best when the party naturally flows outdoors anyway.
Pro Tip: I’ve found that freezing 6–8 water bottles ahead of time works like reusable ice packs—your cooler stays colder longer, and you end up with extra cold water instead of a sloshy mess.

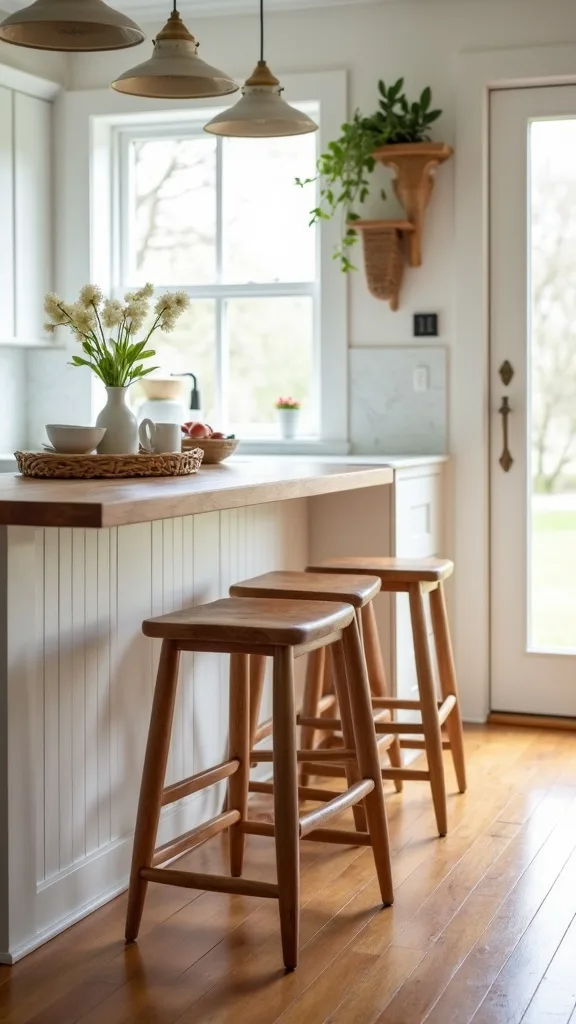
23. Make your island seating “perch-friendly” with footrests and bag hooks
I’ve found that people linger longer (in a good way) when island seating is comfortable, especially during kitchen island entertaining. I always tweak stools and accessories so guests aren’t juggling purses and phones.
I aim for a 10–12 inch gap between the seat and the underside of the counter for leg room, and I space stools about 24 inches apart so elbows aren’t touching. I add 2–3 adhesive bag hooks under the island overhang (rated for 10–15 lb) so handbags don’t land on the counter near food. If your stools don’t have footrests, I recommend adding a 48-inch slim foot rail (or a simple wooden foot bar) mounted about 6 inches off the floor.
From my experience, this costs more upfront, but it protects your counters and keeps the seating zone tidy. For style, I like woven rattan stools for a coastal summer party home feel, but they’re harder to wipe than metal.
Pro Tip: I’ve found that placing a small 6-inch felt pad under each stool leg reduces that constant scraping sound—your kitchen instantly feels more relaxed and conversation-friendly.
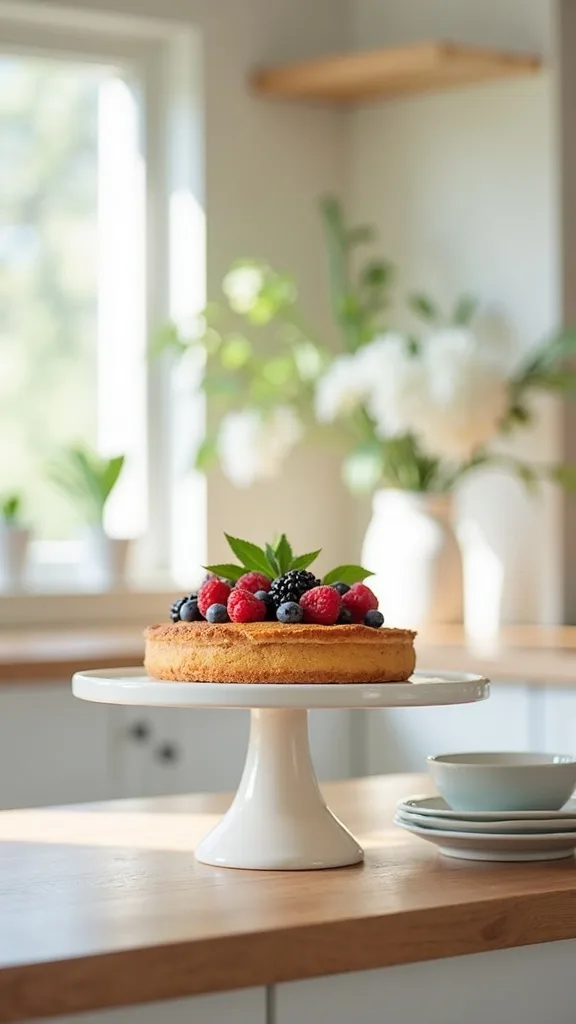
24. Set a “dessert landing” on a cake stand so the island can reset
I always plan dessert as the moment I reset the island, because it gives the party a natural second act. From my experience, a dedicated dessert landing keeps summer entertaining from feeling like one long messy buffet.
I place a 10–12 inch cake stand near the end of the island and keep it empty until I’m ready. Then I bring out dessert in one move—like 12 brownies or 18 cookies—plus a small 6-inch bowl of berries. I keep a stack of 15–20 cocktail napkins and a small knife right there, and I clear the main grazing board into the fridge within 3–5 minutes.
I find that glass cake stands feel classic, while melamine stands are safer if kids are running through. The trade-off is melamine can scratch, but it won’t shatter on tile.
Pro Tip: I’ve found that placing a sheet of parchment cut to a 10-inch circle on the stand makes cleanup nearly instant—lift, toss, wipe—so you’re not stuck scrubbing chocolate off a pedestal.
25. End-of-night 12-minute cleanup sprint: bag, load, wipe, reset
I always end my gatherings with a short cleanup sprint because it protects my next morning. In my opinion, summer entertaining feels more sustainable when I don’t leave a total disaster behind.
I set a timer for 12 minutes and do four steps: (1) tie up trash and replace the liner (2 minutes), (2) load dishwasher with cups/plates (4 minutes), (3) wipe island and sink area with a damp microfiber + gentle cleaner (4 minutes), and (4) reset one “pretty” item like the fruit stand for the next day (2 minutes). If I’m exhausted, I stop there—deep cleaning can wait.
From my experience, keeping a small caddy with wipes, microfiber cloths, and a countertop spray under the sink makes this doable. The trade-off is you’ll still have some dishes, but you’ll wake up to a kitchen that feels 80% normal.
Pro Tip: I’ve found that running the garbage disposal with 2–3 ice cubes and a squeeze of dish soap at the very end reduces odors overnight—especially after fruit peels and charcuterie scraps—so your kitchen smells fresh in the morning.
Final Thoughts
I find that the most memorable summer gatherings aren’t the ones with complicated menus—they’re the ones where people feel comfortable moving, snacking, and helping themselves without asking permission every two minutes. When I design a party hosting kitchen, I’m really designing a flow: where hands land, where cups go, and where mess disappears.
From my experience, the island is your strongest tool for summer entertaining, as long as you give it a simple job: grazing + drinks + cleanup cues. If you try only one thing for 4th of July prep, I’d start with the 3-zone island map and the pull-out trash bin reveal, because those two changes typically reduce clutter and confusion right away.
I always remind myself that trade-offs are normal—more disposable pieces can mean less dish stress, while real plates can feel nicer but require more cleanup. Pick the version that fits your energy, set your zones, and host the kind of summer party home you actually want to be in.
What I’d Do Differently
When I first tried this kind of summer entertaining setup, I made one specific mistake: I put the drink station right next to the fridge because I thought it was “efficient.” In reality, it created a constant knot of people—someone grabbing ice, someone hunting for soda, someone refilling water—so the entire kitchen felt blocked for nearly 2 hours. I also noticed more spills because guests were turning around with full cups in a tight space. The correct approach (that I use now) is to move drinks 4–6 feet away from the fridge and give them their own tray or bar mat, then keep the fridge zone clear for quick in-and-out access.
From my experience, I also wish I’d known how powerful the pull-out trash bin reveal is—once I started cracking it open 6–8 inches and labeling it, people stopped leaving napkins everywhere. If you’re prepping for 4th of July, I recommend choosing just one “hero” island moment (fruit stand + charcuterie flow) and one cleanup win (trash + dish drop zone), then start setting it up today.
Products I Recommend for This Project
Here are some of my favourite products to help you bring these ideas to life:
- Simplehuman 45 Liter / 12 Gallon Slim Step Trash Can — I find that the slim footprint works near a patio door without eating up your walkway.
- OXO Good Grips 3-Piece Stainless Steel Mixing Bowl Set — I always use these for berries, chips, and ice because they’re lightweight and chill fast.
- Prodyne Bamboo Cheese Board with 4 Knives — From my experience, having dedicated cheese knives reduces the “where do I put this?” mess on the island.
- Creative Co-Op 3-Tier Metal Stand — I recommend a tiered stand like this to go vertical and free up 24–30 inches of serving space.
- STARLYF Rechargeable Under Cabinet Lights (Puck Lights) — I’ve found rechargeable pucks are an easy way to add warm white light (2700K–3000K — the cosy, yellowish tone you see in most homes) without wiring.