This post contains affiliate links. As an Amazon Associate, I earn from qualifying purchases at no extra cost to you.
Are you looking for toy organization that doesn’t fall apart the second summer break starts? Do you want kids toy storage that your kids can actually use without you doing a nightly rescue mission?
I always start by designing storage around how kids play in real life: fast dumps, quick swaps, and a lot of “I’ll use it again tomorrow.” In this post, I’m sharing 25 practical playroom storage solutions that work especially well in a garage or utility-style space where you want function first (but still want it to feel inviting).
In my opinion, this is perfect for parents and caregivers who need affordable systems, renters who can’t build permanent cabinetry, and anyone trying to keep summer activities from taking over the whole house.
From my experience, the biggest wins come from low open cubbies, color-coded bins, and one soft “play zone” that visually contains the mess. I’m also including my favourite ways to handle art, tiny parts, and big awkward toys without buying expensive custom built-ins.
I find that once you set up a simple “zones + bins + labels” rhythm, cleanup gets dramatically faster—often under 10 minutes on a normal day. Below are 25 Toy Organization & Playroom Storage Ideas that…
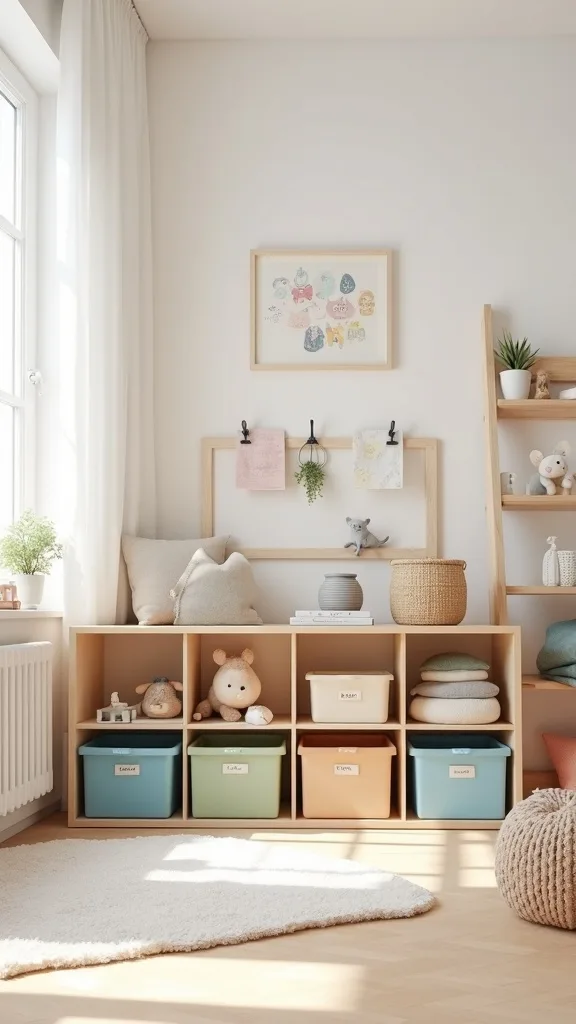
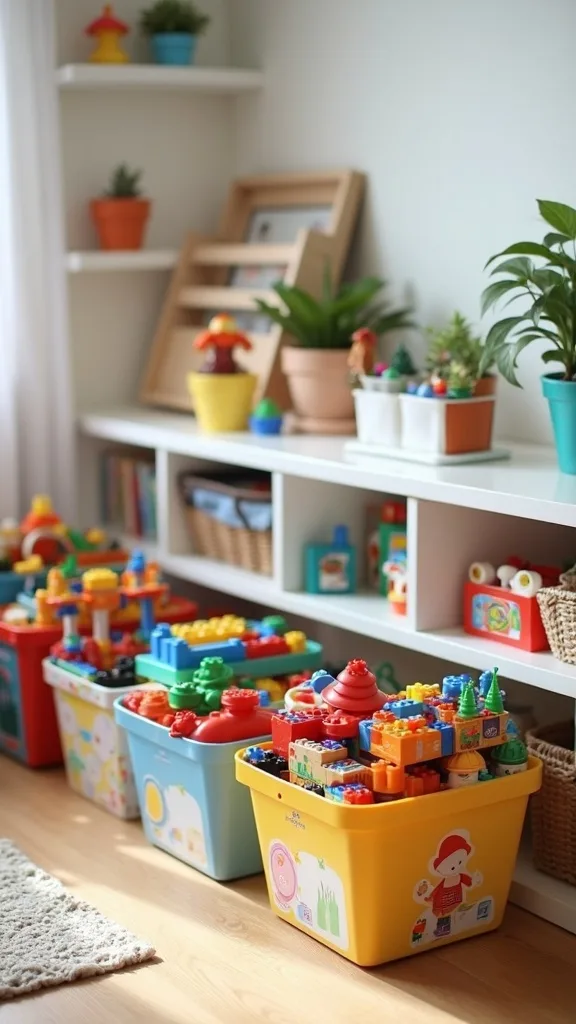
1. Low Open Cubbies + Labeled Color Bins + Soft Rug Zone + Art Display Clips
I always start by anchoring garage toy organization with a low, open cubby wall because kids can see everything and put it back without asking me. When I design this look, I aim for a 72-inch-wide cubby unit that’s about 30–36 inches high, so even a preschooler can reach the top row safely.
I find that it works best when I pair the cubbies with 10–12 color bins (11″ or 13″ fabric cubes) and label each bin with 2-inch vinyl letters or a label maker strip. I typically leave a 5×7 ft washable rug in front as a “soft landing zone,” and I mount 6–8 wall art display clips (like a wire-and-clip set) about 54 inches from the floor so it’s visible but out of toy-grab range.
From my experience, black metal clips, white labels, and 3–4 bin colors (blue/green/yellow/red) look organized without feeling fussy. I also like using a low-pile polypropylene rug because it vacuums easily and doesn’t trap LEGO pieces as badly.
Pro Tip: I’ve found that if I keep one cubby completely empty (a true “overflow slot”), the whole system stays functional during high-chaos weeks—especially when kids bring in 2–3 new summer activity items at once.
2. Create 5 Play Zones Using Painter’s Tape on the Garage Floor
From my experience, the fastest way to make playroom ideas work in a garage is to give toys boundaries you can literally see. I always use painter’s tape to map out 4–5 zones so kids stop migrating toys across the entire space.
I recommend starting with a 6×8 ft “building zone,” a 4×6 ft “pretend zone,” and a 3×5 ft “quiet zone” near the rug, then leaving a 24-inch walkway clear to the door. I find that 2-inch blue painter’s tape holds up for about 2–3 weeks in most garages, and then I refresh it in 15 minutes when it starts to peel.
When I tried this the first time, I kept the tape lines simple (straight rectangles) and used matching bin colors to each zone—like green bins for building and yellow for pretend. Typically, this makes cleanup feel like a game instead of a lecture.
Pro Tip: I’ve found that if I run a second “buffer line” 6 inches outside the zone, kids naturally stop at the first line but you still have a margin before toys spill into walkways—especially helpful for rolling cars and balls.
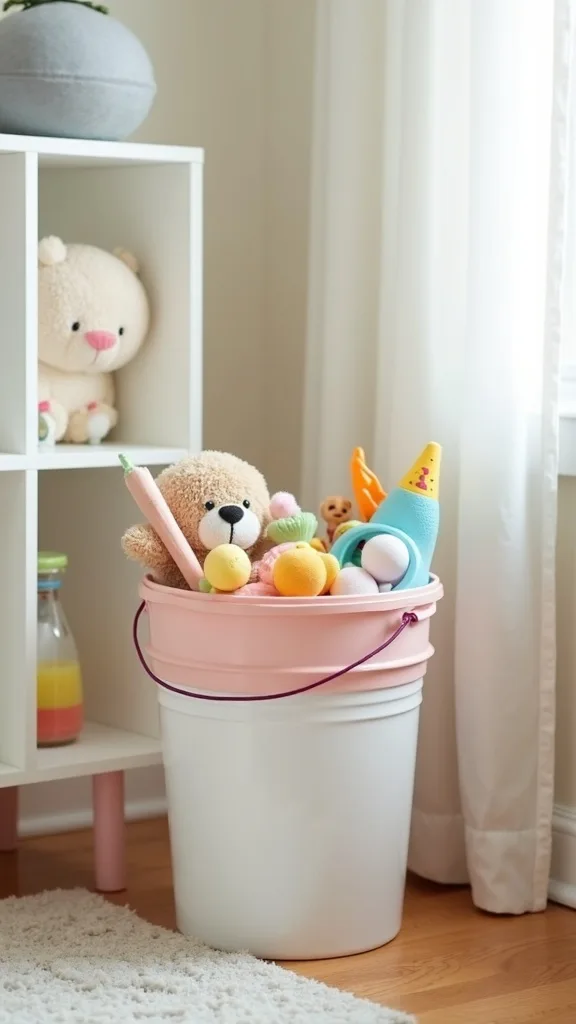
3. Use a 5-Gallon Bucket “Summer Grab-and-Go” Station
I find that summer breaks create a flood of outdoor toys, so I always dedicate a grab-and-go station to stop them from mixing into indoor kids toy storage. From my experience, a simple 5-gallon bucket setup is cheap, durable, and easy for kids to carry.
I recommend 3 buckets total: one for sidewalk chalk, one for bubbles and wands, and one for water toys—each with a laminated label that’s about 3×5 inches. I usually mount a $12 wall hook strip 48 inches high so the bubble refills stay out of reach, and I keep the buckets on a 18-inch-deep boot tray to catch drips.
When I design this look, I choose white buckets and add colored rope handles (about 3/8-inch thick) so the colors match my bin system. Typically, I’ll add a small mesh bag inside one bucket for tiny caps and bubble tools.
Pro Tip: I’ve found that drilling 6–8 drainage holes (1/4 inch) in the bottom of the water-toy bucket prevents that sour “stagnant water” smell that can show up within 48 hours in warm weather.
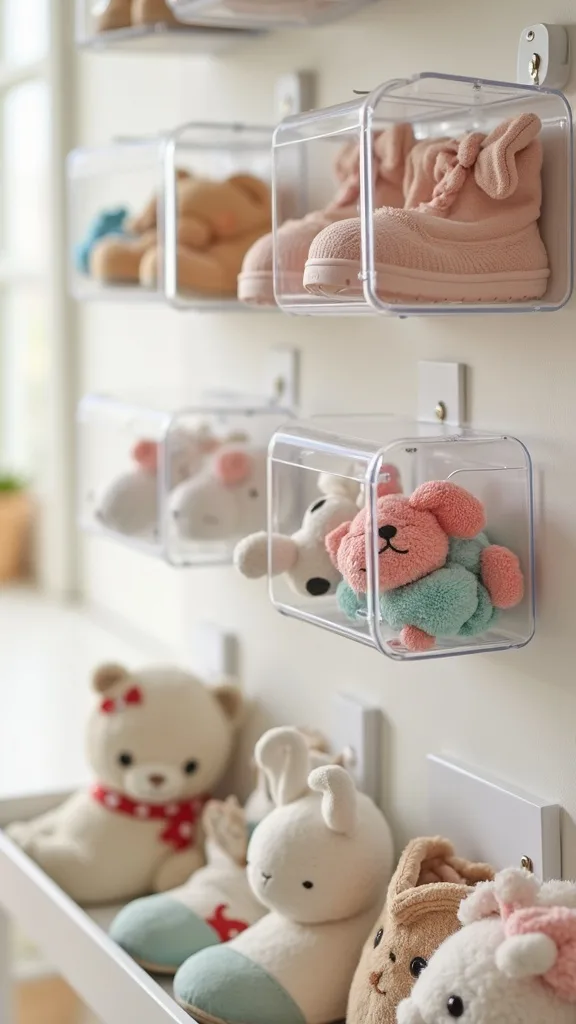
4. Hang Clear Shoe Organizers for Tiny Toys and Accessories
I always recommend a clear over-the-door shoe organizer for tiny toy clutter because it turns “mystery piles” into visible categories. From my experience, it’s one of the easiest toy bins organization upgrades when you don’t have more floor space.
I find that a 24-pocket organizer (roughly 64×19 inches) works for dolls accessories, action figure gear, and small cars, and I like to mount it on a wall using 4 heavy-duty Command hooks instead of the door if the garage door gets banged around. I typically label rows by category with 1-inch label tape and keep the bottom 2 rows for “today’s favorites” so kids don’t dump everything to reach them.
When I tried this, I chose thick vinyl pockets because the thin fabric ones sag after about 2–4 weeks of heavy use. In my opinion, clear pockets also reduce “I can’t find it” meltdowns because kids can scan visually.
Pro Tip: I’ve found that grouping pockets by “sets” (all doll shoes in 4 pockets, all doll hair items in 4 pockets) works better than single-item pockets, because kids can actually put things away without needing perfect sorting.
5. Build a Rolling Toy Cart with Two 27-Gallon Totes
From my experience, rolling storage is a lifesaver in a garage playroom because you can shift the whole mess away from the car in under 60 seconds. I always build a simple cart that holds two 27-gallon heavy-duty totes for bulky toys.
I recommend a 30×18 inch furniture dolly (rated around 800 lb) and two totes with snap lids, then I add a 1-inch ratchet strap to keep them from sliding when kids yank them around. I find that labeling the lids with 3-inch stencil letters (like “BALLS” and “TRACKS”) makes the system work even when the totes are stacked.
When I design this look, I choose black-and-yellow totes because they’re easy to spot and typically tougher than thin clear bins, but I’ll admit they cost a bit more upfront than basic storage. In my opinion, the trade-off is worth it if you’re storing outdoor gear or heavier toys.
Pro Tip: I’ve found that adding a cheap rubber drawer liner sheet between the dolly and the bottom tote stops the annoying “creep” that happens on smooth concrete, especially when kids turn corners too fast.

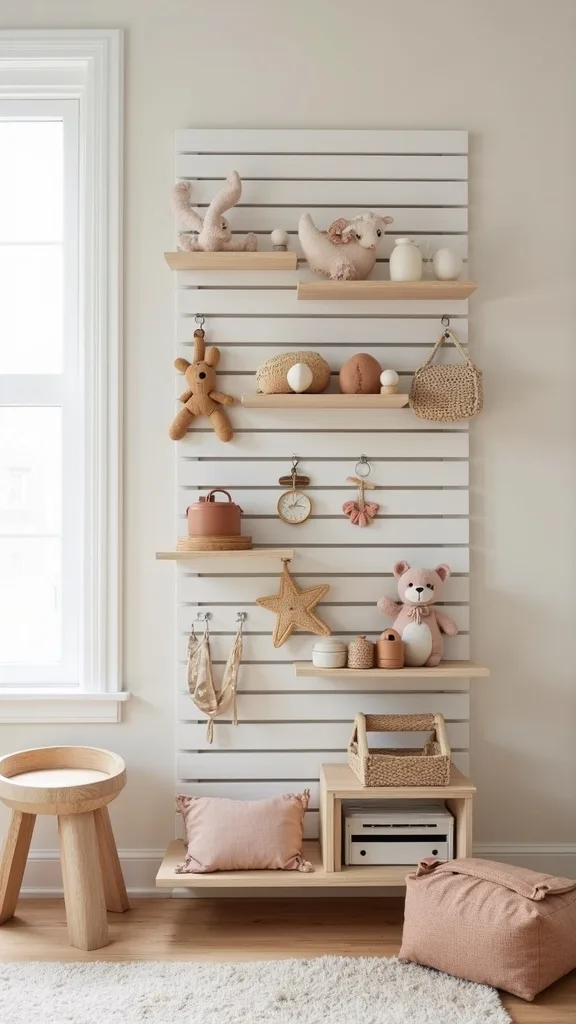
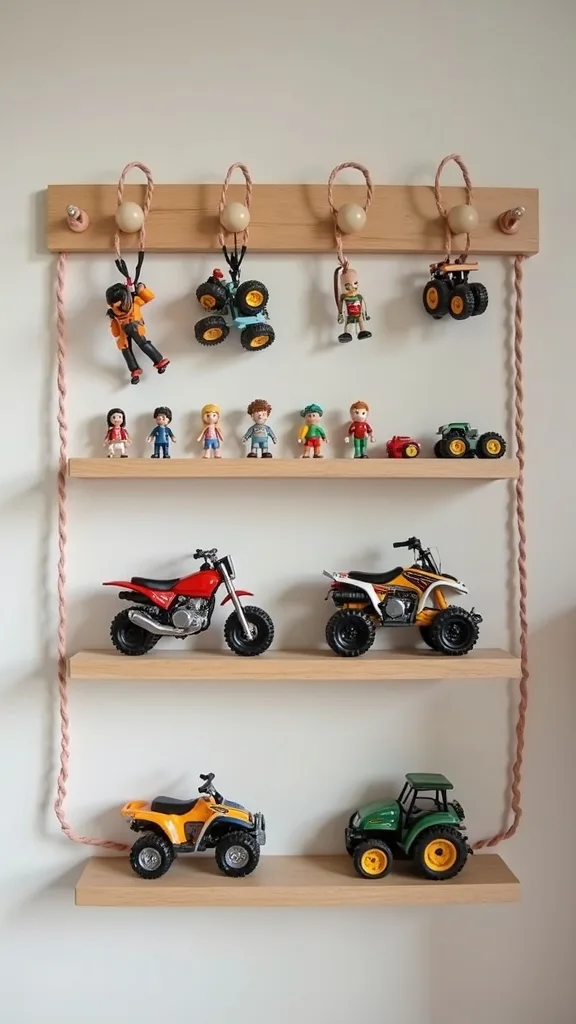
6. Install a 48-Inch Slatwall Panel for Vertical Toy Storage
I find that going vertical is the quickest way to reclaim floor space, and slatwall makes garage playroom storage feel intentional instead of improvised. From my experience, a single 48×24 inch slatwall panel can replace an entire pile of random hooks.
I always start by mounting the panel into studs with 2 1/2-inch wood screws and washers, and I keep the bottom edge about 36 inches off the floor so kids can reach some hooks while I keep sharp items higher. I recommend adding 6–10 slatwall hooks and 2 wire baskets for helmets, jump ropes, and skate pads, spaced about 6 inches apart so items don’t tangle.
When I tried this, I used white slatwall with black hooks because it reads clean and matches most bin systems. Typically, I’ll reserve one basket for “borrowed from outside” toys so they don’t disappear into the house.
Pro Tip: I’ve found that using one hook specifically for a “return lanyard” (a bright ribbon tied to a basket) helps kids remember where helmets go—because the visual cue is stronger than labels for gear they grab quickly.
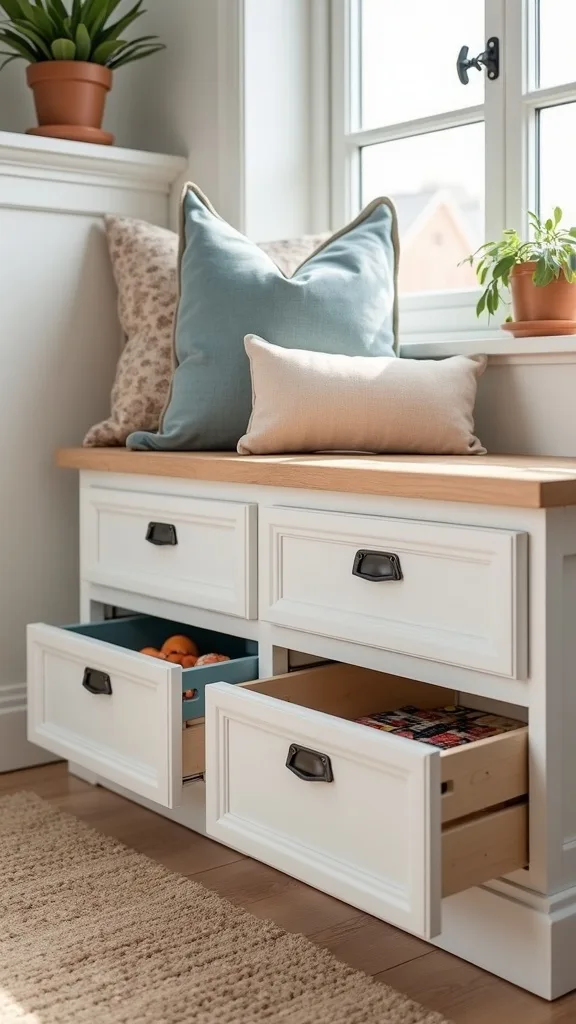
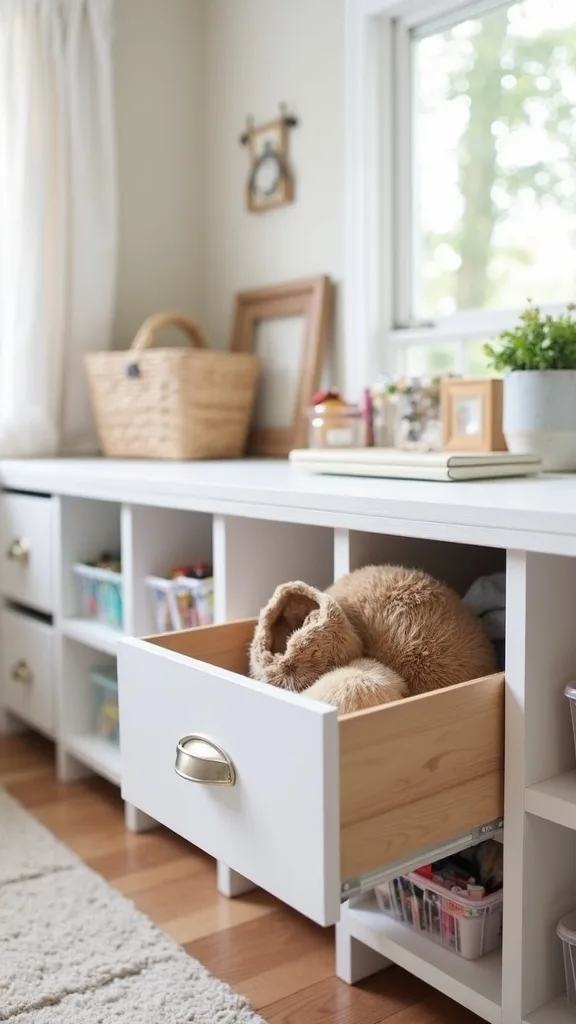
7. Use Under-Bench Drawers for Board Games and Puzzles
In my opinion, board games and puzzles are the easiest category to keep tidy if I give them flat, slide-out storage instead of stacking them in a tower. I always tuck them under a bench so the garage playroom still feels like a room, not a warehouse.
I recommend a 48-inch storage bench paired with two 28-quart under-bed drawers (low-profile, about 6 inches tall). I find that adding a simple inventory card inside each drawer lid saves time, and I rotate 6–8 games every 2 weeks to keep interest high without overflowing the space.
From my experience, felt drawer liners reduce box wear, and a small roll of clear packing tape can reinforce puzzle box corners that start splitting. Typically, I keep puzzles in 1-gallon zip bags inside the box so pieces don’t scatter when kids pull them out fast.
Pro Tip: I’ve found that storing puzzles vertically (like files) inside the drawer works better than stacking, but only if I add two 10-inch bookends—otherwise the boxes slump and the drawer becomes a jammed mess.
8. Magnetic Strip for Hot Wheels, Mini Figures, and Metal Accessories
I find that tiny collectibles become instant clutter unless I give them a “display home,” and a magnetic strip is a surprisingly tidy form of toy organization. From my experience, it also reduces the urge to dump everything out just to see what’s there.
I recommend installing a 24-inch heavy-duty magnetic tool holder about 42 inches high, then adding a second one 8 inches above it if you have a bigger collection. I always test with 3–4 items first because not all toys have enough metal to grip, and I keep the strip away from electronics by at least 12 inches, just to be safe in most cases.
When I tried this, I used matte black strips and mounted them on a painted plywood backer so the wall doesn’t get dinged. In my opinion, it’s a low-cost “gallery” moment that makes the garage playroom feel curated.
Pro Tip: I’ve found that adding a thin 1/8-inch acrylic spacer behind the strip makes it easier for little fingers to pull items off without scraping knuckles on the wall—small detail, big usability win.
Cost & Materials Estimate
For most garage playroom setups, I typically see a realistic total cost of about $120–$650 depending on how many zones and wall systems you add.
| Item | Estimated Cost | Where to Buy |
|---|---|---|
| 72-inch cube organizer (8–12 cube) | $85–$180 | IKEA / Wayfair |
| Fabric cube bins (set of 10–12) | $35–$75 | Amazon / IKEA |
| 5×7 ft washable rug (low pile) | $45–$120 | Wayfair / Amazon |
| Wall art display wire + 12–18 clips | $18–$45 | Amazon / Home Depot |
| Label maker + tape (or vinyl label kit) | $22–$55 | Amazon / Lowe’s |
| Interlocking foam tiles (9–12 tiles) | $28–$65 | Amazon / Home Depot |
Total estimated cost: $120–$650 I always recommend saving money on bins (shop sets) and splurging a little on the rug and labels because those two pieces make the system feel usable every day.
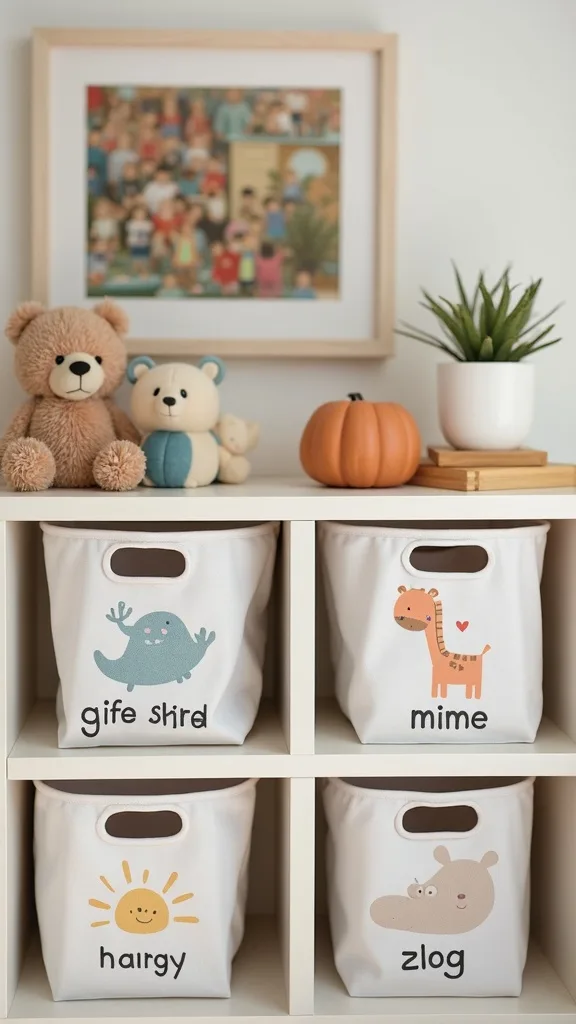
9. Label Bins with Pictures + Words for Pre-Readers
I always recommend picture-and-word labels because they keep toy bins organization working even when kids can’t read yet. From my experience, the moment kids can self-sort, cleanup becomes less of a negotiation.
I find that 3×4 inch labels are the sweet spot: big enough to see from 6 feet away, but not so big they peel. I usually print labels on cardstock, slide them into clear label pockets, and attach them with two strips of industrial Velcro so I can swap categories in under 5 minutes when interests change.
When I design this look, I keep the label style consistent—same font, same border color—and I limit categories to 8–10 total bins to avoid “decision fatigue.” In my opinion, fewer bins that are clearly defined beats a wall of tiny categories that nobody follows.
Pro Tip: I’ve found that if I put the picture on the left and the word on the right, kids naturally learn the word faster because they “confirm” it after recognizing the image—an easy literacy boost built into storage.
10. Use a 3-Tier Wire Shelf for “Toy Rotation”
From my experience, toy rotation is the secret to keeping a garage playroom from exploding, and I always set it up like a mini “library.” I find that when only a portion of toys are available, kids play longer with what’s out.
I recommend a 3-tier wire shelving unit around 23×14 inches, and I assign each shelf a timeframe: “this week,” “next week,” and “resting.” I typically rotate 1–2 bins every 7 days, and I keep a small note on my phone so I’m not guessing what’s been out too long.
When I tried this, I used clear 12-quart bins with locking lids so I can see what’s inside without opening everything. In my opinion, clear bins cost a bit more than solid ones, but they save time and reduce duplicate purchases.
Pro Tip: I’ve found that putting the “resting” toys on the middle shelf (not the top) reduces sneaky climbing—kids can’t resist the top shelf if it’s at eye level, so I keep it for lightweight craft refills instead.

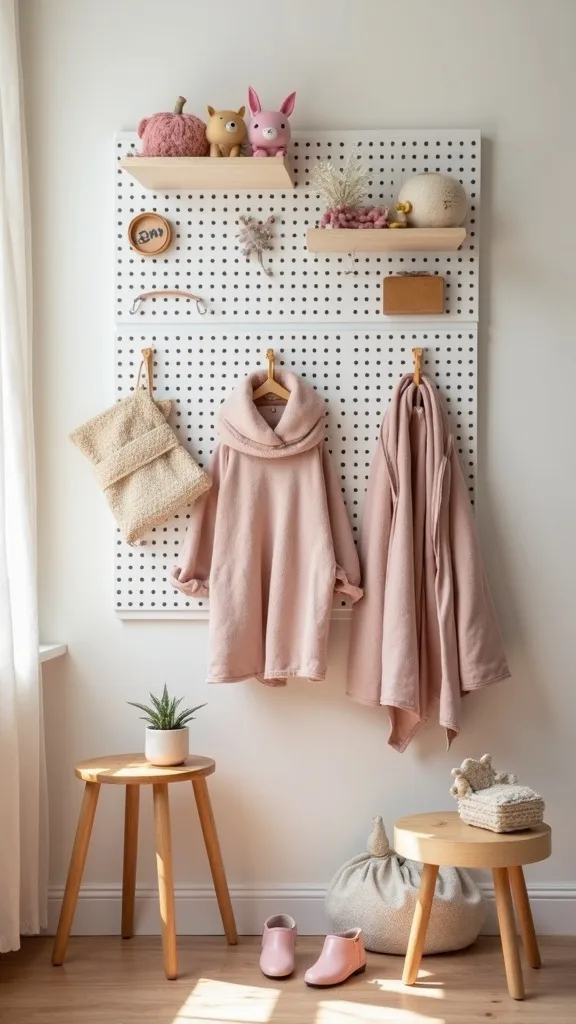
11. Add a 36-Inch Pegboard for Dress-Up and Pretend Play
I always love using pegboard for dress-up because it keeps costumes visible and off the floor, which is half the battle with kids toy storage. From my experience, it also dries out sweaty capes and hats faster than a closed bin.
I recommend a 36×24 inch pegboard panel with a 1×2 inch furring strip frame behind it (so hooks sit properly). I typically mount it with 4 screws into studs and add 8–12 peg hooks plus 2 small peg baskets for masks and gloves, spacing hooks about 4 inches apart so items don’t overlap.
When I design this look, I paint the pegboard the same color as the wall (even a simple white) and use natural wood pegs or black metal hooks for a cleaner vibe. In my opinion, it’s a small DIY step that makes a garage corner feel like a real playroom.
Pro Tip: I’ve found that adding one “outfit limit” hook (labeled “2 costumes max”) prevents the pegboard from becoming a costume avalanche, because kids will always fill whatever space you give them.
12. Sort LEGO by Activity, Not Color (and Use 6-Quart Shoebox Bins)
In my opinion, LEGO storage stays manageable when I sort by activity—like “minifigs,” “vehicles,” and “instructions”—instead of obsessing over color. From my experience, color-sorting looks satisfying for about 1 day, then real life happens.
I always start with 6–8 shoebox-size bins (around 6 quarts each) and keep them in a single cubby row that’s 30–36 inches high. I find that adding one 11×17 inch cafeteria tray for building keeps pieces contained, and cleanup is usually under 8 minutes because you pour the tray back into the correct bin.
When I tried this, I used clear bins with snap lids for “special sets” and open-top bins for daily play. Typically, the trade-off is that open bins look messier, but they’re easier for kids to use consistently.
Pro Tip: I’ve found that keeping instruction booklets in a 1-inch binder with sheet protectors prevents the “missing manual” problem that kills interest—especially for sets kids want to rebuild during rainy summer afternoons.
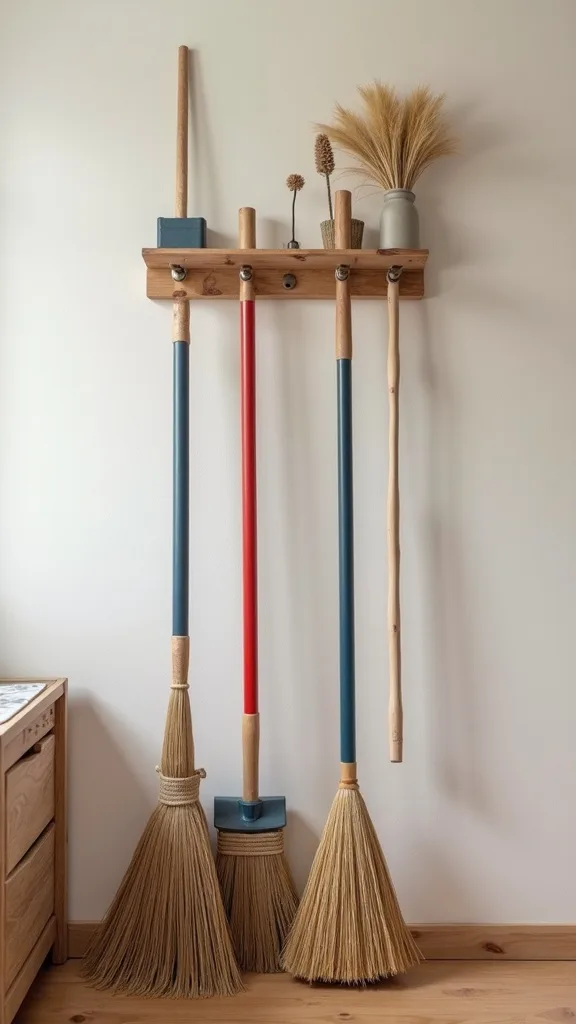
13. Use a Wall-Mounted Broom Clip Rail for Bats, Sticks, and Foam Swords
I find that long toys are the sneakiest clutter category because they don’t fit in bins, so I always hang them. From my experience, a broom clip rail turns awkward items into tidy vertical storage in minutes.
I recommend a 24-inch clip rail with 5–6 rubber grips, mounted about 48–54 inches high so kids can reach foam swords but not whack each other while grabbing them. I typically leave 3 inches between clips so handles don’t collide, and I add a small 12-inch basket below for “tips and extras” like Nerf darts or tennis balls.
When I design this look, I choose white rails on light walls or black rails on darker walls so it reads intentional. In my opinion, it’s one of the cheapest upgrades (often $15–$25) with a big day-to-day payoff.
Pro Tip: I’ve found that if I angle the rail slightly (about 5 degrees) before tightening the screws, heavier items like plastic bats sit more securely and don’t slowly slide out of the clips over time.
14. Make a “One-Bin Per Kid” Personal Caddy System
From my experience, shared bins are where arguments start, so I always create a personal caddy for each kid. I find that “one bin per kid” makes toy organization feel fair and reduces the constant mixing of special items.
I recommend 1 caddy each in the 12–16 quart range, and I label them with a 2-inch name decal on both the front and the lid. I typically set a weekly reset—every Sunday evening for 10 minutes—where each kid returns their caddy to their assigned cubby (usually the bottom row, under 24 inches high).
When I tried this, I used bright, distinct colors (one red, one teal, one purple) so kids can spot theirs instantly. In my opinion, the trade-off is that it can look more colorful than a neutral aesthetic, but it’s worth it for everyday function.
Pro Tip: I’ve found that adding a “caddy rule” (everything must fit with the lid closed) naturally limits hoarding without me having to constantly declutter—kids self-edit when space is finite.
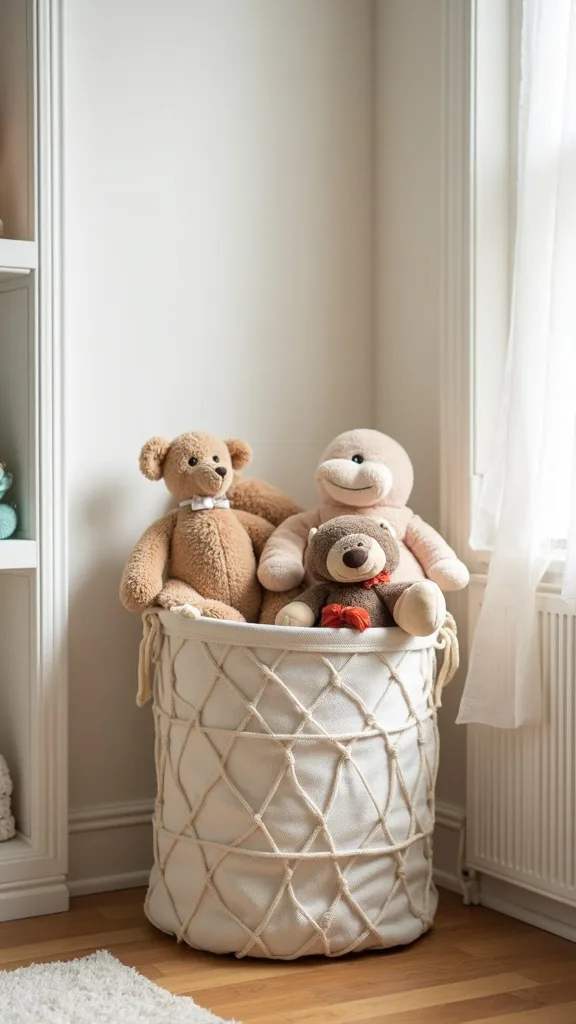
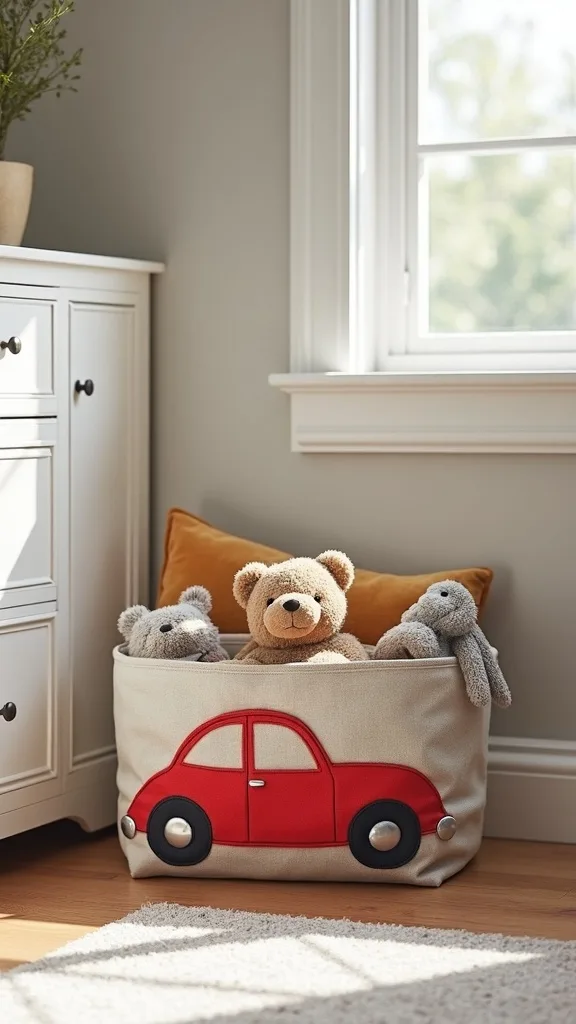
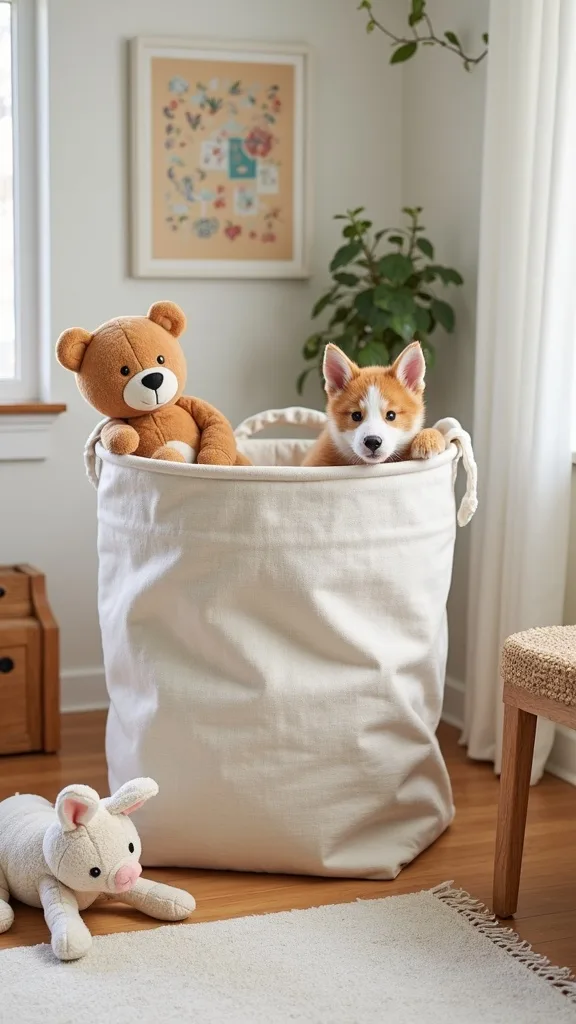
15. Use a 20-Inch Lidded Hamper for Stuffed Animals (Not a Giant Net)
I find that stuffed animals need breathable containment, but I always avoid the big wall net in a garage because it collects dust and looks chaotic fast. From my experience, a lidded hamper gives you cleaner lines and quicker resets.
I recommend a 20–22 inch round hamper with a lid and handles, and I keep it within 3 feet of the rug zone so kids can “toss and go.” I typically set a simple limit—about 15–25 plushies depending on size—and I do a 5-minute “plush sweep” before bedtime on weekdays.
When I design this look, I choose a wipeable plastic or resin hamper rather than woven seagrass, because garages can be humid and woven fibers can smell musty in most cases. In my opinion, the plastic version costs a bit less and lasts longer, but it’s slightly less cozy-looking.
Pro Tip: I’ve found that putting two cedar blocks in the bottom of the hamper (replaced every 2–3 months) helps keep plush from picking up that garage odor—especially in summer heat.
16. Create a “Car Trunk Bin” for Toys That Travel
I always recommend separating “travel toys” from home toys because it prevents the constant back-and-forth that breaks kids toy storage. From my experience, a dedicated trunk bin saves time when you’re running to the park, pool, or grandparents’ house.
I find that a 40–50 liter collapsible trunk organizer works well, and I stock it with 1 small first-aid kit, 2 microfiber towels, and a zip pouch for sunscreen and bug spray. I typically refresh it every 2 weeks in summer, and I keep a laminated checklist (about 4×6 inches) in the front pocket so I don’t forget bubble refills or goggles.
When I tried this, I used a gray organizer with bright zipper pulls so it’s easy to see in a dark trunk. In my opinion, the trade-off is that some toys “live” in the car, but that’s exactly what keeps your garage system from unraveling.
Pro Tip: I’ve found that putting a small mesh laundry bag inside the trunk bin makes sandy toys manageable—when you get home, you can shake the bag out outside instead of vacuuming the trunk later.
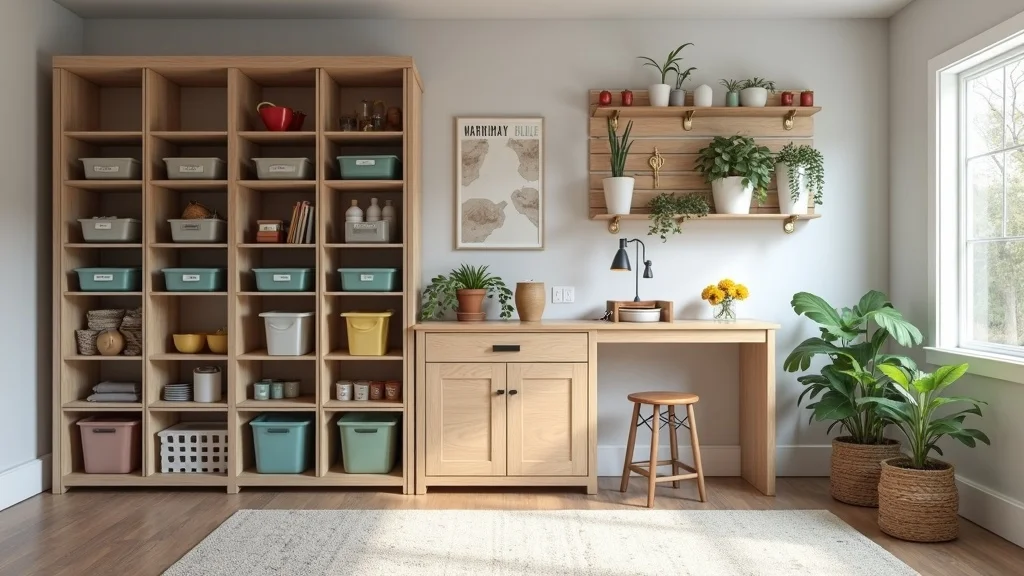
17. Use Clear Drawer Units for Craft Supplies (and Cap the Quantity)
From my experience, crafts can overwhelm a playroom faster than any other category, so I always give them their own “closed system.” I find that clear drawers keep supplies visible while preventing the classic glitter-spill disaster.
I recommend a 3-drawer clear plastic unit (about 12×14 inches) and I limit each drawer to one category: coloring, paper, and adhesives. I typically keep only 2 glue sticks, 1 bottle of school glue, and 1 roll of painter’s tape in the adhesive drawer, and I restock monthly instead of storing bulk where kids can access it.
When I design this look, I add drawer labels that are 1 inch tall and color-coded to match bins (blue for coloring, yellow for paper). In my opinion, the trade-off is that you’ll do small restocks more often, but you’ll waste less and clean up faster.
Pro Tip: I’ve found that storing markers tip-down in a 12-slot acrylic organizer inside the drawer keeps them writing longer—especially during summer when caps don’t always get clicked shut perfectly.
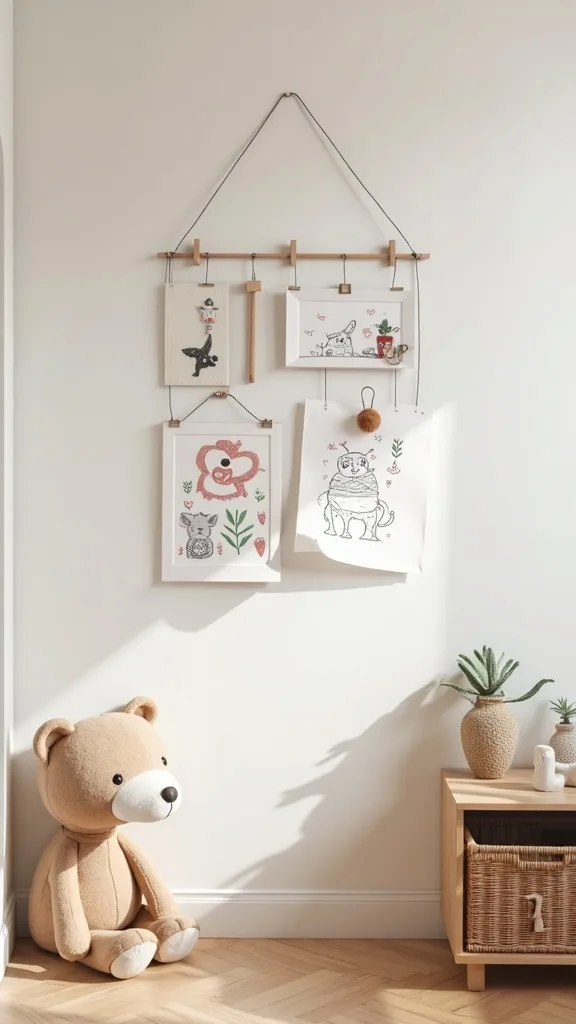
18. Mount a 6-Foot Gallery Wire with Clips for Rotating Kid Art
I find that displaying art is a powerful part of playroom ideas because it makes the space feel like it belongs to kids, not just their stuff. From my experience, a simple wire-and-clip system keeps papers from piling up on every surface.
I recommend a 6-foot gallery wire mounted with 2 wall anchors or into studs, placed about 54–60 inches high so it’s visible above cubbies. I typically use 12–18 mini clothespin clips and rotate pieces every 7–10 days, keeping only a 1-inch stack of “keepers” in a labeled portfolio envelope.
When I tried this, I used a black-coated wire with natural wood clips because it looks clean against most garage walls. In my opinion, it costs a little more than taping art up, but it saves paint and reduces wall damage over time.
Pro Tip: I’ve found that adding one clip labeled “IN PROGRESS” prevents half-finished drawings from getting crumpled—kids know exactly where to park a project without it becoming countertop clutter.
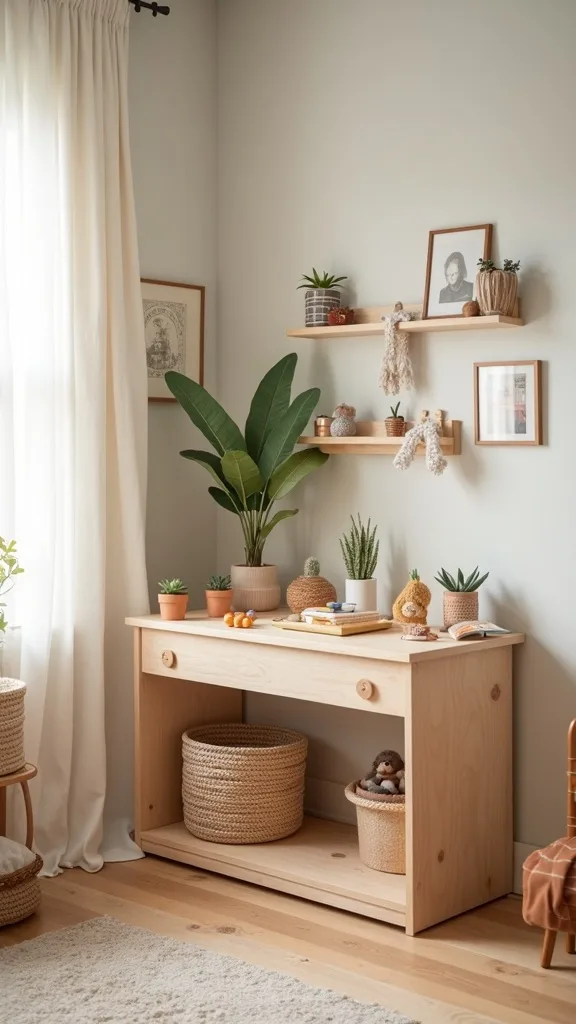
19. Use a 2×4-Foot Folding Table as a “Summer Activity Station”
I always recommend giving messy activities a dedicated surface, because it protects your storage system from becoming a craft explosion. From my experience, a small folding table makes garage playroom storage more functional without committing to built-ins.
I find that a 2×4 ft folding table plus a wipeable vinyl tablecloth works for kinetic sand, water beads (supervised), and painting. I typically keep a 12-quart “activity bin” under the table and set a 30-minute timer for messy play, followed by a 10-minute reset so supplies go back immediately.
When I design this look, I add a $10 paper towel holder and a small caddy with 6 plastic cups for rinsing brushes. In my opinion, the trade-off is you’ll see the table when it’s folded up, but the payoff is fewer stains and faster cleanup.
Pro Tip: I’ve found that placing a cheap 3×5 ft office chair mat under the table catches paint drips and sand grains better than a rug—and it’s easier to hose off outside once a month.
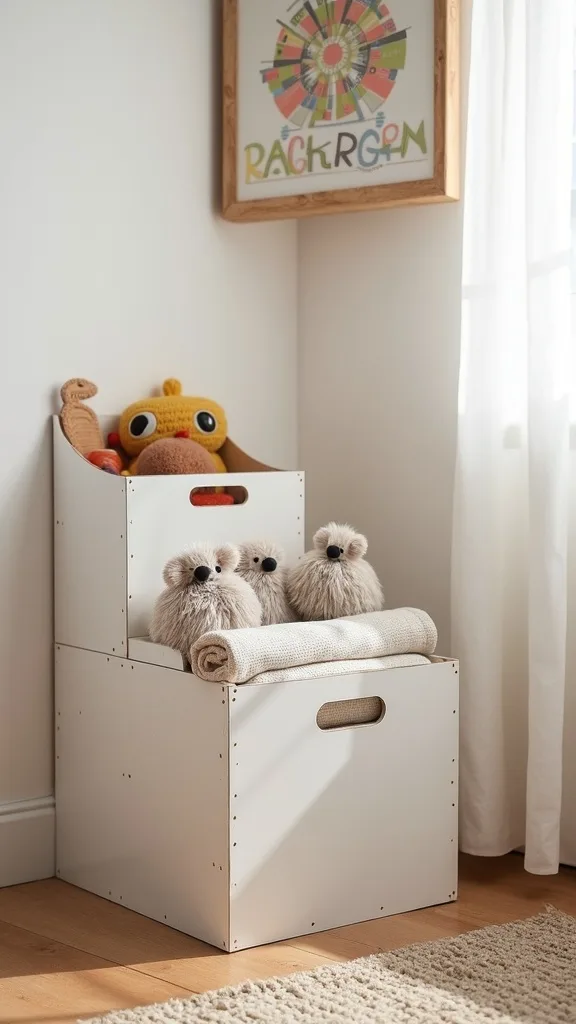
20. Use “Open-Top” Bins for Daily Toys and Lidded Bins for Backstock
In my opinion, mixing open-top and lidded bins is the most realistic approach to toy organization. From my experience, kids consistently use open bins, while lidded bins protect the stuff you don’t want dumped daily.
I always set up 6–8 open fabric cubes for everyday categories (cars, dolls, blocks), and I keep 3–4 lidded bins (12–18 gallons) on the top shelf for overflow. I typically place the top shelf at 60–66 inches high so it’s adult-access only, and I label those bins with 3-inch bold lettering so I can grab the right one quickly.
When I tried this, I used matching label style on both bin types so it still looks cohesive. In my opinion, the trade-off is that open bins look slightly messier, but they drastically reduce the “dump-and-run” behavior.
Pro Tip: I’ve found that if I angle open bins outward by even 1 inch (pulling them forward in the cubby), kids are more likely to toss toys back in—because the opening is visually obvious and feels like a target.
21. Add a “Parts Parking Lot” for Sets with Tiny Pieces
I find that sets with tiny parts are where organization goes to die, so I always create a dedicated “parts parking lot.” From my experience, this one change prevents 80% of missing-piece frustration.
I recommend 4–6 small clear containers (12–16 oz) with screw-top lids, stored in a shallow 12×16 inch tray. I typically label each container with a 1-inch label (like “MAG TILES” or “DOLL SHOES”) and I set a rule that parts only open on the rug zone, not on the driveway or near the car.
When I tried this, I used restaurant-style condiment containers because they’re cheap and surprisingly durable. In my opinion, the trade-off is you’ll spend a little time labeling, but you’ll save hours of hunting later.
Pro Tip: I’ve found that keeping one empty container labeled “FOUND PARTS” helps when kids discover random bits—everything lands in one place, and you can reunite pieces during a 5-minute weekly reset.
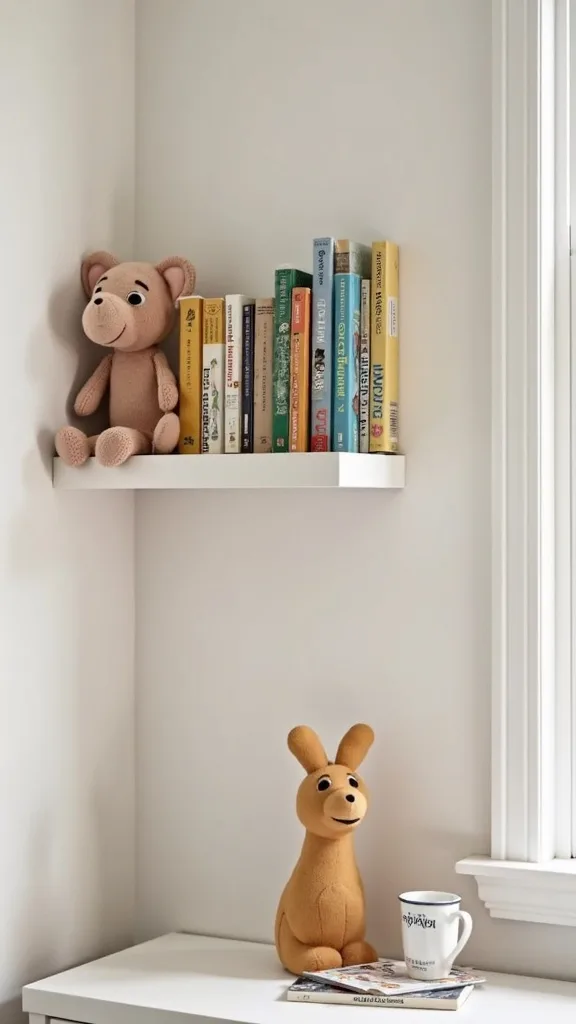
22. Use a 4-Foot Floating Shelf for Books Facing Out
I always like adding a small book moment in a garage playroom because it softens the space and encourages calmer play. From my experience, front-facing books reduce the “dump every book” habit because kids can see covers quickly.
I recommend a 48-inch picture ledge shelf installed about 42 inches high, and I keep 10–15 books on display at a time. I typically rotate 5 books weekly during summer and wipe the shelf every 2 weeks since garages collect dust faster than indoor rooms in most cases.
When I design this look, I choose a wood ledge (pine or oak veneer) and paint it to match the cubbies for a built-in feel. In my opinion, the trade-off is you store fewer books on display, but reading becomes more accessible and less chaotic.
Pro Tip: I’ve found that adding a 1/2-inch clear acrylic lip (or choosing a ledge that already has one) prevents books from sliding off when the garage door vibrates—something you only notice after the first loud “thump.”
23. Create a “Donation Bin” to Keep Clutter from Re-Accumulating
From my experience, toy organization only stays organized if I give myself a way to remove clutter without drama. I always keep a visible donation bin so outgrown toys don’t sneak back into the system.
I recommend a single 18-gallon tote labeled “DONATE” with a lid, placed on the top shelf or in a closet area, and I set a calendar reminder every 30 days to drop it off. I find that a 10-minute monthly scan of cubbies (just checking for broken pieces and duplicates) keeps the whole playroom storage setup from feeling overwhelming.
When I tried this, I used a neutral gray bin so it didn’t feel like a punishment box. In my opinion, the trade-off is you’ll occasionally second-guess what to donate, but the space you gain usually makes daily life easier.
Pro Tip: I’ve found that if I keep a roll of painter’s tape and a marker on top of the donation bin, I actually label what’s inside (“size 3 puzzles,” “baby toys”)—and that prevents me from reopening it and re-sorting later.
24. Use a Simple “10-Minute Close Down” Routine with a Visual Timer
I find that storage systems fail when there’s no routine to support them, so I always pair kids toy storage with a short daily reset. From my experience, the goal isn’t perfection—it’s getting back to functional in a predictable window.
I recommend a 10-minute “close down” at the same time each day (like 6:30 pm) using a visual timer set to 10 minutes. I typically assign 3 steps: toss toys into the correct bin, return big items to the rolling cart, and clear the rug zone completely so it’s ready for tomorrow.
When I tried this, I used a small Bluetooth speaker and played one 10-minute playlist so the routine felt lighter. In my opinion, the trade-off is you have to be consistent for about 7–14 days before it sticks, but it pays off all summer.
Pro Tip: I’ve found that keeping a “mystery bin” for anything that doesn’t belong (then sorting it once a week) prevents the routine from stalling—because kids don’t get stuck deciding where one random piece goes.
25. Add Softness in a Garage with Interlocking Foam Tiles Under the Rug
In my opinion, the biggest difference between “garage storage” and “garage playroom” is comfort, so I always add softness underfoot. From my experience, kids stay in the play zone longer when the floor feels warm and forgiving.
I recommend interlocking EVA foam tiles (each about 24×24 inches) under a 5×7 ft rug, which usually takes 9 tiles to cover the main play area. I typically tape the tile seams on the underside with 2-inch gaffer tape so they don’t separate, and I leave a 6-inch gap from the wall to reduce edge curling in warmer months.
When I design this look, I choose gray or tan tiles so they don’t show every scuff, and I use a washable rug on top for a more home-like finish. I find that the trade-off is foam can dent under heavy shelving, so I keep cubbies on bare concrete and reserve foam for the rug zone only.
Pro Tip: I’ve found that letting the foam tiles “air out” in the garage for 24–48 hours before installing reduces the initial odor significantly—especially important when the space heats up during summer afternoons.
Final Thoughts
I find that the most sustainable toy organization isn’t about buying a dozen matching containers—it’s about making the system easy enough that kids can succeed on a random Tuesday. From my experience, low cubbies, clear labels, and a defined rug zone do more for daily peace than any complicated sorting method.
I always recommend choosing just 2–3 upgrades to start (like labeled color bins, an art clip line, and one rolling tote cart) and living with them for 7 days before you add anything else. In my opinion, that slower approach costs less upfront and helps you avoid buying storage that doesn’t match how your kids actually play.
When I design garage playrooms for real families, I keep coming back to the same truth: a good system makes summer fun easier, not stricter. I’d love for you to pick one corner, set a 2-hour window, and build momentum—because even a small storage win changes how the whole house feels.
What I’d Do Differently
When I first tried this in my own garage, I made one specific mistake: I bought too many bins before I decided on categories. I had 18 fabric cubes lined up (it looked so organized at first), but within 10 days I realized my kids didn’t think in my categories—so they started “stuffing” toys into the nearest bin and the labels became meaningless. The correct approach, from my experience, is to live with a temporary setup for 7 days using painter’s tape labels and only 6–8 bins, then lock in categories after you see what actually gets used daily versus weekly.
I also wish I’d known how important an “overflow slot” is for real life—one empty cubby or one empty tote that buys you time on busy days. In my opinion, it’s better to have one intentionally empty space than a system that collapses the first time you get a birthday haul. Pick one corner this weekend, set a 2-hour timer, and start with the cubbies + labels—you’ll feel the difference immediately.
Products I Recommend for This Project
Here are some of my favourite products to help you bring these ideas to life:
- Brother P-touch PTD220 Label Maker — I find that it makes consistent labels fast, which is what keeps toy organization from turning into guesswork.
- IKEA KALLAX Shelf Unit (cube organizer) — I always like cube storage for kids because the openings are generous and it pairs perfectly with color bins.
- Amazon Basics Collapsible Fabric Storage Cubes — From my experience, these are an affordable way to build a labeled color-bin system without committing to hard plastic.
- Command Large Utility Hooks — I recommend these when you need wall-mounted storage without drilling everywhere, especially for lighter gear and organizers.
- Govee Visual Timer (kids timer) — I’ve found that a visual countdown makes the 10-minute cleanup routine feel concrete and actually doable.